晶澳太阳能光伏组件安装手册-JASolarHoldings
光伏组件安装说明

Add :Xu Xiake Huangtang Industrial Park, Jiangyin, Jiangsu, China Zip: 2144071Installation | Safety instructions | MaintenancePhotovoltaic modules user manualPlease carefully read the following installation and safety instructions. Non-compliance with these instructions may void the module warranty. Purpose of this guideThis guide contains information regarding the installation and safe handling of Hareon photovoltaic modules (hereafter referred to as "modules"). Allinstructions should be read and understood before attempting installation. If there are any questions, please contact your dealer or Hareon for further information.The installer should conform to all safety precautions in the guide wheninstalling modules. Before installing a solar photovoltaic system, the installer should become familiar with the mechanical and electrical requirements for photovoltaic systems. Keep this guide in a safe place for future reference.General| Installing solar photovoltaic systems requires specialized skills andknowledge. The installer assumes all risk of injury, including risk of electric shock. Module installation should be performed only by qualified persons.| All modules come with a permanently attached junction box and #12 AWG (4 mm 2) wire terminated in PV connectors. Your dealer can provide additional extension cables to simplify module wiring.| Exercise caution when wiring or handling modules exposed to sunlight. | When disconnecting wires connected to a photovoltaic module that is exposed to sunlight, an electric arc may occur. Arcs can cause burns, start fires or otherwise create safety problems. Exercise caution whendisconnecting wiring on modules exposed to sunlight.| Photovoltaic solar modules convert light energy to direct-current electrical energy, and are designed for outdoor use. Proper design of support structures is the responsibility of the system designer and installer.| Modules may be ground mounted, pole mounted, or mounted on rooftops.Do not attempt to disassemble the module, and do not remove any attached nameplates or components.Doing so will void the warranty.| Do not apply paint or adhesive to the module.Do not use mirrors or other hardware to artificially concentratesunlight on the module.| When installing modules, observe all applicable local, regional andAdd :Xu Xiake Huangtang Industrial Park, Jiangyin, Jiangsu, China Zip: 2144072national codes and regulations. Obtain a building and/or electrical permit where required.Safety precautions for installing a solar photovoltaic system| Solar modules produce electrical energy when exposed to sunlight. | Only connect modules with the same rated output current in series. If modules are connected in series, the total voltage is equal to the sum of the individual module voltages.| Only connect modules or series combinations of modules with the same voltage in parallel. If modules are connected in parallel, the total current is equal to the sum of individual module or series combination currents.| Keep children well away from the system while transporting and installing mechanical and electrical components.| Completely cover all modules with an opaque material during installation to prevent electricity from being generated.Do not wear metallic rings, watchbands, ear, nose, or lip rings orother metallic devices while installing or troubleshooting photovoltaicsystems.Use appropriate safety equipment (insulated tools,insulating gloves, etc) approved for use on electrical installations.| Observe the instructions and safety precautions for all other components used in the system, including wiring and cables, connectors, DC-breakers, mounting hardware, inverters, etc.| Use only equipment, connectors, wiring and mounting hardware suitable for use in a photovoltaic system.| Always use the same type of module within a particular photovoltaic system.| Under normal operating conditions, PV modules will produce currents and voltages that are different than those listed in the date sheet. Data sheet values are applicable at standard test data.| Short-circuit current and open-circuit voltages should be multiplied by a factor of 1.25 when determining component voltage ratings, conductorampacity, fuse sizes and size of controls connected to the module or system output.Refer to Section 690-8 of the National Electrical Code (NEC) for an additional multiplying factor of 125 percent (80 percent de-rating) which may be applicable.General installation notes| Drainage holes must not be covered with parts of the mounting system. The junction box has a breather port which must be mounted facing downward and cannot be exposed to the rain. The junction box should be on the higher side of the module when it is mounted in order to orient the breather port correctly.| Do not lift the module by grasping the module's junction box or electricalAdd :Xu Xiake Huangtang Industrial Park, Jiangyin, Jiangsu, China Zip: 2144073leads.| Do not stand or step on module.| Do not drop the module or allow objects to fall on the module.| Do not place any heavy objects on the module.| Inappropriate transport and installation may damage the module glass or frame.Mechanical InstallationSelecting the location| Select a suitable location for installation of the module.| For optimum performance, the module must be facing true south in northern latitudes and true north in southern latitudes.| For detailed information on optimal module orientation, refer to standard solar photovoltaic installation guides or a reputable solar installer or systems integrator.| The module should not be shaded at any time of the day.| Do not install the module near equipment or in locations where flammable gases can be generated or collected.Selecting the proper mounting structure and hardware| Observe all instructions and safety precautions included with the mounting system to be used with the module.| Do not drill holes in the glass surface of the module. Doing so will void the warranty.| Do not drill additional mounting holes in the module frame. Doing so will void the warranty.| Modules must be securely attached to the mounting structure using four mounting points for normal installation. If heavy wind or snow loads are anticipated, additional mounting points should also be used.| Load calculations are the responsibility of the system designer or installer. | The mounting structure and hardware must be made of durable, corrosion- and UV-resistant material.| The modules have been evaluated by UL for mounting using the 8 provided mounting holes in the frame.| Each module (or series string of modules so connected) shall be provided with the maximum series fuse as specified.Mounting methods1. Mounting with Bolts| The module must be attached and supported by at least four bolts through the indicated mounting holes.| Depending on the local wind and snow loads, additional mounting points may be required.| The modules have been evaluated by UL for a maximum positive or negative design loading of 30 lbs/ft2.Add :Xu Xiake Huangtang Industrial Park, Jiangyin, Jiangsu, China Zip: 2144074Mono-crystalline Cell ModulePoly- crystalline Cell Module2. Mounting solar modules with bracket on flat roof and ground| Fasten bracket on flat roof or ground first, fasten solar modules on bracket, use nuts to fasten bracket.| The bracket would endure 20 years, and is made of anticorrosive material. Temperature zinc steels and Stainless steel is recommended.| The bracket should be solid enough to resist continuous load ,pressure from wind ,snow, earthquake and other outside force.Add :Xu Xiake Huangtang Industrial Park, Jiangyin, Jiangsu, China Zip: 2144075| Use insulation materials to isolate different metal like stainless steel, aluminum. This would prevent corrosion.| insert screw into flat gasket ,insert screw into installation hole both on the modules and supporting frame| insert screw into flat gasket and spring gasket, then apply nut on the screw fasten it.A2-70, M8SCREW FLA T GASKET SPRING GASKET M8 NUT|refer to the following form for supporting bracket's slope angleAdd :Xu Xiake Huangtang Industrial Park, Jiangyin, Jiangsu, China Zip: 21440763. Other| The recommended standoff height is 5 cm. If other mounting means are employed this may affect the UL Listing.| Direction of module installation: PV module are rectangle shaped; PVmodule array longitudinal installation (the way that installs the module by long side longitudinal) is mostly used because the transverse installation (the way that installs the module by long side transversely) has less rain cleaning ability. | For distance between the modules, longitudinal distance (along the roof gradient) should be enough for installation and disassembly; transverse distance should be 3-10cm.| Other mounting methods are acceptable as long as the minimumrequirements as described above. Above requirements are only basicinstructions.For example, on slant roofMono-crystalline Cell ModulePoly- crystalline Cell ModuleAdd :Xu Xiake Huangtang Industrial Park, Jiangyin, Jiangsu, China Zip: 2144077Accessory:1 Hexagon Self-locking Bolt M8*35 (mm )2 Hexagon Nut M10Add :Xu Xiake Huangtang Industrial Park, Jiangyin, Jiangsu, China Zip: 2144078(mm)3 Spring Washer M10(mm)4 Flat Washers M10(mm)5 Nonstandard Nut M109 (mm)6 Nonstandard Bolt M10(mm)7 Pressure Plate(mm)Add:Xu Xiake Huangtang Industrial Park, Jiangyin, Jiangsu, China Zip: 214407Add :Xu Xiake Huangtang Industrial Park, Jiangyin, Jiangsu, China Zip: 214407108 Crossbeam(mm )9 Crossbeam Foundation(mm)11 (mm)Electrical InstallationGrounding| There is the grounding hole and grounding marking along either edge of the frame indicating a ground bonding location. All module frames must be properly grounded. All bolts, nuts, washers are stainless-steel. Observe all local electric codes and regulations. Use solid uninsulated copper wire sizes 10 or 12 AWG. The wire must have no nick. Make the grounding wire connect to the bolt and tighten it. Put M4 stainless steel bolt across M4stainless steel spring washer, M4stainless steel flat washer, 2 pc of stainless steel cupped washer with a diameter of 4(Copper wire is winded on the bolt between two cupped washers.)and M4 stainless steel star washer, and then through the grounding hole on the aluminum frame components, M4 stainless steel flat washer And spring washer, at last tighten them with the stainless steel M4 nut. (TORQUE:4N.M)Add:Xu Xiake Huangtang Industrial Park, Jiangyin, Jiangsu, China Zip: 214407Add :Xu Xiake Huangtang Industrial Park, Jiangyin, Jiangsu, China Zip: 21440712| Details for wiring in accordance with the NEC, and that the grounding method of the frame of arrays shall comply with the NEC, article 250.General electrical installation| Do not use modules of different configurations in the same system. | This module is supplied with Multi Contact connectors for electrical connections.| Refer to Section 690.31 of the NEC to determine appropriate types and temperature ratings of conductors. Wiring should be #12 AWG, 4 mm 2(minimum) and must be temperature rated at 90 °C (minimum).| Completely cover system modules with an opaque material to prevent electricity from being generated while disconnecting conductors.| Refer to Sections 690.8 and 310 of the NEC to determine overcurrent, conductor ampacity and size requirements.| In Canada, installation shall be in accordance with CSA C22.1, Safety Standard for Electrical Installations, Canadian Electrical Code, Part 1.| For best performance, ensure that positive and negative DC wires run closely together avoiding loops.WARNING!Electrical shock hazard! Do not touch bare conductors or otherpotentially energized parts.MaintenanceHAREON recommends the following maintenance items to ensure optimum performance of the module:| Clean the glass surface of the module as necessary. Use water and a soft sponge or cloth for cleaning. A mild, non-abrasive cleaning agent can be used if necessary. Do not use dishwasher detergent.| Electrical and mechanical connections should be checked periodically by qualified personnel to verify that they are clean, secure and undamaged.Add :Xu Xiake Huangtang Industrial Park, Jiangyin, Jiangsu, China Zip: 21440713| Check the electrical and mechanical connections periodically to verify that they are clean, secure and undamaged.| Problems should only be investigated by qualified personnel.| Observe the maintenance instructions for all other components used in the system.| Artificially concentrated sunlight shall not be directed on the module.Shutting down the system| Completely cover system modules with an opaque material to prevent electricity from being generated while disconnecting conductors.| Disconnect system from all power sources in accordance with instructions for all other components used in the system.| The system should now be out of operation and can be dismantled. In doing so, observe the all safety instructions as applicable to installation.Electrical ratings of the concerned modules:The electrical characteristics are within ±10 % of the indicated values of ISC, VOC, and Pmax under Standard Test Conditions (irradiance of 1000 W/m2, AM 1.5 spectrum, and a cell temperature of 25°C/77°F).Add :Xu Xiake Huangtang Industrial Park, Jiangyin, Jiangsu, China Zip: 21440714Disclaimer of liabilityBecause the use of this manual and the conditions or methods of installation, Operation, use and maintenance of photovoltaic products are beyondHareon’s control; Hareon does not accept responsibility and expresslydisclaims liability for loss, damage, or expense arising out of or in any way connected with such installation, operation, use or maintenance. Noresponsibility is assumed by Hareon for any infringement of patents or other rights of third parties, which may result from use of the PV product. No license is granted by implication or otherwise under any patent or patent rights. The information in this manual is based on Hareon's knowledge and experience and is believed to be reliable, but such information including productspecification (without limitations) and suggestions does not constitute a warranty, expressed or implied. Hareon reserves the right to change themanual, the product, the specifications, or product information sheets without prior notice.Information about manufacturer:Jiangyin Hareon Power Co., Ltd.ADD: Huangtang Industrial Zone(Huanzhen North Road), Xuxiake Town, Jiangyin, Jiangsu ,P.R. ChinaPlease consult your dealer or the manufacturer concerning the warranty of your modules. If you have any further questions, your dealer will gladly assist you.Subject to technical modifications without notice.。
光伏组件使用手册
Addr: Huangtang Industrial Zone, Xuxiake Town, Jiangyin, Jiangsu,P.R China , P .C. 214407光伏组件使用手册请认真阅读以下安装和安全指南。
如果安装时与之不符的话,这样做会使产品保证失效。
指南的目的:本指南包括光伏组件(以下简称为组件)的安装和安全操作的信息。
在安装之前请阅读和理解本指南。
如果有任何问题,请联系您的经销商或海润 公司。
在安装组件的时候,安装人员应该遵守安全防范指南。
在安装太阳能光伏组件之前,安装人员应该熟悉光伏系统的机械和电气要求。
请妥善保存本指南以便今后的使用。
概要²太阳能光伏系统安装需要专业的技巧和知识。
安装人员应该设想到各种受伤害的风险,包括电击风险。
组件的安装应该由合格的人员进行。
²所有的组件具有永久的接线盒和#12 A WG(4 mm2)电缆线连接到的多功能接触光伏连接头。
您可以从您的经销商处得到额外的组件的电缆线。
²每个单独的组件在直接接触到阳光后可以产生大于30伏特的直流电压。
直接接触到30伏特和大于30伏特的直流电压可能导致危险。
暴露于阳光下时连接组件或操作组件要小心。
²当拆除连接在暴露在阳光下的组件的缆线的时候,可能产生电弧。
电弧会导致燃烧,起火或产生其他安全问题。
暴露于阳光下时拆除连接组件上的缆线的时候要小心。
²太阳能光伏组件将光能转换为直流电能,设计为室外使用。
适当得支撑结构的设计是系统的设计者和安装人员有的职责。
²组件可以为地面安装,电线杆安装和屋顶安装。
不要尝试分解组件,不要拆除组件上的任何铭牌或者部件。
此种行为会使产品保证失效。
不要在组件上喷涂任何颜料或黏合剂。
不要使用镜子或其他的装备来集中阳光到组件上。
安装组件时,遵守当地,地区和国家的规范和条例。
需要建筑或电气许可。
安装太阳能光伏系统的安全防范措施²当暴露在阳光下时,太阳能组件产生电能。
组件装卸、拆包及安装指导手册说明书

组件装卸、拆包及安装指导手册Unloading, Dismounting and Installing guide ofModule前言Introduction在装卸、拆包和安装光伏组件之前,请仔细阅读本手册。
因为光伏组件本身具有的特定电气特性及本身结构构成的特性,请严格遵守当地电气设备安装的相关法律法规及标准的要求,请严格遵守当地关于劳动保护的相关法律法规及标准的要求。
Please read this manual carefully before PV module unloading, dismounting and installing. Due to the character of PV module is compose by specific electric and itself. So, comply with relevant laws andregulations and standards of local electric equipment installation strictly, and comply with relevant laws and regulations and standards of locallabor protection strictly.请确保组件装卸及安装人员是经过相关职业培训的合格人员或在具有相关资质工程技术人员的充分指导下进行相关的工作。
Please make sure that loading and unloading people have passed relevant professional training or have been sufficient directed by relevant engineers and technicians when they are loading and unloading.请勿损坏或刮伤组件的前后表面,请勿在组件表面潮湿的情况下进行相关的搬运或安装操作,以防止触电。
太阳能组件安装手册说明书
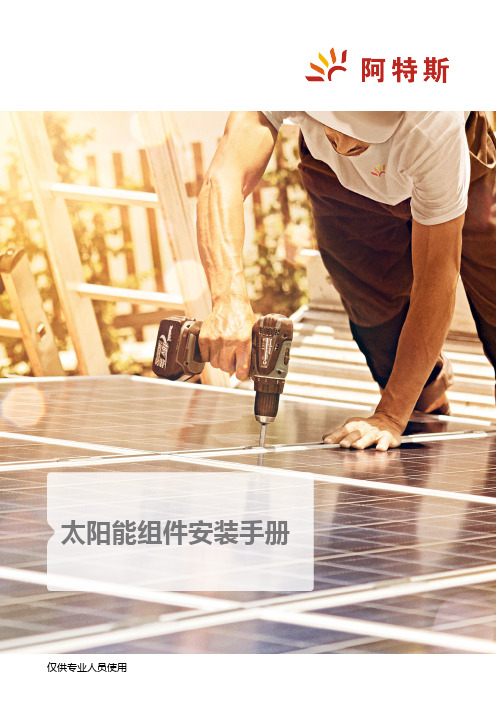
太阳能组件安装手册仅供专业人员使用2 |1.0 1.11.22.03.04.05.0 5.15.26.06.17.0 3 3 3 3 3 4 5 6 7 8 8 11 11CN-Rev IM/IEC-AM-CN/4.0 版权所有 © 2018年7月 阿特斯阳光电力集团|31.0概括本手册为CS系列太阳能标准组件的安装、维护和使用提供了重要的安全说明。
专业安装人员必须仔细阅读这些指南并且严格遵守这些说明。
如果不遵守这些安全指南,将可能导致人员伤亡或财产损失。
安装和操作太阳能组件需要专业的技能,只有专业人员才可以从事该项工作。
安装人员必须把上述事项告知终端客户(或者消费者)。
本说明书中的“组件”或“PV组件”指的是一个或多个CS系列太阳能组件。
本手册只适用于CS1V-MS、 CS1K-MS、CS3U-P、CS3U-MS、CS3K-P、CS3K-MS、CS6A-P、CS6A-M、CS6V-P、CS6V-M、CS6K-P、CS6K-M、CS6K-MS、CS6V-MS、CS6VL-MS、CS6A-MS、 CS6U-P、CS6U-M、CS3W-P和CS3L-P等。
请保留此说明书以供将来参考。
建议查看网页以便下载最新的安装手册。
1.1免责申明Canadian Solar Inc. (以下简称 阿特斯阳光电力) 保留在没有预先通知的情况下变更本安装手册的权利。
阿特斯阳光电力对本说明书所包含的任何明示或暗示的信息不做任何担保。
如果本手册的不同语言版本有描述不一致的情况,以英文版为准。
由于本手册会定时更新,请参考阿特斯阳光电力集团网站( )上的产品和文件资料。
1.2责任范围阿特斯阳光电力不为任何形式的伤害负责,包括但不限于组件操作、系统安装以及未按照本手册的指示产生的身体伤害、受伤和财产损失负责。
2.0安全预防措施警告:对组件进行安装、接线、操作或维护前, 应阅读并理解所有安全细则。
当该组件暴露在阳光或其他光源下时,会产生直流电(DC)。
晶澳太阳能组件运输储存说明书

Packages of JA Solar Modules could be stack up, but it only could stack 2 pallets together. The total stack quantity could not be more than 2. 5. The packages should not bestepped on.Please follow < UnpackingInstruction of JA Solar PV ModulesStandard Package> to openthe packages of JA Solar.It’s forbidden to put packages modules together with caustic chemical or gas. Please pay attention to fire safety.Once you find a wet package,please unpack it carefullyout the modules, thenin a ventilated placeprevent them from mildew. Thetotal stack quantity of unpackedmodules should be no morethe maximum inpackage.It needs two persons to handlethe single module at the sametime.Check if the packing carton is complete, for example, the Peak power and other information.Remove the upper 3 plastic straps.Find the joint of strap, grab the two ends of connector with two hands, pull in the opposite directionand then it can be easy to divide them.Remove the plastic protective film on the top.Remove the protective film.Rip the protective film outside the packing carton with box cutter or other hard thing. Be careful not toscratch the box. Then remove the four side protective film, and remove the inside plastic straps finally.Open the cover.Remove the peripheral board.Two persons stand at the right sides of box, prepare to hold the module avoid module down after the、Move the Module.Two persons seize the short-side of the module separately, and exert strength at the same time to putthe module to the named place.If the unpacked Modules won’t be installed immediately, and you need to put them horizontally, pleaseput the package cover on a pallet, put the first module into the cover and keep its glass faceup, then stackother Modules on the top and keep their glass facedown. when you put the Modules together horizontally,The upper limit is no more than the number of one packing carton.Note: The Modules must be stacked trimly, otherwise the Modules may lean or even droptransport.Must take the glove throughout the moving modules process, for protect your hands to avoid scratch hand.Please seize the frame inside to move modules, finger touch glass surface shall be strictly forbidden,to avoid leaving fingerprints on glass surface.Correct gesture Wrong gestureThen remove all the Modules one by one.Lift by the flange only, cradle the module in your hands being careful not to twist the module when lifting.晶澳太阳能光伏组件运输储存说明四、包装的成品可以叠放在一起运输或存储,但是最多只能叠一层。
晶澳(扬州)太阳能光伏工程有限公司介绍企业发展分析报告模板

Enterprise Development专业品质权威Analysis Report企业发展分析报告晶澳(扬州)太阳能光伏工程有限公司免责声明:本报告通过对该企业公开数据进行分析生成,并不完全代表我方对该企业的意见,如有错误请及时联系;本报告出于对企业发展研究目的产生,仅供参考,在任何情况下,使用本报告所引起的一切后果,我方不承担任何责任:本报告不得用于一切商业用途,如需引用或合作,请与我方联系:晶澳(扬州)太阳能光伏工程有限公司1企业发展分析结果1.1 企业发展指数得分企业发展指数得分晶澳(扬州)太阳能光伏工程有限公司综合得分说明:企业发展指数根据企业规模、企业创新、企业风险、企业活力四个维度对企业发展情况进行评价。
该企业的综合评价得分需要您得到该公司授权后,我们将协助您分析给出。
1.2 企业画像类别内容行业空资质增值税一般纳税人产品服务伏工程产品的生产、批发;太阳能光伏工程及机1.3 发展历程2工商2.1工商信息2.2工商变更2.3股东结构2.4主要人员2.5分支机构2.6对外投资2.7企业年报2.8股权出质2.9动产抵押2.10司法协助2.11清算2.12注销3投融资3.1融资历史3.2投资事件3.3核心团队3.4企业业务4企业信用4.1企业信用4.2行政许可-工商局4.3行政处罚-信用中国4.5税务评级4.6税务处罚4.7经营异常4.8经营异常-工商局4.9采购不良行为4.10产品抽查4.12欠税公告4.13环保处罚4.14被执行人5司法文书5.1法律诉讼(当事人)5.2法律诉讼(相关人)5.3开庭公告5.4被执行人5.5法院公告5.6破产暂无破产数据6企业资质6.1资质许可6.2人员资质6.3产品许可6.4特殊许可7知识产权7.1商标7.2专利7.3软件著作权7.4作品著作权7.5网站备案7.6应用APP7.7微信公众号8招标中标8.1政府招标8.2政府中标8.3央企招标8.4央企中标9标准9.1国家标准9.2行业标准9.3团体标准9.4地方标准10成果奖励10.1国家奖励10.2省部奖励10.3社会奖励10.4科技成果11 土地11.1大块土地出让11.2出让公告11.3土地抵押11.4地块公示11.5大企业购地11.6土地出租11.7土地结果11.8土地转让12基金12.1国家自然基金12.2国家自然基金成果12.3国家社科基金13招聘13.1招聘信息感谢阅读:感谢您耐心地阅读这份企业调查分析报告。
【2018最新】光伏组件安装指导书word版本 (11页)

本文部分内容来自网络整理,本司不为其真实性负责,如有异议或侵权请及时联系,本司将立即删除!== 本文为word格式,下载后可方便编辑和修改! ==光伏组件安装指导书篇一:光伏支架及组件安装作业指导书XXXXXXXXX分布式光伏发电项目光伏支架及组件安装工程作业指导书编制:审核:批准:XXXXXXX工程有限公司201X年5月一、光伏支架及组件安装前应作下列准备工作:(1)在每个厂房相应位置搭设卸料平台及人员走道,在屋面铺设散料通道,避免对屋面造成损坏。
对屋面排水系统进行清理,避免雨季水流不畅,造成比必要的损失。
(2)施工前对屋面进行核实,如遇到和设计不符合,根据设计及设计交底进行相应调整。
按照设计图纸中标识的基线位置测量放线,并控制每个方阵的直角方向。
以屋面采光带中心为横向基线,按照设计图纸确定整个方阵的位置。
(3)核算设计图纸,计算出各区域的支架导轨、配件及组件的使用量,按照区域数量及施工流程分批上料。
(4)支架及组件到场后,检查外包装有无损坏变形。
如有损坏及时与采购人员沟通,进行更坏处理。
(5)支架及组件按照各区域用量运至屋顶后,及时安排人员分散到位。
二、支架及组件安装:2.1支架安装:依据设计图纸,先进行定位放线,彩钢屋面主要是夹具的定位,之后进行导轨的安装,要注意夹具的间距、同排组件导轨及相邻两排组件导轨的间距。
导轨的安装应按照中间段两端段导轨连接件顺序安装,导轨安装完成后,检查每根导轨的水平度,每跨导轨的弯曲度不得大于1mm。
完成一组支架安装后,进行支架位置的精确校核。
要注意前后排的间距、设计中要求离墙边的距离等。
吊装与搬运过程中做好保护措施,避免人身伤害及原有建筑物的破坏。
另外,安装支架立柱、横梁及导轨时不要一次性将螺栓紧固到位,支架全部调平直后将螺栓全部紧固。
2.2组件安装:2.2.1组件开箱后查验:a.开箱后先从侧面查看组件有无破损。
如果有破损及时告知项目部材料员,交由材料员处理。
晶澳太阳能组件安装手册

为了您的安全,请不要在不利的环境下安装或处理组件,包括但不限于强风或阵风,潮湿的或带沙的屋顶。
5 晶澳太阳能光伏组件安装手册 一般信息
3.3• 电性能安全
光伏产品在光照情况下会产生直流电,所以触碰组件连接线金属会有电击或者烧伤的危险。30伏的直流电 压或更高的电压是有可能致命的。
8
操作和维护-------------------------- 23
8.1 清洗----------------------------------23 8.2 组件的外观检查 ----------------------23 8.3 连接器和线缆的检查 -----------------23
产品附录 ------------------------------------------24
•
•
•
•
图1,组件剖面结构及部件说明
1. 铝合金边框 5. 背板 9. 电缆线 13.漏水孔
2. 光伏钢化玻璃 6. 硅胶 10.连接器 14. 电池片
3. 封装EVA 7. 接线盒 11.安装孔
4. 电池片 8. 铭牌 12.接地孔
4 晶澳太阳能光伏组件安装手册 一般信息
3.1组件信息 3.2• 常规安全•
7 晶澳太阳能光伏组件安装手册 一般信息
3.5• 防火安全
不要划伤铝合金边框表面的阳极氧化层,除了接地连接的时候。划伤可能会导致边框腐蚀影响边框载 荷能力; 禁止自行修复玻璃或者背膜损坏的组件;
安装组件前请咨询当地的法律法规,遵守其中关于建筑防火性要求。根据IEC 61730-2标准,晶 澳的组件防火等级为Class C级。 在屋顶安装的时候,屋顶上必须要覆盖有一层适用于该等级的防火材料,并且保证背板和安装面 之间充分的通风。 屋顶的结构和安装方式不同会影响建筑的防火安全性能。如果安装不恰当,可能会酿成火灾。 为了保证在屋顶的防火等级,组件边框与屋顶表面的最小距离为10厘米。 请根据当地的法规要求使用恰当的组件配件如保险丝,断路器,接地连接器。 如果附近出现暴露的可燃性气体,请勿使用组件。
- 1、下载文档前请自行甄别文档内容的完整性,平台不提供额外的编辑、内容补充、找答案等附加服务。
- 2、"仅部分预览"的文档,不可在线预览部分如存在完整性等问题,可反馈申请退款(可完整预览的文档不适用该条件!)。
- 3、如文档侵犯您的权益,请联系客服反馈,我们会尽快为您处理(人工客服工作时间:9:00-18:30)。
晶澳太阳能光伏组件安装手册单面双玻及双面双玻组件重要安全须知✧本安装手册提供了晶澳太阳能控股有限公司(以下称为“晶澳”)光伏发电组件模块(以下称为“组件”)的安装和安全使用的信息。
在组件安装和日常维护中,应遵守本指南的所有安全防范措施和当地法规。
✧安装组件系统需要有专业技能和知识,并且只能由合格的人员进行安装。
在安装和使用组件之前,请仔细阅读本安装手册。
安装人员应熟悉此系统的机械和电气要求。
请妥善保管本手册,以备将来维护与保养或组件需出售或处理时参考。
✧如有任何疑问,请联系晶澳全球质量及客户服务部,请他们做进一步的解释。
1 / 21晶澳太阳能光伏组件安装手册目录1介绍 (3)2法规和条例 (3)3一般信息 (3)3.1 组件识别 (3)3.2 常规安全 (4)3.3 电性能安全 (4)3.4 操作安全 (4)3.5 防火安全 (5)4安装条件 (6)4.1 安装地点和工作环境 (6)4.2 倾角的选择 (6)5机械安装 (7)5.1 常规要求 (7)5.2 安装方式 (8)6电气安装 (15)6.1 电气性能 (15)6.2 电缆线和连线 (16)6.3 连接器 (17)6.4 旁路二极管 (17)7接地 (17)7.1 使用接地夹具接地 (18)7.2 使用未被使用的安装孔接地 (19)7.3 其他的第三方接地装置 (19)8操作和维护 (20)8.1清洗 (20)8.1 组件的外观检查 (20)8.2 连接器和线缆的检查 (20)产品附录 (20)1 介绍首先非常感谢您选用晶澳光伏组件本安装手册包含有重要的电气和机械安装信息,在您安装晶澳组件前,请首先了解这些信息。
此外,手册中还包含了一些其他的您必须熟悉的安全信息。
手册中所有的内容均属于晶澳的知识财产,这些财产源于晶澳长期的技术探索和经验积累。
本安装手册不具备任何质保书的意义,不论是明示或者暗示。
未规定在组件安装、操作、使用或者维护过程中产生或由此引起的或与此有关的损失、组件损坏或者其他费用的赔偿方案。
如果由于使用组件造成的侵害专利权或者第三方的权利,晶澳公司不承担相关任何责任。
晶澳公司保留在没有预先通知的情况下变更产品说明书和本安装手册的权利。
客户在安装组件中未按照本手册中所列出的要求操作,会导致在销售时提供给客户的产品有限质保的失效。
同时本手册中的建议项是为了提高组件在安装过程中的安全性,是经过测试和实践检验的。
请把本手册提供给光伏系统的拥有者作为他们的参考,并告知他们所有相关安全、操作、维护的要求及建议。
2 法规和条例光伏组件的机械安装和电气安装应该参照相应的法规,包括电气法,建筑法和电力连接要求。
这些条例随着安装地点的不同而不同,例如建筑屋顶安装,车载应用等。
要求也可能随着安装系统电压,使用直流或者交流的不同而不同。
具体条款请联系当地的权威机构。
3 一般信息3.1 组件识别每块组件上都贴有2种标签,提供如下的信息1.铭牌:描述了产品类型,在测试条件下的标准额定功率、额定电流、额定电压、开路电压、短路电流,认证标示,最大系统电压等信息。
2. 电流分档标贴:根据组件的最佳工作电流值对组件进行分档,然后根据分档结果,在组件上贴上“Current class X”的标签,其中X有三种值:H, M或L(H意味着最高的电流档)。
在安装的时候最佳的操作是将标有同样“Current class X”标贴(例如全部为H)的安装在一个组串内(普通组件和加反光贴膜组件即使相同电流档,也不能安装在同一组串中)。
3.序列号:每个组件都有一个独特的序列号。
每个序列号有16个数字。
第一和第二位的数字标示年代份,第三位是月份(A,B,C分别代表10、11、12月)。
例如,121PXXXXXXXXXXXX意味着组件的生产和测试是在2012年1月。
它被永久地固化在组件的内部,从组件的正面顶部可以清楚的看到。
这个序列号是组件在层压前就放入的。
此外,你可以找到一个相同的序列号在组件铭牌的旁边。
3.2 常规安全晶澳的组件设计符合国际IEC61215和IEC61730标准,其应用等级评级为A类:组件可用于公众可能接触的、大于直流50V或240W以上的系统。
并且组件通过了IEC 61730-1和IEC 61730-2两部分,组件满足安全II类的要求。
当组件安装在屋顶上应用时,需要考虑最终结构的整体防火等级。
同时,亦需要考虑后期的整体维护。
屋顶的光伏系统只能被安装在经过建设专家或工程师评估,有正式的完整结构分析结果,并被证实能够承受额外的系统支架压力,包括光伏组件自身重量。
为了您的安全,请不要在没有安全防护措施的情况下在屋顶上工作,防护措施包括但不限于摔落保护,梯子或楼梯及个人保护装备。
为了您的安全,请不要在不利的环境下安装或处理组件,包括但不限于强风或阵风,潮湿的或带沙的屋顶。
3.3 电性能安全光伏产品在光照情况下会产生直流电,所以触碰组件连接线金属会有电击或者烧伤的危险。
30伏的直流电压或更高的电压是有可能致命的。
在没有连接负载或者外电路的情况下,组件也会产生电压。
在阳光下操作组件时,请使用绝缘工具,同时佩戴橡胶手套。
光伏组件没有开关。
只能通过将光伏组件挪离光照或者用布、硬纸板或者完全不透光的材料遮挡,或者将组件正面放置在光滑、平坦的表面上才会使组件停止工作。
为了避免电弧和触电危险,请勿在有负载的情况下断开电气连接。
错误的连接也会导致电弧和电击。
必须保持连接器干燥和清洁,确保它们是处于良好的工作状态。
不要将其他金属物体插入连接器内,或者以其他任何方式来进行电气连接。
周围环境的雪和水会光反射增加光强,会造成电流和输出功率的增大。
另外在低温时组件的电压和功率也会相应的增大。
如果组件玻璃或者封装材料有损坏,请戴好个人防护装置,将组件从电路中分离开。
只能在干燥的条件下工作,并且只能使用干燥的工具。
当组件是潮湿的时候不要操作组件,除非穿戴有合适的防电击装备;当清洁组件的时候,需要按照本手册清洗组件的要求操作。
3.4 操作安全组件在运输和储存过程中,除非组件到达安装地点,否则请不要打开晶澳的包装;请保护好包装不要受到损伤。
禁止让包装好成托的组件直接跌落;堆叠组件时请勿超过包装箱上印刷标示的最高层数限制;在组件开箱前,请把包装箱放在通风,防雨和干燥的地方;打开晶澳的包装箱,请按照晶澳包装箱开箱说明书操作;在任何情况下都禁止通过抓住接线盒或者导线来拎起整个组件;禁止在组件上站立或者走动;禁止将一块组件跌落在另外一块组件上;为了避免玻璃破损,请不要把任何重物压在组件玻璃上;当把一块组件放到平面上时,必须小心操作,尤其是在角落的地方;不要尝试拆开组件,也不要移除组件的铭牌或者组件上的部件;不能在组件的表面刷油漆或者涂任何其他的粘胶剂;禁止自行修复玻璃损坏的组件;禁止在组件边框上钻洞。
这可能会降低边框载荷能力并导致边框发生腐蚀;不要划伤铝合金边框表面的阳极氧化层,除了接地连接的时候。
划伤可能会导致边框腐蚀影响边框载荷能力;报废组件须由具有资质的机构回收处理。
3.5 防火安全安装组件前请咨询当地的法律法规,遵守其中关于建筑防火性要求。
在屋顶安装的时候,屋顶上必须要覆盖有一层适用于该等级的防火材料,并且保证组件和安装面之间充分的通风。
屋顶的结构和安装方式不同会影响建筑的防火安全性能。
如果安装不恰当,可能会酿成火灾。
为了保证在屋顶的防火等级,组件与屋顶表面的最小距离为10厘米。
请根据当地的法规要求使用恰当的组件配件如保险丝,断路器,接地连接器。
如果附近出现暴露的可燃性气体,请勿使用组件。
4 安装条件4.1 安装地点和工作环境组件只能在地球上使用,不能在太空中使用。
不要使用镜面或者放大镜来人工聚焦太阳光照射到组件上。
晶澳组件必须安装在适合的建筑上,或者其他适合组件安装的地方(如地面,车库,建筑物外墙,屋顶,光伏追踪系统),组件不能安装在可移动的任何类型车辆上。
不要将组件安装在有可能会被水淹没的地方。
晶澳推荐组件安装在工作环境温度为-20℃到 46℃的环境下,该工作环境温度为安装地点月平均最高温度和最低温度。
组件极限工作环境温度为-40℃ 到85℃。
确保组件安装后所受到的风或者雪的压力不超过最大允许负荷。
组件需要安装在常年没有阴影的地方。
确保在组件安装的地点没有可能阻挡光线的障碍物。
如果组件安装在有频繁雷电活动的地方时,必须要对组件进行防雷击保护。
不要在附近可能有可燃性气体出现的地方安装组件。
组件不能在冰雹、积雪、风沙、烟尘、空气污染、煤烟等过量的环境中安装和使用。
组件不能安装在有强烈腐蚀性物质如盐、盐雾、盐水、活跃的化学蒸汽、酸雨、或者有其他有任何会腐蚀组件,影响组件安全或性能的物质的地方。
在有大雪、极冷、强风或者近水,接近盐雾的海岛上或沙漠等恶劣环境中时,请采用合适的保护措施确保组件安装的可靠和安全。
晶澳的组件通过了IEC61701的盐雾腐蚀测试,但是腐蚀可能发生在组件边框与支架连接的部位,或者接地连接的部位。
晶澳推荐组件安装在海边的时候,采用不锈钢或者铝的材料来与光伏组件接触,并且需要对安装部位做好防锈蚀的处理。
4.2 倾角的选择组件的倾角:组件的表面与水平面所成的夹角。
当组件正对阳光时,组件会获得最大的功率输出。
在北半球安装,组件最好朝南,在南半球安装,组件最好朝北。
对于详细的安装角度,请依据标准组件安装指南或者有经验的光伏组件安装商给出的建议。
晶澳建议组件安装的时候安装夹角不小于10度,这样组件在下雨的时候表面灰尘容易被雨水带走,从而减少组件清洗次数;同时利于组件表面的积水流走,避免长期大量积水在玻璃上留下印迹,进而影响组件外观和性能。
5 机械安装5.1 常规要求确保组件安装方式和支架系统足够坚固,使得组件能够承受所有预定的载荷条件,这是支架安装商所必须要提供的保证。
安装支架系必须经过有静态力学分析能力的第三方测试机构进行检验和测试,采用当地国家或国际标准如DIN1055或等同的标准。
组件安装支架必须由耐用、耐腐蚀、防紫外线的材料构成。
组件必须被牢固地固定在安装支架上。
在冬天有较大积雪的地区,选择较高的的安装支架。
这样组件最低点不会被积雪长时间的覆盖,此外,组件的最低点足够高,这样可以避免组件被植物和树木遮挡,或者是被飞沙走石伤害。
当组件安装在平行于屋顶或者墙面的支架上时。
组件与屋顶或者墙面的最小间隙为10cm,需要让空气流通,防止组件的线路损坏。
禁止在组件的玻璃和边框上打洞。
在屋顶安装组件之前,请确保建筑是适合安装的。
此外,屋顶的任何渗透都必须要进行适当的密封,以防止渗漏。
组件会有热胀冷缩效应,安装时相邻两块组件间隔不能小于10mm。
边框在低温下会有翘曲变形应避免边框受到侧向拉力和压力,避免边框脱开或挤碎玻璃组件通过的最大静态载荷为:背面2400Pa(等同于风压)和正面5400Pa或2400Pa (等同于雪压和风压),这取决于组件的安装类型(请参考下面的安装方式)。