idea maven多模块项目搭建 简书
如何使用eclipse搭建maven多module项目(构建父子项目)

如何使⽤eclipse搭建maven多module项⽬(构建⽗⼦项⽬)创建空maven项⽬1、File–>new–>project…2.next3.next4.finish5.配置pom.xml<project xmlns="/POM/4.0.0" xmlns:xsi="/2001/XMLSchema-instance" xsi:schemaLocation="/POM/4.0.0 /xsd/maven-4.0.0.xsd"><modelVersion>4.0.0</modelVersion><groupId>pdd-shop</groupId><artifactId>pdd-shop</artifactId><version>0.0.1-SNAPSHOT</version><packaging>pom</packaging><name>pdd-shop</name><url></url><properties><project.build.sourceEncoding>UTF-8</project.build.sourceEncoding><junit.version>4.11</junit.version><spring.version>4.0.0.RELEASE</spring.version></properties><build><finalName>pdd-shop</finalName><plugins><plugin><groupId>org.apache.maven.plugins</groupId><artifactId>maven-compiler-plugin</artifactId><version>2.3.2</version><configuration><source>1.6</source><target>1.6</target><compilerVersion>1.6</compilerVersion></configuration></plugin><!-- jar插件 --><plugin><groupId>org.apache.maven.plugins</groupId><artifactId>maven-jar-plugin</artifactId><version>2.5</version><configuration><archive><manifest><addDefaultImplementationEntries>true</addDefaultImplementationEntries> <addDefaultSpecificationEntries>true</addDefaultSpecificationEntries></manifest></archive></configuration></plugin></plugins></build><dependencies><dependency><groupId>junit</groupId><artifactId>junit</artifactId><version>${junit.version}</version></dependency><!-- spring framework --><dependency><groupId>org.springframework</groupId><artifactId>spring-web</artifactId><version>${spring.version}</version></dependency><dependency><groupId>org.springframework</groupId><artifactId>spring-webmvc</artifactId><version>${spring.version}</version></dependency><dependency><groupId>commons-logging</groupId><artifactId>commons-logging</artifactId><version>1.2</version></dependency></dependencies><modules><module>pdd-shop-application</module><module>pdd-shop-appweb</module><module>pdd-shop-application-impl</module></modules></project>创建module创建java module1、右键ppd-shop项⽬–>new–>project…2.next3.next4.next5.finish–>配置pom.xml(主要把多余部分删除,junit只要在⽗⼯程的pom配置就可以了)<?xml version="1.0"?><project xsi:schemaLocation="/POM/4.0.0 /xsd/maven-4.0.0.xsd" xmlns="/POM/4.0.0" xmlns:xsi="/2001/XMLSchema-instance"><modelVersion>4.0.0</modelVersion><parent><artifactId>pdd-shop</artifactId><groupId>pdd-shop</groupId><version>0.0.1-SNAPSHOT</version></parent><groupId>pdd-shop</groupId><artifactId>pdd-shop-application</artifactId><version>0.0.1-SNAPSHOT</version><name>pdd-shop-application</name></project>创建web module1.与创建java module的1、2点⼀样;2.next3.把包名定义下~4.右键pdd-shop-appweb项⽬–>properties–>Project Facets–>Convert to faceted form..这⾥选2.4版本的web⼯程是因为楼主⽤的是tomcat 6.0啦,按⾃⼰实际情况去修改5.配置pom.xml配置中有两点说明下:1、把jar包⾃动拷贝到web-inf⽬录地下,这个搞web开发都懂是为什么了;2、配置⼦项⽬依赖<project xsi:schemaLocation="/POM/4.0.0 /xsd/maven-4.0.0.xsd" xmlns="/POM/4.0.0" xmlns:xsi="/2001/XMLSchema-instance"><modelVersion>4.0.0</modelVersion><parent><artifactId>pdd-shop</artifactId><groupId>pdd-shop</groupId><version>0.0.1-SNAPSHOT</version></parent><groupId>pdd-shop</groupId><artifactId>pdd-shop-appweb</artifactId><version>0.0.1-SNAPSHOT</version><packaging>war</packaging><name>pdd-shop-appweb Maven Webapp</name> <build><finalName>pdd-shop-appweb</finalName><plugins><plugin><artifactId>maven-antrun-plugin</artifactId><executions><execution><id>copy-lib-src-webapps</id><phase>package</phase><configuration><tasks><delete dir="WebContent/WEB-INF/lib" /><copy todir="WebContent/WEB-INF/lib"><fileset dir="target/${artifactId}/WEB-INF/lib"><include name="*" /></fileset></copy></tasks></configuration><goals><goal>run</goal></goals></execution></executions></plugin></plugins></build><dependencies><dependency><groupId>${groupId}</groupId><artifactId>pdd-shop-application-impl</artifactId> <version>${version}</version></dependency></dependencies></project>项⽬依赖扩展以上就是本⽂的全部内容,希望对⼤家的学习有所帮助,也希望⼤家多多⽀持。
Idea搭建基于Maven的SpringMvc项目结构

Idea搭建基于Maven的SpringMvc项⽬结构1、打开Idea,如果在初始化界⾯,选择Create New Project,如果Idea软件已经打开,则选择菜单File》New》Project2、在New Project界⾯,⾸先在左侧选择Maven,Project SDK不要选择默认,选择⾃⼰配置的SDK,勾选Create from archetype,列表中存在两个webapp,选择maven-archetype-webapp。
然后单击Next3、下⾯的信息可以随意填写,ArtifactId最好和你的项⽬名⼀致,然后单击Next4、配置Maven相关信息,初始化为系统默认的Maven,这⾥建议配置成⾃⼰的Maven。
Maven home directory选择⾃⼰本地Maven路径。
勾选override,User setting file选择⾃⼰Maven路径下的conf⽂件下的settings.xml⽂件。
Local repository选择⾃⼰配置的本地Maven仓库,单击Finish完成项⽬创建项⽬⽬录如下:5、添加Spring MVC框架,单击项⽬springmvcdemo,右键选择Add Framework Support...勾选Spring下⾯的Spring MVC。
点击OK新增完成后,在WEB-INF⽂件夹下会增加applicationContent.xml和dispathcher-servlet.xml两个配置⽂件如果框架中已经存在Spring MVC相关配置,则此窗⼝不会有Spring MVC节点。
可以先删除已有的再重新添加,⽅法如下:点击File,选择Project Structure,选择Facets,就会看到有⼀个Spring啦,右击它,点删除,然后再回到上⾯第3步重新Add framework support,Spring就会出现啦。
6、在src/main⽬录右键选择New Directory,分别创建java和resources⽂件夹。
使用IDEA快速搭建基于Maven的SpringBoot项目(集成使用Redis)

使⽤IDEA快速搭建基于Maven的SpringBoot项⽬(集成使⽤Redis)迫于好久没写博客⼼慌慌,随便写个简单版的笔记便于查阅。
新建项⽬新建项⽬然后起名继续next netx finish。
⾸先附上demo的项⽬结构图配置pom.xml<?xml version="1.0" encoding="UTF-8"?><project xmlns="/POM/4.0.0" xmlns:xsi="/2001/XMLSchema-instance"xsi:schemaLocation="/POM/4.0.0 /xsd/maven-4.0.0.xsd"><modelVersion>4.0.0</modelVersion><parent><groupId>org.springframework.boot</groupId><artifactId>spring-boot-starter-parent</artifactId><version>1.5.9.RELEASE</version><!-- 我这⾥⽤的1.5.9 --><relativePath/><!-- lookup parent from repository --></parent><groupId>com.blaze</groupId><artifactId>demo</artifactId><version>0.0.1-SNAPSHOT</version><name>demo</name><description>Demo project for Spring Boot</description><properties><project.build.sourceEncoding>UTF-8</project.build.sourceEncoding><project.reporting.outputEncoding>UTF-8</project.reporting.outputEncoding><java.version>1.8</java.version></properties><dependencies><dependency><groupId>org.springframework.boot</groupId><artifactId>spring-boot-starter-jdbc</artifactId></dependency><dependency><groupId>org.springframework.boot</groupId><artifactId>spring-boot-starter-thymeleaf</artifactId></dependency><dependency><groupId>org.springframework.boot</groupId><artifactId>spring-boot-starter-web</artifactId></dependency><dependency><groupId>org.springframework.boot</groupId><artifactId>spring-boot-starter-test</artifactId><scope>test</scope></dependency><dependency><groupId>org.mybatis.spring.boot</groupId><artifactId>mybatis-spring-boot-starter</artifactId><version>2.0.0</version></dependency><dependency><groupId>org.springframework.boot</groupId><artifactId>spring-boot-starter-data-redis</artifactId><version>1.5.9.RELEASE</version></dependency><dependency><groupId>com.didispace</groupId><artifactId>spring-boot-starter-swagger</artifactId><version>1.1.0.RELEASE</version></dependency><dependency><groupId>mysql</groupId><artifactId>mysql-connector-java</artifactId><version>8.0.11</version></dependency><dependency><groupId>mons</groupId><artifactId>commons-lang3</artifactId><version>3.4</version></dependency><!-- 分页插件 --><dependency><groupId>com.github.pagehelper</groupId><artifactId>pagehelper-spring-boot-starter</artifactId><version>1.2.5</version></dependency><!-- druid数据库连接池 --><dependency><groupId>com.alibaba</groupId><artifactId>druid-spring-boot-starter</artifactId><version>1.1.9</version></dependency><!--tomcat--><dependency><groupId>org.springframework.boot</groupId><artifactId>spring-boot-starter-tomcat</artifactId><!--<version>1.2.4.RELEASE</version>--></dependency><!--fastjson--><dependency><groupId>com.alibaba</groupId><artifactId>fastjson</artifactId><version>1.2.50</version></dependency></dependencies><build><plugins><plugin><groupId>org.springframework.boot</groupId><artifactId>spring-boot-maven-plugin</artifactId></plugin></plugins><finalName>blaze</finalName></build></project>构建demo⽬录结构application.properties改成application.yml格式的配置⽂件server:port: 8080spring:datasource:name: mysql_testtype: com.alibaba.druid.pool.DruidDataSource#druid相关配置druid:#监控统计拦截的filtersfilters: statdriver-class-name: com.mysql.jdbc.Driver#基本属性url: jdbc:mysql://localhost:3306/blaze_test?useUnicode=true&characterEncoding=UTF-8&allowMultiQueries=true&useJDBCCompliantTimezoneShift=true&useLegacyDatetimeCode=false&serverTimezone=UTC username: rootpassword: root#配置连接池初始化⼤⼩/最⼩/最⼤initial-size: 1min-idle: 1max-active: 20#获取连接等待超时时间max-wait: 60000#间隔多久进⾏⼀次检测,检测需要关闭的空闲连接time-between-eviction-runs-millis: 60000#⼀个连接在池中最⼩⽣存的时间min-evictable-idle-time-millis: 300000validation-query: SELECT 'x'test-while-idle: truetest-on-borrow: falsetest-on-return: false#打开PSCache,并指定每个连接上PSCache的⼤⼩。
使用Maven构建多模块层级项目

使⽤Maven构建多模块层级项⽬Maven多模块项⽬ Maven多模块项⽬,适⽤于⼀些⽐较⼤的项⽬,通过合理的模块拆分,实现代码的复⽤,便于维护和管理。
尤其是⼀些开源框架,也是采⽤多模块的⽅式,提供插件集成,⽤户可以根据需要配置指定的模块。
项⽬结构如下: test-hd-parent (⽗级) ---pom.xml ---test-hd-api (第三⽅接⼝层) ----pom.xml ---test-hd-foundation (基础⼯具层) ----pom.xml ---test-hd-resource (资源层) ----pom.xml ---test-hd-service (逻辑业务层) ----pom.xml ---test-hd-modules (web层) ----pom.xml ---test-hd-www (web模块1) ----pom.xml ---test-hd-admin (web模块2) ----pom.xml 创建⼀个⽗maven⼯程 新建⼀个maven项⽬,选择存储位置,并选择创建⼀个简单的maven⼯程 输⼊Group Id、Artifact Id、Packaging,packaging选择pom包 ⽣成⽗⼯程,pom.xml如下 删除⼯程中的src ⽬录创建⼦模块 右击⽗⼯程名---》New---》Project,然后选择新建⼀个maven module⼯程 设置⼦⼯程名以及⽗⼯程,再设置快速创建模式 得到⼦⼯程(test-hd-api,第三⽅接⼝层),设置编译的jdk 同理设置,⼦模块:test-hd-foundation(基础⼯具层)、test-hd-resource(资源层) 、test-hd-service(逻辑业务层) 新建test-hd-modules (web层),选择创建⼀个a simple project,输⼊Group Id、Artifact Id、Packaging,packaging选择pom包创建web⼦模块 web⼦模块在建在test-hd-modules (web层)⾥⾯,右击test-hd-modules ⼯程名---》New---》Project,然后选择新建⼀个maven module⼯程,设置⼦⼯程名以及⽗⼯程,选择新建web项⽬ 配置maven web项⽬,参照: 同理可以配置其他的web⼦模块 test-hd-admin(web模块2)配置个模块的依赖 在parent项⽬pom.xml中建⽴依赖管理(dependencyManagement)<project xmlns="/POM/4.0.0" xmlns:xsi="/2001/XMLSchema-instance" xsi:schemaLocation="/POM/4.0.0 /xsd/maven-4.0.0.xsd"><modelVersion>4.0.0</modelVersion><groupId>com.hd</groupId><artifactId>test-hd-parent</artifactId><version>0.0.1-SNAPSHOT</version><packaging>pom</packaging><modules><module>test-hd-api</module><module>test-hd-service</module><module>test-hd-resource</module><module>test-hd-foundation</module><module>test-hd-modules</module></modules><!-- maven依赖 --><dependencyManagement><dependencies><!-- hd --><dependency><groupId>com.hd</groupId><artifactId>test-hd-api</artifactId><version>0.0.1-SNAPSHOT</version></dependency><dependency><groupId>com.hd</groupId><artifactId>test-hd-service</artifactId><version>0.0.1-SNAPSHOT</version></dependency><dependency><groupId>com.hd</groupId><artifactId>test-hd-resource</artifactId><version>0.0.1-SNAPSHOT</version></dependency><dependency><groupId>com.hd</groupId><artifactId>test-hd-foundation</artifactId><version>0.0.1-SNAPSHOT</version></dependency><!-- Servlet --><dependency><groupId>javax.servlet</groupId><artifactId>javax.servlet-api</artifactId><version>3.0.1</version><scope>provided</scope></dependency><dependency><groupId>javax.servlet.jsp</groupId><artifactId>jsp-api</artifactId><version>2.2</version><scope>provided</scope></dependency><!-- jstl --><dependency><groupId>javax.servlet</groupId><artifactId>jstl</artifactId><version>1.2</version></dependency><dependency><groupId>taglibs</groupId><artifactId>standard</artifactId><version>1.1.2</version></dependency><dependency><groupId>junit</groupId><artifactId>junit</artifactId><version>3.8.1</version><scope>test</scope></dependency></dependencies></dependencyManagement></project>test-hd-foundation中的依赖<?xml version="1.0"?><projectxsi:schemaLocation="/POM/4.0.0 /xsd/maven-4.0.0.xsd" xmlns="/POM/4.0.0" xmlns:xsi="/2001/XMLSchema-instance"> <modelVersion>4.0.0</modelVersion><parent><groupId>com.hd</groupId><artifactId>test-hd-parent</artifactId><version>0.0.1-SNAPSHOT</version></parent><artifactId>test-hd-foundation</artifactId><dependencies><!-- servlet --><dependency><groupId>javax.servlet</groupId><artifactId>jstl</artifactId></dependency><dependency><groupId>taglibs</groupId><artifactId>standard</artifactId></dependency><dependency><groupId>junit</groupId><artifactId>junit</artifactId></dependency></dependencies><build><plugins><!-- define the project compile level --><plugin><groupId>org.apache.maven.plugins</groupId><artifactId>maven-compiler-plugin</artifactId><version>2.3.2</version><configuration><source>1.7</source><target>1.7</target></configuration></plugin></plugins></build></project> test-hd-api中的依赖关系<?xml version="1.0"?><projectxsi:schemaLocation="/POM/4.0.0 /xsd/maven-4.0.0.xsd" xmlns="/POM/4.0.0" xmlns:xsi="/2001/XMLSchema-instance"> <modelVersion>4.0.0</modelVersion><parent><groupId>com.hd</groupId><artifactId>test-hd-parent</artifactId><version>0.0.1-SNAPSHOT</version></parent><artifactId>test-hd-api</artifactId><dependencies><dependency><groupId>com.hd</groupId><artifactId>test-hd-foundation</artifactId></dependency><!-- servlet --><dependency><groupId>javax.servlet</groupId><artifactId>jstl</artifactId></dependency><dependency><groupId>taglibs</groupId><artifactId>standard</artifactId></dependency><dependency><groupId>junit</groupId><artifactId>junit</artifactId></dependency></dependencies><build><plugins><!-- define the project compile level --><plugin><groupId>org.apache.maven.plugins</groupId><artifactId>maven-compiler-plugin</artifactId><version>2.3.2</version><configuration><source>1.7</source><target>1.7</target></configuration></plugin></plugins><finalName>test-hd-api</finalName></build></project> test-hd-resource中的依赖关系<?xml version="1.0"?><projectxsi:schemaLocation="/POM/4.0.0 /xsd/maven-4.0.0.xsd" xmlns="/POM/4.0.0" xmlns:xsi="/2001/XMLSchema-instance"> <modelVersion>4.0.0</modelVersion><parent><groupId>com.hd</groupId><artifactId>test-hd-parent</artifactId><version>0.0.1-SNAPSHOT</version></parent><artifactId>test-hd-resource</artifactId><dependencies><dependency><groupId>junit</groupId><artifactId>junit</artifactId></dependency></dependencies><build><plugins><!-- define the project compile level --><plugin><groupId>org.apache.maven.plugins</groupId><artifactId>maven-compiler-plugin</artifactId><version>2.3.2</version><configuration><source>1.7</source><target>1.7</target></configuration></plugin></plugins></build></project>test-hd-service中的依赖关系<?xml version="1.0"?><projectxsi:schemaLocation="/POM/4.0.0 /xsd/maven-4.0.0.xsd" xmlns="/POM/4.0.0" xmlns:xsi="/2001/XMLSchema-instance"> <modelVersion>4.0.0</modelVersion><parent><groupId>com.hd</groupId><artifactId>test-hd-parent</artifactId><version>0.0.1-SNAPSHOT</version></parent><artifactId>test-hd-service</artifactId><dependencies><dependency><groupId>com.hd</groupId><artifactId>test-hd-foundation</artifactId></dependency><dependency><groupId>com.hd</groupId><artifactId>test-hd-api</artifactId></dependency><!-- servlet --><dependency><groupId>javax.servlet</groupId><artifactId>jstl</artifactId></dependency><dependency><groupId>taglibs</groupId><artifactId>standard</artifactId></dependency><dependency><groupId>junit</groupId><artifactId>junit</artifactId></dependency></dependencies><build><plugins><!-- define the project compile level --><plugin><groupId>org.apache.maven.plugins</groupId><artifactId>maven-compiler-plugin</artifactId><version>2.3.2</version><configuration><source>1.7</source><target>1.7</target></configuration></plugin></plugins><finalName>test-hd-service</finalName></build></project> test-hd-module中的依赖关系<?xml version="1.0" encoding="UTF-8"?><project xmlns="/POM/4.0.0" xmlns:xsi="/2001/XMLSchema-instance" xsi:schemaLocation="/POM/4.0.0 /xsd/maven-4.0.0.xsd"><modelVersion>4.0.0</modelVersion><parent><groupId>com.hd</groupId><artifactId>test-hd-parent</artifactId><version>0.0.1-SNAPSHOT</version></parent><artifactId>test-hd-modules</artifactId><packaging>pom</packaging><modules><module>test-hd-www</module><module>test-hd-admin</module></modules><dependencies><dependency><groupId>com.hd</groupId><artifactId>test-hd-foundation</artifactId></dependency><dependency><groupId>com.hd</groupId><artifactId>test-hd-service</artifactId></dependency><dependency><groupId>com.hd</groupId><artifactId>test-hd-api</artifactId></dependency><dependency><groupId>com.hd</groupId><artifactId>test-hd-resource</artifactId></dependency><!-- servlet --><dependency><groupId>javax.servlet</groupId><artifactId>jstl</artifactId></dependency><dependency><groupId>taglibs</groupId><artifactId>standard</artifactId></dependency><dependency><groupId>junit</groupId><artifactId>junit</artifactId></dependency></dependencies></project> test-hd-www中的依赖关系<?xml version="1.0"?><projectxsi:schemaLocation="/POM/4.0.0 /xsd/maven-4.0.0.xsd" xmlns="/POM/4.0.0" xmlns:xsi="/2001/XMLSchema-instance"> <modelVersion>4.0.0</modelVersion><parent><groupId>com.hd</groupId><artifactId>test-hd-modules</artifactId><version>0.0.1-SNAPSHOT</version></parent><artifactId>test-hd-www</artifactId><packaging>war</packaging><build><plugins><!-- define the project compile level --><plugin><groupId>org.apache.maven.plugins</groupId><artifactId>maven-compiler-plugin</artifactId><version>2.3.2</version><configuration><source>1.7</source><target>1.7</target></configuration></plugin></plugins><finalName>test-hd-www</finalName></build></project>最后使⽤maven-update整个⼯程,右击⽗⼯程名--》Maven--》Update Project打包和发布 打包,右击⽗⼯程名 test-hd-parent---->Run As--->Maven Install 打包web⼦⼯程,右击⼯程名test-hd-www--->Run As ---> Maven Build...---> Goals: clean package--->Run 右击⼯程名test-hd-www,进⾏刷新,找到war包,放到tomcat的webapps中,启动tomcat,即可访问⼯程http://localhost:8080/test-hd-www 可以去tomcat下⾯webapps》test-hd-www》WEB-INF》lib中,看到引⽤的jar包。
maven创建多模块web项目
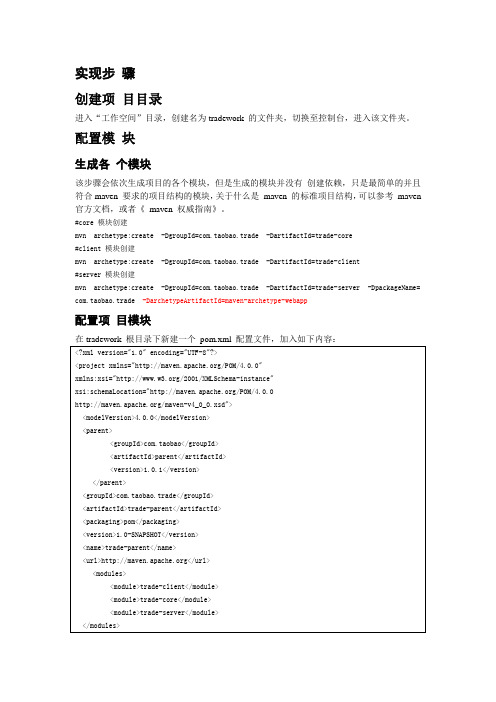
实现步骤
创建项目目录
进入“工作空间”目录,创建名为tradework的文件夹,切换至控制台,进入该文件夹。
配置模块
生成各个模块
该步骤会依次生成项目的各个模块,但是生成的模块并没有创建依赖,只是最简单的并且符合maven要求的项目结构的模块,关于什么是maven的标准项目结构,可以参考maven 官方文档,或者《maven权威指南》。
#core 模块创建
mvn archetype:create -DgroupId=com.taobao.trade -DartifactId=trade-core
#client 模块创建
mvn archetype:create -DgroupId=com.taobao.trade -DartifactId=trade-client
#server 模块创建
mvn archetype:create -DgroupId=com.taobao.trade -DartifactId=trade-server -DpackageName=com. taobao.trade -DarchetypeArtifactId=maven-archetype-webapp
配置项目模块
关系。
生成好各个模块之后在tradework根目录下会生成三个目录,每个目录下都会有一个
配置依赖
进入tradework根目录,在pom.xml文件中加入dependencies节点,加入如下内容:
内容如下:
生成Eclipse 项目文件及包引用定义,注意,需确保定义Classpath Variables: M2_REPO,指向本地maven类库目录。
打开Eclipse ,导入工程即可。
IDEA创建MAVEN项目并使用tomcat启动

IDEA创建MAVEN项⽬并使⽤tomcat启动⼀、开发环境准备1、JDK1.8,已经配置好环境变量2、IDEA2019.2,⽬前稳定版⾥⾯个⼈认为还不错的3、tomcat服务器,笔者使⽤的是apache-tomcat-8.5.574、使⽤IDEA⾃带的maven,如下图,版本还算是⽐较新的,⽐很多博客⾥⾯所记载的都新⼀些以上这些都不是我们讲的重点,具体设置请百度,博客会很多⼆、创建项⽬1、file——>new2、输⼊GroupId和ArtifactId3、⼀直next,到下图4、点击Finish按钮后,idea会开始下载maven所需要的依赖,这时需要⽹络好才能成功完成创建。
当项⽬成功创建后的结构如下图:此时的webapp在src/main⽂件夹下⾯,根据MyEclipse的习惯移到根⽬录,此处操作可做可不做这时项⽬新建就成功了三、修改项⽬配置1、选择File -----> project structure2、Facets 配置:3、Modules 配置:这⾥我们需要增加部分⽂件让项⽬更加符合maven项⽬的⽂件⽬录src/main/java -----------> Sourcessrc/main/resources----->Resourcessrc/test/java ------------->Testssrc/test/resources ------>Test Resources之后如下图进⾏设置修改Java编辑后类的路径4、ArtifactId配置:若下图存在则不进⾏更改,不存在的话⼿动添加即可⾄此项⽬结构配置完毕四、配置tomcat服务器1、找到下图的按钮,点击2、进⾏添加本地的tomcat3、进⼊tomcat配置页⾯如果没有的话那么假如进去,下⾯的Application context是项⽬发布的名称,可以进⾏修改,到此就全部配置完成了。
idea maven管理项目结构

idea maven管理项目结构使用Maven管理项目结构可以让您更轻松地管理Java 项目的构建、依赖关系和项目设置。
以下是一些建议,以帮助您有效地使用Maven管理项目结构:1. 定义项目结构:在Maven中,项目的目录结构需要符合一定的规范。
通常,您的项目应包含以下目录:* src/main:存放项目的核心代码和资源文件。
* src/test:存放测试代码和资源文件。
* pom.xml:Maven项目的核心配置文件,包含项目的基本信息、依赖、插件等。
* pom.properties:用于定义项目属性,比如版本号、开发者信息等。
2. 配置依赖关系:在pom.xml文件中,您可以定义项目所依赖的库和版本号。
这样,Maven就可以自动下载和管理这些依赖库,确保您的项目能够正确编译和运行。
例如:```xml<dependencies><dependency><groupId>junit</groupId><artifactId>junit</artifactId><version>4.12</version><scope>test</scope></dependency></dependencies>```3. 使用Maven插件:Maven提供了许多插件,用于执行各种构建任务,如编译、打包、部署、测试等。
您可以在pom.xml文件中配置这些插件,以满足项目的特定需求。
例如:```xml<build><plugins><plugin><groupId>org.apache.maven.plugins</groupId><artifactId>maven-compiler-plugin</artifactId><version>3.8.1</version><configuration><source>1.8</source><target>1.8</target></configuration></plugin></plugins></build>```4. 分模块管理:如果您的项目较大且复杂,可以考虑使用Maven的多模块管理。
maven配置多模块项目pommodules
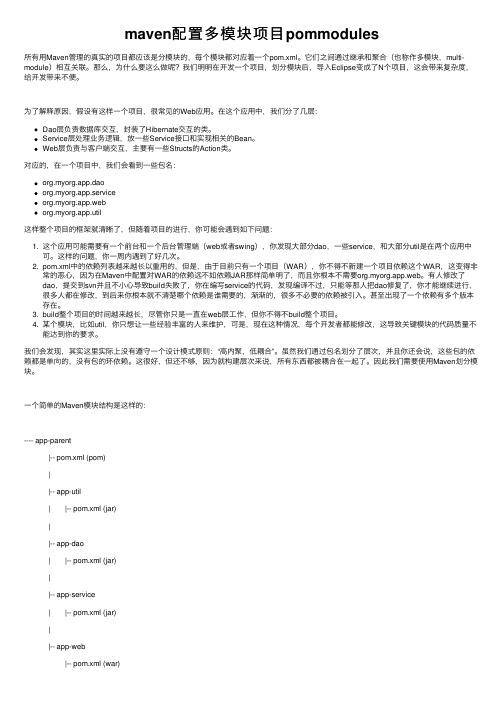
maven配置多模块项⽬pommodules所有⽤Maven管理的真实的项⽬都应该是分模块的,每个模块都对应着⼀个pom.xml。
它们之间通过继承和聚合(也称作多模块,multi-module)相互关联。
那么,为什么要这么做呢?我们明明在开发⼀个项⽬,划分模块后,导⼊Eclipse变成了N个项⽬,这会带来复杂度,给开发带来不便。
为了解释原因,假设有这样⼀个项⽬,很常见的Web应⽤。
在这个应⽤中,我们分了⼏层:Dao层负责数据库交互,封装了Hibernate交互的类。
Service层处理业务逻辑,放⼀些Service接⼝和实现相关的Bean。
Web层负责与客户端交互,主要有⼀些Structs的Action类。
对应的,在⼀个项⽬中,我们会看到⼀些包名:org.myorg.app.daoorg.myorg.app.serviceorg.myorg.app.weborg.myorg.app.util这样整个项⽬的框架就清晰了,但随着项⽬的进⾏,你可能会遇到如下问题:1. 这个应⽤可能需要有⼀个前台和⼀个后台管理端(web或者swing),你发现⼤部分dao,⼀些service,和⼤部分util是在两个应⽤中可。
这样的问题,你⼀周内遇到了好⼏次。
2. pom.xml中的依赖列表越来越长以重⽤的,但是,由于⽬前只有⼀个项⽬(WAR),你不得不新建⼀个项⽬依赖这个WAR,这变得⾮常的恶⼼,因为在Maven中配置对WAR的依赖远不如依赖JAR那样简单明了,⽽且你根本不需要org.myorg.app.web。
有⼈修改了dao,提交到svn并且不⼩⼼导致build失败了,你在编写service的代码,发现编译不过,只能等那⼈把dao修复了,你才能继续进⾏,很多⼈都在修改,到后来你根本就不清楚哪个依赖是谁需要的,渐渐的,很多不必要的依赖被引⼊。
甚⾄出现了⼀个依赖有多个版本存在。
3. build整个项⽬的时间越来越长,尽管你只是⼀直在web层⼯作,但你不得不build整个项⽬。
- 1、下载文档前请自行甄别文档内容的完整性,平台不提供额外的编辑、内容补充、找答案等附加服务。
- 2、"仅部分预览"的文档,不可在线预览部分如存在完整性等问题,可反馈申请退款(可完整预览的文档不适用该条件!)。
- 3、如文档侵犯您的权益,请联系客服反馈,我们会尽快为您处理(人工客服工作时间:9:00-18:30)。
idea maven多模块项目搭建简书
【实用版】
目录
1.idea maven 多模块项目的概念
2.搭建步骤
3.常见问题与解决方法
正文
一、idea maven 多模块项目的概念
在实际软件开发过程中,一个项目可能需要包含多个模块,而每个模块又需要独立编译、测试和部署。
在这种情况下,我们可以采用 maven 多模块项目来管理。
maven 多模块项目是指一个项目组(groupId)下包含
多个子项目(artifactId),每个子项目可以拥有自己的代码库、编译配
置和依赖关系等。
而 IDEA(IntelliJ IDEA)是一款广泛使用的 Java 开发工具,它提供了对 maven 多模块项目的良好支持。
二、搭建步骤
1.创建父项目
首先,我们需要创建一个 maven 父项目。
打开 IDEA,点击“Create New Project”,选择“Maven Project”,然后点击“Next”。
在左侧的“Project”标签下,我们可以看到一个名为“groupId”的输入框,输入父项目的组名。
接着在右侧的“Project”标签下,点击“Browse”,选择一个存放父项目的目录。
最后,点击“Finish”,创建父项目。
2.创建子项目
接下来,我们需要创建一个或多个子项目。
在 IDEA 中,右键点击父项目,选择“Add Module”,然后在弹出的对话框中选择“Maven Project”。
输入子项目的名称(artifactId)和描述(pom.xml 中的<packaging>),
点击“Finish”。
此时,子项目已创建成功。
3.配置子项目
在创建子项目后,我们需要编辑子项目的 pom.xml 文件,添加相关依赖和配置。
例如,我们可以在 pom.xml 的<dependencies>标签内添加子项目所需的 jar 包依赖。
同时,我们还可以在<build><plugins>标签内添加一些构建插件,如 maven-compiler-plugin 等。
4.编译和测试子项目
在子项目配置完成后,我们可以使用 IDEA 的“Run”功能编译和运行子项目。
点击工具栏上的绿色三角形按钮,选择“Run "childProjectName"”,然后点击右侧的“Make”按钮。
编译完成后,如果需要运行子项目,可以点击“Run”按钮。
5.打包和部署
在子项目编译和测试无误后,我们需要将子项目打包成 jar 文件。
这可以通过 IDEA 的“Build”功能实现。
点击工具栏上的“Build”按钮,选择“Build Project”,然后点击右侧的“Make”按钮。
打包完成后,我们可以将生成的 jar 文件部署到服务器或仓库中。
三、常见问题与解决方法
1.依赖冲突
在多模块项目中,可能会出现依赖冲突的问题。
例如,两个子项目都依赖了同一个 jar 包的不同版本。
解决方法是,在 pom.xml 文件中使用<dependencyManagement>标签,统一管理子项目之间的依赖关系。
2.循环依赖
循环依赖是指两个或多个子项目相互依赖,导致编译和测试无法进行的问题。
解决方法是,将相互依赖的子项目改为依赖同一个接口,或者使用 IDEA 的“Build”功能中的“Resolve Dependencies”解决循环依赖问题。
3.编译和测试顺序
在多模块项目中,子项目的编译和测试顺序可能会影响项目的整体构建。