cisco端口链路聚合配置
H3C和CISCO交换机做聚合配置方法教程
H3C和CISCO交换机做聚合配置方法教程交换机工作于OSI参考模型的第二层,即数据链路层。
交换机内部的CPU会在每个端口成功连接时,通过将MAC地址和端口对应,形成一张MAC表,对于聚合配置,有用户表示不知道怎么将两交换机配置,本文将详细介绍H3C和CISCO交换机做聚合配置细节,需要的朋友可以参考下1、H3C_A的配置如下:(动态链路聚合,LACP默认启动)[H3C_A]sys[H3C_A]int bridge-aggregation 1[H3C_A]link-aggregation mode dynamil[H3C_A]int giabthernet1/0/26[H3C_A_giabthernet1/0/26]duplex full[H3C_A_giabthernet1/0/26]speed 1000[H3C_A_giabthernet1/0/26]port link-type trunk[H3C_A_giabthernet1/0/26]port trunk permit vlan all因此,其它三个端口都是一样,如以上配置就可以了,同时H3C_B也是同样如H3C_A的配置一样,配好了,检查下端口的问题。
2、思科的配置[cisco]int port-channel 2[cisco]swit trunk encapsulation dot1q[cisco]swit mode trunk[cisco]swit trunk allowed vlan all[cisco]进入端口模式配置[cisco]int gig0/19[cisco]duplex full[cisco]speed 1000[cisco]swit trun encapsulation dot1q[cisco]swit mode trunk[cisco]swit trunk allowed vlan all[cisco]channel-group 2 mode active其它的端口同样的配置配置好了在H3C交换机用 dis link-aggregation summary查看信息同时,在思科交换机用show ethernetchannel summary查看信息最后经过上面的配置,端口聚合就可以通了。
Cisco链路聚合协议实验
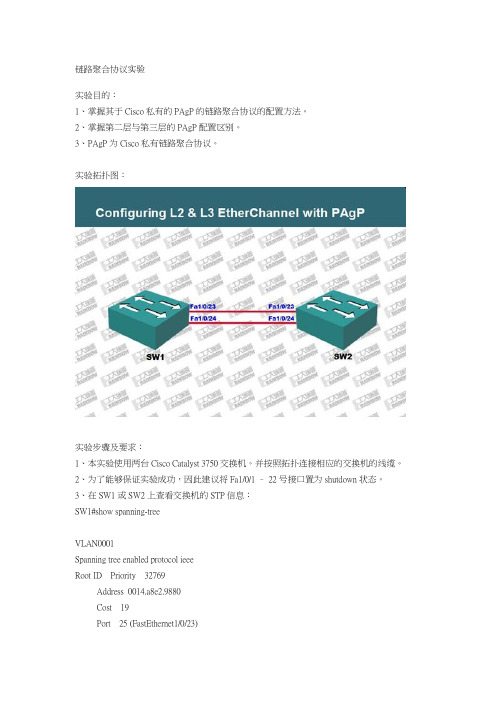
链路聚合协议实验实验目的:1、掌握其于Cisco私有的PAgP的链路聚合协议的配置方法。
2、掌握第二层与第三层的PAgP配置区别。
3、PAgP为Cisco私有链路聚合协议。
实验拓扑图:实验步骤及要求:1、本实验使用两台Cisco Catalyst 3750交换机。
并按照拓扑连接相应的交换机的线缆。
2、为了能够保证实验成功,因此建议将Fa1/0/1 – 22号接口置为shutdown状态。
3、在SW1或SW2上查看交换机的STP信息:SW1#show spanning-treeVLAN0001S panning tree enabled protocol ieeeR oot ID Priority 32769Address 0014.a8e2.9880Cost 19Port 25 (FastEthernet1/0/23)Hello Time 2 sec M ax Age 20 sec F orward Delay 15 secB ridge ID P riority 32769 (priority 32768 sys-id-ext 1)Address 0014.a8f1.9880Hello Time 2 sec M ax Age 20 sec F orward Delay 15 secAging Time 300Interface R ole Sts Cost P rio.Nbr Type---------------- ---- --- --------- -------- --------------------------------Fa1/0/23 R oot FWD 19 128.25 P2pFa1/0/24 A ltn BLK 19 128.26 P2p[stanley1]SW1#4、STP协议虽然可以避免网络环路的问题。
但是其仍然不能充分的利用冗余的链路带宽。
为了解决链路带宽的问题,可以实施PAgP的链路聚合。
cisco 2层交换机链路聚合

Cisco二层交换机链路聚合拓扑图SwitchA的配置Switch>enSwitch#conf tEnter configuration commands, one per line. End with CNTL/Z.Switch(config)#vlan 10Switch(config-vlan)#exitSwitch(config)#vlan 20Switch(config-vlan)#exitSwitch(config)#int fa0/5Switch(config-if)#switchport acc vlan 10Switch(config-if)#no shutSwitch(config-if)#exitSwitch(config)#int range fa0/1-2Switch(config-if-range)#switchport acc vlan 20Switch(config-if-range)#exitSwitch(config)#int vlan 10Switch(config-if)#ip add 192.168.10.254 255.255.255.0Switch(config-if)#exitSwitch(config)#int vlan 20Switch(config-if)#Switch(config-if)#ip add 192.168.20.253 255.255.255.0Switch(config-if)#exitSwitch(config)#int range fa0/1-2Switch(config-if-range)#channel-group 1 mode desirableupSwitch(config-if-range)#exitSwitch(config)#int port-channel 1Switch(config-if)#switchport mode trunkSwitch(config-if)#switchport trunk native vlan 20Switch(config-if)#exitSwitch(config)#SwitchB的配置Switch>enSwitch#conf tEnter configuration commands, one per line. End with CNTL/Z. Switch(config)#vlan 20Switch(config-vlan)#ip add 192.168.20.254 255.255.255.0 Switch(config-vlan)#exitSwitch(config)#vlan 30Switch(config-vlan)#exitSwitch(config)#int range f0/1-2Switch(config-if-range)#switchport acc vlan 20Switch(config-if-range)#exitSwitch(config)#int fa0/5Switch(config-if)#switchport acc vlan 30Switch(config-if)#exitSwitch(config)#int vlan 20upSwitch(config-if)#ip add 192.168.20.254 255.255.255.0 Switch(config-if)#no shutSwitch(config-if)#exitSwitch(config)#int vlan 30Switch(config-if)#ip add 192.168.30.254 255.255.255.0Switch(config-if)#no shutSwitch(config-if)#exitSwitch(config)#int range fa0/1-2Switch(config-if-range)#channel-group 1 mode desirableSwitch(config-if-range)#exitSwitch(config)#int port-channel 1Switch(config-if)#switchport mode trunkSwitch(config-if)#switchport trunk native vlan 20Switch(config-if)#exit。
端口的聚合两种方式
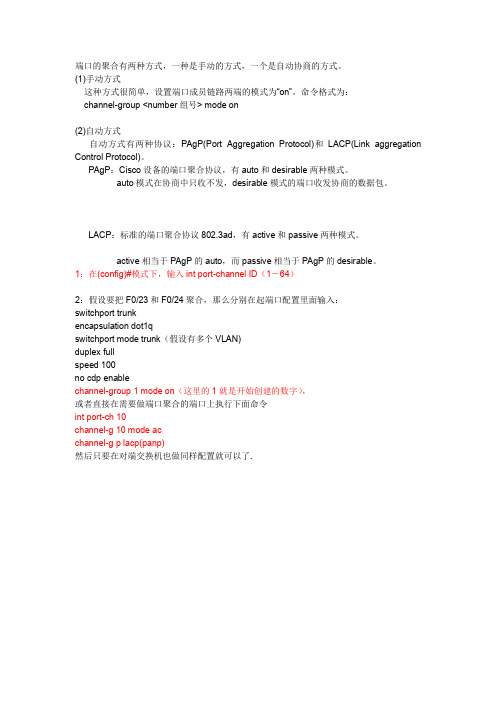
端口的聚合有两种方式,一种是手动的方式,一个是自动协商的方式。
(1)手动方式这种方式很简单,设置端口成员链路两端的模式为“on”。
命令格式为:channel-group <number组号> mode on(2)自动方式自动方式有两种协议:PAgP(Port Aggregation Protocol)和LACP(Link aggregation Control Protocol)。
PAgP:Cisco设备的端口聚合协议,有auto和desirable两种模式。
auto模式在协商中只收不发,desirable模式的端口收发协商的数据包。
LACP:标准的端口聚合协议802.3ad,有active和passive两种模式。
active相当于PAgP的auto,而passive相当于PAgP的desirable。
1:在(config)#模式下,输入int port-channel ID(1-64)2:假设要把F0/23和F0/24聚合,那么分别在起端口配置里面输入:switchport trunkencapsulation dot1qswitchport mode trunk(假设有多个VLAN)duplex fullspeed 100no cdp enablechannel-group 1 mode on(这里的1就是开始创建的数字),或者直接在需要做端口聚合的端口上执行下面命令int port-ch 10channel-g 10 mode acchannel-g p lacp(panp)然后只要在对端交换机也做同样配置就可以了.ORSwitch(config)#interface rang f0/1 - 2Switch(config-if-range)#switchport mode trunkCommand rejected: An interface whose trunk encapsulation is "Auto" can not be configured to "trunk" mode.Command rejected: An interface whose trunk encapsulation is "Auto" can not be configured to "trunk" mode.Switch(config-if-range)#switchport trunk encapsulation dot1qSwitch(config-if-range)#channel-group 1 mode onSwitch(config-if-range)#no shut%LINK-5-CHANGED: Interface Port-channel 1, changed state to up%LINEPROTO-5-UPDOWN: Line protocol on Interface Port-channel 1, changed state to up简单怎么配置就行了对端的交换也是这样ORint range gi0/1 -2channel-group x mode onint port-channel xORint ran fast 0/1 - 2channel-group 1 mode onswitch trunk enca dot1qswitch mode trun好象要生成树spanning-tree mode pvstexitint ran fast 0/3- 24spanning-tree portfastexit。
etherchannel、链路聚合
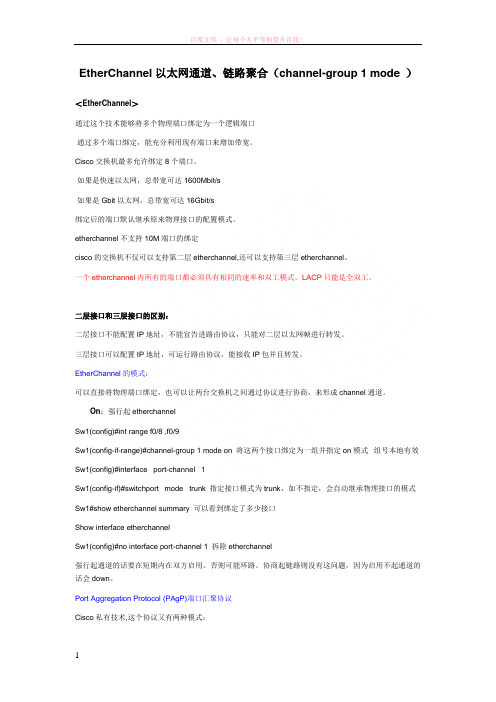
EtherChannel以太网通道、链路聚合(channel-group 1 mode )<EtherChannel>通过这个技术能够将多个物理端口绑定为一个逻辑端口通过多个端口绑定,能充分利用现有端口来增加带宽。
Cisco交换机最多允许绑定8个端口。
如果是快速以太网,总带宽可达1600Mbit/s如果是Gbit以太网,总带宽可达16Gbit/s绑定后的端口默认继承原来物理接口的配置模式。
etherchannel不支持10M端口的绑定cisco的交换机不仅可以支持第二层etherchannel,还可以支持第三层etherchannel。
一个etherchannel内所有的端口都必须具有相同的速率和双工模式。
LACP只能是全双工。
二层接口和三层接口的区别:二层接口不能配置IP地址,不能宣告进路由协议,只能对二层以太网帧进行转发。
三层接口可以配置IP地址,可运行路由协议,能接收IP包并且转发。
EtherChannel的模式:可以直接将物理端口绑定,也可以让两台交换机之间通过协议进行协商,来形成channel通道。
On:强行起etherchannelSw1(config)#int range f0/8 ,f0/9Sw1(config-if-range)#channel-group 1 mode on 将这两个接口绑定为一组并指定on模式组号本地有效Sw1(config)#interface port-channel 1Sw1(config-if)#switchport mode trunk 指定接口模式为trunk,如不指定,会自动继承物理接口的模式Sw1#show etherchannel summary 可以看到绑定了多少接口Show interface etherchannelSw1(config)#no interface port-channel 1 拆除etherchannel强行起通道的话要在短期内在双方启用。
cisco 链路聚合lacp

链路聚合Lacp 实验目的:理解并掌握链路聚合的配置及原理。
实验拓扑:实验步骤:SW1SW1(config)#interface range g0/1 - g0/2SW1(config-if-range)#channel-protocol lacpSW1(config-if-range)#channel-group 1 mode activeSW1(config-if-range)#exitSW1(config)#interface port-channel 1SW1(config-if)#switchport mode trunkSW1(config-if)#switchport trunk encapsulation dot1q SW1(config-if)#switchport nonegotiateSW1(config-if)#exitSW1(config)#^ZSW1#%SYS-5-CONFIG_I: Configured from console by console SW1#wrBuilding configuration...[OK]SW2SW2(config)#interface range g0/1 -g0/2SW2(config-if-range)#channel-protocol lacpSW2(config-if-range)#channel-group 1 mode passiveSW2(config-if-range)#exitSW2(config)#interface port-channel 1SW2(config-if)#switchport mode trunkSW2(config-if)#switchport trunk encapsulation dot1q SW2(config-if)#switchport nonegotiateSW2(config-if)#exitSW2(config)#exitSW2#wrBuilding configuration...[OK]分析:SW1SW2以上显示,链路聚合完成。
Cisco与H3C链路聚合对接
故与H3C做对接时,有以下两种情况: 一、静态(不启用LACP协议) Cisco: # interface Port-channel1 switchport trunk encapsulation dot1q switchport mode trunk # interface FastEthernet0/21 switchport trunk encapsulation dot1q switchport mode trunk channel-group 1 mode on # interface FastEthernet0/22 switchport trunk encapsulation dot1q switchport mode trunk channel-group 1 mode on # -----------------------------------------------------H3C: # interface Bridge-Aggregation 1 port link-type trunk port trunk permit vlan all # interface GigabitEthernet1/0/21 port link-type trunk port trunk permit vlan all port link-aggregation group 1 # interface GigabitEthernet1/0/22 port link-type trunk port trunk permit vlan all port link-aggregation group 1 #
cisco与h3c链路聚合对接cisco链路聚合配置cisco链路聚合cisco交换机链路聚合cisco端口聚合cisco端口聚合配置cisco交换机端口聚合链路聚合链路聚合配置三层交换机链路聚合
CISCO交换机与华为交换机链路聚合
CISCO交换机与华为交换机链路聚合链路聚合有成端口聚合,端口捆绑,英文名port trunking.功能是将交换机的多个低带宽端口捆绑成一条高带宽链路,可以实现链路负载平衡。
避免链路出现拥塞现象。
通过配置,可通过两个三个或是四个端口进行捆绑,分别负责特定端口的数据转发,防止单条链路转发速率过低而出现丢包的现象。
Trunking的优点:价格便宜,性能接近千兆以太网;不需要重新布线,也无需考虑千兆网传输距离极限问题;trunking可以捆绑任何相关的端口,也可以随时取消设置,这样提供了很高的灵活性还可以提供负载均衡能力以及系统容错。
命令:port-group <port-group-number> mode {active|passive|on}no port-group <port-group-number>功能:将物理端口加入Port Channel,该命令的no 操作为将端口从Port Channel 中去除参数:<port-group-number> 为Port Channel 的组号,范围为1~16;active(0)启动端口的LACP 协议,并设置为Active 模式;passive(1)启动端口的LACP 协议,并且设置为Passive 模式;on(2)强制端口加入Port Channel,不启动LACP 协议。
举例:在Ethernet0/0/1 端口模式下,将本端口以active 模式加入port-groupSwitch(Config-Ethernet0/0/1)#port-group 1 mode active命令:interface port-channel <port-channel-number>功能:进入汇聚接口配置模式命令模式:全局配置模式举例:进入port-channel1 配置模式Switch(Config)#interface port-channel 1Switch(Config-If-Port-Channel1)#举例1:如果交换机Switch1 上的1,2,3 端口都是access 口,并且都属于vlan 1,将这三个端口以active 方式加入group 1,Switch2 上6,8,9 端口为trunk 口,并且是allow all,将这三个端口以passive 方式加入group 2,将以上对应端口分别用网线相连。
Cisco交换机基础命令+WinServer08R2多网卡配置链路聚合
Cisco交换机基础命令+WinServer08R2多⽹卡配置链路聚合最近捣⿎服务器链路集合需要配置交换机…以前没弄过交换机,现学现卖…⼀般交换机是⽀持telnet的,配置好ip可以直接telnet,当然如果没配的话就要⽤串⼝了,串⼝要选择Serial…还好我们万能的 putty 都⽀持,⽤⼀个⼯具就OK了,当然你也可以选择 Secure CRT…登录后输⼊密码,然后就需要第⼀个命令:enable //进⼊特权模式补充下密码的修改,来⾃:特权模式密码修改:Route>enableRoute#config terminalRoute(config)#enable secret CISCO ----设置加密密码为"CISCO"(若把"secret"改为"password"则为⽂明显⽰,在show running-config中可以清楚的看出两者的区别)Route(config)#exit删除特权模式密码:Route>enableRoute#config terminalRoute(config)#no enable secret CISCORoute(config)#exit修改登录密码:Console⼝:(这个是设置进⼊路由器的密码)Route>enableRoute#config terminalRoute(config)#line console 0 ----进⼊console⼝模式Route(config-line)#password CISCO ----设置密码为"CISCO"(若要加密密码可在之前:service pass-encryption启⽤路由器密码保护-但是在Boson Netsim环境下没有找到这个命令⼤家知道的可以讨论下) Route(config-line)#login ---- 登⼊时加密Route(config-line)#exitaux⼝:Route>enableRoute#config terminalRoute(config)#line aux 0 ----进⼊aux⼝模式Route(config-line)#password CISCO ----设置密码为"CISCO"(若要加密密码可在之前:service pass-encryption启⽤路由器密码保护)Route(config-line)#login ---- 登⼊时加密Route(config-line)#exitvty(telnet远程登陆⼝):Route>enableRoute#config terminalRoute(config)#line vty 0 4 ----进⼊telnet远程登陆⼝模式(0 4 允许5个⽤户)Route(config-line)#password CISCO ----设置密码为"CISCO"(若要加密密码可在之前:service pass-encryption启⽤路由器密码保护)Route(config-line)#login ---- 登⼊时加密Route(config-line)#exit继续接着上⾯进⼊特权模式,进⼊特权模式后就能⼲什么东西了,不过⼀般应该先看下交换机的信息:show run //show running-config如果我们需要看端⼝的配置信息,那么需要:show run inter 端⼝名 //show run interface端⼝名要看某个端⼝的当前状态信息是:show inter 端⼝名 //show interface端⼝名⽐如我这⾥是 show interfaces gigabitEthernet1/0/45,简写成show inter g1/0/45 就可以(我是多个交换机堆叠,所以要交换机名+端⼝)在这⾥我们可以看到这个端⼝的⼯作⽅式是全双⼯我们可以修改端⼝的⼯作⽅式(全双⼯、半双⼯、⾃动)Switch#conf tSwitch(config)#inter g1/0/45Switch(config-if)#deluplex auto full/half/auto修改后:如果需要关闭某端⼝:Switch#conf tSwitch(config)#inter g1/0/45Switch(config-if)#shutdown开启的话是Switch(config-if)#no shutdown设定端⼝的vlan:Switch#conf tSwitch(config)#inter g1/0/45Switch(config-if)#switchport access vlan 999设置vlan为999下⾯还是回归这次的正题,做链路集合⾸先,我们需要在交换机上建port-channel(注意port-channel貌似最⼤只允许48,另外不能重复…)Switch#conf tSwitch(config)#inter port-channel 21Switch(config-if)#switchport mode accessSwitch(config-if)#switchport access vlan 123Switch(config-if)#description test port channel看下设置结果:然后我们需要设置端⼝的channel-group,把端⼝加到port-channel中Switch#conf tSwitch(config)#inter g1/0/43Switch(config-if)#channel-group 21 mode onSwitch(config-if)#description test group然后依次把端⼝加进来,结果(我测试只加了两个):最后别忘了⽤ wr 写⼊配置⽂件,不然重启就失效了…dir下看看⽂件⽇期是否正确然后交换机的设置就完成了,下⾯就需要设置服务器,我在⽤的是server08 r2,联想的服务器⽤的⽹卡是Inter I350先更新⽹卡驱动,就可以看到选项卡⾥有了“分组”我们新建分组,选择⽹卡⽀持多种类型,根据需要进⾏选择然后把两个⽹卡插上⽹线插好,搞定收⼯…:。
CiscoPT案例七:配置链路聚合负载均衡
CiscoPT案例七:配置链路聚合负载均衡环境Cisco Packet Tracer 5.3Windows 10操作操作:按照如图所⽰连接拓扑图配置交换机0Switch>enableSwitch#configure terminalSwitch(config)#hostname SA (更改交换机名字)SA(config)#interface port-channel 1 (聚合通道1)SA(config-if)#exitSA(config)#interface fa0/22SA(config-if)#channel-group 1 mode on (开启聚合通道1)SA(config-if)#interface fa0/23SA(config-if)#channel-group 1 mode onSA(config-if)#interface fa0/24SA(config-if)#channel-group 1 mode onSA(config-if)#exitSA(config)#interface port-channel 1SA(config-if)#switchport mode trunk (交换机间链路类型为trunk)SA(config-if)#switchport trunk allowed vlan all (允许所有VLAN通过)配置交换机1Switch>enableSwitch#configure terminalSwitch(config)#hostname SBSB(config)#interface port-channel 1SB(config-if)#exitSB(config)#interface range fa0/22-fa0/24 (同时开启聚合通道1)SB(config-if)#channel-group 1 mode onSB(config-if)#exitSB(config)#interface port-channel 1SB(config-if)#switchport mode trunkSB(config-if)#switchport trunk allowed vlan all。
- 1、下载文档前请自行甄别文档内容的完整性,平台不提供额外的编辑、内容补充、找答案等附加服务。
- 2、"仅部分预览"的文档,不可在线预览部分如存在完整性等问题,可反馈申请退款(可完整预览的文档不适用该条件!)。
- 3、如文档侵犯您的权益,请联系客服反馈,我们会尽快为您处理(人工客服工作时间:9:00-18:30)。
cisco 端口/链路聚合配置
2011-01-27 14:46:11
标签:csico channel 端口聚合链路聚合lacp
原创作品,允许转载,转载时请务必以超链接形式标明文章原始出处、作者信息和本声明。
否则将追究法律责任。
.com/715953/486648
环境:
两台cisco 3560-24PS通过g0/1和g0/2相连,两端口属于po1.
pc1: vlan1 接SW1的fa0/1
pc2: vlan1 接SW2的fa0/1
拓扑:
SW1 配置:
Switch(config-if)#int range g0/1-g0/2
Switch(config-if-range)#switchport
Switch(config-if-range)#channel-protocol lacp //以太信道使用链路聚合协议协商
Switch(config-if-range)#channel-group 1 mode active //链路聚合加入通道组1,并设置协商模式为active
Switch(config-if-range)#switchport //端口设置为二层端口
Switch(config-if-range)#switchport trunk encapsulation dot1q //中继链路封装格式为dot1q Switch(config-if-range)# swit mode trunk //将
Switch(config-if-range)# swit trunk allow vlan all
SW2配置(与SW1配置类似):
Switch(config-if)#int range g0/1-g0/2
Switch(config-if-range)#switchport
Switch(config-if-range)#channel-protocol lacp
Switch(config-if-range)#channel-group 1 mode passive //链路聚合加入通道组1,并设置协商模式为passive或者on
Switch(config-if-range)#switchport trunk encapsulation dot1q
Switch(config-if-range)# swit mode trunk
Switch(config-if-range)# swit trunk allow vlan all
本文出自“菜鸟·小蜗牛”博客,请务必保留此出处.com/715953/486648
步骤:
一、两台三层交换机上创建vlan:
Sw0#conf t
Sw0(configure)#vlan 10
Sw0(configure-vlan)#exit
Sw0(configure)#vlan 11
Sw0(configure-vlan)#exit
二、在Sw0交换机上将端口fa0/1-2加入到vlan10中,端口fa0/3加入到vlan 11中
Sw0(configure)#int range fa0/1-2
Sw0(configure-if-range)#switchport access vlan 10
Sw0(configure-if-range)#exit
Sw0(configure)#int fa0/3
Sw0(configure-if)# switchport access vlan 11
Sw0(configure)#exit
三、在Sw1交换机上将fa0/1-2号端口加入到vlan 10中,将fa0/3号端口加到vlan 100中Sw1#conf t
Sw1(configure)#int range fa0/1-2
Sw1(configure-if-range)#switchport access vlan 10
Sw1(configure-if-range)#exit
Sw1(configure)#int fa0/3
Sw1(configure-if)#switchport access vlan 100
Sw1(configure-if)#exit
四、在Sw0和Sw1交换机上为每个vlan 配置虚拟ip地址
Sw0#conf t
Sw0(configure)#int vlan 10
Sw0(configure-if-vlan)#ip address
Sw0(configure-if-vlan)#no shutdown
Sw0(configure-if-vlan)#exit
Sw0(configure)#int vlan 11
Sw0(configure-if-vlan)#ip addresss
Sw0(configure-if-vlan)#no shutdown
Sw0(configure-if-vlan)#exit
Sw1#conf t
Sw1(configure)#int vlan 10
Sw1(configure-if-vlan)#ip address
Sw1(configure-if-vlan)#no shutdown
Sw1(configure-if-vlan)#exit
Sw1(configure)#int vlan 100
Sw1(configure-if-vlan)#ip address
Sw1(configure-if-vlan)#no shutdown
Sw1(configure-if-vlan)#exit
五、将Sw0和Sw1交换机相连的fa0/1-2口进行聚合
Sw0#conf t
Sw0(configure)#int range fa0/1-2
Sw0(configure-if-range)#channel-group 1 mode desirable
Sw0(configure-if-range)#exit
Sw1#conf t
Sw1(configure)#int range fa0/1-2
Sw1(configure-if-range)#channel-gropu 1 mode desirable
Sw1(configure-if-range)#exit
【可选做】// 六、在Sw0和Sw1交换机上将聚合端口设置为trunk口
Sw0#conf t
Sw0(configure)#int port-channel 1
加一句:sw tr en dot1q
Sw0(configure-i)#switchport mode trunk
Sw0(configure-if)#switchport trunk native vlan 10
Sw0(configure-if)#exit
Sw1#conf t
Sw1(configure)#int port-channel 1
Sw1(configure-if)#switchport mode trunk
Sw1(configure-if)#switchport trunk native vlan 10
Sw1(configure-if)#exit
//
七、在Sw0和Sw1交换机上设置默认路由(当然你也可以设置能实现路由功能的协议)Sw0#conf t
Sw0(configure)#ip route
Sw0(configure)#exit
Sw1#conf t
Sw1(configure)#ip route
Sw1(configure)#exit
八、测试
在PC0客户端设置其ip地址为:,子网掩码为:,网关地址为:
在PC1客户端设置其ip地址:,子网掩码为:,网关地址为:
利用PC0客户端去ping PC1客户端的ip,检查是否能够ping 即可!!!
*[注意]:在对Sw0和Sw1交换机上进行端口聚合后,如果没有设置聚合端口为trunk时,交换机两边是不能够被ping 通的。
即使设置了trunk口,如果没有设置三层交换机的路由功能时,也只能实现交换机两端设置了trunk口的端口ip 能够ping 通。
所以,在设置了trunk 口后,还要记得开启三层交换机的路由功能,即:默认路由、静态路由或动态路由
_928/blog/static//。