高新原-particular制作下雨效果
这篇教程我们接着上一篇FORM做水珠的教程继续,我将那篇教程的后半部分也精简翻译了出来。
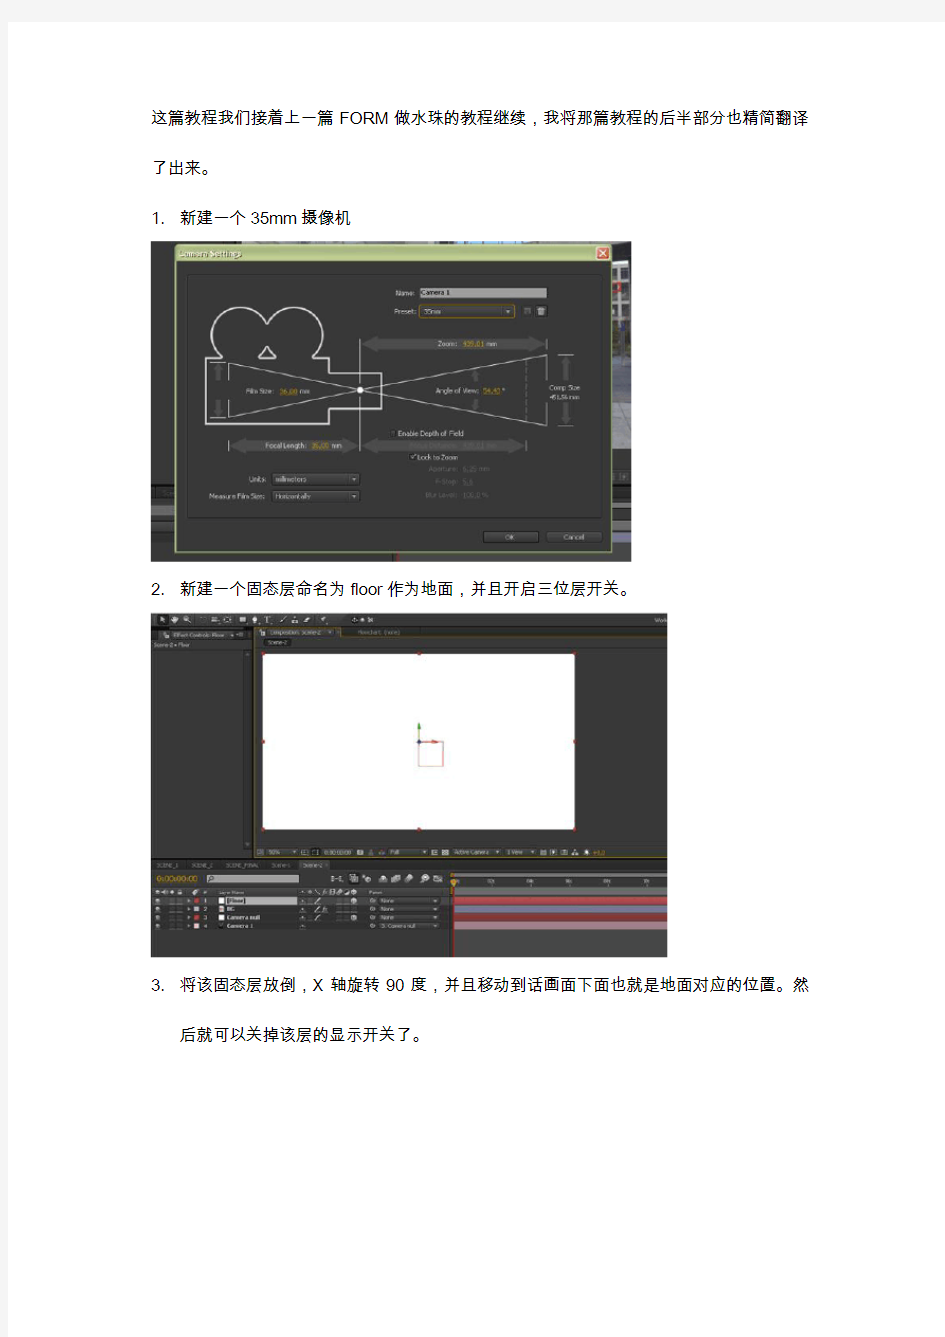
1.新建一个35mm摄像机
2.新建一个固态层命名为floor作为地面,并且开启三位层开关。
3.将该固态层放倒,X轴旋转90度,并且移动到话画面下面也就是地面对应的位置。然
后就可以关掉该层的显示开关了。
4.
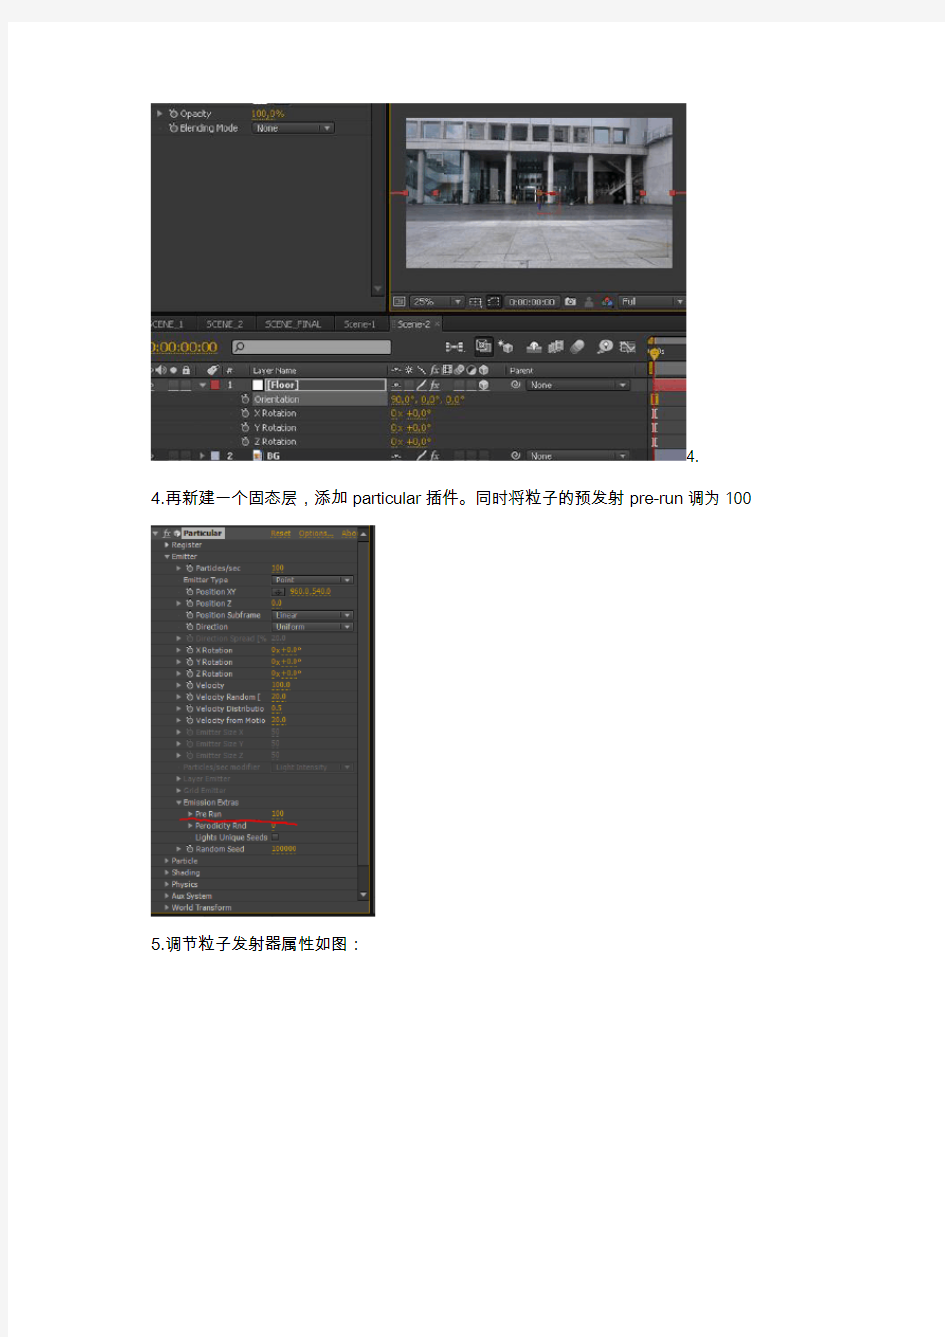
4.再新建一个固态层,添加particular插件。同时将粒子的预发射pre-run调为100
5.调节粒子发射器属性如图:
6.将上次我们做好的水珠(drop)放到这个合成中,调节粒子属性如图:
7.之后我们来让水珠落下来并且让水珠和地面产生碰撞。
8.这样一个下雨的效果就完成了,这里如果各位的电脑渲染不动,可以先将水珠渲染输出成序列再进行粒子替代,减少渲染压力。
正确使用DSC基线
Thermal Analysis Information for Users User Com 25 Introduction In thermal analysis, baselines are mostly used in connection with the integration of peaks. The peak area is determined by integrating the area between the measurement curve and a virtual or true baseline. In the same way, the peak temperature is defined as the point on the curve where the distance to the baseline is greatest. Extrapolated baselines are important for the determination of glass transition temperatures Choosing the correct baseline is crucial for the determination of the enthalpy of a transi- tion or a reaction. The baseline represents the DSC curve that would be measured if no transition or reaction occurred. The examples described in this article illustrate how to choose the right baseline for a particular evaluation. Dear Customer, We are very pleased to receive more and more articles from you for publication in UserCom. Thanks to new techniques and better performance, thermal analysis is being used in an ever-increasing number of scien- tific fields. Hyphenated techniques such as evolved gas analysis, microscopy and chemiluminescence yield much more information about samples and very often greatly simplify the interpretation of measurement results. We think this issue of UserCom will once again give you ideas for applications in new and interesting areas using the multitude of techniques now available. Choosing the right baseline Dr. Rudolf Riesen Contents 1/2007 TA Tip - Choosing the right baseline 1 Applications - Determination of the Noack evaporation loss of lubricants by TGA 7 - The characterization of poly- morphs by thermal analysis 9 - Analysis of melting processes using TOP EM? 13 - Characterization of delivery systems by thermogravimetry 18 Tips and hints - Detection and evaluation of weak sample effects in DSC 21 Dates - Exhibitions 23 - Courses and Seminars 23
一套详细的photoshop设计制作宣传册教程
详细的photoshop设计制作宣传册教程 我会用Photoshop帮你从头开始创建一个即将印刷的宣传册。这篇教程很适合初学者以及那些想知道更多关于出版设计的人。让我们开始吧! 上下是最终效果预览。介绍:这是一个实用的教程,教大家如何用Photoshop设计一个简单的宣传册。我没有使用任何设计样板,也没有用Illustrator,因为有很多人没有这个软件,或者根本不知道如何去使用它。如果你是一个正在学习怎么设计一本能印刷的宣传册的学生的话,或许这就是适合你的教程。 第一部分:建立你的文档 步骤1:选择折叠类型 在开始之前有几件事需要我们考虑到:它的大小、形状和折叠类型。一般来说,我们应该从笔和纸开始。用一张纸寻找最好的折叠方式是一个不错的主意,不过叠完后,你只能打印两面,也就是说,是两个PS文档,一个正面的,一个反面的。 在这,我会告诉你如何设计一个三折叠的宣传册。下面是一个快速折叠指南。我们将每个打印区域以“面”命名,所以我们有“第1面”、“第2面”、“第3面”……直到“第6面”。
步骤2:起草 一旦选择好折叠类型,想象出一个设计图并不难。你折叠之后,就在上面涂鸦,看看它的效果。这是最具创意的一步,尽情发挥你的想象吧~ 在下面的例子中,我已经按照我的方案画出了一些。这种格式基于基本指导方针的设计和一些用图形表达的idea。起草会帮助你了解你想要的宣传册的布局构造,如果布局能帮助读者很快找到信息的话,这就是一个很好的分类信息的方式。例如:你可以在我的草图上看到我是如何把“联系我们”文本放在第2面的(见先前的图形),所以当这个小册子保持折叠状态时,读者仍然能够看到宣传册的题目和联系信息。
SAP系统配置参数详解
SAP系统配置参数详解 SAP 系统参数设置 path: /usr/sap/PRD/SYS/profile profile: PRD_DVEBMGS00_sapapp 如果您想查看所有的参数及当前设定,可使用SA38 执行程序 RSPARAM 修改附加配置 T-CODE:RZ10 进行SAP系统参数的设置,设置后需激活参数并重启SAP实例,配置参数才会生效login/system_client 登录时默认的Client号 login/password_expiration_time 密码有效期 login/fails_to_user_lock 密码输错多少次后锁定 login/failed_user_auto_unlock 用户失效后多长时间解锁 rdisp/mshost 状态栏中显示的系统名称 rdisp/rfc_use_quotas 是否激活配额资源分配,0是关闭,1是启用.以下相关限制必须这个为1时才生效. rdisp/gui_auto_logout 表示如果客户在指定时间内没有进行任何操作,则会自动退出SAP系统。时间为秒 rdisp/max_wprun_time 程序运行的最长时间限制 rdisp/rfc_max_login 最大SAP用户登录数 login/disable_multi_gui_login 限制用户多次登录,该参数可以设置同个client 同个用户ID可以允许同时登录几个,当设为1时,系统将提示用户选择: 'Terminate the Current Sessions' or 'Terminate this Login.' ,以达到保证只允许一个登录. rdisp/tm_max_no 这个参数是限制每个实例最大的用户数,默认是200个. rdisp/rfc_max_own_login 一个程序在一个服务器上允许分配的RFC资源个数,也就是同时能运行多少个.默认值25. rdisp/rfc_min_wait_dia_wp 设置RFC保留的会话设置, rdisp/wp_no_dia 在一个实例中处理的会话数目,如果设置为10,rdisp/rfc_min_wait_dia_wp=3则可用的会话处理是7,3个被保留 rdisp/rfc_max_own_used_wp rdisp/rfc_max_comm_entries rdisp/rfc_max_wait_time rdisp/btctime
AE常用particular粒子中英文对照表教学文稿
A E常用p a r t i c u l a r 粒子中英文对照表
10xLinear(10x线性) 10x Smooth(10x平滑) Exact(slow)精确(慢) Direction(方向) Uniform(统一)——任一粒子发射类型发射粒子时,会向各个方向移动。 Directional(方向)——(如枪口喷射)通过调节X、Y、Z Rotation来实现。 Bi-Directional(双向)——和Directional(方向)十分相似,但是向着两个完全相反的方向发射。通常为180度。 Disc(圆形)——通常只在两个维度上,形成一个盘形。 Outwards(向外)——粒子会始终向远离发射点的方向移动。而Uniform(统一)是随机的。Direction Spread(方向伸展)—20—可以控制粒子发射方向的区域。 粒子会向整个区域的百分之几运动。(即粒子发射方向有多宽) X Rotation(X旋转) 0x0 X Rotation (Y旋转) 0x0 X Rotation (Z旋转) 0x0 Velocity(速率)—100—粒子每秒钟运动的像素数。 Velocity Random[%](随机运动【%】)20 ——每个粒子Velocity的随机性会随机增加或者减小每个粒子的Velocity。 Velocity Distribution(速度分布)—0.5— Velocity from Motion[%](继承运动速度【%】)20 ——粒子在向外运动的同时也会跟随发射器的运动方向运动。 Emitter Size X(发射器尺寸X ) 50
Emitter Size Y (发射器尺寸Y ) 50 Emitter Size Z (发射器尺寸Z) 50 Particles/sec modifier粒子数/秒修改器--- Light(灯光)下有效 Light Intensity光照强度 Shadow Darkness阴影暗部 Shadow Diffusion阴影漫射 None无 Layer Emitter(发射图层)----Layer(图层)、Layer Grid(图层网格)下有效; Layer(图层)—None无—选用哪一个图层作为发射器; Layer Sampling(图层采样)—— Current Time(当前时间) Particular Birth Time(粒子产生时间) Layer RGB Usage(图层RGB用法)—— Lightness-Size(发光-尺寸)——随着图像的明暗变化,粒子的大小也跟着变化 Lightness-Velocity(发光-速率)——随着图像的明暗变化,粒子的速度也跟着变化 Lightness-Rotation(发光-旋转)——随着图像的明暗变化,粒子的旋转也跟着变化 RGB-Size,Vel,Rot(RGB-大小、速率、旋转)——随着图像的颜色变化,粒子的大小,速度,旋转同时变化 RGB-Particle Color(RGB-粒子颜色)——随着图像的颜色变化,粒子的颜色也跟着变化 None无 Grid Emitter(网格发射)----在(网格、图层网格下有效) Particular in X(粒子在X方向上的数量)5 Particular in Y(粒子在Y方向上的数量)5 Particular in Z(粒子在Z方向上的数量)1 Type(类型)
如何使用photoshop制作GIF动态动画
如何使用PHOTOSHOP制作gif动画 步骤 photoshop是图像处理软件,不是动画专业制作工具,但其提供的动画组件用来制作GIF这类片断动画还是非常简单快速的。这里做一例子说明吧。 工具/原料 ?photoshop ?图片 方法/步骤 1.打开photoshop后,将需要成为动画的部分分图层制作出来。如图中所示,图层2 是绿色小汽车,也是我们要制作成动画的唯一一个活动的组件,所以我们根据需要直接复制多个该图层: 2.然后,再根据动画场景需要将各个动画组件放置在相应位置,并根据需要适当修改。 如图中头尾的小汽车相应的剪切过,中间转变处小汽车也有适当旋转:
3.好了,我们再单击“窗口”菜单,选择“动画”命令: 4.可以看到窗口底部打开了“动画”面板:
5.动画是以帧为单位来显示的,可能通俗理解为一个帧也就是PS的一个图层。所以每 个帧只需要显示相应的图层上的图片即可。这里是先制作第一帧,只要动画最开头的只显示半辆汽车的图层,其它所有图层都隐藏掉。注意不会变的底层(图层1)在所有的帧上都不要隐藏掉: 6.第一帧制作完毕后,单击“动画”面板下面工具栏上的“复制所选帧”按钮新建帧 (也就是动画片断):
7.和第一帧一样,在新建的帧上仅保留需要的显示的图层及不变的底层即可: 8.重复前一步操作,分别新建多个帧,并分别设置要显示和隐藏的图层即可:
9.帧制作完成后,我们再对各帧设置合适的播放时间: 10.制作完成后,单击“文件”菜单,选择“存储为Web和设备所用的格式”命令:
11.在弹出的“存储为Web和设备所用的格式”窗口中选择格式为“Gif”: 12.最后再单击“存储”按钮保存动画:
加速度传感器参数讲解(AD)
加速度传感器参数讲解(AD)Accelerometer Specifications - Quick Definitions Measurement range is the level of acceleration supported by the sensor’s output signal specifications, typically specified in ±g. This is the greatest amount of acceleration the part can measure and accurately represent as an output. For example, the output of a ±3g accelerometer is linear with acceleration up to ±3g. If it is accelerated at 4g, the output may rail. Note that the breaking point is specified by the Absolute Maximum Acceleration, NOT by the measurement range. A 4g acceleration will not break a ±3g accelerometer. Sensitivity is the ratio of change in acceleration (input) to change in the output signal. This defines the ideal, straight-line relationship between acceleration and output (Figure 1, gray line). Sensitivity is specified at a particular supply voltage and is typically expressed in units of mV/g for analog-output accelerometers, LSB/g, or mg/LSB for digital-output accelerometers. It is usually specified in a range (min, typ, max) or as a typical figure and % deviation. For analog-output sensors, sensitivity is ratiometric to supply voltage; doubling the supply, for example, doubles the sensitivity. Sensitivity change due to Temperature is generally specified as a % change per °C. Temperature effects are caused by a combination of mechanical stresses and circuit temperature coefficients.
ABAP Number Ranges设置及使用
ABAP:ABAP--How to use Number Ranges' Function? 2007-08-16 14:29:20| 分类:SAP ABAP | 标签:|字号大中小订阅 在SAP系统中,号码范围用于给数据记录提供惟一标识. 1 号码范围对象分类 ?无子对象的号码范围对象 无分组 (1) one, two or several number ranges 有分组 (2) one number range, external or internal, per group (3) two number ranges, external and internal, per group ?有子对象的号码范围对象 无分组 (4) one, two or several number ranges 有不依赖子对象的分组 (5) one number range, external or internal, per group (6) two number ranges, external and internal, per group 有依赖子对象的分组 (7) one number range, external or internal, per group (8) two number ranges, external and internal, pergroup 二、如何使用号码范围 2.1 确定号码范围的类型并创建新的号码范围对象(SNRO) 需要多少个号码范围: 1, 2 或者更多? 号码范围是否需要子范围对象(如:company code, plant, controlling area等等)? 号码范围是否需要分组(如:物料类型)? 如果需要分组,那分组的是否需要子范围对象? 号码范围是否需要区分财务年度? 2.2 维护号码范围对象的间隔; 3.3 在程序中使用号码范围的函数进行记录编号或检查可用号码;
amber动力学常用参数说明
amber动力学常用参数说明 个人日记2009-05-08 19:32:18 阅读130 评论1 字号:大中小订阅 IMIN Flag to run minimization =0 No minimization (only do molecular dynamics;default) = 1 Perform minimization (and no molecular dynamics) =5 Read in a trajectory for analysis. NTX Option to read the initial coordinates, velocities and box size from the "inpcrd" file. The options 1-2 must be used when one is starting from minimized or model-built coordinates. If an MD restrt file is used as inpcrd, then options 4-7 may be used. = 1 X is read formatted with no initial velocity information (default) = 2 X is read unformatted with no initial velocity information = 4 X and V are read unformatted. = 5 X and V are read formatted; box information will be read if ntb>0. The velocity information will only be used if irest=1. = 6 X, V and BOX(1..3) are read unformatted; in other respects, this is the same as option "5". =7 Same as option "5"; only included for backward compatibility with earlier versions of Amber. IREST Flag to restart the run. = 0 Noeffect (default) = 1 restart calculation. Requires velocities in coordinate input file, so you also may need to reset NTX if restarting MD. NTRX Format of the Cartesian coordinates for restraint from file "refc". Note: the program expects file "refc" to contain coordinates for all the atoms in the system. A subset for the actual restraints is selected by restraintmask in the control namelist. = 0 Unformatted (binary) form = 1 Formatted (ascii, default) form NTPR Every NTPR steps energy information will be printed in human-readable form to files "mdout" and "mdinfo". "mdinfo" is closed and reopened each time, so it always contains the most recent energy and temperature. Default 50. NTWR Every NTWR steps during dynamics, the "restrt" file will be written, ensuring that recovery from a crash will not be so painful. In any case, restrt is written ev ery NSTLIM steps for both dynamics and minimization calculations. If NTWR<0, a unique copy of the file, restrt_nstep, is written every abs(NTWR) steps. This option is useful if for example one wants to run free energy perturbations from multiple starting points or save a series of restrt files for minimization. Default 500. NTF Force evaluation. Note: If SHAKE is used (see NTC), it is not necessary to calculate forces for the constrained bonds. = 1 complete interaction is calculated (default) = 2 bond interactions involving H-atoms omitted (use with NTC=2) = 3 all the bond interactions are omitted (use with NTC=3) = 4 angle involving H-atoms and all bonds are omitted = 5 all bond and angle interactions are omitted = 6 dihedrals involving H-atoms and all bonds and all angle interactions are omitted
可视化的PLC程序使用XML
Visualization of PLC Programs using XML M. Bani Younis and G. Frey Juniorprofessorship Agentenbased Automation University of Kaiserslautem P. 0. Box 3049, D-67653 Kaiserslautem, Germany Abstract - Due to the growing complexity of PLC programs there is an increasing interest in the application of formal methods in this area. Formal methods allow rigid proving of system properties in verification and validation. One way to apply formal methods is to utilize a formal design approach in PLC programming. However, for existing software that has to be optimized, changed, or ported to new systems .There is the need for an approach that can start from a given PLC program. Therefore, formalization of PLC programs is a topic of current research. The paper outlines a re-engineering approach based on the formalization of PLC programs. The transformation into a vendor independent format and the visualization of the structure of PLC programs is identified as an important intermediate step in this process. It is shown how XML and corresponding technologies can be used for the formalization and visualization of an existing PLC program. I. INTRODUCTION Programmable Logic Controllers (PLCs) are a special type of computers that are used in industrial and safety critical applications. The purpose of a PLC is to control a particular process, or a collection of processes, by producing electrical control signals in response to electrical process- related inputs signals. The systems controlled by PLCs vary tremendously, with applications in manufacturing, chemical process control, machining, transportation, power distribution, and many other fields. Automation applications can range in complexity from a simple panel to operate the lights and motorized window shades in a conference room to completely automated manufacturing lines. With the widening of their application horizon,PLC programs are being subject to increased complexity and high quality demands especially for safety-critical applications. The growing complexity of the applications within the compliance of limited development time as well as the reusability of existing software or PLC modules requires a formal approach to be developed [I]. Ensuring the high quality demands requires verification and validation procedures as well as analysis and simulation of existing systems to be carried out [2]. One of the important fields for the formalization of PLC programs that have been growing up in recent time is Reverse-engineering [3]. Reverse Engineering is a process of evaluating something to understand how it works in order to duplicate or enhance it. While the reuse of PLC codes is being established as a tool for combating the complexity of PLC programs, Reverse Engineering is supposed to receive increased importance in the coming years
PS制作简要步骤
图片1的制作步骤: (1)打开Ps软件,【文件】【打开】导入素材1(背景)、素材2 素材1 素材2 (2)用【图像】【调整】【色相/饱和度】命令,对背景颜色稍作调整。(3)在素材2中,用【魔棒】工具选取蓝天,再用【选择】【反选】命令,选取雄鹰。 (4)用【工具栏】【移动工具】将所选雄鹰拖入背景图中,拖入两次,即两只鹰,分别作为图层1和图层2 (5)用【编辑】【自由变换】命令,对两只鹰做适当调整,用【移动工具】将一只鹰放在天空,另一只放在水中 (6)对水中雄鹰进行【滤镜】【模糊】【进一步模糊】处理,使其成为水中倒影 (7)【工具栏】【竖排文字工具】插入文字,调整文字的大小、样式、颜色和位置 (8)保存图片
图片2的制作步骤: (1)打开Ps软件,【文件】【打开】导入素材1(背景)、素材2素材3 素材1 素材2 素材3 (2)对素材1进行【滤镜】【扭曲】【挤压】处理 (3)在素材2中,用【工具栏】【Shift+魔棒】选取图片背景,然后【选择】【反选】选取车 (4)用【工具栏】【移动工具】将所选小轿车拖入背景图中,作为图层1
(5)选图层1,【编辑】【自由变换】,调整好大小,用【移动工具】调整好位置 (6)对图层1进行【图层】【添加图层样式】【外发光】处理 (7)在素材3中,用【工具栏】【椭圆选框工具+Shift】选取图中球形部分 (8)用【工具栏】【移动工具】将所选图片拖入背景图中,作为图层2 (9)选图层2,【编辑】【自由变换】,调整好大小,用【移动工具】将其放在车的正前方 (10)调整图层2的不透明度,对图层1进行图层】【添加图层样式】【投影】处理,适当调整背景颜色,使其成如图效果(11)保存图片
Trapcode的3D粒子系统 参数详解
Trapcode的3D粒子系统参数详解 1.Emitter面板 粒子发生器:用于产生粒子,并设定粒子的大小、形状、类型、初始速度与方向等属性。 1.1 Particles/sec 控制每秒钟产生的粒子数量,该选项可以通过设定关键帧设定来实现在不同的时间内产生的粒子数量。 1.2 Emitter Type 设定粒子的类型。粒子类型主要有point、box、sphere、grid、light、layer、layer grid等七种类型。 1.3 Position XY & Position Z 设定产生粒子的三维空间坐标。(可以设定关键帧) 1.4 Direction 用于控制粒子的运动方向。 1.5 Direction Spread 控制粒子束的发散程度,适用于当粒子束的方向设定为Directional、Bi-directional、Disc和Outwards等四种类型。对于粒子束方向设定为Uniform和以灯光作为粒子发生器等情况时不起作用。 1.6 X,Y and Z Rotation 用于控制粒子发生器的方向。 1.7 Velocity 用于设定新产生粒子的初始速度。 1.8 Velocity Random 默认情况下,新产生的粒子的初速度是相等的,我们可以通过该选项为新产生的粒子设定随机的初始速度。 1.9 Velocity from Motion
让粒子继承粒子发生器的速度。此参数只有在粒子发生器是运动的情况下才会起作用。该参数设定为负值时能产生粒子从粒子发生器时喷射出来一样的效果。设定为正值时,会出现粒子发生器好象被粒子带着运动一样的效果。当该参数值为0时,没有任何效果。 1.10 Emitter Size X,Y and Z 当粒子发生器选择Box, Sphere, Grid and Light时,设定粒子发生器的大小。对于Layer and Layer Grid粒子发生器,只能设定Z参数。 2.Particle面板 在particle参数组可以设定粒子的所有外在属性,如大小、透明度、颜色,以及在整个生命周期内这些属性的变化。 2.1 Life [sec] 控制粒子的生命周期,它的值是以秒为单位的,该参数可以设定关键帧。 2.2 Life Random [%] 为粒子的生命周期赋予一个随机值,这样就不会出现“同生共死”的情况。 2.3 Particle Type 在该粒子系统中共有八种粒子类型:球形(sphere)、发光球形(glow sphere)、星形(star)、云团(cloudlet)、烟雾(smokelet)、自定义形(custom、custom colorize、custom fill)等。自定义类型(custom)是指用特定的层(可以是任何层)作为粒子,custom colorize类型在custom类型的基础上又增加了可以为粒子(层)根据其亮度信息来着色的能力,custom fill 类型在custom类型的基础上又增加了为粒子(层)根据其Alpha通道来着色的能力。 对于custom类型的粒子,如果用户选择一个动态的层作为粒子时,还有一个重要的概念:时间采样方式(time sampling mode)。系统主要提供了以下几种方式: (1)Start at Birth –Play Once 从头开始播放custom层粒子一次。粒子可能在custom层结束之前死亡(die),也可能是custom 层在粒子死亡之前就结束了。 (2)Start at Birth –Loop 循环播放custom层粒子。 (3)Start at Birth –Stretch 从头开始或者是对custom层进行时间延伸的方式播放custom层粒子,以匹配粒子的生命周
用PS制作下雨飘雪的动态图片举例
用PS制作下雨飘雪的动态图片举例. 例1.Photoshop制作下雨的动画效果 方法1:通过像素化→点状设置来实现下雨的效果 ①. 打开一张图片. ②. 按D键(默认前景色). ③. 窗口→动作→创建新动作,名称→下雨 . ④.复制图层,在新图层上:滤镜→像素化→点状化单元格大小→ 3;点状化越大雨就越大,点状化越小雨就越小. ⑤. 图像→调整→阈值 255(小词条:阈yù值又称阈强度,是指释放一个行为反应所需要的最小刺激强度,低于阈值的刺激不能导致行为释放;阈值根据情况而定). ⑥.将图层模式改为滤色:右键→混合选项→混合模式→下拉菜单中选→…或通过图层→图层样式→混合选项→…或通过图层样式的按钮调出的对话框中选→…(图层改为“滤色”这一点很重要!) . ⑦. 滤镜→模糊→动感模糊, 角度76,距离22,确定;距离越大雨夜就越大,距离越小雨就越小 . ⑧. 滤镜→锐化→锐化(可以进行两次锐化或进一步锐化). ⑧.点窗口→动作→点停止播放;然后点播放选定动作(实际是复制了图层,也可以手动复制)3次(这样就有了4个下雨图层) (图层交替进行“自由变换”的水平翻转和垂直翻转或按方向作一定的平移,方向可稍作偏移,因为下雨方向并不是完全固定的,这样效果更好;变换可以添加杂色和动感模糊之间). ⑨. 打开动画,复制动画帧3个(此时共4个);在第一帧上关闭上面3个层的眼睛,只留背景和图层1的眼睛;第2帧关闭图层1的眼睛,打开图层1副本的眼睛;第3帧关闭图层1副本的眼睛,打开图层1副本2的眼睛;第4帧关闭图层1副本2的眼睛,打开图层1副本3的眼睛.在选择全部帧,设时间为0.2秒. ⑩.最后在存储为web所用格式里存储为gif文件. 方法2:通过添加“杂色”制作下雨效果 ①.打开素材,比如我选用的是一副荷花图. ②.打开动作面板,如果ps里面没有动作窗口的,在最上面的工具栏里点击窗口→勾选动作→这样动作面板就有了. ③.在动作面板里新建动作,创建新动作,命名为"下雨". ④.回到图层面板,新建图层,填充为黑色. ⑤.然后对新建的图层1进行以下操作:滤镜→杂色→添加杂色(数量25%,高斯分布,单色). ⑥.图层1继续执行滤镜→模糊→动感模糊(-55,25). ⑦.将图层1的混合模式(点图层1按右健,点混合选项),改为滤色(图层改为滤色这一点很重要!). ⑧.找到动作面板-停止动作,执行动作播放三次(三角形的是播放),图层面板中会自动新建图层2,图层3,图层4(也可以通过复制或新建的方法来得到图层,但每个图层都要注意进行⑤⑥的设置;图层交替进行“自由变换”的水平翻转和垂直翻转或按方向移动,效果更好,翻转插在⑤⑥之间进行,即添加杂色和动感模糊之间). ⑨.打开动画窗口,复制5帧. ⑩.回到图层面板,先隐藏所有图层(就是关掉图层前面的眼睛)。 点击帧1同时点击图层面板中的图层1前的小眼睛:显示背景与图层1(关闭其它图层);点击帧2同时点击图层面板中的图层1前的小眼睛:显示背景与图层1(关闭其它图层);
使用QUARTUS II做FPGA开发全流程,傻瓜式详细教程
My First FPGA Design Tutorial 101 Innovation Drive San Jose, CA 95134 (408) 544-7000 https://www.360docs.net/doc/f87402107.html, TU-01002-1.0
Copyright ? 2007 Altera Corporation. All rights reserved. Altera, The Programmable Solutions Company, the stylized Altera logo, specific device des-ignations, and all other words and logos that are identified as trademarks and/or service marks are, unless noted otherwise, the trademarks and service marks of Altera Corporation in the U.S. and other countries. All other product or service names are the property of their respective holders. Al-tera products are protected under numerous U.S. and foreign patents and pending applications, maskwork rights, and copyrights. Altera warrants performance of its semiconductor products to current specifications in accordance with Altera's standard warranty, but reserves the right to make changes to any products and services at any time without notice. Altera assumes no responsibility or liability arising out of the ap- plication or use of any information, product, or service described herein except as expressly agreed to in writing by Altera Corporation. Altera customers are advised to obtain the latest version of device specifications before relying on any published in- formation and before placing orders for products or services. Printed on recycled paper