SSL-Certificates-HOWTO
ssl证书验证原理 -回复

ssl证书验证原理-回复SSL证书是一种用于在互联网上实现加密通信的数字证书。
它用于验证网站的身份并确保数据在传输过程中的安全性。
SSL证书的验证原理是如何确保数据传输的安全性,保护用户的隐私和敏感信息。
第一步:生成SSL证书在建立安全通信之前,网站管理员需要生成SSL证书。
他们可以通过向SSL证书颁发机构(CA)申请证书来完成这个过程。
申请证书的过程通常涉及验证企业或个人的身份。
一旦身份验证通过,CA会签发一个数字证书。
第二步:数字证书的结构数字证书通常由几个重要的元素组成:1. 主体信息:证书的所有者信息,包括名称、电子邮件地址和组织信息。
2. 公钥:用于加密数据的密钥。
这个密钥只能用于加密数据,不能用于解密。
3. 有效期:证书的有效期限,一般为1年或更长时间。
4. 签名:CA使用其私钥对证书进行数字签名,以确保证书的完整性和真实性。
第三步:验证数字证书当用户连接到使用SSL证书保护的网站时,服务器会将数字证书发送给用户的浏览器。
浏览器在处理证书之前需要对其进行验证,以确保它的合法性和可信度。
验证过程包括以下几个步骤:1. 验证证书的签名:浏览器会使用CA的公钥解密数字证书中的签名,并使用同样的算法和哈希函数重新计算签名。
如果签名匹配,则证明证书的完整性没有被篡改。
2. 验证证书的合法性:浏览器会检查证书中的有效期信息,确保证书在当前时间内仍然有效。
如果证书已过期或尚未生效,浏览器会发出警告。
3. 验证证书的颁发机构:浏览器会检查证书中的颁发机构是否被浏览器信任。
浏览器内置了一组根证书颁发机构的公钥,用于验证所接收到的证书。
如果证书的颁发机构不被信任,浏览器会显示安全警告。
第四步:安全连接的建立一旦浏览器验证通过,它会生成一个会话密钥,并使用服务器的公钥进行加密,然后将该会话密钥发送给服务器。
服务器使用自己的私钥进行解密,得到这个会话密钥。
随后,服务器和浏览器之间的通信将使用这个会话密钥进行加密和解密。
ssl证书 流程 -回复

ssl证书流程-回复SSL证书流程:保证网站安全的关键步骤在现代互联网时代,网站安全举足轻重。
为了保护网站和用户的敏感信息,SSL证书成为了一个关键的安全工具。
本文将一步一步回答关于SSL证书的流程,深入探讨如何为网站带来更高的安全性。
第一步:了解SSL证书的基本概念首先,我们需要了解SSL证书的基本概念。
SSL代表安全套接字层(Secure Socket Layer),是一种加密协议,用于在互联网上保护数据传输的安全性。
SSL证书是由可信任的第三方机构(证书颁发机构,CA)签发的数字证书,用于验证网站的身份和加密通信。
第二步:获取SSL证书为了获取SSL证书,您需要从证书颁发机构(CA)购买证书。
证书颁发机构提供多种类型的SSL证书,以满足不同网站的安全需求。
您可以选择DV(域名验证)、OV(组织验证)或EV(扩展验证)证书,取决于您网站的类型和安全需求。
DV证书是最基本的证书类型,只对域名进行验证。
OV证书会验证域名和组织信息,更加可靠。
而EV证书会进行更严格的验证,包括域名、组织和法定认证。
根据您的需求和预算,选择适合您的证书类型。
第三步:生成证书签名请求(CSR)在购买SSL证书之前,您需要生成一个证书签名请求(CSR)。
CSR是包含您网站信息的加密文件,用于向证书颁发机构申请证书。
为了生成CSR,您需要在您的服务器上运行所选的Web服务器软件(如Apache或Nginx)。
然后,按照服务器软件的说明书生成CSR。
CSR包含了您的网站域名、组织名称和其他必要的信息。
这些信息将用于验证您的网站身份和加密数据传输。
第四步:购买SSL证书提交CSR之后,您需要购买所需的SSL证书。
选择一家可信任的证书颁发机构并选择适合您的证书类型。
提供CSR和其他必要信息,并根据购买计划支付费用。
证书颁发机构将进行验证并向您颁发证书。
第五步:验证网站身份一旦您提交了CSR并购买了证书,证书颁发机构将开始验证您的网站身份。
Android:关于HTTPS、TLSSSL认证以及客户端证书导入方法
Android:关于HTTPS、TLSSSL认证以及客户端证书导⼊⽅法⼀、HTTPS 简介 HTTPS 全称 HTTP over TLS/SSL(TLS就是SSL的新版本3.1)。
TLS/SSL是在传输层上层的协议,应⽤层的下层,作为⼀个安全层⽽存在,翻译过来⼀般叫做传输层安全协议。
对 HTTP ⽽⾔,安全传输层是透明不可见的,应⽤层仅仅当做使⽤普通的 Socket ⼀样使⽤SSLSocket 。
TLS是基于 X.509 认证,他假定所有的数字证书都是由⼀个层次化的数字证书认证机构发出,即 CA。
另外值得⼀提的是 TLS 是独⽴于 HTTP 的,使⽤了RSA⾮对称加密,对称加密以及HASH算法,任何应⽤层的协议都可以基于 TLS 建⽴安全的传输通道,如 SSH 协议。
代⼊场景:假设现在 A 要与远端的 B 建⽴安全的连接进⾏通信。
1. 直接使⽤对称加密通信,那么密钥⽆法安全的送给 B 。
2. 直接使⽤⾮对称加密,B 使⽤ A 的公钥加密,A 使⽤私钥解密。
但是因为B⽆法确保拿到的公钥就是A的公钥,因此也不能防⽌中间⼈攻击。
为了解决上述问题,引⼊了⼀个第三⽅,也就是上⾯所说的 CA(Certificate Authority): CA ⽤⾃⼰的私钥签发数字证书,数字证书中包含A的公钥。
然后 B 可以⽤ CA 的根证书中的公钥来解密 CA 签发的证书,从⽽拿到A 的公钥。
那么⼜引⼊了⼀个问题,如何保证 CA 的公钥是合法的呢?答案就是现代主流的浏览器会内置 CA 的证书。
中间证书: 现在⼤多数CA不直接签署服务器证书,⽽是签署中间CA,然后⽤中间CA来签署服务器证书。
这样根证书可以离线存储来确保安全,即使中间证书出了问题,可以⽤根证书重新签署中间证书。
另⼀个原因是为了⽀持⼀些很古⽼的浏览器,有些根证书本⾝,也会被另外⼀个很古⽼的根证书签名,这样根据浏览器的版本,可能会看到三层或者是四层的证书链结构,如果能看到四层的证书链结构,则说明浏览器的版本很⽼,只能通过最早的根证书来识别 校验过程 那么实际上,在 HTTPS 握⼿开始后,服务器会把整个证书链发送到客户端,给客户端做校验。
Linux命令高级技巧使用openssl生成和管理SSL证书
Linux命令高级技巧使用openssl生成和管理SSL证书使用OpenSSL生成和管理SSL证书一、介绍SSL证书是用于保护网站和网络通信安全的重要工具。
OpenSSL是一个开源加密库,能够提供各种加密算法和SSL/TLS协议的实现。
本文将介绍如何使用OpenSSL生成和管理SSL证书的高级技巧。
二、安装OpenSSL首先,确保已经在Linux系统上安装了OpenSSL。
可以通过以下命令来检查OpenSSL是否已安装:$ openssl version如果没有安装,可以使用包管理工具,如apt、yum等进行安装。
三、生成自签名证书自签名证书用于测试环境或本地开发,不需要经过权威机构的认证。
使用OpenSSL可以轻松生成自签名证书。
以下是生成自签名证书的步骤:1. 生成私钥:$ openssl genrsa -out private.key 20482. 生成证书签发请求(CSR):$ openssl req -new -key private.key -out csr.csr在生成CSR的过程中,需要填写一些证书相关的信息,如国家、地区、组织、通用名等。
3. 生成自签名证书:$ openssl x509 -req -in csr.csr -signkey private.key -out certificate.crt生成的certificate.crt即为自签名证书,可以用于配置Web服务器等需要SSL证书的场景。
四、生成CA证书除了自签名证书,我们也可以生成CA(Certificate Authority)证书,以进行证书签发。
以下是生成CA证书的步骤:1. 生成私钥:$ openssl genrsa -out ca.key 20482. 生成证书签发请求(CSR):$ openssl req -new -key ca.key -out ca.csr在生成CSR的过程中,需要填写一些证书相关的信息,如国家、地区、组织、通用名等。
SSL证书配置指南
SSL证书配置指南在互联网发展的今天,网络安全问题越来越受到重视。
为了保障网站的安全性和用户的信任度,越来越多的网站开始使用SSL证书来加密数据传输和保护用户隐私。
本文将为您提供一份简明的SSL证书配置指南,帮助您正确地配置SSL证书,确保网站的安全性。
一、SSL证书简介SSL证书(Secure Sockets Layer Certificate)是一种由可信任的证书颁发机构(Certificate Authority)认证的数字证书,用于验证网站的身份并加密数据传输。
通过使用SSL证书,可以建立起网站与用户之间安全、加密的传输通道,防止敏感信息被窃取或篡改。
二、SSL证书购买与申请1.选择可信赖的证书颁发机构(CA),如Symantec、Comodo或Let's Encrypt。
2.根据您的需求选择证书类型,常见的有域名验证型(DV)、组织验证型(OV)和增强验证型(EV)。
3.填写并提交证书申请表格,提供所需的域名和相关信息。
4.完成验证流程,可以通过电子邮件验证、DNS记录验证或文件验证等方式获得证书。
三、SSL证书安装与配置1.根据您所使用的服务器类型,选择相应的安装和配置方法。
- Apache服务器:将证书文件和私钥文件上传到服务器,并在配置文件中指定证书路径和端口。
- Nginx服务器:将证书文件和私钥文件上传到服务器,并在配置文件中指定证书路径和端口。
- Microsoft IIS服务器:使用IIS管理工具导入证书,配置绑定和服务端口。
2.配置HTTPS强制跳转,将HTTP请求自动重定向到HTTPS。
3.配置SSL/TLS协议版本,建议只允许使用TLS 1.2及以上版本,禁用过时的SSL 2.0和SSL 3.0。
4.启用HTTP严格传输安全(HSTS),通过响应头信息告知浏览器使用HTTPS进行访问。
5.更新您的网站代码和资源,确保网站内部链接和外部资源链接使用HTTPS。
ssl证书安装教程

ssl证书安装教程SSL证书是一种用于加密和保护网络通信的数字证书,它可以确保用户与网站之间的数据传输是安全可靠的。
安装SSL证书是网站管理员必备的技能之一,下面将介绍如何安装SSL 证书。
首先,你需要购买一个SSL证书,可以从知名的证书机构或网站批发商购买。
在购买之前,确保选择合适的SSL证书类型,如域名验证、组织验证或扩展验证。
购买完成后,证书机构会向你提供一组文件,通常包括证书文件、私钥文件和CA证书链文件。
接下来,你需要将这些文件上传到你的服务器。
通常情况下,你可以通过SSH远程登录到服务器,然后使用FTP或SCP等工具上传文件。
将证书文件和私钥文件保存在安全目录下,确保只有有限的人员可以访问它们。
上传完成后,你需要编辑服务器配置文件以启用SSL加密。
具体而言,你需要找到虚拟主机配置文件,通常位于/etc/apache2/sites-available/或/etc/nginx/sites-available/目录下。
打开配置文件,你会看到类似如下的代码:```<VirtualHost *:80>ServerName DocumentRoot /var/www/html...</VirtualHost>```在该代码块下方添加以下代码:```<VirtualHost *:443>ServerName DocumentRoot /var/www/html...SSLEngine onSSLCertificateFile /path/to/your_certificate.crtSSLCertificateKeyFile /path/to/your_private_key.keySSLCertificateChainFile /path/to/CA_certificate_chain.crt</VirtualHost>```将/path/to/your_certificate.crt替换为证书文件的路径,将/path/to/your_private_key.key替换为私钥文件的路径,将/path/to/CA_certificate_chain.crt替换为CA证书链文件的路径。
nginx 生成ssl证书流程
nginx 生成ssl证书流程要生成SSL 证书,您可以按照以下步骤使用OpenSSL 工具和Nginx 服务器:1. 安装OpenSSL 工具首先,确保您已在服务器上安装了OpenSSL 工具。
可通过以下命令检查这一点:```openssl version```如果OpenSSL 未安装,则需先在服务器上安装。
2. 生成SSL 证书和密钥接下来,使用OpenSSL 工具生成SSL 证书和密钥。
可按照以下步骤操作:```openssl req -newkey rsa:2048 -nodes -keyout yourdomain.key -out yourdomain.csr```该命令将生成一个RSA 密钥和证书签名请求(CSR)。
在此过程中,您需要回答一些问题,例如您的国家、地区、组织名称、通用名称等。
3. 获得SSL 证书CSR 文件应该被发送到SSL 证书颁发机构(CA) 以获得SSL 证书。
您需要提供CSR 文件并完成一些其他步骤来验证您的域名所有权。
4. 将SSL 证书和密钥放入Nginx 配置在获得SSL 证书和密钥后,您需要将它们放入Nginx 配置中。
可按照以下步骤操作:-在Nginx 配置中添加以下行:```ssl_certificate /path/to/yourdomain.crt;ssl_certificate_key /path/to/yourdomain.key;```-将"/path/to/yourdomain.crt" 和"/path/to/yourdomain.key" 替换为您的SSL 证书和密钥的路径。
-保存并关闭文件。
5. 重启Nginx 服务器最后,您需要重启Nginx 服务器以使更改生效。
可通过以下命令实现:```sudo service nginx restart```以上步骤完成后,您的Nginx 服务器将配置为使用SSL 证书保护连接。
tomcat 验证ssl证书流程
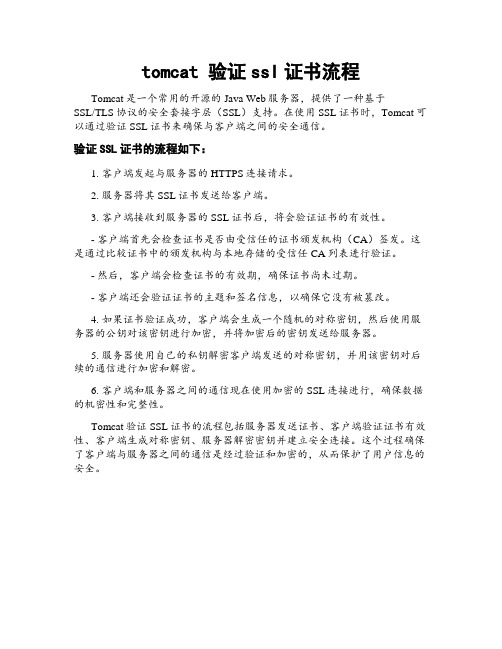
tomcat 验证ssl证书流程Tomcat是一个常用的开源的Java Web服务器,提供了一种基于
SSL/TLS协议的安全套接字层(SSL)支持。
在使用SSL证书时,Tomcat可以通过验证SSL证书来确保与客户端之间的安全通信。
验证SSL证书的流程如下:
1. 客户端发起与服务器的HTTPS连接请求。
2. 服务器将其SSL证书发送给客户端。
3. 客户端接收到服务器的SSL证书后,将会验证证书的有效性。
- 客户端首先会检查证书是否由受信任的证书颁发机构(CA)签发。
这是通过比较证书中的颁发机构与本地存储的受信任CA列表进行验证。
- 然后,客户端会检查证书的有效期,确保证书尚未过期。
- 客户端还会验证证书的主题和签名信息,以确保它没有被篡改。
4. 如果证书验证成功,客户端会生成一个随机的对称密钥,然后使用服务器的公钥对该密钥进行加密,并将加密后的密钥发送给服务器。
5. 服务器使用自己的私钥解密客户端发送的对称密钥,并用该密钥对后续的通信进行加密和解密。
6. 客户端和服务器之间的通信现在使用加密的SSL连接进行,确保数据的机密性和完整性。
Tomcat验证SSL证书的流程包括服务器发送证书、客户端验证证书有效性、客户端生成对称密钥、服务器解密密钥并建立安全连接。
这个过程确保了客户端与服务器之间的通信是经过验证和加密的,从而保护了用户信息的安全。
- 1、下载文档前请自行甄别文档内容的完整性,平台不提供额外的编辑、内容补充、找答案等附加服务。
- 2、"仅部分预览"的文档,不可在线预览部分如存在完整性等问题,可反馈申请退款(可完整预览的文档不适用该条件!)。
- 3、如文档侵犯您的权益,请联系客服反馈,我们会尽快为您处理(人工客服工作时间:9:00-18:30)。
SSL Certificates HOWTOFranck MartinRevision HistoryRevision v0.52002−10−20Revised by: FMAdding IPsec information from Nate Carlson, natecars@ / Adding IMAPS and POPS information from Bill Shirley, webnut@ / Adding WinCrypt information from Colin McKinnon, colin@Revision v0.42002−06−22Revised by: FMVarious corrections − adding ASCII ArtRevision v0.32002−05−09Revised by: FMAdding x509v3 extension information − Correcting spellingRevision v0.22001−12−06Revised by: FMAdding f file / Adding CRL info from Averroes, a.averroes@libertysurf.fr / Correcting spelling Revision v0.12001−11−18Revised by: FMCreation of the HOWTOA first hand approach on how to manage a certificate authority (CA), and issue or sign certificates to be used for secure web, secure e−mail, or signing code and other usages.Chapter 1. Generalities (1)1.1. Introduction (1)1.1.1. Disclaimer and Licence (1)1.1.2. Prior knowledge (1)1.2. What is SSL and what are Certificates? (2)1.2.1. Private Key/Public Key: (2)1.2.2. The Certificate: (2)1.2.3. The Symmetric key: (4)1.2.4. Encryption algorithm: (4)1.2.5. The Hash: (4)1.2.6. Signing: (5)1.2.7. PassPhrase: (5)1.2.8. Public Key Infrastructure (5)1.3. What about S/Mime or other protocols? (5)Chapter 2. Certificate Management (7)2.1. Installation (7)2.1.1. The CA.pl utility (7)2.1.2. The f file (7)2.1.3. Create the Certification Authority (11)2.2. Create a Root Certification Authority Certificate (11)2.3. Create a non root Certification Authority Certificate (12)2.4. Install the CA root certificate as a Trusted Root Certificate (12)2.4.1. In Netscape/Mozilla (12)2.4.2. In Galeon (13)2.4.3. In Opera (13)2.4.4. In Internet Explorer (13)2.5. Certificate management (13)2.5.1. Generate and Sign a certificate request (13)2.5.2. Revoke a certificate (14)2.5.3. Renew a certificate (14)2.5.4. Display a certificate (14)2.5.5. The index.txt file (15)2.5.6. Build your web based Certificate Authority (15)Chapter 3. Using Certificates in Applications (16)3.1. Securing Internet Protocols (16)3.1.1. Using a certificate with mod_ssl in apache (16)3.1.2. Using a certificate with IMAPS (16)3.1.3. Using a certificate with POPS (17)3.1.4. Using a certificate with Postfix (17)3.1.5. Using a certificate with Stunnel (17)3.1.6. Generate and Sign a key with Microsoft Key Manager (17)3.2. Securing E−mails (17)3.2.1. Generate and use an s/mime certificate (18)3.2.2. To use this certificate with MS Outlook (18)3.2.3. To use this certificate with MS Outlook Express (19)3.2.4. To use this certificate with Netscape Messenger (19)Chapter 3. Using Certificates in Applications3.2.5. To use this certificate with Evolution (19)3.2.6. To use this certificate with Balsa (19)3.2.7. To use this certifcate with KMail (19)3.3. Securing Files (19)3.3.1. WinCrypt (19)3.4. Securing Code (20)3.4.1. Micosoft Code (20)3.5. IPSec (20)3.5.1. FreeS/WAN (20)Chapter 4. Global PKI (25)4.1. Current PKIs (25)4.2. The need for a Global PKI (25)Chapter 1. Generalities1.1. IntroductionDear reader, like myself, you have intensively read the man pages of the applications of the OpenSSL project, and like myself, you couldn't figure out where to start, and how to work securely with certificates. Here is the answer to most of your questions.This HOWTO will also deal with non−linux applications: there is no use to issue certificates if you can't use them... All applications won't be listed here, but please, send me additional paragraphs and corrections. I can be reached at the following address:franck@.This HOWTO is published on The Linux Documentation Project this is where you will find the lastest version of this document.1.1.1. Disclaimer and LicenceThis document is distributed in the hope that it will be useful, but WITHOUT ANY WARRANTY; without even the implied warranty of MERCHANTABILITY or FITNESS FOR A PARTICULAR PURPOSE.In short, if the advises given here break the security of your e−commerce application, then tough luck− it's never our fault. Sorry.Copyright (c) 2001 by Franck Martin and others from the openssl−users mailing list under GFDL (the GNU Free Documentation License).Please freely copy and distribute (sell or give away) this document in any format. It's requested that corrections and/or comments be forwarded to the document maintainer. You may create a derivative work and distribute it provided that you:1.Send your derivative work (in the most suitable format such as sgml) to the LDP (LinuxDocumentation Project) or the like for posting on the Internet. If not the LDP, then let the LDP know where it is available.2.License the derivative work with this same license or use GPL. Include a copyright notice and at leasta pointer to the license used.3.Give due credit to previous authors and major contributors. If you're considering making a derivedwork other than a translation, it's requested that you discuss your plans with the current maintainer.It is also requested that if you publish this HOWTO in hardcopy that you send the authors some samples for 'review purposes' :−). You may also want to send something to cook my noodles ;−)1.1.2. Prior knowledgeAs indicated in the introduction, this documents is an hand−on HOWTO, and it is therefore required that you consult the man pages of the OpenSSL software. You should as well read security books to learn how your security could be compromised. Certificates are meant to increase the security of your transactions, it is VERY important that you understand all the security implications of your actions and what security OpenSSL does not provide.1.2. What is SSL and what are Certificates?The Secure Socket Layer protocol was created by Netscape to ensure secure transactions between web servers and browsers. The protocol uses a third party, a Certificate Authority (CA), to identify one end or both end of the transactions. This is in short how it works.1.A browser requests a secure page (usually https://).The web server sends its public key with its certificate.2.3.The browser checks that the certificate was issued by a trusted party (usually a trusted root CA), that the certificate is still valid and that the certificate is related to the site contacted.The browser then uses the public key, to encrypt a random symmetric encryption key and sends it to4.the server with the encrypted URL required as well as other encrypted http data.The web server decrypts the symmetric encryption key using its private key and uses the symmetric5.key to decrypt the URL and http data.The web server sends back the requested html document and http data encrypted with the symmetric6.key.7.The browser decrypts the http data and html document using the symmetric key and displays theinformation.Several concepts have to be understood here.1.2.1. Private Key/Public Key:The encryption using a private key/public key pair ensures that the data can be encrypted by one key but can only be decrypted by the other key pair. This is sometime hard to understand, but believe me it works. The keys are similar in nature and can be used alternatively: what one key emcrypts, the other key pair can decrypt. The key pair is based on prime numbers and their length in terms of bits ensures the difficulty of being able to decrypt the message without the key pairs. The trick in a key pair is to keep one key secret (the private key) and to distribute the other key (the public key) to everybody. Anybody can send you an encrypted message, that only you will be able to decrypt. You are the only one to have the other key pair, right? In the opposite , you can certify that a message is only coming from you, because you have encrypted it with you private key, and only the associated public key will decrypt it correctly. Beware, in this case the message is not secured you have only signed it. Everybody has the public key, remember!One of the problem left is to know the public key of your correspondent. Usually you will ask him to send you a non confidential signed message that will contains his publick key as well as a certificate.Message−−>[Public Key]−−>Encrypted Message−−>[Private Key]−−>Message1.2.2. The Certificate:How do you know that you are dealing with the right person or rather the right web site. Well, someone has taken great length (if they are serious) to ensure that the web site owners are who they claim to be. This someone, you have to implicitly trust: you have his/her certificate loaded in your browser (a root Certificate).A certificate, contains information about the owner of the certificate, like e−mail address, owner's name, certificate usage, duration of validity, resource location or Distinguished Name (DN) which includes the Common Name (CN) (web site address or e−mail address depending of the usage) and the certificate ID of the person who certifies (signs) this information. It contains also the public key and finally a hash to ensurethat the certificate has not been tampered with. As you made the choice to trust the person who signs this certificate, therefore you also trust this certificate. This is a certificate trust tree or certificate path. Usuallyyour browser or application has already loaded the root certificate of well known Certification Authorities(CA) or root CA Certificates. The CA maintains a list of all signed certificates as well as a list of revoked certificates. A certificate is insecure until it is signed, as only a signed certificate cannot be modified. You cansign a certificate using itself, it is called a self signed certificate. All root CA certificates are self signed.Certificate:Data:Version: 3 (0x2)Serial Number: 1 (0x1)Signature Algorithm: md5WithRSAEncryptionIssuer: C=FJ, ST=Fiji, L=Suva, O=SOPAC, OU=ICT, CN=SOPAC Root CA/Email=administrator@sopa ValidityNot Before: Nov 20 05:47:44 2001 GMTNot After : Nov 20 05:47:44 2002 GMTSubject: C=FJ, ST=Fiji, L=Suva, O=SOPAC, OU=ICT, CN=/Email=administrator@sop Subject Public Key Info:Public Key Algorithm: rsaEncryptionRSA Public Key: (1024 bit)Modulus (1024 bit):00:ba:54:2c:ab:88:74:aa:6b:35:a5:a9:c1:d0:5a:9b:fb:6b:b5:71:bc:ef:d3:ab:15:cc:5b:75:73:36:b8:01:d1:59:3f:c1:88:c0:33:91:04:f1:bf:1a:b4:7a:c8:39:c2:89:1f:87:0f:91:19:81:09:46:0c:86:08:d8:75:c4:6f:5a:98:4a:f9:f8:f7:38:24:fc:bd:94:24:37:ab:f1:1c:d8:91:ee:fb:1b:9f:88:ba:25:da:f6:21:7f:04:32:35:17:3d:36:1c:fb:b7:32:9e:42:af:77:b6:25:1c:59:69:af:be:00:a1:f8:b0:1a:6c:14:e2:ae:62:e7:6b:30:e9Exponent: 65537 (0x10001)X509v3 extensions:X509v3 Basic Constraints:CA:FALSENetscape Comment:OpenSSL Generated CertificateX509v3 Subject Key Identifier:FE:04:46:ED:A0:15:BE:C1:4B:59:03:F8:2D:0D:ED:2A:E0:ED:F9:2FX509v3 Authority Key Identifier:keyid:E6:12:7C:3D:A1:02:E5:BA:1F:DA:9E:37:BE:E3:45:3E:9B:AE:E5:A6DirName:/C=FJ/ST=Fiji/L=Suva/O=SOPAC/OU=ICT/CN=SOPAC Root CA/Email=administrator serial:00Signature Algorithm: md5WithRSAEncryption34:8d:fb:65:0b:85:5b:e2:44:09:f0:55:31:3b:29:2b:f4:fd:aa:5f:db:b8:11:1a:c6:ab:33:67:59:c1:04:de:34:df:08:57:2e:c6:60:dc:f7:d4:e2:f1:73:97:57:23:50:02:63:fc:78:96:34:b3:ca:c4:1b:c5:4c:c8:16:69:bb:9c:4a:7e:00:19:48:62:e2:51:ab:3a:fa:fd:88:cd:e0:9d:ef:67:50:da:fe:4b:13:c5:0c:8c:fc:ad:6e:b5:ee:40:e3:fd:34:10:9f:ad:34:bd:db:06:ed:09:3d:f2:a6:81:22:63:16:dc:ae:33:0c:70:fd:0a:6c:af:bc:5a−−−−−BEGIN CERTIFICATE−−−−−MIIDoTCCAwqgAwIBAgIBATANBgkqhkiG9w0BAQQFADCBiTELMAkGA1UEBhMCRkox DTALBgNVBAgTBEZpamkxDTALBgNVBAcTBFN1dmExDjAMBgNVBAoTBVNPUEFDMQwwCgYDVQQLEwNJQ1QxFjAUBgNVBAMTDVNPUEFDIFJvb3QgQ0ExJjAkBgkqhkiG9w0BCQEWF2FkbWluaXN0cmF0b3JAc29wYWMub3JnMB4XDTAxMTEyMDA1NDc0NFoXDTAyMTEyMDA1NDc0NFowgYkxCzAJBgNVBAYTAkZKMQ0wCwYDVQQIEwRGaWppMQ0wCwYDVQQHEwRTdXZhMQ4wDAYDVQQKEwVTT1BBQzEMMAoGA1UECxMDSUNUMRYwFAYDVQQDEw13d3cuc29wYWMub3JnMSYwJAYJKoZIhvcNAQkBFhdhZG1pbmlzdHJhdG9yQHNvcGFjLm9yZzCBnzANBgkqhkiG9w0BAQEFAAOBjQAwgYkCgYEAulQsq4h0qms1panB0Fqb+2u1cbzv06sVzFt1cza4AdFZP8GIwDORBPG/GrR6yDnCiR+HD5EZgQlGDIYI2HXEb1qYSvn49zgk/L2UJDer8RzYke77G5+IuiXa9iF/BDI1Fz02HPu3Mp5Cr3e2JRxZaa++AKH4sBpsFOKuYudrMOkCAwEAAaOCARUwggERMAkGA1UdEwQCMAAwLAYJYIZIAYb4QgENBB8WHU9wZW5TU0wgR2VuZXJhdGVkIENlcnRpZmljYXRlMB0GA1UdDgQWBBT+BEbtoBW+wUtZA/gtDe0q4O35LzCBtgYDVR0jBIGuMIGrgBTmEnw9oQLluh/anje+40U+m67lpqGBj6SBjDCBiTELMAkGA1UEBhMCRkoxDTALBgNVBAgTBEZpamkxDTALBgNVBAcTBFN1dmExDjAMBgNVBAoTBVNPUEFDMQwwCgYDVQQLEwNJQ1Qx FjAUBgNVBAMTDVNPUEFDIFJvb3QgQ0ExJjAkBgkqhkiG9w0BCQEWF2FkbWluaXN0cmF0b3JAc29wYWMub3JnggEAMA0GCSqGSIb3DQEBBAUAA4GBADSN+2ULhVviRAnwVTE7KSv0/apf27gRGsarM2dZwQTeNN8IVy7GYNz31OLxc5dXI1ACY/x4ljSzysQbxUzIFmm7nEp+ABlIYuJRqzr6/YjN4J3vZ1Da/ksTxQyM/K1ute5A4/00EJ+tNL3bBu0JPfKmgSJjFtyuMwxw/Qpsr7xa−−−−−END CERTIFICATE−−−−−As You may have noticed, the certificate contains the reference to the issuer, the public key of the owner of this certificate, the dates of validity of this certificate and the signature of the certificate to ensure this certificate hasen't been tampered with. The certificate does not contain the private key as it should never be transmitted in any form whatsoever. This certificate has all the elements to send an encrypted message to the owner (using the public key) or to verify a message signed by the author of this certificate.1.2.3. The Symmetric key:Well, Private Key/Public Key encryption algorithms are great, but they are not usually practical. It is asymmetric because you need the other key pair to decrypt. You can't use the same key to encrypt and decrypt. An algorithm using the same key to decrypt and encrypt is deemed to have a symmetric key. A symmetric algorithm is much faster in doing its job than an asymmetric algorithm. But a symmetric key is potentially highly insecure. If the enemy gets hold of the key then you have no more secret information. You must therefore transmit the key to the other party without the enemy getting its hands on it. As you know, nothing is secure on the Internet. The solution is to encapsulate the symmetric key inside a message encrypted with an asymmetric algorithm. You have never transmitted your private key to anybody, then the message encrypted with the public key is secure (relatively secure, nothing is certain except death and taxes). The symmetric key is also chosen randomly, so that if the symmetric secret key is discovered then the next transaction will be totally different.Symetric Key−−>[Public Key]−−>Encrypted Symetric Key−−>[Private Key]−−>Symetric Key1.2.4. Encryption algorithm:There are several encryption algorithms available, using symmetric or asymmetric methods, with keys of various lengths. Usually, algorithms cannot be patented, if Henri Poincare had patented his algorithms, then he would have been able to sue Albert Einstein... So algorithms cannot be patented except mainly in USA. OpenSSL is developed in a country where algorithms cannot be patented and where encryption technology is not reserved to state agencies like military and secret services. During the negotiation between browser and web server, the applications will indicate to each other a list of algorithms that can be understood ranked by order of preference. The common preferred algorithm is then chosen. OpenSSL can be compiled with or without certain algorithms, so that it can be used in many countries where restrictions apply.1.2.5. The Hash:A hash is a number given by a hash function from a message. This is a one way function, it means that it is impossible to get the original message knowing the hash. However the hash will drastically change even for the slightest modification in the message. It is therefore extremely difficult to modify a message whilekeeping its original hash. It is also called a message digest. Hash functions are used in password mechanisms, in certifying that applications are original (MD5 sum), and in general in ensuring that any message has not been tampered with. It seems that the Internet Enginering Task Force (IETF) prefers SHA1 over MD5 for a number of technical reasons (Cf RFC2459 7.1.2 and 7.1.3).1.2.6. Signing:Signing a message, means authentifying that you have yourself assured the authenticity of the message (most of the time it means you are the author, but not neccesarily). The message can be a text message, or someone else's certificate. To sign a message, you create its hash, and then encrypt the hash with your private key, you then add the encrypted hash and your signed certificate with the message. The recipient will recreate the message hash, decrypts the encrypted hash using your well known public key stored in your signed certificate, check that both hash are equals and finally check the certificate.The other advantage of signing your messages is that you transmit your public key and certificate automatically to all your recipients.There are usually 2 ways to sign, encapsulating the text message inside the signature (with delimiters), or encoding the message altogether with the signature. This later form is a very simple encryption form as any software can decrypt it if it can read the embedded public key. The advantage of the first form is that the message is human readable allowing any non complaint client to pass the message as is for the user to read, while the second form does not even allow to read part of the message if it has been tampered with.1.2.7. PassPhrase:"A passprase is like a password except it is longer". In the early days passwords on Unix system were limited to 8 characters, so the term passphrase for longer passwords. Longer is the password harder it is to guess. Nowadays Unix systems use MD5 hashes which have no limitation in length of the password.1.2.8. Public Key InfrastructureThe Public Key Infrastructure (PKI) is the software management system and database system that allows to sign certifcate, keep a list of revoked certificates, distribute public key,... You can usually access it via a website and/or ldap server. There will be also some people checking that you are who you are... For securing individual applications, you can use any well known commercial PKI as their root CA certificate is most likely to be inside your browser/application. The problem is for securing e−mail, either you get a generic type certificate for your e−mail or you must pay about USD100 a year per certificate/e−mail address. There is also no way to find someone's public key if you have never received a prior e−mail with his certificate (including his public key).1.3. What about S/Mime or other protocols?If SSL was developed for web servers, it can be used to encrypt any protocol. Any protocol can be encapsulated inside SSL. This is used in IMAPS, POPS, SMTPS,... These secure protocols will use a different port than their insecure version. SSL can also be used to encrypt any transaction: there is no need to be in direct (live) contact with the recipient. S/Mime is such protocol, it encapsulates an encrypted message inside a standard e−mail. The message is encrypted using the public key of the recipient. If you are not online with the recipient then you must know its public key. Either you get it from its web site, from a repository, or you request the recipient to e−mail you its public key and certificate (to ensure you are speaking to the rightrecipient).In a reverse order, the browser can send its own signed certificate to the web server, as a mean of authentication. But everybody can get the browser certificate on the CA web site. Yes, but the signed certificate has been sent encrypted with the private key, that only the public key can decrypt.Chapter 2. Certificate Management2.1. InstallationNowadays, you do not have to worry too much about installing OpenSSL: most distributions use package management applications. Refer to your distribution documentation, or read the README and INSTALL file inside the OpenSSL tarball. I want also to avoid to make this HOWTO, an installation HOWTO rather than an HOWTO use certificates.I describe here some standard installation options which are necessary to know for the samples following. Your installation may differ.The directory for all OpenSSL certificates is /var/ssl/. All commands and paths in this document are issued from this directory, it is not mandatory but it will help the examples.OpenSSL by default looks for a configuration file in /usr/lib/ssl/f so always add −config/etc/f to the commands openssl ca or openssl req for instance. I use /etc/f so all my configuration files are all in /etc.Utilities and other libraries are located in /usr/lib/ssl.2.1.1. The CA.pl utilityEnsure that the utility CA.pl is in an accessible directory such as /usr/sbin. CA.pl can be found inside/usr/lib/ssl directories. CA.pl is a utility that hides the complexity of the openssl command. In all the examples, when I use CA.pl, I will also put the openssl equivalent in brakets./usr/sbin/CA.pl needs to be modified to include −config /etc/f in ca and req calls.#$SSLEAY_CONFIG=$ENV{"SSLEAY_CONFIG"};$SSLEAY_CONFIG="−config /etc/f";#$CATOP="./demoCA";$CATOP="/var/ssl";2.1.2. The f file/etc/f must be configured accordingly to minimize input entry.#−−−Begin−−−## OpenSSL example configuration file.# This is mostly being used for generation of certificate requests.#RANDFILE = $ENV::HOME/.rndoid_file = $ENV::HOME/.oidoid_section = new_oids# To use this configuration file with the "−extfile" option of the# "openssl x509" utility, name here the section containing the# X.509v3 extensions to use:# extensions =# (Alternatively, use a configuration file that has only# X.509v3 extensions in its main [= default] section.)[ new_oids ]# We can add new OIDs in here for use by 'ca' and 'req'.# Add a simple OID like this:# testoid1=1.2.3.4# Or use config file substitution like this:# testoid2=${testoid1}.5.6####################################################################[ ca ]default_ca = CA_default # The default ca section####################################################################[ CA_default ]dir = /var/ssl # Where everything is keptcerts = $dir/certs # Where the issued certs are kept crl_dir = $dir/crl # Where the issued crl are kept database = $dir/index.txt # database index file.new_certs_dir = $dir/newcerts # default place for new certs. certificate = $dir/cacert.pem # The CA certificateserial = $dir/serial # The current serial numbercrl = $dir/crl.pem # The current CRLprivate_key = $dir/private/cakey.pem # The private keyRANDFILE = $dir/private/.rand # private random number filex509_extensions = usr_cert # The extentions to add to the cert # Extensions to add to a CRL. Note: Netscape communicator chokes on V2 CRLs # so this is commented out by default to leave a V1 CRL.# crl_extensions = crl_extdefault_days = 365 # how long to certify fordefault_crl_days= 7 # how long before next CRLdefault_md = sha1 # which md to use.preserve = no # keep passed DN ordering# A few difference way of specifying how similar the request should look# For type CA, the listed attributes must be the same, and the optional# and supplied fields are just that :−)policy = policy_match# For the CA policy[ policy_match ]countryName = matchstateOrProvinceName = optionallocalityName = matchorganizationName = matchorganizationalUnitName = optionalcommonName = suppliedemailAddress = optional# For the 'anything' policy# At this point in time, you must list all acceptable 'object'# types.[ policy_anything ]countryName = optionalstateOrProvinceName = optionallocalityName = optionalorganizationName = optionalorganizationalUnitName = optionalcommonName = suppliedemailAddress = optional####################################################################[ req ]default_bits = 1024default_keyfile = privkey.pemdistinguished_name = req_distinguished_nameattributes = req_attributesdefault_md = sha1x509_extensions = v3_ca # The extentions to add to the self signed cert# Passwords for private keys if not present they will be prompted for# input_password = secret# output_password = secret# This sets a mask for permitted string types. There are several options. # default: PrintableString, T61String, BMPString.# pkix : PrintableString, BMPString.# utf8only: only UTF8Strings.# nombstr : PrintableString, T61String (no BMPStrings or UTF8Strings).# MASK:XXXX a literal mask value.# WARNING: current versions of Netscape crash on BMPStrings or UTF8Strings # so use this option with caution!string_mask = nombstr# req_extensions = v3_req # The extensions to add to a certificate request [ req_distinguished_name ]countryName = Country Name (2 letter code)countryName_default = FJcountryName_min = 2countryName_max = 2stateOrProvinceName = State or Province Name (full name) stateOrProvinceName_default = FijilocalityName = Locality Name (eg, city)localityName_default = SuvaanizationName = Organization Name (eg, company)anizationName_default = SOPAC# we can do this but it is not needed normally :−)#anizationName = Second Organization Name (eg, company)#anizationName_default = World Wide Web Pty LtdorganizationalUnitName = Organizational Unit Name (eg, section) organizationalUnitName_default = ITUcommonName = Common Name (eg, YOUR name)commonName_max = 64emailAddress = Email AddressemailAddress_max = 40# SET−ex3 = SET extension number 3[ req_attributes ]challengePassword = A challenge passwordchallengePassword_min = 4challengePassword_max = 20unstructuredName = An optional company name[ usr_cert ]# These extensions are added when 'ca' signs a request.# This goes against PKIX guidelines but some CAs do it and some software# requires this to avoid interpreting an end user certificate as a CA. basicConstraints=CA:FALSE# Here are some examples of the usage of nsCertType. If it is omitted# the certificate can be used for anything *except* object signing.# This is OK for an SSL server.# nsCertType = server# For an object signing certificate this would be used.# nsCertType = objsign# For normal client use this is typical# nsCertType = client, email# and for everything including object signing:# nsCertType = client, email, objsign# This is typical in keyUsage for a client certificate.# keyUsage = nonRepudiation, digitalSignature, keyEncipherment# This will be displayed in Netscape's comment listbox.nsComment = "Certificate issued by https:///ssl/"# PKIX recommendations harmless if included in all certificates. subjectKeyIdentifier=hashauthorityKeyIdentifier=keyid,issuer:always# This stuff is for subjectAltName and issuerAltname.# Import the email address.# subjectAltName=email:copy# Copy subject details# issuerAltName=issuer:copy# This is the base URL for all others URL addresses# if not suppliednsBaseUrl = https:///ssl/# This is the link where to download the latest Certificate# Revocation List (CRL)nsCaRevocationUrl = https:///ssl/sopac−ca.crl# This is the link where to revoke the certificatensRevocationUrl = https:///ssl/revocation.html?# This is the location where the certificate can be renewednsRenewalUrl = https:///ssl/renewal.html?# This is the link where the CA policy can be foundnsCaPolicyUrl = https:///ssl/policy.html# This is the link where we can get the issuer certificateissuerAltName = URI:https:///ssl/sopac.crt# This is the link where to get the latest CRLcrlDistributionPoints = URI:https:///ssl/sopac−ca.crl[ v3_ca ]# Extensions for a typical CA# PKIX recommendation.subjectKeyIdentifier=hashauthorityKeyIdentifier=keyid:always,issuer:always# This is what PKIX recommends but some broken software chokes on critical # extensions.# basicConstraints = critical,CA:true# So we do this instead.basicConstraints = CA:true# Key usage: this is typical for a CA certificate. However since it will# prevent it being used as an test self−signed certificate it is best# left out by default.# keyUsage = cRLSign, keyCertSign# Some might want this also# nsCertType = sslCA, emailCA# Include email address in subject alt name: another PKIX recommendation# subjectAltName=email:copy# Copy issuer details# issuerAltName=issuer:copy# RAW DER hex encoding of an extension: beware experts only!# 1.2.3.5=RAW:02:03# You can even override a supported extension:# basicConstraints= critical, RAW:30:03:01:01:FF# This will be displayed in Netscape's comment listbox.nsComment = "Certificate issued by https:///ssl/"# This is the base URL for all others URL addresses# if not suppliednsBaseUrl = https:///ssl/# This is the link where to download the latest Certificate# Revocation List (CRL)nsCaRevocationUrl = https:///ssl/sopac−ca.crl# This is the link where to revoke the certificatensRevocationUrl = https:///ssl/revocation.html?# This is the location where the certificate can be renewednsRenewalUrl = https:///ssl/renewal.html?# This is the link where the CA policy can be foundnsCaPolicyUrl = https:///ssl/policy.html# This is the link where we can get the issuer certificateissuerAltName = URI:https:///ssl/sopac.crt。