RBA LE document list 6.0_ UL Internal 20180601
柔性检查作用域套件-USB 产品说明书
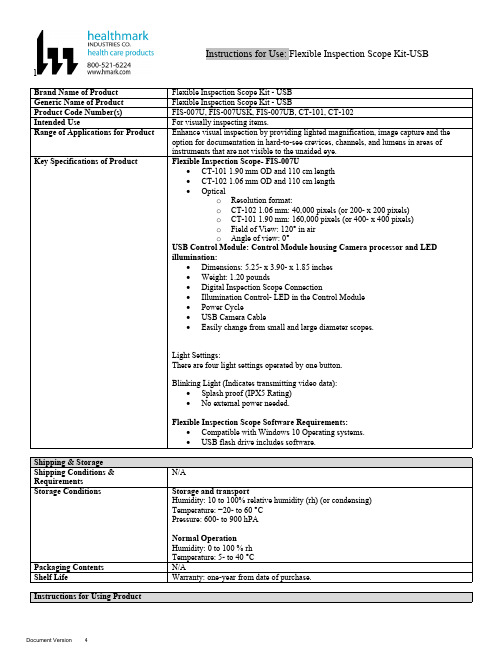
lInstructions for Use: Flexible Inspection Scope Kit-USB Brand Name of ProductFlexible Inspection Scope Kit - USB Generic Name of ProductFlexible Inspection Scope Kit - USB Product Code Number(s)FIS-007U, FIS-007USK, FIS-007UB, CT-101, CT-102Intended UseFor visually inspecting items.Range of Applications for ProductEnhance visual inspection by providing lighted magnification, image capture and the option for documentation in hard-to-see crevices, channels, and lumens in areas of instruments that are not visible to the unaided eye.Key Specifications of Product Flexible Inspection Scope- FIS-007U∙CT-101 1.90 mm OD and 110 cm length∙CT-102 1.06 mm OD and 110 cm length∙Opticalo Resolution format:o CT-102 1.06 mm: 40,000 pixels (or 200- x 200 pixels)o CT-101 1.90 mm: 160,000 pixels (or 400- x 400 pixels)o Field of View: 120° in airo Angle of view: 0°USB Control Module: Control Module housing Camera processor and LEDillumination:∙Dimensions: 5.25- x 3.90- x 1.85 inches∙Weight: 1.20 pounds ∙Digital Inspection Scope Connection∙Illumination Control- LED in the Control Module∙Power Cycle∙USB Camera Cable∙Easily change from small and large diameter scopes.Light Settings:There are four light settings operated by one button.Blinking Light (Indicates transmitting video data):∙Splash proof (IPX5 Rating)∙No external power needed.Flexible Inspection Scope Software Requirements:∙Compatible with Windows 10 Operating systems.∙USB flash drive includes software.Unpacking Flexible Inspection Scope:Carefully inspect for shipping damage. If there is any damage contact the shipping carrier and Heatlhmarkcustomer service 800-521-6224 immediately.USB Control Module: (Fig. 1).1.Digital Inspection Scope Connection 2.Illumination Control 3.Power Cycle B (Type C) on the right side of the boxFigure 1Flexible Inspection Scope™: (Fig. 2).∙CT-101 1.90 mm O.D. and 110 cm length ∙CT-102 1.06 mm O.D. and 110 cm lengthLarge1.90 mmSmall 1.06 mmFigure 2Flexible Inspection Scope™ Features3214Light/Illumination Settings: (Fig. 3).∙Five (5) light settingso Light on control indicats setting levelo Fifth setting is OFF∙Press light button to advance to next setting.∙Fifth setting turns the light OFF.Figure 3Power Cycle ButtonPress button to RESET camera (Fig. 4).Figure 41.Flexible Inspection Scope™ Plug (Fig. 5).Contains camera video connection as well as LED Light for illumination.1Figure 52.Flexible Working Length (Fig. 6).The portion of the Flexible Inspection Scope™ that is inserted into an item during visual inspection.The measuring scale markings on the Flexible Working Length are in centimeters (accuracy = ± 0.5 cm)2Figure 63.Distal Camera (Fig. 7).Distal portion of Flexible Inspection Scope™ that contains the camera lens3Figure 7SOFTWARE INSTALLATION:Note: This section is done only once when connecting the scope to the computer for the first time.∙System Requirements: MS Windows 10∙Install the Flexible Inspection Scope™ Software from the USB flash drive on a computer.Note: If you have any IT policies that may block this installation, please contact your IT team to give access to Healthmark scope viewer to install.1. Insert the USB Flash drive into your computer, and double click on the Healthmark Scope Viewer installer package to begin installation.2. The “Welcome to the Healthmark Scope Viewer Setup Wizard” screen pops up. Click on Next.3. Select the first tab Typical or setup type of your choice, click Next.4. Click Install and wait for installation to complete.5. Click Finish.STARTING SOFTWARE & CONNECTING SCOPE TO PC:(Fig 8).1.Open the Windows PC viewer software.2.Connect the Control Module to PC using USB Cable.3.Plug the Flexible Inspection Scope into the Control Module.4.In the viewer software, click Settings and Select USB Video Device, click on the desiredresolution, select the preferred Video Output Format, and then Click OK.5.Press the Power Cycle Button.Figure 86.Now you can start using the scope.Verifing OperationFollowing the steps listed below will ensure the proper use and performance of the Flexible Inspection Scope™. The Flexile Inspection Scope™ can be checked for normal operation by connecting it as described in the Startup section of this IFU.Normal operation includes:∙An image appearing on your computer monitor or HDMI Monitor.∙ A blinking light on Control Module near the Power Cycle button that indicates the image feed is transmitting.∙White light emitting from the distal end of the Digital Inspection Scope.∙An LED light on the control module top panel that indicates the light intensity of the device. Using SoftwareHealthmark Scope Viewer Software (Fig. 9).1.Capture button: Captures a Reference Image and saves it to the Reference Image folder.2.Main Image Window: Displays the image from the camera.3.Reference Image Window: Displays a reference image.4.Clear Button: Removes the image from the Reference image window.5.Open Reference Image button: Allows selection of a reference image from the Reference Imagefolder.6.Settings Button: Click to select the video camera and resolution settings.7.File Location Button: Click to change location where captured images are being saved.8.File Location Window: Shows the file path where captured images are being saved currently.9.Capture Image Button: Captures images and adds them to the File Location selected by the user(as shown in the File Location Window).10.Capture Video button: Click to record video. Click again to stop recording video.11.File Prefix: Type in text that you would like included in the file name of Captured Images.Figure 9Selecting Video Device or CameraFollow the directions below to select the video device or camera used to capture images using the Flexible Inspection Scope™ Viewer Software. (Fig. 10).1.Click Settings button in the lower left of the Scope Viewer software to display a list of videodevices or cameras being detected by your computer2.Select a device for capturing images using the Scope Viewera.The example below shows a webcam and USB Video Device in the Settings box. Select theUSB Video Device for the Flexible Inspection Scope™.b.You can also select your preferred Video Output Format from the dropdown box3.Click OK to view the selected Video Device.231Figure 10Capturing Still PicturesFollow the instructions for capturing still pictures from the Main Image Window.Select the Capture Image button. (Fig. 11).Figure 11Note: When an image is captured, “Image Captured” in red text will flash on the lower portion of the screen and a new file will appear in the Files Location.Capturing Video ImagesFollow the instructions below for capturing video from the Main Image Window.1.Select the Capture Video Button (Fig. 12).Figure 122.When the video is recording “Recording…” in red text will appear toward the bottom of thesoftware window.3.To stop recording, click Stop Capture. (Fig. 13).Figure 13Setting File PrefixFollowing the steps below allows you to create a file prefix that will appear after the underscore of image file names save to the File Location specified by the user.1.Click in the field next to File Prefix.2.Enter the characters that you would like to be included in the file name. (Fig 14).Figure 14Setting Location for Saved FilesFollowing the steps below allows you to set the file location of saved images using the Scope Viewer software.1.Click the File Location button.2.Select the file location you want to save captured images. (Fig 15).Figure 15Displaying Reference ImageThere are two ways to display a still image in the Reference Image Window on the Scope Viewer software.1.To display an image currently being displayed in the Main Image Window, click the Capture button. Note: The images will be saved in a file folder titled Reference Images in the designated File Location that the user specified in the File Location field. (Fig. 16).Figure 162.To display a saved image in the Reference Image Window from your File Location:a.Click the Open Reference Image button (Fig. 16 above).b.Select the file you want to display (Fig. 17 below).c.Click the OK Button, to display the image in the Reference Image Window. (Fig. 17).Figure 17Switching to a Different Flexible Inspection Scope™ on the Control Module:1.Press the Power button on the Control Module once.2.Disconnect the current Flexible Inspection Scope from the Control Module.3.Repeat the steps in the “STARTING SOFTWARE & CONNECTING SCOPE TO PC” procedure.Inserting Scope in ItemFigure 1Rotating Device to Avoid ObstacleFigure 2 Performing InspectionWipe down the Flexible Inspection Scope™ with a compatible wipe. Follow the manufacturer’s (Mfr.’s)Instructions for Use (IFU) for appropriate wipe usage. Click here to see the Chemical Compatibility Chart(PDF) for approved cleaning.The Flexible Inspection Scope™ is made of the same material as other common endoscopes. Any wipe,solution, or low temperature (≤ 60 °C [140 °F]) method intended for the reprocessing of endoscopes is likelycompatible with the Generation II Flexible Inspection Scope™ Catheters if used according to the productlabeling.Solutions Containing (Flexible Inspection Scope Only)Alcohol Ethoxylates Neutral or Near-Neutral pH DetergentsEnzymatic Cleaning Solutions Enzymatic DetergentsSodium Borated, Decahydrate Tetrapotassium PyrophosphateFlexible Inspection Scope™ has a fluid ingress protection rating of IPX7 (Waterproof) and can withstandimmersion in fluid up to one (1)-meter in depth for up to 30 minutes.Control Module USB has a fluid ingress protection rating of IPX5 (Water resistant) and can withstand asustained, low pressure water jet spray for up to three minutes.For Thorough Cleaning: CablesFollow the cleaning agent Mfr.’s IFU.1.Unplug and disconnect all components from the Control box prior to cleaning.2.Do not submerge or soak the cable for disinfection (cable is not waterproof).3.Wipe thoroughly with non-linting wipe moistened with facility approved neutral detergent. Use theappropriate brushes with detergent solution to remove any residues from areas that cannot bereached with the wipes.For Thorough Cleaning: Control Module1.Unplug and disconnect all components from the Control box prior to cleaning.2.Do not submerge or soak the cable for disinfection (Control Box is not waterproof).3.Wipe thoroughly with non-linting wipe moistened with facility approved neutral detergent. Use theappropriate brushes with detergent solution to remove any residues from areas that cannot bereached with the wipes.Note: Do NOT soak. Control Module and cables are not waterproof and should not be immersed.N/ACleaning –AutomatedDisinfection Control Module and CablesThese may be cleaned with alcohol based disinfectant wipes.Compatible agents (wipes and solutions) for disinfecting Flexible Inspection Scope™ and ControlModule:∙Hydrogen peroxide∙Isopropyl alcohol (IPA)∙Sodium hypochlorite (Bleach)∙Ortho-phenylphenol∙Quaternary ammonium.High-Level Disinfection (Flexible Inspection Scope™ Only)∙Select only disinfecting solutions listed in the compatible disinfecting methods.∙Follow all recommendations regarding health-hazards, dispensing, measuring, and storage from the Mfr. of cleaning and disinfecting agents.∙Soak the Flexible Inspection Scope™ in selected disinfecting solution per Mfr.’s IFU.∙Rinse the Flexible Inspection Scope™ with critical (sterile) water, again, following the disinfecting solutions Mfr.’s instructions.Reprocessing Chemical Compatibility Chart (PDF): Click here.。
RBA(原EICC) Document Checklist (20180626)

Lockout/Tagout Procedure and Relevant Training Records-上锁/挂牌程序 B1.2
及培训记录
B1.3 PPE Management Procedure and PPE List-劳保用品管理程序及相应清单
RBA Document Checklist(E-Version)
#
Health & Safety Documents
Factory Layout Plan-工厂平面图
Documents/permits/license Number, version & issue date
Special Equipment Certificates (Crane, Elevator, Pressure Vessel, B1.1 Boiler, Forklift etc.) and relevant list-特种设备注册登记及检验文件(如起
施维护保养合同和检查记录
B2.3 Emergency Preparedness and Response Program-应急准备和响应程序
B2.3 Business Continuity and Resumption Plan-生产恢复程序
Emergency Drill Records (Fire Drill, Chemical Spill Drill etc.) and CAP
B2.5 report (if possible)- 应急演练记(消防,化学品泄漏等)及改善报告(如有)
Training records for Emergency Response Team members (including
RBA EHS document list 6.0_UL Internal 20180601
EICC Document list / EICC 审核文件清单Please provide the below documents for review:请在审核当天提供以下资料以供审核:C-EnvironmentC1.1: EIA (Environment impact assessment) report, Approval for EIA + Acceptance report of the environment protecting + pollution discharge permit (if applicable), water extraction permit, Radiation safety permit of X-Ray equipment, other legal required environment permits, procedure to timely renew these documents to ensure they keep valid.环境影响评价报告,环境影响评价批复,环保竣工验收报告,排污许可证 , 取水许可证,X-Ray (或其他幅射仪器)机器辐射安全许可证, 文件定期审查的程序去确保这些许可证不会过期。
C1.2: legal environment reports of recent 3 years which are required to submit to local environment authorities最近3年的年度排污申报登记C2.1:Significant environment aspect form and the action plan, Environment targets, reduction plan of the material consumption重大环境因素识别清单以及控制方案,环境目标,降低资源消耗的项目方案C3.1 Chemical management procedure,chemical inventory,chemical in and out record化学品管理程序,化学品清单及库存记录,化学品进出记录C3.2: hazardous waste reduction plan, Hazardous waste dispose contract, certificate of the unit to transfer the hazardous waste, certificate of the unit to dispose the hazardous waste, hazardous waste transfer manifest (recent 3 years); Documented procedures for reception, storage, dispensing, use, return and disposal, Onsite assessment report for the hazardous waste dispose supplier危险废弃物减排计划,危险废弃物处理合同,道路运输许可证,危废处理商的危险废弃物经营许可证,危险废弃物转移联单(最近3年), 废物接收,储存,分配,使用,回收和处置的书面程序;最近3年内对危险废弃物处理供应商的现场审查报告,C4.1: Solid waste management procedure, solid waste reduction plan, Valid contract signed with waste contractors, transfer manifest, license of the contractor to dispose the solid waste固体废弃物管理程序,固体废弃物减量计划,固体废物承包商的资质文件,处理合同及转移记录C5.1:Air emission management procedure, Air emission reduction plan, Monitoring reports for air emission (recent 3 years), Maintenance records of the waste gas treatment facilities, waste gastreatment system operator training records废气排放管理程序,废气减排记录,废气检测报告(最近3年), 废气处理设施维护记录,废气处理人员的培训记录C5.2: Boundary noise management procedure, Monitoring reports for boundary noise (recent 3 years)厂界噪声管理程序,厂界噪声检测报告(最近3年)C6.1: Internal Hazardous substance control limit, Hazardous substance in the product management procedure, ROHS testing procedure to the incoming material and related records, statement of the supplier on ROHS compliance, the material’s ROHS report from the 3rd lab, MSDS of the material工厂有害物质内部控制限值,产品有害物质控制管理程序, 来料有害物质检测程序及检测记,原材料采购管有害物质理程序, 供应商的不含有害物质声明书,原材料第三方检测报告,原材料成分说明书。
O500 O505 Owner's Manual

Part# 1000692 7/12/99 tnOWNER’S MANUALModels:O500 O50501980973(200)Table of ContentsWarnings ............................................................................................................................. 3-4 Model Information ....................................................................................................... .. (5)Installation (5)Operation ............................................................................................................................ 6-7 Preventive Maintenance (8)Troubleshooting (9)Notes (10)Drawings with part lists318 Diaphragm Pump Port Connections (11)O500 …………………………………………………………………………………………………………………. 12-13 O505 …………………………………………………………………………………………………………………. 14-15Warning Symbol Caution SymbolThis symbol alerts you to the possibility of serious injury or death if you do not follow the instructions.This symbol alerts you to the possibility of damage to or destruction of equipment if you do not follow the instructions.Serial Number Purchase Date Model Number DistributorINSTRUCTIONSEQUIPMENT MISUSE HAZARDEquipment misuse can cause the equipment to rupture, malfunction, or start unexpectedly and result in serious injury.• This equipment is for professional use only.• Read all instruction manuals, tags, and labels before operating the equipment. • Use the equipment only for its intended use. • Do not alter or modify this equipment.• Do not exceed the maximum working pressure of the lowest rated system component.• Do not operate the gun washer at a pressure above the maximum working pressure rating of thegun(s) being cleaned.• Route the hoses away from traffic areas, sharp edges, moving parts, and hot surfaces.• Do not use the hoses to pull the equipment. •Do not move pressurized equipment. • Use fluids or solvents that are compatible with the equipment wetted parts. Read the fluid andsolvent manufactures warnings. •Comply with all applicable local, state and national fire, electrical and other safety regulation.PRESSURIZED EQUIPMENT HAZARDSpray from hose leaks, ruptured components, or from operating the gun washer with an open lid can splash fluid in the eyes or on the skin and cause serious injury.• A safety device has been installed to shut off the pump when the gun washer lid is opened. Do not tamper with or alter this device. • Open the gun washer lid slowly.• Do not prop the gun washer lid open with an object or by any other means. • Do not stop or deflect fluid leaks with your hand, body, glove, or rag. • Tighten all fluid connections before operating the equipment. •Replace worn, damaged, or loose parts immediately.FIRE AND EXPLOSION HAZARDImproper grounding, poor air ventilation, open flames, or sparks can cause a hazardouscondition and result in fire or explosion and serious injury.•Ground the equipment. See Installation for grounding procedure.•Provide fresh air ventilation to avoid the build up of flammable fumes from the solvent.•Extinguish all open flames or pilot lights in gun washer area.•Electrically disconnect all equipment in the gun washer area.•Keep the gun washer area free of debris, including solvent, rags, and gasoline.•Do not turn on any light switch in the gun washer area while operating or if fumes are present.•Do not smoke in the gun washer area.•Do not operate a gasoline engine in the gun washer area.•Follow the gun manufactures solvent and other cleaning recommendations.•Use solvent with the highest possible flash point.•If there is any static sparking while using the equipment, stop operation immediately. Identify and correct the problem.•Drain the solvent into a proper storage container when gun washer(s) is not in use.TOXIC FLUID HAZARDHazardous fluids or toxic fumes can cause serious injury or death if splashed in eyes or on the skin, swallowed, or inhaled.•Know the specific hazards of the fluid you are using. Read the fluid manufactures warnings.•Store hazardous fluid in an approved container. Dispose of hazardous fluid according to all local, state and national guidelines.•Wear the appropriate protective clothing, gloves, eyewear and respirator.•Pipe and dispose of the exhaust air safely. If diaphragm fails, the fluid may be exhausted along with the air.Model InformationO500One gun, one cup paint gun washer / recycler with diaphragm pump, filter-regulator, and timer.45 (20) 20.5 (521) 15.625(397) 35 (889) O505O500 for use with water based cleaning solutions or standard lacquer thinner solvents.48 (22)20.5 (521)15.625(397)35 (889)Model shown: O500InstallationInstalling the Gun Washer1. Place gun washer on a level surface in aproperly ventilated paint mixing room.Grounding the Gun Washer1. Connect the ground wire on the gun washer to a true earth ground.2. Ground all equipment used or located in the gun washer area.Connecting the Air Line1. Install a 1/4 in. npt male coupler into the air inletat the left front of the housing. Hand tighten the 1/4 in. npt coupler into the inlet. Then, wrench tighten 1/4 turn. 2. Connect a permanent shop air line of 65-120 psi. Filter/regulator is preset. Do not adjustConnecting the Solvent to the Washer1. Insert the white, plastic siphon plug into a fresh 5gallon solvent can. The can must contain atleast 4 gallons of solvent to pump properly. Use a high quality, slow evaporating solvent, such as DuPont's 3661S or equivalent. 2. Place the siphon tube into the 5-gallon can through the white plastic plug. Attach the flare nut end of the siphon tube to the flare fitting on the underside of the mini gun washer. Tighten the flare nut by hand and snug with wrench.IMPORTANT: Do not over tighten.OperationFigure 2 01960415(254) Preparing the Equipment to be washed1. Remove paint cup or paint line and the air line from the paint gun.Long Stem Su pportShort StemSupport2. Drain excess paint from cup and gun.3. Remove all gauges and regulators.CAUTIONAll pressure gauges must be removed before placing equipment in gun washer to avoid damaging the gauges.4. Lock the gun trigger in the open position by placing the trigger lock around the gun handlePlacing Equipment in the Gun Washer1. To clean guns not mentioned here, use the longor short stem supports as needed (see Fig. 2). For questions or adapter kits contact your paint gun washer distributor.2. The shorter support is designed for siphon feedand pressure feed guns of up to 2 quart capacity which are fitted with siphon tube intakes.3. The long support is designed to hold gravityfeed guns or pressure feed guns that have been removed from the air and paint lines. All pressure gauges must be removed before washing the paint gun.Placing Paint Guns in WasherSiphon FeedPlace siphon tube onto short stem support nozzle.Gravity FeedPlace long stem support over one of the short stem supports. Place paint inlet of gun on long stem support. *For Gravity Feed, High Volume Low Pressure Guns an adapter kit (part number 23K) isavailable from your distributor for best cleaning .Placing Paint Guns in Washer (cont.)HVLP - MattsonUse gun manufacturer's fixtures. 1/4" plastic trigger lock holds sliding rod open. Tubing with quick disconnect to gun and a permanent connect to gun washer manifold completes the special fixtures. Place paint pickup tube onto shorter stem support nozzle.Pressure FeedCleaning Options for Pressure Pot Systems1. P aint gun only: Place onto long stem nozzle (use moveable 6 1/4" stem over the short stem). Remove gauges and regulators. Apply wire triggerlock to gun.2. P ot lid only: Place paint pickup tube over short stem nozzle. Remove gauges.3. P ot lid and attached: Place paint pickup tube over paint line short stem nozzle and coil paint line on bottom.4.Pot lid with paint line attached and gun attached: Apply wire trigger lock to gun. Follow step 3 and lay gun on top of hose.5. P ot only: Place over one of two nozzles.6. A ll equipment at the same time: Follow steps 1, 3 and 5.* For long lengths of paint hose or to clean the paint hose passage outside of the gun washer tub with a pressure flow hookup of solvent, please contact a Herkules Distributor for Herkules pressure pot system Paint gun washers, theGW/R-3 and GW/R-3-SS models. Operating the Gun Washer1. Make sure all wire trigger locks and otheraccessories are inside the gun washer tank. 2. If washing only one set of equipment, placeempty cans over the unused nozzles and/orstem supports to prevent solvent spray fromhitting the underside of the gun washer lid.3. Close the gun washer lid.4. Turn the timer knob clockwise 90 degrees tostart the gun washer. The gun washer will run for 90 seconds. Turning the timer knob lessthan 90 degrees will reduce the timing cycle.Paint equipment will clean in 60 to 90 seconds.5. If the lid is opened prior to the end of the timingcycle, the safety air cutoff switch will stop thegun washer. The gun washer will start againwhen t he lid is closed if time remains on thetimer.Note: Open the lid slowly to minimize solventvapor escape.6. Remove the equipment from the gun washerand wipe off any remaining solvent. The gunhanger on the front of the stand can be used to dry the guns.Preventive Maintenance1. Drain excess paint from cup or pot into separatecontainer before loading into washer.2. Drain paint sludge from 5 gallon solvent canweekly. Do after weekend settling.Pour liquid into second container. Drain sludgeinto disposal container. Refill can from secondcontainer and add solvent for minimum 4 gallonlevel or 3" from the top.Clean siphon tube with cloth and brush toremove paint residue3. Clean filter weekly. Unscrew gray filter cup insolvent tubing line. Place container or clothsunderneath to catch any liquid spill. Removestainless screen. Rinse both pieces and install.4. Clean inside of tub.5. Change solvent completely when objects beingcleaned become tacky to the touch.6. Drain water from filter/regulator at least weekly.Press the water drain pin up (See Fig 3).CAUTIONDo not change the setting of the filter/regulator. Thiscould damage the filter/regulator or pump.01970836TroubleshootingGun washer will not turn on. 1. Make sure the air line is properly connected with 90-120 psi.2. Make sure lid is fully closed. Make sure the limit valve (#M1C)on the side of the tank is in closed position.3. Check all air connections to ensure that there are no leaks.4. Make sure timer cam is engaging the limit valve (#M1C) onthe shield assembly.5. Make sure timer is on and functioning correctly.Gun washer turns on but pumps slowly or not at all. 1. Make sure intake filter is not clogged (Clean or replace).See number 3 of PREVENTIVE MAINTENACE2. Make sure the air line is properly connected with 90-120 psi.3. Check all air connections to ensure that there are no leaks.4. Drain filter/regulator of water. See number 6 of PREVENTIVEMAINTENANCE.5. Make sure the solvent can is at least 4/5 full of clean solvent.6. Make sure lid is fully closed. Make sure the limit valve (#M1C)on the side of the tank is fully actuated.7. Make sure manifold nozzles and stem supports are not clogged.8. Make sure ball moves freely in ball cage. Expand ball cageslightly if ball is lodged in ball cage.9. Make sure teflon o-ring is present and in good conditionwith in the strainer assembly.10. Make sure siphon tube connection is wrench tight.11. Make sure strainer bowl is tightGun washer will not shut off. 1. Make sure timer cam (#M230-001A) is moving. If its not,slightly loosen the nuts holding the limit valve (#M1C) on theshield. Reposition valve and tighten nuts.Notes318 Diaphragm Pump Port ConnectionsParts Layout of O500(#1000230), Filter (#005-150C), Strainerbowl (#005-150D), and Strainer head(#005-150E) .Parts Layout of O505Strainer (#005-150) includes O-Ring(#1000230), Filter (#005-150C), Strainerbowl (#005-150D), and Strainer head(#005-150E) .Manifold Assembly S.S. Note:Parts called out are notnecessarily contained in the assemblies. All parts are not necessarily shown or called out.#10228 Nozzle #54PIShield Assembly #10248 Note:01960415Street Elbow 45° #005-107A Stem Support#53A Hose Barb #M27Nozzle #54Cup Holder #GWRM-1 Adaptor 1/4 npt#67 Filter/Regulator #T17 Reducer #005-134Hose Fitting #T4Timer Knob #M230-002 Nylon Spacer #M230-005 Mounting Nut #1000213Screw #4 #M230-006 Limit Valve #M1C Timer Cam #M230-003 Screw BHSC#002-171 Nylon Spacer #M230-004Nut Nylock#002-172 Mechanical Timer #M230-001A Hose 1/2” Blue #100-083 Hose 3/8” Blue #100-084Diaphragm Pump 1/2”#1000601 Nut Nylock #005-137 Hose Fitting #T4Screw BHSC #002-175Hose 3/8” Black #M7APE01980973(204)。
861DW SMD REWORK SYSTEM Instruction Manual

when putting the handle on the holder.
4. It can automatically sleep and set parameters in the sleeping state.
5. Closed loop sensor,temperature can be controlled by zero voltage triggering mode. Large power and rapid heating. Temperature can
be conveniently adjusted and the temperature is accurate and
stable, and not affected by airflow.
6. It Is with a brushless whirlpool motor and the airflow is adjustable
Power switch
Key ofselect channel
Key ofsetting airflow
The nandle
2. Specification
Power
Voltage Temperature range Airflow range
Maximal airflow
Size (L*D*H) Weight
861DW SMD REWORK SYSTEM
Instruction Manual
Thank you for purchasing our SMD Rework unit. The unit is exclusively designed for reworking and soldering SMD component. Please carefully read this manual before operating the unit. Store this manual in a safe,easily accessible place forfuture reference.
Lauterbach黑芯调试器TRACE32在线帮助说明书

Blackfin Debugger Release 09.2023Blackfin DebuggerTRACE32 Online HelpTRACE32 DirectoryTRACE32 IndexTRACE32 Documents ......................................................................................................................ICD In-Circuit Debugger ................................................................................................................Processor Architecture Manuals ..............................................................................................Blackfin ....................................................................................................................................Blackfin Debugger (1)Introduction (4)Brief Overview of Documents for New Users4 Demo and Start-up Scripts5 Location of Debug Connector5Warning (5)Quick Start JTAG (6)Troubleshooting (8)SYStem.Up Errors8FAQ (8)Configuration (9)System Overview9Blackfin specific SYStem Commands (10)SYStem.CONFIG Configure debugger according to target topology10 Daisy-Chain Example13 TapStates14 SYStem.CONFIG.CORE Assign core to TRACE32 instance15 SYStem.CPU CPU type selection16 SYStem.JtagClock JTAG clock selection17 SYStem.LOCK Lock and tristate the debug port17 SYStem.MemAccess Real-time memory access (non-intrusive)18 SYStem.Mode System mode selection19 SYStem.Option.IMASKASM Interrupt disable19 SYStem.Option.IMASKHLL Interrupt disable20Breakpoints (21)Software Breakpoints21 On-chip Breakpoints21 Breakpoint in ROM21Example for Breakpoints22 Memory Classes (23)CPU specific TrOnchip Commands (24)JTAG Connector (25)Blackfin DebuggerVersion 10-Oct-2023 IntroductionThis document describes the processor specific settings and features for the Blackfin Embedded Media Processor. TRACE32-ICD supports all Blackfin devices which are equipped with the JT AG debug interface.Please keep in mind that only the Processor Architecture Manual (the document you are reading at the moment) is CPU specific, while all other parts of the online help are generic for all CPUs supported by Lauterbach. So if there are questions related to the CPU, the Processor Architecture Manual should be your first choice.If some of the described functions, options, signals or connections in this Processor Architecture Manual are only valid for a single CPU the name is added in brackets.Brief Overview of Documents for New UsersArchitecture-independent information:•“Training Basic Debugging” (training_debugger.pdf): Get familiar with the basic features of a TRACE32 debugger.•“T32Start” (app_t32start.pdf): T32Start assists you in starting TRACE32 PowerView instances for different configurations of the debugger. T32Start is only available for Windows.•“General Commands” (general_ref_<x>.pdf): Alphabetic list of debug commands.Architecture-specific information:•“Processor Architecture Manuals”: These manuals describe commands that are specific for the processor architecture supported by your Debug Cable. T o access the manual for your processorarchitecture, proceed as follows:-Choose Help menu > Processor Architecture Manual.•“OS Awareness Manuals” (rtos_<os>.pdf): TRACE32 PowerView can be extended for operating system-aware debugging. The appropriate OS Awareness manual informs you how to enable theOS-aware debugging.Demo and Start-up ScriptsLauterbach provides ready-to-run start-up scripts for known Blackfin based hardware.To search for PRACTICE scripts, do one of the following in TRACE32 PowerView:•Type at the command line: WELCOME.SCRIPTS•or choose File menu > Search for Script.Y ou can now search the demo folder and its subdirectories for PRACTICE start-up scripts(*.cmm) and other demo software.Y ou can also manually navigate in the ~~/demo/blackfin/ subfolder of the system directory ofTRACE32.Location of Debug ConnectorLocate the debug connector on your target board as close as possible to the processor to minimize the capacitive influence of the trace length and cross coupling of noise onto the JT AG signals. WarningSignal LevelThe debugger output voltage follows the target voltage level. It supports a voltage range of 0.4…5.2V. ESD ProtectionNOTE:T o prevent debugger and target from damage it is recommended to connect ordisconnect the debug cable only while the target power is OFF.Recommendation for the software start:•Disconnect the debug cable from the target while the target power is off.•Connect the host system, the TRACE32 hardware and the debug cable.•Start the TRACE32 software.•Connect the debug cable to the target.•Switch the target power ON.Power down:•Switch off the target power.•Disconnect the debug cable from the target.Quick Start JTAGStarting up the debugger is done as follows:1.Select the device prompt B: for the ICD Debugger, if the device prompt is not active after the TRACE32 software was started.2.Select the CPU type to load the CPU specific settings.3.Enter debug mode:This command resets the CPU and enters debug mode. After the execution of this command access to the registers and to memory is possible. Before performing the first access to external SDRAM or FLASH the External Bus Interface Unit (EBIU) must be configured.4.The following command sequence is for the BF537 processor and configures the SDRAM controller with default values that were derived for maximum flexibility. They work for a system clock frequency between 54MHz and 133MHz.In the example a ST M29W320DB flash device is used in 16-bit mode. All four memory banks and CLKOUT are enabled.B:SYStem.CPU BF537SYStem.Up; configure SDRAM controllerData.Set 0xFFC00A1sLONG 0x0091998D Data.Set 0xFFC00A14 %WORD 0x0025Data.Set 0xFFC00A1C %WORD 0x03A0; EBIU_SDGCTL ; EBIU_SDBCTL ; EBIU_SDRRC; enable all flash memory banks and clock outData.Set 0xFFC00A00 %WORD 0x00FF; EBIU_AMGCTL; ST M29W320DB flash device in 16-bit modeFLASH.Create 1. 0x20000000--0x20003FFF 0x4000 AM29LV100 Word FLASH.Create 1. 0x20004000--0x20007FFF 0x2000 AM29LV100 Word FLASH.Create 1. 0x20008000--0x2000FFFF 0x8000 AM29LV100 Word FLASH.Create 1. 0x20010000--0x203FFFFF 0x10000 AM29LV100 Word5.Load the program.Data.LOAD.Elf demo.dxe; The file demo.dxe is in ELF format The option of the Data.LOAD command depends on the file format generated by the compiler. A detailed description of the Data.LOAD command is given in the “General Commands Reference”. The start-up sequence can be automated using the programming language PRACTICE. A typical start sequence is shown below. This sequence can be written to a PRACTICE script file (*.cmm, ASCII format) and executed with the command DO<file>.B::; Select the ICD device promptWinClear; Delete all windowsSYStem.CPU BF537; select the processorSYStem.Up; Reset the target and enter debug modeData.Load.Elf sieve.dxe; Load the applicationRegister.Set PC main; Set the PC to function mainList.Mix; Open disassembly window *) Register.view; Open register window *) PER.view; Open window with peripheral register *) Break.Set sieve; Set breakpoint to function sieveBreak.Set 0x1000 /p; Set on-chip breakpoint to address 1000; Refer to the restrictions in; On-chip Breakpoints.*) These commands open windows on the screen. The window position can be specified with the WinPOS command.TroubleshootingSYStem.Up ErrorsThe SYStem.Up command is the first command of a debug session where communication with the target is required. If you receive error messages while executing this command this may have the following reasons.All The target has no power.All There are additional loads or capacities on the JTAG lines.All The JTAG clock is too fast.FAQPlease refer to https:///kb.Configuration System OverviewBlackfin specific SYStem CommandsSYStem.CONFIG Configure debugger according to target topologyThe four parameters IRPRE, IRPOST , DRPRE, DRPOST are required to inform the debugger about the T AP controller position in the JT AG chain, if there is more than one core in the JT AG chain (e.g. ARM + DSP). The information is required before the debugger can be activated e.g. by a SYStem.Up . See Daisy-chain Example .For some CPU selections (SYStem.CPU ) the above setting might be automatically included, since the required system configuration of these CPUs is known.T riState has to be used if several debuggers (“via separate cables”) are connected to a common JT AG port at the same time in order to ensure that always only one debugger drives the signal lines. T APState and TCKLevel define the T AP state and TCK level which is selected when the debugger switches to tristate mode. Please note: nTRST must have a pull-up resistor on the target, TCK can have a pull-up or pull-down resistor, other trigger inputs need to be kept in inactive state.Format:SYStem.CONFIG <parameter> <number_or_address>SYStem.MultiCore <parameter> <number_or_address> (deprecated)<parameter>:CORE <core><parameter>:(JTAG):DRPRE <bits>DRPOST <bits>IRPRE <bits>IRPOST <bits>DAPDRPOST <bits>DAPDRPRE <bits>DAPIRPOST <bits>DAPIRPRE <bits>TAPState <state>TCKLevel <level>TriState [ON | OFF ]Slave [ON | OFF ]DEBUGPORTTYPE [JTAG | SWD ]SWDPIDLEHIGH [ON | OFF ]SWDPTargetSel <value>CORE For multicore debugging one TRACE32 PowerView GUI has to be startedper core. To bundle several cores in one processor as required by thesystem this command has to be used to define core and processorcoordinates within the system topology.Further information can be found in SYStem.CONFIG.CORE.… DRPOST <bits>Defines the TAP position in a JT AG scan chain. Number of TAPs in theJTAG chain between the TDI signal and the TAP you are describing. InBYPASS mode, each TAP contributes one data register bit. See possibleTAP types and example below.Default: 0.… DRPRE <bits>Defines the TAP position in a JT AG scan chain. Number of TAPs in theJTAG chain between the TAP you are describing and the TDO signal. InBYPASS mode, each TAP contributes one data register bit. See possibleTAP types and example below.Default: 0.… IRPOST <bits>Defines the TAP position in a JT AG scan chain. Number of InstructionRegister (IR) bits of all TAPs in the JT AG chain between TDI signal andthe TAP you are describing. See possible T AP types and example below.Default: 0.… IRPRE <bits>Defines the TAP position in a JT AG scan chain. Number of InstructionRegister (IR) bits of all TAPs in the JTAG chain between the T AP you aredescribing and the TDO signal. See possible TAP types and examplebelow.Default: 0.TAPState(default: 7 = Select-DR-Scan) This is the state of the TAP controller whenthe debugger switches to tristate mode. All states of the JTAG T APcontroller are selectable.TCKLevel (default: 0) Level of TCK signal when all debuggers are tristated. TriState(default: OFF) If several debuggers share the same debug port, thisoption is required. The debugger switches to tristate mode after eachdebug port access. Then other debuggers can access the port. JT AG:This option must be used, if the JTAG line of multiple debug boxes areconnected by a JTAG joiner adapter to access a single JTAG chain. Slave(default: OFF) If more than one debugger share the same debug port, allexcept one must have this option active.JTAG: Only one debugger - the “master” - is allowed to control the signalsnTRST and nSRST (nRESET).DEBUGPORTTYPE [JTAG | SWD]It specifies the used debug port type “JT AG”, “SWD”. It assumes the selected type is supported by the target.Default: JT AG.SWDPIdleHigh [ON | OFF]Keep SWDIO line high when idle. Only for Serialwire Debug mode. Usually the debugger will pull the SWDIO data line low, when no operation is in progress, so while the clock on the SWCLK line is stopped (kept low).Y ou can configure the debugger to pull the SWDIO data linehigh, when no operation is in progress by usingSYStem.CONFIG SWDPIdleHigh ONDefault: OFF.SWDPTargetSel<value>Device address in case of a multidrop serial wire debug port.Default: none set (any address accepted).Daisy-Chain ExampleBelow, configuration for core C.Instruction register length of •Core A: 3 bit •Core B: 5 bit •Core D: 6 bitSYStem.CONFIG.IRPRE 6.; IR Core D SYStem.CONFIG.IRPOST 8.; IR Core A + B SYStem.CONFIG.DRPRE 1.; DR Core D SYStem.CONFIG.DRPOST 2.; DR Core A + BSYStem.CONFIG.CORE 0. 1.; Target Core C is Core 0 in Chip 1Core A Core B Core CCore D TDOTDI Chip 0Chip 1TapStates0Exit2-DR1Exit1-DR2Shift-DR3Pause-DR4Select-IR-Scan5Update-DR6Capture-DR7Select-DR-Scan8Exit2-IR9Exit1-IR10Shift-IR11Pause-IR12Run-Test/Idle13Update-IR14Capture-IR15Test-Logic-ResetSYStem.CONFIG.CORE Assign core to TRACE32 instance Format:SYStem.CONFIG.CORE<core_index><chip_index>SYStem.MultiCore.CORE<core_index><chip_index> (deprecated) <chip_index>:1 (i)<core_index>:1…kDefault core_index: depends on the CPU, usually 1. for generic chipsDefault chip_index: derived from CORE= parameter of the configuration file (config.t32). The COREparameter is defined according to the start order of the GUI in T32Start with ascending values.T o provide proper interaction between different parts of the debugger, the systems topology must bemapped to the debugger’s topology model. The debugger model abstracts chips and sub cores of these chips. Every GUI must be connect to one unused core entry in the debugger topology model. Once the SYStem.CPU is selected, a generic chip or non-generic chip is created at the default chip_index.Non-generic ChipsNon-generic chips have a fixed number of sub cores, each with a fixed CPU type.Initially, all GUIs are configured with different chip_index values. Therefore, you have to assign thecore_index and the chip_index for every core. Usually, the debugger does not need further information to access cores in non-generic chips, once the setup is correct.Generic ChipsGeneric chips can accommodate an arbitrary amount of sub-cores. The debugger still needs information how to connect to the individual cores e.g. by setting the JT AG chain coordinates.Start-up ProcessThe debug system must not have an invalid state where a GUI is connected to a wrong core type of a non-generic chip, two GUIs are connected to the same coordinate or a GUI is not connected to a core. The initial state of the system is valid since every new GUI uses a new chip_index according to its CORE= parameter of the configuration file (config.t32). If the system contains fewer chips than initially assumed, the chips must be merged by calling SYStem.CONFIG.CORE.SYStem.CPU CPU type selection Format:SYStem.CPU <cpu><cpu>:BF531 | BF532 | BF533 | BF534…Default selection: BF534.Selects the CPU type.SYStem.JtagClock JT AG clock selection Format:SYStem.JtagClock [<frequency>]SYStem.BdmClock<frequency>(deprecated)Default frequency: 1MHz.Selects the JT AG port frequency (TCK). Any frequency up to 50MHz can be entered, it will be generated by the debuggers internal PLL.For CPUs which come up with very low clock speeds it might be necessary to slow down the JT AGfrequency. After initialization of the CPUs PLL the JT AG clock can be increased.SYStem.LOCK Lock and tristate the debug port Format:SYStem.LOCK [ON | OFF]Default: OFF.If the system is locked, no access to the debug port will be performed by the debugger. While locked, the debug connector of the debugger is tristated. The main intention of the SYStem.LOCK command is to give debug access to another tool.SYStem.MemAccess Real-time memory access (non-intrusive) Format:SYStem.MemAccess Denied | StopAndGo | BTCBTC“BTC” allows a non-intrusive memory access while the core is running, if aBackground T elemetry Channel (BTC) is defined in your application. Anyinformation on how to create such a channel can be found in AnalogDevices’ VisualDSP++ user’s manual. The JT AG clock speed should be asfast as possible to get good performanceDenied Real-time memory access during program execution to target is disabled.StopAndGo Temporarily halts the core(s) to perform the memory access. Each stoptakes some time depending on the speed of the JT AG port, the number ofthe assigned cores, and the operations that should be performed.SYStem.Mode System mode selectionFormat:SYStem.Mode <mode>SYStem.Attach (alias for SYStem.Mode Attach)SYStem.Down (alias for SYStem.Mode Down)SYStem.Up (alias for SYStem.Mode Up)<mode>:DownGoAttachUpDown Disables the debugger.Go Resets the target with debug mode enabled and prepares the CPU fordebug mode entry. After this command the CPU is in the system.upmode and running. Now, the processor can be stopped with the breakcommand or if a break condition occurs.Attach User program remains running (no reset) and the debug interface isinitialized.Up Resets the target and sets the CPU to debug mode. After execution ofthis command the CPU is stopped and prepared for debugging.StandBy Not supported.NoDebug Not supported.SYStem.Option.IMASKASM Interrupt disable Format:SYStem.Option.IMASKASM [ON | OFF]Mask interrupts during assembler single steps. Useful to prevent interrupt disturbance during assembler single stepping.SYStem.Option.IMASKHLL Interrupt disable Format:SYStem.Option.IMASKHLL [ON | OFF]Mask interrupts during HLL single steps. Useful to prevent interrupt disturbance during HLL single stepping.BreakpointsThere are two types of breakpoints available: software breakpoints and on-chip breakpoints. Software BreakpointsSoftware breakpoints are the default breakpoints. A special breakcode is patched to memory so it only can be used in RAM or FLASH areas.There is no restriction in the number of software breakpoints.On-chip BreakpointsThe Blackfin processor has a total of six instruction and two data on-chip breakpoints.A pair of two breakpoints may be further grouped together to form a range breakpoint. A range breakpointcan be including or excluding. In the first case the core is stopped if an address in the range is detected, in the second case the core is stopped when an address outside of the range is observed.Breakpoint in ROMWith the command MAP.BOnchip<range> it is possible to inform the debugger about ROM(FLASH,EPROM) address ranges in target. If a breakpoint is set within the specified address range the debugger uses automatically the available on-chip breakpoints.Example for BreakpointsAssume you have a target with FLASH from 0x20000000 to 0x200FFFFF and RAM from 0x0 to 0x1000000. The command to configure TRACE32 correctly for this configuration is: Map.BOnchip 0x20000000--0x200FFFFFThe following breakpoint combinations are possible.Software breakpoints:Break.Set 0x0 /Program; Software Breakpoint 1Break.Set 0x1000 /Program; Software Breakpoint 2On-chip breakpoints:Break.Set 0x20000100 /Program; On-chip Breakpoint 1Break.Set 0x2000ff00 /Program; On-chip Breakpoint 2Memory ClassesThe following memory classes are available: Memory Class DescriptionP ProgramD DataCPU specific TrOnchip CommandsThe TrOnchip command group is not available for the Blackfin debugger.JTAG ConnectorSignal Pin Pin SignalGND12EMU-N/C34GNDVDDIO56TMSN/C78TCKN/C910TRST-N/C1112TDIGND1314TDOJTAG Connector Signal Description CPU Signal TMS JTAG-TMS,TMSoutput of debuggerTDI TDI JTAG-TDI,output of debuggerTCK TCK JTAG-TCK,output of debugger/TRST /TRST JTAG-TRST,output of debuggerTDO TDO JTAG-TDO,input for debugger/EMU JTAG Emulation Flag /EMUVDDIO VDDIO This pin is used by the debugger to sense the targetI/O voltage and to set the drive levels accordingly. Ifthe sensed voltage level is too low (e.g. target has nopower) the debugger powers down its drivers toprevent the target from damage.。
RB建立消息的IE说明

3.1.4 RB信息表3.1.5 IE“RB Information Elements”数据结构3.1.4.1 Signalling RB information to setup list参数意义信令RB的信息。
包括RB标识、RLC info、RB mapping info。
UE根据这些信息建立相应的信令RB。
参数配置策略参见2.1节。
3.1.4.2 RAB information to setup list此参数包括两部分:RAB info、RB information to setup list。
其中RB information to setup list给出新建RAB所对应的RB信息,主要是从RB到传输信道的映射信息,即从RB->PDCP->RLC(逻辑信道)->MAC(传输信道)。
1)对于语音业务,一个RAB可以映射在两个或三个RB上,即列表中可以包括2~3个RB;2)对于其它类型的RAB,则RAB、RB是一一对应的关系,即列表中只有一个RB的信息。
3.1.4.2.1 NAS Synchronization Indicator参数意义参数设置的影响:此参数来自于CN(RAB指派请求消息)。
RNC只是负责传递而已。
在此之前,UE已经将自己支持的编解码类型通知CN,CN从中选择一种类型并使用此参数来通知UE。
这种过程一般发生在如下情况:1)呼叫建立时。
一般使用RB建立过程。
2)呼叫建立后,由于某种情况编解码类型发生改变。
可以通过RB重配过程来修改RAB属性。
2)呼叫建立后发生系统间切换,这一般通过系统间切换命令来实现,而与RB 控制过程无关;3)UE-UTRAN之间的业务类型发生转换,如语音变为数据、或数据变为语音,同时这种转换通过RAB重配来实现,而不涉及RAB的释放、建立。
这种情况可能通过RB重配过程来实现。
建议配置:协议中,此参数为OP选项;1)如果RB控制过程是由CN触发的(如RNC收到RAB指派请求消息),则根据RAB指派请求消息中的同名参数来设置,a) 如果该消息中包括NAS Synchronization Indicator,则相应的Uu接口消息中也必须包括此参数;b) 否则不需要。
INS 036 Security Control Panel User Guide

To TEST the SOUNDERS and STROBE
q Enter your existing code
. The Unset light will flash. Enter
0 0 0 1 . All the zone lights will illuminate. Enter . All the zone lights
Enter Your Code Press Part
Enter Your Code
Enter Your Code Press Full or Part Press Omit Press Zone Number(s) Press Prog
Enter Your Code Press Reset
Enter Your Code Press Chime Press Zone Number(s) Press Prog
q Enter via a designated entry route. The slow entry tone will start.
Enter your code
. The system will unset and the entry
tone will stop. The display will flash the zone light of the zone
It is possible to omit (exclude) or include individual zones during
q f p setting. Enter your code
. Press
or
.
O Press . The exit tone and exit timer will stop and the display will
- 1、下载文档前请自行甄别文档内容的完整性,平台不提供额外的编辑、内容补充、找答案等附加服务。
- 2、"仅部分预览"的文档,不可在线预览部分如存在完整性等问题,可反馈申请退款(可完整预览的文档不适用该条件!)。
- 3、如文档侵犯您的权益,请联系客服反馈,我们会尽快为您处理(人工客服工作时间:9:00-18:30)。
EICC Document list / EICC 审核审核文件清单文件清单
Please provide the below documents for review:
请在审核当天提供以下资料以供审核:
A1.1: Hiring procedure, contract with labor agency (if applicable), employee contract 招工程序,与劳务派遣公司的合同(如适用),员工合同
A1.2: Forced / Bonded / Prison / Slave Labor prohibiting policy
禁止使用强迫/债役/监狱/奴隶劳工的政策
A1.3: Worker’s labor contract ,Contract with labor agent
员工的劳动合同,与劳务派遣公司的合同。
A1.4: Worker’s personal file, including worker’s recruitment registration form and copy of identify card, policy on not hold worker’s identity card or Original document safe keeping policy in other countries (if required by the workers)
员工的人事档案,包括入职登记表和身份证复印件。
不扣押员工身份证件的政策或员工证件保管程序(如果员工要求工厂保管证件)。
A1.5: Facility rule/regulations, policy/procedure on freedom of movement
厂规厂纪,不限制员工行动自由的程序
A2.1: Worker register including detailed number of direct, indirect, contracted and temporary workers, worker’s birth date and hire date; Child labor prohibiting policy; Worker’s personal file with copy of ID card.
员工花名册包括工厂内直接、间接、劳务派遣工和临时工的数目,员工的出生日期和进厂日期; 禁止招聘童工的政策,员工的个人档案包括其身份证复印件。
A2.2: Identify card verification procedure, Remedy procedure for the discovery of Child labor, 员工身份证核查程序,发现童工后的补救程序
A2.3: Young worker list, young worker register (acknowledged by local labor department), young worker protecting procedure, entrance & annual health check reports of juvenile workers, time records of young workers
未成年工清单,未成年工备案登记表,未成年工保护程序,未成年工定期体检报告, 未成年工考勤记录
A2.4: Apprenticeship using procedure, or policy on not hiring apprentices, triangle agreements among the apprentice worker, factory and the school
实习生使用程序,或者不招聘实习生的政策, 实习生、工厂以及学校之间的三方协议。
A3.1: Comprehensive working hours waiver, Time records of sample workers, leave applications.
工时批文,抽样员工的工时记录,请假记录
A3.2: Time records of sample workers, leave applications.
抽样员工的工时记录,请假记录
A3.3:Working hours control records, working hours Management procure to ensure the working hours is compliance with the legal and EICC’s requirement, Production records (QC records, daily production records, material receiving record of each department).
工时控制记录,工作时间管理程序以确保工作时间符合EICC以及当地法规的要求, , 工厂的生产记录(QC记录,生产日报表和各车间的领料记录)
A3.4:Facility rule and regulations on worker’s meal time, break time, paid leave; paid leave records such as annual leave and marriage leave.
工厂厂规中列出的员工休息时间,有薪假期包括病假和产假; 员工休有薪假期的记录
A4.1 Sample workers’ time records and wage records, bank transfer records (if applicable), resign worker’ application and wage payment record,
抽样员工的考勤记录及工资记录, 银行转账记录,离职员工的辞工申请和离职工资发放记录
A4.2: Employee Manual / Handbook, new worker’s orientation training material, Pay slip.
员工手册,新员工入职培训教材,员工工资条
A4.3: Sample workers’ wage records, Facility rule on disciplinary measures, disciplinary records
抽样员工的工资记录,纪律性处罚措施,纪律性处罚记录
A4.4: Social insurance receipts and related waivers (if applicable)
社保缴费记录以及相关证明文件(如适用)
A5.1:Disciplinary records, Grievance records
纪律性处罚记录,员工申述报告
A5.2: Policy on prohibition of inhumane treatment including harassment, abuse and corporal punishment, Employee Manual / Handbook, new worker’s orientation training material, Facility rule on disciplinary measures, Workers grievances handling policy / procedure.
禁止不人道(骚扰,辱骂以及体罚)对待员工的政策,员工手册,新员工培训教材,纪律性处罚政策,员工投诉处理的政策/程序
A5.3:Facility rule of disciplinary measures, disciplinary records
工厂厂规里关于纪律性处罚的规定,纪律性处罚记录
A6.1: Job posting and advertisement, medical testing reports of workers during the recruitment, promotion records
招工广告,员工入职体检报告, 员工晋升记录。