E2CENTER安装手册
Flex Gateway G2 用户手册说明书

User Manual Flex Gateway G204 / 25 / 2018Revision 21. CPS Data & Controls System Description (3)1.1) Standard Inverter Modbus Communication Card (4)1.2) Optional Flex Gateway Communications Card (5)1.3) Chint Power Systems Connect (CPS Connect) Mobile App (6)1.4) CPS Service Portal (6)2. Interface & Indicators (7)3. Installation Options (9)3.1) Inverter Wirebox (9)3.2) External Installation (10)4. Site Activation (11)4.1) Download the APP : CPS Connect ( Chint Power Systems Connect) (11)4.2) Connect the Flex Gateway (12)4.3) Status of Wifi Module (13)4.4) Test and Save the Configuration (14)4.5) Activate Flex Gateway (15)5. Hardware Datasheet of Flex Gateway 2.0 (18)1. CPS Data & Controls System DescriptionChint Power Systems (CPS) offers a complete inverter data acquisition and controls solution for its customers in North and Central America. Our platform aims to:Enable advanced inverter data communications & controlReduce communications HW cost and installation laborSupport seamless 3rd party integrationReduce O&M costs and improve field performanceEnable customers with direct data accessThe system comprises of four key components:Standard Inverter Modbus CommunicationsOptional Flex Gateway Communications CardChint Power Connect (CPS Connect) Mobile AppCPS Service Web Portal1.1) Standard Inverter Modbus Communication CardEach CPS three phase string inverter (Models SCA23KTL-X, SCA28KTL-X, SCA36KTL-X, SCA50KTL-X, SCA60KTL-X, SCA100KTL-X, SCA125KTL-X) ships standard, at no charge, with Modbus communications capability. This built in communications capability offers both data read access to approximately 32 parameters, depending on inverter model, but also advanced and remote controls of as many as 56 parameters.To enable inverter level data access, each inverter must be connected to a 3rd party monitoring gateway via standard RS-485 twisted shield pair Modbus daisy chain. Modbus wiring instructions are provided in the respective inverter product manuals.Standard built-in communicationsin every inverter wireboxApplication guides and Modbus data maps are available at the website athttps:///downloads.htmlor by contacting CPS applications engineering at 1-855-584-7168.1.2) Optional Flex Gateway Communications CardThe optional Flex Gateway card offers a site level inverter communications capability to customers and to CPS Service. This card works as a Modbus master gateway (site level) and connects to the inverter Modbus daisy chain network.The Flex Gateway enables the following additional features above standard Modbuscommunications:Remote inverter firmware upgrade support by CPS ServiceRemote diagnostics by CPS ServiceBroadcast controls commands to speed up control loops for advanced applications like power quality management or zero export requirementsDirect customer data from the Flex Gateway via a programmable Ethernet XML Sunspec Data Exchange connection for customers who want to manage their owndata directlyPass thru Modbus communications to a 3rd party gatewayOptional Flex Gateway1.3) Chint Power Systems Connect (CPS Connect) Mobile AppThe CPS Connect mobile application is used to wirelessly program and setup the Flex Gateway in the field. It is intended to be used by installers, operations, maintenance and other site personnel to program the communications equipment. The app is available at the Apple iOS store and at the Google store for Android based devices.Each Flex Gateway ships with a Wi-Fi Module that connects to the Flex Gateway to create a local Wi-Fi network. Once connected to the Flex Gateway, all inverters on the Modbus daisy chain network can be programmed.1.4) CPS Service PortalThe CPS Service Portal is a web based interface intended for use by the CPS service team. This advanced portal enables remote diagnostics and FW management of connected systems.2. Interface & IndicatorsSwitchSwitchSwitch Switch3. Installation Options3.1) Inverter Wirebox3.2) External Installation4. Site Activation4.1) Download the APP: CPS Connect (Chint Power Systems Connect)Scan the following QR-code to complete APP download and installation by using the mobile phones that can access the Internet.and Web Portal.4.2) Connect the Flex GatewayOpen the APP – CPS Connect and choose Flex Gateway. Click Wi-Fi Setting and switch to Wi-Fi configuration of mobile phone.Ensure to connect the SSID starts with CPLK-XXXXXXX.4.3) Status of Wi-Fi Module4.4) Test and Save the ConfigurationClick Test to check the default configuration.The APP will send the default configuration to the Flex Gateway and start testing. Click Save the Config to ensure all settings take effect.Auto start to scan the address in turn according to Modbus range after the Sever testing.4.5) Activate Flex GatewayAfter testing and saving the configuration, the Activate button will be enabled. Click Activate and move to the next step. Ensure the mobile phone is connected to the Internet during this step.Input the site owner’s email address and click Next.Click Apply to proceed with activation. Name a new site or choose an existingsite. Name a new Flex Gateway.Choose the time zone of the site.When the installer logs out and back to the area of the same Flex Gateway again. This Flex Gateway should be shown as Activated. Click Activated.It displays the basic information of this Flex Gateway including the date of the last upload and the connection status of Servers.5. Hardware Datasheet of Flex Gateway 2.0Address 7060 Koll Center Parkway, Suite 318Pleasanton, CA 94566Hotline 855 584 7168Website 。
u-center2 用法

u-center2 用法
u-center2是u-blox公司开发的一款专为u-blox GNSS接收器设计的软件工具,主要用于配置和监控接收器的工作状态以及进行位置解算。
u-center2的主要用法包括:
1. 连接接收器:在u-center2中,可以通过串口、USB或者无
线方式与GNSS接收器进行连接。
连接成功后,u-center2将显示接收器的详细信息,包括型号、固件版本等。
2. 配置接收器:通过u-center2,可以配置接收器的工作模式、输出数据格式、波特率等参数。
可以根据具体需求,自定义接收器的工作方式。
3. 监控接收器状态:u-center2提供了丰富的状态监控功能,可以实时显示接收器的信号质量、卫星信号图、接收器的位置解算精度等信息。
可以通过这些信息,评估接收器的工作状况。
4. 数据记录和回放:u-center2支持将接收器接收到的原始数据进行记录和回放。
可以用于故障排查、性能评估等。
5. 卫星信号分析:u-center2提供了卫星信号分析工具,可以实时显示接收器所接收到的卫星信号质量。
可以用于选择合适的卫星以提高接收器的定位性能。
以上只是u-center2的一些常用用法,其功能非常丰富。
用户
可以根据具体需求,灵活使用u-center2来设置、监控和优化GNSS接收器的工作。
omnitrend center 安装和启用说明书

OMNITREND®Center安装和启用版本:2.7.1版的:2022/8/24文件编号:LIT82.201.ZH翻译手册翻译本文档的信息可能在无事先告知的情况下发生更改。
本文档中介绍的软件在提供时附有许可证协议。
只有在符合本协议中包含的条件时,才允许复制软件。
本文档或其片段未经PRÜFTECHNIK批准,不得印刷或以其他方式复制。
Fluke.OMNITREND是PRÜFTECHNIK AG的注册商标。
©Fluke.保留所有权利Fluke Deutschland GmbH85737Ismaning(德国)目录1引言51.1欢迎使用OMNITREND Center51.2开始前61.3安全81.4售后服务地址91.5系统条件102安装112.1安装服务器112.2配置服务器122.3准备服务器模块152.4启动/停止服务器162.5安装客户端182.6安装单机版192.7更新203启用213.1启动客户端/单用户应用213.2与服务器建立连接223.3中断/断开与服务器的连接233.4激活OMNITREND Center244索引27 OMNITREND Center│安装和启用3空白页1引言1.1欢迎使用OMNITREND CenterOMNITREND Center是一款新开发的状态监测软件,用于监测和诊断旋转设备的运行状态。
OMNITREND Center可对用普卢福公司(PRÜFTECHNIK AG)推出的便携式状态监测系统(如测量数据采集系统)或固定安装式状态监测系统(如在线设备)记录的设备园区的状态数据进行处理。
OMNITREND Center拥有丰富的实用分析功能,可帮助分析测量数据。
所有结果均以报告和调查结果形式进行记录和存档,令人一目了然。
在软件内,可借助测量模板和设备模板对状态监测系统进行配置,以便采集测量数据。
OMNITREND Center│安装和启用5安装和启用1.2开始前检查供货范围到货时请检查货物是否有受损件或缺失件。
e-天地商业信息管理系统--安装详细流程图解!!!

安装流程一、先安装IIS后台要安装Windows XP或以上的版本。
因为XP以上的版本系IE6.0,IIS版本也比较高。
IIS需要用直装的系统碟来安装,IIS的安装文件时放在安装的“I368”文件夹里面。
、安装步骤:1、打开添加删除程序里面的添加删除Windows组件:2、选中Internet 信息服务(IIS)后,并点击详细信息,里面的选项全部打勾(默认是头尾没打勾,把他们勾上就可以了):3、然后一直点击下一步,如果找不到文件需要浏览,就根据路径提示选择最终的文件或文件夹后,打开就可以了;一直到安装完成为止。
4.然后打开控制面板---里面管理工具---如果能看到并打开“Internet 信息服务”,那就说明IIS安装完成了,此时一定要把电脑重启一次。
二、安装“dotNetFramework3.5”框架重启完后安装“dotNetFramework3.5”框架,安装此框架之前一定要先安装IIS,后果时安装过程一般是不会报错,但实际会丢失很多文件。
点击下面图标开始安装:如果已经安装了或者安装失败过,会有以下画面。
建议先选择修复,如果不行就选择卸载,如果还是不行只能重装系统:此过程需要15~30分钟不等(主要看电脑配置)看到一下画面表示安装完成,点击推出后,安装中文预言包上、安装ReportViewer中文语言包;此安装过程分为“ReportViewer”和“ReportViewerLP”两个文件安装。
1、安装ReportViewer:2、安装ReportViewerLP:看到以下画面表示安装完成,点击完成,重启电脑。
四、安装E天地后台程序点击ClothSoftSetup安装后台程序:ClothSoft时数据库,服务器名、用户名和密码都是Microsoft SQL Server数据库软件的配置,以上内容不用修改,直接点下一步。
站点(默认站点)为IIS的站点,打开Internet信息服务可以看到,正常安装完后可以看到,IIS的默认网站下面多出一个ClothSoft网站。
FME 扩展 Currency Switcher 2 安装指南说明书

FME E XTENSIONSE XTENSION FOR M AGENTO 2 I NSTALLATION I NSTRUCTIONSI NTENDED A UDIENCEThe content of this document is designed to facilitate the users -managers, supervisors, and others of Currency Switcher Extensionfor Magento 2. A step by step instruction has been added to thisdocument to help users to install the extension on Magento 2.This extension will only work on Magento 2. As a safe practice alwaysbackup your files and database before installing any extension onMagento. If you are looking for someone to install the extension, wecan do it for you as well. Just go to the following link and let supportknow the order id to expedite the installation process.Once you have installed please see the User Guide to help youunderstand how to use the extension to its full capacity. If you stillhave questions, feel free to contact us on our website.T ABLE O F C ONTENTSI NTENDED A UDIENCE (2)I NSTALLATION I NSTRUCTIONS (4)M ETHOD I (4)M ETHOD II (5)D ISCLAIMER (6)I NSTALLATION I NSTRUCTIONSM ETHOD I1.Unzip fme_currency-switcher-x.x.x.zip to a local folder.2.Make folder FME into your_magento_directory/app/code/ (if you don't find codefolder within app folder, please create it first).3.Create following folders (as mentioned in step 2):a.app/code/FMEb.app/code/FME/CurrencySwitcher4.Copy all the contents from fme_currency-switcher-x.x.x to newly createdCurrencySwitcher folder.5.Note:This module uses the MaxMind GeoLite2 Country IP Database for GeoIPInformation. MaxMind is very reliable and updates its database every month.You can download the latest database fromhttps:///geoip/geoip2/geolite2/. Download the file GeoLite2-Country-CSV_xxxx.zip (file size: 1.08M approx and CSV Formate) and extract it.Copy 2 files name as ‘GeoLite2-Country-Blocks-IPV4.CSV’and‘GeoLite2-Country-Locations-en.CSV’to the /pub/media/geoipcurrencyswitcher folder insideMagento. Make sure that the files are named as GeoLite2-Country-Blocks-IPV4.CSV, GeoLite2-Country-Locations-en.CSV and 777 rights are given to themedia folder.6.Now open console or shell.7.Go to your Magento directory and run the below commands:a.php bin/magento module:enable FME_CurrencySwitcherb.php bin/magento setup:upgradec.php bin/magento setup:static-content:deploy -f (-f may not work inMagento versions less than 2.2.x.)d.chmod command for var/ pub/static and generated/ folders8.Reload the Magento admin and you will see FME Extensions in Left side Menu ofyour admin panel.M ETHOD II1.Unzip fme_currency-switcher-x.x.x.zip to a local folder.2.Make folder FME into your_magento_directory/app/code/ (if you don't find codefolder within app folder, please create it first).3.Create following folders (as mentioned in step 2):•app/code/FME•app/code/FME/CurrencySwitcher4.Copy all the contents from fme_currency-switcher-x.x.x to newly createdCurrencySwitcher folder.5.Note:This module uses the MaxMind GeoLite2 Country IP Database For GeoIPInformation. MaxMind is very reliable and updates its database every month.You can download the latest database fromhttps:///geoip/geoip2/geolite2/. Download the file GeoLite2-Country-CSV_xxxx.zip (file size: 1.08M approx and CSV Formate) and extract it.Copy 2 files name as ‘GeoLite2-Country-Blocks-IPV4.CSV’and‘GeoLite2-Country-Locations-en.CSV’to the /pub/media/geoipcurrencyswitcher folder insideMagento. Make sure that the files are named as GeoLite2-Country-Blocks-IPV4.CSV, GeoLite2-Country-Locations-en.CSV and 777 rights are given to themedia folder.6.Go to your_magento_directory/app/etc/7.Open config.php file in etc folder8.Add below line in $modules array at the end‘FME_CurrencySwitcher’=>1,9.Now open console or shell.10.Go to your Magento directory and run the below commandsa.php bin/magento setup:upgradeb.php bin/magento setup:static-content:deploy -f (-f may not work in Magentoversions less than 2.2.x.)c.chmod command for var/ pub/static and generated/ folders11.Reload the Magento admin and you will see FME Extensions in Left side Menu ofyour admin panel.D ISCLAIMERIt is highly recommended to back up your server files anddatabase before installing this module.No responsibility will be taken for any adverse effects occurringduring installation.It is recommended you install on a test server initially to carryout your own testing.。
E2_TC_manual_1.0CTTW

使用指南版本. 1.0CT+ 版權聲明感謝您購買 COWON 產品。
我們總是力臻至善,將最好的 DIGITAL PRIDE 交給客戶。
這份手冊的內容包含產品使用說明以及使用注意事項等相關資訊。
當您熟讀完這本手冊,您就可以盡情享受本產品所提供的數位體驗。
网站简介+ 相關產品的網站位址,請前往 。
+ 您可以從我們網站下載關於產品的最新資訊以及最新韌體。
+ 針對首次造訪的使用者,網站還提供 FAQ 專區以及使用指南。
+ 請使用產品背面的序號註冊產品,成為網站會員。
您就可以成為註冊會員。
+ 當您成為註冊會員後,您就可以使用一對一的諮詢服務接收線上客戶建議。
同時也會收到最新產品與活動相關資訊的電子郵件。
+ 版權聲明一般+ COWON 是 COWON SYSTEMS, INC. 的註冊商標。
+ COWON SYSTEMS, INC. 擁有這本手冊的版權,對於本手冊內容之部分或全部,嚴格禁止任何未經授權之散布。
+ COWON SYSTEMS, INC. 一切按照唱片、磁碟、影片及遊戲等相關法律規定辦理。
我們也強烈建議使用者遵守相關法律規定。
+ 購買本產品後,請立即造訪我們的網站 (),註冊成為會員。
享受會員專屬的各種服務。
+ 本手冊乃根據產品規格及各式示範文字、插圖、圖片、詳細功能與 H/W 及 S/W 規格所制訂,版權所有人得不經任何事先通知任意修改。
BBE 資訊+ 根據 USP4638258、5510752 及 5736897,BBE Sound, Inc. 擁有 BBE 名稱和本產品所使用相關資訊的授權。
+ BBE 及 BBE 標誌是 BBE Sound, Inc. 的註冊商標。
All rights reserved by COWON SYSTEMS, Inc.+ 目錄用前須知 !預防措施包裝內容零件與功能名稱充電與電腦連接及移除韌體升級基本用法LED 燈號說明音樂播放和使用產品其他說明產品規格COWON MediaCenter – 使用 JetAudio 轉換音樂 CD 疑難排解614 18 22用前須知 !+ 預防措施這些預防措施的目的是為了正確使用產品以及使用者安全而設計,請務必詳讀。
E2Q业务基础平台培训教材

E2Q业务基础平台培训教材(操作篇)此教材与《E2Q安装手册》和《E2Q帮助》结合使用重庆亚德科技有限责任公司目录1. E2Q业务基础平台安装布署 (4)1.1. E2Q业务基础平台安装说明 (4)1.1.1. 安装JDK (4)1.1.2. 安装E2QStudio (4)1.1.3. 安装E2Q Web服务 (4)1.2. E2QStudio服务配置 (4)1.3. WEB端访问 (5)2. E2Q业务基础平台 (6)2.1. 数据库连接配置 (6)2.1.1. E2QStudio本地数据库连接配置 (6)2.1.2. E2QStudio远端数据库(E2Q应用系统数据库)连接配置 (6)2.1.3. Jrun连接池配置 (6)2.1.4.Tomcat连接池配置 (7)2.2. 数据表建模 (8)2.2.1. 分类操作 (8)2.2.2. 记录表操作 (8)2.2.2.1. 记录表分类和组成 (8)2.2.2.2. 要素数据类型 (9)2.2.2.3. 要素操作 (9)2.2.3. 数据上传下载 (11)2.3. 业务流程建模 (12)2.3.1. 新建过程 (12)2.3.2. 打开过程 (12)2.3.3. 编辑过程 (12)2.3.3.1. 新增活动 (12)2.3.3.2. 复制活动 (12)2.3.3.3. 编辑活动属性 (13)2.3.3.4. 编辑活动规则 (13)2.3.3.5. 删除活动 (13)2.3.3.6. 新增转移条件 (13)2.3.3.7. 删除转移条件 (14)2.3.3.8. 增加视图 (14)2.3.3.9. 编辑视图 (14)2.3.3.10. 编辑视图卡片 (15)2.3.3.11. 编辑视图网络 (15)2.3.3.12. 编辑视图规则 (16)2.3.3.13. 修改视图位置 (16)2.3.3.14. 删除视图 (16)2.3.4. 修改过程属性 (17)2.3.5. 删除过程 (17)2.4. 数据报表 (17)2.4.1. 新建报表 (17)2.4.2. 打开报表 (17)2.4.3. 修改报表属性 (18)2.4.4. 报表设计 (18)2.4.5. 删除报表 (20)2.5. 图表 (20)3. E2Q Web操作说明 (20)3.1. 建立企业组织机构 (20)3.1.1. 系统管理员登录 (20)3.1.2. 基础设置 (21)3.1.2.1. 创建部门 (21)3.1.2.2. 创建岗位 (23)3.1.2.3. 创建用户 (24)3.2. 过程活动权限分配 (26)3.2.1. 设置过程启动权限 (26)3.2.2. 设置活动权限 (27)4. E2Q集成工具 (27)4.1. E2Q文件服务器 (27)4.2. RTX集成 (27)5. 常见问题 (28)1. E2Q业务基础平台安装布署1.1. E2Q业务基础平台安装说明1.1.1. 安装JDK运行安装程序E2QSetup.exe后,点击“安装JDK”安装程序自动安装JDK;1.1.2. 安装E2QStudio运行安装程序E2QSetup.exe后,点击“安装E2Q STUDIO”安装程序自动安装E2QStuio;1.1.3. 安装E2Q Web服务1.安装Tomcat服务运行安装程序E2QSetup.exe后,点击“安装E2Q平台_Tomcat服务”安装程序自动安装E2QWeb服务—TomCat服务;在安装完成后需配置安装Web数据库服务,在弹出的数据配置窗口中设置相应的数据库服务器(或数据库服务器的IP地址)以及数据访问用户sa的密码,配置程序将自动创建Web 数据库。
Xen center使用说明

Xen center关于xencenter 这个软件,在下载xenserver 的时候思杰网站上有,大家可以去官网下载。
网址/lang/English/home.asp另外我再说下这个东西需要微软的.NET Framework 2.0 的支持,不装的话是无法安装的各位请注意。
另外就是这东西需要注册,如果不注册的话只能使用30天,这东西是免费的大家可以去他的官网上申请个免费的license 这样就可以使用了。
申请和安装的过程很简单我就不多说了。
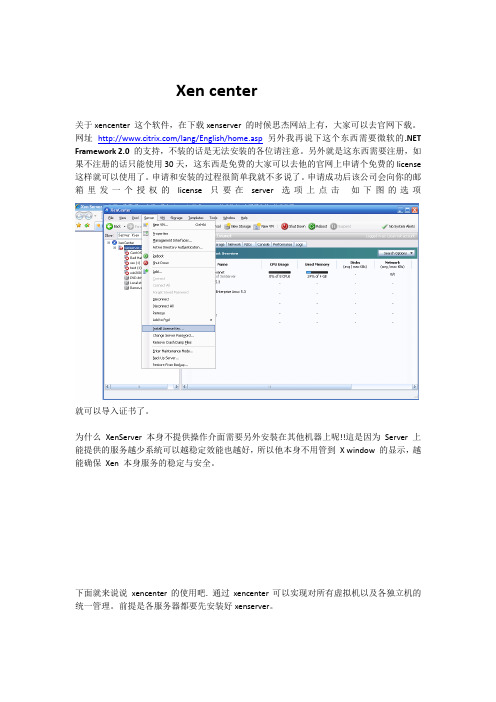
申请成功后该公司会向你的邮箱里发一个授权的license 只要在server选项上点击如下图的选项就可以导入证书了。
为什么XenServer 本身不提供操作介面需要另外安裝在其他机器上呢!!這是因为Server 上能提供的服务越少系統可以越稳定效能也越好,所以他本身不用管到X window 的显示,越能确保Xen 本身服务的稳定与安全。
下面就来说说xencenter的使用吧. 通过xencenter可以实现对所有虚拟机以及各独立机的统一管理。
前提是各服务器都要先安装好xenserver。
上图就是打开后的xencenter的使用界面我先说下如何连接到xenserver用鼠标点击add new server 如下图出现该对话框后在hostname上填写你的服务器地址用户名和密码。
这个就是你安装XENSEVER的时候所设置的密码填好后如下图上面在XENCENTER下是你的主机和主机下的虚机列表。
开始情况下是什么都没有的不过我用这个机器做了很多实验所以大家看见的是有很多虚拟机器的情况。
下面我就来说说如何创建一个新的虚机点击NEW VM然后会出现如下图。
上面的2个SSS 和test大家可以忽略这个事我创建的快照这个东西功能非常强大一会我在说关于快照的问题。
然后选择好自己所需要安装的操作系统。
列入windows2003选择好后点击next上面可以出现该主机的一些基本信息,大家可以给该主机起个名字啊。
- 1、下载文档前请自行甄别文档内容的完整性,平台不提供额外的编辑、内容补充、找答案等附加服务。
- 2、"仅部分预览"的文档,不可在线预览部分如存在完整性等问题,可反馈申请退款(可完整预览的文档不适用该条件!)。
- 3、如文档侵犯您的权益,请联系客服反馈,我们会尽快为您处理(人工客服工作时间:9:00-18:30)。
软件列表硬件要求:∙CPU 型号:Intel,AMD∙CPU频率:2G∙内存容量:4GB DDR3∙硬盘容量:300GB ,7200转,SATA∙光驱类型:DVD-ROM∙网络接口:1000兆网卡∙USB接口:USB2.0(3个以上)∙屏幕尺寸:建议选用19英寸或以上系统准备:∙操作系统:Windows7 32/64位旗舰版∙安装.NET4.0版本框架∙安装WINDOWS系统重要补丁∙检测系统防火墙是否正常:打开:控制面板\所有控制面板项\Windows 防火墙(若平台有800D采集器,则需要更改Windows 防火墙设置)如果防火墙不能正常工作,请联系系统管理员进行处理,或重新安装操作系统电源设置,让系统处于高性能工作模式:打开:控制面板\所有控制面板项\电源选项:不要让计算机休眠和睡眠。
安装mysql 数据库配置MYSQL数据库如果是初次安装MYSQL,直接输入新的密码就可以,下图是之前安装过MYSQL的界面需要输入之前的密码和新的密码。
安装mysql-connector-net-6.5.4 mysql-connector-odbc-5.1.8-win32 安装NAVICAT FOR MYSQL安装jdk-7u45-windows-i586配置java环境变量1.打开控制面板\所有控制面板项\系统1. 选择左侧功能菜单:高级系统设置2. 选择:环境变量3. 新建:系统变量JAVA_HOME(第2个新建按钮)变量名:JAVA_HOME变量值:java安装目录,C:\Program Files (x86)\Java\jdk1.7.0_454. 编辑:系统变量Path(此变量已经存在)在变量值字符串前面增加:%JAVA_HOME%\bin;注意:不要漏掉分号5. 新建:系统变量CLASSPATH(第2个新建按钮)变量名:CLASSPATH变量值:.;%JAVA_HOME%\java\jre7\lib\rt.jar;%JAVA_HOME%\java\jre7\lib\tools.jar6. 完成后点击确定按钮,关闭环境变量窗口,重新计入环境变量窗口,检查刚才新增和编辑的环境变量是否生效,若没有生效请再次编辑。
7. 打开cmd,输入javac –version ,输出应该是安装Java版本号安装tomcat(也可直接拷贝tomcat目录,这样不需要进行安装操作)安装完成,启动服务看是否成功。
安装dotNetFx40,安装完成重新启动机器查看系统是否安装了framework4.0,如果没有,请安装,安装结束后重启机器。
初始化MYSQL数据库装好后,不要删除自带的三个数据库(删除会导致不能进入MYSQL,错误2003/1045)1. 准备初始化MYSQL数据库文件,将初始化文件120830094930.psc拷贝到D:\BMS\Mysql目录下,打开NAVICAT for mysql工具连接到MYSQL数据库。
2. 在NAVICAT中新建数据库:数据库名:energy字符集:utf8 -- UTF-8 Unicode排序规则:utf8_general_ci3. 恢复mysql数据库打开cmd执行命令:mysql -uroot –p sams energy<d:/bms/energy.sqlsams为数据库密码energy为已创建数据库名称d:/bms/energy.sql 为恢复的数据库文件路径执行成功后打开navicat查看数据库的表,视图和函数是否已经创建成功。
4. 保存数据库mysqldump -uroot -psams --allow-keyword --opt --quick --routine s --triggers -E energy>d:/xdsc.sqlsams为密码 energy为要备份的数据库名称,d:/xdsc.sql 为备份文件请根据实际情况修改部署能源管理系统1. 将部署文件apache-tomcat-7.0.6拷贝到D盘根目录d:/bms下2. 修改配置文件WEB-INFD:\bms\apache-tomcat-7.0.124\conf\Catalina\localhost\XXXX.xml --------这个文件是指向apache-tomcat-7.0.124目录下的XXXX文件夹,XXXX.xml用记事本打开,下面中的红字部分就是XXXX文件夹路径<Context docBase="D:\bms\apache-tomcat-7.0.124\XXXX"privileged="true" antiResourceLocking="false" antiJARLocking="false">apache-tomcat-7.0.124\XXXX\WEB-INF\classes\ jdbc.properties--------这个文件用记事本打开,红字是MYSQL数据库名;蓝字是MYSQL 用户名及密码#local mysql databasemonitoring.jdbc.url=jdbc:mysql://localhost:3306/energy?useUnicode=true& characterEncoding=UTF-8ername=rootmonitoring.jdbc.password=sams3.修改ername和monitoring.jdbc.password为设定的值。
4.启动TOMCAT服务D:\apache-tomcat-7.0.6\bin\startup.bat等待启动完成5.在浏览器中打开网址http://127.0.0.1:8080/bms/login.action,查看是否正常进入系统6.设置windows防火墙:设置TCP可访问7.打开高级WINDOWS防火墙,新增入站规则和出站规则,针对端口,端口号为:8080,8989TIBBO虚拟串口配置安装虚拟串口工具tibbo按图示例进行配置平台软件配置平台软件安装主目录:D:\BMS1、注册平台软件服务:1、核心组态服务:运行批处理程序在cmd命令行模式下执行:生成服务cmcoreserver,注册服务是否成功在控制面板服务中查看是否有该服务InstallUtil.exe这个文件属性里要设置成管理员权限installCMCORESERVER.bat这个文件要右键管理员打开如此打开文件,服务才能安装上Wsconfig.ini这个文件要配置好Cd D:\BMS\cmcoreserver\D:installCMCORESERVER.bat2、数据库存储软件服务:Cd D:\BMS\cmcoreserver\D:installCMARCCLIENT.bat3、数据加载软件:Cd D:\BMS\cmdataserver\D:installCMDataServer.bat4、同步软件服务:Cd D:\BMS\ CMSYNCCLIENT\D:InstallCMSYNCCLIENT.bat将本地数据同步到中心数据库中。
修改运行目录下的SyncClient.exe.config文件内容:其中这段语句:<endpoint address=":9618/SyncCenter" binding="basicHttpBinding"红色‘:’是公司服务器域名蓝色‘9618’是每个项目网页在服务器上的端口,设置前先在徐总那里报备,然后徐总分配一个端口号,设置在这里5、平台外部数据通讯服务实现平台变量的写入操作:直接赋值,平台间变量赋值,数据库读取数据赋值操作。
Cd D:\BMS\CMITCC\D:installcmitcc.bat6、启动数据采集服务软件:运行可执行程序:D:\BMS\LcdAueServer\ZtDauServer.exe从采集器获取数据并存储到指定的mysql数据库中配置如截图:数据库为MYSQL配置数据库名称表名为:t_meterorigvalue正确输入:数据库用户名和密码2、wsconfig.ini配置文件说明:1、在每个软件目录下有配置文件:wsconfig.ini 内容如下:红色是需要修改部分内容修改好后将文件分别拷贝到各服务目录下:3、tb_db2clserver_config表配置说明配置表tb_db2clserver_config表的说明:Sid:序号整型唯一不重复Datatype:数据类型三种类型:1 值;2 平台自有变量;3 sql语句Cname:变量名称在组态中已经定义好的变量,变量名称为全称例如:modbus_connection_plug.variable_4 Cvalue:变量值针对Datatype给出变量的值当Datatype=1时,直接给出该变量的一个值如:100、2.5、390.12、ABC、M表示将100这个值赋给cname对用的变量modbus_connection_plug.variable_4当Datatype=2时,为组态中已经定义好的另外的一个变量,变量名称为全称例如:modbus_connection_plug.variable_3表示将变量modbus_connection_plug.variable_3的值赋给modbus_connection_plug.variable_4 当Datatype=3时,改内容为一个SQL语句,改sql语句的结果有唯一的返回值,系统将把这个返回值赋给modbus_connection_plug.variable_4;SQL语句的语法框架为:SELECT COLUMNNAME FROM TABLE LIMIT 1注意该SQL语句只能选取一个字段并且只能有一个返回值, COLUMNNAME和TABLE 部分根据所需进行编写;TABLE 部分可以为子查询COLUMNNAME字段可以是计算字段。
Enablex:该条记录是否有效,只有两种状态0和1;0为无效默认为0;1为有效。
4、数据加载配置配置表Data_status_mid 和Data_status1.Data_status_midBuildingsid:建筑SID;Interdatatime:能耗数据已加载截至时间,整点30分钟:初始需要设置Rtdatatime:组态实时数据已加载截至时间,5分钟:初始需要设置Basedate:能耗和组态实时数据截至时间:规则如下:Interdatatime>= Rtdatatime 结果为RtdatatimeInterdatatime< Rtdatatime AND Rtdatatime –Interdatatime<30 结果为RtdatatimeInterdatatime< Rtdatatime AND Rtdatatime –Interdatatime>=30 结果为Interdatatime+25 2.Data_statusBuildingsid:建筑SID;初始需要设置Basedate:根据Data_status_mid表的数据获取和Data_status_mid表的Basedate数据相等;Middate:专家系统已计算的截至时间该时间一直要计算到basedate时间;初始需要设置Kpidate:kpi表计算的截至时间,初始需要设置3、t_meterorigvalue_status表设置该表存储数据采集器中mssqlserver数据库已经同步到mysql数据库的记录序号:设定T_MeterOrigValue_sid的值为MYSQL已有数据的最大序号加1;初始设置为0,或MSSQLSERVER中有效数据的最小序号。
