nexus 4 说明书(中文版)
AtlasIED Atmosphere AZA404四通道网络放大器说明书

S o u n d L P . T h e A t l a s “C i r c l e A ”, S o u n d o l i e r , a n d A t l a s S o u n d a r e t r a d e m a r k s o f A t l a s S o u n d L .P . I E D i s a R e g i s t e r e d T r a d e m a r k o f I n n o v a t i v e E l e c t r o n i c D e s i g n s L L C . A l l r i g h t s r e s e r v e d . d e m a r k s a r e p r o p e r t y o f t h e i r r e s p e c t i v e o w n e r s . N o e n d o r s e m e n t i s i m p l i e d . D u e t o c o n t i n u a l p r o d u c t d e v e l o p m e n t , s p e c i f i c a t i o n s a r e s u b j e c t t o c h a n g e w i t h o u t n o t i c e . A T S 006181 R e v C 8/20AZA404Multi-Channel Network AmplifierApplicationsAZA Series amplifiers integrate with Atmosphere signal processors which makes them ideal for use in restaurants, presentation rooms,classrooms, conference rooms, and retail background / foreground music applications.General DescriptionThe AtlasIED Atmosphere AZA404 four-channel amplifier is designed to interface with the Atmosphere family of products, such as the AZM series of processors. The AZA amplifiers can be configured in three different configurations to meet the design requirements of any installation. These AZA models are factory preconfigured in a four-channel, 70V mode. If the design requires four channels of low impedance amplification, the AZA amplifiers can be configured as four-channel models with either 4Ω or 8Ω load impedances. Many system designs require both low and high impedance amplification. These AZA models can be configured to deliver 70V / 100V for apaging / background system on two (2) channels plus two (2) additional 4Ω or 8Ω amplifier channels for foreground stereo application.These AZA models come standard with four (4) balanced line inputs and an accessory slot for an optional four-channel Dante™ receiver card (model DPA-DAC4), giving the AZA404 and AZA804 a total of up to eight (8) inputs. All inputs can be mixed and routed to any of the four amplifier channels. All four (4) amplifier channels have an assortment of advanced DSP tools.The AZA404 is ready to use out of the box in four-channel, 70V mode, with no configuration or network connectivity required, making them easily paired for use with AtlasIED Atmosphere Signal Processors.Features• 4 Amplified Channels• AZA404 Configuration Power Levels • 4 x 100-Watt 70V (Factory Default) • 4 x 100-Watt 100V • 4 x 75-Watt @ 8Ω • 4 x 50-Watt @ 4Ω• 2 x 100-Watt 70V/100V & 2 x 75-Watt @ 8Ω • 2 x 100-Watt 70V/100V & 2 x 75 -Watt @ 4Ω• Integrates with Atmosphere AZM Zone Master • Energy Efficient• Convection Cool / Fan Assist • Accepts Low Z & Hi Z Loads• Onboard Web UI for Remote Monitoring of Status & Levels • Front Panel Power Switch Disable• APD - Auto Power Down with Audio Sense Turn On •Dante™ Optional Accessory Card SlotS o u n d L P . T h e A t l a s “C i r c l e A ”, S o u n d o l i e r , a n d A t l a s S o u n d a r e t r a d e m a r k s o f A t l a s S o u n d L .P . I E D i s a R e g i s t e r e d T r a d e m a r k o f I n n o v a t i v e E l e c t r o n i c D e s i g n s L L C . A l l r i g h t s r e s e r v e d . d e m a r k s a r e p r o p e r t y o f t h e i r r e s p e c t i v e o w n e r s . N o e n d o r s e m e n t i s i m p l i e d . D u e t o c o n t i n u a l p r o d u c t d e v e l o p m e n t , s p e c i f i c a t i o n s a r e s u b j e c t t o c h a n g e w i t h o u t n o t i c e . A T S 006181 R e v C 8/20S o u n d L P . T h e A t l a s “C i r c l e A ”, S o u n d o l i e r , a n d A t l a s S o u n d a r e t r a d e m a r k s o f A t l a s S o u n d L .P . I E D i s a R e g i s t e r e d T r a d e m a r k o f I n n o v a t i v e E l e c t r o n i c D e s i g n s L L C . A l l r i g h t s r e s e r v e d . d e m a r k s a r e p r o p e r t y o f t h e i r r e s p e c t i v e o w n e r s . N o e n d o r s e m e n t i s i m p l i e d . D u e t o c o n t i n u a l p r o d u c t d e v e l o p m e n t , s p e c i f i c a t i o n s a r e s u b j e c t t o c h a n g e w i t h o u t n o t i c e . A T S 006181 R e v C 8/20S o u n d L P . T h e A t l a s “C i r c l e A ”, S o u n d o l i e r , a n d A t l a s S o u n d a r e t r a d e m a r k s o f A t l a s S o u n d L .P . I E D i s a R e g i s t e r e d T r a d e m a r k o f I n n o v a t i v e E l e c t r o n i c D e s i g n s L L C . A l l r i g h t s r e s e r v e d . d e m a r k s a r e p r o p e r t y o f t h e i r r e s p e c t i v e o w n e r s . N o e n d o r s e m e n t i s i m p l i e d . D u e t o c o n t i n u a l p r o d u c t d e v e l o p m e n t , s p e c i f i c a t i o n s a r e s u b j e c t t o c h a n g e w i t h o u t n o t i c e . A T S 006181 R e v C 8/20Notes:1. Power level measurement is defined as follows: 1KHz Sine wave signal burst of 20 cycles (20mS) at 1% THD+N, followed by 480 cycles of a 1kHz sine wave at 10% of the max power. Other power measurements are available upon requests.2. Power measurement with Ethernet connected. Without Ethernet connected deduct 0.2W3. Average Power is defined as Pink Noise input signal applied to achieve 1/4 of the 4 Ohm or 70.7V power rating.4. Max Power is defined as 1 KHz input signal applied to achieve the maximum power output before clipping into a 4 Ohm or 70.7V load.5. BTU is calculated by the AC Mains Power consumed minus the total power output measured at the specified load and condition, multiplied by 3.412. Example: 785 Watts from the AC Source - 600 Watts Total Output power = 185 x 3.412 = 631 BTUS o u n d L P . T h e A t l a s “C i r c l e A ”, S o u n d o l i e r , a n d A t l a s S o u n d a r e t r a d e m a r k s o f A t l a s S o u n d L .P . I E D i s a R e g i s t e r e d T r a d e m a r k o f I n n o v a t i v e E l e c t r o n i c D e s i g n s L L C . A l l r i g h t s r e s e r v e d . d e m a r k s a r e p r o p e r t y o f t h e i r r e s p e c t i v e o w n e r s . N o e n d o r s e m e n t i s i m p l i e d . D u e t o c o n t i n u a l p r o d u c t d e v e l o p m e n t , s p e c i f i c a t i o n s a r e s u b j e c t t o c h a n g e w i t h o u t n o t i c e . A T S 006181 R e v C 8/20Dimensional Drawings1"(25.4mm)S o u n d L P . T h e A t l a s “C i r c l e A ”, S o u n d o l i e r , a n d A t l a s S o u n d a r e t r a d e m a r k s o f A t l a s S o u n d L .P . I E D i s a R e g i s t e r e d T r a d e m a r k o f I n n o v a t i v e E l e c t r o n i c D e s i g n s L L C . A l l r i g h t s r e s e r v e d . d e m a r k s a r e p r o p e r t y o f t h e i r r e s p e c t i v e o w n e r s . N o e n d o r s e m e n t i s i m p l i e d . D u e t o c o n t i n u a l p r o d u c t d e v e l o p m e n t , s p e c i f i c a t i o n s a r e s u b j e c t t o c h a n g e w i t h o u t n o t i c e . A T S 006181 R e v C 8/20The rear-mounted Input connectors for inputs 1 - 4 shall be individually removable 3-way 3.5mm Phoenix type connectors that accept balanced line input signals (+) (–) and (GND) pins and will support unbalanced signals by connecting the (–) and (GND) pins together. The amplifier configuration and I/O Routing shall be done in the UI. Any Input shall be capable of being routed to any Output.The rear-mounted Output connector shall be a screw terminal block type for connecting speakers to the amplifier. The recommended wire to use shall be Class 3 rated,14-gauge wire or lower for speaker wiring. Amplifier output channel configurations shall be done in the amplifier UI. The amplifier shall be shipped with two speaker output terminal covers for safety. Included in the carton with the amplifier shall be eight (8) spade crimp terminals that accept 12-gauge wire and four (4) security cover screws (M3 x 8mm). Terminal block screws shall be M4. The amplifier shall be pre-configured at the factory for four-channel 70.7V / 100V mode.The amplifier shall have one (1) rear mounted Accessory Card Slot to add accessory modules. Accessory modules shall make available 4 additional inputs (for a total of 8) that can be routed to any of the four output channels. The DPA-DAC4 optional accessory card shall include a four-channel Dante™ Digital Audio inputs.The amplifier shall have a rear-mounted Ethernet connector to connect to a Local Area Network (LAN), computer, or router / switch using a standard RJ45 cable to access the amplifiers control settings.When network enabled, the amplifier shall have a UI home page with Output active meters, Output Configuration indicators and Network settings. All four amplifier channels shall have an assortment of DSP tools.The amplifier shall have four (4) rear-mounted Control Ports to allow assigned / configured Remote Level or Mute functions to be activated by external contact closure relay or controlled by voltage. Each Control Port pin shall be assigned to one function such as Mute or Level, but not both. Control Port assignment shall be done in the UI Mute, Link, Port Assignment Page. The factory default assignments for the Amplifier Control Ports are assign as a Remote Level & shall be as follows: C1 controls Output 1, C2 controls Output 2, C3 = controls Output 3, C4 controls Output 4. The Control Ports shall provide +10V and GND connections for Remote Level Control Port using 10k Ω Linear Taper pots.The AZA404 amplifier shall be ready to use, out of the box infour-channel, 70V mode, with no configuration or network connectivity required, The AZA404 shall be ideally suited to be used with AtlasIED Atmosphere Signal ProcessorsThe amplifier shall be an AtlasIED AZA404.Architect and Engineer SpecificationsThe AZA404 amplifier shall be ready to use, out of the box infour-channel, 70V mode, with no configuration or network connectivity required. The AZA404 shall be ideally suited to be used with AtlasIED Atmosphere Signal Processors. The AZA404 shall be configurable as four-channel high impedance 70V / 100V or four- channel low impedance 4Ω or 8Ω or two-channel low impedance 4Ω or 8Ω and two-channel high impedance 70V/100V mode. The I/O router shall be configured as follows: Input 1 routed to Outputs 1, Input 2 to Output 2, Input 3 to Output 3 and Input 4 to Output 4. This out of box configuration will not require a computer or network to operate.The performance specifications shall match or exceed the following: 70V / 100V = 4CH x 100W; 8Ω = 4CH x 75W, 4Ω = 4CH x 50W; 70V / 100V = 2CH x 100W & 8Ω = 2 CH x 75W; 70V / 100V = 2CH x 100W & 4Ω = 4CH x 50W;(reference specifications Notes 1-4); Input Sensitivity 750mV Balanced, 0dBU; Input Impedance Balanced 40K Ohms; Max Input Level channels 1-4, +14dBU, 7dBU inputs 5-8 with Dante™; THD 1% at rated output, .2% Typical; Frequency Response -3dB 20Hz @ 20kHz (DSP set to flat); Signal to Noise Ratio -100dB Below Rated Output A Weighted; Crosstalk >70dB @1kHz; Protection circuits =Thermal, Short, Signal Limiter; Sleep Mode (Ethernet Active) 3.5W, 12BTU; Standby/ADP mode 14W, 48BTU; Max Power All CH driven 70.7V/100V (default mode) = 704W, 390BTU. Dimensions: 1 x RU, 19" W x 1.72" H x 15.5" D. Weight 13.1 lbs.The power amplifier shall have a front panel power switch and three states of idle power: Idle Active Mode, Sleep Mode, and Standby Auto Power Down (APD) Mode. Each mode shall have an LED indicator on the front panel indicating the power status. When in Sleep Mode, the Ethernet shall remain active for access to the amplifiers on board UI.The amplifier shall include convection cooling with dynamic fan assist for extreme conditions. If the unit is not being used or in Standby mode, the fan shall not be needed for cooling and shall remain Off until the unit is in heavy use. As heat is generated in the amplifier during use, the fan shall activate at a low speed and increase as needed to maintain the amplifier at safe operating temperature. The amplifiers air flow shall be from rear to front.The front panel controls shall consist of power switch that is defeatable in the UI. Each channel shall have LED indicators for Signal andLimit / Protect / Mute. The four-channel output operating mode shall be displayed to the right of the output indicators by 4 multicolor LEDs. These indicators illustrate if Channels 1 and 2 and 3 and 4 are low impedance 4Ω or 8Ω or 70V / 100V output. Amplifier operation mode settings shall be completed using the internal DSP UI.On the rear panel, the amplifier shall have an IEC AC receptacle that operates from 110V - 120V & 220V - 240V and shall automatically sense the AC Mains voltage and change voltage settings. A removable AC Mains fuse shall be provided for protection.。
霍尼韦尔X4使用中文说明
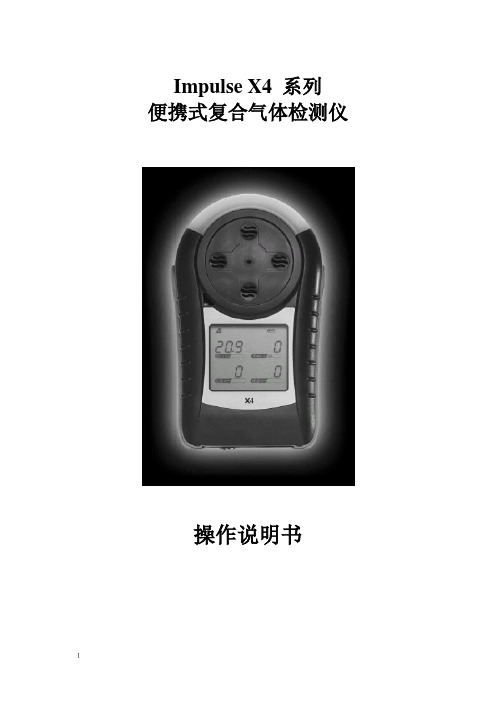
Impulse X4 系列便携式复合气体检测仪操作说明书!重要提示:!在首次使用仪器以前请认真阅读本手册,您将会掌握仪器正确的使用方法和了解仪器的功能,包括操作,维护,功能设置等内容。
!为了使操作者更安全,请按照手册中的要求,定期对仪器进行标定。
!如果在使用过程中,遇到的故障或问题在本手册中没有提到,请直接联系制造商Zellweger Analytics,或联系当地的代理商/服务商。
!警告和注意:·更换任何元器件都有可能损坏仪器的本质安全结构。
·如果需要使用存储卡,请选用Zellweger Analytics 提供的存储卡(订货号2566-0435),使用其它的存储卡有可能损坏仪器的本质安全结构。
·在允许的储存期之后激活检测器,有可能影响仪器的使用性能和保质期。
·应使用许可的5号干电池,如劲量电池,不要使用质量低下的干电池,以免影响仪器的本质安全性能。
·在更换电池时,应同时更换2节型号相同的新电池。
·在电池欠压提示后,应尽快更换新电池,以免旧电池漏液损坏仪器。
·在低温环境下,电池的寿命会缩短。
·更换电池时,应该在安全环境下进行。
·当更换任何一个传感器的情况下,都需要对仪器进行标定。
·在每天使用以前,应完成仪器的自检过程。
·定期的对仪器用标气进行测试,检查声、光、振动报警是否正常。
·标定时应选用厂家或国家认证合格企业提供的标准气体。
·标定时应在良好通风的环境下进行,以避免污染。
·不要在仪器电量不足的情况下标定。
·不要在富氧的环境下使用本仪器。
·可燃气体传感器的灵敏度会受到高浓度硫化物,卤素化合物,含硅化合物,以及含铅气体或蒸汽的影响,也叫“中毒”,应避免在以上的环境中使用仪器,如果必须使用,则使用完后应对仪器进行检测和标定,以免影响以后的使用。
Nexus 4就得这么玩 谷歌四儿子体验MIUI

自从谷歌四儿子Nexus 4(以下简称:N4)问世以来,其在全球范围内的受欢迎程度绝对不亚于iphone。
硕大的屏显、主流的配置、唯美的做工、无暇的手感加上官方公布的低廉价格,使得该手机在发布初期经常卖断货。
与此同时,在国内,所有商家都本着优良的“加价不加量”的光荣传统,使得N4的价格一直居高不下,一时间成为了不差钱人士的首选,这也让许多囊中羞涩的买家望而却步。
时过境迁,现在N4的价格已经趋于稳定,非常亲民了,同时也引来了更多消费者的关注。
但是我们不得不承认,搭载着原生Android系统的N4在上手起来非常的不便,同时也缺乏了许多必要的实用功能。
如此一来,对于刚刚接触Android系统的用户就显得更加的麻烦了。
这个时候我们何不尝试去刷入一个最适合中国人使用习惯的ROM呢?不用多说,大家已经猜到了,这便是今天笔者要谈到的话题——Nexus 4体验MIUI。
锁屏与下拉通知栏首先笔者要声明的一点就是,本次在N4中刷入的MIUI并非小米公司官方制作的,而是来自民间高手的移植作品。
熟悉MIUI的朋友肯定都知道,该系统的默认锁屏样式是以一个圆点为中心,用户手指点按之后会在上下左右四个方向显示4个功能,划到哪个位置就可以开启对应的功能。
同时,如果双击这个圆点的话,就可以激活音乐模式。
Nexus 4的MIUI系统截图细心的读者肯定都会发现,在锁屏状态下的屏幕左下角有一个类似于菜单键的虚拟按键。
的确,那个就是菜单键,但按上以后没有任何的作用,笔者相信这是一个BUG所在。
虽然在视觉方面有些欠妥,但是绝不影响正常使用的。
其实这也有个“好处”,那就是让我们更容易分辨出这不是一款出自官方的ROM了。
Nexus 4的MIUI系统截图在下拉通知栏方面,我们能够看到MIUI V5那浓郁的气息,简洁模式与单页模式的显示样式可以根据用户自己的喜好自由的切换。
只不过,笔者还是建议大家选择简洁模式,毕竟有很多功能选项只要一次性设置完之后就不用再二次设定了。
兰尼电子GS412L Bass电钢琴电铃器说明书

42 11 42 1L A N E Y A M P L I F I C A T I O Nw w w.l a n e y.c o.u kGS412LAGS412LSLaneyDear Player,Thank you very much for purchasing your new Laney product and becoming part of the worldwide Laney family. Each and every Laney unit is designed and built with the utmost attention to care and detail, so I trust yours will give you many years of enjoyment.Laney products have a heritage which stretches back to 1967 when I first began building valve amplifiers in my parent’s garage. Since then we have moved on from strength to strength developing an extensive range of guitar, bass, public address and keyboard amplification products along with a list of Laney endorsees that includes some of the world’s most famous and respected musicians. At the same time we believe we have not lost sight of the reason Laney was founded in the first place - a dedication to building great sounding amplification for working musicians. Warm Regards,Lyndon Laney CEOPage 2/4412 412INTRODUCTIONThe GS412LA & GS412LS are a pair 4 x 12” cabinets optimised for use with GH100TI - to enhance the amplifiers huge tonal range and produce stunning tone at any volume, but are equally at home with any other amplifier from the Laney range.Rated at 320 watts (16 ohms) these cabinets can be used in isolation or together to form an 8 x 12 stack. Construction features a robust plywood cabinet, with black powdercoated steel side bar handles and corner protection, castor cups on top of the straight cabinet to allow stacking, removable kick proof grille and a set of roadworthy casters mounted to each model for ease of mobility.Every Laney product is extensively play tested by experienced guitarists to ensure it has the tone and durability to perform at the very highest level, before being shipped to our customers.We hope you enjoy using your new extension cabinet as much as we enjoyed designing and making it. It should give you years of trouble-free service, however please take time to read this manual, as it will allow you to get the best from your GS412LA or GS412LS.Best wishes from all at Laney.LaneyCHECK CONTENTS ARE ALL INCLUDED16 Ohms16 OhmsDesigned in the UK by Laney1. Open top of carton, remove top foam tray and open protective bag, pull back to sides.2. Flip carton over. Cabinet rests on its castors.3. Remove the Carton, bottom foam tray and protective bag.4. Enjoy.UNPACKING INSTRUCTIONSAlways use good quality speaker cablesThis product conforms to the requirements of the following European Regulations, Directives & Rules:-CE Mark (93/68/EEC), LowIn order to reduce environmental damage, at the end of its useful life, this product must not be disposed of along with normal household waste to landfill sites. It must be taken to an approved recycling centre according to the recommendations of the WEEE(Waste Electrical and Electronic Equipment) directive applicable in your country.IMPORTANT SAFETY INSTRUCTIONSDuration Per Day In Hours 864321 ½1½¼ or less Sound Level dBA, slow response 909295971001021051101151). Read & Retain these Instructions carefully before installing or operating this product.2). Comply with Warnings: All warnings and instructions for these products should be adhered to.3). Unpacking: On unpacking your product please check carefully for any signs of damage that may have occured whilst in transit from the Laney factory to your dealer. In the unlikely event that there has been damage, please repack your unit in it original carton and consult your dealer. We strongly advise you to keep your original transit carton, since in the unlikly event that your unit should develop a fault, you will be able to return it to you dealer for rectification securely packed.4). Amplifier Connection: In order to avoid damage , it is advisable to establish and follow a pattern for turning on and off your system. With all system parts connected, turn on source equipment, tape decks, cd players, mixers, effects processors etc, BEFORE turing on your guitar amplifier. Many products have large transient surges at turn on and off which can cause damage to your speakers.By turning on your guitar amplifier LAST and making sure its level control is set to a minimum, any transients from other equipment should not reach your loud speakers. Wait till all system parts have stabillised, usually a couple of seconds. Similarly when turning off your system always turn down the level controls on your guitar amplifier and then turn off its power before turning off other equipment5). Cables: Never use shielded or microphone cable for any speaker connections as this will not be stubstantial enough to handle the amplifier load and could cause damage to your complete system.6). Caution: These professional loudspeaker systems are capable of generating very high sound pressure levels. Use care with placement and operation to avoid excessive levels that can cause permament hearing damage.7). Exposure to extremely high noise levels may cause a permanent hearing loss. Individuals vary considerably in susceptibility to noise induced hearing loss, but nearly everyone will lose some hearing if exposed to sufficiently intense noise for a sufficient time.The U.S. Government's Occupational Safety and Health Administration (OSHA) hasspecified the permissible noise level exposure in the chart oposite.According to OSHA, any exposure in excess of the above permissible limits could result insome hearing loss. Ear plugs or protectors in the ear canals or over the ears must beworn when operating this amplification system in order to prevent a permanent hearingloss if exposure exceeds the limits set forth oposite. T o ensure against potentiallydangerous exposure to high sound pressure levels it is recommended that all persons exposed to equipment capable of producing high sound pressure levels such as this amplification system be protected by hearing protectors while this unit is in operation.8). Servicing: The user should not attempt to service these products. Refer all servicing to qualified service personnel。
大型游戏机厂家使用说明书

-4-
概述
检查机器出厂包装件 包装清单:本产品包装为一个整体,打开包装后即可插电使用。
请注意
● 请仔细确认包装附件是否齐备 ● 如有缺货情况发生,请及时与经销店及货运承担商联系。
-5-
机台功能简介
整机前面部分介绍
-6-
机台功能简介
内部线路连接示意图
-1-
前言
感谢您购买本公司出品的“3D 索尼克”(以下简称“本机”)产品,在使用本 产品之前,请认真阅读本说明书。当您开始使用本产品时,我们认为您已经认真 阅读了本说明书。使用说明书的所有内容均是通过本公司细心编写,如有任何印 刷错漏或翻译错误望广大用户谅解。当本机软件如需升级时,涉及的内容有所改 变时,恕不另行通知,请谅解。 本说明书的部份图片是在开发阶段设计的,可能与实物略有不同,但不会影响用 户使用。 在本使用说明书中说明了以下内容: ● 安全地进行本机的搬运、安装、移动、运行、设置、维护、废弃方法。 ● 为充分运用本机的功能详细提供了游戏设置、玩法。 ● 为确保使用本机的玩家以及在周围参观的人士的安全的方法。 ● 关于本机简易故障排除和本机修理的方法。 ● 关于本机操作或维修的疑问,请向我司经销店或客户服务中心咨询。
清扫脏污
注意
● 不要使用如酒精和丙酮等有机溶剂,用于清洗。有机溶剂可导致材料损耗。 ● 不要使用碱性或酸性的清洁剂。
本游戏每关有四个难度,每次必须跑在第一才能进入下一难度,如在规定时间内 未完成或完成了但不是第一名都将失败。
- 17 -
游戏玩法
42 寸 3D 高清液晶显示器,冲击您的视觉感观。 时尚外观设计、新颖独特。动感方向盘和坐椅,让你身临其境。满足您的人性化需求。 14 个游戏人物和汽车、5 个难度模式、6 个地图、随你选择。晋级模式,15 个晋级关卡. 新滚轮设计,移动方便快捷。 为方便顾客使用,本游戏设有 3D/2D 切换功能键,游戏者可根据自己需要手动调节。 该游戏为新型摸拟游戏,与其它模拟游戏相比较,这款游戏更具有动漫艺术气息。新增的游戏道具,主游戏更刺 激。 本游戏通过定时和任务模式同时进行游戏,不仅要在规定时间内完成,还要是参赛选手中最优秀的才能通关。 玩家每关都有三条生命,请好好珍惜哦。 本游戏通过计时和任务晋级,时间耗尽即游戏结束,任务未完成,游戏结束。只有在规定时间内完成任务才能进 入下一游戏关卡。游戏中共有八名选手一起游戏,你是其中一员,游戏结过关或结束时系统会对所有游戏选手的 表现进行排名
nexus 4_5_7 安卓4.4.4 KTU84P 一键root办法教程-基础入门-Nexus中文网

true
帖子
4加关注
最新评论
Nexusage1小时前
在什么节奏,谷歌释放安卓4.4.4 KTU84P系
统底包中评论
好吧,姑姑壮阳药喝多了~Android
上一篇:nexus 4安卓4.4如何实现透明状态栏和导航栏?
下一篇:安卓4.4kitkat如何选择默认的短信应用?
10条评论1条新浪微博
等等高手
对,因为这个蛋疼地重刷了两次!
回复 kirinmini:
回复顶转发举报
回复顶转发举报
回复顶转发举报
回复顶转发举报
回复顶转发举报
回复顶转发举报
回复顶转发举报
回复顶转发举报
回复顶转发举报
回复顶转发举报Nexus4user
?
小雨滴
?
ddmxx: TWRP 下载不了,楼主网盘分享个吧
ˉ
root ...
Archiver )。
Vicon Nexus 使用指南
VICON NEXUS 入门手册目录未找到目录项。
Vicon Nexus.研究是繁杂的,软件却必须简洁!专为前沿的科研和临床分析设计的软件欢迎使用Vicon Nexus Nexus的主要功能易学易用Nexus提供了前超水平的易用性来节省您的时间。
用户界面根据现代的UI原则设计,并且指引您轻松的完成所有设置,捕捉,数据采集和复查阶段。
不再需要话费几天的时间来学习晦涩难懂的菜单。
您可以轻松的在Nexus中找到您所需要的按钮和菜单。
本机实时Nexus其核心就是实时功能,让您可以实时浏览数据。
如果您新添加了一个摄像头到系统中,您无需告诉Nexus,它会告诉您。
而Nexus中独特的剂量计将通知您在实时状态下发生的意想不到的事情。
您可以边采集边检查数据质量,这将消除一些意外的情况。
无缝视频Nexus是第一款应用软件可以无缝接合数字参考视频。
显著地加强了您的经验和分析进程。
您也可以将三维信息重叠于视频图像之上。
比如,地面反作用力的矢量图或者三维标记点的位置来与视频图像重叠。
我们还提供给您可用DV和DCAM标准的多样化数字视频摄像机。
任意定制另一个非常棒的功能关于Nexus是您可以令它按照您方式来工作。
您可以任意改变它符合您的需要。
定制协议器可使您创建您自己基于向导的工作流程,以深入简化Nexus使用以及逐步执行的常见任务。
硬件组成及配件硬件●摄像机(T160/T40/T20/T10…)⏹Vicon的最新的光学摄像机,含有定制传感器和镜头、高能红外发光器、强大的在线处理技术、高以太网传输性和新的人体工学设计。
该摄像机具有极高的性能,可在120fps的全幅捕捉速度下达到最高一千六百万象素的分辨率。
●MX Giganet⏹这个是Vicon处理系统的核心部分。
它连接您的T系列摄像机和PC电脑。
MX Giganet为摄像机提供交换、同步、供电、时间代码、同步耦合器、同步输出、以及连接第三方设备的界面(按照Giganet的速度)。
LG Nexus 4 硬件详细介绍
RF收发器:RTR8600
制造商:高通
其他信息:不明
无线收发器:Atheros WCN3660
制造商:高通
蓝牙支援:3.0,4.0(低耗能)
WiFi支援:802.11 a/b/g/n (2.4/5 GHz)
FM:支援
NFC:BCM2079x
制造商:Broadcom
电压:3.8V
类型:锂离子聚合物
耳机插孔:FSA8008
制造商:飞兆半导体公司(Fairchild Semiconductor)
检测:附件插头,3或4极音频,发送/结束键按下
功能:FSA8008A减少时序敏感 发送/结束键
开关类型:MIC
VDD:2.5V至4.4V
VIO:1.6V至VDD
指令集:ARMv7
Dhrystone: 3.3 DMIPS/MHz
内存:双通道 内存时钟:533MHz(8.5GB/s)
GPU:Adreno 320
制造商:高通
支援:OpenGL ES 3.0
最大纹理单元:2
最大纹理尺寸:4096
最大光源:8
支援能力:VOB,帧缓存器,立方体贴图,纹理合成器,DOT3合成,交互组合
开关频率为500kHz - 550kHz
电源电流:1.35毫安
半导体PowerWise:是
RAM:型号未知(应该是尔必达)
大小:2GB
技术支援:LPDDR
NAND芯片:型号未知(应该是闪迪)
大小:8GB或16GB
电池:LG BL-T5
制造商:LG
容量:2100mAh/8.0Wh(最低2030mAh/7.7Wh)
- 1、下载文档前请自行甄别文档内容的完整性,平台不提供额外的编辑、内容补充、找答案等附加服务。
- 2、"仅部分预览"的文档,不可在线预览部分如存在完整性等问题,可反馈申请退款(可完整预览的文档不适用该条件!)。
- 3、如文档侵犯您的权益,请联系客服反馈,我们会尽快为您处理(人工客服工作时间:9:00-18:30)。
NEXUS 4: GUÍA DE INICIO RÁPIDO
15
•
NEXUS 4 QUICK START GUIDE
11
空公司,很多航空公司 对飞机上使用无线设备是有限制的!
机场安检设备主要有三种类型:X射线机(用于传送带上的物品摆放 带),磁探测器(用于人走通过安全检查),磁性棒(手持设备)。 您可以让您的Nexus通过机场的X光机。 但不要把你的Nexus4暴露在探测器或将其暴露在磁性棒下,这可能带来设备 损坏。
•
如果您使用的是无线充电器,请参阅说明附带的充电器。 (不知道多少机油会买无限充电模块啊,小吐槽一下!哈哈……)
重要:必须使用经过谷歌认可的无线充电器!无线充电器可能 不会像旅行充电器那样产生足够的电流!
6
NEXUS 4 QUICK START GUIDE
安装SIM卡&开机
在使用手机前,需要安装SIM卡,否则您的手机上可能会显示“没有SIM卡”
持续轻按电源键几秒钟开机
电源/锁屏键
8
NEXUS 4 QUICK START GUIDE
当 Nexus 4 处于开机状态时, 按压电源键将锁屏或者开屏。
关闭您的 Nexus 4, 按压电源键数秒,出现确认关机对话框,点击确认后 即可完成关机操作。
强制重启您的手机,请按压电源键至少10秒钟以上。
TIP: 要快速静音或者切换到飞行模式,按下电源键1~2秒钟, 您会看到一个对话框,及时在锁屏的状态下,仍可以使用。
NEXUS 4 QUICK START GUIDE
5
• 旅行充电器因国家或地区而异! • 只可使用旅行充电器和Micro USB数据线来给你的Nexus4充电。
使用不同的适配器或数据线可能会损坏 您的手机! 输入电压范围:旅行充电器AC 100V-240V, 旅行适配器的输出电压DC5V,1.2A! • 使用其他设备,例如笔记本电脑,将比使用充电器花费更多 的充电时间来完成充电! Nexus 4的电池不可拆卸,请不要试图拆开您的手机!
NEXUS 4 QUICK START GUIDE
9
设置您的 Nexus 4
当您第一次打开你的手机,你会看到一个 欢迎屏幕。要选择不同的语言,触摸菜单。 然后轻触“开始”,然后按照屏幕上的提示操作。
一系列的画面将引导您设置您的手机,如果您已经有Gmail, 使用您的Gmai账户和密码登陆,如果,你没有Gmail或 任何其他的Google帐户,请创建一个。
弹出按钮
SIM卡盘位于电话左侧音量按钮的下方。弹出按钮是一个 小圆形光圈盘。要安装新的Micro SIM卡:
1. 插入电话自带的SIM卡弹出工具或簿针
NEXUS 4 QUICK START GUIDE
7
2.取出卡托,SIM只有唯一的安装方式是它与卡托接触! 3. 小心仔细的将卡托重新插入电话内!
TIP: 您的IMEI码位于SIM卡的托盘上,您可能需要这个号码, 来享受后续的服务,及确定您是都有被服务的条件。IMEI码 也在您的包装盒上。
Google, Android, Gmail, Google Maps, Nexus, Google Play, YouTube, Google+和其他商标为谷歌公司所持有。 谷歌公司的商标列表可在如下网站查询http://www. /permissions/ guidelines.html. LG 和 LG 的商标 是LG公司的电子商标。所有其他商标均为各公司持有者的财产。
本指南的内容可能会在一些细节上与您的产品或软件不同。 本文档中的所有信息如有变更,恕不另行通知!
如需在线支持,请访问:/nexus
NEXUS 4 QUICK START GUIDE
1
包装清单:
Micro USB数据线
旅行充电器
Nexus 4
SIM卡弹出工具
本快速入门指南和安全及保修手册也包括在内。
如果有任何硬件损坏或丢失请联系您的经销商。 请使用经过谷歌认可的配件,不同国家配件可能会有差异!
NEXUS 4 QUICK START GUIDE
你的Nexus 4
3.5mm 耳机插口
距离感应器 音量键
SIM卡插口
上面 听筒
Microphone
前置摄像头
电源/锁屏 按键
NEXUS 4 QUICK START GUIDE 正面
。12
NEXUS 4 QUICK START GUIDE
Contenido de la caja(不知道怎么 翻译!!!!!!!)后面的内 容都一样了,只不过是西班牙语, 看不懂啊!!!!所以就不翻译 了!!!!!和英文的意思一样, 起码后面的插图都一样!哈 Cable micro USB 哈!!!!!!!!!!!!! !!!!!!!!!!!!!! !!!!!!!!!!!!!! !!!!!!!!!!!!!! !!!!!!!!!!!!A!dap!tador de viaje !!!!!!!!!!!!!! !!!!!!!!!!!!!! !!!!!!!!!!!!!! !!!N!exu!s 4 !!!!!!He!rram!deieln!atatadrjeeetaxtSrIaMcción !!!!!!!!!!!!!!!!!!
LED 3
摄像头 电源/锁屏 按键 闪光灯
NFC感应线圈
3.5mm 耳机插口
声音键
充电/USB插口
背面
扬声器 话筒
下面
4
NEXUS 4 QUICK START GUIDE
为电池充电
你的电池在刚打开包装的时候,不会完全充满电,如果你有机会进行一次 完全的充放电,那是一个好主意!
如果您正在使用附带的旅行充电器给手机充电,那么手机数据线的一端连接到充电器在底部的 电话端口,而另一端连接到旅行充电器。然后将旅行充电器插入一个电源插座。
谷歌账户可以让你的信息在不同的数码设备间交流, 从任何地方访问查看您的电子邮件,文本消息,无论身在何处只要你有一 个Wi-Fi或移动数据连接。 •这同样适用于播放音乐,电影,您的谷歌游戏库或书籍。 永远也不会失去您的联系人,当您登陆谷歌账户后,一切都会为您同步!
•
10
NEXUS 4 QUICK START GUIDE
应用程序也会自动备份。 谷歌会保证您的数据的安全性,以确保在您需要的时候能及时被使用。 同步和备份您的所有数据。无论您 编写一封电子邮件,添加联系人,将事件添加到您的 日• 历,或照片,都可以被备份 由谷歌同步到任意使用相同的Google帐户的计算机上用户。 您的谷歌帐户也可以让你充分利用任何其他的Google 应用程序和服务,你可能想使用,例如Gmail,谷歌地图导航, 谷• 歌游戏,YouTube,Google+等等
MBM63860401 (1.0) G Printed in Korea
Para obtener ayuda y soporte en línea, visite /nexus
快速入门指南
快速入门指南
For online help and support, visit /nexus