Apache 虚拟主机的配置方法总结
虚拟机中如何在Linux上安装和配置Apache服务器
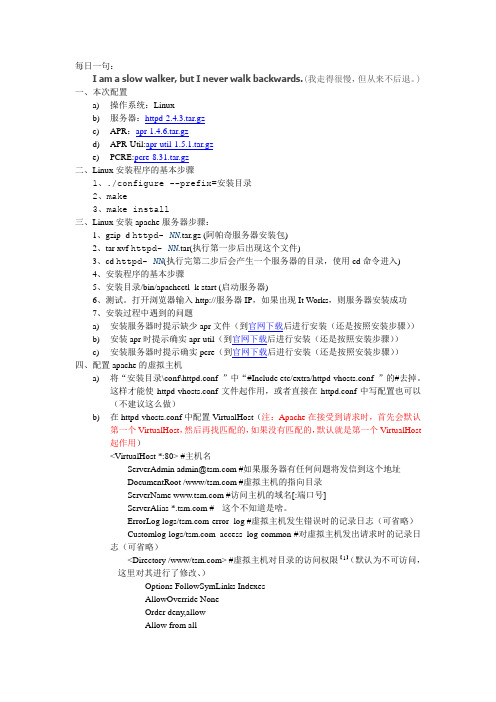
每日一句:I am a slow walker, but I never walk backwards.(我走得很慢,但从来不后退。
)一、本次配置a)操作系统:Linuxb)服务器:httpd-2.4.3.tar.gzc)APR:apr-1.4.6.tar.gzd)APR-Util:apr-util-1.5.1.tar.gze)PCRE:pcre-8.31.tar.gz二、Linux安装程序的基本步骤1、./configure --prefix=安装目录2、make3、make install三、Linux安装apache服务器步骤:1、gzip -d httpd- NN.tar.gz (阿帕奇服务器安装包)2、tar xvf httpd- NN.tar(执行第一步后出现这个文件)3、cd httpd- NN(执行完第二步后会产生一个服务器的目录,使用cd命令进入)4、安装程序的基本步骤5、安装目录/bin/apachectl -k start (启动服务器)6、测试。
打开浏览器输入http://服务器IP,如果出现It Works,则服务器安装成功7、安装过程中遇到的问题a)安装服务器时提示缺少apr文件(到官网下载后进行安装(还是按照安装步骤))b)安装apr时提示确实apr-util(到官网下载后进行安装(还是按照安装步骤))c)安装服务器时提示确实pcre(到官网下载后进行安装(还是按照安装步骤))四、配置apache的虚拟主机a)将“安装目录\conf\httpd.conf ”中“#Include etc/extra/httpd-vhosts.conf ”的#去掉。
这样才能使httpd-vhosts.conf文件起作用,或者直接在httpd.conf中写配置也可以(不建议这么做)b)在httpd-vhosts.conf中配置VirtualHost(注:Apache在接受到请求时,首先会默认第一个VirtualHost,然后再找匹配的,如果没有匹配的,默认就是第一个VirtualHost起作用)<VirtualHost *:80> #主机名ServerAdmin admin@ #如果服务器有任何问题将发信到这个地址DocumentRoot /www/ #虚拟主机的指向目录ServerName #访问主机的域名[:端口号]ServerAlias * #- -这个不知道是啥。
apache下配置详解

Apache下关于虚拟主机的配置关于虚拟主机的概述:配置虚拟主机主要应用场景:多站点访问,一个服务器放置了多个站点服务。
主要的三种配置方法:1、基于IP 2、基于端口3、基于主机名步骤详解:1.虚拟主机使用的话,必须将中心服务关闭,在/etc/httpd/conf/httpd.conf文件里,将DocumentRoot一行注释掉来关闭中心服务。
2.可以在httpd.conf文件最后面直接添加虚拟主机的配置内容,也可以在/etc/httpd/conf.d/下面创建一个自己的配置文件,如:my.conf文件。
3.my.conf文件配置详解1)基于IP配置<VirtualHost 192.168.0.112:80>ServerName DocumentRoot "/www/"</VirtualHost><VirtualHost 192.168.0.113:80>ServerName DocumentRoot "/www/"</VirtualHost>以上2个虚拟主机配置的IP分别为192.168.0.113和192.168.0.112,端口同为80端口。
这样在浏览器分别输入不同的ip或域名时就会访问到不同的站点。
Tips:如果只有一块网卡可以同过ipaddr add 192.168.0.112 dev eth0来添加辅助ip。
如果是域名方式访问,还需要在windows和linux下的hosts文件里面自行添加域名解析。
关于辅助ip的设置:ipaddr add 192.168.0.112/24 dev eth0这是为网卡设置一个辅助ip。
假如一个网卡的ip地址为192.168.0.22,执行上面的命令,在用ifconfig 查看,会发现有两个ip地址,而192.168.0.22称为主地址(Primary IP address),而192.168.0.112称为辅助地址(secondary IP address),一块网卡是允许有多个IP地址的,所以就算再多添加几个secondary IP 也是合法行的。
Linux下Apache的安装与配置
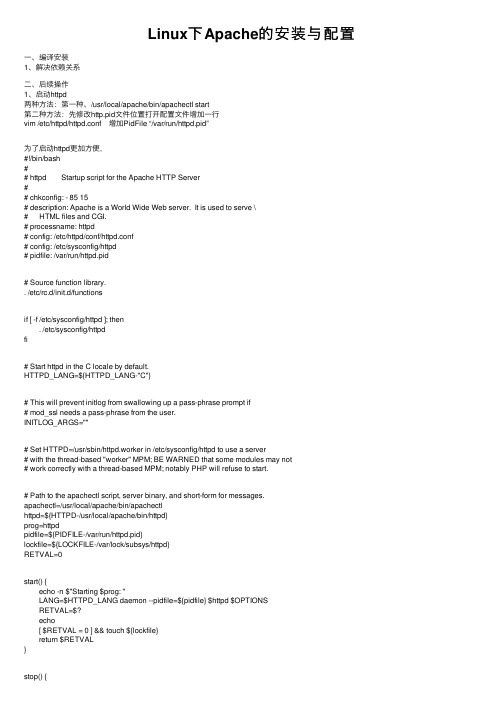
Linux下Apache的安装与配置⼀、编译安装1、解决依赖关系⼆、后续操作1、启动httpd两种⽅法:第⼀种、/usr/local/apache/bin/apachectl start第⼆种⽅法:先修改http.pid⽂件位置打开配置⽂件增加⼀⾏vim /etc/httpd/httpd.conf 增加PidFile “/var/run/httpd.pid”为了启动httpd更加⽅便,#!/bin/bash## httpd Startup script for the Apache HTTP Server## chkconfig: - 85 15# description: Apache is a World Wide Web server. It is used to serve \# HTML files and CGI.# processname: httpd# config: /etc/httpd/conf/httpd.conf# config: /etc/sysconfig/httpd# pidfile: /var/run/httpd.pid# Source function library.. /etc/rc.d/init.d/functionsif [ -f /etc/sysconfig/httpd ]; then. /etc/sysconfig/httpdfi# Start httpd in the C locale by default.HTTPD_LANG=${HTTPD_LANG-"C"}# This will prevent initlog from swallowing up a pass-phrase prompt if# mod_ssl needs a pass-phrase from the user.INITLOG_ARGS=""# Set HTTPD=/usr/sbin/httpd.worker in /etc/sysconfig/httpd to use a server# with the thread-based "worker" MPM; BE WARNED that some modules may not# work correctly with a thread-based MPM; notably PHP will refuse to start.# Path to the apachectl script, server binary, and short-form for messages.apachectl=/usr/local/apache/bin/apachectlhttpd=${HTTPD-/usr/local/apache/bin/httpd}prog=httpdpidfile=${PIDFILE-/var/run/httpd.pid}lockfile=${LOCKFILE-/var/lock/subsys/httpd}RETVAL=0start() {echo -n $"Starting $prog: "LANG=$HTTPD_LANG daemon --pidfile=${pidfile} $httpd $OPTIONSRETVAL=$?echo[ $RETVAL = 0 ] && touch ${lockfile}return $RETVAL}stop() {echo -n $"Stopping $prog: "killproc -p ${pidfile} -d 10 $httpdRETVAL=$?echo[ $RETVAL = 0 ] && rm -f ${lockfile} ${pidfile}}reload() {echo -n $"Reloading $prog: "if ! LANG=$HTTPD_LANG $httpd $OPTIONS -t >&/dev/null; thenRETVAL=$?echo $"not reloading due to configuration syntax error"failure $"not reloading $httpd due to configuration syntax error"elsekillproc -p ${pidfile} $httpd -HUPRETVAL=$?fiecho}# See how we were called.case "$1" instart)start;;stop)stop;;status)status -p ${pidfile} $httpdRETVAL=$?;;restart)stopstart;;condrestart)if [ -f ${pidfile} ] ; thenstopstartfi;;reload)reload;;graceful|help|configtest|fullstatus)$apachectl $@RETVAL=$?;;*)echo $"Usage: $prog {start|stop|restart|condrestart|reload|status|fullstatus|graceful|help|configtest}" exit 1esacexit $RETVAL将以上代码加⼊到vim /etc/init.d/httpd中⽽后为此脚本赋予执⾏权限:chmod +x /etc/rc.d/init.d/httpd加⼊服务列表:chkconfig --add httpd给3,5启动chkconfig --level 3,5 httpd on最后加路径将 export PATH=$PATH:/usr/local/apache/binvim /etc/profile.d/httpd.sh完成后重新登录就可以了。
APACHE安装配置说明
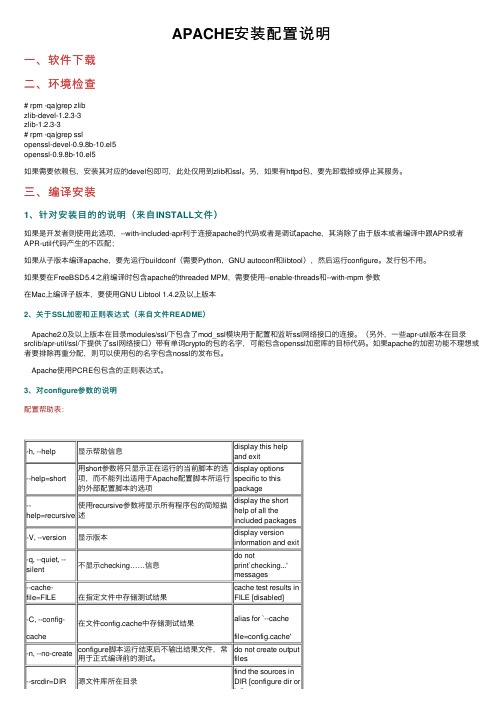
APACHE安装配置说明⼀、软件下载⼆、环境检查# rpm -qa|grep zlibzlib-devel-1.2.3-3zlib-1.2.3-3# rpm -qa|grep sslopenssl-devel-0.9.8b-10.el5openssl-0.9.8b-10.el5如果需要依赖包,安装其对应的devel包即可,此处仅⽤到zlib和ssl。
另,如果有httpd包,要先卸载掉或停⽌其服务。
三、编译安装1、针对安装⽬的的说明(来⾃INSTALL⽂件)如果是开发者则使⽤此选项,--with-included-apr利于连接apache的代码或者是调试apache,其消除了由于版本或者编译中跟APR或者APR-util代码产⽣的不匹配;如果从⼦版本编译apache,要先运⾏buildconf(需要Python,GNU autoconf和libtool),然后运⾏configure。
发⾏包不⽤。
如果要在FreeBSD5.4之前编译时包含apache的threaded MPM,需要使⽤--enable-threads和--with-mpm 参数在Mac上编译⼦版本,要使⽤GNU Libtool 1.4.2及以上版本2、关于SSL加密和正则表达式(来⾃⽂件README)Apache2.0及以上版本在⽬录modules/ssl/下包含了mod_ssl模块⽤于配置和监听ssl⽹络接⼝的连接。
(另外,⼀些apr-util版本在⽬录srclib/apr-util/ssl/下提供了ssl⽹络接⼝)带有单词crypto的包的名字,可能包含openssl加密库的⽬标代码。
如果apache的加密功能不理想或者要排除再重分配,则可以使⽤包的名字包含nossl的发布包。
Apache使⽤PCRE包包含的正则表达式。
3、对configure参数的说明配置帮助表:-h, --help显⽰帮助信息display this help and exit--help=short ⽤short参数将只显⽰正在运⾏的当前脚本的选项,⽽不能列出适⽤于Apache配置脚本所运⾏的外部配置脚本的选项display optionsspecific to thispackage--help=recursive 使⽤recursive参数将显⽰所有程序包的简短描述display the shorthelp of all theincluded packages-V, --version显⽰版本display version information and exit-q, --quiet, --silent不显⽰checking……信息do notprint`checking...' messages--cache-file=FILE在指定⽂件中存储测试结果cache test results in FILE [disabled]-C, --config-cache 在⽂件config.cache中存储测试结果alias for `--cachefile=config.cache'-n, --no-create configure脚本运⾏结束后不输出结果⽂件,常⽤于正式编译前的测试。
Apache虚拟主机VirtualHost配置
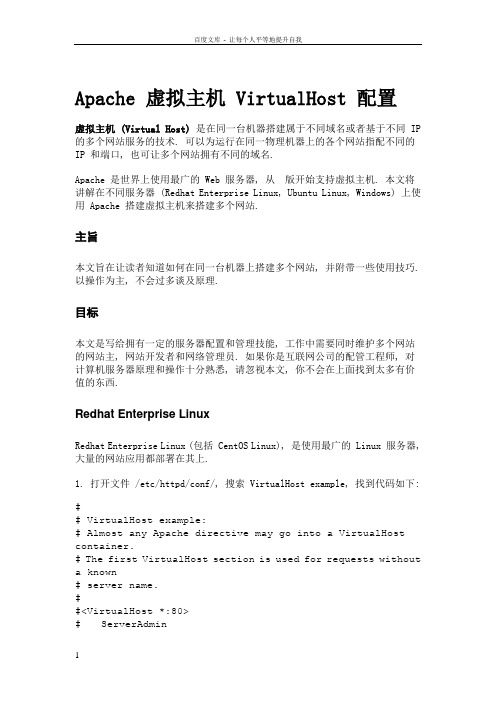
Apache 虚拟主机 VirtualHost 配置虚拟主机 (Virtual Host)是在同一台机器搭建属于不同域名或者基于不同 IP 的多个网站服务的技术. 可以为运行在同一物理机器上的各个网站指配不同的IP 和端口, 也可让多个网站拥有不同的域名.Apache 是世界上使用最广的 Web 服务器, 从版开始支持虚拟主机. 本文将讲解在不同服务器 (Redhat Enterprise Linux, Ubuntu Linux, Windows) 上使用 Apache 搭建虚拟主机来搭建多个网站.主旨本文旨在让读者知道如何在同一台机器上搭建多个网站, 并附带一些使用技巧. 以操作为主, 不会过多谈及原理.目标本文是写给拥有一定的服务器配置和管理技能, 工作中需要同时维护多个网站的网站主, 网站开发者和网络管理员. 如果你是互联网公司的配管工程师, 对计算机服务器原理和操作十分熟悉, 请忽视本文, 你不会在上面找到太多有价值的东西.Redhat Enterprise LinuxRedhat Enterprise Linux (包括 CentOS Linux), 是使用最广的 Linux 服务器, 大量的网站应用都部署在其上.1. 打开文件 /etc/httpd/conf/, 搜索 VirtualHost example, 找到代码如下:## VirtualHost example:# Almost any Apache directive may go into a VirtualHost container.# The first VirtualHost section is used for requests without a known# server name.##<VirtualHost *:80># ServerAdmin# DocumentRoot /www/docs/ ServerName ErrorLog logs/ CustomLog logs/ common#</VirtualHost>2. 仿照例子, 添加一段代码来指定某一域名的网站.## DocumentRoot 是网站文件存放的根目录# ServerName 是网站域名, 需要跟 DNS 指向的域名一致#<VirtualHost *:80>ServerAdminDocumentRoot /var/www/httpdocs/demo_aliluna_comServerName ErrorLog logs/ CustomLog logs/ common</VirtualHost>3. 重启 httpd 服务, 执行以下语句.service httpd restartUbuntu LinuxUbuntu 在 Linux 各发行版中, 个人用户数量最多的. 很多人在本机和虚拟机中使用. 但 Ubuntu 和 Redhat 的 VirtualHost 设置方法不相同.1. 打开目录 /etc/apache2/sites-available/, 发现 default 和default-ssl 两个文件, 其中 default 是 http 虚拟主机服务的配置文件, default-ssl 是配置 https 服务使用的. 可以复制一份 default 文件. 并修改配置文件名, 文件名必须与域名一致 (如:2. 打开新建的配置文件, 修改 DocumentRoot, ServerName 和对应的配置目录. 例子如下:## DocumentRoot 是网站文件存放的根目录# ServerName 是网站域名, 需要跟 DNS 指向的域名一致#<VirtualHost *:80>ServerAdminDocumentRoot /var/www/httpdocs/demo_aliluna_comServerName ErrorLog ${APACHE_LOG_DIR}/ CustomLog ${APACHE_LOG_DIR}/ combined</VirtualHost>3. 通过 a2ensite 激活虚拟主机配置sudo a2ensite 打开目录 /etc/apache2/sites-enabled/, 你会发现所有激活的虚拟主机, 可以通过 a2dissite 进行注销sudo a2dissite 重启 Apache 服务, 激活虚拟主机sudo/etc/apache2 restartWindowsWindows 是市场占有率最高的 PC 操作系统, 也是很多人的开发环境. 其VirtualHost 配置方法与 Linux 上有些差异, 以下方式适合原生 Apache, XAMPP 和 WAMP 套件.1. 打开目录 {Apache2 安装目录}\conf\extra\, 找到文件.2. 仿照例子, 添加一段代码来指定某一域名的网站.## DocumentRoot 是网站文件存放的根目录# ServerName 是网站域名, 需要跟 DNS 指向的域名一致#<VirtualHost *:80>ServerAdminDocumentRoot "D:/workspace/php/demo_aliluna_com"ServerName ErrorLog "logs/"CustomLog "logs/" common</VirtualHost>3. 打开文件, 添加如下语句.# Virtual hostsInclude conf/extra/4. 重启 Apache 服务.总结最近我在不同的几台服务器上搭建了一些网站服务, 这篇文章也算是我的个人笔记, 望日后可自用, 也希望对读者有用. 文中介绍了几个主流开发和部署环境上配置虚拟主机的方法, 其他 OS 大同小异.。
Apache服务器配置

IN CNAME
IN CNAME
在上面的配置中,在提交的DNS正向配置文件以及反向配置文件中, 已经具有如下的A记录和PTR记录,分别为
www
利用httpd.conf我们可以对Apache服务器进行全局 配置、管理或预设服务器的参数定义、虚拟主机的设 置等。httpd.conf是一个文本文件,我们可以用vi编辑 工具进行修改。 httpd.conf文件主要分为三个部分: Section 1: Global Environment (全局变量) Section 2: 'Main' server configuration(主服务器配置) Section 3: Virtual Hosts(虚拟主机配置)
2.配置基于IP的虚拟主机 (1)基于IP虚拟主机的DNS配置 如果用户想要创建两个基于IP的虚拟主机和
这两个虚拟主机站点的共同域名是 。用户可以按照如下所示在DNS正向配置文 件中进行配置:
lth IN
A 192.168.15.212
3.Port 该参数用来指定Apache服务器的监听端口。一般来说,标准的HTTP
服务默认端口号是80,一ቤተ መጻሕፍቲ ባይዱ不要更改这个数值。本例为80端口:
Port 80 4.ServerAdmin
设置Apache服务器管理员的邮件地址。
5.ServerName 该参数使得用户可以自行设置主机名,以取代安装Apache服务器主机
7.MaxKeepAliveRequests 当使用保持连接(persistent connection)功能时,可以使用本参数决定
每次连接所能发出的要求数目的上限。如果此数值为0,则表示没有限制。 建议尽可能使用较高的数值,以充分发挥Apache的高性能,本例设置每次 连接所能发出的要求数目上限为100:
tomcat 配置host的规则
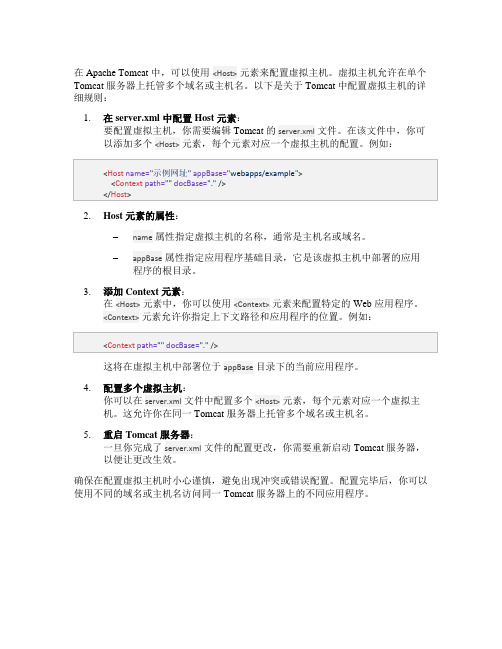
在 Apache Tomcat 中,可以使用<Host>元素来配置虚拟主机。
虚拟主机允许在单个Tomcat 服务器上托管多个域名或主机名。
以下是关于 Tomcat 中配置虚拟主机的详细规则:
1.在 server.xml 中配置 Host 元素:
要配置虚拟主机,你需要编辑 Tomcat 的server.xml文件。
在该文件中,你可以添加多个<Host>元素,每个元素对应一个虚拟主机的配置。
例如:
2.Host 元素的属性:
–name属性指定虚拟主机的名称,通常是主机名或域名。
–appBase属性指定应用程序基础目录,它是该虚拟主机中部署的应用程序的根目录。
3.添加 Context 元素:
在<Host>元素中,你可以使用<Context>元素来配置特定的 Web 应用程序。
<Context>元素允许你指定上下文路径和应用程序的位置。
例如:
这将在虚拟主机中部署位于appBase目录下的当前应用程序。
4.配置多个虚拟主机:
你可以在server.xml文件中配置多个<Host>元素,每个元素对应一个虚拟主
机。
这允许你在同一 Tomcat 服务器上托管多个域名或主机名。
5.重启 Tomcat 服务器:
一旦你完成了server.xml文件的配置更改,你需要重新启动 Tomcat 服务器,以便让更改生效。
确保在配置虚拟主机时小心谨慎,避免出现冲突或错误配置。
配置完毕后,你可以使用不同的域名或主机名访问同一 Tomcat 服务器上的不同应用程序。
linux-Apache 配置
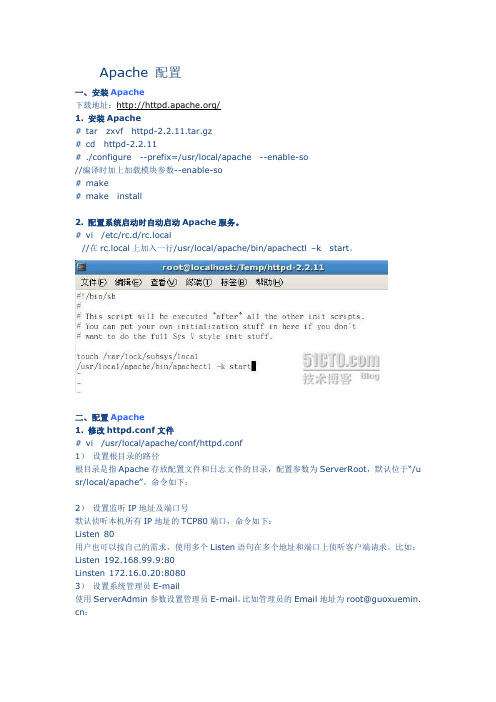
Apache 配置一、安装Apache下载地址:/1. 安装Apache# tar zxvf httpd-2.2.11.tar.gz# cd httpd-2.2.11# ./configure --prefix=/usr/local/apache --enable-so//编译时加上加载模块参数--enable-so# make# make install2. 配置系统启动时自动启动Apache服务。
# vi /etc/rc.d/rc.local//在rc.local上加入一行/usr/local/apache/bin/apachectl –k start。
二、配置Apache1. 修改httpd.conf文件# vi /usr/local/apache/conf/httpd.conf1)设置根目录的路径根目录是指Apache存放配置文件和日志文件的目录,配置参数为ServerRoot,默认位于“/u sr/local/apache”。
命令如下:2)设置监听IP地址及端口号默认侦听本机所有IP地址的TCP80端口,命令如下:Listen 80用户也可以按自己的需求,使用多个Listen语句在多个地址和端口上侦听客户端请求。
比如:Listen 192.168.99.9:80Linsten 172.16.0.20:80803)设置系统管理员E-m ail使用ServerAdmin参数设置管理员E-m ail,比如管理员的Email地址为root@guoxuemin. cn:4)设置服务器主机的名称参数ServerName用来设置服务器的主机名称,如果没有域名则填入服务器的IP地址,比如服务器的IP地址为192.168.99.9:5)设置主目录的路径用户可以使用参数Document Root配置服务器主目录默认路径,比如,主目录路径为:6)设置默认文件Apache的默认文件名为index.ht ml,可以使用Directory Index参数来配置,比如,将ind ex.php设置为默认文件名:7)测试:打开浏览器,输入地址:http://192.168.99.9,可以打开站点了:2. 配置目录权限使用<Directory 目录路径>和</Directory>设置目录的权限。
- 1、下载文档前请自行甄别文档内容的完整性,平台不提供额外的编辑、内容补充、找答案等附加服务。
- 2、"仅部分预览"的文档,不可在线预览部分如存在完整性等问题,可反馈申请退款(可完整预览的文档不适用该条件!)。
- 3、如文档侵犯您的权益,请联系客服反馈,我们会尽快为您处理(人工客服工作时间:9:00-18:30)。
Apache 虚拟主机的配置方法总结:
虚拟主机
1. 在httpd.conf中找到Include conf/extra/httpd-vhosts.conf 把前面的#去除
2. 添加监听如:Listen 8080
Listen 192.168.0.100:80
3. 删除或注掉DocumentRoot "D:/Apache2.2/htdocs"
# DocumentRoot: The directory out of which you will serve your
# documents. By default, all requests are taken from this directory, but
# symbolic links and aliases may be used to point to other locations.
#
#DocumentRoot "D:/Apache2.2/htdocs"
4. 在配置extra/httpd-vhosts.conf时,如果要保留原来httpd.conf中默认的访问目录和域名,必须为默认域名也创建一个virtualHost,样例如下(监听端口是8080):
5. httpd-vhosts.conf配置如下:
NameVirtualHost *:8080
NameVirtualHost 192.168.0.100:80
在文档底部接着添加:
<VirtualHost 192.168.0.100:80>
ServerName njumasoft
DocumentRoot F:/php/UmasoftFrw
<Directory />
Options FollowSymLinks
AllowOverride None
Order allow,deny
Allow from all
Satisfy all
</Directory>
DirectoryIndex index.html index.php
CustomLog "logs\njumasoft-access.log" common
ErrorLog "logs\njumasoft-error.log"
</VirtualHost>
<VirtualHost 192.168.0.100:8080>
ServerName mysqld
DocumentRoot D:/Apache2.2/htdocs
<Directory />
Options FollowSymLinks
AllowOverride None
Order allow,deny
Allow from all
Satisfy all
</Directory>
DirectoryIndex index.html index.php
CustomLog "logs\mysqld-access.log" common
ErrorLog "logs\mysqld-error.log"
</VirtualHost>
其它设置参见:/Apache/ApacheMenu/vhosts/index.html
虚拟目录
1.找到"conf/httpd.conf" 文件,按如下示例设置:
<IfModule dir_module>
DirectoryIndex index.html index.html.var index.php
Alias /mysql D:/Apache2.2/htdocs/phpMyAdmin
<Directory D:/Apache2.2/htdocs/phpMyAdmin>
Options MultiViews
AllowOverride None
Order allow,deny
Allow from all
</Directory>
</IfModule>
注:以上配置均需重启Apache。