AdaptecbyPMC联合希捷演示12Gbit/sSAS
PMC展示分层存储解决方案
龙源期刊网 PMC展示分层存储解决方案作者:来源:《中国信息化周报》2014年第10期近日,PMC在2014 CeBIT上展出其带有maxCache Plus分层软件的Adaptec by PMC 8系列RAID卡及基于12Gb/s SAS HBA的软件定义存储解决方案。
PMC演示了其研发的带有零维护缓存保护和maxCache Plus的8系列12Gb/s SAS RAID卡。
演示中展示了一款由12Gb/s SAS SSD和HDD组成的两层存储解决方案。
其中性能分层是采用希捷的1200 12Gb/s SAS SSD,而通过maxCache Plus驱动SSD加速第二层的希捷企业级Constellation.2 SATA HDD。
Adaptec maxCache Plus的分层功能及冗余存储池均由Adaptec的maxView Storage Manager软件进行管理。
8系列中的maxCache Plus,在管理与其连接的PCIe闪存卡、SSD以及HDD的同时,可以实现对不同存储介质的分层,以确保关键应用和热数据优先使用高性能的存储介质。
另外,PMC还演示了基于Windows Storage Spaces软件定义存储解决方案的带冗余的高可用性集群。
该集群由Adaptec by PMC 12Gb/s SAS HBA驱动,通过PMC的12Gb/s SAS扩展器相连。
演示中,Chenbro的一款外置高密度存储解决方案将采用一款基于PMC的12Gb/s RoC 技术的原型HBA解决方案与两个服务器节点相连。
PMC的此项技术在单个板卡上结合了配备基本启动服务器系统的RAID功能以及完整的HBA功能。
(杨光)。
希捷 Barracuda 7200.12 产品资料

1TB、750GB、500GB、320GB、250GB、160GB7200RPM SATA 6Gb/秒,具备 NCQ 功能主要优势•Seagate®技术引领者现在推出业内首款单碟 500GB 和双碟 1TB 硬盘—降低存储成本,同时提高性能。
•现有可预测故障率为 0.34%,希捷 Barracuda 7200.12 硬盘继续提供业内领先的可靠性。
•采用了硬盘行业内先进的自动化制造工艺,客户可以确信希捷 Barracuda 7200.12 硬盘可提供坚如磐石的性能和可靠性。
•拥有 1TB、750GB、500GB、320GB、250GB 和 160GB 容量,希捷 Barracuda 7200.12 硬盘可满足每种台式机存储的需求。
完美应用•台式机•工作站Array•直连式外置存储设备 (DAS)•网络附加存储设备 (NAS)•基于 PC 的游戏系统•家庭服务器希捷 Barracuda ®7200.12性能和可靠性适合各类用户美洲地区 Seagate Technology LLC 920 Disc Drive, Scotts Valley, California 95066, United States, +1 831-438-6550亚太地区Seagate Singapore International Headquarters Pte. Ltd. 7000 Ang Mo Kio Avenue 5, Singapore 569877, +65-6485-3888欧洲、中东和非洲地区Seagate Technology SAS 16–18 rue du Dôme, 92100 Boulogne-Billancourt, France, +33 1-4186-10-00© 2011 希捷公司版权所有。
保留所有权利。
Seagate 、Seagate Technology 和 Wave 标识是希捷公司的注册商标。
adaptec Adaptec 6系列和5Z系列 RAID控制卡的零维护缓存保护
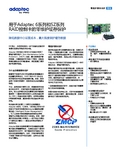
零维护缓存保护简报降低数据中心运营成本,最大限度保护缓存数据产品要点低运营成本– 没有电池相关的安装、监控、维护、弃置或者更换成本停电情况下不会丢失数据– 取代锂电池零维护缓存保护– 无需监测电池充电情况– 更换电池过程中不需要关闭系统– 无限期地保护数据 -“在电池电量耗尽之前”不需要急于重启系统– 保存数据长达数年之久RAID缓存即时保护– 充电只需要几分钟时间,而不是几小时– 环境优化RAID性能环保– 无毒电池废弃处理– 配合Adaptec智能电源管理功能打造行业“最绿色”解决方案- 遵从简化的 IATA 规则完全集成在5Z系列RAID控制上并作为6系列的附件套件IDC预计,在四年时间内一步IT设备的运营成本将增长到原始采购成本的4倍。
Adaptec 6系列和5Z系列RAID控制卡采用了零维护缓存保护(Zero-Maintenance CacheProtection,ZMCP)功能,最大限度保护缓存数据,大幅削减成本并减少了复杂、杂乱和昂贵的锂电池对环境的影响,同时提高了缓存保护和缓存性能。
为什么你需要缓存保护随着用户持续关注针对快速增加的数据集进行的容量利用率优化,RAID 5和RAID 6在企业级存储系统中的运用继续增长着。
然而,除非启用了所有可用缓存,否则系统无法实现最佳性能。
不过,启用控制卡缓存之后,数据被保存在控制卡的内存中,并有可能在系统断电的情况下丢失。
防止这种情况发生的最常见保护措施就是使用一个直接安装在控制卡上的电池备份单元(BBU)来备份控制卡缓存。
这种电池是维护板载缓存数据,直到恢复对电池备份单元的供电。
电池备份单元的第二个使用方法就是配合Adaptec 6系列、5Z系列、5系列和2系列RAID控制卡产品系列所提供的Adaptec智能电源管理功能(Intelligent Power Management)。
为了让控制卡降低硬盘转速或者完全停转,硬盘中必须是没有任何I/O活动的。
大华报警主机和门禁接入方案

大华报警主机和门禁接入方案报警主机和门禁接入方案1/10目录第一章.方案概述 ........................................................................... (3)1.1 概况 ........................................................................... (3)1.1.1 方案背景 ........................................................................... ................................ 3 1.1.2 现状分析 ........................................................................... ................................ 3 1.2 设计原则 ........................................................................... ........................................... 3 1.3 设计依........................................... 4 第二章.方案亮点 ........................................................................... (5)2.1 集约化 ........................................................................... ............................................... 5 2.2 性能卓越 ........................................................................... ........................................... 5 2.3 稳定性 ........................................................................... ............................................... 5 2.4 多样化接入 ........................................................................... ....................................... 5 2.5 定制化 ........................................................................... ............................................... 5 2.6 节能环保 ........................................................................... ........................................... 5 第三章.方案部署 ........................................................................... (6)3.1 部署拓扑图 ........................................................................... ....................................... 6 第四章.核心产品概述 ........................................................................... . (7)4.1 AAC7100简介 ........................................................................... .. (7)4.1.1 产品外观 ........................................................................... ................................ 7 4.1.2 系统配置 ........................................................................... ................................ 7 4.1.3 硬件参 (8)第五章.控标点 ........................................................................... .. (10)2/10第一章. 方案概述1.1 概况1.1.1 方案背景随着IT技术,信息化的不断发展和推进,我们的周边出现了越来越多的系统,它们各自完成着不同的业务,带给我们便利。
Seagate Media Sync 用户手册说明书

Seagate Media Sync User GuideSeagate Media Sync User Guide© 2013 Seagate. All rights reserved. No part of this publication may be reproduced, stored in a retrieval system, or transmitted in any form or by any means, electronic, mechanical, photocopying, recording or otherwise, without the prior written consent of Seagate.ChangesThe material in this document is for information only and subject to change without notice. While reasonable efforts have been made in the preparation of this document to assure its accuracy, Seagate assumes no liability resulting from errors or omissions in this document, or from the use of the information contained herein. Seagate reserves the right to make changes or revisions in the product design or the product manual without reservation and without obligation to notify any person of such revisions and changes.TrademarksSeagate, Seagate Technology, the Wave logo, and Seagate Media are trademarks or registered trademarks of Seagate Technology LLC or one of its affiliated companies in the United States and/or other countries. All other trademarks or registered trademarks are the property of their respective owners.Seagate Technology LLC10200 S. De Anza Blvd.Cupertino, CA 95014USAContents1. Synchronizing Your Media . . . . . . . . . . . . . . . . . . . . . . . . . . . . . . . . .3What You Can Do with Seagate Media Sync . . . . . . . . . . . . . . . . . . . . . . . . 3Install Seagate Media Sync . . . . . . . . . . . . . . . . . . . . . . . . . . . . . . . . . . . . . . 3Select a Device and View the Device Settings . . . . . . . . . . . . . . . . . . . . . . . 3Synchronization Plans . . . . . . . . . . . . . . . . . . . . . . . . . . . . . . . . . . . . . . . . . . 4Synchronize Files Using Simple iPad or Simple Sync for Mac . . . . . . . . . . . 4Synchronize Files Using Custom Sync for Mac . . . . . . . . . . . . . . . . . . . . . . 5Synchronize Files Using Simple iPad or Simple Sync for Windows . . . . . . . 5Synchronize Files Using Custom Sync for Windows . . . . . . . . . . . . . . . . . . . 6Change or Delete Sync Plans . . . . . . . . . . . . . . . . . . . . . . . . . . . . . . . . . . . . 72. Customizing Your Drive Settings (Windows Only) . . . . . . . . . . . . .9Use Power-Saving Mode . . . . . . . . . . . . . . . . . . . . . . . . . . . . . . . . . . . . . . . . 9Test Your Drive for Errors . . . . . . . . . . . . . . . . . . . . . . . . . . . . . . . . . . . . . . . 9Turn Drive Lights On or Off . . . . . . . . . . . . . . . . . . . . . . . . . . . . . . . . . . . . . 10Display Your Drive’s Free Space and Capacity . . . . . . . . . . . . . . . . . . . . . 10Display Tips and Tricks . . . . . . . . . . . . . . . . . . . . . . . . . . . . . . . . . . . . . . . . 10Check for Updates . . . . . . . . . . . . . . . . . . . . . . . . . . . . . . . . . . . . . . . . . . . . 101. Synchronizing Your Media What You Can Do with Seagate Media Sync 1.Synchronizing Your MediaWith the free Seagate Media Sync app, you can copy and synchronize your media files with your external drive. You can copy files from your computer or mobile device to your external drive or vice versa. You can use the Seagate Media Sync app with any NTFS- or FAT32-formatted USB, FireWire, or eSATA drive.What You Can Do with Seagate Media SyncWith the Seagate Media Sync app, you can:•Copy and synchronize files on a Mac (OS 10.6.8 or later) or Windows(Windows 8, Windows 7, Windows Vista, and Windows XP) computer.•Set filters to synchronize files that can only be played on an iPad, iPhone, or iPod touch.•Specify which folders and media types to synchronize between your computer and external drive.•(Windows only) Adjust many power-saving options for your drive.Install Seagate Media Sync1.Go to / support/downloads and locate the Media Sync software version foryour operating system.2.Download and install the Media Sync software.Note: The Software Update feature automatically informs you when an update is available for yourand select software. You can also manually check for new updates. In Windows, click ,Check for Software Updates. On Mac, choose Software Update from the Help menu. Select a Device and View the Device Settings1.On your desktop, start the Media Sync app.2.In the Media Sync window, click the drive’s name or icon to display its information.Note: The Seagate Media Sync app detects all NTFS- and FAT32-formatted USB external drives and lists them in the Media Sync window. It can take a few seconds to detect your device. Ifyour device does not appear, make sure it is connected and turned on.1. Synchronizing Your Media Synchronization Plans3.To change the device’s settings, click . To review the device information, click . Synchronization PlansYou can copy and synchronize media files, including videos, photos, music, and documents, with your Seagate Wireless or GoFlex Satellite device. You can select the synchronization plan for a device, and then can set the synchronization to work automatically or manually.The Seagate Media Sync app includes these synchronization plans:•Simple iPad Sync synchronizes all media files that can be played on an iPad.Synchronized media is added to a folder on the external drive calledUser_ComputerName.•Simple Sync synchronizes all your media folders between your computer and external drive.Synchronize Files Using Simple iPad or Simple Sync for MacYou can also create a custom sync plan. See “Synchronize Files Using Custom Sync for Mac” on page5.1.Connect the USB 3.0 adapter and cable to your device and computer.2.On your desktop, start the Seagate Media Sync app.3.Select your device in the left panel of the Seagate Media Sync window if more than onedevice is displayed.4.Select a sync plan.5.To sync files that can be only opened on specific Apple, Android, or Kindle Fire devices,choose the device type under Sync files for.6.In Include, select the type of files to synchronize.7.Click Sync Now and the sync process starts, or select Automatic Sync to use that option.The Automatic Sync feature continuously tracks changes in synchronized folders andoverwrites the previous files with the newer version. Automatic Sync only works when yourexternal device is connected.Synchronize Files Using Custom Sync for Mac You can create a custom synchronization plan and select the folders and media types to synchronize between your computer and device.1.Connect the USB 3.0 adapter and cable to your device and computer.2.On your desktop, start the Seagate Media Sync app.3.Select your device in the left panel of the Seagate Media Sync window if more than onedevice is displayed.4.Select Custom Sync.5.Select Include my Movies, Music and Pictures folders to use your Mac’s default mediafolders.6.Click the + button and then navigate to the source media folders. Click the - button to removean item from the list.7.Select the files and folders to sync, and then click Add to Sync.8.To sync files that can be only opened on specific Apple, Android, or Kindle Fire devices,choose the device type under Sync files for.9.In Include, select the type of files to synchronize.10.Click Sync Now and the sync process starts, or select Automatic Sync to use that option.The Automatic Sync feature continuously tracks changes in synchronized folders ando verwrites the previous files with the newer version. Automatic Sync only works when your external device is connected.Synchronize Files Using Simple iPad or Simple Sync for WindowsYou can also create a custom sync plan. See “Synchronize Files Using Custom Sync for Windows” on page6.1.Connect the USB 3.0 adapter and cable to your device and computer.2.On your desktop, start the Seagate Media Sync app.3.If more than one device is connected, select your device. You can specify synchronizationsettings for each device.4.In the Media Sync window, click next to the device you want to sync.5.Click Simple iPad or Simple Sync, and then click Confirm.6.Click Sync Now or select Automatic Sync to use that option.The Automatic Sync feature continuously tracks changes in synchronized folders andoverwrites the previous files with the newer version. Automatic Sync only works when your external device is connected.Synchronize Files Using Custom Sync for Windows You can create a custom synchronization plan and select the folders and media types to synchronize between your computer and device.1.Connect the USB 3.0 adapter and cable to your device and computer.2.On your desktop, start Seagate Media Sync.TIP: If you are using Seagate Wireless Plus with Windows 8, press Windows key +D, and then select File Explorer. Double-click your Seagate Wireless Plus drive.Double-click the Media Sync icon.3.If more than one device is connected to your computer, select the appropriate device forsynchronization. Each device has its own settings.4.In the Media Sync window, click next to the device you want to sync.5.Click Custom Sync.6.Select the files and folders to sync, and then click Continue.7.Under Sync files for, select the type of device you are synchronizing.To sync only files that can be opened on a specific Apple or Android device, choose the device from the list. To sync all files identified as movies, music or photos, select All digital devices.8.Select the type of files to include.9.To see the file types for the selected device, click Review file types included.10.Click Finish.11.Click Sync Now, or select Automatic Sync to use that option.The Automatic Sync feature continuously tracks changes in synchronized folders andoverwrites the previous files with the newer version. Automatic Sync only works when your external device is connected.Your media is stored on your drive in a folder UserName_ComputerName.Note: If you are using Windows and your drive is partitioned, the folders with your synchronized data have the partition letter followed by the name of the computer. For example, if your customsync plan is synchronizing files on both your C: and D: partitions, the folders would beC_FolderName and D_FolderName.Change or Delete Sync Plans1.Click next to the drive.2.To delete the sync plan, click Delete sync plan. To modify your plan, click Edit syncsettings.2. Customizing Your Drive Settings (Windows Only) Use Power-Saving Mode 2.Customizing Your Drive Settings(Windows Only)You can control your drive’s settings, such as power and lighting, in the Seagate Media Sync app. By customizing power settings, for example, you can conserve the battery power so your drive stays on longer.Use Power-Saving ModeIn power-saving mode, your drive stops spinning when it is not in use for a certain time.Although power-saving mode uses less electricity, it takes more time for your drive to become active again when you want to use it.If you use your drive frequently, you can choose a longer time interval so your work is not interrupted when accessing files. If you use your drive less frequently, choose a shorter time interval to save energy.1.In Seagate Media Sync, click .1.In the Settings window, click Adjust Power Setting.2.Select an interval from the drop-down menu, or click Default to return to the 5-Minute setting.3.Click Apply to save the settings.4.Click Back to my devices to return to the Seagate Media Sync window.Test Your Drive for ErrorsYou can check the health of your drive and look for physical errors on your drive. Thediagnostic utility does not affect the data on your drive.1.In Seagate Media Sync, click .2.In the Settings window, click Test My Drive. The Test My Drive window opens.3.Click Test.If the diagnostic encounters an error during testing, the serial number of the bad device is displayed with instructions.4.Click OK to close the Test My Drive results.2. Customizing Your Drive Settings (Windows Only)Turn Drive Lights On or OffTurn Drive Lights On or OffYou can turn on or off the lights on your drive to save battery power. By default, your drive lights remain on and flicker to indicate drive activity and status.Note: This feature might not be supported on all Seagate drives.1.In Seagate Media Sync, click and then select Adjust Drive Lights.2.To turn the drive lights off, select Turn lights off.3.To turn the drive lights back on, click Display status and activity lights.4.Click Apply.Display Your Drive’s Free Space and Capacity1.In Seagate Media Sync, click to review the drive’s information.The drive information displays the serial number, firmware version, volume, capacity, free disk space, and file-system type.Display Tips and TricksYou can display popup messages that include special promotions and tips in the system tray.1.In Seagate Media Sync, click .2.In the Settings window, click Change Seagate Advisor Settings.3.Select Show Seagate Advisor messages. To turn messages off, deselect Show SeagateAdvisor messages.Check for UpdatesThe Software Update feature automatically displays when an update is available for the software. You can also manually check for new updates.1.In Seagate Media Sync, click .2.In the Settings window, click Check for Software Updates.3.To turn off Software Update, deselect Check for updates automatically.To check for updates, click Check Now. If new software is available, you can download it in the Software Updates window. For more information about the new software, click More Info.。
HP Color LaserJet Pro M454 使用指南说明书
惠威HR70遥控器使用说明书
HR070 Series Remote Control Programming Guide
6. Repeat steps 1 to 5 for the other components you want to control. For future reference, write down each working component code below:
HR Series Remote Control Programming
Assigned Push-button Component Program Code
TV
CBL
SAT
AUX
DVR
Push-buttons available for Programming
Flashes during Programming
4
Used to activate Programming Mode
with the most popular code first. If the component
responds, go to step 7.
6. If the component does not respond, press LEVEL+
Push-button and the Remote Control will test
The HR70 Series Remote Controls have stored in permanent memory the necessary information to send the correct commands to the component to be controlled. By entering a five digit numeric code the commands for controlling the component is activated.
ST25DV-DISCOVERY 动态NFC RFID标签发现器数据简介说明书
ST25DV-DISCOVERYFor further information contact your local STMicroelectronics sales office.September 2017DocID029577 Rev 21/4ST25DV-DISCOVERYDiscovery kit for the ST25DV04K dynamic NFC/RFID tagData briefFeaturesTwo ready-to-use printed circuit boards (PCB):•ST25DV_Discovery_Mboard:–STM32F405VGT6 LQFP100 32-bitmicrocontroller, with 1 Mbyte Flashmemory, 192 + 4 Kbytes SRAM.–LCD color screen (320 x 200 pixels)–Touch screen driver–Different color LEDs (power, user, ST link)–User push button–Joystick for menu selection–Reset button–On board ST link for microcontrollerfirmware upgrade and debug–ST link mini USB–User micro USB–USB micro or mini connector for boardpowering–Demonstration use cases stored inmemory–Demonstration edition (optional add-onmodule) with Bluetooth Low Energymodule, Wi-Fi ® module and JTAG 20 pinconnector •ST25DV_Discovery_ANT_C5: –40 mm x 24 mm, 13.56 MHz inductive antenna etched on the PCB –ST25DV04K Dynamic NFC / RFID tag –I 2C interface connector –Energy harvesting output (VOUT) with a 10 nF capacitance filtering circuit –GPO configurable as RF WIP/BUSY output, to indicate that an RF operation is ongoing Figure 1. ST25DV Discovery board (top side)Table 1. Device summary ReferenceOrder code ST25DV-DISCOVERY ST25DV-DISCOVERYDescription ST25DV-DISCOVERY 2/4DocID029577 Rev 21 DescriptionThe ST25DV-DISCOVERY is a demonstration kit to evaluate the features and capabilities ofthe ST25DV series. It is based on the NFC ST25DV04K device embedded on a daughtercard using a Class 5 antenna and a STM32 processor driving a mother board. A dedicatedsoftware stored in the Flash memory is provided.The ST25DX_Discovery_Mboard is available in two versions. The demonstration editionincludes all of the standard edition features with Wi-Fi ®, and BLE (Bluetooth Low Energy)modules to demonstrate various connectivity use cases. The standard edition is used toachieve the demonstration edition features.The ST25DV04K device is a dynamic NFC/RFID tag IC with a dual interface. It embeds a4 Kbits EEPROM memory. It can be operated from an I 2C interface, or by a 13.56 MHzRFID reader, or by a NFC phone. The ST25DV04K Class 5 antenna daughter card, includedin the kit, can be replaced by Class 1 or Class 6 antennas. For this purpose an ST25DVantennas bundle is available for ordering. Its references are available on the ST web site.The ST25DV I 2C interface uses a two-wire serial interface, consisting of a bidirectional dataline and a clock line. The I 2C two-wire serial interface behaves as a slave in the I 2Cprotocol. The RF protocol is compatible with ISO/IEC 15693 and NFC Forum Type 5 tag contactless interface.The boards are powered through the USB connectors.The ST25DV-DISCOVERY (MB1283 & MB1285) schematics, BOM, gerber files, drivers andfirmware sources can be downloaded from .Figure 2. Block diagramST25DV-DISCOVERY Revision history 2 RevisionhistoryTable 2. Document revision historyDate Revision Changes25-Jan-20171Initial release.05-Sep-20172New release with kit modificationsUpdated:–Features–Description–Figure 1: ST25DV Discovery board (top side)–Figure 2: Block diagramDocID029577 Rev 23/4ST25DV-DISCOVERYIMPORTANT NOTICE – PLEASE READ CAREFULLYSTMicroelectronics NV and its subsidiaries (“ST”) reserve the right to make changes, corrections, enhancements, modifications, and improvements to ST products and/or to this document at any time without notice. Purchasers should obtain the latest relevant information on ST products before placing orders. ST products are sold pursuant to ST’s terms and conditions of sale in place at the time of order acknowledgement.Purchasers are solely responsible for the choice, selection, and use of ST products and ST assumes no liability for application assistance or the design of Purchasers’ products.No license, express or implied, to any intellectual property right is granted by ST herein.Resale of ST products with provisions different from the information set forth herein shall void any warranty granted by ST for such product. ST and the ST logo are trademarks of ST. All other product or service names are the property of their respective owners.Information in this document supersedes and replaces information previously supplied in any prior versions of this document.© 2017 STMicroelectronics – All rights reserved4/4DocID029577 Rev 2ST25DV-DISCOVERY。
