POS小票打印机设置
票据打印机使用说明

第一章 性能指标
1. 打印方法: 九针列式双向打印
2. 打印密度:
42CPL-210( 全点)/420(半点) 40CPL-200(全点)/400(半点)
3. 有效打印宽度:42CPL-42(7×7)/35(5×7) 40CPL-40(7×7)/33(5×7)
4. 打印速度:
本打印机具有逻辑搜索功能,可以显著提高整体 打印速度。
16.打印机可靠性:900 万行(MCBF). 使用条件:必须使用厂家指定的打印纸、打印内容和指定色带的 情况下才能保证该使用寿命。
17.环境适应 : 工作温度:5-40℃, 相对湿度:10-80% 储存温度:-20-60℃,相对湿度:10-90%
18.产品型号:
表 1-18-1 产品型号列表
类
型号
选择切纸方式及切纸送纸
传送状态
4
GS z 0 t1 t2 FS ! n FS & FS . FS 2 c1 c2 d1…dk FS ? c1 c2 FS S n1 n2 FS W n GS ( F PL PH a m nL nH GS FF
设置在线恢复等待时间 设置汉字打印方式 进入汉字打印方式 退出汉字打印方式 用户自定义汉字 取消用户自定义汉字 设置汉字字左字右间距 设置/取消汉字四倍模式打印 设置黑标定位偏移量 送黑标纸至打印起始位置
型号
打 印 速 度 (行/秒) 16CPL 时 40CPL 时 42CPL 时
POS2000
7.12
4.18
4.12
5. 走纸速度: 6. 打印字符:
约 100mm/秒
IBM 字符集 II,7×7 点,或 5×7 点 国标汉字一、二级字库,15×16 点 字符说明: 5×7 点(W×H):全点打印,水平方向占 6 个全点。 7×7 点(W×H):半点打印,水平方向占 10 个半点。 其中,一个全点大小为:0.318mm(W)×0.353mm(H)
亿利达POS-FM简易操作指南

亿利达POS-FM简易操作指南一、开票前准备工作1、登录税控开票软件:第一次登录时,系统默认的操作员为“001”,密码为“001”。
进入后,用户可自行设置操作员和口令,以便下次登录时使用。
2、票样设置(行业选择):用户可根据业务需求选择相应的票样。
设置方法为:单击。
3、程可在演示版软件中进行)。
4、收费项目设置:开票前必须设置收费项目,收费项目设置完成后才能打印发票。
操作如下:单击菜单中的收费项目设置命令-单击“增加”按钮设置收费项目-[保存]。
5、发票分发:发票分发就是把用户购买的发票通过用户卡将发票的号码和张数分发到税控器和税控卡中统一管理。
操作如下:1)先插入用户卡,单击菜单中的命令或单击主界面中的快捷键;2)单击“读取发票”按钮;发票分发界面会按发票卷显示发票起始号、发票终止号、发票代码和发票使用情况(正使用或未使用),此操作只是从用户卡中将发票号读入到税控器中;3)选中要使用的发票,单击“使用发票”按钮,该卷发票的使用状况栏中会显示“正使用”,此操作是把税控器中的发票号分发到税控卡中;(一次只能使用一卷发票,不能同时使用多卷);4)发票分发完成后,退出发票分发界面。
注:①开票前必须先分发发票。
②开票时不用插入用户卡。
③分发发票时,可以一次读取多卷发票到税控器,但一次最多读取20卷。
④使用发票时,是将税控器中存有的发票分发到税控卡中,一次只能读入一卷,用完后再继续分发。
二、销售开票操作开票打印:“开票打印”就是填写付款单位、消费项目和金额等开票信息,并打印发票。
操作如下:1)单击菜单中的命令或单击主界面中的快捷键;2)填写“付款单位”;(必须填写)3)填写用户“开票项目”(必须选择)、“规格”和“数量”(可不填)和“金额”(必须填写);4)单击“开票打印”按钮,开票完成;5)开票完成后,机打票号栏中的发票号会自动向后滚动一张;当一卷发票已用完后,系统会如下提示:没有已分发但未使用的发票号(税控卡无发票)!注: 单张发票付款总额不能超过税控卡中所允许的单张发票限额,此时应分多张发票打印,使单张发票总额不超过税控卡中所允许的单张发票限额!三、发票异常情况处理1、退票登记:“退票”是指所涉及的服务在发票开出后被取消或因发票受票人、服务项目、金额等内容有误而需要做退还处理的发票。
小票机调整及操作流程
BJ-A水泥搅拌桩电脑喷灌自动记录仪调整及操作流程小票调整流程:一.按一下“下钻”按两下退出。
1.第一项为桩号,按“结束”灯闪时调速数字(下钻为加,喷浆为减)调好桩号的数字后按一下“结束”,再按一下“下钻”进行下一项调整。
2.第二项为段浆量,一般为63就行。
(这项一般不用调)再按一下“下钻”进入下一项。
3.第三项为日期中的年,调好××××年后,按一下“下钻”进行下一项。
4.第四项为日期中的月,调好××月后,按一下“下钻”进行下一项。
5.第五项为日期中的日,调好××日后,按一下“下钻”进行下一项。
6.第六项为时间中的小时,调好××小时后,按一下“下钻”进行下一项。
7.第七项为时间中的分钟,调好××分钟后,按一下“下钻”进行下一项。
8.第八项为小票显示,(一般为3不用调)按一下“下钻”调整完后。
(打票有曲线图)小票操作流程:一.桩机下钻和提钻前必须操作提前操作下小票机按钮,检查下钻和喷浆数字是否有变动,是否正确。
1.桩机下钻前,按“下钻”和“喷浆”按钮,桩机开始下钻。
2.提钻前按一下“提钻”按钮,桩机开始提钻。
3.进行二次搅拌,下钻前,同样按“下钻”按钮,桩机开始下钻。
4.二次搅拌提钻前按一下“提钻”按钮,桩机开始提钻。
5.钻打完成后,先按“结束”,后按“打印”,一根桩小票操作结束,小票机开始打印。
补打小票步骤:一.先按“下钻”,后按6次“退出”。
二.按一次“喷浆”看到第一显示格显示为第数字11,再按一次“结束”看到灯闪几下就停下来了。
备注:(再按“结束”灯闪时进行数字调整,“下钻”为加,“喷浆”为减,调好后按一次“结束”表示为确认。
)1.第一项为桩号。
2.第二项为下钻xx。
3.第三项为复搅xx。
4.第四项为参数不用调。
(一般为5)5.第五项为××月。
6.第六项为××日。
OKI POS系统浏览器配置与打印机设置指南说明书
Guide to Browser Setup and OKI Printer Settings2About this GuideThe purpose of this guide is to show how to configure your browser and which printer settings to use to get the best results with our POS system. The printer settings are based on OKI C511dn and OKI C531dn but you will be able to use very similar settings with other OKI models and should be able to adapt the settings to any other type of printer.ContentsBrowser Configuration:About PDF Files and Your Web Browser .............................3Google Chrome ....................................................3Internet Explorer ...................................................4Mozilla Firefox .. (4)Printer Settings:About Printer Settings .............................................6Shelf Talkers .......................................................6Banners ...........................................................9A4 ................................................................11A4 Landscape .....................................................13A4 Double-Sided ..................................................14A5 ................................................................16A5 Double-Sided ..................................................17A3 Poster (printed on 2 A4 pages, taped together) .. (18)3Browser ConfigurationAbout PDF Files and Your Web BrowserSigns produced with our system are downloaded to your computer as a type of file called PDF (which stands for Portable Document Format).These type of files are very useful because they are the easiest way to deliver high-quality print-ready files to your browser.Your browser cannot display PDF files on its own - so it needs to use another application to do so. We recommend using Adobe Reader. This is a free PDF viewer provided by Adobe and is available from /reader/Google ChromeWhen Google Chrome is first installed, it will by default use its own PDF viewer.Once you have installed Adobe Reader, you’ll need to make sure you disable the Chrome PDF Viewer and enable Adobe Reader.In the address bar of Google Chrome, type this in: chrome://pluginsYou should now see the list ofplugins available. Look for “Chrome PDF Viewer”. If it is not already greyed out, click “disable”.(continued next page)4Google Chrome (continued)Now you need to look for Adobe Reader on the same list and click “enable”:You shouldn’t need to restart your browser. If you currently have a PDF onscreen click “update” so the PDF will reload using Adobe Reader.Internet ExplorerInternet Explorer should just use Adobe Reader by default if it is installed. Makesure you have the most up-to-date version of Adobe Reader by visiting /reader/FirefoxWhen Firefox is first installed, it will by default use its own PDF viewer. You’llneed to change Firefox’s settings so it will use Adobe Reader instead.First, make sure you see the menu items at the top of your browser:If you don’t see the standard menu items, right-click towards the top of your browser in a blank space and select “Menu Bar”:(continued on next page)5Firefox (cont’d)Now select “Tools”, then at the bottom of that menu, select “Options”.You should now see this window with your browser options:Select “Applications”. You will then see a list of the applications that are used by the browser to display different types of files. Scroll down this list (it’s alphabetical) until you get to “Portable Document Format (PDF)”.On the right, select “Use Adobe Acrobat (in Firefox)”. Be careful you select this option, and not “Use Adobe Reader”. Even though you will be using Adobe Reader, the “Use Adobe Acrobat (in Firefox)” option makes it possible to see the PDFs onscreen in yourbrowser window rather than opening them separately.6Printer SettingsAbout Printer SettingsDepending on what size paper you are using, you will need to use different settings in the print dialogue. Once you have created your settings, if you are using an OKI printer you will be able to save your settings for a particular size.Then, to recall your settings for that size later, you click “Properties” in the print dialogue and select your saved settings from the Driver Settings box in the lower left.The best way to proceed is to create all of your custom settings for each size first and save them all, then you will be able to quickly bring the settings back when you need them.Shelf Talkers (203 x 74mm)1. Select your printer2. Click Actual size3. Click Auto portrait/landscape 4. Click Propertiesbutton (continued next page)75. Click the Sizedropdown and select “User Defined”6. Enter Width: 75, Length:203, click mm , then click OK (Note: for Mini Shelf Talkers, this should be Width: 75, Length: 150)7. Click the Sourcedropdown and select “Multipurpose Tray” 8. Click “Landscape” inthe Orientation box. (If you have an older model OKI printer, you will find theOrientation settings in the Job Options tab.)(continued on next page)89. At the lower left, clickSave in the Save Driver Settings box.10. Type in “shelftalker” and be sure the Include media settings checkbox is checked. Click OK . You will now be able to recall these settings next time you print a shelf talker by selecting “shelf talker” from the Driver Settings box.11. Open the multipurposetray on the front of the printer. Insert your pre-cut shelf-talker paper the long way and slide the guides in at the left and right. You are nowready to print.9Banners (210 x 900mm)1. Select your printer2. Click Actual size3. Click Auto portrait/landscape 4. Click Propertiesbutton 5. Click the Sizedropdown and select “User Defined” (if you have an older model OKI printer, you may have “Banner” as an option here - if so, select it and skip step 6)6. Enter Width: 210, Length:900, click mm , then click OK(continued next page)10Banners (cont’d)7. Click the Sourcedropdown and select “Multipurpose Tray” 8. Click “Landscape” inthe Orientation box. (If you have an older model OKI printer, you will find theOrientation settings in the Job Options tab.)9. At the lower left, clickSave in the Save Driver Settings box.10. Type in “banner” andbe sure the Include media settingscheckbox is checked. Click OK . You will now be able to recall these settings next time you print a banner by selecting “banner” from the Driver Settings box.(continued next page)11Banners (cont’d)11. Open the back panel of the printer. This will allow the banner to feed straight through and is the best way to avoid paper jams.12. Open the multipurpose tray on the front of the printer. Insert your banner paper and slide the guides in at the left and right. You are now ready to print.A4 (210 x 297mm)1. Select your printer2. Click Actual size3. Click Auto portrait/landscape4. Click Properties button(continued next page)12A4 (cont’d)5. Click the Size dropdown and select A4 210 x 297 mm6. For Source select Tray 17. For Orientation select Portrait (If you have an older model OKI printer, you will find the Orientation settings in the Job Options tab.)8 At the lower left, click Save in the Save Driver Settings box.9. Type in “A4” and be sure the Include media settings checkbox is checked. Click OK . You will now be able to recall these settings next time you print a banner by selecting “A4” from the Driver Settings box.You are now ready to print. Click OK , then click Print.13A4 Landscape1. Select your printer2. Click Actual size3. Click Auto portrait/landscape4. Click Properties button5. Click the Size dropdown and select A4 210 x 297 mm6. For Source select Tray 17. For Orientation select Landscape (If you have an older model OKI printer, you will find the Orientation settings inthe Job Options tab.)14A4 Landscape (cont’d)8 At the lower left, click Save in the Save Driver Settings box.9. Type in “A4 Landscape” and be sure the Include media settings checkbox is checked. Click OK . You will now be able to recall these settings next time you print a banner by selecting “A4 Landscape” from the Driver Settings box.You are now ready to print. Click OK , then click Print.A4 Double-Sided1. Select your printer2. Click Actual size3. Click Auto portrait/landscape4. Click Properties button(continued next page)15A4 Double-Sided (cont’d)5. Click the Size dropdown and select A4 210 x 297 mm6. For Source select Tray 17. For Orientation select Portrait (If you have an older model OKI printer, you will find the Orientation settings in the Job Options tab.)8. In 2-Sided Printing , select Long Edge9. At the lower left, click Save in the Save Driver Settings box.10. Type in “A4 Double-Sided” and be sure the Include media settings checkbox is checked. Click OK . You will now be able to recall these settings next time you need them.You are now ready to print. Click OK , then click Print.16A5 (148 x 210 mm)1. Select your printer2. Click Actual size3. Click Auto portrait/landscape4. Click Properties button5. Click the Size dropdown and select A5 148 x 210 mm6. For Source select Multipurpose Tray7. For Orientation select Portrait (If you have an older model OKI printer, you will find the Orientation settings in the Job Options tab.)(continued next page)17A5 (cont’d)8. At the lower left, click Save in the SaveDriver Settings box.9. Type in “A5” and be sure the Include media settings checkbox is checked. Click OK . You will now be able to recall these settings next time you need them.10. Open the multipurpose tray on the front of the printer. Insert yourpre-cut A5 paper the long way and slide the guides in at the left and right. You are now ready to print.A5 Double-Sided1. Select your printer2. Click Actual size3. Click Auto portrait/landscape4. Click Properties button(continued next page)18A5 Double-Sided (cont’d)5. Click the Size dropdown and select A4 210 x 297 mm6. For Source select Tray 17. For Orientation select Portrait (If you have an older model OKI printer, you will find the Orientation settings in the Job Options tab.)8. In 2-Sided Printing , select Long Edge9. At the lower left, click Save in the Save Driver Settings box.10. Type in “A5 Double-Sided” and be sure the Include media settings checkbox is checked. Click OK . You will now be ableto recall these settings next time you needthem.11. Open the multipurpose tray on the front of the printer. Insert your pre-cut A5 paper the long way and slide the guides in at the left and right. You are now ready to print.19A3 Poster Printing (printing A3 on two A4 sheets)1. Select your printer2. In Page Sizing & Handling , click Fit3. Click Auto portrait/landscape4. Click Properties button5. Click the Size dropdown and select A4 210 x 297 mm6. For Source select Tray 17. For Finishing Mode select Poster Print8. In Orientation, select Portrait9. At the lower left, click Save in the Save Driver Settings box.10. Type in “A3 Poster” and be sure the Include media settings checkbox is checked. Click OK . You will be able to recall these settings here next time you need them.You are now ready to print. Click OK , then click Print .。
POS80 热敏小票打印机使用说明书
POS80 Thermal Printer User’s ManualCatalogue1.1 Brief introduction (2)1.2 Main features (2)2 specification (3)2.1 Specification (3)2.2 Printing material requirements (5)2.2.1 Paper parameters (5)2.2.2 Mark paper parameters (5)2.2.3 Paper using attention (5)2.3 Printing and paper cutting position (6)2.3.1 Printing position (6)2.3.2 Paper cut position (6)3 Appearance and components (7)3.1 Appearance and components (7)3.2 Indicator and buzzer instruction (8)4 Printer installation (9)4.1 Open the package (9)4.2 Requirements of installation position (9)4.3 Connect to power adapter (9)4.4 Connect communication cables (9)4.5 Connect to cash drawer (9)4.6 Paper roll loading (10)4.6.1 Printing paper type confirmation (10)4.6.2 Loading/change paper roll (10)4.7 Set DIP switch (12)4.8 Printer self-test (12)4.9 Set ethernet port IP address (12)5 Interface pin definition (14)5.1 Parallel interface pin definition(DB25M) (14)5.2 USB interface pin definition(standard B type female base) (14)5.3 Power interface pin definition(MPC-3-001B) (15)5.4 Cash drawer interface pin definition(RJ11-6P6C) (15)5.5 Serial port pin definition(DB9F) (16)5.6 Ethernet interface pin definition(RJ45) (16)6 Faults handling (17)6.1 Printer does not work (17)6.2 Indicator light error and buzzer warning (17)6.3 Problems when it is printing (17)6.4 Problems when cutting paper (18)6.5 Paper jam and cutter retraction troubles removal (18)1 Introduction1.1 Brief introductionPOS80 is a thermal POS printer with auto-cutter. It has good printing quality, high printing speed and high stability, which is widely used in POS system, food service industry and many other fields.POS80 connects other devices via parallel, serial or USB port. It offers drivers for WINDOWS and LINUX operating systems.The supported operating systems are as below:WINDOWS XPWINDOWS 7 32/64WINDOWS 8UBUNTU 12.04 32/64UBUNTU 14.04 32/641.2 Main features1)With auto-cutter2)Low noise and high printing speed3)Easy paper loading4)Easily use and maintain5)Support mark paper and continuous paper printing6)Compatible with many kinds of paper width7)With cash drawer interface8)Optional communication interfaces(Such as USB, parallel, serial, Ethernet)9)Optional Wireless communication function(Wi-Fi or Bluetooth, just for special models)2 Specification2.1 SpecificationItem ParameterPrinting parameter Printing method Thermal printingResolution 203DPI,8 dots/mmPrinting width 72mm(576 dots)Printing speed About 250 mm/sInterfacesStandard: cash drawer /USB interfaceOptional: serial/parallel/Ethernet portsOptional Wireless Communication: Wi-Fi or BluetoothPage mode / Support(Optional)Command set / ESC/POS compatible commandsStorageRAM RAM 8M bytes, receive buffer area 1M bytes FLASH FLASH 4M bytes, NV bitmap 256K bytescharactersChinese GB18030 24×24Words, figures ASCII 9×17,12×24User-defined SupportCode pagesOptional international character sets 45TRADITIONAL CHINESECHINESECP437 [U.S.A., Standard Europe]KatakanaCP850 [Multilingual]CP860 [Portuguese]CP863 [Canadian-French]CP865 [Nordic]WCP1251 [Cyrillic]CP866 Cyrillic #2MIK[Cyrillic /Bulgarian]CP755 [East Europe,Latvian 2]IranCP862 [Hebrew]WCP1252 Latin IWCP1253 [Greek]CP852 [Latina 2]CP858 Multilingual Latin Ⅰ+Euro)Iran IILatvianCP864 [Arabic]ISO-8859-1 [West Europe]CP737 [Greek]WCP1257 [Baltic]ThaiCP720[Arabic]CP855CP857[Turkish]WCP1250[Central Europe] CP775WCP1254[Turkish]WCP1255[Hebrew]WCP1256[Arabic]WCP1258[Vietnam]ISO-8859-2[Latin 2]ISO-8859-3[Latin 3]ISO-8859-4[Baltic]ISO-8859-5[Cyrillic]ISO-8859-6[Arabic]ISO-8859-7[Greek]ISO-8859-8[Hebrew]ISO-8859-9[Turkish]ISO-8859-15 [Latin 3] Thai2CP856Chart / Supports different density dots and images printingsSupports grating bitmap printingSupports download bitmap printing, every bitmap size should less than 256K, and the total capacity of download bitmap is 256K.Bar codes 1DUPC-A、UPC-E、EAN-8、EAN13、CODE39、ITF、CODEBAR、CODE128、CODE932D PDF417、QR CodeDetection function Sensor Paper out, cover opened, paper will be lack(optional),un-take out printed paper(optional)LED indicatorPower indicator Green Paper out indicator Red Error indicator RedPaper RequirementType Standard thermal receipt paper Width 79.5±0.5mmThickness 0.056~0.1mmDiameter 80mm(Max.)Physical characteristicsPaper loading Easy paper loadingPaper cutting Manual or automatically cut paper Operating condition -10℃~ 50℃,25% ~ 80%RH Storage condition ~40℃~ 70℃,≤93%RH(40℃)Outline dimension 145mm×195mm×144mm(W×L×H)Weight 1.1KgReliabilityTPH life 50kmCutter life 2,000,000 times Motor life 360,000 hoursSoftware function Driver procedure Windows(WIN7/WIN8/Vista/XP/2000)Ubuntu 12.04 32/64, Ubuntu 14.04 32/642.2 Printing material requirements2.2.1 Paper parameters1)Paper type: thermal receipt paper/thermal black mark paper2)Paper width:80±0.5 mm3)Paper roll diameter: 80 mm (Max.)4)Paper thickness:0.065 ~ 0.10mm2.2.2 Mark paper parametersBlack mark imprint position is on the front side of the receipt when using mark paper. The black mark reflectivity is no more than15%, the other parts of paper reflectivity should be more than 85%.There are not any patterns in black mark area, such as ad, and the mark size shall be satisfied with requirements as below:2.2.3 Paper using attentionNote:1)Please use good quality paper, otherwise, it will effect printing quality and even reduce printer head life.2)Don’t make the paper stick on axis.3)Paper will be fading out or reduced thermal sensitivity if it is polluted by chemical or oil, which will affectprinting effects.4)Don’t use nail or hard things to clash printing paper, otherwise, it will be fade out.5)Paper will be fading out if the environment temperature exceeds 70°C. So please take note the temperature,humidity and illumination effects.2.3 Printing and paper cutting position2.3.1 Printing positionL1-Paper storehouse’s width: 82±0.5mmL2-Effective printing width: 80mmL3-Distance between print head to paper storehouse’s left edge (fixed width): 3±0.3mmL4-Distance between print head to paper storehouse’s right edge (fixed width): 3±0.3mmL5-Left margin: Default is 4mmL6-Printing area width: it is set by commands (refer to programming manual). Default is 72mm. L7-Right margin: Default is 4mm.2.3.2 Paper cutting positionThe distance between print head to cutter: 12.5mm3 Appearance and components 3.1 Appearance and componentsFunction instruction of components1)Power switchPress “O” side to power off, press “I” side to power on.2)Power indicator(green)The indicator is on when power on, and it is off when power off.3)Error indicator (Red)Error indicator is on when it detects error. Such as: paper out, upper cover is open and cutter is stocked. 4)Paper indicator(red)Paper out indicator is on when it detects the paper is out. Please put a new paper roll to printer inside then.3.2 Indicator and buzzer instruction1)Function instruction of indicators and buzzerName Status InstructionPower indicator (Power) On Printer is power on Off Printer is power offError indicator (Error) On Printer is in error status Off Printer is in normal statusPaper out indicator (Paper)On Printer is in paper out status Off Printer is in normal statusDescription Power Indicator Error Indicator Paper Indicator Buzzer Open printer cover On On On It rings 6 times by 1.5s.Paper is enough On Off Off Silent Paper out On On On It rings 3 times by 1.5s.Note: Printer detects printer head temperature via thermal resistance. It will cut off print head powerand stop printing if print head is overheat. The print head protection temperature is 80℃.4 Printer installation4.1 Open the packagePlease make sure everything is in good status when you open the package. Otherwise, please contact to distributor in time.4.2 Requirements of installation position1)Put the printer on a stably place.2)Let the printer far away from water, fire, and sunlight.3)Avoid to put it on oscillatory and impassive place.4)Make sure to connect printer with ground safety4.3 Connect to power adapter1)Make sure the printer is power off.2)Connect power adapter’s DC output plug to the printer.3)Connect power adapter’s AC input plug to a power outlet.4)Please be careful to operate correctly when plug out the plug of power cord to avoid damage.4.4 Connect Communication cables1)Make sure the printer is power off.2)Connect communication cable to the printer’s port, and fix it as plug lag spike (or snap spring).3)Connect communication cable to the other side host.4.5 Connect to cash drawer1)Make sure the printer is power off.2)Connect cash drawer to cash drawer port behind the printer.Warning: The Voltage of cash drawer port is 24V. (It cannot connect to telephone cable.)4.6 Paper roll loading4.6.1 Printing paper type confirmationYou can load paper roll to print after connecting power adapter and communication cables. Please make sure the printing paper type before printing. The default paper type is continuous thermal receipt paper.4.6.2 Loading or change paper roll1)Power off the printer.2)Slide or press paper roll storehouse button, and then open storehouse cover.3)Draw out paper roll tap, and load paper roll as below.4)Draw out a printing paper, and leave some on the paper out month, then close the storehouse cover.5)The status after paper loading4.7 DIP switch settingDIP switch Switch Function On Off Default 1 Cutter Forbidden Enable Off 2 Buzzer Enable Forbidden On 3 Printing density DarkLight Off 4 Multi-byte encoding Single-byte encodingmulti-byte encodingOff 5 Max. number of Printing characters in each line42 48 Off 6 Cash drawer EnableForbiddenOn 7 Baud rate options (bps)Ref. Chart 1Off 8OffChart 1:Baud rate optionsBaud rate Switch 7 Switch 8 Default9600 On Off 19200 19200 Off Off 38400 On On 115200Offon4.8 Printing self-test page1) Make sure the printer loaded paper roll correctly.2) Press down [FEED] button and hold on, then power on the printer, the printer will print a self-test page.4.9 Set Ethernet port IP Address.The printer’s Ethernet IP address can be set directly via printer inserted web setting page. The operation steps are as below:1. Connect printer and PC in a same Ethernet LAN.2. Print a printer self-test page to get printer recent IP address (self-test page printing operation method refers to “4.8 printer self-test” instruction):You can find the printer’s IP address is same as 192.168.1.87 in self-test page “IP address: 192.168.1.87” 3. Set network card IP address in PC and printer IP address as different IP address in the same networksegment.(Such as 192.168.1.xxx, xxx is a number among 1 to 254);4. Please enter address “http://printer IP address ” in browse of PC after making sure that printer connects with Ethernet.(e.g.: If printer IP address is “192.168.1.87”, please enter “http://192.168.1.87”), then press Enter key,open Ethernet port setting page in browser as below:5. Click “Configure Interface” link in the left side, then enter the modified target IP and click “save” button tosave setting. Click “Reboot” button to reset printer if you want the setting to take effect.6. Enter the new IP address as the above step 4 procedure, and re-open printer Ethernet port setting web page, then click “Printer Status” link in the left side. And click “Printer Test Page” button to print self-test page, andcheck the IP Address contents in the self-test page is right or not.5 Interface pin definitionsThe printer has a cash drawer driver interface and many kinds of communication interfaces: parallel, serial (RS-232), USB and Ethernet ports. USB port and cash drawer interfaces are standard interfaces, and it has Ethernet, serial and parallel ports as optional.5.1 Parallel interface pin definition(DB25M)Number Signal Function Number Signal Function1 /STROBE Gate. Low level is10 /ACK Confirm. Low level is effectiveeffective2 DATA0Data bit is 011 BUSY Busy3 DATA1Data bit is 112 PE Paper out4 DATA2Data bit is 213 SEL Choose5 DATA3Data bit is 314 /AUTOFEED Change line automatically. Lowlevel is effective6 DATA4Data bit is 415 /ERROR Error. Low level is effective7 DATA5 Data bit is 516 /INIT Initialize. Low level is effective8 DATA6 Data bit is 617 /SELIN Choose input. Low level iseffective9 DATA7 Data bit is 718-25 GND Ground wire5.2 USB interface pin definition(standard B type female base)1)Pin definitionPin Number Signal name Typical wire color1 VBUS Red2 D- White3 D+ Green4 GND Black5.3 Power interface pin definition(MPC-3-001B)1)Pin definitionPin number Signal name1 +24V2 GND3 N.CSHELL F.G5.4 Cash drawer interface pin definition(RJ11-6P6C)1)Electrical specificationDriver voltage: DC24VDriver current: Max. 0.8A (within 510ms)Cash drawer status tests signal: “L” = 0~0.5 V ; “H” = 3~5 V2)Cash drawer interface socket uses RJ-11 6P type connector;3)Interface signal definitionPin number Signal function1 FG Printer cover2 DRAWER 1 Cash drawer 1 driver signal3 DRSW Cash drawer status detection signal4 VDR Cash drawer driver power5 DRAWER 2 Cash drawer 2 driver signal6 GND Common ground circuitNotes:1) Prohibit socket with power to pull out communication wire plug.2) Please avoid to parallel with strong power when wring communication cables av通讯线布线时应避免和强电并行;3) Communication cables use with shielded cables.5.5 Serial port pin definition(DB9F)Printer serial port is compatible with RS-232, the interface socket is DB9 female socket.User can check interface setting status via printing setting self-test page. Printer default serial interface is set as: baud rate 19200bps, 8 bit data bits, no parity,1 bit stop bit, and the handshakes method is DTR/DSR。
MY-POS58系列使用手册
将钱箱的插头顺着与打印机上接口垂直的方向小心地插入打印机钱箱接口,插入时一定 要注意插头与插座的方向,当听到“嗒”一生响时,表示已插到位。
-4-
PDF created with pdfFactory Pro trial version
解释:
该命令可设置字符倍宽、倍高打印,打印参数 n 的定义为:(n 值默认为 0)
位
″1″
″0″
7
——
——
6
——
——
5
倍宽字
——
4
倍高字
——
3
——
——
2
——
——
1
——
——
0
——
——
-7-
PDF created with pdfFactory Pro trial version
冷却下来,才开始除掉塞纸。 ·请勿将本产品放置在潮湿或多法的环境中。 ·不可重压,不能堆放。
使用上的注意事项 纸卷:必须使用符合要求的纸卷。 请勿使用易掉纸屑,炭粉的热敏纸,这种打印纸会严重降低产品的使用寿命。 请勿选用末端被黏合在纸轴上的纸卷,否则打印机便无法正确测出纸卷末端,可能对打印机 构造成损害。
-6-
PDF created with pdfFactory Pro trial version
美域产品使用手册
MY-POS58 系列
ESC 3
设置行间距为 n 点行
格式:
ASC II 码:E六进制码:1B
33
n
解释:
设置行间距为 n/180 英寸,n 值应为 0 到 255 之间任意值。
T+典型业务处理-POS外设配置

钱箱
连接方式:确定钱箱与主机的连接方式,看一下钱箱的数据线连接在顾
客显示器还是小票打印机:
图片中的这个钱箱是连接在 小票打印机上的,设置之前 先仔细看一下确定钱箱的连 接方式。
钱箱
指令:目前系统支持常用的8种指令,常见的两种是,27,122, 0,128,128和27,122,0,60,255。
整体介绍
登陆POS端在主菜单界面选择“5 【参数设置】” 。
在打开的界面中F1(参数设置)界面,分别对小票打印机、顾客显示 器、钱箱、电子称、双屏显示进行设置。
会员卡
会员卡
会员卡:无限制支持磁条卡、条码卡类型的会员卡;
IC卡串口:支持明华RF-35系列读卡器
IC卡USB接口:明华URF-R330读卡器
电子秤
计重秤补充说明: 当计重秤出现问题暂时无法向POS机输入数据或者POS收银补录数据 时,可以应用条码秤的方案处理,称重属性的存货,当在POS收银时 录入带有数量的条形码时,系统会自动解析不再读取计重秤的数据。 条码方案可设置如下:长度可随意设置能够表达标识位、存货编码、数量三个信息即可。
电子秤
会员卡-IC卡
T+后台制卡/读卡:零售选项中启用IC卡,会员档案中下载制卡驱动并 安装;
安装驱动的机器可以登录T+,在会员档案中制卡,会员查询、积分兑换、会员储值单 界面刷卡。
POS端读卡:
参数设置-IC卡设置,选择读卡器类型(明华RF-35系列、URF-R330);设置端口和 通讯参数。设置完成后,点击“测试”按钮,有“滴”的声音,读卡器设置成功! POS端不需要安装驱动,只要选对读卡器类型就可以。
收银秤:也叫PC秤,是集成了电脑和计重秤两种硬件的设备。这种设备的 显示屏多都是支持触摸的,适合使用触摸屏的收银模式。(目前支持:托 利多- iSmart系列 )
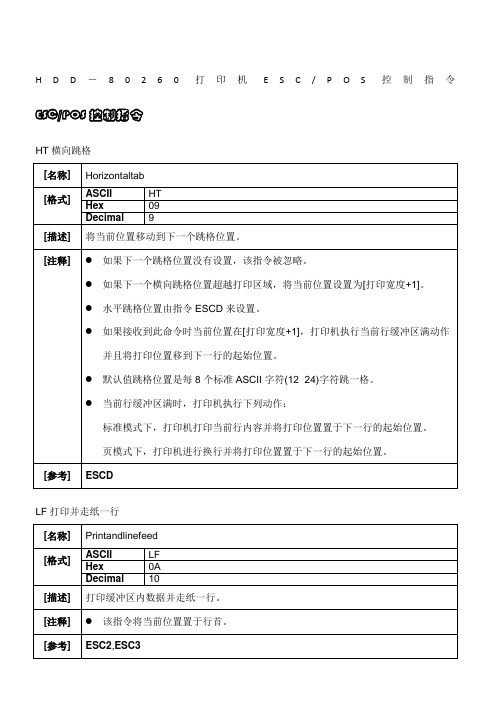
打印机ESCPOS控制指令
H D D-80260打印机E S C/P O S控制指令ESC/POS控制指令HT横向跳格LF打印并走纸一行FF打印并走纸CR打印并回车CAN页模式下删除打印缓冲区内容DLEDC4nmt实时产生钱箱开启脉冲ESCFF页模式下打印ESCSPn设置字符右间距ESC!n选择打印模式ESC$nLnH设置绝对打印位置ESC%n选择/取消用户自定义字符ESC&yc1c2[x1d1...d(y×x1)]...[xkd1...d(y×xk)]定义用户自定义字符ESC*mnLnHd1...dk选择位图模式ESC–n选择/取消下划线模式ESC2设置默认行高ESC3n设置行高ESC=n选择打印机ESCn取消用户自定义字符ESC@初始化打印机ESCDn1...nkNUL设置横向跳格位置ESCEn选择/取消加粗模式ESCGn选择/取消双重打印模式ESCJn打印并走纸ESCL选择页模式ESCMn选择字体ESCRn选择国际字符集ESCS选择标准模式ESCTn在页模式下选择打印区域方向ESCVn选择字符旋转打印ESCWxLxHyLyHdxLdxHdyLdyH页模式下设置打印区域ESC\nLnH设置相对横向打印位置ESCan选择字符对齐模式ESCc5n允许/禁止按键ESCdn打印并向前走纸n行ESCpmt1t2产生钱箱控制脉冲ESCtn选择国际扩展字符码表ESC{n选择/取消倒置打印模式FSpnm打印下载到FLASH中的位图FSqn[xLxHyLyHd1...dk]1...[xLxHyLyHd1...dk]n定义Flash位图GS!n选择字符大小GS#n定义当前下载图号GS$nLnH页模式下设置纵向绝对位置GS*xyd1...d(x×y×8)定义下载位图GS/m打印下载位图GS:开始/结束宏定义GSBn选择/取消黑白反显打印模式GSHn选择HRI字符的打印位置GSLnLnH设置左边距GSPxy设置横向和纵向移动单位①GSVm②GSVmn选择切纸模式并切纸GSWnLnH设置打印区域宽度GS\nLnH页模式下设置纵向相对位置GS^rtm执行宏命令GSfn选择HRI使用字体GShn选择条码高度①GSkmd1...dkNUL②GSkmnd1...dn打印条码GSv0mxLxHyLyHd1....dk打印光栅位图GSwn设置条码宽度FS!n设置汉字字符模式FS&选择汉字模式FS-n选择/取消汉字下划线模式FS.取消汉字模式FS2c1c2d1...dk定义用户自定义汉字FSSn1n2设置汉字字符左右间距FSWn选择/取消汉字倍高倍宽。