GPSTRACKER追踪王中文说明书
定位器中文说明书

GSM/GPRS/GPS定位追踪器使用手册序言.非常感谢您购买我们的GPS定位跟踪器。
使用手册将详细的说明如何操作本产品。
因此务必请您在使用产品前认真的阅读本份使用手册。
如有更改,恕不另行通知。
每次更改将统一在最新的一次产品销售中发布。
生产商对于使用手册其中的过失和疏漏不承担法律责任。
目录1 简介---------------------------------------------------------------------------------- 32 应用领域---------------------------------------------------------------------------------- 33 硬件3.1 前面---------------------------------------------------------------------------------------- 33.2 后面----------------------------------------------------------------------------------------- 33.3 侧面--------------------------------------------------------------------------------------- 33.4 底面----------------------------------------------------------------------------------------- 43.5 内部---------------------------------------------------------------------------------------- 44 规格描述------------------------------------------------------------------------------------- 41 简介本产品基于GSM/GPS网络和GPS卫星定位系统,通过短信息或互联系对远程目标进行定位或监控.。
GPSTrackerUserManualUT车载定位器使用说明书(精品)

UniGuard Technology LimitedGPS/GPRS/GSM Vehicle TrackerUser ManualUT01UniGuard Technology Limited 1System Function IntroductionThis v e h i c l e t r a c k e r h a s c o m b i n e d GPS and GSM(GPRS)functions.Location information will be send by SMS or GPRS.You can enquiry where the vehicle is on Google map and its history.You can control the vehicle the engine remotely by SMS or internet.UniGuard Technology Limited 2Product Description2.1SpecificationGSM module:l Band:850/900/1800/1900MHzl Max RF Output:33.0dBm±2dBml Dynamic Input Range:-15~-102dBmGPS module:l GPS chip set:SiRF Star IIIl Frequency:L1,1575.42MHzl Number of Channel:20Battery:l Voltage:3.7Vl Charge:<4.2VUniGuard Technology Limited l Li-ion:450mAhInput Voltage:DC6~36VOperating Temperature:-45~65℃2.2Features:e Google map,Global free2.Real-time locating/inquiry3.SOS button/Power-cut Alarm4.Listen by telephone5.E-fence/Over-speed Alarmpatible original anti-theft7.Remote control engine3Installation Instructions3.1InterfaceThe One side:The other side1、SIM:Port for SIM card2、PHONE:Connect to Microphone3、MIC:Connect to earphone4、LED1:Power light5、LED2:Status light6、ResetUniGuard Technology Limited 3.2Installation Figure3.3Installation and Test:Please test after installation.If you don’t need some functions,you can disconnect corresponding interface.Please make sure ACC,DC,GND installed correctly.Otherwise,the device cannot work.Please check the device status through signal light after power on:ØLED1is off which indicates there is no power.ØLED2flashes for one second which indicates GSM registers successfully.ØLED2flashes three seconds once which indicates GPS is obtainingUniGuard Technology Limited orientationØLED2is on which indicates work successfully that GSM has registered and GPS has obtained the orientation.ØIf LED2is on0.1second then off0.1second for more than3minutes, please make sure SIM card inserts well.Without SIM card,the device cannot work.4SMS Operation InstructionSMS Format:A******,cmd,param1,param2…1.******is the password,Initial Password is0000002.cmd is the command ID.3.Param is the command parameter.Different cmd use different parameters. All the parameters must use half-angle symbol.Wrong SMS format or wrong password,it will not respond.4.1Location Inquiry(000/100)1.Google Map reply Message format:A******,000e.g.A000000,000Reply:/maps?q=22.54079,113.9392309-10-2017:38:30 Speed:20you can just open the link from your cell to view the map.UniGuard Technology Limited2.Detailed Address Name reply Message format:A******,100e.g.A000000,100Reply:42Xiacheng North Rd,Wujin,Changzhou,Jiangsu,China4.2Change Password(001)Message format:A******,001,New Passworde.g.A000000,001,123456Note:000000is the old password,123456is the new password.Reply:Set Password OK!4.3Real-time return setting(002)Message format:A******,002,XXXXXX=0is for STOP,value of XXX is within[15~64800]seconds.e.g.A000000,002,30Message replied after successful setting:Set time interval(30)OK!Message contains position information will be sent in every30seconds after successful setting.4.4SOS/Listen Telephone Number settingMessage format:A******,003,P,TelNumberP=1is for SOS and listenP=2or3is the second\the third listen number.UniGuard Technology Limited e.g.A000000,003,1,136xxxxxxxxMessage replied after successful setting:Set Telephone OK!Keep pressing SOS button for2seconds.The device will send emergency SMS and dial the number you set as SOS number.Reply:SOS Pos:Longitude E114.04577Latitude N22.3240508-10-20 17:38:30,If you dial with your listen number,it can be connected automatically after the7th ring.Then you can listen the voice in the vehicle.4.5Over-speed Alarm Setting(005)Message format:A******,005,XXXXXX=[000,200](unit:km/h)XXX=00is close the function.e.g.A000000,005,020Message replied after successful setting:Set Over speed(20)KM OK!If the vehicle is over speed you set,it will send alarm SMS to SOS mobile number. 20KM/H Over speed!4.6e-Fence Setting(006)Message format:A******,006,XXXX=[00-50](Unit:100m).When XX=0,e-Fence is OFF.And the maximum limited value of XX is 50*100=5000m. e.g.A000000,006,10Reply:Set Distance(1000)M OK!When user is out of the bound region(e.g.UniGuard Technology Limited 1020m),a prompt message will be sent to the user:1020m is further than 1000m!4.7Cut-off the Vehicle Engine(007)Message format:A******,007,XX=0cut off engine,x=1resume engine,For security,this command will execute when the speed less than20Km/h or the ACC is off.e.g.A000000,007,05GPRS Communication Settings5.1Set APN(APN(Access Point NAME))Message format:A******,012,APNLength of APN is limited within100characters,E.g:A000000,012,cmnet “cmnet”is the APN of China Mobile5.2Set the IP and Port of Gprs_ServerMessage format:A******,010,IP,PORTe.g.A000000,010,121.37.58.10,6900121.37.58.10is the IP of GPRS_server,6900is the port of GPRS_Server application(be in communication with GPS Vehicle tracker)UniGuard Technology Limited 5.3Open GPRS functionMessage format:A******,011,X(note:x=1open GPRS,X=0close GPRS)e.g.A000000,011,1GPRS function will be open,and Vehicle tracker will send data to Internet,Users can turn off this function though send SMS:A000000,011,05.4Query the GPRS SettingIf the device can not be see on the internet,you will check the APN/IP/PORT and the GPRS function of SIM card.You can send message to check the GPRS setting.Message format:A******,004The device will send back GPRS setting parameters.You can check whether the parameter sets correctly by it.(1)Device ID(2)APN(China Mobile is CMNET,China Unicom is UNINET)(3)Server IP address(4)Server port(5)GPRS open status(0-off,1-on)(6)GPRS connecting status(0-Internet is bad,1-work well)UniGuard Technology Limited (7)GSM signal value(1~31),if value<10is too weak to work well.6GPS tracking system on website6.1User LoginGoogle Map can support many different languages.It can change language for local language by itself.6.2Vehicle monitoringChoose vehicle in the vehicle list on the left.Then right-click,it will show a menu.Choose the menu Go to Vehicle Current Location.If thereare location record of the choose vehicle,it could skip to the latestvehicle location.If the location is not in the scope of map,the system willset it in middle automatically and show the Remind message box.UniGuard Technology Limited6.3Vehicle real-time tracking1choose vehicleà2map modeà 3.vehicle state,Google map have3 model:map mode,satellitic mode and Hybrid modeMap mode satellites mode:UniGuard Technology Limited 6.4Vehicle history record playbackPlease point run history review page1choose vehicleà2start timeà3inquire timeà4.setup review speed à5start review process you can know that time date,speed,way and distance sum.。
GSM GPRS GPS TRACKER 说明书
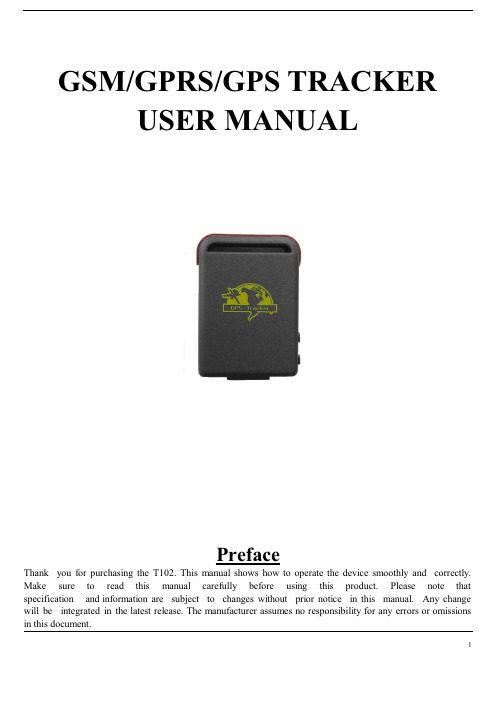
GSM/GPRS/GPS TRACKERUSER MANUALPrefaceThank you for purchasing the T102.This manual shows how to operate the device smoothly and correctly. Make sure to read this manual carefully before using this product.Please note that specification and information are subject to changes without prior notice in this manual.Any change will be integrated in the latest release.The manufacturer assumes no responsibility for any errors or omissions in this document.1Content1 Summary ---------------------------------------------------------------------------------- 32 Application --------------------------------------------------------------------------------- 33 Hardware description3.1 Front face -------------------------------------------------------------------------------------- 33.2 Rear face -------------------------------------------------------------------------------------- 33.3 Side face --------------------------------------------------------------------------------------- 33.4 Bottom face --------------------------------------------------------------------------------------- 43.5 Interior --------------------------------------------------------------------------------------- 44 Specifications ---------------------------------------------------------------------------------------- 45 Usage5.1 SIM card installation ----------------------------------------------------------------------- 55.2 Battery and Charger ------------------------------------------------------------------------ 55.3 Q uick Startup ---------------------------------------------------------------------- 65.4 Initialization ---------------------------------------------------------------------- 65.5 Change the password ---------------------------------------------------------------------- 65.6 Authorization -------------------------------------------------------------------------- 75.7 Real-time polling ------------------------------------------------------------------------ 75.8 Auto track ------------------------------------------------------------------ 85.9 Voice Surveillance ------------------------------------------------------------------------ 85.10 Modes switch between ¡track¡and ¡monitor¡ ------------------------- 85.11 Geo-fence ----------------------------------------------------------------------- 85.12 Movement Alert ----------------------------------------------------------------------- 95.13 Overspeed Alert ---------------------------------------------------------------------- 95.14 IMEI Check ---------------------------------------------------------------------- 95.15 SOS Button -------------------------------------------------------------------- 105.16 Low battery alert -------------------------------------------------------------------- 105.17 Hidden number tracking-------------------------------------------------------- 105.18 SMS center -------------------------------------------------------------------- 105.19 GPRS setting -------------------------------------------------------------------- 116 Cautions --------------------------------------------------------------------- 117 Faults & Solutions --------------------------------------------------------------------- 111 SummaryWorking Based on existing GSM/GPRS network and GPS satellites, this product can locate and monitor any remote targets by SMS or GPRS.2 Applicationsz Vehicle rental / Fleet management etcz Protect child / the old / the disabled / pet etcz Provide peace-of-mind for businessmenz Manage personnelz Track criminals secretly3 Hardware Description3.1 Front face3.2 Rear face3.4 Bottom face 3.5 Interior 4 Specs.Content Specs.Dim.64mm x 46mm x 17mm(1.8¡*2.5¡*0.65¡)Weight 50gNetwork GSM/GPRSBand 850/1800/1900Mhz or 900/1800/1900MhzGPS chip SIRF3 chipGSM/GPRS moduleSiemens MC55 or Simcom300 GPS sensitivity -159dBmGPS accuracy 5mTime To First Fix Cold status 45s Warm status 35sH ot status 1sCar charger12¡24V input5V output Wall charger 110ˉ220V input5V outputBattery Chargeable changeable 3.7V 800mAh Li-ion batteryStandby 48hours Storage Temp. -40¡C to +85¡COperation Temp. -20¡C to +55¡Cumidity 5%--95% non-condensing Install the battery like this.5 Usage5.1 SIM card installationMake sure that there is no call transfer and call display is on, and PIN code off. The SMS message must in Text format, can¡t be identified for PDU format.Steps:1 Open the rear cover, and pick out the battery.2 Push the foil along and turn it left.3 Put the SIM card into the holder, and turn the foil right and fasten it in place.5.2 Battery and ChargerDo charge the battery to capacity in 8 -12 hours for first use. Please use the battery and charger provided by the manufacturer. This unit adopts built-in Li-ion battery, and full battery will support around 48 hours use on end. After first use, the battery can be charged fully in 3-5hours.Cautions:a: For it¡s Li-ion battery, which contains harmful chemicals and may burst, please don¡t bump, puncture it violently and keep it off fire.b: Please charge the battery in time to keep it working normally.5.3 Startupz Put the SIM card and battery in place.z Turn on the unit outdoors by pressing the ¡on/off¡ button until the indicator is on.z For first use, please initialize the unit and restore it to default setting.( please refer to 5.4 for instruction.)z In 10 or 40seconds, the unit will begin to work and acquire the GSM signals as well as the GPS signals. The indicator will keep flashing every 4 seconds when the unit has received the signals, otherwise it will keep on.z When this unit receives GPS signals normally, you can use it and do all the following settings.5.4 InitializationSend ¡begin+password¡ in SMS to the unit, it will reply ¡begin ok¡ and initialize all the settings. (default password: 123456)5.5 Change the passwordSend SMS password+old password+space+new password to change the password.Remark:5.5.1 Be sure keep the new password in mind, you have to upload the software to restore the original setting in case of losing the new password.5.5.2 Make sure the new password is in 6 digits, or else the tracker can not recognize the password.5.6 AuthorizationThere are only 5 numbers able to be authorized.5.6.1 Call the tracker for 10 times, it will make the cell phone number as the authorized number automatically.5.6.2 Send SMS admin+password+space+cell phone number to set up a authorized number. The other authorized numbers should be set by the first authorized number. If the number is successfully authorized, the unit will reply ¡admin ok!¡ in SMS.5.6.3 Send SMS noadmin+password+space+authorized number to delete the authorized number.5.6.4 For roaming purpose, you have to add your country code ahead of the cell phone number, for example, please send admin123456 0086133******** to tracker to set 133******** as an authorized number.5.7 Real-time polling5.7.1If there is no authorized number, when any number dials up the unit, it will report a Geo-info; If there is already an authorized number, then it will not respond when an unauthorized number calls it up.5.7.2 When an authorized number dials up the unit, it will hang up and report a real-time Geo-info as below:5.8 Auto TrackReport a Geo-info at 30s intervals to the authorized numbers for 5 times:5.8.1 Set up: Send SMS t030s005n+password to the unit, it will report the Geo-info at 30s intervals for 5 times.(s: second, m: minute, h: hour). The setting must be in 3 digits and at maximum 255 in value.5.8.2 Send SMS t030s***n+password to the unit, it will reply SMS heaps of times5.8.3 Cancel: Send notn+password to delete the ¡ auto track ¡Remark: the interval must not be less than 20s.5.9 Voice SurveillanceIn this mode, the user can dial up the unit to monitor the voice (please refer to 5.10 for instruction).5.10 Modes switch between ¡track¡ and ¡monitor¡5.10.1. The default mode is ¡track¡.5.10.2. Send SMS monitor+password to the unit, and it will reply ¡monitor ok!¡ and switch to ¡monitor¡mode.5.10.3. Send SMS tracker+password to the unit, it will reply ¡tracker ok!¡ and restore to ¡track¡ mode.5.11 Geo-fenceSet up a geo-fence for the unit to restrict its movements within a district. The unit will send the message to the authorized numbers when it breaches the district.5.11.1 Set up: When the unit stays immobile in a place for 3-10 minutes, the user can Send SMS stockade+password+space+latitude,longitude; latitude,longitude to unit to set therestricted district. In case of breach, it will send SMS ¡stockade!+geo-info¡ to the authorized numbers.Remark : The first latitude&longitude is coordinate of the top left corner of the Geo-fence, while the second latitude&longitude is the coordinate of the bottom right corner. It will alarm one time in each setting.5.11.2 Cancel: Send SMS nostockade+password to deactivate this function.This function will be out of effect after the unit moves outside the district.5.12 Movement alert5.12.1 Set up: When the unit stays immobile in a place for 3-10 minutes, the user can send SMS move+password to the unit, then the unit will reply ¡move ok!¡. In case of such a movement, it will send SMS ¡Move¡ along with a Geo-info to the authorized numbers. It will alarm one time in each setting.5.12.2 Cancel: Send SMS nomove+password to deactivate the movement alert.Remark: This function will be out of effect after the unit moves outside the district.5.13 Overspeed alert:5.13.1 Set up: Send SMS speed+password+space+080 to the unit (suppose the speed is 80km/h), and it will reply ¡speed ok!¡. When the target moves exceeding 80 km/h, the unit will send SMS speed+080!+Geo-info to the authorized numbers. It will alarm one time in each setting. 5.13.2 Cancel: Send SMS nospeed+password to deactivate the overspeed alertRemark: It is recommended that the speed alarm is set at not less than 50km/h. For below that rate, it may cause the excursion of the GPS signal influenced by clounds etc.5.14 IMEI checking:Send SMS imei+password to the unit to check the IMEI number.5.15 SOS buttonPress the SOS for 3 second, it will send ¡ help me !+ Geo-info¡ to all the authorized numbers every 3 minutes. It will stop sending such a SMS when any authorized number reply SMS ¡help me!¡ to the tracker.5.16 Low battery alertIt begins to alert when it is 3.7V and sends you SMS in 30m interval.SMS format: low battery+Geo-info.5.17 Hidden number trackingWhen a hidden authorized number calls the tracker, the tracker will reply SMS with the hidden number&Geo-info to all the authorized numbers.5.17.1 Send SMS ¡hide number¡ to set up the hidden number.5.17.2 Send SMS ¡nohide number¡ to delete the hidden number.5.18 SMS center5.18.1 Send SMS adminsms+password+space+cell phone number to set the SMS center.If the SMS center is set up, when an authorized number sends SMS to the tracker, the tracker will reply a SMS with Geo-info & authorized number to SMS center.5.18.2 Send SMS noadminsms+password to cancel the SMS center.Response SMS format: authorized number+Geo-info5.19 GPRS settingIn order to use GPRS function, the user needs to set IP, Port and APN ( access point name ) by either cell phone, or our PC software.5.19.1 Set an IP address and port:Setup: Send SMS adminip+123456+space+IP address+space+port.If setup successful, the tracker will reply SMS adminip okCancel: Send SMS noadminip+1234565.19.2 Set APNSetup: Send SMS apn+123456+space+specify apn.If setup successful, the tracker will reply SMS ¡APN ok¡.P.S. The old APN will be invalid when you set a new APN.As soon as the IP & Port & APN are set up, the user can make a call or send SMS to tracker. The tracker will hand up the telephone and report the coordinates to IP address.The message sent by tracker to IP address is as following:Serial number + authorized number + GPRMC + GPS signal indicator + command + IMEI number + CRC16 checksum.For example, it will send GPS coordinates as below illustrated6 CautionsPlease comply with the instructions to extend the unit life:1. Keep the unit dry. Any liquid, i.e. rain, moisture, may destroy or damage the inside circuitry.2. Don¡t use & store the unit in dusty places.3. Don¡t put the unit in overheated or overcooled places.4. Handle carefully. Don¡t vibrate or shake it violently.5. Clear the unit with a piece of dry cloth. Don¡t clean in chemicals, detergent.6. Don¡t paint the unit, this may cause some foreign materials left in between the parts.7. Don¡t disassemble or refit the unit.8. Please use the battery and charger provided by manufacturer. Using other batteries and chargers will cause unwanted situation.9. Don¡t dismount the antenna randomly, or use other antennas. This may interfere the transmission, and increase the radiation as well.7 Faults & The solutions。
曼昆VGPSTRACKER追踪王使用说明

G P S T R A C K E R追踪王(GPS+AGPS+LBS+GSM+SMS/GPRS)使用指南(版本V1.0)非常感谢你选择使用GPS TRACKER追踪王,使用指南将详细的说明如何操作本产品。
请你在使用之前认真阅读使用指南,以便得到正确使用方法。
如有更改,恕不另行通知,每次更改将统一在最新的一次产品销售中发布,制造商对于使用指南中的过失和疏漏不承担法律责任。
目录1.产品简介2.应用领域3.规格描述4.产品配件5.使用说明5.1 SIM卡的安装和设备启动5.2设备充电5.3主控号码设置5.4单次定位5.5基站定位5.6中文地址查询5.7 SOS紧急求救5.8远程监听5.9震动报警5.10位移报警5.11电子围栏5.12超速报警5.13低电报警5.14睡眠省电模式设置5.15设防/重启和恢复出厂设置5.16 查询设备状态6.监控平台应用7.故障排除8.保修1.产品简介GPS TRACKER追踪王融合了GSM无线通信技术及GPS全球定位系统技术,采用工业级防火材料,6颗18MM×3MM强磁装置,IPX-5防水等级设计,内置8000MAH 大容量电池,超长待机100天,通过短信和全球定位服务平台实现对远程目标进行定位和监控管理。
强磁免安装设计,简单易用。
2.应用领域●汽车租赁/小型车队管理●户外活动●儿童/老人/残疾人士/贵重物品的监护●个人安全●人员管理●跟踪定位●动物保护和放牧3.规格描述4.产品配件●5V 1000MA充电器一个●充电线一条●使用指南和保修卡一本●GPS TRACKER追踪王设备一台5.使用说明5.1 SIM卡的安装和设备启动5.1.1 打开包装盒,检查设备型号是否正确,配件是否齐全,否则请联络你的经销商;5.1.2 SIM卡选择,设备需要插入一张GSM SIM卡,GSM卡联通或移动任选(GSM 网络全球通用)5.1.3 SIM卡的安装,拆开设备防水塞,依据标示,SIM卡芯片朝下插入卡槽,盖上防水塞。
MT600 4G GPS车辆追踪器用户手册说明书
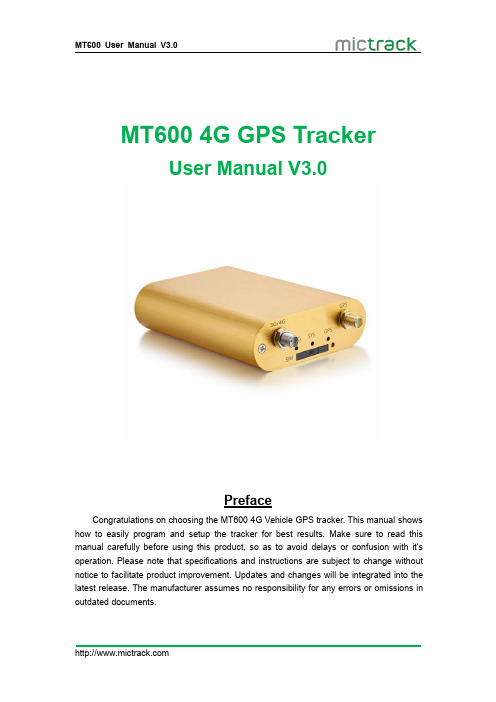
MT6004G GPS TrackerUser Manual V3.0PrefaceCongratulations on choosing the MT6004G Vehicle GPS tracker.This manual shows how to easily program and setup the tracker for best results.Make sure to read this manual carefully before using this product,so as to avoid delays or confusion with it’s operation.Please note that specifications and instructions are subject to change without notice to facilitate product improvement.Updates and changes will be integrated into the latest release.The manufacturer assumes no responsibility for any errors or omissions in outdated documents.Contents1.Overview (1)2.Application (1)3.Specifications (1)4.MT600and Accessories (2)5.Unit Diagram (3)6.Installation (3)6.1SIM Card installation (3)6.2LED Indications (4)6.2.1CHG-Charge indicator(RED) (4)6.2.2SYS-System indicator(BLUE) (4)6.2.3GPS-GPS indicator(GREEN) (4)6.3Device Button Instruction (4)6.4Install4G&GPS Antenna (5)6.5Connection of supplied wiring loom (5)6.6Install the SOS switch(optional) (6)7.Setup and Configuration (6)7.1Setting Authorized Mobile Phone Numbers (6)7.2Deleting authorized number (6)7.3Changing the Admin password (6)7.4Instant Location Request(used to receive unit location via SMS) (6)7.5SOS Alarm(optional) (7)7.6Round Geo-fence(Setting of size and shape of Geo-Fence) (7)7.6.1Enable the Round Geo-fence (7)7.6.2Disable the Round Geo-fence (7)7.7Remote cut off fuel and ignition(optional) (7)7.8External power cut off alarm (7)7.9Towing alarm (7)7.10Low battery Alarm(internal backup battery) (8)7.11Over-Speed alarm(Alerts that the unit is exceeding a preset speed) (8)7.12Set time zone (8)7.13Set APN(Access Point Name) (8)7.14Set Tracking Server IP and PORT (8)7.15Set GPRS Upload Interval Time (8)7.15.1ACC ON(Upload default status is AUTO) (8)7.15.2Vehicle Towed Alarm(vehicle moves whilst ACC is turned OFF) (9)7.15.3ACC OFF&Vehicle Stationary(Upload status is AUTOLOW) (9)7.16SMS Response ON/OFF (9)7.17Unit Phone Calling Control(useful for SIM Card data cost saving) (9)8.App&PC Tracking platform (10)8.1Active the device ID number (10)8.2App install&Login (10)8.3PC login (10)9.Troubleshooting (11)1.OverviewThe MT600is the latest technology4G GPS tracker,fully supporting4G LTE mobile networks.This device can be used locate,track and monitor any remote target via SMS, PC Computer or Mobile APP.It is commonly used to track and locate individual vehicles, motorbikes or boats,and is a valuable tool for enhanced fleet management.The user also can remotely cut off Fuel/Ignition and check the historical route travelled and other vehicle data.The MT600has an excellent track record for stable performance and possesses a wide variety of features.2.Application●4G LTE network support(fallback to3G/2G network)●Real-time tracking●Vehicle trip history and mileage data on web server●SOS alarm reporting(optional)●ACC switch status report●Geo-Fence alarm and reporting●External power cut off alarm●Remote cut off fuel/ignition(optional)●Vehicle towing/Movement alarm●Over-Speed alarm and reporting●Backup battery low power alarm●Power saving/sleep mode●Compatible with most of third party platform●Open protocol3.Specifications4.MT600and Accessories5.Unit Diagram6.Installation6.1SIM Card installation1.Get ready a Standard size SIM Card with10-15MB data a month.2.Insert the SIM card into the SIM card plastic tray.3.Ensure the SIM card has metal contacts facing up(Diagram#1).4.Gently slide the SIM Tray into the SIM Slot(Diagram#2).Note:●The device only supports Standard Size SIM card;●To remove SIM card,use paperclip to press the SIM card pop-out button to eject theSIM card tray.●Make sure insert the sim card first and then connect the external12V power.Diagram #1Diagram #26.2LED Indications6.2.1CHG-Charge indicator (RED )StatusDescription Constant ONNo SIM Card (or)No Network Reception OFFVehicle Parked –ACC Power OFF Quick flash Normal Working Mode6.2.3GPS-GPS indicator (GREEN )6.3Device Button InstructionButton Description StatusDescriptionConstant ONCurrently Charging OFF Charging Complete or sufficient battery.(Note:LED will no light if backup battery is not low power.)StatusDescription OFFGPS /Satellites Unavailable –Out of Range Quick flash GPS/Satellite Locked –Normal ModePowerON/OFF ●Insert the SIM trayto POWER ON the unit;Take out SIM tray to POWER OFF the unit ●Connect the external power to POWER ON;Disconnect thepowerto POWER OFF6.4Install 4G &GPS Antenna●Connect the 4G Antenna firmly to "3G/4G"Socket ●Connect the GPS Antenna firmly to “GPS”socket6.5Connection of supplied wiring loomWhen installing the device,please connect supplied wiring loom as follows:(or contact us for help)●Red :Connect to constant 12V Car Battery(+)●Black:Connect to Earth(Chassis)Car battery(-)●Green:Connect to ACC switched12V Power●Yellow:Connect to red wire of supplied SOS switch●White:Connect to Relay terminal(85)●Pink:Connect to Relay terminal(86)Note:Relay is optional for remote fuel/ignition shut-off.6.6Install the SOS switch(optional)●Red:connect to Yellow wire from supplied wiring loom●Black:connect to Earth(Chassis)Car battery(-)Note:installation Video:https://bit.ly/mt600-install7.Setup and ConfigurationNote:When sending SMS command to the unit,do NOT use spaces or symbols not listed below.[brackets and+are for instructional use only]*and#are valid command parameters.7.1Setting Authorized Mobile Phone NumbersSMS Command format:mobile number+password+[command parameter]Note:Command Parameter here is the sequence of the mobile numberi.e.[1=Admin]or[2=SOS call number]For example:*134****2330*0000*1**Unit Reply:SET USER NUMBER1OK.Note:●The defaulted password is0000.●It can authorize up to3phone numbers.7.2Deleting authorized numberSMS Command format:password+number+[command parameter]Note:Command Parameter here is the sequence of the mobile numberi.e.[1=Admin]or[2=SOS call number]For example:**0000*1**Unit Reply:DELETE USER NUMBER1OK.7.3Changing the Admin passwordSMS Command format:777+new password+old passwordFor example:77712340000Unit Reply:SET USER PASSWORD OK.7.4Instant Location Request(used to receive unit location via SMS)SMS Command format:666+passwordFor example:6660000When sent,this command will result in a Unit Reply SMS as follows:ID:865662000409210Date:05:36:5911/11/2016Fix:A State:SMS/maps?q=+22.63146%2c+114.03701Note:This link can to be opened on any Smart Phone to reveal the Google Maps Location of the unit at the time of request7.5SOS Alarm(optional)When the SOS button is pressed for3seconds,the unit will automatically send it’s location to authorized phone number via SMS,and also upload location data to the Web Tracking Platform server along with the status description“SOS”7.6Round Geo-fence(Setting of size and shape of Geo-Fence)SMS Command format:005+password+R+[Command Parameter]Note:Command Parameter here is fence diameter in KM[0.1~999.9]For example:0050000R1.0Unit Reply:SET ROUND GEO-FENCE:ON7.6.1Enable the Round Geo-fenceSMS Command format:211+passwordFor example:2110000Unit Reply:SET ROUND GEO-FENCE:ON.7.6.2Disable the Round Geo-fenceSMS Command format:210+passwordFor example:2100000Unit Reply:SET ROUND GEO-FENCE:OFF.7.7Remote cut off fuel and ignition(optional)To remotely Cut-Off fuel or powerSMS Command format:940+passwordFor example:9400000Unit Reply:SET OILWAY DISCONNECT.To remotely Resume fuel or powerSMS Command format:941+passwordFor example:9410000Unit Reply:SET OILWAY RECOVERY CONNECT.Note:The default setting for the Cut-Off feature is OFF7.8External power cut off alarmIf the external power to the unit is disconnected,[i.e.unit tampering or vehicle battery removal]the unit will call the authorized phone numbers,and then send location data to the authorized phone number and upload location data to the Web Tracking Platform server along with the status description“DEF”7.9Towing alarmIf the vehicle was be moved or towed when ACC is turned OFF,it will SMS locationdata to the authorized phone number,and upload location data to the Web Tracking Platform server along with the status description“TOWED”7.10Low battery Alarm(internal backup battery)When the unit’s internal backup battery is low,it will SMS the authorized phone number,and upload location data to the Web Tracking Platform server along with the status description“BLP”7.11Over-Speed alarm(Alerts that the unit is exceeding a preset speed)SMS Command format:#122#user password#[Command Parameter]##Note:Command Parameter here is[Km/Hour]Example:#122#0000#100##Unit Reply:SET SPEED LIMIT:ONTo disable the Over-Speed AlarmSMS Command format:#122#0000#0##Note:Command Parameter here is[0=OFF]Unit Reply:SET SPEED LIMIT:OFF.Note:Speed is in KM/H,Maximum setting=[999].7.12Set time zoneSMS Command format:896+password+[+/-]HH:MMNote:Command Parameter here is[Plus or Minus GMT]&[Hours/Minutes]For example:8960000+10:00Reply:SET TIME ZONE:+08:00Note:The default is Greenwich Time(UTC).[i.e.Melbourne Australia=+10:00]7.13Set APN(Access Point Name)SMS Command format1:#803#password#APN##For example:#803#0000#telstra.internet##SMS Command format2:#803#password#APN#APN user name#APN password## For example:#803#0000#CMNET#INTERNET#INTERNET##Reply:SET GPRS APN OK.Note:Please CALL your SIM Card provider to get the correct APN info.7.14Set Tracking Server IP and PORTSMS Command format:#804#password#IP address(or domain)#port##Example:#804#0000#112.95.164.248#7700##Reply:SET SERVER IP AND PORT OK.7.15Set GPRS Upload Interval TimeThis sets how often[in seconds]the unit sends location data back to the Tracking Platform whilst the ACC is switched on.This will affect accuracy and data usage.7.15.1ACC ON(Upload default status is AUTO)SMS Command format:#805#password#interval time#[command parameter]##Note:Command Parameter here[1=ON]&[0=OFF]For example:#805#0000#10#1##Unit Reply:SET GPS PERIODIC UPLOAD ON.Note:interval time maximum[10,65535]secondsUnit Reply:SET GPS PERIODIC UPLOAD OFF.7.15.2Vehicle Towed Alarm(vehicle moves whilst ACC is turned OFF)SMS Command format:#809#password#interval time#[command parameter]##Note:Command Parameter here[1=ON]&[0=OFF]For example:#809#0000#10#1##Unit Reply:SET GPS TOWED UPLOAD ON.Note:interval time maximum[10,65535]secondsUnit Reply:SET GPS TOWED UPLOAD OFF.7.15.3ACC OFF&Vehicle Stationary(Upload status is AUTOLOW) [Periodic upload of vehicle status to the Web Tracking Platform server whilst ACC off –variable to save SIM data costs when parked for long periods and Power Saving] SMS Command format:#807#password#interval time##For example:#807#0000#2##Unit Reply:SET GPS POWER SAVING UPLOAD ON.Note:interval time maximum[2,1440]minutes[If interval time=0,it will stop upload] Unit Reply:SET GPS POWER SAVING UPLOAD OFF.7.16SMS Response ON/OFFTo turn SMS messages OFFSMS Command format:160+passwordFor example:1600000Unit Reply:SET SEND SMS:OFF.To turn SMS messages back ONSMS Command format:161+passwordFor example:1610000Unit Reply:SET SEND SMS:ON.Note:if you want to disable the SMS alerts,send16000007.17Unit Phone Calling Control(useful for SIM Card data cost saving)To turn OFF unit Calling Alerts(i.e.to save SIM data costs)SMS Command format:150+passwordFor example:1500000Unit Reply:SET VOICE CALL:OFFTo turn ON unit Calling AlertsSMS Command format:151+passwordFor example:1510000Unit Reply:SET VOICE CALL:ON\Note:if you want to disable the call alerts,send15000008.App&PC Tracking platform8.1Active the device ID number●Contact with your sales or distributor●If not please subscribe the server plan from official online shop:https:///shop/gps-tracking-platform-service8.2App install&Login●Search“Yi tracker”in Google Play or iOS store(or scan the following QR code)todownload the Mobile APP(not Yi tracker2);●Choose the”Login by Device No.,Input server ●Input your device’s ID number and password(default is123456)to login.8.3PC login●Web:,Choose“ID No.”●Input your device’s ID number and password(default is123456)to login●Watch the video:https://bit.ly/trackis9.TroubleshootingIssues Caused SolutionsSend SMS to the device but no reply 1>SIM Card have not active2>Card balance is not enoughPlease check the SIM cardstatus and try again.Text command format is wrongPlease check the commandformat againConnect network fail.Please check LED status andmake sure the networkconnect successful first.GPS platform shows logged off 1.Check the APN setting;2.Check IP and port3.Check network if matchGPS platform shows no location or the coast of Africa.Device indoor/garage Take it outside for a10-minute walk or drive,andits location should update.LED no light Backup battery is low power Please charge the device for30minutes at least.Any questions please do not hesitate to contact us:Add:706,United Building,Donghuan1st Road,Longhua District,Shenzhen,China518109 Tel:+86-755-28198746Web:Email:*****************。
GT08 车载GPS追踪器用户手册说明书
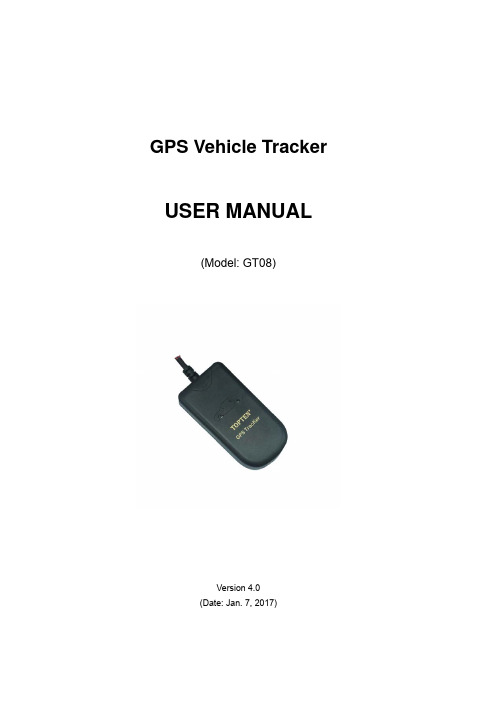
GPS Vehicle Tracker USER MANUAL(Model:GT08)Version4.0(Date:Jan.7,2017)CONTENT Preface (2)I.Features&Functions (3)II.How to Operate it (4)Authorize the Alarm-received Phone No (4)Arm/Disarm by Phone Calling (4)Check the Vehicle’s Status (5)Arm/Disarm the System by SMS (5)Check the location by Google Map’s URL (5)Check the Real Physical Address (6)Check the Real Physical Address Directly without Server (6)Check the Location by GSM Base Station Code (6)Change User Password (6)Stop the Car by SMS (6)Restore Car from Being Stopped (7)Monitor the V oice around the Car (7)Two-way Talking (7)Over-speed Alert (7)Speed Limiter (8)Power Save Mode (8)Fatigue Driving Alarm (8)Show the SMS Content in Languages (9)Define the SMS Content in other languages (9)Other SMS Command List (10)III.The Setting for GPRS Connection (13)IV.Snap Photo&Monitor via MMS/Email/Platform (14)V.Alarm Types (16)VI.Installation (17)VII.Specifications (19)VIII.FAQs&Troubleshooting (19)IX.Maintenance (20)PrefaceGT08GPS Vehicle tracker is the most advanced&cost-effective solution for vehicle security,real-time tracking&fleet management.It has the following unique functions:✧Support wireless immobilizer;✧Fuel leaking alarm,speed limiter&fatigue driving alarm;✧It is integration with GPS tracker+Car alarmRead it Firstly:Please read this manual thoroughly before you use the device;please keep it for future reference.Attention:(1)Please keep the device away from heavy water,high temperature,heavy dust or strong magnetism.(2)Please prepare a valid GSM SIM card in advance.(3)For safety,please keep the SIM number of your tracker in secretWarning:We strongly suggest user let the professional car electrician to install the system.I.Features&Functions1.Industrial design with high performance ARM7process2.Track on command or by time interval or by distance;3.Arm/disarm by SMS,phone call;4.Check the car’s real physical address(such as city name,street name..);5.Track by mobile SMS to get the latitude,longitude,speed,direction&odometer etc.6.Check the location directly by the Google map’s URL;7.Over-speed alert,Geo-fence alert,movement alarm;8.Snap photo and send out via MMS&Email when there is SOS alarm,ACCOn alarm or door open alarm,snap the photo via platform(optional);9.Speed limiter,when the speed is over limitation,the siren will sound to warndriver&relay will response to slow down the car automatically;10.Crash alarm,when there is crash&it can detect it automatically;(optional)11.Fatigue driving alarm,if continuous driving time is over the limitation,thealert will be triggered;12.Check the coordinates via LBS,even there is no any GPS signal..13.Support voice monitoring&2-way talking;14.Cut off engine to stop the car safely by SMS/GPRS;15.Trace optimization when vehicles turns a corner;16.Built-in shock sensor for power saving&triggering alarm17.Power failure alarm,with built-in rechargeable backup battery;18.SOS alarm(optional);19.Support analog input for fuel/temperature monitoring,fuel loss alarm;20.I/O:4digital inputs,1analog inputs&1digital outputs;21.There are3types of working mode for power saving flexibly.22.8M-bit offline data logger,it can store up to9,090waypoints.23.SMS content in multi-languages(English,Arabic,Spanish,Portuguese).II.How to Operate itThe default user password is111111.If the user password is changed,user should send the SMS command withXXX is the control code,all the letters must be capital letters or in small letters,command with mixed capital letter&small letter is not recognized by systemAuthorize the Alarm-received Phone No.SMS command:111111*10Mobile#1*20Mobile#2*In case of alarm,if user wants to get the alarm SMS from the tracker,he/she needs send the following SMS to program the tracker firstly,otherwise,the alert information can't be received correctly.Example:User sends the SMS111111*1013922713571*2013711189059*to the tracker’s SIM card number,if there is any alarm,system will send SMS to both of these two mobiles.In case of SOS alarm,the system will only send alarm to the mobile#2Arm/Disarm by Phone CallingUser could also use the1st alarm-received mobile phone to call the tracker’s SIM card number,so as to arm/disarm the system.Arm:After hearing several ring tones,if the systems hang up the call automatically,and call back you,it means that the system is armed.Disarm:After hearing several ring tones,if the system hangs up the call automatically,and don’t call back you,it means that the system is disarmed.Note:(1)There is no communication fee for this operation,it is a very convenient way to arm&disarm the system.(2)The SIM card inside the device must have the function of Caller ID Display.(3)Only the1st alarm-received mobile phone can realize this function.Check the Vehicle’s StatusSMS command:111111CHK(or111111chk)This instruction is used to inquiry the vehicle’s location&system’s status.The system will send back the SMS,includes the similar information,such as“Armed……”User could also use the2nd alarm-received mobile phone to call the tracker’s SIM card number,the tracker will hand up the calling&send back the location directly.Arm/Disarm the System by SMSSMS command:111111ARM(or111111arm)This SMS instruction is used to arm the systemSMS command:111111DSM(or111111dsm)This command is used to disarm the system&stop sending alert SMS.Check the location by Google Map’s URLSMS command:111111MAP(or111111map)Upon receiving the SMS command,the tracker will automatically send back the SMS including the Google map’s URL,user can use smart phone(GPRS data service is enabled)to open the URL link,the car’s location will be showed on the Google map.Check the Real Physical AddressSMS command:111111ADD(or111111add)When user sends this SMS command to the tracker,the tracker will automatically send back the car’s real physical address(such as city name,street name)to your mobile by SMS.(it need server's support for address translation).Check the Real Physical Address Directly without ServerSMS command:111111DDD(or111111ddd)When user sends this SMS command to the tracker,the tracker will automatically send back the car’s real physical address(such as city name,street name)to your mobile by SMS.(Note:this function might not work with some operator's SIM card.it is just for test).Check the Location by GSM Base Station CodeSMS command:111111LOC(or111111loc)This instruction is used to check the location by GSM base station code. The tracker will send back the relative GPS coordinates which is translated by the GSM base station code.Change User PasswordSMS command:111111PSWnnnnnn(or111111pswnnnnnn)This instruction is used to change the user password.The length of the user’s password is3~ers are suggested to change to the new password in use.Example:User sends the SMS“111111PSW12345”to the system SIM card number,and gets the confirmed SMS“111111PSW12345”in3seconds.It means that the user password has been changed to12345.Remark:Please keep the password deep in mind if it is changed.Stop the Car by SMSSMS command:111111STP(or111111stp)This instruction is used to stop the car in safe condition.If the car's speed is higher than30KM/h,the car is stopped gradually by impulse control,if the car's speed is lower than30Km/h,the car is stopped immediately.Attention:It is very dangerous to stop the car when the vehicle is running at high speed.We do not take any responsibility to the consequence caused by this action.Restore Car from Being StoppedSMS command:111111RES(or111111res)It is used to restore the car to normal status after being stopped.Monitor the Voice around the CarSMS command:111111MONThis instruction is used to monitor the voice around the car.The SIM card inside the system pays for the communication fee.SMS command:111111MON!This instruction is used to monitor the voice around the car.The user’s telephone pays for the communication fee.Example:User uses the mobile137****2345to send111111MON!to the system, then use the mobile137****2345to call the tracker,it will be connected automatically,and user can monitor the voice around.Two-way TalkingSMS command:111111MON:P1*This instruction is used to program the phone number which is used for carrying out direct monitoring or talking always.P1is suggested as center phone number for easy communication with drivers.Example:111111MON:139****3571*Over-speed Alert111111SPD:X x is the speed in KM/H,maximum value is255M/H(For example:111111SPD:120,if the car speed is over120KM/H,it will send out warning alert by SMS/platform).111111SPD:0to disable the over-speed alert.It is the default setting.111111SPD:to check the setting of over-speed alert.Remark:this function is just for reference,because there might be some time delay or error in detecting the running car’s real speed by GPS.Default speed limitation is120KM/H.Speed LimiterAfter user sets the speed limitation by command111111SPD:X,if car is over speed,the car will be slowed down gradually.111111BUZ:3:X,(X=1,activate siren;X=0:deactivate siren;default=1)111111RLY:3:X,(X=1,activate relay;X=0:deactivate relay;default=1)Power Save ModeSMS command:111111PWR:XValue of X Actions Power consumption 0(default)Disable power save mode60mA 1Close GPRS connection48mA2Close GPRS connection,GPS module13mA After setting111111PWR:1(or2),if there is no vibration&SOS alarm, integration line is not triggered,and ACC is OFF,the tracker will go into power save mode after5minutes.Once there is vibration or SOS alarm,or integration line is triggered,or ACC is ON,the tracker will wake up from the power save mode immediately.Fatigue Driving AlarmWhen this function is activated,if the engine is turned on for a certain time, the siren will sound to warn the driver.The SMS command:111111TIR:1:X,(with,at the end)X:is time in minutes(default:X=180minutes,maximum:65535minutes) Example:111111TIR:1:120,Show the SMS Content in Languages.SMS command:111111LNG:Xit is used to define the SMS content in different languages.X=0,English;X=1,Chinese;X=2,Arabic;X=3,Portuguese;X=4,Spanish;(Default setting:X=0,English) Define the SMS Content in other languagesStep1:choose the language mode such as:111111LNG:4to change to Spanish language firstly.Step2:Define your own text by the following command:111111TXT:nn:str!nn:str!nn:str!nn:str!nn:str!nn:str!Remarks:(1)6pieces of strings can be defined in one command.(2)nn:2bits,range:01~18(3)the number of letters in each str.can't be more than8(4)the character(.),(.),(!)can't be showed in str.Example:111111TXT:09:vibración!is to define the alarm text in Spanish when the shock sensor is triggerednn Meaning of Str.01Arm02Disarm03Power failure alert04SOS alert(in1)05Engine ON alert(in4)06Vibration alert07Stop the car(out1)08Restore the car(out1)09Over-speed alert10Original alarm's triggering(in5)11Geo-fence alert12Movement alert13The vehicle can't be stopped14Crash alert15Car door open alert(in3)16Broken line alert(in2)17Fuel loss alert18Un-defineOther SMS Command ListNote:******is user’s password and the default password is111111.The tracker will only accept commands with the correct password.III.The Setting for GPRS ConnectionThe GPRS setting is necessary for using the following2functions:(1)Check the car’s real physical address by send111111ADD(2)Online tracking service by web-based tracking platformSMS format:111111WWW:IPN:X;COM:X;APN:apn,user,password;RPT:X;SLP:X;RUN:X;⏹IDN:The tracker’s ID,it is the last14digits of IMEI which can't bechanged.⏹IPN:The IP address or domain name of the GPRS server⏹COM:The communication port for the GPRS server⏹APN:The Access Point Name for the GSM SIM card.⏹RPT:The interval for the uploading GPRS packet(Unit:sec.)⏹SLP:The interval for uploading GPRS packet when car is parked(Engine is OFF and no vibration).(unit:sec.);⏹RUN:GPRS connection setting.0=close,1=TCP,2=UDP.⏹IDN:The tracker’s ID,it is the last14digits of IMEI which can't bechanged.Example,if server is:,TCP port is8500,APN is web.gprs,,apn user:web,apn password:web,time interval is60 seconds,Then the command is:111111WWW:IPN:;COM:8500;APN:, web,web;RPT:60;RUN:1;User can send one or more options at the same SMS commands,such as:✧111111WWW:IPN:X;COM:X;This is to set the server’s address and port separately.Example:111111WWW:IPN:;COM:8500;✧111111WWW:APN:X;This is to set the APN(access point name).Please use“,”to separate the APN,APN username&APN password.Example:111111WWW:APN:,web,web;✧111111WWW:RPT:X;This is to set the upload time interval.The unit is second,the minimum value is10seconds.The default setting is60Example:111111WWW:RPT:60;(Upload time interval is every60s)✧111111WWW:RUN:X;X=0;is to close down the GPRS;X=1;is to open the GPRS via TCPX=2;is to open the GPRS via UDPEg:111111WWW:RUN:1;(Open the TCP connection)✧111111WWW:You can send111111WWW:to check the GPRS settings.Default GPRS SettingThe default GPRS setting is:✧IPN:,COM:8500✧APN:cmnet RPT:30seconds✧SLP:0RUN:1IV.Snap Photo&Monitor via MMS/Email/Platform It is the optional function for3G version,the extra serial camera is needed.✧Snap the Photo via MMS111111MMS:to get the Photo via MMSTo realize this function,user must do the correct MMS settings firstly.✧MMS Setting for SnappingThe MMS setting is different from GPRS setting,the SMS command is as following:✧X:MMSC server URL;✧Y:The IP of MMS proxy✧Z:MMS_APN,user,Password.✧N:The Port of MMS proxyFor more information about the MMS settingparameters of worldwide GSM operators,please searchby Google or refer to this link:/mobile-operator.mmsc-settingsExample:(for Nigeria MTN SIM card)The correct setting SMS command is:111111MMS:SVR:http://10.199.212.8/servlets/mms;PRX:10.199.212.2;APN:web.g,web,web;COM:8080;✧Set the Way of Sending PhotoSMS command:111111PIC:1:X,2:X,3:X,4:X,5:X,6:X,7:X,8:X,9:X,(with,at the end)X=0,means Disable;X=1,means Enable1:X,engine on(input4);2:X,car door open(input3);3:X,over-speed;4:X, vibration;5:X,movement alarm;6:X,fatigue driving alarm;7:X,broken line alarm(Input2);8:X;original alarm's triggering(input5);9:X;SOS(Example:111111pic:1:1,2:1,9:1,)default setting as1.SMS command:111111SEE:6:X,7:Y,8:Z,(with,at the end)6:X,X=1,send photo via MMS to1st alarm-received no.;X=0,disable.7:Y,Y=1,send photo via MMS to2nd alarm-received no;Y=0,disable.8:Z,Z=1,send photo to email box;Z=0,disable.(Example:111111SEE:6:1,7:1:8:1,)✧Set the Email to Receive the PhotoSMS command:111111BOX:Email(Example:111111BOX:*******************)V.Alarm TypesVibration AlarmIn arming status,if the car is vibrated,it will send out alarm SMS.Power Failure AlarmIn arming status,if the battery is cut off,it will send out alarm SMS.Engine ON AlarmIn arming status,if the car’s engine is ON,it will send out alarm SMS and call the preset phone.Movement AlarmIn arming status,the movement alert is enabled automatically.Once the car moves away from the parking point for100meters,it will it will send out alarm SMS and call the preset phone.Geo-Fence AlarmOnce the Geo-fence is activated,if the car oversteps the boundary,it will send out alarm SMS.Over-speed AlarmIf the car runs over the speed limitation continuously for3minutes,it will send out alarm SMS.SOS AlarmIn any condition,if the SOS button is pressed,it will trigger the SOS alarm.(NOTE:the SOS alarm will only be sent to the2nd phone,the3rd phone number&the GPRS tracking center,the other alarms will send to all the preset phones&GPRS tracking center.)Crash Alarm(optional)If there is crash,the crash sensor will detect it and send out alarm.Fatigue AlarmIf the accumulated time of engine on is over the setting,the sire will sound to warn the driver.Fuel loss Alarm(optional)When the engine is OFF,if the fuel level is down,it will trigger the alarm.VI.InstallationInstallation Steps:(1)Please read the manual carefully before installation.Please prepare a validGSM SIM card with Caller ID Display&GPRS function;(2)Please push the front cover according to the direction;(3)Insert the valid GSM SIM card,then turn on the backup battery switch;(4)Close the cover,and fix the main unit tightly with the wiring harness at thecorrect place,please make sure that the side with GPS antenna is placed upside to sky,please make sure to install the main unit at broad place so that it can receive GPS signal well.For motorcycle,it is better to install inside the head bulb light where there is power supply and water proof.For vehicle,it is better to install inside the upper rim of the driving room or inside the dashboard.The recommend installation place is showed in the following picture:For motorcycle For vehicle(5)Do the wring connection according to the diagram;(6)Call the SIM card,to check if rings,if not,then check the power supply andthe change the place of installation;(7)If it rings when calling the SIM card,then send SMS to the tracker to checkthe GPS coordinate,if the GPS location is not correct,then fix the main unit to other place so that it can receive better GPS signal.(8)IMPORTANT:The side with GPSantenna must be placed upside to thesky and kept away from the metalmaterials,otherwise,it can’t get GPSsignal well.VII.SpecificationsVIII.FAQs&Troubleshooting(2)Low power,please use outside power supply to power on the unit to testI can not get the alarm message (1)The SIM card inside the device has no credit;(2)The Alert-received mobile number is not programmed correctly,or the SMS command is not in correct format;(3)The mailbox of the user’s mobile is full;I can not get the correct GPS coordinates or the location is wrong (1)Please make sure there is no metal obstacles above the tracker.Please place the side with GPS antenna upside to the sky;(2)Please check it at broad place;(3)Please check if the GPS LED flash once every3seconds;place the tracker to other place, so as to make sure that it can receive the GPS siganl well(4)In cloudy condition,it is a little hard to get the GPS signal,and the GPS coordinate might have some errors.Tracker fails to connect to server by GPRS (1)The SIM card must be activated with GPRSfunction;(2)Do the correct setting for GPRS connectionIX.Maintenance✧The installation must be done by the professionals.Illegal disassemblywithout permission might cause invalidity of warranty.✧Please keep the device in dry place✧When the car is inside buildings,cave,tunnel,or very close to tall buildings,the GPS/GSM signal may not work well and the system may fail to work at that moment.✧Please check the balance of the tracker’s SIM card periodically.✧The backup battery can only work for a certain time once power-off.FCC Information and CopyrightThis equipment has been tested and found to comply with the limits for a Class B digital device, pursuant to part15of the FCC Rules.These limits are designed to provide reasonable protection against harmful interference in a residential installation.This equipment generates,uses and can radiate radio frequency energy and,if not installed and used in accordance with the instructions,may cause harmful interferenceto radio communications.However,there is no guarantee that interference will not occur in a particular installation.If this equipment doescause harmful interference to radio or television reception,which can be determined by turning the equipment off and on,the user isencouraged to try to correct the interference by one or more of the following measures:—Reorient or relocate the receiving antenna.—Increase the separation between the equipment and receiver.—Connect the equipment into an outlet on a circuit different from that to which the receiver is connected.—Consult the dealer or an experienced radio/TV technician for help.This device complies with part 15 of the FCC Rules. Operation is subject to the condition that this device does not cause harmful interferencechanges or modifications not expressly approved by the party responsible for compliance could void the user's authority to operate the equipment.This equipment complies with FCC radiation exposure limits set forth for an uncontrolled environment.This equipment should be installed and operated with minimum distance20cm between the radiator&your body.This transmitter must not be co-located or operating in conjunction with any other antenna or transmitter.。
GPS车辆追踪器说明书

GPS Vehicle tracker(GPS+GSM+SMS/GPRS)GT06 User Manual(Version 3.2)Thank you for purchasing the tracker. This manual shows how to operate the device smoothly and correctly. Make sure to read this manual carefully before using this product. Please note that specification and information are subject to changes without prior notice in this manual. Any change will be integrated in the latest release. The manufacturer assumes no responsibility for any errors or omissions in this document.1. SummaryWorking Based on existing GSM/GPRS network and GPS satellites, this product can locate and monitor any remote targets by SMS or internet.Overview of the characteristics:1.GSM 850/900/1800/1900MHZ.2.GPS position.3.Auto set APN.4.300Mah Battery inside, Power-Cut alarm.5.Motion detect, save GPRS flow.6.SOS Alarm.7.Shock Alarm.8.ACC Alarm.9.Speed Alarm10.Voice Surveillance.11.Voltage DC 9-50V.12.Enginee Cut off.2.Accessories:Power line:Relay:Microphone:SOS line:Manual3. Specs1).GSM:850/900/1800/1900MHZ2).GPRS: Class12, TCP/IP3).Working Voltage:9-50V DC4).Working current:≈22mA (12VDC)5).Working current:≈12mA (24VDC)6).GPS locating time:Cold start≈38s(Open sky) Warm start≈32sHot start≈2s(Open sky)7).GPS Precision:10m(2D RM)8).Working temperature:-20℃~+70℃9).Working humidity:20%~80%RH10).Measurement:98(L)×52(W)×16.5(H)mm4.Wire defined5.Device status indicators5.1 Connect DC 9-50V power supply and the red LED will light continuously.5.2 The blue LED light continuously when searching the GPS signals. When GPSposition,the blue LED flashing.5.3 The intermediate green LED (GSM signal state)GSM signal is normal, green LED flashing. No GSM signal, the blue LED light continuously.All LED will turn off after 5 minutes. When there is a new call, the LED will relight and turn off 5 minutes later.6.Installation6.1 Prepare for installation6.11 Product Check. Open the packing box and check the device‘s model and accessories.If the model is wrong or the accessories not complete, please contact the dealer.6.12 Choose SIM card. Please insert a SIM card to the device. Please take dealer’sadvice as reference.6.13 SIM card installation. Discharge the cover of the device and uncover the SIMcard holder. Then insert the SIM card and cover SIM card holder (as follows).6.14 Open the cover, Push the switch to make the battery working. Then Put back thefront cover and screw it up.6.15 Connect the device to the 9-50V power supply.6.16 Install the device in the hidden place of the car;The SIM card must be with GPRS function and enough deposit. If your SIM card need input PIN when power on, please cancel it.6.2 InstallationThe GPS tracker must be installed under professional personnel.Note:1) Please install the device in the hidden place as followings:Under Front windshield;In the front instrument panel;Under back windshield;2) Avoid being placed with signal radiators like reverse sensor ;3) The device has GSM antenna and GPS antenna inside. Please ensure thereceiving side of the device is face up and without metal cover.Note: The metal cover will lessen the receiving of GPS signals.6. The device connecting requirements.7. Device wiring requirements7.1The device power supply is DC 9-50V. The red line is positive pole while the black line is negative pole.7.2 The negative pole of power supply connects with ground or the metals. Please do not connect with other ground lines.7.3 When finishing the power supply wire connection, please make the plug of power supply to the device.8.The Device Working8.1Power on:Connecting to the power. Then the three LED indicators will light. Thedevice will upload the data to the online platform (the default intervalof uploading data is 15seconds). When the car is in static state for a longtime, the device will be in energy saving mode and it will be more smartand precise.8.2 Power off:Pull off the power plug then power off the device.er Settings9.1 SMS Commands instruction1)Center NumberText command Parameter SampleCENTER Add710#number#711#number# 710#135****5000# 711#138****8000#CENTER DelD01#D02# D01# D02#Command Description 1)Center number can control the oil and power and resumefactory settings2) Center number can receive the call and text of vibration alarm and over speeding alarm.3) SIM must display the income call number to controloil and power.4) Only 2 number can be center number.5) Change center number must resend the command.6)Add new center number by CETNER,A, and delete byCENTER,DCommandFeedbackSuccessful Setting:Add admin account 1 OK!2) View Center NumberText command Parameter SampleView 901# 901#CommandDescriptionThis directive is used to view Device Manager number.Command Feedback Successful Setting:Admin1: Admin2:3)Authorized Number SetText command Parameter SampleAuthorized Add 101# number #102# number #103# number #1:101#138****8000#2:102#12345678912#3:103#12345678912#Authorized Del D11#D12#D13#D11#D12#D13#Command Description 1) Authorization number for SMS control oil.2) only three numbers to set the authorization number3) change the authorization number needs to delete the previous numberCommand Feedback Successful Setting:Add Authorization account 1 OK!4) View Authorized NumberText command Parameter SampleViewauthorizedC10# C10#Command Description This directive is used to view the equipment authorization numberCommand FeedbackSuccessful Setting: Authorization 1: Authorization 2: Authorization 3:5)APN SettingText command Parameter SampleAPN Setting 802#username#pass1:802#intenet#123#123#word] 2: 802#internet#Command Description APN differs according to the local telecom operators. For example:APN request password,please refer to Sample 1,and Sample 2 for no password.CommandFeedbackSuccessful Setting:SET APN OK!6) Set ServerText command Parameter SampleSERVERParameter803#SERVER # port# 803#222.217.240.243#8011# View SERVER CIP# 1)CIP#Command Description Change the IP and port when move to a new server port:10~655351 is domain and 0 is IP;Command Successful Setting:set IP OK!Feedback7)Moving Time IntervalText command Parameter Sample TIMEERParametersetting730#uploading interval# 730#20#Command Description Time scope:0,10~60 seconds; 0,no data uploading;10~60,means time interval;the default value is 15 seconds!CommandFeedbackSuccessful Setting:SET TIMER OK!8)Static Time IntervalText command Parameter Sample STATIC SUP# time interval#SUP#5#Command Description Timescope:1~60 minutes;The device has3D transmission and the default time interval are 5 minutes.CommandFeedbackSuccessful Setting:SET STATIC TIME OK!9)Cancel the continuous uploadText command Parameter SampleNUP NUP# NUP#Command Description This command is used to cancel sending data to the platformIf need again to restore the upload , you need to send TIMEER Parameter setting.CommandFeedbackSET OK!10)Oil-CutText command Parameter SampleRELAYParameter1222# 222# cut off oil and power RELAYParameter2333# 333# recover oil and powerCommand Description 1)RELAY control the start and closeness of the relay2) Only the center number can operate.3)the device only cut off the oil circuit on the condition of the driving speed below 20KM/H or in static state.4)When send the command, the device will reply “please waiting “When the vehicle speed is over 20KM/H, the device will cut off the oil or the power when the speed below 20KM/H.Command Feedback Successful Setting:Fuel cut has already been completed OK!11)GMTText command Parameter Sample GMT801#location,time#801#E8#Command Description The default time zone is Beijing time. If time zone need revised, please operate according to the above command.CommandFeedbackSuccessful Setting:Set time zone ok!12)Vibration AlarmText command Parameter Sample Open Vibration Alarm911# 911# VIBRATION Parameter123#sensitivity#,alarming way#1) 123#2#3# Set intovibration alarm time V123#2#1) V123#2#2) V123#1#Cancel vibrationalarm456# 456#Command Description the sensitivity value of the vibration is from 1 to 5,1is the most sensitive and o is close. Alarming ways: 1, calling 2, texting, 3 calling and texting.Must set the center number and receiving number.Command Feedback set vibration alarm level,OK!13)Speed AlarmText command Parameter SampleSPEEDING Parameter SSA#120# alarmingway#11) SSA#120#2) SSA#150#3#Command Description The speed scope is form 60-220, if the speed is no this cope, the alarm is off.Alarming :1, calling 2, texting, 3 calling and texting.Must set the center number and receiving number. CommandFeedbackSuccessful Setting:set speeding alarm,OK!14)ACC AlarmText command Parameter SampleOpen ACCAlarm840#1# 840#1#Close ACCALARM840#0#Close ACC ALARM The speed scope is form 60-220, if the speed is no this cope, the alarm is off.Alarming :1, calling 2, texting, 3 calling and texting. Must set the center number and receiving number.CommandFeedbackSuccessful Setting:set speeding alarm,OK!15)ResetText command Parameter SampleRESET 930# 930#CommandDescriptionReset the deviceCommandFeedbackSuccessful Setting:Reset system, ok!16)FactoryText command Parameter Sample Parameter 940# 940#Command Description Restore the factory settingOnly center number can initial this functionFactory setting will recover to the original settingCommand Successful Setting:FACTORY OK!Feedback17)Language SettingText command Parameter SampleLANG Parameter LANG1#LANG0#LANG1# 1:CHINESE,LANG0#:ENGLISHCommand Description ;When check the location, it will reply the Chinese location in Chinese language setting; while reply the URL link when in English language setting.CommandFeedbackSuccessful Setting:SET LANG OK!18)PositionText command Parameter Samplecommand 988# 988#Command Check the longitude and altitude and otherDescription information of the deviceCommandFeedbackReply with longitude and altitude, speed and IMEL.19)Google LinkText command Parameter Samplecommand 666# 666#CommandDescriptionCheck the location link of Google mapCommand Feedback <Datetime:12-07-05 13:21:30>/maps?q=N22.540885,E113.9526520)VersionText command Parameter SampleVERSION V00# V00#Command The command is to check the software versionDescriptionCommand Feedback VERSION:XxxxBUILD:2012-07-05 10:1221)Param CheckText command Parameter Sample PARAM 886# 886#Command Description The command is to check the settings and the default parameter.Command Feedback IMEI:351190012535936APN : cmnetIP:IP and portTIMER: moving uploading interval STATIC: static uploading interval CENTER: center numberLANG: language(CN/EN)GMT: time zone (E/W8)22)Status CheckText command Parameter Sample STATUS 902# 902#Command Description The command is designed for checking the device’s working status.Command Feedback External power:ON/OFFGSM Signal:HIGH/MIDDLE/LOW GPS:FIXED/UNFIXED RELAYER:DISABLE/ENABLE Vibrate Warning:ON/OFF Pause:ON/OFF23)Monitor (Voice Surveillance)Text command Parameter SampleSSS# SSS# SSS#Command Description Using Command Send this command to the tracker’s number, the tracker will call back to admin number.CommandFeedback10.Trouble shooting10.1 The device is not online or offline on the web platform.10.1.1 First, please check the three LED working state. Ifpossible. You can call the device’s number to check.● If not connected, the device is out of signal. If the GSMsignals cannot reach your location, please drive to the open sky.z If reminding the device SIM card is out of deposit, please make deposit by the telecom operator.● If you can connect to the device when calling, the SIM card hasdeposited and please check with your operator for GPRS function. You also can check by searching the internet on your mobile phone.● If reminding the device is power off, please turn back the deviceand proceed as followings:a)Check if the red LED is in constant glow. If the LED is dark, pleasecheck the power connecting. If fuse is broken, please return the device to the seller.b)If the green GSM LED is not in constant glow, please check theinstallation of SIM card.10.1.2Please check the offline area in order to judge if the networkproblem of operators.10.2When GPS cannot receive the signals, please drive in the open skyand ensure there is no metal thins on the device.10.3 When the device cannot receive the GSM signal, please check theSIM card installation. If the GSM signals cannot reach your location (such as the basement), please drive to the open sky.。
MT200-GPS定位追踪器使用说明书
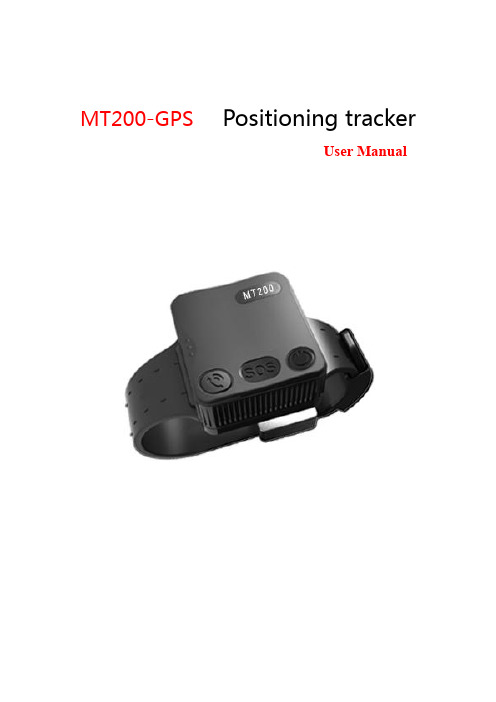
MT200-GPS Positioning trackerUser Manualcontent1.Product Overview and Appearance Introduction 3Product specifications 3button 3Function indicator light 4the belt 4Accessories 52.First use 5How to use the belt 5Charge 7turn on/off 7Parameters set up 83.Instruction and function applications 81. Change password 82. Authorized number 93. Monitoring function 104. Two-way communication 105. SOS emergency calling 116. Real time tracking 117. Tracking regularly by GPRS 118. GPRS data logger 129. Geo-fence 1210. Time zone setting 1311. Low battery alarm and Power on/off automatically 1412. Timing turn on/off tracker 1413. Belt on/off alarm 1414. Leave the home alarm 144.Problems & Diagnostics 161. Product Overview and Appearance IntroductionThe GPS Tracker has the advantages ofwaterproof IP67,low powerconsumption, Long Standby Time(22-24 days) and easy to use. apply to correct the crowd.Product specificationsbuttonMICSpeaker5VTX DXGNDFunction indicator lightRed/yellow– Power indicationThe red light is always on Power chargingThe green light is always on Power charging finishedBlue– GSM indication0.3s on and 0.3s off GSM module is initializing or calling inAlways on GSM network is not registered1s on and 3s off GSM network is registered0.1s on and 3s off GSM network is registered and connected to the server by GPRS Always off GSM in power save modeGreen– GPS indication0.3s on and 0.3s off GPS module is initializing or waiting for the SOS button press toconfirm the calling in number as the authorized numberAlways on Button being pressed1s on and 3s off GPS module is working normally but hasn't fixed position0.1s on and 3s off GPS module is working normally and has fixed positionAlways off GPS module stops workingthe beltAccessoriesScrew driverCharge cablemicro Charge cablePower BankAC adapter2 .First useHow to use the belt——Install the card requirements●Ensure that your tracker has a working SIM card.√● Please make sure SIM card has enough credit.● Please make sure that the SIM is not locked and do not require a passwordto operate.● Please make sure the SIM card is supporting caller ID display.——Install the card steps :❶ ❷1、open the Rubber back cover2、Open the SIM card cover with a screwdriver ❸3、Open the metal cover of the card slot, insert the SD card and SIM card, and fastenthe metal card cover4、Install the SIM card cover and lock the screw——adjust to suitable size and fixed the belt.❶❷1、Select the suitable size point2、Screwdriver fixed lock headNote:When the lock edge must be aligned with the size point,The screw can come into contact with the wrist strap❸❹3、Insert the plug into the lock4、Complete installation——unlock the belt.1、The key is aligned with the locking hole2、press it on firmly.❸3、opens the lockCharge.Power bank charging1、Tracker charging interface2、Rechargeable contacts areconnected to the charging interfaceof the tracker and The mobilepower supply is mounted on thetracker.turn on/off1、power onWhen you pull the switch that is after the SIM metal card cover, the machine can be powered on2、soft switch button to turn on❶❷1、Press soft key for 3 seconds2、Turn on or off after vibrationNote:The tracker can be turned off when the wrist strap is disconnected Parameters set upTracker supports APP setup software by smart phone or by sending command via SMS or by pc. After setup, please turn the tracker on and positioning in an open environment, please do it every time after turn the tracker on.3.Instruction and function applications1. Change passwordDescription: change user’s passwordSMS Command:$SMS,******;W001,######;!SMS Command explain:$SMS,default password;W001,new password;! Explain:******: user password, the range of 6 digits, default password is 000000######: new password, the range of 6 digits.Note:please switch to the English input method when you input a command by smart phone;tracker will only accept commands from a user with the correct password. Command will be ignored if with wrong password.Example:$SMS,000000;W001,123456;!Read password:$SMS,000000;R001;!Clear password:$SMS,000000;C001;!2. Authorized numberSet the authorized number by SMSDescription: Set authorized phone number and its related functionsSMS Command:$SMS,000000;W010,NO.,Phone Number,ABC;!Explain:NO. authorized number’s serial number range of: 1~3Phone Number authorized number range of: 0~19 charactersA when the parameter ‘A’ is 0, it means disable Geo-fence alarm,otherwise it means enable Geo-fence alarm. Default is 0range of: 0~1B when the parameter ‘B’ is 0, it means disable monitoringfunction, otherwise it means enable monitoring function. Defaultis 0range of: 0~1C when the parameter ‘C’ is 0, it means disable SOS emergencycalling function, otherwise it means enable SOS emergencycalling function. Default is 0range of: 0~1For example:Set the 1st authorized number is 138******** and enable monitoring function.$SMS,000000;W010,1,138****0000,010;!Read authorized No.1 and it’s related authority:$SMS,000000;R010,1;!Clear authorized No.1 and it’s related authority:$SMS,000000;C010,1;!Read all authorized number:$SMS,000000;R010;!Clear all authorized number:$SMS,000000;C010;!Easy authorized phone no. setup by callingTracker only supports three authorized numbers; we can set the authorized number by phone call if there are not set authorized number fully (this function only supports to set the authorized number, not included its related functions). Set as follows:1、Any non-authorized number calls to the tracker over than 10 seconds, thetracker will hang up the line automatically and the yellow light will blink for30 seconds.2、During these 30 seconds, press SOS button less than 3 seconds, and thensuccessfully set this call-in number as a new authorized number and send an SMS to this number to inform the setting is OK.3. Monitoring functionIf enable monitoring function, when the authorized number call to the tracker, it will answer the call automatically and shut down the speaker and the background voice of the tracker will be listened.Note:Please make sure the SIM card installed supports displaying caller ID when you want to enable this function.4. Two-way communicationThe first method:If you turn the monitoring function off when set authorized number, use this authorized number call to tracker, bell will ring, at this time, press the CALLbutton (less than 3s) to answer the phone call, so you can speak each other. The Second methods:If the authorization number was set with the CALL function, Press SOS button for 3 seconds or longer, the device will make a call to authorized numbers one by one and it will stop to make a call if call is answered.5. SOS emergency callingPress SOS button for 3 seconds or longer, tracker will send SOS alarm SMS to all authorized numbers.6. Real time trackingThe tracker will reply a location SMS if there is any authorized number makes a phone call to it.7. Tracking regularly by GPRSDescription: Enable this functionSMS Command:$SMS,000000;W002,APN,Username,Password;W003,IP,Port;W005,X;W009,Y;!Explain:Access point name ofrange of: 0~29 charactersAPN:networkUsername:accesses port’ user name range of: 0~29 charactersPassword:Accesses port’s password range of: 0~29 charactersIP:server’ IP address range of: 0~29 charactersPort:server’s port range of: 0~65535range of: 0~65535, default is 0, unit is 30 X:GPRS upload intervalsecondsExample: if X is 2, and 2*30s=60s, so it means the GPRS upload interval is 60 seconds.Y:GPRS upload mode range of: 0~20:means disable GPRS function,1:means upload by TCP,2:means upload by UDPdefault is 0Example:$SMS,000000;W002, cmnet,;W003,192.168.1.1,8088;W005,1;W009,1;!Read tracking regulary by GPRS:$SMS,000000;R002;R003;R005;R009;!Clear tracking regulary by GPRS:$SMS,000000;C002;C003;C005;C009;!8. GPRS data loggerTracker has build in 8M bytes memory for GPRS data save.1、When GPRS interval tracking can not upload to server, data will be automatically stored in the memory2、After that, once the GPRS reconnected, tracker will send the data to server again.Note: real time data will be sent first, the priority of the stored data is low.9. Geo-fenceDescription:Two ways to set the Geo-fence:1、When you know the exact latitude and longitude , the longitude and latitude can be filled in command directly.2、tracker will get the newest position automatically to be fence center if there is no available GPS position.After set the Geo-fence:when the tracker moves in/out the preset geo-fence, it will send a SMS alarm to the authorized phone number (enable the Geo-fence function when you set the authorized number), and if GPRS is connected, tracker will send this alarm data to server via GPRS.SMS Command:$SMS,000000;W018,NO.,name,lat,lng,radius;!explain:NO. serial number of geo-fence, range of: 1 to 5name name of geo-fence, range of: 0-9 characterslat center’s latitude, range of: -90.00000000~90.00000000, unit: degreeslng center’s longitude, range of:-180.00000000~180.00000000, unit: degrees radius geo-fence’s radius, range of: 0.0~1.79E+308, unit: metersNote: The geo-fence is a perfect circle based on the preset radius and centre. Example:$SMS,000000;W018,1,school,22.12345,114.12345,10.50;!$SMS,000000;W018,1,home,,,10.50;!1、Read Geo-fence:$SMS,000000;R018,1;!2、Clear Geo-fence:$SMS,000000;C018,1;!3、Clear all Geo-fence:$SMS,000000;C018;!10. Time zone settingSMS Command:$SMS,000000;W020,X;!Description: Set the SMS time zoneExplain:X: time zone’s value, range of:-720~780, default: 0, unit: minutesFor example:$SMS,000000;W020,480;!1 hour is equal to 60 minutes, and Beijing is GMT+8, 60*8=480(parameter), so this command means 480 is the time zone in Beijing.Read time zone:$SMS,000000;R020;!Clear time zone:$SMS,000000;C020;!11. Low battery alarm and Power on/off automatically1、When the battery level is lower than 15%, it will send SMS to all authorized numbers or send alarm data to server.2、Tracker will be off automatically if the battery level is 0%.3、during charging,tracker will automatically switch on when battery level is higher than 15%, and send a warning SMS to all authorized number.12. Timing turn on/off trackerDescription:set the time of turn on/offSMS Command:$SMS,000000;W038,on time,off time;!explain:Example:$SMS,000000;W038,08:00,20:00;! Turn on time:08:00,turn off time:20:00。
- 1、下载文档前请自行甄别文档内容的完整性,平台不提供额外的编辑、内容补充、找答案等附加服务。
- 2、"仅部分预览"的文档,不可在线预览部分如存在完整性等问题,可反馈申请退款(可完整预览的文档不适用该条件!)。
- 3、如文档侵犯您的权益,请联系客服反馈,我们会尽快为您处理(人工客服工作时间:9:00-18:30)。
.GPS TRACKER 追踪王(GPS+AGPS+LBS+GSM+SMS/GPRS)使用指南(版本V1.0)非常感谢你选择使用GPS TRACKER 追踪王,使用指南将详细的说明如何操作本产品。
请你在使用之前认真阅读使用指南,以便得到正确使用方法。
如有更改,恕不另行通知,每次更改将统一在最新的一次产品销售中发布,制造商对于使用指南中的过失和疏漏不承担法律责任。
目录1.产品简介2.应用领域3. 规格描述4.产品配件5.使用说明'..5.1 SIM卡的安装和设备启动5.2 设备充电5.3 主控号码设置5.4 单次定位5.5 基站定位5.6 中文地址查询5.7 SOS紧急求救5.8 远程监听5.9 震动报警5.10 位移报警5.11 电子围栏5.12 超速报警5.13 低电报警5.14 睡眠省电模式设置5.15 设防/重启和恢复出厂设置 5.16 查询设备状态6.监控平台应用7.故障排除8. 保修1.产品简介GPS TRACKER 追踪王融合了GSM无线通信技术及GPS全球定位系统技术,采用工业级防火材料,6颗18MM×3MM强磁装置,IPX-5防水等级设计,内置8000MAH大容量电池,超长待机100天,通过短信和全球定位服务平台实现对远程目标进行定位和监控管理。
强磁免安装设计,简单易用。
'..2.应用领域●汽车租赁/小型车队管理●户外活动●儿童/老人/残疾人士/贵重物品的监护●个人安全●人员管理●跟踪定位●动物保护和牧场管理3. 规格描述项目规格DC 5V/1000mA (MICRO USB)充电电压8000 mAh (3.7V)内置电池130 mm × 72 mm × 20mm体积300g (重量包括电池)-20° to 工作温度55° C5% to 95% Non-condensing工作湿度四频GSM 850/900/1800/1900Mhz模块GSMUBLOX7020GPS芯片--162Db灵敏度GPSL1, 1575.42 MHzGPS频率1.023 MHz chip rate码C/A56 channel all-in-view trackin频10 meters, 2D RM位置精0.1 m/速度精卫星时微秒同时间精WGS-8默认数平0.1 sec更新时平1 sec热启平暖启30 sec平冷启32 sec'..18,000 meters (60,000 feet) max.最大高度515 meters/second (1000 knots) max.最大速度最大加速度4g小于20 m/sec瞬间位移待机时间天100状态、GSM3个LED灯显示充电、GPSLED灯按键求救SOS.产品配件4 充电器一个● 5V 1000MA充电线一条●使用指南和保修卡一本●追踪王设备一台GPS TRACKER ●5.使用说明 5.1 SIM卡的安装和设备启动打开包装盒,检查设备型号是否正确,配件是否齐全,否则请联络你的经销5.1.1商;GSMGSM卡联通或移动任选(卡选择,设备需要插入一张GSM SIM卡, 5.1.2 SIM 网络全球通用)卡芯片朝下插入卡槽,盖卡的安装,拆开设备防水塞,依据标示,SIM5.1.3 SIM 上防水塞。
)插卡自动开机;注意:(1功能;SIM卡需要开通GPRS(2)设备卡需要开通来电显示功能(依据客户需要的功能选择开通或者SIM3)设备(;不开通),请参考您的手机用户手册将输SIM PINSIM卡已开启要求输入(4)若您的 SIM PIN功能关闭;入 SIM卡有资费。
(5)请确保设备 6)为避免窃贼破坏,设备选位应尽量隐蔽;()避免和发射源放在一起,如倒车雷达,防盗器及其他车载通讯设备;(7,且上(朝天空)天线,安装时应确保正面向上GSM8)设备内置天线及GPS(方无金属物遮挡屏蔽。
5.1.4 指示灯说明充电指示5.1.4.1红色灯'..5.1.4.2黄色灯-GSM指示灯5.1.4.3 蓝色灯-GPS指示灯5.2 设备充电设备每次充电,请充电20小时以上,请使用原厂充电器和电池。
注意:(1)本产品电池含有化学成分,请不要用力摔,刺它和投入火中。
)请及时充电保证设备正常工作。
2 ( 5.3 主控号码设置5.3.1 主控号码只能绑定一个,最后一次绑定的主控号码有效;5.3.2 默认主控号码密码为:123456;5.3.3 设置主控号码指令是:admin123456 回复:admin ok;5.3.4修改主控号码密码指令:password123456 666888 (666888为新密码)回复:passwordok。
注意:GPS TRACKER 追踪王设备发送短信代码给主控号码通过短信设置参数,SIM卡号,隔开符号为逗号,以下各功能参数设置指令格式中的逗号为英文输入状态格式。
5.4 单次定位5.4.1 如果没有设置主控号码,任何号码拨打设备(开通来电显示)它都将回复经纬度信息,如果已经设置主控号码,非主控号码拨打设备将不会回复经纬度信息。
5.4.2 设备,将回复经纬度到该短信查询经纬度信息,任意号码发送指令到手机号码上指令格式:g1234注意:位置查询,当GPS信号不好时,收到的经纬度信息是最后收到经纬度有GPS信号的地方,如果与所在位置产生偏差,要注意查看经纬'..度信息中所包含的时间信息。
5.5 基站定位(主控号码发送有效)打开基站定位指令:jz=1 回复:OK关闭基站定位指令:jz=0 (默认)回复:OK5.6 中文地址查询当需要查询设备的中文位置信息时,可编写位置查询短信发送至设备SIM卡上,设备回复最后一次的位置信息。
短信指令:123注意:中文地址回复需要监控平台支持。
5.7 SOS紧急求救5.7.1 SOS特定号码设置特定号码为报警号码,可发送增加特定号码指令短信至设备来添加号码,可以添加两个SOS特定号码,101为默认主控号码,102为第一个SOS特定号码,103为第二个SOS特定号码;5.7.2 增加特定号码:指令格式:102#号码#例:102##回复: OK5.7.3 删除特定号码:指令格式:D101#D102#D103#例:D101#表示删除第一个号码。
回复: OK5.7.4 查询特定号码:指令格式:C10#例:C10#回复: 101#102#103#5.7.5 SOS求救报警设置当遇到紧急情况需要求助时,可按下SOS按键,将触发SOS紧急求助报警。
设备将向设定的SOS特定号码发送一条SOS报警短信,并拨打SOS特定号码,直至拨通为止,设备也会向监控平台上传SOS报警信息。
注意:SOS报警需设置SOS特定号码。
5.7.5.1 SOS报警短信打开指令,sossms123456(默认)回复:sossms ok5.7.5.2 SOS报警短信关闭指令,no sossms123456'..回复:no sossms ok5.7.5.3 SOS报警电话打开指令,soscall123456(默认)回复:soscall ok5.7.5.4 SOS报警电话关闭指令,no soscall123456回复:no soscall ok5.8 远程监听短信指令格式:88主控号码或者特定号码发送此指令到设备SIM卡号时,设备回拨电话实现监听功能。
注意:实现此功能需先设置好主控号码和SOS特定号码。
5.9 震动报警5.9.1开启振动短信报警:125#(默认)回复:OK5.9.2关闭振动短信报警:126#回复:OK5.9.3开启振动电话报警:122#回复:OK5.9.4关闭振动电话报警:121#(默认)回复:OK5.9.5设置震动报警持续时间短信指令,1-15秒。
指令:vibtime123456,n 回复:vibtime set okn(0~15),0取消振动报警,默认3秒,即振动持续3秒报警5.10 位移报警位移报警设置指令:move123456 300(默认)单位:米回复:move ok取消位移报警指令:nomove123456 回复:nomove ok5.11 电子围栏上或者监控平台上进行设置。
此功能在手机APP5.12 超速报警超速短信报警速度上限:speed123456 080 设置速度上限80公里/小时5.12.1 关闭超速短信通知:speed123456 000 (默认) 回复:speed ok5.12.2 开启超速短信通知:speed123456 080回复:speed ok5.13 低电报警“你的设备电量低,请及时充电”到主控号码。
当设备电量低时,会发送短信:5.14 休眠省电模式设置5.14.1 单次工作模式(休眠状态下,可设定单次工作时长,单位为分钟)指令格式:DW5 回复:OK工作5分钟进入后进入默认工作模式'..5.14.2 自动工作模式(默认)设备在没有设置任何报警的情况下,5分钟后没有任何操作,设备进入休眠状态:GPS 关,GPRS关。
有电话和短信或者震动即时会唤醒设备。
自动工作模式指令格式:auto123456 回复: OK5.14.3 连续工作模式(关闭休眠)连续工作模式指令格式: nslp123456 回复:OK5.14.4 上传间隔设置(默认120秒)上传间隔设置指令格式: upmove123456 120 回复:OK5.15 设防/重启和恢复出厂设置5.15.1 短信设防:SF 回复:SF OK 短信撤防:CF 回复:CF OK5.15.2 重启设备短信指令:CQFORMA5.15.3 恢复出厂设置短信指令:5.16 查询设备状态短信指令:CXZT 回复:设备软件版本,ID,IP,电量,工作模式:M为单次,A,还有上传间隔为连续为自动,C6.监控平台应用(各经销商的平台都不同,平台网址请咨询经销商) 6.1 实时监控,网络/手机查车GPS+LBS双模定位,GPS定位精度2米,有GPS信号时用GPS定位,在没有GPS信号的地方用LBS基站定位,双模自动切换,让你的设备永远在线,确保你的监控365天×24小时时时在线。
4.20.2 平台实时监控: 电脑上网登陆监控平台6.2 轨迹回放登陆平台,点击历史轨迹回放功能6.3 报表统计物流企业可通过该软件来设置被监控货物的出发时间、途径点通知、线路告警、区域告警、重撞告警、侧翻告警、行驶速度等,我们将综合分析货物在途状况,出具报表。
登陆平台,点报表统计。
6.4 Windows ,Android ,Ipad ,Iphone,Wechat 客服端请到经销商服务平台下载,各客户端应用请咨询客服。
7.故障排除7.1设备首次安装后一直无法连接至后台服务器,后台显示未上线,请检设备安装:7.1.1 设备是否充满电;7.1.2SIM卡是否正确安装,请参考使用指南;7.1.3检查LED指示灯状态,请参考指示灯说明;7.1.4检查GPS是否已定位,若未定位请到室外空旷的地方进行首次定位。