使用Python进行Windows系统编程(Windows System Programming Using Python)
如何在Windows下开发Python:在cmd下运行Python脚本

如何在Windows下开发Python:在cmd下运行Python脚本此处提供两种方法:使用者自行选择第一种方法:1.找个文本编辑器,一般选择notepad++,新建个.py文件,写上Python代码,代码可选择简单的print()函数。
源码:简单打印一些Python版本信息和系统信息#!D:\Field\python –>可不修改#!/usr/bin/env python# -*- coding: utf-8 -*-"""Function:【整理】如何在Windows下开发Python(如何运行Python脚本)Author: Field YangVersion: 2016-12-06"""import platform;pythonVersion = platform.python_version();uname = platform.uname();print("Just for demo how to do python development under windows:")print("Current python version info is %s"%(pythonVersion))print("uname=",uname)2.首行解释执行器添加安装Python的路径,此处为D:\Field\python3.打开cmd CMD>path="解释器位置" →enter→python运行脚本名.py或python绝对路径/运行脚本名.py此处为path=D:\Field\python →Enter →python demoRunPythonUnderWindows.py或python d:\Field\ demoRunPythonUnderWindows.py附:Windows命令行的切换路径切换盘输入盘符:如D:或E:切换文件夹cd 文件夹名如:cd Field返回上级目录输入cd ..第二种方法:点击菜单→点击计算机→系统属性→高级系统设置→环境变量→TEMP →编辑path→输入python安装路径(此处为D:\Field\python)2、打开cmd CMD>D: →enter→python运行脚本名.py。
python的使用方法
python的使用方法Python是一种流行的高级编程语言,它简单易学,可读性强,广泛应用于数据分析、人工智能、网络开发等领域。
本文将介绍Python的使用方法,帮助读者快速上手。
一、Python的安装与环境配置在开始Python的使用之前,我们首先需要安装Python解释器。
Python提供了Windows、macOS和Linux等多个操作系统下的安装包,读者可以根据自己的系统选择对应的安装包进行下载。
安装过程中需要注意选择正确的版本,并按照提示进行安装。
安装完成后,我们需要进行环境配置。
在Windows系统下,可以通过配置环境变量将Python解释器的路径添加至系统路径中,以便在命令行中直接使用Python命令。
在macOS和Linux系统下,可以通过修改.bashrc或.bash_profile文件来实现环境变量的配置。
二、Python的基本语法Python的基本语法简洁易懂,深受程序员的喜爱。
下面介绍几个Python的基本语法要点:1. 变量与数据类型:Python是动态类型语言,变量的类型可以根据赋值自动确定。
常见的数据类型包括整数(int)、浮点数(float)、字符串(str)、列表(list)、字典(dict)等。
2. 条件判断与循环:Python提供了if-else语句用于条件判断,可以根据条件的真假来执行不同的代码块。
同时,Python还支持for和while循环,用于重复执行一段代码。
3. 函数与模块:Python支持函数和模块的定义与调用。
函数可以将一段可复用的代码封装起来,可以通过import语句引入其他模块,以便复用其中的函数和变量。
三、Python的常用库和功能Python拥有丰富的第三方库和功能,可以加速开发过程并提升效率。
下面介绍几个常用的库和功能:1. NumPy:高性能科学计算库,提供了多维数组对象和各种计算函数,适用于进行大规模数据运算。
2. Pandas:数据分析工具,提供了数据结构和数据处理函数,方便读取、处理和分析结构化数据。
scons windows编译详解

scons windows编译详解SCons 是一个用 Python 编写的跨平台软件构建工具,在Windows 上也可以使用。
它提供了一种简单的构建脚本语言来描述软件构建过程,并通过执行这些脚本来自动构建项目。
下面是关于在 Windows 上使用 SCons 进行编译的详细说明。
1. 安装 Python:首先,你需要在 Windows 上安装 Python。
你可以从 Python 官方网站上下载并安装最新的 Python 版本。
按照安装向导进行操作,确保将 Python 添加到系统的环境变量中。
2. 安装 SCons:在完成 Python 安装后,你需要安装 SCons。
打开命令提示符(cmd)并输入以下命令来安装 SCons:```shpip install scons```这将使用 pip 包管理器下载和安装 SCons。
3. 创建 SConstruct 文件:在项目的根目录下创建一个名为SConstruct 的文件。
SConstruct 是 SCons 构建脚本文件的标准名称。
你可以使用文本编辑器打开并编辑 SConstruct 文件。
4. 配置编译环境:在 SConstruct 文件中,你需要配置编译环境。
你可以指定要编译的源文件、目标文件、编译器选项等。
以下是一个简单的示例:```python# 导入 SCons 构建环境from SCons.Script import DefaultEnvironment# 创建默认的构建环境env = DefaultEnvironment()# 配置编译器和选项env.Replace(CC='gcc')env.Append(CFLAGS=['-Wall', '-O2'])# 配置源文件和目标文件src_files = ['main.c', 'util.c']obj_files = [env.Object(src_file) for src_file in src_files]# 配置生成可执行文件env.Program('myapp', obj_files)```在这个示例中,我们使用 gcc 编译器,并设置了一些编译选项。
使用PYTHON开发WINDOWS桌面程序

使用PYTHON开发WINDOWS桌面程序使用Python开发Windows桌面程序Python是一种高级、面向对象、解释性的计算机编程语言,它具有简洁、易读、易学的特点,并且拥有丰富的第三方库和模块,因此在Windows桌面程序的开发中非常流行。
下面我们将详细介绍如何使用Python开发Windows桌面程序。
一、Python开发环境的安装安装完成后,可以通过命令行输入以下命令检查Python的安装情况:```python --version```如果看到输出的版本号,则说明Python已经成功安装。
二、Python GUI库Python提供了多种多样的GUI库,其中较为常用的有Tkinter、PyQt、wxPython等。
这些库都提供了丰富的GUI组件和功能,用户可以根据需求选择合适的库进行开发。
在本文中,我们以Tkinter为例进行介绍。
1. Tkinter介绍2. 安装Tkinter库在Python 3.x版本中,Tkinter库已经被打包进入了Python安装包中,因此不需要额外安装。
可以通过以下命令导入Tkinter库:```import tkinter```如果没有报错信息,则说明Tkinter库已经安装成功。
3.创建窗口在使用Tkinter库进行开发时,首先需要创建一个窗口对象。
窗口对象可以通过Tkinter库提供的Tk(函数创建。
示例代码如下所示:```import tkinter as tk#创建窗口对象window = #设置窗口标题window.title("Hello World")#设置窗口大小window.geometry("500x300")#启动窗口的消息循环window.mainloop```以上代码创建了一个标题为"Hello World"的窗口,大小为500x300像素,并且通过window.mainloop(启动了窗口的消息循环。
sys.path模块在windows中的用法

sys.path模块在Windows中的用法1.简介在P yt ho n中,`sy s.p at h`是一个包含模块搜索路径的列表。
当我们使用`i mp or t`语句导入模块时,Py th on会按照`s ys.p at h`中的顺序依次搜索要导入的模块。
本文将介绍如何在W in do ws操作系统中正确使用`s ys.p at h`模块。
2.导入sy s模块在使用`sy s.pa th`之前,我们需要先导入`sy s`模块。
可以使用以下代码在程序中导入`s y s`模块:i m po rt sy s3.显示当前的模块搜索路径在开始使用`sy s.pat h`之前,我们可以通过以下代码查看当前的模块搜索路径:p r in t(sy s.pa th)执行以上代码后,会输出一个包含当前模块搜索路径的列表。
4.添加自定义路径到sys.pa th中在某些情况下,我们可能需要将自定义的路径添加到`sy s.pat h`中,以便Py th on能够正确搜索到我们的模块。
可以使用以下代码将自定义路径添加到`s ys.p at h`中:s y s.pa th.a pp en d("自定义路径")在上述代码中,将"自定义路径"替换为您想要添加的实际路径。
5.修改模块搜索路径顺序在默认情况下,P yth o n会按照`s ys.p at h`中列表的顺序搜索模块。
如果我们希望修改模块搜索路径的顺序,可以使用以下代码:s y s.pa th.i ns er t(0,"自定义路径")在上述代码中,将"自定义路径"替换为您想要插入的实际路径。
执行以上代码后,`s ys.p a th`列表中的第一个路径将变为我们刚插入的路径。
6.移除sys.path中的路径如果我们需要从`sys.pa th`中移除某个路径,可以使用以下代码:s y s.pa th.r em ov e("要移除的路径")在上述代码中,将"要移除的路径"替换为您想要移除的实际路径。
Python中的操作系统

Python中的操作系统Python是一种高级编程语言,它可以在不同的操作系统上运行,包括Windows,macOS,Linux等。
每个操作系统都有其自己的特性和限制,Python允许程序员使用不同的系统上的不同的功能和特性。
在本文中,我们将考虑Python的不同操作系统,并探讨Python对于操作系统的使用。
1. WindowsWindows操作系统是最广泛使用的操作系统之一,特别是在家庭和办公室环境中。
Python可以很好地在Windows上运行,具有许多内置的Windows API和库,可以轻松地访问Windows的各种功能。
Python中最受欢迎的Windows库是pywin32。
Pywin32库是一种Python扩展库,它提供了Python和Windows操作系统之间的接口,允许Python程序员访问Windows的各种内部操作。
通过pywin32,程序员可以轻松地使用COM和OLE自动化等Windows技术。
此外,Python还有一个称为winreg的内置库,它允许Python程序员访问Windows注册表,从而实现对Windows系统的控制。
2. macOSmacOS是一种广泛使用的操作系统,特别是在创意和开发领域中。
Python在macOS上的表现非常优秀,Python可以很好地与macOS内置的Unix命令行工具集成,这使得Python的脚本非常有用。
此外,Python处理文本和图形也非常出色。
大多数macOS专用的图形工具由Python的GUI库Tkinter支持。
还有一个非常强大的Python图形库,即PyObjC,它是一个用于Objective-C和Python之间交互的桥梁。
它允许Python程序员使用macOS的Cocoa API来创建GUI应用程序。
3. LinuxLinux是一种广泛使用的操作系统,特别是在服务器领域。
Python 在Linux上的表现非常出色,因为Linux是一个开放源代码的操作系统,大多数Python应用程序都在Linux上运行。
Windows下Python环境搭建(Win7 64位setuptools)
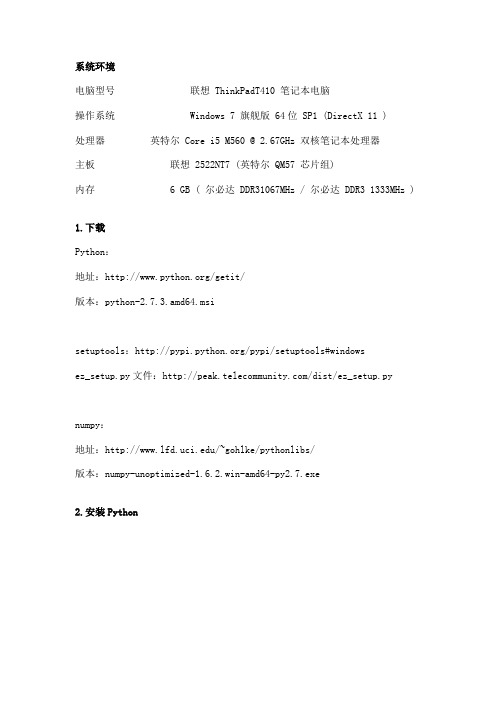
系统环境电脑型号联想 ThinkPadT410 笔记本电脑操作系统 Windows 7 旗舰版 64位 SP1 (DirectX 11 )处理器英特尔 Core i5 M560 @ 2.67GHz 双核笔记本处理器主板联想 2522NT7 (英特尔 QM57 芯片组)内存 6 GB ( 尔必达 DDR31067MHz / 尔必达 DDR3 1333MHz ) 1.下载Python:地址:/getit/版本:python-2.7.3.amd64.msisetuptools:/pypi/setuptools#windowsez_setup.py文件:/dist/ez_setup.pynumpy:地址:/~gohlke/pythonlibs/版本:numpy-unoptimized-1.6.2.win-amd64-py2.7.exe2.安装Python选择安装路径:除了选择安装路径外,其他的基本都可以默认了,一直到安装完成。
此时的目录结构如下:3为Python配置环境变量测试,Python安装成功。
4.安装setuptools官网声称.exe版本的不支持64位Windows系统,推荐使用ez_setup.py自动安装。
据说,有筒子32位的exe文件在64位系统上也能用,我就不试了,按照官方的指导来吧,免得以后出些莫名其妙的问题。
打开/dist/ez_setup.py,把页面上的代码copy一份保存为ez_setup.py,也可以下载:ez_setup.rar(3.78 KB, 下载次数: 1, 售价: 1 金子)在命令行窗口下执行即可,前提是可以联网。
1.D:\>ez_setup.py2.Downloading/packages/2.7/s/setuptools/setuptools-0.6 c11-py2.7.egg3.Processing setuptools-0.6c11-py2.7.egg4.Copying setuptools-0.6c11-py2.7.egg tod:\python27\lib\site-packages5.Adding setuptools 0.6c11 to easy-install.pth file6.Installing easy_install-script.py script to D:\Python27\Scripts7.Installing easy_install.exe script to D:\Python27\Scripts8.Installing easy_install.exe.manifest script toD:\Python27\Scripts9.Installing easy_install-2.7-script.py script toD:\Python27\Scripts10.Installing easy_install-2.7.exe script to D:\Python27\Scripts11.Installing easy_install-2.7.exe.manifest script toD:\Python27\Scripts12.13.Installedd:\python27\lib\site-packages\setuptools-0.6c11-py2.7.egg14.Processing dependencies for setuptools==0.6c1115.Finished processing dependencies for setuptools==0.6c11复制代码setuptools安装完成后的目录如下:5.为setuptools配置环境变量6.使用easy_install安装django:1.C:\Users\Biao>easy_install2.error: No urls, filenames, or requirements specified (see --help)3.4.C:\Users\Biao>easy_install django5.Searching for django6.Reading /simple/django/7.Reading /8.Reading /m/bad-installer.txt9.Best match: Django 1.4.210.Downloadinghttps:///m/releases/1.4/Django-1.4.2.tar.g z11.Processing Django-1.4.2.tar.gz12.Running Django-1.4.2\setup.py -q bdist_egg --dist-dirc:\users\biao\appdata\local\temp\easy_install-tahhsu\Django-1.4 .2\egg-dist-tmp-0hpiac13.zip_safe flag not set; analyzing archive contents...14.django.contrib.admindocs.views: module references __file__15.django.contrib.auth.tests.context_processors: module references__file__16.django.contrib.auth.tests.forms: module references __file__17.django.contrib.auth.tests.views: module references __file__18.django.contrib.flatpages.tests.csrf: module references __file__19.django.contrib.flatpages.tests.middleware: module references__file__20.django.contrib.flatpages.tests.templatetags: module references__file__21.django.contrib.flatpages.tests.views: module references __file__22.django.contrib.formtools.tests.__init__: module references__file__dwizardtests.tests:module references __file__24.django.contrib.formtools.tests.wizard.wizardtests.tests: modulereferences __file__25.django.contrib.gis.geometry.test_data: module references__file__26.django.contrib.gis.tests.geo3d.tests: module references __file__27.django.contrib.gis.tests.geogapp.tests: module references__file__yermap.tests: module references__file__29.django.contrib.sitemaps.tests.base: module references __file__30.django.contrib.staticfiles.storage: module references __file__31.django.core.management.sql: module references __file__32.django.core.management.templates: module references __path__33.django.core.management.__init__: module references __file__34.django.core.management.__init__: module references __path__mands.loaddata: module references__file__mands.loaddata: module references__path__mands.makemessages: module references__file__38.django.core.servers.basehttp: module references __path__39.django.db.utils: module references __file__40.django.db.models.loading: module references __file__41.django.template.loaders.app_directories: module references__file__42.django.test._doctest: module references __file__43.django.test._doctest: module MAY be using inspect.getsourcefile44.django.utils.autoreload: module references __file__45.django.utils.module_loading: module references __path__46.django.utils.version: module references __path__47.django.utils.translation.trans_real: module references __file__48.django.utils.translation.__init__: module references __file__49.django.utils.unittest.collector: module references __file__50.django.utils.unittest.loader: module references __file__51.django.views.i18n: module references __file__52.Adding django 1.4.2 to easy-install.pth file53.Installing django-admin.py script to D:\Python27\Scripts54.55.Installed d:\python27\lib\site-packages\django-1.4.2-py2.7.egg56.Processing dependencies for django57.Finished processing dependencies for django58.59.C:\Users\Biao>python60.Python 2.7.3 (default, Apr 10 2012, 23:24:47) [MSC v.1500 64 bit(AMD64)] on win3261.Type "help", "copyright", "credits" or "license" for moreinformation.62.>>> import django63.>>> exit()复制代码django已安装成功。
电脑中Python技术的使用方法及步骤详解

电脑中Python技术的使用方法及步骤详解近年来,Python作为一种强大的编程语言,受到了越来越多开发者的喜爱。
它简洁而又易于学习,适用于各种编程任务。
在本文中,我们将详细介绍如何在电脑中使用Python技术,并提供一些实用的步骤和建议。
一、安装Python要使用Python技术,首先需要在电脑上安装Python解释器。
Python解释器是一个将Python代码转化为机器语言的工具。
在官方网站上下载最新版本的Python 解释器,并根据安装向导进行安装。
安装完成后,可以在命令行中输入“python”命令来验证是否成功安装。
二、编写第一个Python程序在安装完成Python解释器后,我们可以开始编写第一个Python程序。
打开一个文本编辑器,输入以下代码:```pythonprint("Hello, world!")```将文件保存为以.py为后缀名的文件,比如hello.py。
然后在命令行中进入到该文件所在的目录,输入“python hello.py”命令,即可运行该程序并在命令行中看到输出的结果。
三、使用Python库Python拥有丰富的第三方库,可以帮助我们更高效地完成各种任务。
下面介绍几个常用的Python库:1. NumPy:用于进行科学计算和处理大型数组的库。
可以通过在命令行中输入“pip install numpy”命令进行安装。
2. Pandas:用于数据分析和处理的库。
可以通过在命令行中输入“pip install pand as”命令进行安装。
3. Matplotlib:用于绘制图表和可视化数据的库。
可以通过在命令行中输入“pip install matplotlib”命令进行安装。
四、创建虚拟环境虚拟环境是一个独立的Python运行环境,可以帮助我们在不同项目之间隔离开发环境。
创建虚拟环境可以避免不同项目之间的依赖冲突。
以下是创建虚拟环境的步骤:1. 在命令行中输入“pip install virtualenv”命令来安装虚拟环境工具。
- 1、下载文档前请自行甄别文档内容的完整性,平台不提供额外的编辑、内容补充、找答案等附加服务。
- 2、"仅部分预览"的文档,不可在线预览部分如存在完整性等问题,可反馈申请退款(可完整预览的文档不适用该条件!)。
- 3、如文档侵犯您的权益,请联系客服反馈,我们会尽快为您处理(人工客服工作时间:9:00-18:30)。
– Files can be passed as stdin/out/err – Process and thread handles are waitable using the win32event module.
O’Reilly Python Conference Aug 24, 1999 Windows System Programming using Python Slide 14
O’Reilly Python Conference Aug 24, 1999
Windows System Programming using Python
Slide 13
Ultimate Process Control (1 of 2)
win32process module exposes the low level Win32 API. Full support for CreateProcess, CreateProcessAsUser, CreateThread etc. Full support for Windows Handles
– Hence we are here.
Often used in a similar problem domain to Perl/Tcl Proponents consider readability and maintainability a big strong-point
– Very similar to os.system(), but overcomes limitations. – >>> import win32api – >>> win32api.WinExec("notepad") – Optional parameter allows you to specify the Window’s initial state (eg, minimized)
Official releases can be found at
/windows
Extensions home is at
/crew/mhammond
Windows System Programming using Python Slide 6
O’Reilly Python Conference Aug 24, 1999
Windows System Programming using Python
Slide 2
Who this talk is for?
Existing Python programmers
– Even those without any Windows experience should follow this without problem.
Most content taken directly from upcoming book for O’Reilly Python Programming on Win32 By Mark Hammond and Andy Robinson
/catalog/pythonwin32/
O’Reilly Python Conference Aug 24, 1999 Windows System Programming using Python Slide 12
Better Process Control (2 of 2)
win32api.ShellExecute()
– Typically opens “documents” - eg, execute “foo.doc”, and (typically) Word will open. – Finer control over the new process. – Can also execute arbitrary executables - not limited to documents. – For example, to print a specific document: win32api.ShellExecute(0, "print", \ "MyDocument.doc", None, "", 1)
O’Reilly Python Conference Aug 24, 1999 Windows System Programming using Python Slide 9
Portable Process Control (2 of 3)
os.execv family
– Doesn’t search system path, and doesn’t parse command lines
Windows System Programming using Python
Slide 10
Portable Process Control (3 of 3)
os.popen()
>>> file = os.popen("echo Hello") >>> file.read() 'Hello\012' – Works fine from Windows NT console programs, but fails miserably from a GUI! – win32pipe module in the Win32 extensions provides a working replacement.
Although
there is not enough time to explain the relevant Windows APIs
Existing Windows Programmers
– Even without Python experience, you should immediately see the similarities between your existing language.
O’Reilly Python Conference Aug 24, 1999 Windows System Programming using Python Slide 7
Why not just use Python?
Python has excellent native support for files, processes, threads etc. These features are typically limited to those defined by ANSI C.
O’Reilly Python Conference Aug 24, 1999
System Level Programming?
For this talk, we define system level programming as working with low-level features of Windows Files, Pipes, Processes, Threads, Services, Event Log and so forth. Python and similar languages really not suitable for device-driver type development, and other more system-like Systems Programming!
– Many advanced Windows features are not exposed using these interfaces. – Standard implementation of some of the standard library functions leaves a little to be desired in a Windows environment.
O’Reilly Python Conference Aug 24, 1999 Windows System Programming using Python Slide 5
Python Windows Extensions
Includes:
– Pythonwin: MFC based GUI environment and IDE/Debugger – win32com: Interfaces Python and COM – win32 Extensions: Interfaces to native Win32 API.
– Just often not quite how we would like!
os.system()
import os os.system(“notepad C:\\autoexec.bat”)
Problems – Creates a new console window when run from a GUI. – Waits for process to terminate.
O’Reilly Python Conference Aug 24, 1999
Windows System Programming using Python
Slide 3
What is Python
Interpreted, dynamic high-level language Obviously open source
Windows System Programming using Python
Mark Hammond mhammond@.au
OReilly Open Source Python Conference August 1999, Monterey, CA