曼昆VGSTRACKER追踪王使用说明
迈克罗斯 47007-0005450 远程控制器用户指南说明书

For countries outside the European Union:
If you wish to discard these items, please contact your local authorities or dealer and ask for the correct method of disposal.
• If you must operate this unit while driving, do not take your eyes off the road or an accident could result.
• If any of the following problems occur, immediately stop using this unit and consult your dealer from whom you purchased this unit: – smoke coming from the unit. – abnormal odors or smells. – a foreign object has entered the unit. – liquid has been spilled on or into the unit. If you continue to use the unit when it is not operating properly, damage could result in an accident or fire.
Notes
• Depending on the car stereo, there may not be some buttons with the same names as those on this unit.
MEITRACK T399G车辆追踪器用户指南说明书
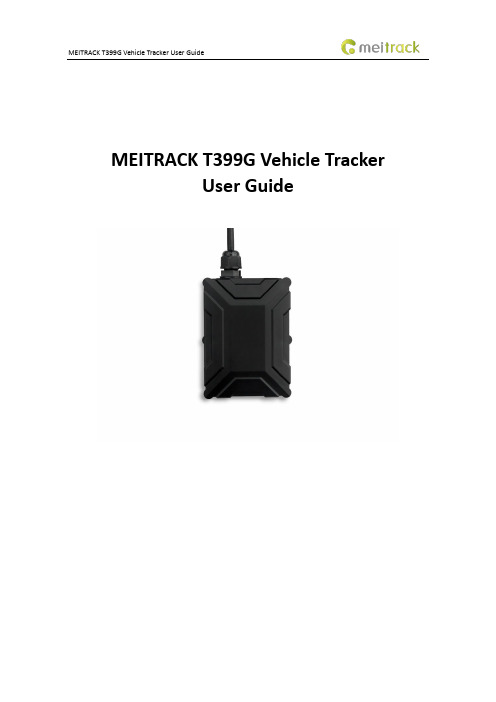
MEITRACK T399G Vehicle TrackerUser GuideChange HistoryContents1 Copyright and Disclaimer........................................................................................................................................... - 5 -2 Product Introduction ................................................................................................................................................. - 5 -2.1 Product Features........................................................................................................................................... - 5 -2.1.1 LoRa communication ........................................................................................................................... - 5 -2.1.2 K211G Status Monitoring..................................................................................................................... - 6 -2.1.3 Harsh Acceleration/Braking Alert......................................................................................................... - 6 -2.1.4 GPS Data Filtering ................................................................................................................................ - 7 -2.1.5 Activating Output by Event .................................................................................................................. - 7 -2.1.6 Idling Detection.................................................................................................................................... - 8 -2.1.7 Changing I/O Port Mode ...................................................................................................................... - 8 -2.1.8 Auto Arming......................................................................................................................................... - 8 -2.1.9 Starting the Engine by RFID/iButton .................................................................................................... - 9 -3 Product Functions and Specifications........................................................................................................................ - 9 -3.1 Product Functions......................................................................................................................................... - 9 -3.1.1 Position Tracking .................................................................................................................................. - 9 -3.1.2 Anti-Theft............................................................................................................................................. - 9 -3.1.3 Other Functions ................................................................................................................................. - 10 -3.1.4 Functions of Optional Accessories ..................................................................................................... - 10 -3.2 Product Specifications ................................................................................................................................ - 10 -4 T399G and Accessories............................................................................................................................................ - 11 -5 Appearance.............................................................................................................................................................. - 12 -6 First Use................................................................................................................................................................... - 12 -6.1 Installing the SIM Card................................................................................................................................ - 12 -6.2 LED Indicator............................................................................................................................................... - 13 -6.3 Device Configuration .................................................................................................................................. - 13 -6.3.1 Installing the USB Driver .................................................................................................................... - 13 -6.3.2 Configuring Device Parameters by Meitrack Manager....................................................................... - 14 -6.3.3 Binding the K211G ............................................................................................................................. - 15 -6.3.4 Unbinding the K211G......................................................................................................................... - 15 -6.4 Tracking by Mobile Phone........................................................................................................................... - 16 -6.5 Common SMS Commands .......................................................................................................................... - 17 -6.5.1 Real-Time Location Query – A00........................................................................................................ - 17 -6.5.2 Setting Authorized Phone Numbers – A71 ........................................................................................ - 17 -6.5.3 Setting the Smart Sleep Mode – A73 ................................................................................................. - 17 -6.5.4 Controlling Output Status – C01 ........................................................................................................ - 18 -6.5.5 Setting I/O Port Status – C08 ............................................................................................................. - 18 -6.5.6 Setting Idling Time – D34 ................................................................................................................... - 19 -7 MS03 Tracking System ............................................................................................................................................. - 20 -8 Installing the T399G................................................................................................................................................. - 20 -8.1 Installing an I/O Cable................................................................................................................................. - 20 -8.1.1 Interface Definition............................................................................................................................ - 20 -8.1.2 Wiring Diagram .................................................................................................................................. - 21 -8.1.3 Setting Code Matching of the RF Remote Control ............................................................................. - 23 -8.2 Mounting the T399G................................................................................................................................... - 24 -1Copyright and DisclaimerCopyright © 2019 MEITRACK. All rights reserved.and are trademarks that belong to Meitrack Group.The user manual may be changed without notice.Without prior written consent of Meitrack Group, this user manual, or any part thereof, may not be reproduced for any purpose whatsoever, or transmitted in any form, either electronically or mechanically, including photocopying and recording.Meitrack Group shall not be liable for direct, indirect, special, incidental, or consequential damages (including but not limited to economic losses, personal injuries, and loss of assets and property) caused by the use, inability, or illegality to use the product or documentation.2Product IntroductionThe T399G is a multi-purpose vehicle tracker. It not only can be used for tracking and positioning, but also used for K211G GPS smart lock management. It has an ability to monitor and record K211G status in real time, and to systematically manage the connection status, battery power and alerts of the K211G. This unit features an IP67 water resistance rating, is equipped with built-in GPS and GSM antennas, and can work in different environments. When it works with the K211G, it can be installed into trailers and box trucks. When it works alone, it can be installed into cars, motorcycles, yachts, boats, etc.2.1Product Features2.1.1LoRa communicationThis function is used for communication between the T399G and the K211G GPS smart lock. After the LoRa connection is successful, the K211G will send information such as lock status information, alert events and battery power to the T399G via LoRa. Then the T399G will upload K211G status information to the server at specific interval via GPRS network and will monitor the K211G status in real time.2.1.2K211G Status Monitoring2.1.3Harsh Acceleration/Braking AlertYou can detect the harsh acceleration/braking alert by setting the limit value. Cautions on device installation:1.The device should be installed into the vehicle according to the following direction.2.The device installation angle cannot exceed 15 degrees.The default harsh acceleration and braking alert values are 230 mG and -300 mG respectively.Note: The alert results vary according to the device installation, vehicle model, vehicle weight, and driving behaviors. After the device has been installed properly, you can use the Meitrack Manager software to adjust the harsh acceleration and braking alert values by every 10 mG. You can also use the D79 command to set the values.2.1.4GPS Data FilteringThe GPS data filtering function can ensure GPS data accuracy and eliminate static drift.You can set the following parameters by Meitrack Manager: GPS speed range, GPS positioning accuracy, and Number of GPS satellites. When the GPS data filtering function is enabled, if all conditions are met, GPS data will be updated.Note: This function can be enabled by Meitrack Manager.2.1.5Activating Output by EventYou can activate output by event.For example:1.When speeding is detected, the device can control buzzer sounds.2.When unauthorized ignition or GPS antenna cut-off is detected, the engine will not be able to start.3.When iButton triggering is detected, the device can control engine startup.4.When input or output status is detected, the output will be active or inactive.2.1.6Idling DetectionThis function is used to detect whether a vehicle's engine is switched off while parking. To enable the function, you must connect input 2 to ACC detection.When the device detects that the driving speed is 0 and the ACC is on for one consecutive minute (default time), an idling alert will be generated.For details, see section 6.5.6 "Setting Idling Time – D34."2.1.7Changing I/O Port ModeThis function is used to change the I/O port mode. For example, change active negative input to analog port or positive input.For details, see section 6.5.5 "Setting I/O Port Status – C08."2.1.8Auto ArmingYou can enable the auto arming function by B27 command, Meitrack Manager software or MS03 tracking platform. This function is disabled by default.When the device is in sleep mode and the function has been enabled, the device will enter auto arming state.You can set disarming by B21 command or remote control.Note:1.To implement the fuel/power cut-off function for a vehicle theft alert, you should select the vehicle theft eventin the Output 1 column on the Meitrack Manager software.2.To implement the alert function of the buzzer, you should set the 1-Wire interface (green cable) to alert output.2.1.9Starting the Engine by RFID/iButtonAfter swiping the authorized RFID card or the authorized iButton key touches the iButton reader, the driver must start the engine within 1 minute. Otherwise, the tracker's output 1 will be triggered (engine cut-off), and thus the driver cannot start the vehicle. At the moment, if you want to start the engine, you must swipe the iButton key/RFID card again.Before starting the engine, ensure that:1.The tracker's input 2 is connected to the engine detection cable.2.An iButton key or RFID card has been authorized.3.The tracker's output 1 is connected to the engine control cable through a relay.4.The RFID ignition function has been enabled by Meitrack Manager or MS03 tracking platform.5.The RFID event has been enabled on Meitrack Manager.3Product Functions and Specifications3.1Product Functions3.1.1Position Tracking●GPS + LBS positioning●Real-time location query●Tracking by time interval●Tracking by distance●Tracking by mobile phone●Speeding alert●Cornering report3.1.2Anti-Theft●Polygonal geo-fence alert●Engine or vehicle door status alert●Remote vehicle fuel/power cut-off●GPS blind spot alert●Towing alert3.1.3Other Functions●SMS/GPRS (TCP/UDP) communication●Built-in 8 MB buffer for recording driving routes ●IP67 water-resistance rating●Mileage report●Roaming parameter settings●Smart sleep mode●Built-in 3-axis accelerometer●Online Parameter Editor●GPS data filtering●Activate output by event●Stop Moving and Start Moving alerts●Vehicle power protection●Idling alert●AGPS3.1.4Functions of Optional Accessories3.2Product Specifications4T399G and AccessoriesT366G and standard accessories:●T366G tracker (with a cable of 50 cm in length) ●400 mAh battery (-20°C to 60°C)●L wrench●Hexagon screw●CD download card5Appearance6First Use6.1Installing the SIM Carde the screwdriver to open the back cover.SIM card slot Firmware upgrade button Power buttonGSM indicator USB portGPS indicator2.Insert the SIM card into the card slot (card chip facing down).3.Close the cover, and tighten the screws.Note:●Power off the device before installing the SIM card.●Ensure that the SIM card has sufficient balance.●Ensure that the phone card PIN lock has been closed properly.●Ensure that the SIM card in the device has subscribed the caller ID service if you want to use your authorizedphone number to call the device.6.2LED IndicatorPress and hold down the power button for 3–5 seconds to start the device.6.3Device Configuration6.3.1Installing the USB Driver1.Decompress the stsw-stm32102.zip file provided by Meitrack, locate the following file, and install the USBdriver on a computer with 64-bit Windows system.2.After the installation is finished, connect the tracker to the computer by USB cable. If STMicroelectronicsVirtual COM Port (COM5) is displayed on the Computer Management page, the driver is installed successfully.Note: Before connecting the device to the computer by USB cable, turn on the device first. Otherwise, it cannot be detected by Meitrack Manager.Note: After you finish the driver installation, if the preceding figure is not displayed, copy the mdmcpq.inf file to the c:/windows/inf/directory and usbser.sys file to the C:/windows/system32/drivers/directory. Then restart the computer.6.3.2Configuring Device Parameters by Meitrack ManagerThis section describes how to use Meitrack Manager to configure the device on a computer.Operation steps:1.Install the USB driver and Meitrack Manager.2.Connect the device to a computer by using the USB cable.3.Run Meitrack Manager (6.0.0.9 version or later), then the following dialog box will appear:4.Turn on the device, then Meitrack Manager will automatically detect the device model and the parameter pagewill appear accordingly.For details about Meitrack Manager, see the MEITRACK Manager User Guide.6.3.3Binding the K211GTo make the T399G and K211G communicate with each other via LoRa, bind the two devices. After the binding is successful, the T399G can communicate with multiple K211G devices, and will upload lock status information and alerts of multiple K211G devices to the server.Perform the following steps to bind the K211G:1.Go to the Peripheral page of Meitrack Manager.2.Enter the IMEI number of the K211G.3.Click Binding.4.Click Set.After the binding is successful, the IMEI number of the K211G will displayed on the Head Tracker Information area.6.3.4Unbinding the K211GThis operation is used to disconnect the communication between the T399G and the K211G. After the unbinding is successful, the T399G will not obtain status information and alerts of the K211G.Perform the following steps to unbind the K211G:1.Go to the Peripheral page of Meitrack Manager.2.Select the IMEI number to be unbounded.3.Click Unbind.4.Click Set.6.4 Tracking by Mobile PhoneCall or send the 0000,A00 command by SMS to the device's SIM card number. The device will reply to an SMS with a map link.Click the SMS link. The device's location will be displayed on Google Maps on your mobile phone.Note: Ensure that the device's SIM card number has subscribed the caller ID service. Otherwise, the tracking function by mobile phone will be unavailable.SMS example:Now,061314 10:36,V,26,0Km/h,96%,/?lat=22.513781&lng=114.057183 The following table describes the SMS format:If your mobile phone does not support HTTP, enter the latitude and longitude on Google Maps to query a location.6.5Common SMS Commands6.5.1Real-Time Location Query – A00SMS sending: 0000,A00SMS reply: Now,Date and time,Positioning status,GSM signal strength,Speed, Remaining battery power,Map link Description: This command is used to query tracker's current location.Example:Sending: 0000,A00Reply: Now,160721 16:40,V,12,56Km/h,97%,/?lat=22.513015&lng=114.0572356.5.2Setting Authorized Phone Numbers – A71SMS sending: 0000,A71,Phone number 1,Phone number 2,Phone number 3SMS reply: IMEI,A71,OKDescription:Phone number: A phone number has a maximum of 16 bytes. If no phone numbers are set, leave them blank. Phone numbers are empty by default.Phone number 1/2/3: Set these phone numbers to authorized phone numbers. When you call the tracker by using these phone numbers, you will receive SMS notification about the location, geo-fence alert and low power alert and SMS notification or a call about the unauthorized door open and unauthorized ignition.If you need to delete all authorized phone numbers, send 0000,A71.Example:Sending:0000,A71,138****1111,138****2222,138****3333Reply: 353358017784062,A71,OK6.5.3Setting the Smart Sleep Mode – A73SMS sending: 0000,A73,Sleep levelSMS reply: IMEI,A73,OKDescription:When the sleep level is 0, the sleep mode is disabled (default).When the sleep level is 1, the tracker enters the normal sleep mode. The 3G module always works, and the GPS module occasionally enters the sleep mode. The tracker works 25% longer in the normal sleep mode than that in the normal working mode. This mode is not recommended for short interval tracking; this will affect the route precision. When the sleep level is 2, the tracker enters the deep sleep mode. If no event (SOS, button changes, incoming calls, SMSs, or vibration) is triggered after five minutes, the GPS module will stop working, and the 3G module will enter sleep mode. Once an event is triggered, the GPS and 3G modules will be woken up.Note: In any condition, you can use an SMS command to disable the sleep mode, and then the tracker exits the sleep mode and returns back to the normal working mode.Example:Sending: 0000,A73,2Reply: 353358017784062,A73,OK6.5.4Controlling Output Status – C01SMS sending: 0000,C01,Speed,ABCDESMS reply: IMEI,C01,OKDescription:When the speed is 0, no speed limit exists. That is, when the tracker receives a command, the output control takes effect immediately.When the speed is a value ranging from 1 to 255 (unit: km/h), set the speed limit for output control. When the driving speed is lower than the speed limit, the output control takes effect.ABCDE: indicates the output 1, output 2, output 3, output 4, and output 5 respectively. When the parameter value is 0, the output is disabled. When the parameter value is 1, data will be generated according to preset output mode. When the parameter value is 2, previous status will be remained.Example:Sending: 0000,C01,10,10000Reply: 353358017784062,C01,OK6.5.5Setting I/O Port Status – C08SMS sending: 0000,C08,IO0:Mn,IO1:Mn,IO2:Mn,IO3:Mn,IO4:MnSMS reply: IMEI,C08,IO0:Mn,IO1:Mn,IO2:Mn,IO3:Mn,IO4:MnDescription:1.IO0, IO1, IO2, IO3, and IO4 indicate I/O ports.IO0: open collector 1 by default (yellow cable)IO1: 1-Wire interface by default (green cable)IO2: negative input 1 by default (grey cable)IO3: positive input 2 by default (white cable)IO4: AD input 1 by default (blue cable)2.Mn indicates the I/O port status. The parameter value is as follows:0: low trigger1: high trigger2: AD input3: Remote control input4: open collector5: low output6: PWM output7: Buzzer alert output8: 1-Wire3.You can set one or multiple input ports at the same time. The command 0000,C08 is used to read I/O portparameters.Note:1.IO0: Mn parameter value is 4, 5, or 6.2.IO1: Mn parameter value is 0, 4, 5, 7, or 8.3.IO2: Mn parameter value is 0, 1, or 2.4.IO3: Mn parameter value is 0, 1, or 2.5.IO4: Mn parameter value is 0, 1, 2, or 3.Example:Sending: 0000,C08,IO0:5Reply: 353358017784062,C08,IO0:5,IO1:0,IO2:2,IO3:2,IO4:16.5.6Setting Idling Time – D34SMS sending: 0000,D34,TimeSMS reply: IMEI,D34,OKDescription:Time: When the device detects that the driving speed is 0 and the ACC is on (input 2 activated) for consecutive several minutes, an idling alert will be generated.Value range: 0–65536; unit: minute; default value: 1 minuteExample:Sending: 0000,D34,1Reply: 353358017784062,D34,OKFor details about SMS commands, see the MEITRACK SMS Protocol.Note:1.The default SMS command password is 0000. You can change the password by using Meitrack Manager andSMS command.2.The device can be configured by SMS command with a correct password. After an authorized phone number isset, only the authorized phone number can receive the preset SMS event report.7MS03 Tracking SystemVisit , enter the user name and password, and log in to the MS03. (Purchase the login account from your provider.)For more information about how to add a tracker, see the MEITRACK GPS Tracking System MS03 User Guide (chapter 4 "Getting Started").The MS03 supports the following functions:●Track by time interval or distance.●Query historical trips.●Set polygonal geo-fences.●Bind driver and vehicle information.●View various reports.●Send commands in batches.●Support OTA updates.For details, see the MEITRACK GPS Tracking System MS03 User Guide.8Installing the T399G8.1Installing an I/O Cable8.1.1Interface DefinitionThe I/O cable is an 8-pin cable, including the power, analog input, and negative/positive input and output interfaces.The I/O cable of T399G RS232 version is an 11-pin cable. Besides the above 8 pins, there are the following 3 pins.8.1.2Wiring DiagramT399G standard version:T399G RS232 version:8.1.3Setting Code Matching of the RF Remote ControlAfter the cover of the remote control receiver is removed, there will be a purple cable, as shown in the following figures.Remove the coverPerform the following steps to set code matching:1.Connect the remote control receiver's yellow cable to 5 V power supply and code matching cable (purple) toGND for more than 2 seconds.2.Press any key of the remote control, and then press any key of the other remote control.3.Release the code matching cable of the remote control receiver.4.Enable the SMS/GPRS events of arming and disarming, and use the remote control to set arming or disarming.If an SMS or GPRS event is received, the code matching is set successfully.Definitions of RF Remote Control Keys:Arm keyNote: The buzzer connects to the 1-Wire interface (green cable), which needs to be set to output 2.8.2Mounting the T399GMount the device in the vehicle by cable tie.Note: Do not install it at a metal covered place.Ifyouhaveanyquestions,*****************************************.。
SimplTrack 2 自动跟踪相机快速启动指南说明书

SimplTrack 2 Auto Tracking CameraQuick Start GuideStep 1:The first thing to do when you receive your SimplTrack 2 is read through the included manual.Step 2:As you unbox your HuddleCamHD SimplTrack 2 you will find the camera, a power supply, an IR remote control, the user manual, a 10’ USB 3.0 A-B cable, and a serial control cable used for joystick controllers.Step 3:Now it is time to plug your camera intopower with the included power supply. Let’s put theincluded AAA batteries inside our remote controland take a look at the features. You can pan, tiltand zoom your camera using the up/down/left/rightarrow keys on your remote. You can also, set aspecific PTZ camera preset by clicking the “preset”button and than entering the number you want to set. You can try moving the camera and calling a preset quickly to test out the cameras movement operations.Note: In order to configure the camera, you will need to connect the camera to a live network feed from a network with a DHCP server. Once the camera is turned on and connected to the network we can install the HuddleCamHD SimplTrack control software.Step 4:You can download the HuddleCamHD SimplTrack control software from /ResourcesNote:This software is only available for Windows. Therefore a Windows computer will be required for initial setup of this cameraStep 5:Once the software is installed on your computer, make sure your computer is connected to the same network as the camera. The software should automatically recognize your SimplTrack camera on the network. You can simply double click the camera in your camera list to start configuration.Step 6: You may want to connect your camera to a meeting room computer or in room display. You can connect the camera to a computer using the USB 3.0 output, to any standard televisionusing a DVI to HDMI cable, and to an SDI monitor using a standard SDI cable.Note: The camera features auto resolution & frame rate conversion upon connecting to a video conference software via USB. The camera may auto power cycle in order to reset the camera resolution to match your connected source.Step 7: Let’s review the software interface and configure your SimplTrack. The main interface offers the ability to interact with the basic features of the camera not directly relating toauto-tracking in addition to providing a live preview. Clicking the magnifying glass in the Camera List section will show the available auto tracking cameras on a network. Simply double click on an available camera to connect. Under Lens Control, standard controls are available for Zoom (Tele / Wide), Focus (Near / Far), Iris (Open / Close), and Iris Reset. The Presets section will Set, Call, and Clear Presets 0-255.Note : Preset 1 is used as a reference for framing your tracking subject and Preset 0 is typically used for framing your stage / podium. This is how you tell the camera how much space you want around your subject during the auto-tracking mode.Step 8:The PTZ Controls section serves two functions: first, to provide manual Pan and Tilt controls, the other is to control the OSD using the Menu button. You can start and stop the cameras auto-tracking capabilities at any time using the Start and Stop buttons under Tracking Control. But before we turn on the auto-tracking let’s set some parameters that will ensure seamless operation.Note:Use the “Iris+” button within the OSD to choose options, and “Iris-” to go back a field.Step 9:Let’s click the “Settings” button at the bottom right of this application. When entering the Advanced Parameters settings interface, the live preview will switch to a split-screen showing the images from both the reference camera and the tracking camera. This is where all features relating to auto-tracking can be setup. Under the Basic Settings section, the SDI & DVI Output resolution and frame rate can be set in addition to protocol settings for the RS-232 connection. Clicking Set in the Tracking Zone section will allow you to draw a green rectangle to define a priority tracking area. Within the Tracking Zone you can set Blocking Zones. These are areas that the camera will ignore motion within, such as a doorway with people walking by or an LCD screen with active video content displayed. Note that the Blocking Zones must be used within the Tracking Zone. Tracking Setting will define what actions the camera is allowed to perform. Use Auto-Tilt when your subject will be walking towards and away from the camera. Free track is used to track a ny moving object regardless of being within the defined tracking zone. Use Permanent Track if your presenter walks outside of the defined tracking zone. Enable Auto Zoom to allow the presenter to move freely beyond the Object Lost reference position. AutoZoom is also affected by the Zoom Limit slider.Step 10:Use the Tracking Parameters section to cater the tracking for your room & presenter. Tracking sensitivity defines how much motion is required from the subject to trigger the tracking capabilities. The higher the sensitivity, the less motion is required. Pan & Tilt Speed allows customization over the speed at which the camera tracks. Set the Zoom Limit to define the maximum distance the camera will auto zoom. Set the Lost Timeout to set when the camera will automatically go back to the reference preset after the presenter is lost.Step 11:The Object Lost Action tells the camera to go to Preset 0, Preset 1 or to Stay when the presenter is lost by the camera. For best results, set the Object Lost Action to the full “stage”, which allows the camera to find the presenter and start tracking again.Note:When adjusting the settings of the SimplTrack, be sure to click Save, then OK to save the current settings.Note: W hen working with multiple SimplTrack systems you can ensure you are working on live settings for each camera by clicking the Inquire button to query the connected camera for its current settings. If you have multiple cameras on your network you may want to change the cameras name in the configuration area.Note:To pull the main RTSP stream please use the following URL rtsp://:/main.h264 (example: rtsp://192.168.111.85:5000/main.h264) Note: To pull the sub RTSP stream please use the following URL rtsp://:/sub.h264 (example: rtsp://192.168.111.85:5000/sub.h264)Step 12:You have now set up your SimplTrack and configured the auto-tracking capabilities towork in your environment. Remember if you have any questions during your setup process youcan always call our support team using the phone number listed on our website. You can also submit a support ticket at any time at . Enjoy!。
Mantis使用及提单细则

1
2016/3/29
•Mantis功能使用
•提单规范细则 •Bug跟踪流程
2
Mantis地址为: http://192.168.0.223:8090/login_page.p hp
注册 1.账号请输入姓名的拼音.
2.输入正确的Email.
3.通过Email邮件激活Mantis账号. 4.设置登录密码. 5.检查账号密码是否可以正常登录.
17
关闭(修改关闭): ①.当测试在回归内部的“测试人员回归测试”状态的PR时,如果回归通过,则将此PR状 态改为“关闭(修改关闭)”. ②.Mantis上的某Bug为“关闭(内部关闭)”状态,且当华为Bug库的此Bug改为“关闭 (修改关闭)”时,测试将Manis中此问题单状态改为“关闭(修改关闭)”.
10
分派给 : 下个环节问题单跟踪处理者(对应的开发,测试,主审人). 摘要 : [崩溃][修改引入][版本号][模块名称]:„„„„„„„„„„„„„„ [崩溃][修改引入][1.2.2.1][注册]:使用一个已经注册过的账号注册发生崩溃. 描述: 【前提条件】: 机型:XXXX 系统:XXXX 其他:XXXX 【步骤以及现象】:XXXXXXXXXXX 【预期结果】:XXXXXXXXXX 提交者:姓名+联系方式
20
THANKS!
21
3
搜索过滤功能 1.可以通过条件进行搜索.
2.将条件都关闭,可以通过问题 单号进行单条问题搜索.
提单前 1.当右上角选择为“所有项目”. 2.点击提交问题,出现左边项目 选择画面. 3.选择正确的项目进行提单.
4
添加分类 1.选择[管理][项目管理]出现左图. 2.将应用按照功能模块划分. 3.将每个模块作为一个分类进行添加.
迈钦特限编号小恶魔预置器说明书

Thank you for purchasing the Chandler Limited Little Devil Pre Amp. Your Devil is handmade in the USA by real people. What does that mean? We do not use large solder or component machines that pick and solder the parts. We pay a real person to do it like they did in the golden age of gear. We do not have most of our work done in China only to do nal assembly in America and then call it made in USA. We do not use surface mount components or ribbon cables that have been recently developed to shrink the size and build time of cell phones and computers. Instead we use time proven through-hole audio components, discrete transistors, and large transformers just like they did in the golden age of gear.At Chandler we are proud of our American made products and we hope you like them!The Little Devil Pre uses a 100% discrete transistor circuit and specially wound transformers. Included are item descriptions and hints to get you on your way.Please feel free to call our shop anytime for help or questions.Prior to sending in your gear for repair, please contact our shop at the number listed below. We will assist you in troubleshooting the problem and, if needed, we will issue you an RMA# to send in the gear.Send repairs to: Chandler Limited, Inc. Attention: Repairs 222 S. Cherry St.Shell Rock, IA 50670Phone: (319) 885-4200Email:*************************** Connections - All connections on the Devils are transformer balanced with pin 2 hot.Current draw -Here are the current draw speci cations for the Little Devil Preamp when the Devil is loaded 600 ohm and operating at a continuous level of unity gain. Please consult your rack and PSU speci cations to make sure you are not overloading your system.+16 volt power rail = +95ma -16 volt power rail = -70maLittle Devil Pre Amp - Designed by Wade Chandler GoekeChandler Limited, Little Devil and the Little Devil Flame Logo are trademarks of Chandler Limited Inc.All rights reserved.COMPATIBILTY-The Little Devil Pre is tested and proven to have no start up or power errors in these racks-API 500v 10-slot with L200 PSUAPI 500-6B LunchboxAPI 500-6B HC “new version” LunchboxBAE 11-slot with power one supplyBAE 6-slot portable with power one supplyBAE 6-slot with Avedis designed supplyEmperical Labs 2-slot (awesome rack and worth the money!)A-Designs 2-slotPurple Sweet 10As of the release of this product we have not yet tested with the Radial Workhorse.POWER SUPPLY RECOMMENDATIONS-With ANY 500 modules (not just the Devils) we recommend using a rack with external supply. We feel a power supply in such close proximity to the right hand slots of the rack can cause hum and noise oor issues with many modules by many manufacturers. For this reason we mainly recommend the API 500v rack with external L200 supply and the BAE 11-slot with external supply.NOTES on BAE racks-We recommend adding a wire from Earth to power supply common on all BAE racks. In many cases hum can be avoided and Earth to common is standard procedure on most electronic equipment.GAIN - max gain 66.5 MIC/LINE- There are three di erent input types on the Devil 500. Mic/line switchesLOW/HIGH- Selects low or high impedance for BOTH mic and line freq response.FEEDBACK/BIAS-bias of the gain stage AT THE SAME TIME as the feedback. So what does this mean?Well you can modify about any parameter of the sound of the pre with the use of the feedback/bias control. It will change the frequency response in the hi and low areas, harmonic distortion, nature of clipping, and the overall tonal characteristic of the pre amp. For example with the feedback on full the sound gets “gushy” as users have described. The unit will soft clip much earlier, harmonics increase exponentially, hi frequency is slightly increased and the unit takes on a very high voltage “overbiased” Class A personality.With the feedback control low you get a very colored but more “tame” sound. Harmonics are very low (in the range of .007%) and noise is the lowest possible with the unit, in the area of -93db. The sound could be described as an accurate but interestingly colored Class A sound.With the Feedback/Gain near the middle of its operation you will get the most headroom and what could be considered the most typical operation of a mic pre. All parameters tend to come into the norm for a Class A style mic pre, BUT don't let that keep you from using it set there! The pre always has a great colored sound we all look for!Feedback continued on next page. . .IMPEDANCE LINEfeedback& biasNOTES ON FEEDBACK-With the feedback all the way down you will not get much level. This is the nature of feedback. Lots of feedback = very little gain. I wanted it like that because there are very speci c sounds you can get with it. For example, with lots of feedback (control o or counter clockwise)you get very little distortion and the noise oor is very low. It also allows you to use the pre with almost no gain for when you are recording loud sources like drums and guitar.Control o or counter clockwise- Lots of feedback, Little gain.Control full or clockwise- Very little feedback, lots of gain.pres with this feature, headroom of the pre is decreased as you lower the signal butwith the added bene t of a lower noise oor. The Devil pre loves to be driven so try this out! BRIGHT-LOW CUT-Gently sloping low cut at 100hz. We tuned this to work as needed with instruments such as acoustic guitar and voice.much di erent than that on readily available direct boxes. Please note that it is possible to make the DI oscillate with the Gain and Feedback/Bias at or near maximum. We did not compensate for this because it would alter the overall tone of the pre amp. In standard Mic or Line input it is not possible to cause oscillation.PHASE-Reverses the output polarity of the unit at the output transformer.DIRECT INoutputMIC48vCE CertificationChandler Limited declares under its sole responsibility that all products manufactured by them are in compliance with EC directives 2004/108/EC Electromagnetic Compatibility; 2004/108/EG Electromagnetic Compatibility; 2006/95/EC Low Voltage Equipment Safety.。
曼昆VGPSTRACKER追踪王使用说明

G P S T R A C K E R追踪王(GPS+AGPS+LBS+GSM+SMS/GPRS)使用指南(版本V1.0)非常感谢你选择使用GPS TRACKER追踪王,使用指南将详细的说明如何操作本产品。
请你在使用之前认真阅读使用指南,以便得到正确使用方法。
如有更改,恕不另行通知,每次更改将统一在最新的一次产品销售中发布,制造商对于使用指南中的过失和疏漏不承担法律责任。
目录1.产品简介2.应用领域3.规格描述4.产品配件5.使用说明5.1 SIM卡的安装和设备启动5.2设备充电5.3主控号码设置5.4单次定位5.5基站定位5.6中文地址查询5.7 SOS紧急求救5.8远程监听5.9震动报警5.10位移报警5.11电子围栏5.12超速报警5.13低电报警5.14睡眠省电模式设置5.15设防/重启和恢复出厂设置5.16 查询设备状态6.监控平台应用7.故障排除8.保修1.产品简介GPS TRACKER追踪王融合了GSM无线通信技术及GPS全球定位系统技术,采用工业级防火材料,6颗18MM×3MM强磁装置,IPX-5防水等级设计,内置8000MAH 大容量电池,超长待机100天,通过短信和全球定位服务平台实现对远程目标进行定位和监控管理。
强磁免安装设计,简单易用。
2.应用领域●汽车租赁/小型车队管理●户外活动●儿童/老人/残疾人士/贵重物品的监护●个人安全●人员管理●跟踪定位●动物保护和放牧3.规格描述4.产品配件●5V 1000MA充电器一个●充电线一条●使用指南和保修卡一本●GPS TRACKER追踪王设备一台5.使用说明5.1 SIM卡的安装和设备启动5.1.1 打开包装盒,检查设备型号是否正确,配件是否齐全,否则请联络你的经销商;5.1.2 SIM卡选择,设备需要插入一张GSM SIM卡,GSM卡联通或移动任选(GSM 网络全球通用)5.1.3 SIM卡的安装,拆开设备防水塞,依据标示,SIM卡芯片朝下插入卡槽,盖上防水塞。
自动跟踪球最新说明书
.球形摄像机使用说明书V1.0版本简体中文板.目录目录 (1)第1章产品概述 (3)1. 1产品简介 (3)1. 2性能特点 (3)1. 3 功能说明 (4)1. 4 技术参数 (7)第2章球形摄像机的基本操作 (9)第3章菜单的设置 (11)3. 1 主菜单 (12)3. 2系统信息菜单 (13)3. 3 显示设置菜单 (14)3.3.1显示信息设置菜单 (14)3.3.2标志位置菜单 (15)3. 4 球机设置1菜单 (16)3.4.1球机设置1菜单 (16)3.4.2镜头设置菜单 (17)3.4.2.1自动曝光控制菜单 (18)3.4.2.2其它菜单 (21)3.4.3云台设置菜单 (24)3.4.3.1 设置区域扫描范围的操作 (25)3.4.3.2 清除区域扫描范围的操作 (26)3.4.3.3 设置手动限位操作 (27)3.4.3.4设置水平方位角为0度操作 (28)3.4.3.5清除0度水平方位角操作 (28)3.5上电设置菜单 (29)3.6预置点设置菜单 (30)3.6.1编辑预置点标题 (30)3.6.2编辑预置点位置 (33)13.6.3清除此预置点设置 (33)3.7花样扫描菜单 (34)3.7.1花样扫描设置 (35)3.7.2清除此花样扫描路线 (35)3.8区域设置菜单 (36)3.8.1編輯区域标题 (37)3.8.2编辑区域 (37)3.8.3打开和关闭此区域 (38)3.8.4清除此区域标题 (38)3. 9 清除设置菜单 (39)3. 10 球机设置2菜单 (40)3.10.1 球机设置2菜单 (40)3.10.2报警输入设置菜单 (40)3.10.3 报警设置菜单 (41)3.10.4清除报警设置 (43)3.10.5 报警输出设置 (43)3.10.6 密码设置菜单 (44)3.10.7 密码输入菜单 (45)3.10.7 屏幕遮挡菜单 (46)3.10.8 屏幕遮挡设置菜单 (47)3.10.9 编辑屏幕遮挡区域菜单 (48)3.10.10 编辑屏幕遮挡放大倍数菜单 (49)3.10.11 加热控制菜单 (50)3.10.12 巡航设置菜单 (51)3.10.13跟踪控制菜单 (52)3.10.14跟踪区域控制菜单 (54)3.11 球机标题菜单 (55)3.12 语言选择 (55)附录一型号说明 (56)2第1章产品概述1. 1产品简介VT系列球形摄像机是采用当今最新的科技成果、最精尖的制造工艺;综合多年的宝贵经验研制成功的,配置了自动变焦镜头的高性能数字信号处理(DSP)CCD;集内置云台和数字解码器于一体,代表新一代高技术监控产品的发展潮流。
Mantis Bug Tracking系列教程说明书
About the T utorialMantis is a Bug Reporting tool, widely used as an issue tracking tool for all types of testing. This is a brief tutorial that introduces the readers to the basic features and usage of Mantis. The various chapters of this tutorial will guide the readers on how to utilize the tool in reporting and maintain an issue.AudienceThis tutorial has been prepared for beginners to help them understand how to use Mantis for testing and issue tracking.PrerequisitesAs a reader of this tutorial, you should have a basic understanding of a bug and testing lifecycle as well as the contents to provide in a bug.Copyright &DisclaimerCopyright 2018 by Tutorials Point (I) Pvt. Ltd.All the content and graphics published in this e-book are the property of Tutorials Point (I) Pvt. Ltd. The user of this e-book is prohibited to reuse, retain, copy, distribute or republish any contents or a part of contents of this e-book in any manner without written consent of the publisher.We strive to update the contents of our website and tutorials as timely and as precisely as possible, however, the contents may contain inaccuracies or errors. Tutorials Point (I) Pvt. Ltd. provides no guarantee regarding the accuracy, timeliness or completeness of our website or its contents including this tutorial. If you discover any errors on our website or in this tutorial,******************************************T able of ContentsAbout the Tutorial (i)Audience (i)Prerequisites (i)Copyright &Disclaimer (i)Table of Contents (ii)1.MANTIS ─ INTRODUCTIO N (1)2.MANTIS ─ FEATURES (3)3.MANTI S ─ INSTALLATION (5)System Requirements (5)Installation of System Requirements (5)Install and Launch Mantis (11)4.MANTIS ─ TRIAL SETUP (16)Setup for Demo Trial (16)5.MANTIS – LOGIN (18)On Error (19)On Successful Login (20)6.MANTIS ─ MY VIEW (21)7.MANTIS ─ PROJECT MAN AGEMENT (23)Create a Project (23)Select a Project (25)Archive a Project (25)8.MANTIS ─ MANAGE CATEGORIES (27)Create a Category (27)Configure Categories (28)Delete a Category (29)9.MANTIS ─ VERSIONS (31)Update or Add Version (31)10.MA NTIS ─ ISSUE LIFECYC LE (33)11.MANTIS ─ REPORT AN I SSUE (34)12.MANTIS ─ IMPORT ISSU ES (37)Rules for CSV File (37)Import CSV (37)13.MANTIS ─ VIEW ISSUES (42)Filters (42)Print Reports (45)CSV/Excel Export (47)14.MANTIS ─ EDIT ISSUES (49)15.MANTIS – CLONE AN ISSUE (53)16.MANTIS – ADVANCED FEATURES (56)@Mention – Notification (56)Send Reminder (57)Text Formatting (59)Attach Files (59)17.MANTIS – CHANGE STATUS (61)18.MANTIS – ISSUES RELATIONSHIPS (63)Create a Link to Another Issue (63)Delete a Link (64)19.MANTIS – MOVE AN ISSUE (66)One Issue At a Time (66)Multiple Issues at a Time (67)20.MANTIS – ISSUE HISTORY (68)21.MANTIS – MISCELLANEOUS FUNCTIONALITIES (70)Monitor (70)Stick (71)Close an Issue (73)Delete an Issue (75)22.MANTIS – SEARCH ISSUES (77)Search (77)Recently Visited (78)23.MANTIS – CHANGE LOG (79)24.MANTIS – ROADMAP (81)25.MANTIS ─ SUMMARY (83)26.MANTIS – ADD CUSTOM FIELDS (84)Mantis Bug Tracker is an open source web-based application tool. It is used for Bug Tracking throughout Defect Lifecycle. Along with bug tracking, Mantis supports Release Features to manage various releases of a project or a software.Mantis is also known as MantisBT, which stands for Mantis Bug Tracker. The name and logo of Mantis refers to Mantidae family of insects. In software, it is referred to as a bug.Mantis provides Demo, Download (to set up your own Mantis) and Hosting version of the tool. It supports various features for Issue Tracking and life cycle along with Release Management. The development of Mantis started in 2000 by Kenzaburo Ito. Later in 2002, other team members (Jeroen Latour, Victor Boctor and Julian Fitzell) joined. The basic version 1.0.0 of Mantis was released in February 2006.In 2012, GitHub became the official repository for the Mantis project source code.License and Free Trial∙It is an open source software. License is not required to use its basic version.∙It provides Demo and Hosting Version for free trails.∙It supports Download feature to set up your own Mantis software.The user can sign up using email ID.∙Mantis has different price quotes based on added features that can be seen at https:///pricingUsage∙To track all bugs/issue throughout Defect lifecycle.∙To manage at Release level as well.∙Supports Analytic and Reporting features.∙Supports plug-in with other softwares and IDE to make it more strong and effective. SpecificationsMantisMantis supports a wide range of features to attract QAs and other stakeholders for bug tracking. Following are the core features of Mantis.Core FeaturesMantisMantis is a web application, provides a private website to individuals or set of requested users belonging to the same company/project.Mantis can be run at the server side. It is a PHP-based application and supports all OS platforms such as Windows, Linux of different versions, MAC, etc. It supports mobile browsers as well in mobile views.System RequirementsSince Mantis is a web-application, it follows the concept of client/server. This means, Mantis can be installed centrally on the server and users can interact with it through web-browsers using a website from any computer.∙Web Server: Mantis is tested with Microsoft IIS and Apache. However, it can work with any latest web server software. Mantis only uses .php file. Configure the web server with .php extension only.∙PHP:The web server should support PHP. It can be installed as CGI or any other integration technology.∙Mandatory PHP Extensions: Extensions for RDBMS are mysqli, pgsql, oci8, sqlsrv mbstring is required for Unicode– UTF-8 support.∙Optional Extensions: Curl, GD, Fileinfo.∙Database: Mantis requires a database to store its data. MySQL and PostgreSQL are supported RDBMS.∙Client Requirements: Firefox 45 and above, IE 10 and above, Chrome, Safari, and Opera.Users can separately install all the requirements either manually or automatically to use Mantis.Installation of System RequirementsIf a user has adequate knowledge about the installation process, all the requirements can be installed one by one separately before proceeding to Mantis.Alternatively, there are many all-in-one packages available, having all the requirements and can be automatically installed in the system by exe file. Here, we will take the help of XAMPP to install pre-requisites easily.Step 1: Go to https:///index.html and click XAMPP for Windows as shown in the following screenshot.Step 2: A pop-up will display to save the file. Click Save File. It will start downloading the file.Step 3: Run the .exe file to run the installation wizard. After clicking the .exe file, XAMPP Setup wizard displays. Click Next.The following screenshot shows the XAMPP setup wizard.Step 4: The next wizard displays all the component files that will install as shown in the following screenshot. Click Next after making a selection of components.Step 5: Provide a folder name where XAMPP will be installed and click Next.Ready to Install wizard is displayed.Step 6: Click Next to start the installation.MantisEnd of ebook previewIf you liked what you saw…Buy it from our store @ https://。
Shipment Tracking for Magento 2 设置与用户指南说明书
Shipment Tracking for Magento 2Setup &User GuideAbout this documentThis document offers the basic knowledge for installing and using the ShipTracker extension for Magento 2.This document is copyrighted © 2018 – 2021 Athanasios Terzis / .The document is licensed under the terms of Creative Commons Attribution-NoDerivatives 4.0. license [https:///licenses/by-nd/4.0/] .This license allows for redistribution, commercial and non-commercial, as long as it is passed along unchanged and in whole, with credit to the copyright holder. If you require another use, please email the author in order to acquire such a license and the source to this document.About ShipTrackerThe ShipTracker extension offers automated shipment tracking based on the tracking codes which are saved in the Magento shop (Sales > Shipments). This happens by using 3rd party APIs, for shipment tracking.Also notifies the customer/recipient with an email, every time there is a change in the status of the shipment (Info Received, In Transit, Out for Delivery, Delivered, Failed Attempt, etc.).CompatibilityMagento Open Source 2.2.x, Magento Open Source 2.3.x, Magento Open Source 2.4.xInstallation (alternative to Marketplace installation) You are advised to install the extension following the Marketplace guidelines.The described process, can be used as an alternative in case you are facing issues, with the installation through the Marketplace.After downloading the package, please do the following:1.In your Magento’s installation, create the folder: app/code/Breakdesigns/ShipTracker2.Extract/Unpack the zip file, you downloaded.3.Upload the extracted files/folders to the folder you created(app/code/Breakdesigns/ShipTracker).4.Enable the module and update the database schema.In the terminal use the following commands:Enable the moduleUpdate the databaseDeploy static filesConfigurationGo to Stores > Configuration > Breakdesigns Extensions > ShipTrackerWeb API1. Select the service you are going to use as Web API.An active account with adequate credits is required, for the extension to work.2. Enter your API KeyThe Web Api services, provide an API key, to their users, for accessing their API.To get your API Key, you better address to your service's documentation and support.•Get AfterShip Api Key•How to get TrackingMore Api Key3. Set the period/days that you want a shipment, to be monitored (Shipments Monitoring Period). The maximum limit is 60 days.4. If your shop is already in production and has orders and shipments, you better limit our module tomonitor shipments (POST new shipments) created before some days, instead of monitoring all of them. This will spare credits and resources to your Web API service, for shipments that are possibly already delivered. For that you can use the setting, New Shipments Lookup PeriodEmailsWith these settings you can determine, when and which notification emails will be send to the customer/recipient.All the email templates, can be customized and overwritten as any email template in magento.For more details on that topic, please read Customize email templates using the Magento Admin.If you create your own customized email templates, you have to come back in this section and select your preferred template.UsageCheck the CarriersNow the module should normally perform most of it's tasks.Though there are cases that require some action.Go to ShipTracker > Carriers and click on the Sync Carriers button.*This page shows the carriers installed in the shop and is used as an interface between the shop's carriers and the web API’s carriers.This is the 1st call to the Web Api, hence it's a good chance to check if the configuration isproper and your web api account is functional. If there is any problem, you will get an error message.If you did not get any error, check if the used carrier codes are validated by the web API.What the validation process does, is to check if the carrier codes used in your shop, are the same as those used by the web tracking API service.If a code is not valid, you need to edit the carrier and set a valid carrie code, that will be used for the communication with the API.Before doing that you better visit the website of your selected web api (AfterShip, TrackingMore, etc.), to learn what are the codes they use for your carriers that seem invalid.You can easily determine a carrier code from the urls of the demo tracking pages relatedwith a carrier, provided by your web api service.e.g. https:///elta-courier/PS205923435GR indicates that the code for theHellenic Post is elta-courier.Beyond setting a web api code, you can edit a carrier to fill in information like a website, a telephone and a logo. These information will be used both in the notification emails and in the tracking page, provided to the user.Add Custom Carriers (Optional)In some cases, you may want to use carriers in your trackings without having the respected carrier modules installed in your shop.In such cases, you can create those custom carriers in ShipTracker. This way you can use them inyour trackings (Shipments>Orders).Go to ShipTracker > Carriers and click the Add Custom Carrier button.Then you have to fill in the respected formThe 2 most important fieldshere are:•Code > The carrier codethat used in your shop(as saved in the table sales_shipment_track)•Web Api Code > The carrier code that the web api uses for that carrier (see previous chapter).TrackingsThis is the page that the shop's admin can use to get informed about the status of a shipment.The Update Trackings button, can be used for deliberate/manual update of the trackings. Themodule automatically sends and fetches information about the trackings every 15minutes through cron jobs. Also the sending of notification emails is automated as well.DetailsBy clicking the details link, you can find details such as the Itinerary/History of the Shipment or the notifications sent to the recipient.I need more helpIf you got stuck and you need more help you can use our support services.If you purchased the extension from the Magento Marketplace, you can ask for support at********************************Support is only offered for the time period after the purchase, referred in the product’s page. After that period, the extension needs to be purchased again, to receive support.。
Digi-Star Harvest Tracker 软件用户手册说明书
PC Software User ManualTopcon Ag AmericasW5527 Hwy 106Fort Atkinson, WI 53538USATel: 800-225-7695E-mail:*******************D3833-EN Harvest Tracker Rev DAll rights reserved. Reproduction of any part of this manual in any form whatsoever without Digi-Star’s express written permission is forbidden. The contents of this manual are subject to change without notice. All efforts have been made to assure the accuracy of the contents of this manual. However, should any errors be detected, Digi-Star would greatly appreciate being informed of them. The above notwithstanding, Digi-Star can assume no responsibility for errors in this manual or their consequence.© Copyright 2017 Topcon Ag Americas, Fort Atkinson (U.S.A.)D3833 EN Rev D 29 Jul 17Page 2Harvest Tracker Software ManualD3833Table of Contents1.0 INTRODUCTION ................................................................................................................. 3 2.0 USE AND SETUP ................................................................................................................ 3 2.0.1 Minimum PC Requirements .......................................................................................... 3 2.0.2 Setup ............................................................................................................................. 3 3.0 RETRIEVING DATA ............................................................................................................ 4 4.0 REPORTS ........................................................................................................................... 5 4.0.1 Report Screen Information ............................................................................................ 6 5.0 FIELDS ................................................................................................................................ 7 5.0.1 Fields Screen Information ............................................................................................. 8 6.0 ID’S ...................................................................................................................................... 9 6.0.1 ID’s Screen Information ............................................................................................... 10 7.0 CROPS .............................................................................................................................. 11 7.0.1 Crops Screen Information ........................................................................................... 12 8.0 FILE OPTIONS .................................................................................................................. 13 9.0 UTILITIES OPTIONS ......................................................................................................... 14 10.0 REPORTING OPTIONS .................................................................................................. 15 11.0 LANGUAGE OPTIONS .................................................................................................... 15 12.0 HELP OPTIONS .............................................................................................................. 16 13.0 REGISTRATION AND SYNCING WITH HARVEST TRACKER ON LINE ....................... 17 14.0 SOFTWARE LICENSE AGREEMENT . (18)Introduction1.0 INTRODUCTIONHarvest Tracker PC software is designed exclusively for use with Digi-Star GT460, GT465, and GT560 indicators used on Grain Carts, Weigh Wagons, and other harvest transport implements. Harvest Tracker PC software also works in conjunction with Digi-Star’s Harvest Tracker On-Line software.Harvest Tracker PC software is a utility software interface for GT460, GT465 and GT560 indicators. This software provides the following features:•Setup and manage “Fields” in Harvest Tracker and the Scale Indicator•Setup and manage “ID’s” and “Capacities” in Harvest Tracker and the Scale Indicator (GT560 Only)•Setup and manage “Crops” in Harvest Tracker and the Scale Indicator•Display, manage, produce reports, and export harvest data that is collected by the Scale Indicator.A USB drive with Harvest Tracker PC software is provided with each GT460, GT465, andGT560 indicator. Harvest Tracker PC software is also available as a free download from the Digi-Star website at the following location:/products/5/Software_and_Data_Transfer2.0 USE AND SETUP2.0.1 Minimum PC Requirements•Microsoft .NET 2.0 Framework or above•Microsoft Windows Vista SP2 or above•100 MB free disk space•500 MB Ram•Free USB port2.0.2 SetupTo load Harvest Tracker PC software on the computer double-click on the “Setup” file either on the USB drive provided with the indicator or downloaded from the Digi-Star website.D3833 Harvest Tracker Software Page 3Retrieving Data3.0 RETRIEVING DATAData retrieval from Digi-Star Indicator is by a USB drive.1. Once you have the data stored from the Indicator to the USB drive, plug the USB intoyour PC.2. Verify that the selected Drive Letter is the same as the USB drive. You will find this inthe top ribbon of Harvest Tracker:a. If this is not the correct drive, then choose the Utilities/USB Drive for Files andfollow the prompts:3. Click to transfer USB drive records to the PC.Page 4 Harvest Tracker Software Manual D3833Reporting4.0 REPORTINGThere are two ways you can view reports in Harvest Tracker:1. Click to open the report generator. In the screen that opens, chose the daterange and print format (see item 4 in section 4.0.1) then click the open button.2. Clicking Reporting/Report GeneratorThe Report Generator allows for Filtering and Hide/Display columns of data. It alsoallows you to display Google Maps of your GPS identified GT560 data.a. Double click any row that has GPS coordinates to map that single Load/Unload.b. Click to map all Load/Unload events currently displayed.Example Report Generator Screen:D3833 Harvest Tracker Software Page 5Page 6 Harvest Tracker Software Manual D38334.0.1 Report Screen Information1. Summary Table – Shows results of selections in tables 2 and 32. Items to Show – Click on the box to show a check mark next to the items that will display in the summary table. Click on the box again to remove the item.3. Filters – Allows user to filter data in table 1 by date, field and ID.4. Print Format – Click on the down arrow at the right end of the box to see print formatselects then click on same print format as the indicator uses. See indicator direct access number 216 or 2304 depending on model. 5. Reports – Click on the button of the type of file needed to print report: Adobe Acrobat (PDF), Microsoft Excel (Spreadsheet), Web Browser (Print from PC Web Browser) CVS, (move date from one file to another). The report generated contains all the information in the summary table. The appropriate software must already be installed on the PC. 6. Save Report Definition – Saves the setting in the Items to Show and Filters section.Program will ask for a name to save. This gives the ability to have multiple saved settings. 7. Open Report Definition – Opens a saved report definition8. Load Single File – View the information from a single Retrieve Data action9. Click on icon to see map of where loads: originated, field, crop, moisture and amount unloaded.123456789ReportingFields 5.0 FIELDSClick to transfer Field information to/from the indicator via the USB drive.The indicator contains a single “file” of 150 fields. The Harvest Tracker PC program allowscre ation of many “files” of 150 fields. Individual files are transferred via the USB drive. Example Fields Screen:D3833 Harvest Tracker Software Page 7Fields 5.0.1 Fields Screen InformationFiles Area1. Click to add a set of fields. Program will ask for a file name to represent these fields.2. Click to copy an existing file and give it a new name.3. Click to delete a file.4. Click or to reorder the selected file up or downFields Area1. Click in the cell to modify a Field or Accumulator value2. Click to delete a Field/Accumulator3. Click or to reorder FieldImport from USB – click to transfer Field and Accumulator information from indicator tohighlighted file via USB driveTransfer to USB– click to transfer Field and Accumulator information from program to USB drive. Insert USB drive in indicator to transfer information.NOTE: Click or to transfer Fields for printingPage 8 Harvest Tracker Software Manual D38336.0 ID’SClick to transfer ID information to/from the indicator via the USB drive.The indicator contains a single “file” of 150 ID’s. The Harvest Tracker PC program allows creation of many “files” of 150 ID’s. Individual files are transferred via the USB drive.Example ID Screen:D3833 Harvest Tracker Software Page 96.0.1 ID’s Screen InformationFiles Area1. Click to add a set of ID’s. Program will ask for a file name to represent these ID’s.2. Click to copy an existing file and give it a new name.3. Click to delete a file.4. Click or to reorder the selected file up or downID’s Area1. Click in the cell to modify a ID or Total Cap value2. Click to delete a ID/Total Cap3. Click or to reorder IDImport from USB – click to transfer ID and Total Cap information from indicator to highlighted file via USB driveTransfer to USB– click to transfer ID and Total Cap information from program to USB drive.Insert USB drive in indicator to transfer information.Page 10 Harvest Tracker Software Manual D3833Crops 7.0 CROPSClick to transfer Crop information to/from the indicator (GT560 only) via the USB drive. The indicator contains a single “file” of 150 Crops. The Harvest Tracker PC program allowscreation of many “files” of 150 Crops. Individual files are transferred via the USB drive. Example Crops Screen:Crops 7.0.1 Crops Screen InformationFiles Area1. Click to add a set of Crops. Program will ask for a file name to represent these ID’s.2. Click to copy an existing file and give it a new name.3. Click to delete a file.4. Click or to reorder the selected file up or downCrop’s Area1. Click in the cell to modify a Name, Std. %,Dry Bushel Weight, Factor B, and Factor Cvalues2. Click to delete a Crop3. Click or to reorder CropImport from USB – click to transfer Crop information from indicator to highlighted file via USB driveTransfer to USB– click to transfer Crop information from program to USB drive. Insert USB drive in indicator to transfer information.File Options 8.0 FILE OPTIONSRetrieve and Store Data– use to retrieve or store data to a selected PC fileReports– view reports see section 4.0Fields –transfer field information to or from the indicator, see section 5.0Backup Data– use to backup data to a selected PC fileRestore Data from Backup– use to restore previously save data, this will delete current data Recover Data Previously Loaded– recovers USB data by dateExit– exits the Harvest Tracker ProgramUtilities Options 9.0 UTILITIES OPTIONSUSB Drive for Files - browse for USB Drive containing Harvest Tracker filesSettings– use to select:•Report Format•Farm Name•Indicator Print Format•Use Touch Screen•Indicator Model – 460, 510, 520, 560Indicate Date Format– MM/dd (Month/Day) or dd/MM (Day/Month)Delete All Data from PC– use to delete selected data:•Loads•Fields•ID’s•Seed Type (Touch Screen)•Brands (Touch Screen)•Varieties (Touch Screen)Clear Log of Unstorable Data– delete unrecognized program dataView Log of Unstorable Data– click to view unrecognized program dataAdd/Edit records– delete, add, edit:•ID’s•Date•Weight•Weight Tag•Accumulated Weight•Accumulated Tag•Field NameUtilities Options Check for Duplicate Records– enter beginning and end date to check for duplicate recordsRegister with Digi-Star Cloud Services– enter information indicated and click REGISTER Synchronize Records with Digi-Star Cloud Service– schedule number of minutes to synchronize records of Harvest Tracker with Harvest Tracker Online, see section 13.010.0 REPORTING OPTIONSReport Generator– see section 4.011.0 LANGUAGE OPTIONSChoose language: English, Spanish, Portuguese, Dutch, and GermanHelp Options 12.0 HELP OPTIONSPC Operators Manual– view this manual on a PCHelp Topics– click for various Harvest Tracker help topicsAuto Check for Updates– click to show check mark, click again to hide check mark, if acheck mark is showing, program automatically check for updates Check for Updates Now– click to update Harvest Tracker softwareDigi-Star Connect– at direction of Digi-Star technical support, click for remote connection Send Database to Digi-Star- click to store a backup of program data at Dig-StarVisit Digi-Star on the Web– click to connect to Digi-Star home pageClick here for Harvest Tracker HelpRegistration13.0 REGISTRATION AND SYNCING WITH HARVEST TRACKER ON LINE Harvest Tracker PC has the ability to synchronize its data with Harvest Tracker Online. To do this register via Utilities/Register with Digi-Star Cloud Services:After registration is complete, you have the ability to:1. Synchronize your records2. Synchronize your Fields and ID’sLicense 14.0 SOFTWARE LICENSE AGREEMENTDigi - Star LLCSOFTWARE LICENSE AGREEMENTIMPORTANT: The Digi-Star software being installed by you or by our technical staff will be licensed to you, the licensee, on the condition that you agree with DIGI-STAR LLC ("Digi-Star") to the terms and conditions set forth in this legal agreement. PLEASE READ THIS AGREEMENT CAREFULLY, YOU WILL BE BOUND BY THE TERMS OF THIS AGREEMENT IF YOU INSTALL, OR IF YOU HAVE DIGI-STAR'S TECHNICAL STAFF OR AUTHORIZED REPRESENTATIVE INSTALL SOFTWARE FOR YOU. If you do not agree to the terms contained in this agreement, please return the disk package to your dealer for a full refund, or do not have a Digi-Star technician or authorized representative install this software. Once you have allowed the software to be installed you are bound by this agreement.If you agree to these terms and conditions, Digi-Star grants to you a nonexclusive license to use the accompanying software (the "Software") and documentation. The Software and the documentation are referred to in this Agreement as then"Licensed Material".1. OwnershipThe Licensed Materials are the sole and exclusive property of Digi-Star and are protected by U.S. Copy Right Law and international Treaty Provisions. By paying the license fee and by installing, or by allowing a Digi-Star technical or authorized representative to install the software, you do not become the owner of the licensed Material according to the terms of this agreement.2. LicenseThe license granted to you by Digi-Star in this agreement authorizes you to use the Software on any single computer, or any replacement for that computer. The Software may not be used on a Network Server. A separate disk, licensed under an additional software agreement, is required for any other computer on which you wish to load the Software. YOU MAY NOT USE, COPY, OR MODIFY THE LICENSED MATERIAL IN WHOLE OR PART, EXCEPT AS EXPRESSLY PROVIDED IN THIS AGREEMENT.3. TermThis Agreement is effective from the date on which you open the sealed disk package and installed the Software or have the Software installed by Digi-Star. This agreement may be terminated by you at any time by destroying the Licensed Material, together with all copies, modifications and merged portions in any form. It will also terminate automatically if you fail to comply with any term of condition of this agreement.4. Restrictions and TransferYou may not sublicense, assign, share, rent, lease, or otherwise transfer your right to use the Licensed Material, nor any other rights granted to you under this agreement, except stated in this paragraph. You may permanently transfer the software to any other party if the other party is purchasing your business operation, the other party agrees to the terms and conditions of this agreement, you transfer all copiesof the Licensed Material to that party, or destroy those which are not transferred and that new party pays a license transfer fee of 25% of the original license fee. By such transfer, you terminate the license granted to you in this agreement.5. Restrictions against copying or modifying the Licensed MaterialThe Licensed Materials are copyrighted by Digi-Star. Except as expressly permitted in this agreement, you may not copy or otherwise reproduce the Licensed Materials. In no event does the limited copyingor reproduction permitted under this Agreement include the right to decompile, disassemble, or electrically transfer the Software in any form, in whole or in part, or of any modification of the Software, or any updated work containing the Software, or any part thereof. You also agree not to remove any existing copyright notice of the License Materials.6. Protection and SecurityYou agree to use your best efforts and take all reasonable steps to safeguard the License Materials to ensure that no unauthorized person has access to them and that non authorized copying, publication, disclosure, or distribution of any of the Licensed Material is made. You acknowledge that the Licensed Materials contain valuable, confidential, and trade secrets and that unauthorized use and copying are harmful to Digi-Star and its software suppliers, and that you have the confidential obligation on such valuable information and trade secrets.7. Limited WarrantyDigi-Star warrants that the media on which the Software is recorded will be free from defects in workmanship and materials for a period of 90 (ninety) days from the payment of the license fee, and if Digi-Star determines the media to be defective and provided the media was not subject to misuse, abuse, or use in defective equipment, Digi-Star will replace the media. ALL IMPLIED WARRANTIES ON THE MEDIA, INCLUDING IMPUTED WARRANTIES OF MERCHANTABILITY AND FITNESS FOR A PARTICULAR PURPOSE, ARE LIMITED TO THE DURATION OF THE EXPRESS WARRANTY SET FORTH ABOVE.IN NO EVENT WILL DIGI-STAR OR ANY OTHER PARTY WHO HAS BEEN INVOLVED IN THE CREATION, PRODUCTION, OR DELIVERY AND INSTALLATION OF THE LICENSE MATERIALS BE LIABLE FOR SPECIAL, DIRECT, INDIRECT, OR CONSEQUENTIAL DAMAGES, IN NO EVENT SHALL DIGI-STAR'S OR SUCH OTHER PARTY'S LIABILITY FOR ANY DAMAGE, OR LOSS TO YOU OR ANY OTHER PARTY EXCEED DIGI-STAR REPLACING THE MEDIA ON WHICH THE LICENSED MATERIALS HAS SUPPLIED.8. GeneralIf any provision or of portion of a provision of this Agreement is determined to be invalid under any applicable law, it shall be deemed omitted and the remaining provision and partial provisions of this Agreement shall continue in full force and effect.。
- 1、下载文档前请自行甄别文档内容的完整性,平台不提供额外的编辑、内容补充、找答案等附加服务。
- 2、"仅部分预览"的文档,不可在线预览部分如存在完整性等问题,可反馈申请退款(可完整预览的文档不适用该条件!)。
- 3、如文档侵犯您的权益,请联系客服反馈,我们会尽快为您处理(人工客服工作时间:9:00-18:30)。
G P S T R A C K E R追踪王
(GPS+AGPS+LBS+GSM+SMS/GPRS)
使用指南
(版本)
非常感谢你选择使用GPS TRACKER追踪王,使用指南将详细的说明如何操作本产品。
请你在使用之前认真阅读使用指南,以便得到正确使用方法。
如有更改,恕不另行通知,每次更改将统一在最新的一次产品销售中发布,制造商对于使用指南中的过失和疏漏不承担法律责任。
目录
1.产品简介
2.应用领域
3.规格描述
4.产品配件
5.使用说明
SIM卡的安装和设备启动
设备充电
主控号码设置
单次定位
基站定位
中文地址查询
SOS紧急求救
远程监听
震动报警
位移报警
电子围栏
超速报警
低电报警
睡眠省电模式设置
设防/重启和恢复出厂设置
查询设备状态
6.监控平台应用
7.故障排除
8.保修
1.产品简介
GPS TRACKER追踪王融合了GSM无线通信技术及GPS全球定位系统技术,采用工业级防火材料,6颗18MM×3MM强磁装置,IPX-5防水等级设计,内置8000MAH大容量电池,超长待机100天,通过短信和全球定位服务平台实现对远程目标进行定位和监控管理。
强磁免安装设计,简单易用。
2.应用领域
●汽车租赁/小型车队管理
●户外活动
●儿童/老人/残疾人士/贵重物品的监护
●个人安全
●人员管理
●跟踪定位
●动物保护和放牧
● 5V 1000MA充电器一个
●充电线一条
●使用指南和保修卡一本
●GPS TRACKER追踪王设备一台
5.使用说明
SIM卡的安装和设备启动
打开包装盒,检查设备型号是否正确,配件是否齐全,否则请联络你的经销商;
SIM卡选择,设备需要插入一张GSM SIM卡,GSM卡联通或移动任选(GSM网络全球通用)
SIM卡的安装,拆开设备防水塞,依据标示,SIM卡芯片朝下插入卡槽,盖上防水塞。
注意:(1)插卡自动开机;
(2)设备SIM卡需要开通GPRS功能;
(3)设备SIM卡需要开通来电显示功能(依据客户需要的功能选择开通或者不开通);
(4)若您的SIM卡已开启要求输入SIM PIN,请参考您的手机用户手册将输入SIM PIN功能关闭;
(5)请确保设备SIM卡有资费。
(6)为避免窃贼破坏,设备选位应尽量隐蔽;
(7)避免和发射源放在一起,如倒车雷达,防盗器及其他车载通讯设备;
(8)设备内置GSM天线及GPS天线,安装时应确保正面向上(朝天空),且上方
设备充电
设备在第一次充电时请充电12小时以上,请使用原厂充电器和电池。
注意:(1)本产品电池含有化学成分,请不要用力摔,刺它和投入火中。
(2)请及时充电保证设备正常工作。
主控号码设置
默认主控号码密码为:123456;
(主控号码)回复:admin ok;
修改主控号码密码指令:password123456 666888 (666888为新密码)回复:password ok。
注意:GPS TRACKER追踪王通过短信设置参数,主控号码发送短信代码给设备SIM 卡号,隔开符号为逗号,以下各功能参数设置指令格式中的逗号为英文输入状态格式。
单次定位
短信查询经纬度信息,任意号码发送指令到设备,将回复经纬度到该手机号码上,指令格式:g1234
注意:位置查询,当GPS信号不好时,收到的经纬度信息是最后收到经纬度有GPS 信号的地方,如果与所在位置产生偏差,要注意查看经纬度信息中所包含的时间信息。
基站定位(主控号码发送有效)
打开基站定位指令:jz=1回复:OK
关闭基站定位指令:jz=0 (默认)回复:OK
中文地址查询
当需要查询设备的中文位置信息时,可编写位置查询短信发送至设备SIM卡上,设备回复最后一次的位置信息。
短信指令:123
注意:中文地址回复需要监控平台支持。
SOS紧急求救
特定号码为报警号码,可发送增加特定号码指令短信至设备来添加号码,可以添加两个SOS特定号码,101为默认主控号码,102为第一个SOS特定号码,103为第二个SOS特定号码;
指令格式:102#号码#
例:
回复: OK
指令格式:
D101#
D102#
D103#
例:D101#表示删除第一个号码。
回复: OK
指令格式:C10#
例:C10#
当遇到紧急情况需要求助时,可按下SOS按键,将触发SOS紧急求助报警。
设备将向设定的SOS特定号码发送一条SOS报警短信,并拨打SOS特定号码,直至拨通为止,设备也会向监控平台上传SOS报警信息。
注意:SOS报警需设置SOS特定号码。
回复:sossms ok
回复:no sossms ok
回复:soscall ok
回复:no soscall ok
远程监听
短信指令格式:88
主控号码或者特定号码发送此指令到设备SIM卡号时,设备回拨电话实现监听功能。
注意:实现此功能需先设置好主控号码和SOS特定号码。
震动报警
开启振动短信报警:125#(默认)
回复:OK
回复:OK
回复:OK
回复:OK
设置震动报警持续时间短信指令,1-15秒。
指令:vibtime123456,n 回复:vibtime set ok
n(0~15),0取消振动报警,默认3秒,即振动持续3秒报警
位移报警
位移报警设置指令:move123456 300(默认)单位:米回复:move ok
取消位移报警指令:nomove123456 回复:nomove ok
电子围栏
此功能在手机APP上或者监控平台上进行设置。
超速报警
超速短信报警速度上限:speed123456空格080 设置速度上限80公里/小时
回复:speed ok
低电报警
当设备电量低时,会发送短信:“你的设备电量低,请及时充电”到主控号码。
休眠省电模式设置
单次工作模式(休眠状态下,可设定单次工作时长,单位为分钟)
指令格式:DW05回复:OK
工作5分钟进入后进入默认工作模式回复的Gps Time Set OK
设备在没有设置任何报警的情况下,5分钟后没有任何操作,设备进入休眠状态:GPS关,GPRS关。
有电话和短信或者震动即时会唤醒设备。
现在默认是10分钟自动工作模式指令格式:auto123456回复: OK
连续工作模式(关闭休眠)
连续工作模式指令格式: nslp123456 回复:OK
上传间隔设置(默认120秒)
上传间隔设置指令格式: upmove123456 120 回复:OK
设置时间间隔范围1-300秒
设防/重启和恢复出厂设置
短信设防:SF 回复:SF OK 短信撤防:CF 回复:CF OK
重启设备短信指令:CQ
恢复出厂设置短信指令:FORMA设备回复短信应该加上去
查询设备状态
短信指令:CXZT回复:设备软件版本,ID,IP,电量,工作模式:M为单次,A 为自动,C为连续,还有上传间隔把这个信息的意思表示出了
6.监控平台应用(各经销商的平台都不同,平台网址请咨询经销商)
实时监控,网络/手机查车
GPS+LBS双模定位,GPS定位精度2米,有GPS信号时用GPS定位,在没有GPS信号的地方用LBS基站定位,双模自动切换,让你的设备永远在线,确保你的监控365天×24小时时时在线。
轨迹回放
登陆平台,点击历史轨迹回放功能
报表统计
物流企业可通过该软件来设置被监控货物的出发时间、途径点通知、线路告警、区域告警、重撞告警、侧翻告警、行驶速度等,我们将综合分析货物在途状况,出具报表。
登陆平台,点报表统计。
Windows,Android,Ipad,Iphone,Wechat客服端请到经销商服务平台下载,各客户端应用请咨询客服。
7.故障排除
设备首次安装后一直无法连接至后台服务器,后台显示未上线,请检设备安装:设备是否充满电;
SIM卡是否正确安装,请参考使用指南;
设备在后台显示离线状态
首先观察设备三个指示灯是否正常,在没有条件观察的情况下,可以先检查SIM 卡的状态,步骤如下:
SIM卡是否欠费;
GPRS业务是否被取消(月底最后一天离线的);
若设备GPS功能已被激活,但又长时间不定位,请检查设备的安装位置是否符合要求,请参考使用指南。
当GPS信号接收环境较差时(周边有高大建筑物遮挡GPS信号),请开车到天空较开阔的地方来定位,一般首次定位时间需要1-2分钟。
8.保修
特别申明:
1.若本产品日后有任何技术变更,恕不另行通知。
2.产品外观、颜色如有改动,以实物为准。
3.保修卡只适用于下述所列IMEI/ID号机子的三包服务。
4.请妥善保管此维修卡,保修时请出示此卡及原购买单据。
5.具体保修范围请参见下表说明。