便捷,高效的build工具ervius Visual kitchen 1.8.2-简明教程
厨房橱柜安装指南说明书

Kitchen CabinetInstallation GuideThe instructions given here serve as a general guideline on how to install frameless cabinets in a reasonably simple installation. Many cabinet designs and installations may be far more complex and beyond the scope of these instructions and require a professional installer.∙Tools Required∙Layout and Planning the Installation∙Cabinet Installation Order∙Installing Cabinets Level∙Fastening Cabinets to the Wall∙Fastening Cabinets Together∙Installing Fillers∙Installing Trim∙Adjusting Hinges and DrawersWarning: Kitchen installations typically involve gas, high voltage wiring, plumbing and mechanical details like heating and AC vents. This guide only covers cabinet installation. At a minimum, if you’re not well versed in these areas make sure that all power is shut off to exposed wiring and gas valves are closed to gas supply lines.∙Tools Required• Tape Measure • Pencil • 3 to 4 foot Level • 3/16" Drill Bit • Phillips Head Screwdriver •#2 Square Drive Bit*• Electric Drill • Hammer • Wood Shims • Phillips Head Screw Gun • Handsaw • Chalk Line • Step Ladder • Extension Cord • Pry Bar • Clamps • Carpenter’s Square • NOTE: If “C” clamps are used, protect material between finished case of the cabinet and the clamp.∙Additional tools that make the job easier:Small Table saw •Power Miter Saw • Laser Level • Stud FinderLocating the Highpoint on the Floor for a WallLayout andPlanning the Installation1. Take inventory of the cabinets as per the plan or order.2. Find the high spot in the floor using a level as shown below.3. Measure up the wall 34 ½” above the high spot and draw a level line anywhere that base cabinets will be installed. (This means that this line will measure greater than 34 ½” above the floor in most places along the wall.)4. Find and mark the studs. This can be done by trial and error of driving a nail in the wall until you find a stud or use an electronic stud finder. Studs will usually be every 16” center to center.Locating the Highpoint on the Floor for an Adjacent WallLocating the Highpoint on the Floor Between Two WallsStep 2Place a mark 34 ½” up from the high spot in floor5. It is best when installing a larger kitchen to mark the cabinet positions and code (size) on the wall. Better to find out now if things aren’t going to fit just right than after you’ve installed several cabinets.6. Unbox the cabinets and be cautious not to drag them across the floor. Save some cardboard to rest thecabinets on to prevent damage to the cabinets and the floor.7. Remove all doors, drawers and shelves, being careful to mark them so that they go back on correct cabinets. Removing the doors can be done without tools as the hinges are “clip ‐on”.Removing drawer boxes are different depending on the type drawer.Standard drawers can be removed by simply pulling the drawer out until it stops, then lift up the front of the drawer and remove the drawer.Dovetail drawers can be removed by pulling the drawer out until it stops. Then reach under the drawer box onboth sides just behind the drawer front. Pull the clipsholding both of them simultaneously while lifting up on the drawer box. Then slide the drawer out.∙Cabinet Installation Order1.Determining the installation order of the cabinets depends on the plan. As a general rule it is better tostart with wall cabinets in the corner and work out. However, if you have “tall” cabinets, like a pantry or oven cabinet in the plan, it is critical to make sure that the tall cabinet is used to determine the top alignment of wall cabinets.∙Installing Cabinets Level1.Nearly every floor, in any house, will not be level and flat. The illustrations below show an exaggeratedview of why leveling cabinets to the high point in the floor is critical.Wrong Right2.Cabinets should be shimmed up from the floor level to the 34 ½” line with wood or composite shims.3.Cabinets should also be shimmed out from the wall to maintain a straight line. Hampton Bay DesignerSeries cabinets are designed to be a “frameless construction” which means when the cabinets arescrewed together they will be forced into a straight line regardless of how wavy or bowed the wall orsurface they’re fastened to may be.WrongRightFastening Cabinets to the Wall1. Screw wall cabinets and tall cabinets to the predetermined height through the back panel into a stud. Make sure to place screws 1” below the top and 1” above the bottom. Measure and mark the studlocation on the cabinet before drilling. Use #8 x 2‐1/2” flat head screws when fastening through a single layer of drywall into wood studs.2. Place a screw at the top of the cabinet and the bottom of a cabinet in as many studs as can be located in the cabinet width.3. Level the cabinets.4. Important: Make sure the cabinets are square by placing a framing square inside or outside of the cabinet. Frameless cabinets can be racked (or slightly twisted) before they are fastened in place.W3036W3036W3036Correcting for a “Bowed In”or “Bellied”Wall ConditionBoxes are at an angle to each otherBox faces are not alignedW3036W3036W3036Proper shimming will allow cabinet boxes to be aligned along a flat plane and the door facia to be adjusted within acceptable tolerancesPlace screws 1” below the inside top ofPlace screws 1” above the inside bottom of cabinet∙Fastening Cabinets Together1. Align cabinet frames together carefully.2. Cabinet cases can be clamped together using various kinds of clamps, however use caution with any kind of steel clamp to not damage the surface material of the cabinet.3. Screw cabinets together with #7 x 1‐1/8” flat head screws.∙ Installing fillers1. Cabinets come is 3” increments in width, therefore fillers will be required when cabinets are to fit between walls.2. Measure the space between the wall and the cabinet at the top, middle and bottom. If the dimensionsare close to the same you can rip (saw) the filler in a straight line to the proper width to fit.3. Next, predrill holes for 1¼” screws and screw the fillers from the inside of the cabinet.4. In a case where the wall is not plumb, the filler will have to be cut to fit to the uneven wall.3”2¾”Installing Trim1. Installing crown molding can be accomplished in a variety of ways depending on the application. Using “frameless cabinets” means that a sub ‐crown molding will always have to be screwed to the top of the cabinet case to attach the crown molding to.ATSM as Sub Crown-Crown Spans to CeilingATSM by Itself as TopscribeATSM as Sub CrownABU PB58as Sub Crown AMLR 2as Sub CrownSide ViewFront ViewSide ViewFront ViewHinge Removal and ReinstallationTo Remove a Mounted Hinge:Push the Release Plunger in from the Back of the Hinge The Hinge Will Disengage from the Mounting PlateHingeMounting PlateRelease PlungerTo Remount a Hinge:Align and Insert theHinge Hooks into the Front of the Mounting PlatePush the Back of the Hinge into the Plate Until it ClicksHinge HooksAdjusting Doors and DrawersHinge AdjustmentUp and Down AdjustmentSide to Side Adjustment and Out Open DoorViewOut of AlignmentCondition Alignment ConditionCorrected10Drawer AdjustmentStandard DrawerDovetail Drawer Adjustment ‐ To Adjust the dovetail drawer for alignment, slide the white plastic clip on the under side of the drawer back and forth to raise and lower the left and right side of the drawer.Rear View ofOpen Drawer Out of Alignment Condition Alignment ConditionCorrectedScrewScrews Raises RaisesLowersThis warranty covers substantial defects in materials and workmanship in your Hampton Bay Designers Series products under normal home use. This warranty is offered only to the original consumer purchaser and may not be transferred. The coverage of this warranty lasts for the lifetime of the original purchaser, so long as he or she owns the home in which the product was first installed.What This Warranty Covers: RSI Home Products, Inc. (“RSI”) warrants its parts and products to be free of substantial defects in materials and workmanship from the original date of purchase under normal home use. This warranty is offered to the original consumer purchaser only and may not be transferred.How Long The Warranty Lasts: Coverage for all Kitchen Cabinets and Accessories lasts for the life of the product. What RSI Home Products Will Do Under The Warranty: During the warranty period, RSI, at its option, will repair or replace any part or product that proves to have substantial defects in materials or workmanship, or RSI will provide an equivalent replacement product. In keeping with our policy of continuous product improvement, RSI reserves the right to change specifications in design and materials without notice and with no obligation to retrofit products we previously manufactured.How State Law Applies: This warranty gives you specific legal rights, and you may also have other rights that vary from state to state.Implied Warranties: RSI disclaims any implied warranty of merchantability, and there are no warranties that extend beyond the descriptions on the face hereof. T o the extent that such disclaimer is not valid under applicable law, any implied warranty shall be coextensive in duration with this warranty.Wood, Aging And Printing Limitations: Because of the varying natural characteristics of wood and the effects of aging, product shown in displays and/or printed materials will not be an exact match to new cabinetry you will receive. Depending on the wood characteristics, the age of a sample and the environment of the showroom, samples will show some degree of variation from new product. In addition, you should not expect all doors, drawer fronts, trim or molding to match exactly in either finish or grain. Variation in wood is normal and unavoidable. In addition, it is not possible to match our colors exactly in printed materials. Therefore, you should view the actual samples when making your color selection.What This Warran ty Does Not Cover: T his warranty does not cover any problems or damage which result from improper transportation, improper installation, mishandling, misuse, abuse, neglect, abnormal use, commercial use, improper maintenance, non-RSI repairs, accidents, or acts of God, such as hurricanes, fire, earthquakes or floods. This warranty, and any applicable implied warranties, does not cover incidental or consequential damages arising from any defects in the product, such as labor charges for installation or removal of the product or any associated products. This warranty does not cover defects or damage caused by normal wear and tear, alterations, environmental conditions, humidity absorption, or mold. In addition, variations in hand carved items, wood grain, finish color, aging or other natural wood and stain characteristics are not considered defects and are not covered by this warranty. Some states do not allow the exclusion or limitation of incidental or consequential damages, so the above limitation or exclusion may not apply to you. U180215 09/15Limited Lifetime WarrantyVendor InformationEmail: ***************************Address: 11350 Riverside Dr. Mira Loma, CA 91752Customer Service #: 800-230-5661Fax # for Order Processing: 844-554-0636。
installshield教程
installshield教程InstallShield是一种用于创建安装程序的软件工具,它被广泛用于Windows操作系统。
它提供了一个易于使用的界面,可以帮助开发人员创建和部署软件安装包。
以下是一个简单的InstallShield教程,帮助您开始使用这个强大的工具:1. 下载和安装InstallShield软件。
您可以从Flexera的官方网站下载最新版本的InstallShield。
2. 打开InstallShield软件。
在打开软件后,您将看到一个主要的项目窗口,其中包含项目资源和设置。
3. 创建新项目。
单击“文件”菜单,然后选择“新建项目”选项。
在新建项目对话框中,选择您的项目名称和保存位置。
4. 添加软件资源。
在项目窗口的左侧面板中,选择“资源视图”。
选择“文件夹”,然后从您的计算机中选择要添加到安装程序的文件和文件夹。
5. 配置安装程序设置。
在项目窗口的左侧面板中,选择“设置视图”。
在“常规”选项卡中,设置安装程序的名称、版本号和目标操作系统等信息。
6. 配置安装程序界面。
在项目窗口的左侧面板中,选择“用户界面视图”。
选择一个适合您的项目的安装界面模板,并进行必要的自定义设置。
7. 配置安装程序行为。
在项目窗口的左侧面板中,选择“行为视图”。
在这里,您可以设置安装程序的行为规则,例如安装位置、文件覆盖选项等。
8. 构建安装程序。
在菜单栏中,选择“生成”选项,并选择“构建”选项。
这将开始编译和生成您的安装程序。
9. 测试安装程序。
在菜单栏中,选择“生成”选项,并选择“运行”选项。
这将启动一个安装程序测试程序,您可以在其中模拟真实环境中的安装。
10. 发布安装程序。
在菜单栏中,选择“生成”选项,并选择“导出”选项。
这将创建一个可执行的安装程序文件,您可以将其分发给用户并进行安装。
这是一个简单的InstallShield教程,帮助您开始使用这个功能强大的软件工具来创建和部署Windows安装程序。
ug装配功能详解

ug装配功能详解1 UG/Gateway + Y8 e+ ~8 |2 n. H' _UG入口) O* x- \# q m- ^UG/Gateway入口模块是连接UG软件所有其它的基本框架,是启动UG软件运行的第一个模块,该模块为UG软件其它各模块运行提供底层统一数据库支持和一个窗口化的图形交互环境,执行包括打开、创建、存储UG模型、屏幕布局、视图定义、模型显示、消隐、着色、放大、旋转、模型漫游、图层管理、绘图输出、绘图机队列管理、模块使用权浮动管理等关键功能,同时该模块还包括以下方面功能:# i" S9 W3 p4 |! D: j, l包括表达式查询、特征查询、模型信息查询、坐标查询、距离测量、曲线曲率分析、曲面光顺分析、实体物理特性自动计算功能在内的对象信息查询和分析功能用于定义标准化零件族的电子表格功能按可用于互联网主页的图片文件格式生成UG零件或装配模型的图片文件,这些格式包括:CGM、VRML、TIFF、MPEG、GIF和JPEG输入、输出CGM、UG/Parasolid等几何数据Macro宏命令自动记录、回放功能" C; A8 y* H3 P$ w' N( C9 G$ [$ n. X! V6 u9 j/ M# iUser Tools用户自定义菜单功能,使用户可以快速访问其常用功能或二次开发的功能; b6 B0 I; K1 h8 R4 z( [: N( k/ O2 UG/Solid ModelingUG实体建模7 `0 t" a! x" X; a0 vUG/Solid Modeling实体检模模块将基于约束的特征造型功能和显示直接几何造型功能无缝地集成一体,提供业界最强大的复合建模功能,使用户可以充分利用集成在先进的参数化特征造型环境中的传统实体、曲面和线架功能。
该模块提供用于快速有效地进行概念设计的变量化草图工具、尺寸驱动编辑和用于一般建模和编辑的工具,使用户既可以进行参数化建模,又可以方便地使用非参数化方法生成2维、3维线架模型、扫掠和旋转实体以及进行布尔运算,也可以部分参数化或将非参数化模型后参数化,方便地生成复杂机械零件的实体模型。
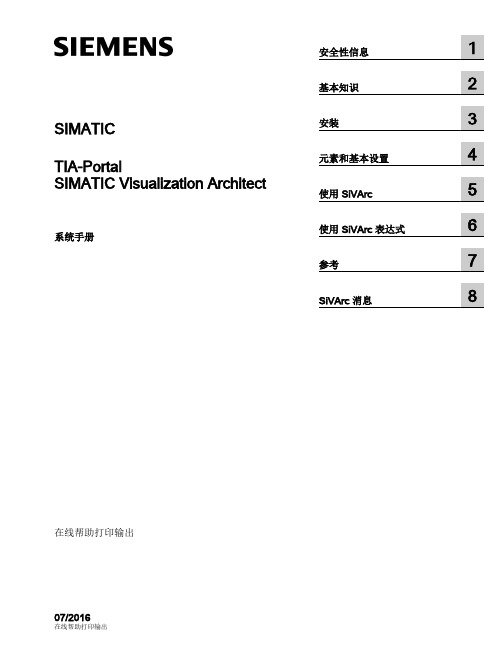
SIMATIC Visualization Architect系统手册
危险 表示如果不采取相应的小心措施,将会导致死亡或者严重的人身伤害。
警告 表示如果不采取相应的小心措施,可能导致死亡或者严重的人身伤害。
小心 表示如果不采取相应的小心措施,可能导致轻微的人身伤害。
注意 表示如果不采取相应的小心措施,可能导致财产损失。
当出现多个危险等级的情况下,每次总是使用最高等级的警告提示。如果在某个警告提示中带有警告可能导致人身 伤害的警告三角,则可能在该警告提示中另外还附带有可能导致财产损失的警告。
安全性信息
1
基本知识
2
SIMATIC
安装
3
TIA-Portal
元素和基本设置
4
SIMATIC Visualization Architect
使用 SiVArc
5
系统手册
使用 SiVArc 表达式
6
参考
7
SiVArc 消息
8
在线帮助打印输出 07/2016
在线帮助打印输出
法律资讯 警告提示系统ቤተ መጻሕፍቲ ባይዱ
为了您的人身安全以及避免财产损失,必须注意本手册中的提示。人身安全的提示用一个警告三角表示,仅与财产 损失有关的提示不带警告三角。警告提示根据危险等级由高到低如下表示。
2.3
关于使用 SiVArc 的基础知识..........................................................................................17
2.4
支持的设备......................................................................................................................21
SuperForge简介

Simufact.Forming8.0先进和便捷的制造仿真系统SuperForge航空航天、汽车、船舶等行业许多重要的零部件都通过锻造加工生产出来。
传统锻造工艺和模具设计通常借助于反复的实物试验,周期长、成本高,而产品性能并不一定最佳。
相反锻造过程的数值仿真技术的应用越来越显示其优越性。
SuprForge是一个全新的工业锻造过程仿真软件包,由功能极强的有限体积求解器和WINDOWS风格的易用图形界面无缝集成。
利用SuperForge的锻造仿真技术,能够大幅度减少反复试验,缩短锻造工艺开发周期,加快产品投放市场时间,增加获利。
SuperForge已被成功用于全球各大著名锻造公司和零部件供应商的锻造产品开发。
滑轮锻造SuperForge采用纯WINDOWS风格的图形界面,具有同Microsoft Office应用软件类似的易用性。
用户如果在PC机上已经熟悉了这类应用软件,再学习SuperForge就变得非常容易。
SuperForge专为锻造工程师设计的图形界面,使锻造过程建模、仿真、评定和结果动画处理等一系列过程尤其简单。
WINDOWS风格的图形界面SuperForge的工艺过程窗口,是以结构化方式内置各种锻造过程。
这就允许用户组合用不同锻造道次创建一个新的锻造过程,通过拖放技术,易于在锻造过程中把模具和工件模型分配给不同的加工道次。
同样利用拖放技术,将材料特性、压机类型,摩擦和热传导及模型间的导热等需要考虑的各种因素分配给模具和工件。
完成锻造模拟后,结果自动转入可视化和动画处理。
SuperForge真正做到把锻造建模、分析与结果处理无缝连接。
●直接输入模具几何形状。
●无网格分析: SuperForge无需用网格划分程序对模具和工件的CAD几何划分网格。
以STL (StereoLithography)文件格式描述的CAD几何可直接输入图形界面。
用户不需要额外掌握单元划分技术。
●支持MSC.Nastran的Bulk Data文件格式:这就保证能够将老版本的SuperForge上的锻造数据库模型转换成的bdf文件格式,传入新版本的SuperForge继续使用。
家具设计软件

家具设计软件家具设计软件:BestCut.v1.52(面向家具制造等行业,它帮助减少单调的板材切割操作,能计算材料和制造的费用)Cabinet Vision Solid v4.0-ISO 1CD(基于windows的橱柜设计软件)Compusoft.Winner.v7.0.a8.Multilang-ISO 1CD(卫浴与厨具设计软件,可以快速做出效果图)Cutting.3.v1.31.WinAll(矩形材料切割工具。
可用于木工行业的生产加工,或家具、玻璃切割的生产加工)Dynalog.v2.3.31-ISO 1CD(应用于设计家具的一个使用方便的手册和设计程序 )KitchenDraw.v.4.52.Multilingual(包括简体中文。
著名的橱柜、衣柜和卫浴设计软件)Instant Kitchen Design v2.0 1CD(著名的橱柜、衣柜和卫浴设计软件)MasterCook.Deluxe.v9.0 1CD(橱柜设计软件)Planit Fusion v12-ISO 1CD(先进的厨房,浴室,橱柜设计软件)LECTRA力克产品:Lectra.Formaris.V5R1C1-ISO 1CD(家具设计,打版解决方案)Lectra.DesignConcept.3D.v3R1c.Multilanguage-ISO 2CD(三维软装饰设计)-+加工及雕刻类软件+-~~~~~~~~~~~~~~~~~~~~~~CNC产品:MasterCAM X2 v11.0 Full-ISO 1CD(简体中文汉化)MasterCAM X2 v11.0 SP1 full-ISO 2CDMasterCAM X MR2 的完全汉化文件MasterCAM X v10.0 Final 简体中文完整汉化包MasterCAM ART v9.0-ISO 1CD(CNC推出的新的曲面雕刻软件。
这里的Art代表"Artistic Relief Technnogy",它能根据简单的二维艺术图形,快速生成复杂雕刻曲面)MasterCAM Post Processor ExecutablesMasterCAM 的中文书MasterCAM 中文语音教学 1CDFMMT MasterCAM Lathe v9 Training-ISO 1CDMoldplus metric v9 for mastercam 9(分模模块)l.Program.Editor.v1.2Machinist DIGI Spline v4.0.1Machinist TOOLBOX v9.2DELCAM产品:ArtCAM Pro v9.126-ISO 1CD(多语言,包括简体中文)ArtCAM Pro and Jewelsmith v8.1-ISO 1CD(多语言,包括简体中文。
工具软件 VSuite Ramdisk 1.8

工具软件VSuite Ramdisk 1.8VSuite Ramdisk 1.8是一种典型的虚拟硬盘软件。
其可以通过可视化界面,帮助用户从内存中划拨一部分空间,然后将这些控件虚拟为硬盘分区,提高系统的运行速度。
VSuite Ramdisk不仅支持系统中已经识别的内存,还支持X86(32位)Windo ws操作系统无法识别的超过3.25G的内存,允许用户通过将这些内存虚拟为硬盘,提高系统资源的使用率。
打开VSuite Ramdisk,即可在其界面中定义各种虚拟硬盘的属性,如图12-18所示。
标题栏虚拟硬盘列表导航栏属性设置栏图12-18 VSuite Ramdisk 1.8程序界面在VSuite Ramdisk 1.8程序的主界面中,分为标题栏、导航栏和虚拟硬盘列表栏和属性设置栏等4个部分。
其中,用户可进行操作的部分如下所示。
●导航栏导航栏用于切换内存虚拟硬盘情况和软件基本设置等内容。
●虚拟硬盘列表栏显示当前系统中存在的虚拟硬盘列表。
●属性设置栏设置选中的虚拟硬盘,以及建立和删除虚拟硬盘。
使用VSuite Ramdisk 1.8可以方便地创建、删除虚拟硬盘,还可以设置虚拟硬盘的各种属性。
首先,在VSuite Ramdisk窗口中设置【硬盘容量】、【文件系统】、【卷标】以及是否【启用压缩】等选项,然后,即可单击【创建】按钮,创建一个虚拟的硬盘,如图12-19所示。
单击图12-19 单击创建其次,即可打开【我的电脑】,在【我的电脑】窗口中查看、使用虚拟的磁盘,如图12 -20所示。
虚拟磁盘图12-20 查看虚拟磁盘再次,选中已创建的虚拟硬盘后,用户可单击【删除】按钮,删除已创建的虚拟硬盘,如图12-21所示。
删除虚拟磁盘图12-21 删除已创建的虚拟硬盘最后,如果需要永久保存虚拟硬盘中的数据,则可以单击【使用镜像文件】选项,然后在【镜像路径】后面单击【浏览】按钮,设置镜像保存的路径,每次关闭计算机时,都将虚拟硬盘中的数据保存下来,如图12-22所示。
lde3et使用方法

lde3et使用方法随着科技的发展,各种编程语言和工具层出不穷,为广大开发者提供了便利。
lde3et正是一款实用的编程工具,本文将详细介绍其使用方法及其相关注意事项。
一、了解lde3et工具的背景和用途lde3et(Lightweight DEBUGGER for ET)是一款轻量级的调试工具,主要用于嵌入式系统开发中的调试、测试和故障排查。
它支持多种嵌入式处理器架构,如ARM、MIPS等,适用于各种嵌入式操作系统,如Linux、FreeRTOS等。
通过lde3et,开发者可以快速定位问题,提高开发效率。
二、lde3et工具的使用方法详解1.安装lde3et首先,根据您的操作系统和硬件平台,从lde3et官方网站或其他可靠来源下载对应的安装包。
然后按照官方文档或教程进行安装,确保安装过程中所需的依赖库和驱动都已正确配置。
2.配置lde3et在安装完成后,根据您的嵌入式系统配置和使用需求,对lde3et进行相应的配置。
这包括:- 配置目标板信息:如处理器型号、频率、内存大小等;- 配置调试通道:如串口、以太网等;- 配置调试代理:选择合适的调试代理,如GDB、J-Link等;- 配置调试参数:如调试时钟频率、调试缓冲区大小等。
3.使用lde3et进行调试配置完成后,即可开始使用lde3et进行调试。
以下是调试过程中的一些常用功能:- 启动调试:通过命令行或图形界面启动调试;- 单步执行:逐步执行代码,观察程序运行状态;- 设置断点:在特定位置设置断点,以便在调试过程中暂停程序;- 变量查看:查看当前程序中的变量值;- 堆栈查看:查看当前程序的堆栈信息;- 输出查看:观察程序运行时的输出信息。
4.调试结束在调试过程中,如发现问题或需要对代码进行优化,可以借助lde3et进行修改。
调试结束后,可通过保存调试配置文件和生成报告等方式,便于后续开发过程中的复查。
三、使用lde3et注意事项及建议1.确保目标板与调试工具的连接稳定可靠;2.在使用调试通道时,注意避免与其他设备冲突;3.根据实际需求选择合适的调试代理,以确保调试性能;4.定期更新lde3et版本,以获取新功能和修复潜在问题;5.熟练掌握lde3et的常用功能,提高调试效率。
- 1、下载文档前请自行甄别文档内容的完整性,平台不提供额外的编辑、内容补充、找答案等附加服务。
- 2、"仅部分预览"的文档,不可在线预览部分如存在完整性等问题,可反馈申请退款(可完整预览的文档不适用该条件!)。
- 3、如文档侵犯您的权益,请联系客服反馈,我们会尽快为您处理(人工客服工作时间:9:00-18:30)。
ervius Visual kitchen 1.8.2 (EVK)简明教程(2-6楼)(半转)授之渔人ervius Visual kitchen 1.8.2是一款便捷,高效的build工具,无论在目录管理、xip移植、组件选择上,还是在多机型、语言的支持上。
虽稍有不足,如在xip及sys中加入了软件版权信息(可以想法去掉),但作为一款免费共享的软件,还是瑕不掩瑜的。
论坛上几乎见不到vk的模板,而国外论坛上却附拾即是,可见是有一定影响力的。
对prb熟悉的人非常容易上手,而效率更高erviuskitchen.ini为EVK的变量.字体大小.kitchen_build_rom.bat\OLD_kitchen_build_rom.b at为定植ROM运行参数.准备工作:1.下载软件,解压至kitchen目录,并建立ext rom oemsys realese_<机型>目录2.收集自己机型的oem组件(以oem开头的)3.一个近来可用的xip.bin及romhdr.bin及sys文件夹4.os.nb.payload和你的boot.rgu文件以及boot.hv 文件.5.运行需要的环境Microsoft .NET Framework 3.0以上.1、第一次?按楼下方式组织文件夹!2、软件图解(1)界面(2)other(其它:主要是impantxip设定):imgstart:设定imgfs.bin的起始扇区,参数:0表示缩减xip扇区,紧跟xip插入imgfs.bin;omitted表示保持原设定,也可填入自定义地址uldr:设定uldr分区,为空表示不设定此选项,填入uldr表示尽可能缩减uldr分区,不建议删除PP\nocert:(3)xipportex &rom:xip自动移植和rom工具,自动移植按2楼操作即可(4)Extra:扩展按钮,你可自定义常用或收集的工具、批处理命令集,怎么设置?打开tools目录下的extrabuttons.ini文件及extrabuttons目录就一目了然了3 build新rom,load上次设定,在sys xip下拉菜单里选定版本,就可以延用上一次的组件设定了,然后保存就可以了说明:1\由于本人至今用过的都是HTC机型,其它机型未曾移植过,不知其能不能通用,折腾得最多的是6850,6875,6975,S511,6715,难度也稍大一些,花的时间也多一点,趁资料还在,就以6850作原型机说明。
6850机型代号是Raphael,其它机型可依葫芦画瓢即可,有时间的时候一步步完善吧。
2\prb采用的ext包格式,不存在文件关联信息dsm文件,build出来的rom能dump出来,但很难归类还原shared: 共用文件夹,经常升级的东西,当然是对喜欢折腾的人而言,在 xxxxx(版本号)/ 下放入xip里的MSXIPKernel部分.MSXIPKernel夹里:机型(Raphael): 机型模板文件夹,根目录下放入原始xip.bin、romhdr.bin、os.nb.payload,info.txt文件,xxxxx(版本号)下放入xip里的OEMXipKernel部分及boot.rgu文件,里面内容大多是不经常变动的结构如下图:OEMXipKernel夹里的内容info.txt文件定位机型的分辨率.Raphael_CDPI_192dpi_192_resh_480_resv_640注意:romhdr.bin必须对应.之前我自己也犯一样的错误.一直死在一屏,方法是.用自己原版的XIP,分解时得到.XIP初次分解:把自己原版的XIP复制到Tools\xip.bin_old下,要移植新的XIP到Tools\xip.bin_new.点xipporterex & ROM 点Port IT.到Tools\xip.bin_old下得到自己的OemXipKernel文件夹和romhdr.bin.Tools\xip.bin_new目录里得到将要移植的MSXIPKernel夹oem文件夹带DSM和RGU文件.与普通模板结构一样,可以直接使用老厨房的OEM建立如图:这个文件夹有点关键:1.0804、0409等等:有关语言的文件夹,放入oem_lang_%lang%,wincenls_lang_%lang%也可以放在这里,wincenls_lang_%lang%可提取于新的sys里面mon文件夹,放入那些oem****模块3..VM是你机型的sys文件夹用evk,要了解一下它的sys归类方式,在我看来,也是目前最合理的方式,最大程度兼容了老式的option.xml的组件结构,在evk里面是不可以更改的,它是层层分类并统一相关的。
如果系统有时间锁,evk会自动解决掉(在目前的加锁模式下)dpi_192_resh_480_resv_640为VGA的分辨率使用的文件目录.dpi_192_resh_480_resv_800为WVGA的使用文件目录.看看目录结构图片,你也许能理解了:ext文件夹这个文件夹子目录好象也只认识shared及common,在prb的变量里怎么自定义其它名称都是无效的。
一个EXT包基本有以下内容,有语言分类的.files里不能再有子目录.模块形式的不算文件夹.一些特定的,例如没有注册表的,没有文件的.app.dat为指定的文件路径,也就是老厨房的initflashfiles.txt.注册表为app.reg.shared:共用文件夹,下面可建立一级分类目录,这个目录在build时所有机型都可以用到.可以理解为老厨房的OEM分类.机型(Raphae):prb赋予ext一个版本变量,可建立一个数字目录,如我建了一 2010目录,因ext不是经常变动的,所以里面什么也没放,你也可以放入常用的ext包,但必须有这个文件夹EXT\机型\22010\你喜欢的名称common通用文件夹,下面可再建一级分类目录,这个只在build匹配机型时才会在evk界面里显示器出来.一般可以不理会这里.系统的扩展软件包及你的旧式oem转化后都放在这些最终的子目录里了ROM打包如果做好了准备工作就开始下面步骤:出现机型名称的文件夹目录必须一样名称同时也和NBHUtil.xml或者htcrt_devices.ini里的对应.这里需要解读蛮长的时间,一次性说不完.不熟悉的朋友,最好别修改参数,特别是RomSections=后续或者Item value=后续的参数,代表着系统刷入手机FLASH芯片的位置参数.砖头就是这里产生的!EVK可以有2种打包的形式:取决kitchen_build_rom.bat或者OLD_kitchen_build_rom.bat 的定义!一目了然.代码为:rem do htcrt insteadcopy ..\tools\%device%.htcrtproj ..\temp\..\tools\htcrt.exe /buildrom "..\temp\%device%.htcrtproj" "RUU_signed.nbh"rem ..\tools\nbhutil -model %deviceid% -ver %versionid% -lang %langid%-chunk %chunksize% -nogui -e -i %osidvalue% ..\temp\os-new.nb -b RUU_signed.nbh rem ---------------------------------------------------1,让系统识别你的机型:进入tools目录,找到NBHUtil.xml(可以定义你的信息)这个文件,打开,是不是看到很多似曾相识的代号?如果找到了你的机型代号,就不需要修改它了,由于你前面所建的目录,evk会自动识别,没有?就复制一个相似的修改成你要的,不知详细参数,就改一下代号可以了。
2,htcrt_devices.ini引导htcrt.exe识别Raphael_C.htcrtproj,从而打包.(我使用这个打包方式).Raphael_C.htcrtproj可以定义你的版号信息.以下为htcrt_devices.ini内容[Info]Magic=kateiloveyouVersion=1020[Defaults]DefCountryId=hct30DefVersionId=DefLanguageId=CHS[Devices]Polaris=1Kaiser=1Jade=1Iolite=1Diamond=1BlackStone=1Topaz=1Opal=1Pharos=1Elf/Touch=1Artemis=1Gene=1Nike=1Trinity=1Hermes=1Breeze=1Herald=1Athena=1Cheetah=1Excalibur=1Oxygen=1Startrek=1Shadow=1Love=1Vox=1OZONE=1SNAP=1WHITESTONE=1Rhodium_W=1Raphael_C=1;;;;;;;;;;;;;;;;;;;;;;;;;;;;;;;;;;;;;;;;;;;;;;TESTED ;;;;;;;;;;;;;;;;;;;;;;;;;;;;;;;;;;;;;;;;;;;;;[Rhodium_W]Experimental=1ModelId=RHOD*****VersionId=langzi_PRO2_Y18SignMaxChunkSize=64RomSections=4, "0x200,SPL,262144,TRUE", "0x600,Splash,262144,FALSE", "0x301,Radio,17563648,TRUE", "0x400,OS,0,FALSE"[WHITESTONE]Experimental=1ModelId=WHIT*****VersionId=langzi_6975_Y1SignMaxChunkSize=64RomSections=4, "0x200,SPL,262144,TRUE", "0x600,Splash,262144,FALSE", "0x301,Radio,17563648,TRUE", "0x400,OS,0,FALSE"[OZONE]Experimental=1ModelId=CEDA*****VersionId=hct30_ozone_H2SignMaxChunkSize=64RomSections=4, "0x200,SPL,262144,TRUE", "0x600,Splash,262144,FALSE", "0x301,Radio,17563648,TRUE", "0x400,OS,0,FALSE"[SNAP]Experimental=1ModelId=CEDA*****VersionId=hct30_S511_H2SignMaxChunkSize=64RomSections=4, "0x200,SPL,262144,TRUE", "0x600,Splash,262144,FALSE", "0x301,Radio,17563648,TRUE", "0x400,OS,0,FALSE"[Raphael_C]Experimental=1ModelId=RAPH*****VersionId=langzi_PRO_Y10SignMaxChunkSize=64RomSections=4, "0x200,SPL,262144,TRUE", "0x600,Splash,262144,FALSE", "0x301,Radio,17563648,TRUE", "0x400,OS,0,FALSE"RELEASE_(机型)这里就不用多说了!把你的机型的刷机工具文件都放在这里!会自动调用刷机程序.刷机目录希望更多的朋友一起加入ROM的折腾,有模板使用中出现的疑难杂症可以跟帖回复,但期待大家的回复是建设性的,而不是灌水.尽量把问题说得清楚明了.自己用的就是evk,严重感谢分享!建议教程应注意表述方式不要误导,例如:“但没有这个文件夹却行不通.EXT\Raphael_C\22010\Raphael_C_OEM ”应该是ext文件夹下必须建立对应机型名字的文件夹,本教程例子6850机型命名为Raphael_C,所以应建立子文件夹EXT\Raphael_C。