常用音频功放芯片-HX8321用户手册
航芯芯片调试器使用手册说明书
航芯芯片调试器使用手册Version1.0上海爱信诺航芯电子科技有限公司条款协议本文档的所有部分,其著作产权归上海爱信诺航芯电子科技有限公司(以下简称航芯公司)所有,未经航芯公司授权许可,任何个人及组织不得复制、转载、仿制本文档的全部或部分组件。
本文档没有任何形式的担保、立场表达或其他暗示,若有任何因本文档或其中提及的产品所有资讯所引起的直接或间接损失,航芯公司及所属员工恕不为其担保任何责任。
除此以外,本文档所提到的产品规格及资讯仅供参考,内容亦会随时更新,恕不另行通知。
版本修订目录1.简介 (5)2.AC-Link V2概况 (5)3.AC-Link V2仿真/调试器特点 (5)4.AC-Link V2仿真/调试器使用指南 (6)5.其他 (9)图表1AC-Link V2仿真/调试器框图 (5)图表2AC-Link V2实物图 (6)图表3AC-Link V2接口引脚说明 (6)图表4选择驱动程序 (7)图表5选择端口 (7)图表6更新驱动程序 (8)图表7选择AisinoChipCDC.inf (8)图表8成功安装驱动程序 (8)1.简介AC-Link V2仿真器是一款遵循ARM公司的CMSIS-DAP标准开发的调试工具,支持航芯(AisinoChip)旗下所有的Cortex-M系列MCU产品。
为用户提供了一款小巧便携、安全可靠、低成本的仿真/调试器。
2.AC-Link V2概况AC-Link V2仿真器调试框图如图表1所示,主要由仿真器和通信设备类(Communication Device Class,CDC)驱动软件组成。
图表1AC-Link V2仿真/调试器框图3.AC-Link V2仿真/调试器特点1)在线调试的功能-支持目标板3.3V或5V自供电环境;-即插即用,不需安装驱动,可直接在Keil,IAR Embedded Workbench等集成开发环境(Integrated Development Environment,IDE)下调试;-支持串行线调试(Serial Wire Debug,SWD)接口。
GP1 - 水抗式双音频充电收音机手册说明书
USER / INSTALLATION MANUAL GP1 - WATERPROOF STEREO1 Getting Started...............................................................................................................................................1.1 Contents..................................................................................................................................................1.2 Connections.............................................................................................................................................1.3 Connections Diagram...............................................................................................................................1.4 Installation.............................................................................................................................................1.5 Power On.................................................................................................................................................2 Controlling the Stereo.....................................................................................................................................2.1 Location of Controls.................................................................................................................................2.2 Control Functions.....................................................................................................................................3 Listening via Bluetooth...................................................................................................................................3.1 Listening via Bluetooth............................................................................................................................3.2 Pair with Bluetooth Audio Device.............................................................................................................3.3 Listening via Bluetooth Audio Device.......................................................................................................3.4 Bluetooth Multi-Link................................................................................................................................4 Listening via USB...........................................................................................................................................4.1 Listening via USB....................................................................................................................................4.2 Direct Search by Track Number.................................................................................................................4.3 Random Playback.....................................................................................................................................4.4 Repeat Playback.......................................................................................................................................4.5 Device Charging.......................................................................................................................................5 Listening to AM/FM Radio...............................................................................................................................5.1 Listening to AM/FM Radio.........................................................................................................................5.2 Manually Save AM/FM Radio Stations to Memory......................................................................................5.3 Automatically Save AM/FM Radio Stations to Memory...............................................................................5.4 Listening to Saved Radio Memory.............................................................................................................6 Audio & Settings Menus..................................................................................................................................6.1 Audio Menu..............................................................................................................................................6.1.1 EQ.....................................................................................................................................................6.1.2 Loudness...........................................................................................................................................6.2 Settings Menu.........................................................................................................................................6.2.1 Beep Tone..........................................................................................................................................6.2.2 Info/Clock..........................................................................................................................................6.2.3 Power On Volume (P-VOL)..................................................................................................................6.2.4 Area USA/Euro...................................................................................................................................6.2.5 Local On/Off......................................................................................................................................6.2.6 Stereo/Mono......................................................................................................................................7 Additional Features........................................................................................................................................7.1 Listening to Auxiliary Devices..................................................................................................................7.2 Dimmer High/Low....................................................................................................................................8 Specifications & Dimensions..........................................................................................................................8.1 Specifications..........................................................................................................................................8.2 Dimensions..............................................................................................................................................9 Warranty Information.. (333455667888889999991010101010111111111111111212121212121213131314)Table of ContentsGP1 WATERPROOF STEREO• GP1 Gauge Size Waterproof Stereo • User/Installation Manual • Wiring Harness (AQ-UNH-2)• Mounting Bracket• Two (2) Stainless Steel screws • Two (2) Stainless Steel nuts1.1 Contents1. 12-pin Watertight HarnessThe 12-pin harness supplies power and ground connections to the stereo and four (4) speaker channel output connections from the stereo.Do not cut or modify the 12-pin harness on the stereo side or warranty will be void.2. AM/FM Radio Antenna JackAllows connection of AM/FM radio antenna. For best AM/FM performance make sure the antenna is extended to the highest achievable position.3. Auxiliary OutputsAllows external amplifiers to be connected to power additional speakers.4. Auxiliary InputsAllows an additional RCA input, from a standalone unit or another stereo source.5. USB InputPlay USB thumb drives with supported audio media and charge devices when connected.1.2 Connections (see Wiring Diagram 1.3)1.3 Connections DiagramAll open wire connections should be soldered and protected against water and dust for best long-term performance.No lower than a 2 Ohm speaker load should be used or damage may occur to the stereo. Make sure the polarity ofspeakers is connected correctly.4312-pin Watertight Harness1.4 InstallationPLEASE READ THIS INSTRUCTION MANUAL BEFORE INSTALLATION AND OPERATION. Aquatic AV recommends installation of this stereo by a professional technician.Aquatic AV recommends using the ‘measure twice, cut once’ method!1. Check clearances on both sides of a planned installation area before drilling any holes.2. Drill a pilot hole at the center point and then use a circular saw to drill a hole with a 3”(76.2mm) diameter.3. Slide the GP1 stereo through the mounting hole and secure the stereo using the mountingbracket, screws and washers. If the bracket needs to be shortened this can be done byremoving the appropriate number of breakaway segments using a pair of pliars.4. Once complete make sure the outside surface is clean and clear of debris to ensurea proper water/dust seal. The GP1 stereo has an external water/dust proof gasket whichrequires a clean and flat surface for long-term environmental protection performance.DashboardMounting hole size3” (76.2mm)Break LinesMountingBracket1.5 Power OnIn a spa application the red and yellow wires should be jumped together and then connected to the +12VDC output of the power source. In this set up the GP1 will always be on, with a very low current draw when idle.In a boat, ATV or other application requiring power from a battery, the yellow wire (constant power) should be connected to the battery, and the red wire should be connected to the ignition or a switch.For detailed instructions you can check out our online video:‘How to wire your Aquatic AV stereo system’/support/videosOnce all connections are made press the POWER/MUTE button and the stereo will turn ON. Press and hold the POWER/MUTE button to turn the unit OFF.1. Power/Mute2. LCD Display3. Display4. Dimmer5. Band / File Search6. Next / Fast Forward7. Preset / Play/Pause8. Rotary Selector9. Previous / Fast Rewind10. Mode2.1 Location of Controls2.2 Control FunctionsIf your music player is connected via the Auxiliary input you will not be able to control track or receive trackinformation.Navigating past the last Settings Menu item (Restore) will automatically exit the Settings Menu and enter the Audio Menu. Press and hold Audio/Menu button to enter the Settings Menu again.3.1 Listening via BluetoothThe Bluetooth Audio menu is accessible by pressing the MODE button and is used to connect a Bluetooth Audio device or disconnect a Bluetooth Audio device that has already been paired. 3.2 Pair with Bluetooth Audio Device1. Enable Bluetooth Audio mode by pressing MODE and selecting Bluetooth.2. Switch on your Bluetooth Audio device.3. Select ‘AQUATIC AV GP1’ from the list of available devices to pair. No password should berequired however if prompted for a password use ‘0000’.4. A Bluetooth logo will illuminate on the stereo’s LCD to verify Bluetooth is connected. 3.3 Listening via Bluetooth Audio Device1. Bluetooth Audio mode will be activated once a Bluetooth Audio device is paired in anymode. Use MODE to change to Bluetooth Audio mode to listen to music from your device.2. Play the song from device and the sound will play through the stereo.3. Press PLAY/PAUSE to play or pause the song.4. Press FAST REWIND / FAST FORWARD buttons to play previous/next song file.5. Previous/next track and volume up/down can also be controlled directly from yourBluetooth Audio device.Bluetooth functions are device specific and not all devices will allow Fast Forward/Rewind or Next/Previous to work.3.4 Bluetooth Multi-linkA second Bluetooth Audio device can pair to the stereo even when music is playing from the first Bluetooth Audio device.1. Long press MODE to unlink first device.2. Pair second device by selecting ‘Aquatic AV GP1’ in the device’s Bluetooth menu.3. Once paired, playing music from device 2 will override device 1 and the stereo should begin playing from device 2.4. Should you wish to play music from the first device again, repeat steps 1, 2 & 3.4.1 Listening via USB1. Attach your USB thumb drive to the female USB connector and the music files on theUSB will play automatically.2. If your USB device is readable then USB source mode will be automatically selected andyour compatible content will begin to play.3. Press PLAY/PAUSE to play or pause the music.4. Press FAST REWIND / FAST FORWARD once play previous / next song file.5. Press and hold FAST REWIND / FAST FORWARD to fast forward / fast rewind the song file.Playback and navigation of music files via USB includes MP3 and WMA files.4.2 Direct Search by Track number1. Press BAND button and the display will show ‘NUM ****’2. Turn the Rotary Selector to select numeric value.3. Press FAST REWIND / FAST FORWARD to move to the next number in the sequence.4. Once the desired file number is selected press the Rotary Selector or allow the timer toauto select the track number being displayed.4.3 Random PlaybackPress and hold the BAND button to toggle RDM ON or RDM OFF (default).4.4 Repeat PlaybackPress and hold the DIM button to toggle RPT ONE, RPT FOLD, RPT ALL (default).4.5 Device ChargingWhen specified USB devices such as Smartphones or MP3 players are connected with a standard male-to-female USB cable the device’s battery will charge automatically. The USB connection will deliver up to 2.1A of current to charge a device battery.5.2 Manually Save AM/FM Radio Stations to Memory1. Tune to the station you would like to be saved as a preset.2. Press and hold the PLAY/PAUSE button and the stereo will display ‘SAVE CH1’.3. Turn the Rotary Selector to select the desired preset slot you would like to save the current station to.4. Press the Rotary Selector to save the preset.5. Upon successfully saving a preset the preset number that was chosen will be shown in the right corner.Presets are only for the current band you are on. Each band FM1, FM2, FM3, AM1 and AM2 has six presets for a total of 30 (18x FM & 12x AM).5.1 Listening to AM/FM Radio1. Enter radio mode by pressing MODE and selecting FM1, FM2, FM3, AM1 or AM2.2. Press BAND button to select the radio band.3. Navigate the available stations using the FAST REWIND / FAST FORWARD buttons.4. Press FAST REWIND / FAST FORWARD to seek another station.5. Press and hold FAST REWIND / FAST FORWARD for manual tuning. (Manual tuning will time out after 5 seconds of no action then will revert back to Seek/Auto).5.3 Automatically Save AM/FM Radio Stations to MemoryPress and hold the BAND button for 2 seconds to auto store stations to preset locations 1-6 of bands FM1-FM3 when in FM or AM1-AM2 when in AM.5.4 Listening to Saved Radio Memory1. Press the PLAY/PAUSE button and the stereo will display CH ‘X’.2. Turn the Rotary Selector to the desired preset channel.3. Press the Rotary Selector to start listening to the preset selected.Listening to AM/FM RadioGP1 WATERPROOF STEREOAudio & Settings Menus GP1 WATERPROOF STEREO 6.1 Audio Menu1. Press the Rotary Selector to enter the Audio menu. The available Audio options are:BASS - TREBLE - BALANCE - FADER - EQ - LOUD2. Press the Rotary Selector to navigate the menu options.3. Turn the Rotary Selector to adjust the desired Audio option.4. Press the Rotary Selector to confirm your change and continue in the Audio menu or wait5 seconds for the unit to time out to close the Audio menu.Any changes made in the Audio menu are system wide and will affect all modes.6.1.1 EQThe GP1 stereo is equipped with an audio DSP (Digital Signal Processor) to provide preset listening experiences for different music types. If you have chosen a preset equalizer setting (Classic, Rock, Pop, Flat, Off (default)) the previous Bass & Treble settings will be overridden. 6.1.2 LoudnessIncreases the sound output level by 15dB.6.2 Settings Menu1. Press and hold the Rotary Selector to enter the Settings menu. The available Settingsoptions are:BEEP - CLOCK - P-VOLUME - AREA - LOCAL - STEREO/MONO2. Press the Rotary Selector to navigate the menu options.3. Turn the Rotary Selector to adjust the desired Setting option.4. Press the Rotary Selector to confirm your change and continue with your selections in theSettings Menu or allow 5 seconds for the menu to time out.Any changes made in the Settings menu are system wide and will affect all modes.6.2.1 Beep ToneThe Beep tone plays when any button is pressed. This can be switched ON or OFF in the Settings Menu.6.2.2 Info/ClockShort press the DISP button to display either Clock or Information, or change the time as below.1. Press and hold the DISP button for 2 seconds. The hours ‘00’ will display flashing.2. Turn the Rotary Selector to change the hour and then press to confirm.3. The minutes ‘00’ will display flashing. Turn the Rotary Selector to change the minutes andpress to confirm.6.2.5 Local On/OffWhen Local is turned on the stereo seeks to only the radio channels with strong signal strength. When Local is turned off the stereo will seek to all radio channels it receives signal from.When Local setting is turned on the word ‘Local’ will appear in the upper right hand corner of the stereo’s display.6.2.6 Stereo/MonoChange the output mode between stereo and mono.6.2.4 Area USA/EuroSelect USA or European AM/FM radio frequencies.USA mode will increase and decrease the FM frequency in steps of 0.1 MHz, e.g. 88.5, 88.6,88.7 MHz. EURO mode will increase and decrease the FM frequency in steps of 0.05 MHz, e.g. 88.25, 88.30, 88.35 MHz.6.2.3 Power On Volume (P-VOLUME)Sets the maximum volume the stereo will be set when powering the unit on. If the stereo is switched off with a lower volume than the P-Vol setting then the lower volume setting will be used.Normal volume control and operation is resumed once the Rotary Selector is turned after switching the stereo on.7.1 Listening to Auxiliary Devices1. Connect your audio device to the rear RCA connectors using a stereo RCA cable.2. Press MODE on the stereo to select ‘AUX IN’ mode.3. Play the song from your auxiliary audio device and the sound will play through the stereo.4. Volume level will be determined by the auxiliary device’s audio output level.Always ensure you connect and disconnect the stereo with dry hands!7.2 Dimmer High/LowAdjust the display brightness from 100% for normal operation to 30% brightness to reduce screen glare during night time operation.Additional FeaturesSettings Operation GP1 WATERPROOF STEREO8.1 Specifications8.2 DimensionsMediaSupported Media...............................Bluetooth Audio / USB / MP3 / AM/FM / AUXDevice Charging.................................via rear USB cable (2.1A)DisplayDisplay Type.....................................Monochrome TFT with blue backlight Clock Display....................................YesVariable Screen Brightness.................100% and 30% settingsInputsBluetooth..........................................Bluetooth AudioUSB.................................................1x USB Auxiliary............................................1x stereo pair RCA OutputsPre-Out.............................................1x stereo pair RCA (2V)RadioAM/FM Tuner.....................................18x FM pre-set & 12x AM pre-set memory. US/Euro frequenciesPowerPower (max)......................................4x 45W (4 Ohms), 4x 72W (2 Ohms)Amplifier Type...................................Class A/B (2 Ohm stable)Output Voltage..................................10.5V - 14.4V DCCurrent Draw.....................................7A (max) / <3mA (standby)Multi-Environment CertificationsWaterproof / Dustproof.......................Yes - IP65Conformal PCB Coating......................YesUV Protection....................................500hrs stable, ASTM D4329 compliantSalt/Fog Protection............................500hrs stable, ASTM B117 compliantCertifications.....................................CE, RoHS, WEE, FCCStainless Steel Mountings..................YesSpecifications & DimensionsGP1 WATERPROOF STEREOWarranty Information GP1 WATERPROOF STEREOAquatic AV offers a limited warranty of our products on the following terms:Length of warranty2 years on audio systems, electronics, speakers, and accessories (receipt required).CoverageThis warranty covers only the original purchaser of an Aquatic AV product purchased from an authorized Aquatic AV dealer. In order to receive service, the purchaser must provide Aquatic AV with a copy of the receipt stating the customer name, dealer name, product purchased and date of purchase.Defective productsProducts found to be defective during the warranty period will be repaired or replaced (with a product deemed to be equivalent) at Aquatic AV’s discretion.What is not coveredDamage caused by accident, abuse, improper operations or theft. Any cost or expense related to the removal or reinstallation of product. Service performed by anyone other than an authorized Aquatic AV service center. Any product with the serial number or tamper labels defaced, altered, or removed. Subsequent damage to other components. Any product not purchased from an authorized Aquatic AV dealer.Limit on implied warrantiesAny implied warranties including warranties of fitness for use and merchantability are limitedin duration to the period of the express warranty set forth above. Some states do not allow limitations on the length of an implied warranty, so this limitation may not apply. No person is authorized to assume for Aquatic AV any other liability in connection with the sale of the product. How to obtain serviceYou must obtain a return material authorization number (RMA) to return any product to Aquatic AV. You are responsible for shipping charges of returned products to Aquatic AV.Priority Customer Support & Free Extended WarrantyIn order to receive the best customer support from Aquatic AV we recommend you register your product for a free extended warranty.Register your product for extended warranty and priority support at /register Please record the model and serial number[s] of your equipment in the space provided below as your permanent record and will assist us with your factory warranty coverage. These numbers can be found on the chassis label found on the rear of the stereo on the wire harness.FCC Statement GP1 WATERPROOF STEREO FCC ID:MADE IN CHINAFCC Statement to the UserThis equipment has been tested and found to comply with the limits for a Class B digital device, pursuant to Part 15 of the FCC Rules. These limits are designed to providereasonable protection against harmful interference in a residential installation. Thisequipment generates, uses and can radiate radio frequency energy and, if not installedand used in accordance with the instructions, may cause harmful interference to radiocommunications. However, there is no guarantee that interference will not occur in aparticular installation. If this equipment does cause harmful interference to radio ortelevision reception, which can be determined by turning the equipment off and on, the user is encouraged to try to correct the interference by one of the following measures:1. Reorient or relocate the receiving antenna.2. Connect the equipment into an outlet on a circuit different from that to which thereceiver is connected.3. Increase the separation between the equipment and receiver.4. Consult the dealer or an experienced radio/TV technician for help.FCC Caution:Any changes or modifications not expressly approved by the party responsible forcompliance could void the user’s authority to operate this equipment.This device complies with Part 15 of the FCC Rules. Operation is subject to the following two conditions: (1) This device may not cause harmful interference, and (2) this devicemust accept any interference received, including interference that may cause undesired operationProduct design and specification subject to change without notice. E&OE.Doc V1.1E-mail:******************US & Canada:187****2782International: +1 408 559 1668 Fax: +1 408 559 0125 Aquatic AV282 Kinney Drive San Jose, CA 95112, USA。
HX8330功放IC芯片规格书
参数名称 符号
测试条件
电源纹波 抑制比
20kHz~1kHz 200mVpp 纹波
kSVR
输入交流耦合到地
规范值 单位
最小 典型 最大
-70
dB
输出功率
输出功率 总失真 加噪声
PO PO THD+N
THD+N= 10% f= 1kHz,VCC= 12V
THD+N= 10% f= 1kHz,VCC= 16V RL= 4Ω,f= 1kHz Po= 7.5W(半功率)
规范值 单位
最小 典型 最大
-100
dB
102
dB
200
450 kHz
150
℃
20
℃
4、典型应用线路与应用说明
4. 1、应用线路
4. 2、应用说明
直流检测 为防止输入电容损坏或输入短路引起喇叭损伤,电路内含 DC 检测功能。如果由于输入
端异常造成输出差分信号保持同一个极性,且维持超过 420ms 时间,就会启动 DC 检测保护, 关闭输出。
版本:S-2017-04-A
第7页 共7页
2. 3、引脚排列图
HX8330
2. 4、引脚说明 引脚 1 2 3 4 5 6 7 8
PowerPad
符号 VCC GVDD ININ+ OUT+ BS+ BSOUTGND
功能 电源 栅驱动电压,外接 1μF 电容 负输入 正输入 正输出 正输出上管自举 负输出上管自举 负输出 功率地
属性 P O I I O I I O P
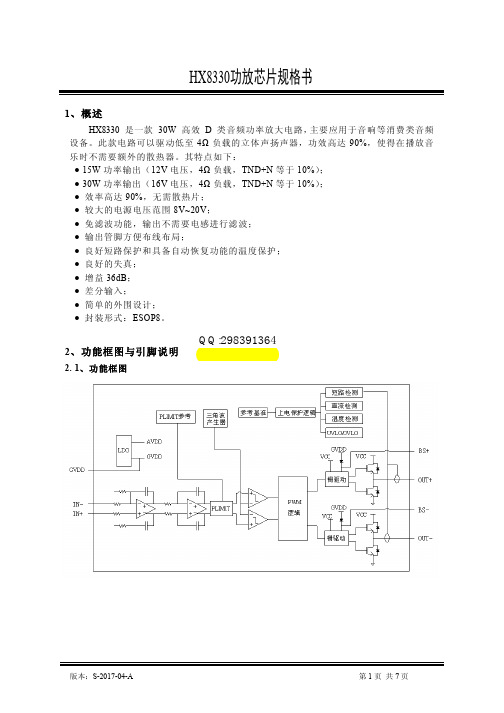
2、功能框图与引脚说明
2. 1、功能框图
QQ:298391364
版本:S-2017-04-A
RCA 使用说明书
RCA 使用说明书PR-5600中文说明书重要提示:在你使用该产品之前,请详细阅读功能介绍说明书。
功能介绍:1,蓝色LED大字体显示屏,12小时制,准确显示时间。
2,钟控功能:可以设置2组闹钟模式,定时开启闹钟,关闭闹钟,把收音机 CD歌曲设置成闹铃,在睡梦中畅享音乐。
3,CD功能:提开式CD播放机,可以播放CD、CD-R和CD-RW光碟,单曲重复和全碟重复播放模式可供选择。
4,双喇叭立体声音质好超薄机身放置床头方便携带!5,TUNING 收音功能:FM(89---108MHz),AM(540---1600kHz)。
手动拨盘调谐收音,收音符合中国制式,接收效果极为清晰、稳定。
FM自动频率控制,可减少FM接收的不稳定状况!6,SLEEP 睡眠关机功能:收音机自动关机,不影响闹铃设置,SNOOZE 贪睡功能,闹钟响了以后可以每隔6-8分钟提醒一次7,电源:直插220V交流电源8,数字调频/调幅调谐器(FM/AM)收音功能9,全面支持刻录碟,CD,CD-R,CD-RW 碟,超强读碟能力10,AUX-IN音频输入接口,可以连接MP3,手机等其他多媒体输入播放。
11,喇叭2W*2 带3.5mm音频输入接口全新原包!12,主機尺寸:高75*深200*宽145MM在你未使用之前插上电源,该机器原有电压是120V-60HZ,我们已经根据国内的电压,改成了220V-50HZ,所以,国内用户直接插上电源就可以使用了。
电池备份操作介绍当电源切断时,保护回路将不运行,除非机器本身已经安装了备份电池。
当电池备份功能工作时,那数字显示屏将不会亮,但是,闹钟功能仍然正常运行(在备份电池电力充足的前提下)正常使用时,当电源切断又重新恢复供电时,时间显示和闹钟功能会自动恢复,所以,你不必重新设置时间和闹钟。
(前提是机器本身已经装上了备份电池)备份电池安装指南:1.打开底部的备份电池槽的盖子(在机器底部)2.将一个9V的电池接到电池槽里面的电源接口。
FY1 USB声卡 XMOS 用户手册_V1.0Cn
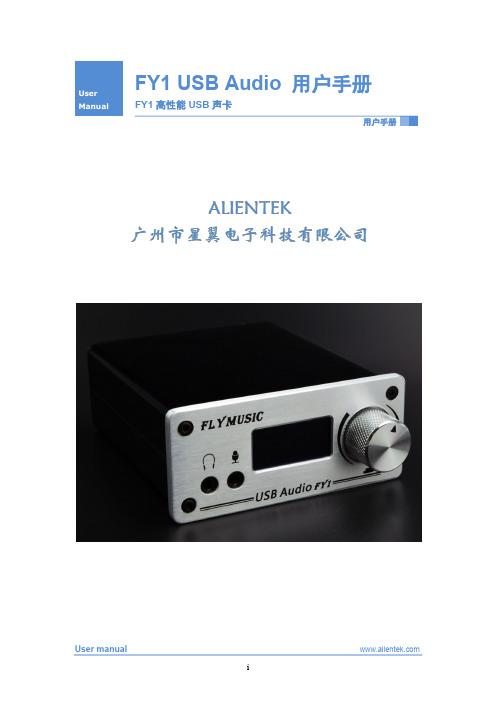
ALIENTEK
FY1 USB Audio 用户手册
FY1 高性能 USB 声卡
4. 在使用录音输出功能的时候要特别注意: 请先把麦克风和 FY1 连接好 (线录则把音源设 备和 FY1 连接好)再打开录音输出,以免出现暴音损坏耳机或设备。
4 接口
3.5mm 驻极体话筒及电容麦克风话筒接口 输入 B 型 USB 2.0 高速设备接口 外接电源输入(DC 7-9V)接口 3.5mm 耳机输出接口 输出 其他 光纤输出接口 RCA 同轴输出接口 I2S&DFU 扩展接口
2 产品包装
包装 FY1 声卡 标配 USB 数据线 光盘(DVD) 说明书(含保修卡) 数量 1台 1条 1张 1份
3 注意事项
1. 使用本产品时,为避免一些不安全的因素,应该遵循基本的安全预防措施。 2. 仔细阅读说明书并按说明书进行操作。 3. 为保证产品的性能,请使用我们提供的 USB 数据线且使用接触良好的 USB 接口,使用 过程中严禁插拔 USB 线。 User manual
User manual
ALIENTEK
FY1 USB Audio 用户手册
FY1 高性能 USB 声卡
7 使用说明Байду номын сангаас
7.1 驱动和软件安装
7.1.1 FY1 USB 声卡驱动安装
① 安装 FY1 USB 声卡驱动:这个驱动用于电脑对 FY1 声卡的支持,必须安装。“打开 光盘1, FY1 驱动1 , FY1 声卡驱动” , 然后双击运行“ FY1 USB Audio.exe” ,如图 7.1.1.1:
支持高达384khz32bit发烧级的音频文件播放支持高达192khz24bit录音室音质的录音支持高达192khz32bit的同轴光纤输出完全开放的i2s接口可外接性能更高的dac或adc配有炫酷蓝光oled显示屏具有极好的显示效果支持多种显示模式波形显示频谱显示混合显示独创硬件agc电路能有效避免显示的时候出现信号失真幅值过低的现象外接电源dc79v和usb电源2种供电方式自动切换
AX8303 3W 无滤波器单通道D类音频放大器 说明书
AX8303 3W无滤波器单通道D类音频放大器产品概述AX8303是一款高电源抑制比3W单通道D 类音频功率放大器,采用差分输入消除噪声和RF调整。
高达90%的效率,占据较小的PCB面积使AX8303成为手持设备的理想选择。
无滤波特性不要求额外的外部滤波器,更少的外部元件,更少的PCB区域,更低的系统成本,而且简化了应用系统设计。
AX8303具有短路保护与热保护特性。
主要特点z在1W,8Ω负载时达到90%的效率。
z关机电流<1µA。
z5V电源电压下,带4Ω负载输出功率3W,总谐波失真10%。
z要求极少的外部元件。
z无输入时超低噪声。
z电源电压2.8V~5.5V。
z短路保护。
z过温关断。
典型应用z手机/智能电话z MP4/MP3z GPSz数码相框z电子字典z便携式游戏机引出端排列VO+PVDD12引出端功能TEL:0755-******** 132******** E-MAIL:panxia168@最大额定值(注:使用时超过以下最大额定值有可能造成器件的永久性损伤。
在最大条件下工作超过一定时间有可能影响器件的可靠性,所有的电压都是对地电压)。
序号 名称极限值 1 最大工作电压6V2 输入电压 −0.3V ~ V DD +0.3V 3存储温度−55℃ ~ 150℃推荐工作条件序号 名称范围 1 工作电压 2.8V ~ 5.5V2环境温度−40℃ ~ 85℃电气参数(除非特别注明,V DD =5V ,Gain =2V /V ,R L =L (33µH)+R +L (33µH),T A =25℃)。
符号 参数 测试条件最小 典型最大单位V DD电源电压2.80 5.50VV DD = 5.0V 2.85 3.00 V DD = 3.6V 1.65 1.80 THD +N =10%,f =1kHz, R L =4Ω V DD = 3.2V 1.20 1.35 W V DD = 5.0V 2.50 2.66 V DD = 3.6V 1.15 1.30 THD +N =1%, f =1kHz, R L =4ΩV DD= 3.2V 0.85 1.00 W V DD = 5.0V 1.65 1.80 V DD = 3.6V 0.75 0.90 THD +N =10%, f =1kHz, R L =8Ω V DD = 3.2V 0.55 0.70 W V DD = 5.0V 1.30 1.50 V DD = 3.6V 0.55 0.72 P O输出功率THD +N =1%, f =1kHz, R L =8ΩV DD= 3.2V 0.40 0.55 W V DD =5.0V, P O =1W, R L =8Ω 0.28 0.35V DD =3.6V, P O =0.1W, R L =8Ω0.40 0.45V DD =3.2V, P O =0.1W, R L =8Ω0.55 0.60V DD =5.0V, P O =0.5W, R L =4Ω0.20 0.25V DD =3.6V, P O =0.2W, R L =4Ω 0.35 0.40THD +N总谐波失真 + 噪声 V DD =3.2V, P O =0.1W, R L =4Ωf =1kHz0.50 0.55%(转下页)(接上页) 符号 参数 测试条件最小典型 最大单位f =217Hz −63 −55f =1kHz −62 −55PSRR 纹波 抑制比 V DD =3.6V,Inputs ac-grounded with C =1μFf =10KHz−52 −40dBDyn 动态范围 V DD =5.0V, THD =1%, R =8Ωf =1kHz 8595 dBNo A-weighting50100V N输出噪声Inputs ac-groundedA-weighting 30 60μVCMRR 共模抑制比 V IC =100mVpp, f =1kHz 4063 dBR L =8Ω, THD =10% 8590η效率 R L =4Ω, THD =10% f =1kHz8086%V DD 5.0V 7.5 10V DD 3.6V 4.6 7I Q 静态电流 V DD =3.0V R L =8Ω 3.6 5mA I SD 关断电流 V DD =3V to 5VV SD =0.3V 0.5 2 μAV DD = 5.0V 365 420V DD = 3.6V 385 450R DS(ON) 静态漏源导通电阻 MSOP/DFN ,高端PMOS +低端NMOS ,I =500mAV DD =3V 410500m ΩR i 输入电阻 150 k ΩGv 闭环增益 V DD =3V to 5V 300k Ω/Ri V/V f sw 开关频率 V DD =3V to 5V200250300kHzVos 输出失 调电压 Input ac-ground, V DD =5V 10 50 mV V IH 输入高 电平有效 V DD =5V 1.5VV IL输入低 电平有效V DD =5V0.3 V功能说明图1 AX 8303功能框图1 输入电阻(R i )输入电阻(R i )依照等式1来设置放大器的增益。
Focusrite ISA 828 MkII 八通道麦克风前置放大器用户指南说明书
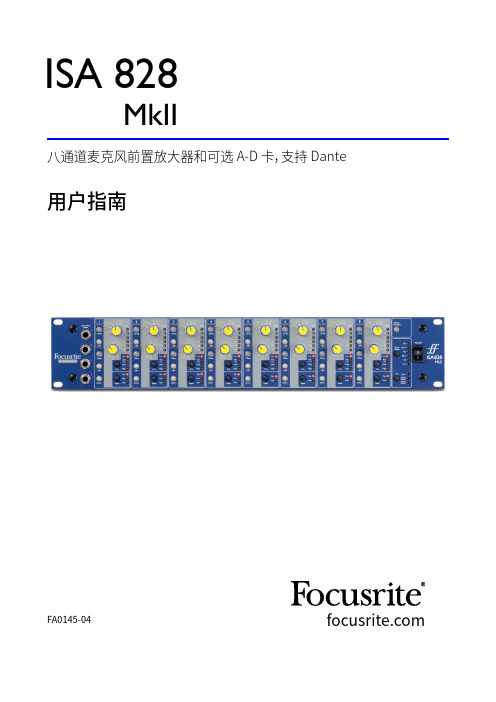
用户指南FA0145-04八通道麦克风前置放大器和可选 A-D 卡,支持 DanteISA 828MkII目录关于本用户指南 . . . . . . . . . . . . . . . . . . . . . . . . . . . . . . . . . . . . . . . . . . . . . . . . . . . . . . . . . . . . . . . . . . . . . . . . . . . .3简介 . . . . . . . . . . . . . . . . . . . . . . . . . . . . . . . . . . . . . . . . . . . . . . . . . . . . . . . . . . . . . . . . . . . . . . . . . . . . . . . . . . . . . . . . . .4 ISA 828 MKII 控件和功能 . . . . . . . . . . . . . . . . . . . . . . . . . . . . . . . . . . . . . . . . . . . . . . . . . . . . . . . . . . . . . . . . . . . . .5前面板 . . . . . . . . . . . . . . . . . . . . . . . . . . . . . . . . . . . . . . . . . . . . . . . . . . . . . . . . . . . . . . . . . . . . . . . . . . . . . . . . . . . . .5通道控件 . . . . . . . . . . . . . . . . . . . . . . . . . . . . . . . . . . . . . . . . . . . . . . . . . . . . . . . . . . . . . . . . . . . . . . . . . . . . . . . . . . .5输入选择 . . . . . . . . . . . . . . . . . . . . . . . . . . . . . . . . . . . . . . . . . . . . . . . . . . . . . . . . . . . . . . . . . . . . . . . . . . . . . . .5麦克风输入 . . . . . . . . . . . . . . . . . . . . . . . . . . . . . . . . . . . . . . . . . . . . . . . . . . . . . . . . . . . . . . . . . . . . . . . . . . . . .5线性输入 . . . . . . . . . . . . . . . . . . . . . . . . . . . . . . . . . . . . . . . . . . . . . . . . . . . . . . . . . . . . . . . . . . . . . . . . . . . . . . .6乐器输入 . . . . . . . . . . . . . . . . . . . . . . . . . . . . . . . . . . . . . . . . . . . . . . . . . . . . . . . . . . . . . . . . . . . . . . . . . . . . . . .6 Z In(输入阻抗) . . . . . . . . . . . . . . . . . . . . . . . . . . . . . . . . . . . . . . . . . . . . . . . . . . . . . . . . . . . . . . . . . . . . . . . . .6 + 48V . . . . . . . . . . . . . . . . . . . . . . . . . . . . . . . . . . . . . . . . . . . . . . . . . . . . . . . . . . . . . . . . . . . . . . . . . . . . . . . . . .6相位 . . . . . . . . . . . . . . . . . . . . . . . . . . . . . . . . . . . . . . . . . . . . . . . . . . . . . . . . . . . . . . . . . . . . . . . . . . . . . . . . . . .6 HPF(高通滤波器) . . . . . . . . . . . . . . . . . . . . . . . . . . . . . . . . . . . . . . . . . . . . . . . . . . . . . . . . . . . . . . . . . . . . . . .6插入 . . . . . . . . . . . . . . . . . . . . . . . . . . . . . . . . . . . . . . . . . . . . . . . . . . . . . . . . . . . . . . . . . . . . . . . . . . . . . . . . . . .6通道仪表 . . . . . . . . . . . . . . . . . . . . . . . . . . . . . . . . . . . . . . . . . . . . . . . . . . . . . . . . . . . . . . . . . . . . . . . . . . . . . . . . . . .7仪表校准 . . . . . . . . . . . . . . . . . . . . . . . . . . . . . . . . . . . . . . . . . . . . . . . . . . . . . . . . . . . . . . . . . . . . . . . . . . . . . . .7后面板 . . . . . . . . . . . . . . . . . . . . . . . . . . . . . . . . . . . . . . . . . . . . . . . . . . . . . . . . . . . . . . . . . . . . . . . . . . . . . . . . . . . . .8交流电源插座 . . . . . . . . . . . . . . . . . . . . . . . . . . . . . . . . . . . . . . . . . . . . . . . . . . . . . . . . . . . . . . . . . . . . . . . . . . .8麦克风输入 . . . . . . . . . . . . . . . . . . . . . . . . . . . . . . . . . . . . . . . . . . . . . . . . . . . . . . . . . . . . . . . . . . . . . . . . . . . . .8线性输入 . . . . . . . . . . . . . . . . . . . . . . . . . . . . . . . . . . . . . . . . . . . . . . . . . . . . . . . . . . . . . . . . . . . . . . . . . . . . . . .8模拟音频输出 . . . . . . . . . . . . . . . . . . . . . . . . . . . . . . . . . . . . . . . . . . . . . . . . . . . . . . . . . . . . . . . . . . . . . . . . . . .8 A-D 输入 . . . . . . . . . . . . . . . . . . . . . . . . . . . . . . . . . . . . . . . . . . . . . . . . . . . . . . . . . . . . . . . . . . . . . . . . . . . . . . . .8仪表微调 . . . . . . . . . . . . . . . . . . . . . . . . . . . . . . . . . . . . . . . . . . . . . . . . . . . . . . . . . . . . . . . . . . . . . . . . . . . . . . .8 A-D 选件卡插槽 . . . . . . . . . . . . . . . . . . . . . . . . . . . . . . . . . . . . . . . . . . . . . . . . . . . . . . . . . . . . . . . . . . . . . . . . .8 A-D 选件卡 . . . . . . . . . . . . . . . . . . . . . . . . . . . . . . . . . . . . . . . . . . . . . . . . . . . . . . . . . . . . . . . . . . . . . . . . . . . . . . . . .9 A-D 卡时钟和同步开关 . . . . . . . . . . . . . . . . . . . . . . . . . . . . . . . . . . . . . . . . . . . . . . . . . . . . . . . . . . . . . . . . . .10物理特性 . . . . . . . . . . . . . . . . . . . . . . . . . . . . . . . . . . . . . . . . . . . . . . . . . . . . . . . . . . . . . . . . . . . . . . . . . . . . . . . . . . . .11电源要求 . . . . . . . . . . . . . . . . . . . . . . . . . . . . . . . . . . . . . . . . . . . . . . . . . . . . . . . . . . . . . . . . . . . . . . . . . . . . . . . . . .11附录 . . . . . . . . . . . . . . . . . . . . . . . . . . . . . . . . . . . . . . . . . . . . . . . . . . . . . . . . . . . . . . . . . . . . . . . . . . . . . . . . . . . . . . . . .121. 连接器插脚引线 . . . . . . . . . . . . . . . . . . . . . . . . . . . . . . . . . . . . . . . . . . . . . . . . . . . . . . . . . . . . . . . . . . . . . . . .122. 前置放大器输入阻抗 . . . . . . . . . . . . . . . . . . . . . . . . . . . . . . . . . . . . . . . . . . . . . . . . . . . . . . . . . . . . . . . . . . .143. Pro Tools 界面 . . . . . . . . . . . . . . . . . . . . . . . . . . . . . . . . . . . . . . . . . . . . . . . . . . . . . . . . . . . . . . . . . . . . . . . . .16性能和规格 . . . . . . . . . . . . . . . . . . . . . . . . . . . . . . . . . . . . . . . . . . . . . . . . . . . . . . . . . . . . . . . . . . . . . . . . . . . . . . . . . .17 Focusrite RedNet 保修与服务 . . . . . . . . . . . . . . . . . . . . . . . . . . . . . . . . . . . . . . . . . . . . . . . . . . . . . . . . . . . .192关于本用户指南本用户指南适用于 ISA 828 MkII 麦克风前置,提供安装和使用此设备的信息,并包含如何将其连接到您系统的方式。
HX8110A规格书

H X8110A 深圳华美芯科技有限公司H X8110A 用户手册H X8110A27W、低EMI、AB/D类双模单声道音频功率放大器27W、超低EMI、AB/D类双模单声道音频功率放大器芯片功能说明●HX8110A 是一款低EMI,无需滤波器,AB/D类可选式音频功率放大器。
14.4V工作电压时,最大驱动功率为27W(VDD=14.4V,4Ω BTL负载,THD<10%),音频范围内总谐波失真噪声小于1%(20Hz~20KHz);●HX8110A 的应用电路简单,只需极少数外围器件;●HX8110A 输出不需要外接耦合电容或上举电容和缓冲网络;●HX8110A 采用ESOP8封装,特别适合用于小音量、小体重的便携系统中;●HX8110A 可以通过控制进入关断模式,从而减少功耗;●HX8110A 内部具有过流、欠压、短路以及过热自动关断保护机制;●HX8110A 工作稳定,通过配置外围电阻可以调整放大器的电压增益,方便应用。
芯片功能主要特性●低EMI,高效率,音质优良●AB/D类切换、单通道●VDD=14.4V,RL=4Ω,Po=27W,THD+N≤10%VDD=12V,RL=3Ω,Po=23.5W,THD+N≤10% VDD=12V,RL=4Ω,Po=20W,THD+N≤10%VDD=7.4V,RL=2Ω,Po=13W,THD+N≤10%●宽工作电压范围5V—15V●优异的上掉电POP声抑制●采用ESOP8封装芯片的基本应用●拉杆音箱、背包音箱●扩音器●大功率蓝牙音箱、声霸H X8110A原理框图深圳华美芯科技有限公司H X8110A 深圳华美芯科技有限公司27W、低EMI、AB/D类双模单声道音频功率放大器芯片定购信息表1 订购信息表图1 HX8110A 典型应用电路注: 以上应用图中元件说明:Ci:隔直电容,采用0.1µF或更小的,进一步消除咔嗒-噼噗声和从输入端耦合进入的噪声。
- 1、下载文档前请自行甄别文档内容的完整性,平台不提供额外的编辑、内容补充、找答案等附加服务。
- 2、"仅部分预览"的文档,不可在线预览部分如存在完整性等问题,可反馈申请退款(可完整预览的文档不适用该条件!)。
- 3、如文档侵犯您的权益,请联系客服反馈,我们会尽快为您处理(人工客服工作时间:9:00-18:30)。
HX8321
5.5W、超低EMI、AB/D类可选、单声道、带过热保护功能音频功放HX8321用户手册
2016年10月
HX8321
5.5W、超低EMI、AB/D类可选、单声道、带过热保护功能音频功放5.5W、超低EMI、AB/D类可选、单声道、带过热保护功能音频功放
芯片功能说明
l HX8321是一款超低EMI,无需滤波器,AB/D 类可选式音频功率放大器。
5V工作电压时,最大
驱动功率为5.5W(VDD=5V,2ΩBTL负载,
THD<10%),音频范围内总谐波失真噪声小于
1%(20Hz~20KHz);QQ:1207435600
l HX8321的应用电路简单,只需极少数外围器件;l HX8321输出不需要外接耦合电容或上举电容和缓冲网络;
l HX8321采用ESOP8封装,特别适合用于小音量、小体重的便携系统中;
l HX8321可以通过控制进入关断模式,从而减少功耗;
l HX8321内部具有过热自动关断保护机制;
l HX8321工作稳定,通过配置外围电阻可以调整放大器的电压增益,方便应用。
芯片功能主要特性
l超低EMI,高效率,音质优
l AB/D类切换、单通道
l VDD=5V,RL=2Ω,Po=5.5W,THD+N≤10% VDD=5V,RL=4Ω,Po=3.2W,THD+N≤10% l宽工作电压范围2.5V—7V
l优异的上掉电POP声抑制
l采用ESOP8封装
芯片的基本应用
l手提电脑、台式电脑
l扩音器
l蓝牙音箱
l安防产品、童车
HX8321
原理框图
芯片定购信息
表1订购信息表
芯片型号封装类型包装类型最小包装数量(PCS)备注
HX8321ESOP8管装100/管
典型应用电路
图1HX8321典型应用电路
注:以上应用图中元件说明:
Ci:隔直电容,采用0.1µF或更小的,进一步消除咔嗒-噼噗声和从输入端耦合进入的噪声。
Cs:电源去耦电容,采用足够低ESR的电容(小于1µF),当VDD=5V时,为更好的滤除低频噪声,建议另加一个低ESR电容(不小于10µF)。
去耦电容离VDD管脚越近越好,保持 1.5mm之内。
C B:BYPASS端口输出VDD/2电压,通过电容C B(1µF)接地以保证稳定性。
引脚分布图
图2HX8321管脚定义
HX8321管脚描述
表2HX8321管脚描述
芯片特性说明
芯片最大极限值
表3芯片最大物理极限值
芯片数字逻辑特性
表4AB/D类模式脚控制信号数字逻辑特性
表5关断信号数字逻辑特性
芯片性能指标特性
表6HX8321芯片电气特性参数表
HX8321应用说明
输入电阻(Ri )
HX8321内部设有两级的放大,第一级增益可通过外置电阻进行配置,而第二级增益是内部固定的。
通过选择输入电阻的参数值可以配置放大器的增益:
(1)
输出与反馈的平衡取决于电路的阻抗匹配情况,CMRR ,PSRR 和二次谐波失真的消除也可以得到优化。
因此采用精度为1%的电阻优化的效果更为显著。
在PCB 布局时,输入电阻应尽量的靠近芯片的输入引脚以获得更好的信噪比效果和更高的输入阻抗。
低增益和大电压信号可以使得芯片的性能更为突出。
退耦电容Cs
在放大器的应用中,电源的旁路设计很重要,特别是对应用方案的噪声性能及电源电压纹波抑制性能。
HX8321是一款高性能的音频功率放大器,需要适当的电源退耦以确保它的高效率和低谐波失真。
退耦电容采用低阻抗陶瓷电容,尽量靠近芯片电源供电引脚,因为电路中任何电阻,电容和电感都可能影响到功率转换的效率。
一个220uF 或更大的电容放置在功率电源的附近会得到更好的滤波效果。
典型的电容为220uF 的
电解电容并上1uF 的陶瓷电容。
输入电容Ci
HX8321用在单端输入系统中,输入端是个高通滤波器,输入电容是必须的。
输入端作为高通滤波器时,滤波器截止频率的计算公式如下:
12c f RiCi
p =
(2)
输入电阻和输入电容的参数直接影响到滤波器的下限频率,从而影响放大器的性能。
输入电容的计算公式如下:
1
2Ci Rifc
p =
(3)
如果信号的输入频率在音频范围内,输入电容的精度可以是±10%或者更高,因为电容不匹配会影响滤波器的性能。
过大的输入电容,增加成本、增加面积,这对于成本、面积紧张的应用来讲,非常不利。
显然,确定使用多大的电容来完成耦合很重要。
实际上,在很多应用中,扬声器(Speaker )不能够再现低于100Hz -150Hz 的低频语音,因此采用大的电容并不能够改善系统的性能。
除了系统的成本和尺寸外,噪声性能被输入耦合电容大小影响,一个大的输入耦合电容需要更多的电荷以达到静态直流电压(通常为电源中点电压即1/2V DD ),这些电荷来自于反馈的输出,往往在器件使能时产生噪声。
因此,基于所需要的低频响应的基础上最小化输入电容,开启噪声能够被最小化。
旁路电容(CBYP)
在HX8321应用电路中,另一电容C B (接BYP 管脚)也是非常关键,C B 会影响PSRR 、开关/切换噪声性能。
一般选择0.1uF ~1uF 的陶瓷电容。
除了最小化输入输出电容尺寸,旁路电容的尺寸也应该详细考虑。
旁路电容C B 是最小化开启噪声最重要的元器件,它决定了开启的快慢及输出达到静态直流电压(通常为电源中点电压即1/2V DD )的过程,过程越缓慢,开启噪声越小。
选择1.0uF 的C B 和一个小的Ci(在0.033uF ~0.1uF)将实现实质上没有噪声的关断功能。
在器件功能正常(没有振荡或者噼啪声)且C B 为0.1uF 时,器件会更多的受到开启噪声的影响。
因此,在所有的除了最高成本敏感的设计中推荐使用1.0uF 或者更大的C B 。
HX8321输出滤波器
在不加输出滤波器的情况下使用HX8321,放大器到扬声器的连线的长度一般在100mm 以下。
在手机等便携式通信设备应用中,都可以不用输出滤波器。
在一些环境等条件不允许和一些特殊的情况下,要加入输出低通滤波器,比如LC 滤波器。
图4输出加LC滤波器典型应用电路(截止频率为27KHz)
保护功能模式概述
HX8321是一款AB/D类音频功率放大器,内置了过热保护功能。
有效地保护芯片在异常工作状况下不被损坏。