M4U1 Word Power
九年级英语下册 Module 4 The way we look Unit 1 I really like these shoes学案(无答案) 外研版

M4U1 I really like these shoes.一.Key words:1. dress n. 连衣裙e.g. She wears a beautiful d_______ tonight.联想辐射:(1) dress v. 给…穿衣服宾语通常是人Can he d______ himself now?(2) get dressed 穿好衣服 Have you got dressed?(3) be/ get dressed in 穿着,后可接服饰或表示颜色的形容词。
She is alwaysdressed in red.(4) dress up as 装扮成The boy likes _______ ____ ___ a policeman.2. fit v. 指大小、形状适合,常指“衣服合身”。
主语是衣物。
e.g.The coat f______ me well.联想辐射: (1)fit adj.适当的;合适的be fit for He is ____ ____ the position.be fit to do sth. The weather isn’t fit ________(climb) the hill.(2) fit adj. 健康的If you keep f____, take more exercise.3. scarf n. 围巾;头巾。
是可数名词,其复数形式可以是scarf, 也可以是scarves.e.g.She likes wearing scarfs / scarves.联想辐射:其他常见以-f(-fe)结尾的词,其复数形式要将-f(-fe)变为-v,再加-es的有:leaf树叶 half一半 wife妻子 knife小刀 wolf狼 shelf书架 thief小偷 life生命其顺口溜:树叶半数自己黄,妻子拿刀去割粮,架后窜出一只狼,就像强盗逃命忙。
4.size n. 尺寸;号码 I take the wrong s_____.联想辐射:(1) What size…?常用来提问衣服、鞋帽等的号码。
办公系统使用手册(简版)

九江学院办公系统使用手册---校级管理员2017年5月目录目录 (I)1系统概述 (1)1.1系统特点 (1)1.2系统主要功能介绍 (1)2运行环境及相关设置 (2)2.1登录办公系统 (2)2.2密码修改与重置 (2)2.3系统帮助 (2)2.4IE浏览器设置 (2)2.5安装系统插件 (4)2.6个人设置 (5)3系统权限管理 (5)3.1新增单位内设机构 (5)3.2修改单位内设机构 (6)3.3新增岗位 (6)3.4调整岗位 (7)3.5用户管理 (7)3.5.1添加用户账号 (7)3.5.2修改用户密码 (8)4工作流的建立 (8)4.1校级工作流的建立 (8)5文件办理 (10)5.1校内请示、报告办理 (11)5.1.1流程说明 (11)5.1.2起草请示报告 (12)5.1.3处理请示报告 (13)5.1.4流转到拟稿者 (13)5.1.5校领导审批 (14)5.1.6分发或者归档 (14)5.2发文办理 (14)5.2.1流程说明 (14)5.2.2起草发文 (15)5.2.3处理发文 (16)5.2.4党政办秘书 (17)5.2.5党政办审批 (17)5.2.6校领导审批 (18)5.2.7党政办机要科 (18)5.2.8分发公文 (18)5.3退回及撤回文件 (19)5.3.1由收件人退回 (19)5.3.2由发件人撤回 (19)5.4文件废除及恢复 (20)5.4.1文件废除 (20)5.4.2文件恢复 (21)5.5已办公文 (21)5.5.1已办发文 (21)5.5.2已办请示报告 ............................................................................................ 错误!未定义书签。
5.6公文检索 ................................................................................................................ 错误!未定义书签。
NUVOTON NuMaker-M483KG用户手册说明书

N U M A K E R -M 483K G U S E R M A N U A LARM ® Cortex ®-M32-bit MicrocontrollerNuMaker-M483KG User ManualNuMicro ®M483 SeriesThe information described in this document is the exclusive intellectual property ofNuvoton Technology Corporation and shall not be reproduced without permission from Nuvoton.Nuvoton is providing this document only for reference purposes of NuMicro microcontroller based systemdesign. Nuvoton assumes no responsibility for errors or omissions.All data and specifications are subject to change without notice.For additional information or questions, please contact: Nuvoton Technology Corporation.N U M A K E R -M 483K G U S E R M A N U A LTable of Contents1Overview (6)NuMaker-M483KG Features (6)1.12NuMaker-M483KG Overview (8)Front View ............................................................................................... 8 2.1 Rear View ............................................................................................... 9 2.2 Arduino UNO Compatible Extension Connectors ................................................ 10 2.3 Pin Assignment for Extension Connectors ........................................................ 12 2.4System Configuration (17)2.52.5.1 VIN Power Source ............................................................................................ 17 2.5.2 5 V Power Sources ........................................................................................... 17 2.5.33.3 V Power Sources ......................................................................................... 17 2.5.4 1.8V Power Sources ......................................................................................... 18 2.5.5 Power Connectors ............................................................................................ 18 2.5.6 USB Connectors .............................................................................................. 18 2.5.7 Power Switches ............................................................................................... 18 2.5.8 Power Supply Models ........................................................................................ 19 2.5.9External Reference Voltage Connector (22)2.5.10 Ammeter Connector .......................................................................................... 22 2.5.11 Extension Connectors ........................................................................................ 22 2.5.12 Push-Buttons .................................................................................................. 23 2.5.13 LEDs (23)Nu-Link2-Me ........................................................................................... 23 2.6PCB Placement (24)2.73Quick Start (25)Toolchains Supporting ............................................................................... 25 3.1 Nuvoton Nu-Link Driver Installation ................................................................ 25 3.2 BSP Firmware Download ............................................................................ 27 3.3 Hardware Setup ....................................................................................... 27 3.4 Find the Example Project ............................................................................ 29 3.5Execute the Project under Toolchains (29)3.63.6.1 Keil MDK ....................................................................................................... 29 3.6.2 IAR EWARM ................................................................................................... 33 3.6.3NuEclipse (34)N U M A K E R -M 483K G U S E R M A N U A L4NuMaker-M483KG Schematics (35)Nu-Link2-Me ........................................................................................... 35 4.1 M483 platform ......................................................................................... 36 4.2 Extension Connector ................................................................................. 37 4.3Advance Connector (38)4.45REVISION HISTORY (39)N U M A K E R -M 483K G U S E R M A N U A LList of FiguresFigure 1-1 NuMaker-M483KG Board ............................................................................................... 6 Figure 2-1 Front View of NuMaker-M483KG ................................................................................... 8 Figure 2-2 Rear View of NuMaker-M483KG .................................................................................... 9 Figure 2-3 Arduino UNO Compatible Extension Connectors ......................................................... 10 Figure 2-4 M483KGCAE2A Extension Connectors ....................................................................... 12 Figure 2-5 External Power Supply Sources on Nu-Link2-Me ........................................................ 19 Figure 2-6 External Power Supply Sources on M483 platform ...................................................... 20 Figure 2-7 Separate the Nu-Link2-Me from NuMaker-M483KG .................................................... 21 Figure 2-8 Wiring between Ammeter Connector and Ammeter ..................................................... 22 Figure 2-9 Front Placement ........................................................................................................... 24 Figure 2-10 Rear Placement .......................................................................................................... 24 Figure 3-1 Nu-Link USB Driver Installation Setup .......................................................................... 25 Figure 3-2 Nu-Link USB Driver Installation .................................................................................... 26 Figure 3-3 Open VCOM Function .................................................................................................. 27 Figure 3-4 ICE USB Connector ...................................................................................................... 27 Figure 3-5 Device Manger .............................................................................................................. 28 Figure 3-6 PuTTY Session Setting................................................................................................. 28 Figure 3-7 Template Project Folder Path ....................................................................................... 29 Figure 3-8 Warning Message of “Device not found” . (29)Figure 3-9 Project File Migrate to Version 5 Format ...................................................................... 30 Figure 3-10 Debugger Setting in Options Window......................................................................... 30 Figure 3-11 Programming Setting in Options Window ................................................................... 31 Figure 3-12 Compile and Download the Project ............................................................................ 31 Figure 3-13 Keil MDK Debug Mode ............................................................................................... 32 Figure 3-14 Debug Message on Serial Port Terminal Windows .................................................... 32 Figure 3-15 IAR EWARM Window ................................................................................................. 33 Figure 3-16 Compile and Download the Project ............................................................................ 33 Figure 3-17 IAR EWARM Debug Mode ......................................................................................... 34 Figure 3-18 Debug Message on Serial Port Terminal Windows .................................................... 34 Figure 4-1 Nu-Link2-Me Circuit ...................................................................................................... 35 Figure 4-2 M483 platform Circuit.................................................................................................... 36 Figure 4-3 Extension Connectors Circuit ....................................................................................... 37 Figure 4-4 Advance Connectors Circuit .. (38)N U M A K E R -M 483K G U S E R M A N U A LList of TablesTable 2-1 Arduino UNO Extension Connectors and M483KGCAE2A Mapping GPIO List ........... 11 Table 2-2 Extended Connector JP3 Interface with M483KGCAE2A GPIO ................................... 13 Table 2-3 Extended Connector JP5 Interface with M483KGCAE2A GPIO ................................... 14 Table 2-4 Extended Connector JP4 Interface with M483KGCAE2A GPIO ................................... 15 Table 2-5 Extended Connector JP6 Interface with M483KGCAE2A GPIO ................................... 16 Table 2-6 Vin Power Source .......................................................................................................... 17 Table 2-7 5V Power Sources ......................................................................................................... 17 Table 2-8 3.3 V Power Sources ..................................................................................................... 17 Table 2-9 1.8V Power Sources ...................................................................................................... 18 Table 2-10 Power Connectors ....................................................................................................... 18 Table 2-11 USB Connectors .......................................................................................................... 18 Table 2-12 Power Switches ........................................................................................................... 18 Table 2-13 Supply External Power through Nu-Link2-Me ............................................................. 19 Table 2-14 Supply External Power for M483 platform ................................................................... 21 Table 2-15 External Reference Voltage Connector ....................................................................... 22 Table 2-16 Ammeter Connector ..................................................................................................... 22 Table 2-17 Extension Connectors .................................................................................................. 22 Table 2-18 Push-Buttons ............................................................................................................... 23 Table 2-19 LEDs ............................................................................................................................ 23 Table 2-20 VCOM Function of Nu-Link2-Me . (23)N U M A K E R -M 483K G U S E R M A N U A L1OVERVIEWThis user manual is aimed to give users a fast introduction to the use of NuMaker-M483KG board. The NuMaker-M483KG consists of two parts, a M483 platform and an on-board Nu-Link2-Me debugger and programmer. The NuMaker-M483KG allows users to quickly develop and easily program and debug application.The NuMaker-M483KG offers M483KGCAE2A full pins extension connectors and Arduino UNO compatible extension connectors. It is an easy-to-develop platform for user to expand the functionality and build the applications. The NuMaker-M483KG also provides an ammeter connector, allows user to monitor the microcontroller’s power consumption during development.The Nu-Link2-Me is a debugger and programmer that supports on-line programming and debugging through SWD interface. The on-board 16 Mbit SPI Flash allows it able to off-line programming the target microcontroller. Nu-Link2-Me provides virtual COM port (VCOM) function to print out messages on PC. Nu-Link2-Me can be separated from NuMaker-M483KG, allowing user to use as a mass production programming tool.Figure 1-1 NuMaker-M483KG BoardNuMaker-M483KG Features1.1●NuMicro ®M483KGCAE2A used as main microcontroller with function downward compatible with: ◆ M483SGCAE ◆ M482LGCAE ◆ M482ZGCAE● M483KGCAE2A full pins extension connectors ● Arduino UNO compatible extension connectors● Ammeter connector for measuring the microcontroller’s power consumption ●Fixable board power supply: ◆ External V DD power connector◆ Arduino UNO compatible extension connector Vin ◆USB FS connector on M483 platformN U M A K E R -M 483K G U S E R M A N U A L◆ ICE USB connector on Nu-Link2-Me ●On-board Nu-Link2-Me debugger and programmer:◆ Debug through SWD interface ◆ On-line/off-line programming ◆Virtual COM port functionN U M A K E R -M 483K G U S E R M A N U A L2NUMAKER-M483KG OVERVIEWFront View2.1ICE USB Connector VCOM SwitchReset ButtonICE Status LEDOff-line Program Button USB FS Connector Power LEDLEDInput ButtonTarget Chip: M483KGCAE2ATarget Chip Extension Connector Arduino UNO Compatible Extension ConnectorExternal V DD ConnectorNu-Link2-MeAmmeterICE Chip: M48SSIDAE External V SS Connector M483 PlatformExternal V REF ConnectorWiFi Module ConnectorCMOS ConnectorExternal V BAT ConnectorExternal V DDIO Connector Figure 2-1 Front View of NuMaker-M483KGFigure 2-1 shows the main components and connectors from the front side of NuMaker-M483KG. The following lists components and connectors from the front view:● Target Chip: M483KGCAE2A(U1) ● USB FS Connector(J2)● Arduino UNO Compatible Extension Connectors (NU1, NU2, NU3, NU4) ● M483 Extension Connectors (JP3, JP4, JP5 and JP6) ●External V DD Power Connector(JP1) ● External V SS Power Connector(JP2) ● External V REF Connector(VREF1) ● External V BAT Connector(VBAT) ● External V DDIO Connector(VDDIO) ● WiFi Module Connector(WIFI1) ● CMOS Connector(CON16) ● Input Button(SW3 and SW4) ● Ammeter Connector(AMMETER) ● Reset Button(SW1)● Power LED, PH4 LED, PH5 LED and PH6 LED(LEDG1, LEDR1, LEDY1 and LEDG2) ●Nu-Link2-Me ◆ VCOM Switch◆ ICE Chip: M48SSIDAE(ICEU2) ◆ ICE USB Connector(ICEJ3)◆ ICE Status LED(ICES0,ICES1, ICES2, ICES3) ◆Off-line Program Button(ICESW1)N U M A K E R -M 483K G U S E R M A N U A LRear View2.2Figure 2-2 shows the main components and connectors from the rear side of NuMaker-M483KG. The following lists components and connectors from the rear view:● SD Card Slot(U9) ●Nu-Link2-Me ◆ MCUVCC Power Switch (ICEJPR1) ◆ICEVCC Power Switch (ICEJPR2)ICEVCC Power SwitchMCUVCC Power SwitchSD Card SlotFigure 2-2 Rear View of NuMaker-M483KGN U M A K E R -M 483K G U S E R M A N U A LArduino UNO Compatible Extension Connectors2.3Figure 2-3 shows the Arduino UNO compatible extension connectors.Figure 2-3 Arduino UNO Compatible Extension ConnectorsN U M A K E R -M 483K G U S E R M A N U A LTable 2-1 Arduino UNO Extension Connectors and M483KGCAE2A Mapping GPIO ListN U M A K E R -M 483K G U S E R M A N U A LPin Assignment for Extension Connectors2.4The NuMaker-M483KG provides the M483KGCAE2A target chip onboard and full pins extension connectors (JP3, JP4, JP5 and JP6). The Figure 2-4 shows the M483KGCAE2A extension connectors.JP3Pin1 ~ Pin32JP6Pin97 ~ Pin128JP5Pin33 ~ Pin64JP4Pin65 ~ Pin96Figure 2-4 M483KGCAE2A Extension ConnectorsN U M A K E R -M 483K G U S E R M A N U A LN U M A K E R -M 483K G U S E R M A N U A LN U M A K E R -M 483K G U S E R M A N U A LN U M A K E R -M 483K G U S E R M A N U A LN U M A K E R -M 483K G U S E R M A N U A LSystem Configuration2.52.5.1 VIN Power SourceTable 2-6 presents the Vin power source.Table 2-6 Vin Power Source2.5.2 5 V Power SourcesTable 2-7 presents the 5 V power sources.Table 2-7 5V Power Sources2.5.33.3 V Power SourcesTable 2-8 presents the 3.3 V power sources.Table 2-8 3.3 V Power SourcesN U M A K E R -M 483K G U S E R M A N U A L2.5.4 1.8V Power SourcesTable 2-9 presents the 1.8 V power source.Table 2-9 1.8V Power Sources2.5.5 Power ConnectorsTable 2-10 presents the power connectors.Table 2-10 Power Connectors2.5.6 USB ConnectorsTable 2-11 presents the USB connectors.Table 2-11 USB Connectors2.5.7 Power SwitchesTable 2-12 presents the power switches.Table 2-12 Power SwitchesN U M A K E R -M 483K G U S E R M A N U A L2.5.8 Power Supply ModelsExternal Power Supply through Nu-Link2-Me to Target Chip 2.5.8.1The external power supply source on Nu-Link2-Me is shown in Figure 2-5.ICE USB Connector (ICEJ3)Nu-Link2-MeFigure 2-5 External Power Supply Sources on Nu-Link2-MeTo use ICEJ3 as external power supply source with Nu-Link2-Me, please follow the below steps:1. Solder the resistor on ICEJPR1 (MCUVCC) depends on the target chip operating voltage.2. Solder the resistor on ICEJPR2 (ICEVCC) depends on the ICE chip operating voltage.3. Connect the external power supply to JP1.Table 2-13 presents all power models when supplies external power through Nu-Link2-Me. The Nu-Link2-Me external power sources are highlighted in yellow.Table 2-13 Supply External Power through Nu-Link2-MeN U M A K E R -M 483K G U S E R M A N U A LExternal Power Supply through M483 platform to Target Chip 2.5.8.2The external power supply sources on M483 platform are shown in Figure 2-6.USB Power Connector (J2)NU1 pin8 (Vin)External V DD Connector (JP1)External V SS Connector (JP2)Figure 2-6 External Power Supply Sources on M483 platformTo use Vin or J2 as external power supply source, please follow the below steps:1. Remove the resistor on ICEJPR1 (MCUVCC).2. Solder the resistor on ICEJPR2 (ICEVCC) depends on the ICE chip operating voltage.3. Connect the external power supply to Vin or J2.To use JP1 as external power supply source, please follow the below steps:1. Remove the resistor on ICEJPR1 (MCUVCC).2. Solder the resistor on ICEJPR2 (ICEVCC) depends on the ICE chip operating voltage.3. Connect ICEJ3 to PC.4. Connect the external power supply to JP1.To use Vin or J2 as external power supply source with Nu-Link2-Me separated from NuMaker-M483KG, please follow the below steps:1. Separate the Nu-Link2-Me from NuMaker-M483KG.2. Connect the external power supply to Vin or J2.To use JP1 as external power supply source with Nu-Link2-Me separated from NuMaker-M483KG, please follow the below steps:1. Separate the Nu-Link2-Me from NuMaker-M483KG.2. Connect the external power supply to JP1.N U M A K E R -M 483K G U S E R M A N U A LUSB Power Connector (J2)NU1 pin8 (Vin)External V DD Connector (JP1)External V SS Connector (JP2)Separate Nu-Link2-Me""Figure 2-7 Separate the Nu-Link2-Me from NuMaker-M483KGTable 2-14 presents all power models when supplies external power through M483 platform. The M483 platform external power sources are highlighted in yellow.Table 2-14 Supply External Power for M483 platformN U M A K E R -M 483K G U S E R M A N U A L2.5.9 External Reference Voltage ConnectorTable 2-16 presents the external reference voltage connector.Table 2-15 External Reference Voltage Connector2.5.10 Ammeter ConnectorTable 2-16 presents the ammeter connector.Table 2-16 Ammeter ConnectorRemove the R16 and R12 ResistorFigure 2-8 Wiring between Ammeter Connector and Ammeter2.5.11 Extension ConnectorsTable 2-17 presents the extension connectors.Table 2-17 Extension ConnectorsN U M A K E R -M 483K G U S E R M A N U A L2.5.12 Push-ButtonsTable 2-18 presents the push-buttons.Table 2-18 Push-Buttons2.5.13 LEDsTable 2-19 presents the LEDs.Table 2-19 LEDsNu-Link2-Me2.6The Nu-Link2-Me is a debugger and programmer that supports on-line programming and debugging through SWD interface. The on-board 16 Mbit SPI Flash allows it to off-line program the target microcontroller. Additionally, the Nu-Link2-Me provides virtual COM port (VCOM) function to print out messages on PC. Table 2-20 presents how to set the VCOM function by ICESW2.Table 2-20 VCOM Function of Nu-Link2-MeN U M A K E R -M 483K G U S E R M A N U A LPCB Placement2.7Figure 2-9 and Figure 2-10 show the front and rear placement of NuMaker-M483KG.Figure 2-9 Front PlacementFigure 2-10 Rear PlacementN U M A K E R -M 483K G U S E R M A N U A L3 QUICK STARTToolchains Supporting3.1Install the preferred toolchain. Please make sure at least one of the toolchains has been installed.● KEIL MDK Nuvoton edition M0/M23 ● IAR EWARM● NuEclipse (GCC)(Windows) ●NuEclipse (GCC)(Linux)Nuvoton Nu-Link Driver Installation3.2Download and install the latest Nuvoton Nu-Link Driver.● Download and install Nu-Link_Keil_Driver when using Keil MDK. ● Download and install Nu-Link_IAR_Driver when using IAR EWARM. ●Skip this step when using NuEclipse.Please install the Nu-Link USB Driver as well at the end of the installation. The installation is presented in Figure 3-1 and Figure 3-2.Figure 3-1 Nu-Link USB Driver Installation SetupN U M A K E R -M 483K G U S E R M A N U A LFigure 3-2 Nu-Link USB Driver InstallationN U M A K E R -M 483K G U S E R M A N U A LBSP Firmware Download3.3Download and unzip the M480 Board Support Package (BSP).Hardware Setup3.41. Open the virtual COM (VCOM) function by changing Nu-Link2-Me VCOM Switch No. 1 and 2 toON.Figure 3-3 Open VCOM Function2. Connect the ICE USB connector shown in Figure 3-4 to the PC USB port through USB cable.Figure 3-4 ICE USB Connector3. Find the “Nuvoton Virtual COM Port ” on the Device Manger as Figure 3-5.N U M A K E R -M 483K G U S E R M A N U A LFigure 3-5 Device Manger4. Open a serial port terminal, PuTTY for example, to print out debug message. Set the speed to115200. Figure 3-6 presents the PuTTY session setting.Figure 3-6 PuTTY Session SettingN U M A K E R -M 483K G U S E R M A N U A LFind the Example Project3.5Use the “Template” project as an example. The project can be found under the BSP folder as shown in Figure 3-7.Figure 3-7 Template Project Folder PathExecute the Project under Toolchains3.6Open and execute the project under the toolchain. The section 3.6.1, 0, and 3.6.3 describe the steps of executing project in Keil MDK, IAR EWARM and NuEclipse, respectively.3.6.1 Keil MDKThis section provides steps to beginners on how to run a project by using Keil MDK. 1. Double click the “Template.uvproj ” to open the project.Note: If Figure 3-8 warning message jumps out, please migrate to version 5 formats as shown in Figure 3-9. The “.uvproj ” filename extension will change to “.uvprojx ”.Figure 3-8 Warning Message of “Device not found ”‘M483KGCAE2A ’N U M A K E R -M 483K G U S E R M A N U A L123Figure 3-9 Project File Migrate to Version 5 Format2. Make sure the debugger is “Nuvoton Nu-Link Debugger ” as shown in Figure 3-10 and Figure 3-11.Note: If the dropdown menu in Figure 3-10 does not contain “Nuvoton Nu-Link Debugger ” item, please rework section 3.2.21Figure 3-10 Debugger Setting in Options WindowN U M A K E R -M 483K G U S E R M A N U A L345Figure 3-11 Programming Setting in Options Window3. Rebuild all target files. After successfully compile the project, download code to the flash memory.Click “Start/Stop Debug Section ” button can enter debug mode.13241. Rebuild3. Download4. Start/Stop Debug2. Successfully compile Figure 3-12 Compile and Download the Project4. Figure 3-13 shows the debug mode under Keil MDK. Click “Run ” and the debug message will beprinted out as shown in Figure 3-14. User can debug the project under debug mode by checkingN U M A K E R -M 483K G U S E R M A N U A Lsource code, assembly language, peripherals ’ registers, and setting breakpoint, step run, value monitor, etc.2. Stop 3 1 21. Run3. ResetFigure 3-13 Keil MDK Debug ModeFigure 3-14 Debug Message on Serial Port Terminal WindowsN U M A K E R -M 483K G U S E R M A N U A L3.6.2 IAR EWARMThis section provides steps to beginners on how to run a project by using IAR EWARM. 1. Double click the “Template.eww ” to open the project.2. Make sure the toolbar contain “Nu-Link ” item as shown in Figure 3-15.Note: If the toolbar does not contain “Nu-Link ” item, please rework section 3.2.Figure 3-15 IAR EWARM Window3. Make target file as presented in Figure 3-16. After successfully compile the project, downloadcode to the flash memory and enter debug mode.1321. Make3. Download and Debug2. Successfully compileFigure 3-16 Compile and Download the ProjectN U M A K E R -M 483K G U S E R M A N U A L4. Figure 3-17 shows the debug mode under IAR EWARN. Click “Go ” and the debug message willbe printed out as shown in Figure 3-18. User can debug the project under debug mode by checking source code, assembly language, peripherals ’ registers, and setting breakpoint, step run, value monitor, etc.1 2 31. Go 3. Reset2. BreakFigure 3-17 IAR EWARM Debug ModeFigure 3-18 Debug Message on Serial Port Terminal Windows3.6.3 NuEclipseFor more information about how to use NuEclipse, please refer to the NuEclipse User Manual.N U M A K E R -M 483K G U S E R M A N U A L4 NUMAKER-M483KG SCHEMATICSNu-Link2-Me4.1Figure 4-1 shows the Nu-Link2-Me circuit. The Nu-Link2-Me is a debugger and programmer that supports on-line programming and debugging through SWD interface.Figure 4-1 Nu-Link2-Me CircuitNu-Link2-MeN U M A K E R -M 483K G U S E R M A N U A LM483 platform4.2Figure 4-2 shows the M483 platform circuit.Figure 4-2 M483 platform CircuitN U M A K E R -M 483K G U S E R M A N U A LExtension Connector4.3Figure 4-3 shows extension connectors of NuMaker-M483KG.Figure 4-3 Extension Connectors CircuitN U M A K E R -M 483K G U S E R M A N U A LAdvance Connector4.4Figure 4-3 shows advance connectors of NuMaker-M483KG.Figure 4-4 Advance Connectors CircuitN U M A K E R -M 483K G U S E R M A N U A L5 REVISION HISTORY2019.05.101.001.Initially issued.N U M A K E R -M 483K G U S E R M A N U A LImportant NoticeNuvoton Products are neither intended nor warranted for usage in systems or equipment, any malfunction or failure of which may cause loss of human life, bodily injury or severe property damage. Such applications are deemed, “Insecure Usage”.Insecure usage includes, but is not limited to: equipment for surgical implementation, atomic energy control instruments, airplane or spaceship instruments, the control or operation of dynamic, brake or safety systems designed for vehicular use, traffic signal instruments, all types of safety devices, and other applications intended to support or sustain life.All Insecure Usage shall be made at customer’s risk, and in the event that third parties lay claims to Nuvoton as a result of customer’s Insecure Usage, custome r shall indemnify the damages and liabilities thus incurred by Nuvoton.。
Roland MPU-401兼容卡片安装指南:Windows 95说明书

SupplementalNotesMay 14, 1996©1996 Roland Corporation U.S. Installing MPU-401Compatible Cards in Windows 95 Page 1 of 8Installing MPU-401 Compatible Cards in Windows 95These notes are designed to help you install the following Roland MIDI cards and configure them in Windows 95:• LAPC-1• MPU-401, MPU-IPC-T, MPU-401AT • SCC-1I. First, we will look at computers and peripherals and how they work together. See “Typical Hardware Setup”.II. Second, we will prepare the MIDI card for installation. See “Changing Hardware Settings”. III. Third, we will install the Windows 95 drivers. See “Installing Windows 95 Drivers”.IV. Finally, we will test the MIDI configuration to make sure it is working properly. See “Testing the MIDI Card”.I. Typical Hardware SetupIBM-compatible computers can be expanded to accept many different devices such as a mouse, modem, printer, sound card, or MIDI card. Your computer uses interrupts (also called IRQ’s) and port addresses (or I/O addresses) to distinguish between these different devices. Since this guide is not intended to explain the concepts of IBM computers in detail, we will not jump into the particular definitions of IRQ’s and addresses. Just remember that the IRQ and port address numbers must be unique for EVERY device in your computer.When two different devices in your computer are set to the same interrupt or address, a conflict results. A conflict is the most common problem encountered when installing a new device. This may result in your computer crashing, reporting an error message, or playing MIDI in an unusual manner. In order to avoid conflicts, it is important to be familiar with the interrupt and address settings of the various devices in your computer. Here are some typical devices and their settings :Device IRQ Port Address MIDI card 2/9 330-331 COM 2 (Mouse or Modem) 3 2F8 COM 1 (Mouse or Modem) 4 3F8 Sound card 5 220-22F Floppy drive controller 6 3F0-3F7 LPT1 (Printer) 7 378-37F Reserved for system use 8 070-071 Video card 2/9 3D0-3DF Reserved for system use 13 0F0-0FF Hard disk controller 14 1F0-1F7 SCSI card (scanners, etc.) 15 330-33FNote: All port addresses are written using Hexadecimal notation.As you can see, there are many devices and settings in your computer to examine before installation. All Roland MIDI cards are set to interrupt 2/9 and address 330 when shipped from the factory. The notation of interrupt 2/9 means that interrupts 2 and 9 are redirected IRQ’s. This means anything set on IRQ 2 also shares IRQ 9. Notice that video cards and MIDI cards typically have the same interrupt settings of 2/9. Although this is usually OK, some computers may have problems with these two devices sharing the same interrupt.COM 1 and COM 2 refer to the 9 and 25-pin serial port connectors on the back of your computer. A mouse may be attached to one of these ports. If not, you probably have a PS/2 style mouse that uses a round 8-pin connector. A PS/2 style mouse typically uses IRQ 12, leaving your serial ports available for other devices. A Fax/Modem will also use one of the available serial ports. This is true whether it is connected to the computer internally or externally. Note: Due to the fact that IBM computers and devices are manufactured by many different companies, default settings may vary. Contact your computer or device manufacturer for more information.II. Changing Hardware SettingsTo change an IRQ or port address setting of a Roland MIDI card, you must change jumpers or switches on the card itself.Possible IRQ and Port Address SettingsThe following is a list of Roland MIDI cards with possible settings for each. The settings inbold are the defaults.SCC-1 and LAPC-1IRQ: 2/9, 3, 4, 5, 6, 7P ort Address: 330, 332, 334, 336MPU-401IRQ: 2/9Port Address: 330MPU-IPC-TIRQ: 2/9, 3, 4, 5, 6, 7Port Address: 220, 230, 240, 250, 320, 330, 340, 350MPU-401ATIRQ: 2/9, 3, 4, 5, 6, 7Port Address: 300, 320, 330, 332, 334, 336Jumper and Switch settings for IRQ and Port AddressBelow are the jumper and switch settings used to change the IRQ and port address for Roland MIDI cards. The settings that are shaded are the factory defaults.Note: The default settings for Roland cards are usually the least likely to conflict with other cards. Therefore it is recommended that you do not change these settings unless you are sure you have a conflict with another device.LAPC-1IRQ: There is a set of jumpers labeled J01 through J06 on the LAPC-1. With the connectors of the card facing down and to the right, these jumpers are located near the bottom-center of the LAPC-1. Look at the chart below and move the jumper to the appropriate set of pins to select the IRQ you want to use.IRQJumper NamePort Address: There are two jumpers on the LAPC-1 used to change the address, labeled J07 and J08. These jumpers are located to the left of the IRQ jumpers on the card (see above). Move the jumper to the desired location using this chart:1MPU-401The original MPU-401 card was hard-wired from the factory to IRQ 2/9 and port address 330H. If you wish to change these settings, contact an authorized Roland Service Center.IRQ: The jumpers used to change the interrupt are labeled on the card as 2/9, 3, 4, 5, 6, and 7. Position the card with the connectors facing down and to the right. The interrupt jumpers are located near the bottom-center. Move the jumper to the desired position to select the IRQ.IRQPort Address: There are several jumpers labeled A04 through A09 on the MPU-IPC-T used to change port address. With the connectors of the card facing down and to the right, these jumpers are located near the top-center of the MPU-IPC-T. You will find a 0 and 1 position for each of the jumpers. To set a jumper to the 1 position, install it on the middle pin and the top pin (labeled 1). To set a jumper to the 0 position, install it on the middle pin and the bottom pin (labeled 0). Move the jumpers to the desired locations for A04 through A09 using this chart:NameSwitchAddress A05A06A07A08A09220 0 1 0 0 0 1230 1 1 0 0 0 1240 0 0 1 0 0 1250 1 0 1 0 0 1320 0 1 0 0 1 1330 1 1 0 0 1 1340 0 0 1 0 1 1350 1 0 1 0 1 1SCC-1IRQ: With the connectors of the card facing down and to the right, the jumpers used to change interrupts are located near the bottom-center. IRQ’s are labeled on the card as 2/9, 3, 4, 5, 6, and 7. Move the jumper to the appropriate set of pins to select the interrupt you want to use.IRQPort Address: There are two switches on the SW2 block labeled 1 and 2 which are used to select the port address. With the connectors of the card facing down and to the right, these switches are located near the top-center of the card on the right. You will find an OFF and ON position for each of the switches. Move the switch to the desired location using this chart:330 332 334 3361 2 1 2 1 2 1 2ON↑↑↑↑OFF↓↓↓↓IRQ: There is a set of jumpers labeled SW1 on the MPU-401AT card. With the connectors of the card facing down and to the right, the SW1 jumpers are located near the bottom left of the MPU-401AT. Move the jumper to the desired location using this chart to select an interrupt:IRQPort Address: There is a set of switches labeled SW2 to the right of the SW1 interrupt jumpers on the MPU-401AT. You will find an OFF and ON position for each of the switches. Move the switches to the desired locations using this chart to select the address:300 320 3301 2 3 4 1 2 3 4 1 2 3 4ON↑↑↑OFF↓↓↓↓↓↓↓↓↓332 334 3361 2 3 4 1 2 3 4 1 2 3 4ON↑↑↑↑↑↑↑↑↑↑OFF↓↓MIDI Card InstallationNote: Since computers vary dramatically by manufacturer and type, it is a good idea to consult your computer manufacturer before installation. If you are not comfortable installing the card, please consult a local computer technician.MPU-401AT Note: If you are using an MPU-401AT with a daughterboard, you will need to attach the daughterboard to the card. The MPU-401AT has a connector labeled CN1. This connector will attach to the equivalent connector on the daughterboard. Two of the four plastic spacers on the daughterboard will fit into holes on the MPU-401AT.Now that the card is set to the appropriate IRQ and port address settings, it must be physically installed in the computer. Remove the cover of your computer - this will typically require a screwdriver and/or key. Slide the card into an available slot in the PC. Be careful not to drop anything like a screwdriver or other tool in your computer. Use a screw to fasten the card firmly in your computer. Replace the computer’s cover.III. Installing Windows 95 DriversThere are three parts to this process:1. First, we will install the Windows driver.2. Second, we will tell Windows which interrupt and address settings you have chosen.3. Third, we will select the new MIDI card as the primary Windows MIDI device.Installing the Windows Driver1) From the Start Menu, select Settings and open the Control Panel.2) In the Control Panel, double-click on Add New Hardware.3) To begin installing your hardware, click Next.4) Since you do not want Windows to search for your hardware, click No, followed by Next.5) For hardware type, scroll down through the list and select Sound, video and game controllers.6) For Manufacturer on the left, choose Microsoft.For Models on the right, choose MPU-401Compatible. Click Next.7) Windows will indicate the default interrupt andaddress settings for the card. If the card you installed is not at these default settings, you will need to change them in Windows. Finish the steps below and then go to the “Setting the Interrupt and Address in Windows” section. 8) You may need to insert a Windows disk at this point. Afterwards, click Finish to end theinstallation.9) At this point you will be asked to shut down thecomputer. After doing so, restart it.Setting the Interrupt and Address in Windows If your MIDI card is not at the default settings, or if Windows is not recognizing the card, follow these steps to change the settings in Windows. Otherwise, go to the “Selecting the MIDI Card as the Primary Windows MIDI Device” section below.1) From the Start Menu, select Settings and open theControl Panel.2) In the Control Panel, double-click on the Systemicon.3) Click on the Device Manager tab at the top of the System Properties window.4) Double-click on Sound, video and game controllers.5) Your sound cards will be displayed. Double-click on MPU-401 Compatible.6) Click on the Resources tab at the top of the Properties window.7) Clear the check mark from the Use automatic settings box, if necessary.8) To change the port address, click on Input/Output Range. To change the interrupt, click on Interrupt Request. Then click the Change Setting button.9) The screen you will be shown displays the value for the parameter you have selected. Click the up and down arrows to choose from the availablevalues, making sure that no devices are conflicting in the Device Conflict box at the bottom.10) Click OK, and change the other settings asnecessary.11) Click OK again and restart Windows when requested.Selecting the MIDI Card as the Primary Windows MIDI Device 1) Open the Control Panel. 2) Double-click on the Multimedia icon.3) Click the MIDI tab at the top of the window. 4) Click the dot to the left of Single Instrument. 5) Click on MIDI for MPU-401 Compatible in thewhite box under Single Instrument.6) Click OK at the bottom of the window.IV. Testing the MIDI CardAt this point we will test the MIDI card to make sure it is installed and configured properly. We will be using the Media Player program included with Windows. If you are using an external MIDI device, it should be turned on and waiting to receive MIDI data. Connect its MIDI input to your new card’s MIDI output.1) From the Start Menu, select Programs, thenAccessories, and Multimedia, followed by Media Player.2) Under the Device menu, select MIDI Sequencer.3) A window to open a file will be displayed. If youupgraded from Windows 3.1, you should be able to find the CANYON.MID file in the Windows directory. Otherwise, you will need to locate andopen a MIDI file of your own.4) To make sure the correct MIDI device has beenchosen, select Properties under the Device menu. 5) Under Single Instrument, click on the MIDI deviceyou wish to test (the MPU-401 Compatible).6) Click OK at the bottom of the window.7) In the Media Player, click the Play button (the button on the far left that looks like a sideways triangle) and the MIDI file will begin playing. Start ProgramsAccessoriesMultimedia Media PlayerIf you are not getting any output, check the following:• Is your output device (speakers, headphones, etc.) attached to the correct connector? • Are the speakers or headphones working properly? Try connecting them to another audio device to test them.• If the signal is going through a mixer or an amplifier, are the volume levels turned up?• If you are controlling an external MIDI device, are the MIDI connections correct? Can it be verified that the device is receiving MIDI data?If the sound you are getting is still not right, or you are not getting any output at all, then you may have an interrupt or address conflict. Determine some other available settings for the card that you can use. Change the jumpers or switches on the card, and change the corresponding values in Windows to reflect the updates. Then try testing the card again.。
外研八上M4U1 He lives the farthest from作业

课时作业(十)Module 4Unit 1(20分钟50分)Ⅰ.根据句意及汉语提示完成单词(5分)1.There was an________(事故)last night.2.The hall is________(拥挤的)at noon in my school.3.It is raining hard. Go home by________(出租车).4.The skirts are the________(最廉价的) in Lily’s Clothes Store.5.Her home is________(近的)to school, so she often walks to school.Ⅱ.用所给词的适当形式填空(5分)1.Zhang Chao runs the______(fast)in his class.2.Taking the bus is the best way______(get)to school.3.Wang Hong has the______(many)books of us all.4.Tony is______(good)at maths than Jim.5.He lives the______(far)from school, so he has the longest journey.Ⅲ.单项选择(10分)1.Paul is the______ student in our class.A. goodB. wellC. betterD. best2.Bill was late______ school this morning.A. forB. atC. withD. on3.—______do the twins go to Beijing?—______bus.A. How; ByB. What; TakeC. How; TakeD. What; By4.Alice’s new house is close______Bill’s.A. betweenB. amongC. toD. with5.—How does your mother go shopping?—______her car.A.ByB. WithC. InD. For Ⅳ.句型转换(10分)1.Bill goes to school on foot every day.(改为同义句)Bill________ ________school every day.2.He sometimes takes the train to Shanghai.(改为同义句)He sometimes goes to Shanghai________ ________.3.Daming gets to school by bus.(对画线局部提问)________does Daming _______ _________school?4.I go shopping twice a week.(对画线局部提问)________ ________do you go shopping?5.is,this,way,to,comfortable,most,the,school(.)(连词成句)____________________________________________________________________Ⅴ.补全对话,每空一词(10分)A:__1__does Tom get to school?2__the best way to get to school.A:How__3__Daming get to school?B:He has the fastest journey__4__he goes by bicycle.A:But it’s the__56__ __7__Lucy?B:Her home is the closest to school,__8__she walks. Does Dad always go to work__9__taxi?A:Yes.He sometimes__10__the train.Ⅵ.阅读理解(10分)Do you like to travel? Which transportation do you like best, by car, bytrain, by ship or by plane?The fastest way of traveling is by plane. With a plane, we can travel in oneday to places which it took a month or more to get to a hundred years ago.Traveling by train is slower than by plane, but we can see beautiful sceneryduring the travel. Modern trains have comfortable seats and dining cars. Theymake even the longest journey enjoyable.Some people like traveling by ship. There are large luxury liners(客轮)or river boats. They are not as fast as trains or planes, but traveling by ship is a very pleasant way to spend a holiday.Many people like to travel by car because they can make their own timetable. They can travel hundreds of miles a day, just as their wish. They can stop wherever they want to see something interesting or to enjoy a good meal at a good restaurant, or to spend the night at a hotel. That is why people choose traveling by car for pleasant trips, while they usually take trains or planes for business.1.If we travel by car, we can______.A. enjoy the longest journeyB. travel only fifty miles a dayC. make our own timetableD. travel to a very far place in a few minutes2.When people travel on business, they usually take______.A. ships or trainsB. cars or trainsC. planes or carsD. trains or planes3.________have comfortable seats and dining cars.A. CarsB. Modern trainsC. PlanesD. Buses4.If possible, people like traveling by sea because______.A. it is as fast as trains and planesB. it is a pleasant way to spend a holidayC. it is very cheapD. it can stop wherever they like5.How many means of transportation are mentioned in this passage?A.3.B.4.C.5.D.6.答案解析Ⅳ.答案:1.walks to 2.by train 3.How;get to4.How often5.This is the most comfortable way to school.Module 5 Unit 3I. 根据句意和首字母提示写单词。
T4 系列使用手册说明书
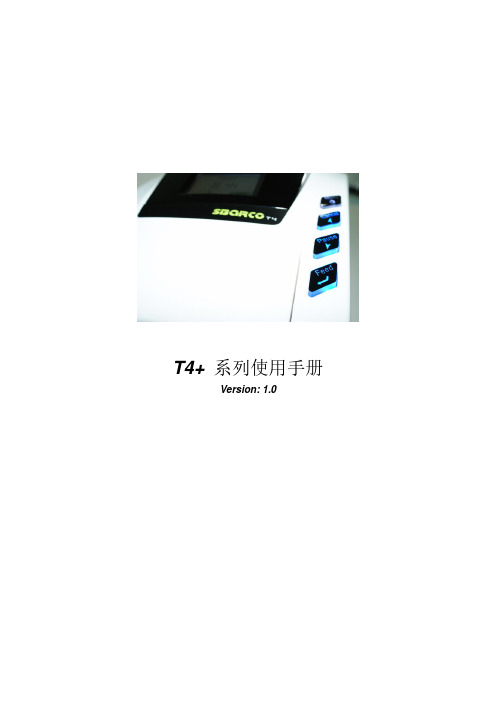
I T4 系列使用手册
Ver:1.0
5.2.4 测试打印...........................................................................................44 5.2.5 内存...................................................................................................44 5.2.6 表格...................................................................................................44 5.2.7 警告讯息...........................................................................................45 5.2.8 打印机状态.......................................................................................46 6. 故障排除 ................................................................................................................47 6.1 液晶屏幕错误讯息......................................................................................47 7. 規格 ........................................................................................................................48 7.1 T4+系列規格................................................................................................48 7.2 通用序列总线(USB)接脚图.......................................................................50 7.3 串行端口脚位图..........................................................................................51 7.4 以太网络脚位图..........................................................................................51
mpow mx1 说明书

Mpow Bluetooth Headset User ManualMpow Bluetooth HeadsetContents[ hide1 Package2 Structure Diagram3 Product Specification4 Function and Operation5 Pairing Mode6 Correct disposal of this product7 Related Manuals:PackageEVA bag ×1Difference sizes earplugs ×3Memory cotton earplugs ×1USB line ×1User manual ×1Structure Diagram1. Speaker2. + volume key3. MFB Key4. – volume key5. LED indicator6. Charging jackProduct SpecificationBluetooth Standard : V4.1Wireless profile : Headset, Handsfree, A2DP, AVRCPOperating Range : 10mStandby Time : 220hrsCharging Time : 1.5hrsTalk /Playing Time : 7hrsCharging Voltage : DC 5VBattery Capacity : 100mAh/3.7VFunction and OperationPower On/OffPower On : Long press the MFB button for 3 seconds in the shutdown state.Power Off : Long press the MFB button for 3 seconds in the boot state with the red indicator light flashing 3times and goes off.Answer / Hang Up / Reject PhoneShort press the MFB button or use the phone key to answer Short press the MFB button or use the phone key to hang up Long press the MFB button for 1 seconds to reject when incoming call ringing Redial the Dialed NumberDouble press the MFB button for voice dialing when connectedVolume Up / Down/ Next/ Last songShort press “+”the volume increase, Long press“+” for 2 seconds will turn to next songShort press “-” the volume decrease, Long press“-“ for 2 seconds will turn to last songPlay / Pause/AnswerShort press the MFB button to pause and press again to play when playing songShort press the MFB button to answer when call ringing and press again to hang up when calling Clear Pairing InformationLong Press the MFB button until the blue light flashing 3 times when chargingCharging the headsetYou must fully charge the headset before using the headset in first time.1. Connect the USB charging cable to the USB charge port of the headset.2. The red light will turn on when charging.3. The blue light turn on when charging completed.Pairing Mode1. Long press the MFB button for 5 seconds until the red and blue light start flashing alternately inthe shutdown state, and it will automatically enter the pairing mode.2. Turn on the Bluetooth function of your phone or other devices, search the Bluetooth devices andselect “Mpow Flame ” to connect.3. Enter the code “0000” if needed.Remark: It will connect to the last paired smart device automatically when it’s turned on next time .Please make sure the Bluetooth function of your smart device is turned on before turn on the headset.Connect two Bluetooth device at the same time1. Pair the Bluetooth headset to the first phone.2. After a successful pairing, turn off the headset, turn off the headset, and also turn off theBluetooth function of the first phone.3. Pair the Bluetooth headset to the second phone.4. After a successful pairing, turn on the Bluetooth headset of the first phone, Select the “MPOWFlame” and click connect.5. Two phone will both be connected to the headset at the same time.Correct disposal of this product(Waste Electrical & Electronic Equipment)This marking shown on the product or its literature, indicates that it should not be disposed with other household wastes at the end of its working life.。
m7u4word power

Unit 4 Public transportPeriod 5 Word PowerLearning aims(学习要求):To learn different means of transportImportant and difficult points(重难点):How to make Ss familiar with the special expressions related to transportStep1:自主学习1. In part B, Zhao Ning has categorized the different ways that we can travel in a flow chart. Look at the chart she has made. Make sure you know the meaning of each word, then try to answer:1) Who has ever traveled by light railway or underground? What was it like? Do you like traveling by light railway or underground? Why or why not?2) Have you ever traveled by coach/ by aeroplane/ by ferry/ by ship? How do you like it?3) If you are traveling to Nanjing, what means of transport will you choose?4) If you want to go London, which means is the best choice?2. In part C,You should complete the introduction with the words you’ve learnt in Parts A and B.Step2:合作探究Vocabulary extension1)Do you know any other words or phrases related to transport besides what you have already learnt in Part A and B? For Example:1.What must we do before we go somewhere by train or by plane?We must _______________beforehand.2.Where will you go to buy the ticket?_______________3.What do we call the person who is traveling by train or plane?_______________4.What do we call the person who sells bus ticket?________________5.If you want to travel to a foreign country, what must you have?________________2)Next let’s come to Part D and fill in the box. You can present more words and phrases related to the correct categories.Step3: 当堂检测Match the words related to transport in Column I with their definitions in Column II.I II1) lane ______ a a boat or ship for taking passengers and oftenvehicles across an area of water, especially as a regular service2) coach ______ b a public road, especially an important road that joinscities or towns together.3) ferry ______ c a vehicle designed for air travel, which has wings andone or more engines4) underground ______ d a road or path that goes under something such as abusy road, allowing vehicles or people to gofrom one side to the other5) flyover ______ e a bridge that carries a road or railway over anotherroad.6) railway ______ f a place where things, especially roads or railways,come together7) highway ______ g a narrow road in the countryside or in a town.8) underpass ______ h a long motor vehicle with comfortable seats, used totake groups of people on journeys9) junction ______ i the metal tracks on which trains run.10) aeroplane ______ j a railway system in which electric trains travel alongpassages below ground.Step4: homeworkComplete the sentences with proper words or phrases in the box below. Changes the form1) Americans usually say “____________”, but British people say “motorways”.2) It is so exciting to drive a ____________ on the lake.3) He is a kind ____________ and he always gives his passengers help in time.4) Many people are eager to go to the concert, so you’d better ____________.5) Annie is going to Shanghai to visit her uncle and she’ll stay there for three weeks.So she just bought a ____________.6) Many years ago, when people were traveling on the underground, they could neverimagine there would be ____________.7) It’s a ____________. You need to pay some money to pass.8) Many refugees(难民) have arrived at the border without ____________.9) If you want to be back tomorrow, I think you need to buy a ____________.10) Since you don’t know when the next train arrives, why not ____________?。
- 1、下载文档前请自行甄别文档内容的完整性,平台不提供额外的编辑、内容补充、找答案等附加服务。
- 2、"仅部分预览"的文档,不可在线预览部分如存在完整性等问题,可反馈申请退款(可完整预览的文档不适用该条件!)。
- 3、如文档侵犯您的权益,请联系客服反馈,我们会尽快为您处理(人工客服工作时间:9:00-18:30)。
classic
fantastic energetic
Try to guess the meaning: Electronic angelic magnetic
Noun + al
center commerce function nation office race culture origin
central commercial functional national official racial cultural original
Word power
Look at a dialogue.
A: Do all ads play tricks on people? B: No. PSAs use some of the same methods as commercial ads, like attractive pictures and exciting language, but they are not meant to trick us.
stem
the main part of a word
suffix
a group of letters placed at the end of a word
Here are some of the different ways to form adjectives from nouns or verbs.
hope
beauty peace Pain hand spoon
hopeful
beautiful peaceful Painful handful spoonful
Noun + ish
fool
adjective
foolish
child
childish
Try to guess the meaning: Piggish bookish boylish
Mr. Carter: That’s quite encouraging. I consumers really like think it is because __________ our unique design. I would like you to do market research about some further _______________ young people’s views on the product. The ___________________________ sales & marketing department should also finish the report on the next month’s sales targets by Monday. ___________
市场份额
销售目标
market leader 市场主导者 high quality 高质量 sales figures 销售量
Pair work
Complete the dialogue between Mr.
Carter and Ms. Jones in the textbook.
Mr. Carter: Our new product has been on the market for one month. What is its market share now? _____________ Ms. Jones: We have about a 15 per cent share of the market at the moment. The sales figures rose by 5 per cent across the ____________ whole country, and are continuing to rise.
How to form adjectives from nouns or verbs?
commerce n. attract v. excite v.
Using suffixes
commercial attractive exciting
word
prefix
a group of letters added to the beginning of a word
productive
Try to guess the meaning: impressive persuasive representative
Noun
Verb
+y health suffixes +ly week (后缀) +ic hero +al origin +ous danger +ful help +ed gift +ish child +ed amaze +ing excite +ive attract
adjective
Try to guess the meaning: Global regional exceptional
Noun + ous
danger poison fame
dangerous poisonous famous
adjective
adventure
zeal
adventurous
zealous
Try to guess the meaning: Disastrous glorious
Noun + ful
help
success
adjective
helpful
successful
Try to guess the meaning: Fruitful Shameful Forgetful doubtful
bore
disappoint
boring/bored
disappointing/disappointed
please
pleasing/pleased
n+ ed
kind-hearted
adjective
aged
Gifted talented skilled beard
Verb + ed/ing
falling fallen
Ms. Jones: We’re doing it right now. I’ll present it to you in one or two days.
Mr. Carter: That’s great. If we want to be the market leader, we need to make a good plan.
weekly
monthly daily
year
friend love
yearly
friendly lovely
Try to guess the meaning: heavenly homely quarterly
Noun + ic
hero
adjective
heroic
class
fantasy energy
adjective
developing developed
growing retired
rising
married
Verb + ive
attract
adjective
attractive
act
talk
active
talkative
compete
create
competitive
creative
produce
Noun + y
health
wealth dirt
adjective
healthy
wealthy dirty
luck
hand
lucky
handy
Try to guess the meaning: Sleepy rosy hairy trusty
Noun + ly
week
month day
adjective
healthy weekly heroic original dangerous helpful gifted childish amazed exciting attractive
Answers to Best Clothing Shop
• 1. lovely 2. attractive 3. boring 4. energetic • 5. friendly 6. enjoyable 7. wealthy • 8. lucky 9. fantastic
Sales and Marketing
Learn some new words.
sales and marketing (产品)销售和市场营销
sales/marketing department
consumers sales targets 消费者
销售/营销部门
market share
Verb + ed/ing
amaze interest surprise
adjective
amazing/amazed interesting/interested surprising/surprised
exciteLeabharlann encourageexciting/excited
encouraging/encouraged