自己动手DIY美式书架
教你制作简易书架

这个简易时尚书架,设计风格有点后现代未来派,有点曲线造型。
又好象是从墙里衍生出来的第一件亲手制作的家具就是我的书架。
它大得足够放下我所有的书籍,而且美观时尚。
设计风格有点后现代未来派,如照片中显示的曲线型。
看起来,象是墙的一部分,又好象是从墙里衍生出来的。
制作过程相对来说是比较简单的,不需要太多工作,但是对精确度还是有要求的哦。
书架的大小可以自己定,我的书架大约宽2米,高2。
7米。
8层架子隔成16个空间。
当然啦,宽度可以根据自己的喜欢来调整,形状也是,不一定是未来派的曲线型,尽情发挥自己的想象啦。
材料:- 木头- 3块2700*120*18的板- 至少2到3块2700*1400*18硬纸板(个人建议三合板比较好)- 3个配有螺旋的超长的螺丝钉- 涂料和清漆工具:- 竖锔- 钻孔机这样的设计比传统书架比较稳固,牢牢地固定在墙上,不容易被移动。
虽然只有三个螺旋钉,但是能支撑整个书架,而且对墙面的美观毫无影响。
第一步:垂直面板架制作首先,切割好木板的形状,垂直和水平线条。
3块垂直的木板一定要大小一致。
架子就可以随意安置了。
或大或小,大的可以放上两本厚厚的古典名著和相册。
这些只需要在长度和宽度上做些改变就好了。
窍门就在于切割出漂亮的弧线。
水平面木板基本也是直的,只是在离末端40厘米的地方切割成弯曲形状。
第二步:切割划刻整个过程里最复杂的一步就是精确地锯出横架和竖架契合的凹口。
每块横板切出三个凹口,入图所示,中心一个口,离两端20厘米处两个口。
竖板上的凹口割据自己的需要来切,因为它直接决定着格子空间大小。
根据你的书籍大小来调整切口的位置。
可以参考下我的数据:放相册的那一层,两个凹口之间的距离依次是33厘米,30厘米,26厘米。
精确测量好,做好标记,然后再切口。
如果测量不够精确,书架就不够平衡。
所有的切口要有18毫米宽,这样木板才能插进去。
至于切口也就是凹口的深度,就是窍门的所在啦。
竖板是曲线型的,所以不能把所有的凹口都切成同样的深度。
如何用硬纸板做出书架

如何用硬纸板做出书架如何用硬纸板做书架书架是我们家中必不可少的一件家具,它可以摆放我们喜欢的书籍、装饰品,让居室更加整洁和有序。
但是有时候我们可能会发现市面上的书架款式不够符合我们的品味,想要自己动手做一个独特的书架。
今天我将教大家如何用硬纸板来制作一个简单又实用的书架。
材料准备:1. 硬纸板:硬纸板是我们制作书架的主要材料,要选择质量好的硬纸板,这样书架才会更加坚固和耐用。
2. 剪刀和刀具:用来切割硬纸板的工具,剪刀和刀具要锋利,这样可以更加方便快捷地完成作业。
3. 胶水:用来粘合硬纸板的材料,要选择耐用、环保的胶水,这样书架才会更加稳固。
4. 尺子:用来测量硬纸板的长度和宽度,确保书架的尺寸符合我们的需求。
5. 铅笔:用来在硬纸板上标记出需要切割的位置,让操作更加准确。
步骤一:测量硬纸板首先我们需要根据自己想要的书架的尺寸来测量硬纸板的长度和宽度。
可以用尺子和铅笔在硬纸板上标记出需要切割的位置,然后使用剪刀或刀具将硬纸板按照标记切割成所需的大小。
步骤二:制作书架的主体将切割好的硬纸板按照自己设计的样式进行拼接,可以根据书架的需求来决定书架的高度和层数。
可以在硬纸板上划分出不同的隔板,然后用胶水将隔板和书架的主体粘合在一起。
步骤三:加固书架为了让书架更加稳固,可以在书架的每个连接处添加一些硬纸板片,用胶水将其固定在书架上,这样可以增加书架的稳定性,更加耐用。
步骤四:装饰书架可以在书架的表面上添加一些装饰品,比如贴上一些壁纸、贴纸,或者用彩绘工具在书架上绘制一些花纹,让书架更加个性化。
步骤五:放置书籍和装饰品最后将书架放在自己喜欢的位置上,摆放我们喜欢的书籍和装饰品,让书架成为家中的一道亮丽风景线。
总结:通过以上的步骤,我们可以用硬纸板很容易地制作出一个简单实用的书架。
硬纸板虽然不像木材那样坚固,但只要我们制作得当,选择好质量的硬纸板,书架也可以使用很长一段时间。
用自己的双手创造出一个独一无二的书架,不仅可以提升自己的动手能力,还可以充实家中的装修,让居室更加有情调。
创意家具:极具艺术感的书架

创意家具:极具艺术感的书架
分享一个创意家具:极具艺术感的书架,横放、竖放都可以,可以自由组合成你喜欢的样式,放在家中会给你的家带来美妙的艺术感。
如果你也喜欢这个书架,可以自己尝试DIY一个哈。
#创意家居##书架#。
爱乐活居家热门标签创意家居。
极具艺术感的书架,横放、竖放都可以,可以自由组合成你喜欢的样式
极具艺术感的书架,横放、竖放都可以,可以自由组合成你喜欢的样式
极具艺术感的书架,横放、竖放都可以,可以自由组合成你喜欢的样式
极具艺术感的书架,横放、竖放都可以,可以自由组合成你喜欢的样式
爱乐活——有态度、正能量的品质生活社区。
热爱生活,乐于分享的各类达人聚在这里,分享消费攻略,激发生活灵感,发现城市最IN 的角落。
在这里,有爱,有乐,有生活。
【更多精彩内容尽在爱乐活】
文章来源:/post/24af6410ff438617d793f581?from=wenku/?from=wenku。
自制简易书架环创方案

自制简易书架环创方案自制简易书架是一个很好的环创方案,不仅可以充分利用废弃材料,还可以提供一个实用的储物空间,使家居更加整洁和温馨。
以下是一个简易书架的环创方案。
材料准备:1. 木板:选择一块长度和宽度适中的废弃木板,可以根据需要调整尺寸。
2. 支架:可以选择用木条、旧家具腿或者金属支架作为书架的支撑。
步骤:1. 清理和准备材料:清洁木板并修整边角,确保其平整。
2. 测量确认尺寸:根据需要和空间大小,将木板锯成所需的长度和宽度。
确保测量准确。
3. 涂装木板:选择一种你喜欢的颜色和涂料,为木板进行上色。
可以选择油漆、涂料或者木器保养剂等。
确保涂料均匀,让木板充分吸收涂料,并晾干。
4. 安装支架:根据自己的喜好和设计需求选择支架。
将支架固定在墙上或者地面上,确保支架牢固。
5. 安装木板:将涂好漆的木板搁放在支架上,调整位置,确保搁板平整。
可以选择固定木板在支架上,以免滑动造成危险。
6. 完善细节:根据需要,可以在书架上添加一些装饰品,例如花盆、照片框架等,使书架更加个性化和美观。
7. 定期清理:保持书架的整洁和干净,定期清理灰尘和杂物。
这个简易书架环创方案既简单又实用。
在一个充满创意和环保的家居环境中,自制简易书架不仅可以提供一个实用的储物空间,还可以将废弃材料重新利用,减少废物的产生。
这也是一个可以与家人共同参与的DIY项目,增进亲子关系。
同时,这个简易书架可以根据个人喜好和需求进行设计和改造,实现个性化的书架布置。
总之,这个简易书架环创方案不仅是一个环保的选择,还是一个经济实惠和创意十足的家居装饰方案。
无论是自己亲手制作还是装饰,它都会为你的家带来一份独特和温暖的氛围。
我的小创意作文自制书架

我的小创意作文自制书架
哎呀,看着满屋子的书,我突然就想,给它们整个家吧!家里
不是有几块旧木板吗?说不定能派上用场。
说干就干,我找来锯子开始“咔嚓咔嚓”地锯木板。
虽然锯得
不太直,但大致形状还是有了,哈哈,我就是个手工达人!
拼接的时候可把我愁坏了,这些木板好像都不太愿意“合作”。
不过没关系,我可是有耐心的。
磨磨唧唧地调整了好久,终于让它
们乖乖地待在一起了。
光有木板还不够,我灵机一动,找来家里剩下的布料,给书架
做了个“小裙子”。
别说,这么一打扮,书架立马变得可爱多了!
最后,我把这个“小宝贝”放在窗边,阳光一照,哇,简直美
呆了!看着这些书在书架上整齐地排列着,我心里那个得意啊,感
觉自己就像个艺术家一样!。
用纸箱变书架的方法
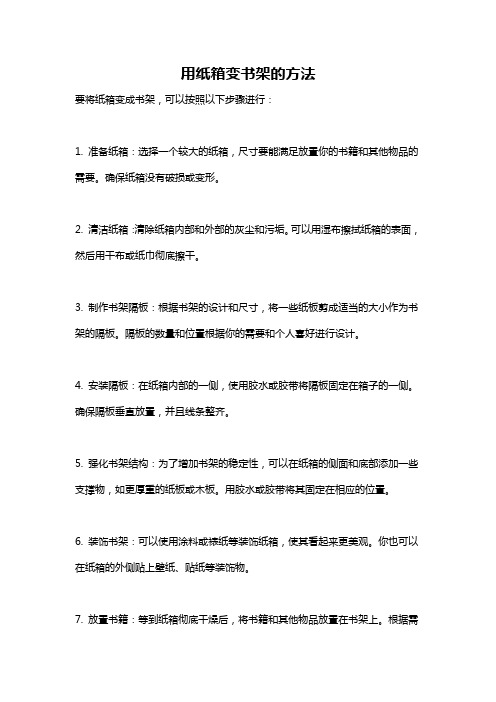
用纸箱变书架的方法
要将纸箱变成书架,可以按照以下步骤进行:
1. 准备纸箱:选择一个较大的纸箱,尺寸要能满足放置你的书籍和其他物品的需要。
确保纸箱没有破损或变形。
2. 清洁纸箱:清除纸箱内部和外部的灰尘和污垢。
可以用湿布擦拭纸箱的表面,然后用干布或纸巾彻底擦干。
3. 制作书架隔板:根据书架的设计和尺寸,将一些纸板剪成适当的大小作为书架的隔板。
隔板的数量和位置根据你的需要和个人喜好进行设计。
4. 安装隔板:在纸箱内部的一侧,使用胶水或胶带将隔板固定在箱子的一侧。
确保隔板垂直放置,并且线条整齐。
5. 强化书架结构:为了增加书架的稳定性,可以在纸箱的侧面和底部添加一些支撑物,如更厚重的纸板或木板。
用胶水或胶带将其固定在相应的位置。
6. 装饰书架:可以使用涂料或裱纸等装饰纸箱,使其看起来更美观。
你也可以在纸箱的外侧贴上壁纸、贴纸等装饰物。
7. 放置书籍:等到纸箱彻底干燥后,将书籍和其他物品放置在书架上。
根据需
要,可以按照自己的喜好来排列整理书籍。
8. 定位书架:将书架放置在你想要的位置上,确保它稳固并能够方便使用。
请注意,这是一个简单的DIY方法,可根据个人需要和创意进行调整和改进。
确保材料和工具使用安全,并遵循相关的安全操作规范。
DIY书架,让娃的绘本有处安放

DIY书架,让娃的绘本有处安放上周手工DIY一个儿童绘本书架,架子上可以放书也可以放乐高积木。
硬纸片外面贴了小熊贴纸,还有豌豆豆喜欢的小车贴纸。
虽然制作过程老费劲,但是做好了还是满满的成就感。
所用的工具材料,花了79元。
这个价格完全可以买一个小型塑料四层绘本书架,稍微一安装还比较方便。
那我这么费劲画图纸,裁纸等一系列工作到底是图啥呢?有的时候,现成的东西没有手工制作的那种感觉。
一家三口参与一个书架,忙前忙后收获的不仅仅是一个书架,而是在一起将零散的碎片拼接成一个完整成型物件的那种成就感。
这种成就感,用一个现实的且不太恰当的例子进行阐述:别人给你一块钱的价值和你努力捡破烂换取的一块钱的价值永远是不一样的。
以下我就分享一下DIY书架用到的工具,还有制作细节,以供参考。
准备工具溶胶枪、溶胶棒、玻璃胶、一把剪刀或美术刀、废的硬纸片溶胶枪,也是我们常说的热熔胶枪,经常做DIY的小伙伴应该对这个工具不陌生。
我买的是得力的热熔胶枪,单独购入的溶胶棒。
(一般购入热熔胶枪,都会送溶胶棒,因为他们是黄金搭档)关于热熔胶枪,这里要写一下它的具体瓦数,分别有20W,40W,60W,80W,100W。
瓦数的高低决定溶胶的快慢,所以选择溶胶的时候一定要结合自己的实际使用情况,不能选择太慢的,也不能选择太快的。
我是粘贴硬纸片,选择的是40W的,足够用了。
如果你想粘贴石头或者其他的,可以选择高一点的瓦数。
使用的注意事项如下:1、使用过程中,不能触碰枪嘴,胶液容易烫伤皮肤。
2、家有孩子的话,千万要放到远离熊孩子的地方3、不要在潮湿的环境使用胶枪。
4、通电停止使用时,一定要切断电源,以防止溢胶。
制作过程先想好书架的样子,用笔在草稿纸上简单画个草图,先定个轮廓,然后再在轮廓上添加你想要的样子。
如果家里有装尿不湿的快递大箱子,稍微剪一下就可以做一个三面成形的轮廓。
为了固定底部的重量,可以底部可以用比较硬的纸片箱打底,底座一定要重,不然放下绘本容易倾倒。
如何用硬纸板做出书架子

如何用硬纸板做出书架子如何用硬纸板制作书架书架是我们生活中很常见的一种家具,它可以摆放书籍、装饰品,让房间更加整洁和美观。
但是有时候我们可能会觉得购买一套书架太贵,或者找不到合适的书架款式,这个时候DIY 一个书架就成了一个很好的选择。
今天,我就来教大家如何用硬纸板制作一个简单实用的书架。
准备工具和材料首先我们需要准备一些工具和材料:1.硬纸板:硬纸板可以在书店或者办公用品店购买,选择硬度适中的硬纸板,这样书架才能有足够的支撑力。
2.剪刀/美工刀:用来裁剪硬纸板。
3.胶水:选择适合硬纸板的胶水,粘合力强。
4.尺子:测量大小,保证书架的稳固。
5.铅笔:用来标记尺寸,方便裁剪。
6.彩色纸/贴纸:可以用来点缀书架,让它更加美观。
步骤一:测量和裁剪硬纸板首先,我们需要确定书架的大小和形状。
根据自己的需求可以决定书架的高度、宽度和深度。
在硬纸板上用铅笔画出书架的结构图,包括侧板、横板和隔板等。
然后使用剪刀或者美工刀沿着画好的线条将硬纸板裁剪成相应的形状。
步骤二:拼接书架的基本结构将裁剪好的硬纸板侧板和横板按照设计的结构图拼接起来,用胶水将它们粘合在一起,保证书架的稳固性。
可以利用书架的侧板和横板的结合部位,增加书架的稳定性,或者在内部加入一些隔板,增加书架的层次感。
步骤三:装饰书架书架的基本结构已经完成,接下来可以根据个人喜好选择一些彩色的纸张或者贴纸来点缀书架,让它看起来更加美观和个性化。
可以利用贴纸在书架的侧板上画上一些图案,或者在书架的背板上贴上一些漂亮的纸张,增加书架的装饰性。
步骤四:放置书架书架制作完成后,我们可以将它摆放在书房、客厅或者卧室等位置,然后将书籍、装饰品等物件放置在书架上,让书架发挥它的作用,既整洁又美观地展示我们的物品。
总结通过以上四个步骤,我们就可以用简单的硬纸板制作一个实用的书架。
DIY书架不仅可以满足我们对自己的创造力的展示,还可以让家里更添一份温馨和美感。
希望这篇文章能够对大家有所帮助,快来动手制作一个属于自己的书架吧!。
- 1、下载文档前请自行甄别文档内容的完整性,平台不提供额外的编辑、内容补充、找答案等附加服务。
- 2、"仅部分预览"的文档,不可在线预览部分如存在完整性等问题,可反馈申请退款(可完整预览的文档不适用该条件!)。
- 3、如文档侵犯您的权益,请联系客服反馈,我们会尽快为您处理(人工客服工作时间:9:00-18:30)。
22n p r o j e c t o n eM y mom has a bookcase in every room of my parent’s house. Most of them are stuffed two-rows deep with pa-perbacks, hardbacks, picture books and travel books and still, whenever I visit, I find even more novels and novellas piled on top of end tables, underneath coffee tables, by the sides of chairs and on the backs of toilets. but I’m like her — I love collecting books.tired of moving my own piles of books every time I needed a place to set a drink down, I decided to build a bookcase of my own. this project serves as a nice chal-lenge for the beginning woodworker and as a great week-end project for those more skilled. Its arts & crafts style is emphasized by mortise-and-tenon joinery, wedges and stickley-style (sans ammonia) finish. While the ends re-main forever assembled, a few good whacks to the wedges and the whole project comes apart, stacks together and can be transported easily in the trunk of a car. GettinG StartedIn keeping with the arts & crafts tradition, I bought rough quartersawn white oak for this project, which I jointed and planed. Don’t have a jointer or planer? no problem. Head out to your local home center and purchase some dimension-al lumber, in a species to suit your taste. the shelves can be cut from 1×8s, as can the rails and stiles, with some waste.When purchasing your lumber, be picky. choose knot-free heartwood (you don’t want pieces with a lot of sap) that has lots of figure. Determine which pieces are the most attractive and mark those for the most visible parts of the project. now cut all your pieces to size according to the cutting list.teSt MortiSethe first step to building this bookcase is tackling the joinery and assembling the sides. It’s important that the project’s tenons fit snugly into the mortises, which means first making a test mortise. this will allow you to check the size of your tenons throughout the tenon-cutting pro-cess, ensuring accuracy. there are twenty-four mortises in this project. Do yourself a favor and, if you don’t already have one, buy a hollow chisel mortising machine (about $250). a mortising attachment for your drill press or a 3⁄8" forstner bit are also acceptable options.to make your test mortise, first select a piece of scrap from this project. some sappy waste will do just fine. as a rule of thumb, mortises should be half the thickness of your tenon’s stock. because this project’s tenon stock is 3⁄4" thick, the mortises need to be 3⁄8" thick. It’s also a good idea to make your mortises about 1⁄16" deeper than the tenons are long. this will keep the tenons from bottom-ing out in the mortises. the depth isn’t as important as the width in a test mortise, so simply make your test mortise as deep as the longest tenon is long. because the rails have 3⁄4"-long tenons and the stiles have 1"-long tenons, the test mortise for this project needs to be 11⁄16" deep.If you’ve never used a hollow chisel mortiser before, check out A New Manual for Mortisers (august 2001 issue#123, available for sale at ). cut your test mortise.table-Saw tenonSnow it’s time to cut the twenty-four tenons. sure this sounds like a lot, but with a dado stack and a miter gauge,p r o j e c t o n ea r t s&c r a f t sb o o kc a s e n2324 n p r o j e c t o neUse a test mortise to check the fit of your tenons throughout the tenon-cutting process. This ensures accuracy.A few quick passes is all it takes to cut both sides of the rails’ tenons (above left), using a dado stack and a miter gauge. The same table saw setup will take care of the edges of the tenons (above right).a r t s&c r a f t s b o o k c a s e n25Use the edges of the rails’ tenons like rulers to mark the beginningand end of each mortise in the stiles.Slide an extra rail (which is 3⁄4" thick) into the space between the toptwo rails to ensure a perfect slot for the top shelf.you’ll breeze through this step in no time.first, install a 5⁄8" dado stack in your table saw. set the fence for the finished length of your tenon and set the height of the dado stack to about 3⁄16", which is the depth of your shoulders on your tenon. I cut the rails’ tenons first, so the finished length was 3⁄4". Hold the piece about 1⁄16" from the fence and push it through the blade, using your miter gauge. now hold the piece directly against the fence and, using your miter gauge, push it through the blade again. repeat this same procedure for the edges of the tenon.after you’ve cut your first tenon, make sure that it fits snugly into your test mortise. If satisfied, keep cutting. remember to set the fence for 1" once you’re ready to cut the tenons on the end of the stiles.back to the MortiSerto cut the mortises, first use the diagrams to measure where the rails start and stop along the stiles. now use your rails to lay out the locations of your mortises, asshown above. cut each mortise a little over each measured line so that you’re able to maneuver the rails for perfect positioning during glue up. cut all the stiles’ mortises. You’ll cut the mortises in the feet after the sides of the bookcase are assembled.before assembling the sides, use your table saw, plane or chisel to cut a 3⁄16" × 3⁄16" chamfer on the stiles’ top four edges, which is a traditional arts & crafts look.aSSeMblinG the SideSnow that the rails and stiles are complete, it’s time to as-semble the sides. first, dry fit everything together. choose the face sides of your pieces carefully. remember: Your most visible pieces should be your most attractive. clamp the assembly together.check for gaps, squareness, mistakes or anything else that might cause panic during glue up. Use the extra space you cut (when you mortised slightly over the measured lines) to maneuver the rails until they’re in their appropri-ate places. If it’s tight, try hitting them with a mallet. once you’re positive that everything is perfectly positioned, use a ruler to draw lines across the joints. these lines will beUse the diagrams to measure where the stiles start and stop on the feet. Like the rails, use the edge of the stiles’ tenons like rulers to mark the beginning and end of each mortise.Sturdy Shel veSWith the sides assembled, it’s time to cut the shelves. first you need to cutnotches in the shelves’ cor-ners. the top and bottom shelves’ notches are 21⁄4" long by 3⁄4" wide, allowing enough overhang for the wedges. the notches in the two middles shelves are 3⁄4" long by 3⁄4" wide.once you’ve measured and drawn where the notches start and stop, head to the table saw tocut the notches on the top and bottom shelves. because the table saw’s blade is curved and because you won’t be running the entire length of the board through the blade, you must be a little creative in your cutting. first, correctly position your fence and raise your blade to its appropri-ate height. then, with a grease pencil, draw a line on the fence where the blade enters the table. now, draw a line on your work where the cut should stop. run the piece through until the two lines meet, stop and pull the piece back. carry the line on the piece over to the other side, flip the shelf over and again run it through until the two lines meet, as shown in the photograph on page 28. Head to your band saw and cut the remaining part of the top and bottom shelves’ notches away. now cut theyour guides during glue up. now take everything apart, put glue in the mortises, clamp and let dry.band Sawn Feetonce the glue has cured, it’s time to cut the feet. each foot has two mortises and a detail cut using the band saw. Use the diagram to lay out the shape of the feet on each piece. Lay out and cut your mortises, again going a little over each line for maneuverability during assembly. now head to the band saw. cut the feet to shape as close to your lines as possible. the closer you get, the less cleanup you’ll have to do. remove the saw marks with a chisel. Dry fit the sides and feet, draw your guide lines, take the sides and feet apart and then glue them together.341/2"1Profile PlanSectionDetail of top and bottom shelf2 1/41 1/81/2"3/4"Detail of footDetail of wedgea r t s&c r a f t s b o o k c a s e n27I L L U S T r A T I o n S b y J o h n h U T c h I n S o n .When cutting the shelves’notches, draw a line on yourtable saw’s fence to determinewhen to stop cutting. becauseof the table saw’s curved blade,more material will be cut awayon the underside of the piecethan on the top.notches on the middle shelves, using onlythe band saw.the whole bookcase is held tightlytogether by tapered wedges that snug intothrough-mortises in the top and bottomshelves. cut the mortises in the top andbottom shelves, as shown at left.tapered wedGeSIf you haven’t done so already, plane thestock for your wedges down to 1⁄2" thick.Measure and make a mark 3⁄8" from the topof each wedge, and another mark 3⁄8" widefrom the bottom of each wedge. Draw aline, connecting your marks. cut the taper,using either your band saw or a sander.clean up the wedges with your chisel. testfit the wedges, as shown at far right.FiniShinG toucheSafter all of your hard work, the last thingyou want to do is slack off when it comesto sanding. first, clean up all your edgeswith a sanding block and a chisel. next,sand everything, starting with 100 grit andthen moving on to 150. Hold each pieceup to the light, making sure you have allthe scratch marks removed. break the edges.because this is an arts & crafts piece, I decided on a stickley-style finish, without ammonia’s danger. first apply j.e. Moser’s 1"-long tenons on stiles3/4"-long tenons on rails28n p r o j e c t o n ea r t s&c r a f t s b o o k c a s e n29Most of the tapered part of the wedges should slide through each mortise. As the wedge gets wider, you will need a mallet and a block of wood to finish pounding them down to auniform height.golden amber Maple water-based aniline dye. Let it dry overnight. next, apply Mo-hawk Van Dyke brown glaze. Let it, too, dry overnight. finally, apply your favorite topcoat. check out the supplies box on page 27 for ordering information.。