YT07语音模块说明书
RC07使用操作手册
长鑫盛通CC 呼叫系统RC07操作手册深圳市长鑫盛通科技有限公司地址:深圳市宝安41区甲岸路华丰大厦1601联系电话:400-0088-005修订历史记录目录目录 (2)(一)产品信息 (4)(二)概述 (6)2.1 用户介绍 (6)2.2 用户登陆 (6)2.3 用户界面 (7)(三)功能模块介绍 (7)一话务管理 (7)1.通话记录 (8)2 转移设置 (8)3 座席管理 (9)4 队列管理 (10)5 IVR按键记录 (10)二客户管理 (10)1 黑名单 (11)2 标记客户 (11)3 跟进记录 (12)4 预约登记 (12)6 资料转移 (14)7 资料管理 (15)三外呼管理 (15)1 自动外呼 (15)2 点击外呼 (17)3 语音外呼 (18)4 任务列表 (22)5 智能中继 (23)四系统状态 (23)1 活动通道 (23)2 状态管理 (24)五报表管理 (25)1 服务质检 (25)2 未接来电 (25)3示忙示闲记录 (25)4任务明细报表 (26)5座席话务报表 (26)六信息管理 (26)1 知识库 (26)2 公告列表 (28)七组织结构 (28)1角色管理 (28)2用户管理 (29)3部门管理 (30)4单位设置 (31)5 Logo修改 (31)八数据配置 (32)1重启服务 (32)2标签配置 (32)4重置授权 (34)5密码修改 (34)6防火墙设置 (34)7客户字段配置 (35)8弹屏方式设定 (35)(四)工具栏(顶部) (36)1通话记录 (36)2分机示忙 (36)3 通话保持 (36)4 通话转移 (37)5服务质检 (37)6座席界面 (37)7 注销 (38)(一)产品信息CC呼叫中心系统是我公司自主研发的新一代企业级呼叫中心系统。
该系统采用了最新的IP内核一体化设计,无须外挂任何其他设备、就能实现大容量的电话呼入/呼出处理、电话转接等传统 PBX 的所有功能,同时还提供了传统 PBX 所不具备的 VoIP 网关、来电智能分配、CRM 客户关系管理、电话录音、电话会议、语音信箱、通话报表等高端系统功能。
七驱动器混合入耳式耳机 IT07 使用说明书

Thank you for selecting the IT07 Audiophile in-ear monitors. Plesae take a few minutes to read these instructions carefully before using the product.谢谢您选择 IT07 入耳式耳机。
请您在使用本产品前花几分钟时间仔细阅读本说明书。
SAFETY INSTRUCTIONSWhen you connect the in-ear monitors, please make sure that the volume level is set to minimum. Adjust the volume level only after inserting the eartips. To avoid possible hearing damage, do not use your in-ear monitors for extended periods of time at high volume.The ability to hear your own voice while listening and speaking normally with in-ear monitors can serve as a measure of correct volume adjustment.We would like to point out that excessively high volumes and long listening times may cause hearing damage. Hearing defects can constitute an irreversible impairment of hearing ability.1安全须知当您连接耳机时,请确保音量设置为最小。
音频特技模块使用说明

大洋音频特效制作模块用户使用手册(V 1.0)北京中科大洋科技发展股份有限公司版权所有2005-7一.简介大洋音频特效制作模块是D3-Edit内置的一个功能模块,在所有D3-Edit产品中都可使用。
该模块能运行在任何声卡上,也支持大洋Redbrdige板卡进行输入输出;主要用来进行音频素材的精确剪辑、特效添加,也可进行声音的录制和混音。
大洋音频特效制作模块具有如下特色功能:¾兼容性好,支持MMX及ASIO驱动的声卡¾支持22/44.1/48kHz采样,最高24bit量化的数字音频文件¾支持WA V、MP3、WMA等多种音频文件格式,并支持各种内嵌音频的编辑¾基于音频波形的调节,横向和纵向均可无级缩放¾剪辑可精确到采样点,支持对采样点值的调节¾时码显示可选择LTC、25P、30P、24P及采样点¾波形显示可选择采样值、规格化值、百分数及分贝值¾支持音频文件的剪切、拷贝、粘贴等操作¾支持混音粘贴操作¾支持反相、倒放、静音操作¾支持直接录音操作¾无限REDO/UNDO¾内置几十种音频特效,包括EQ、混响、延迟、声像调节、调制、压缩、扩展、门限、声像摇移等¾支持采样降噪处理¾提供变速不变调、变调不变速功能¾支持第三方特效插件,包括DX、VST等¾精确的相位表、VU表、频谱表,为声音调节提供参考¾VU表有平均值和峰值两种显示类型¾提供音频发生器,可发生标准千周测试信号用以设备校准¾可同步显示视频画面,方便声画对位编辑注3-Edit用户使用手册》,并已经掌握软件操作方式;相同或类似的操作本文不做详细说明,请参看《D3-Edit用户使用手册》的相关章节。
注2:以下章节涉及到的所有操作都不附快捷键说明,快捷键详情参看软件中的相应工具按钮。
唯创 MP3录音模块WTN1XXX系列语音芯片说明书
广州唯创电子有限公司MP3录音模块WTN1XXX系列语音芯片说明书Note:WAYTRONIC ELECTRONIC CO.,LTD.reserves the right to change this document without prior rmation provided by WAYTRONIC is believed to be accurate and reliable.However,WAYTRONIC makes no warranty for any errors which may appear in this document.Contact WAYTRONIC to obtain the latest version of device specifications before placing your orders.No responsibility is assumed by WAYTRONIC for any infringement of patent or other rights of third parties which may result from its use.In目录1.概述: (2)2.功能简述: (2)3.管脚描述: (2)4.极限参数: (3)5.播放速率: (3)6.单线脉冲触发: (3)7.按键控制方式: (5)8.程序范例 (6)9.应用电路 (8)10.封装管脚图 (9)我司说明书以业务员和公司官网的为准1.概述:WTN1系列为全新世代高性价比的语音芯片,具有9bits高性能PWM/DAC语音引擎。
并且具备有5~20秒(6K/4bits)多样化的型号选择,并内置有高精准度起振器,毋需外部起振组件,外接组件少,让应用开发整体成本具有市场领先的优势。
2.功能简述:(1)工作电压:2.0V~5.0V(2)具备串口控制模式:数脉冲,按键控制(3)语音引擎:9bits PWM./9bits DAC(部分型号无DAC功能)(4)可编辑阶数:3800(5)阶可编辑群组数:63组(最大)(6)开机执行群组:1(7)组可放声音长度:/10(WTN1010)/20(WTN1020)(8)内置RC震荡起振回路选型注意:1.芯片的控制方式和输出方式在烧写程序时已经设定好,不可以再次更改,订做芯片时需要和业务员说明应用要求。
新颖通道微音频预置器、EQ、压缩器、SILK操作手册说明书

Newton ChannelMic Preamp, EQ, Compressor, SILKOperations Manual1.Read these instructions.2.Keep these instructions.3.Heed all warnings.4.Follow all instructions.5.Do not use this apparatus near water.6.Clean only with a dry cloth.7.Do not block any ventilation openings. Install in accordance with themanufacturer’s instructions.8.Do not install near any heat sources such as radiators, heat registers,stoves, or other apparatus (including amplifiers) that produce heat.9.Do not defeat the safety purpose of the polarized or grounding-typeplug. A polarized plug has two blades with one wider than the other.A grounding-type plug has two blades and a third grounding prong.The wide blade or the third prong are provided for your safety. If theprovided plug does not fit into your outlet, consult an electrician forreplacement of the obsolete outlet.10. Protect the power cord from being walked on or pinched particularly atplugs, convenience receptacles, and the point where they exit from theapparatus.11. Only use attachments/accessories specified by the manufacturer.12. Use only with a cart, stand, tripod, bracket, orthe apparatus. When a cart is used, use cautionavoid injury from tip-over.13. when unused for long periods of time.14. Refer all servicing to qualified service personnel. Servicing is requiredwhen the apparatus has been damaged in any way, such as power-supply cord or plug is damaged, liquid has been spilled or objects have fallen into the apparatus, the apparatus has been exposed to rain ormoisture, does not operate normally, or has been dropped.15. This apparatus shall not be exposed to dripping or splashing, and noobject filled with liquids, such as vases or beer glasses, shall be placed on the apparatus.16. Do not overload wall outlets and extension cords as this can result in a risk of fire or electric shock.17. This apparatus has been designed with Class-I construction and must be connected to a mains socket outlet with a protective earthingconnection (the third grounding prong).18. This apparatus has been equipped with a rocker-style AC mains power switch. This switch is located on the rear panel and should remainreadily accessible to the user.19. The MAINS plug or an appliance coupler is used as the disconnect device, so the disconnect device shall remain readily operable.20. N OTE: This equipment has been tested and found to comply with the limits for a Class B digital device, pursuant to part 15 of the FCC Rules. These limits are designed to provide reasonable protection against harmful interference in a residential installation. This equipment generates, uses, and can radiate radio frequency energy and, if not installed and used in accordance with the instructions, may cause harmful interference to radio communications. However, there is no guarantee that interference will not occur in a particular installation. If this equipment does cause harmful interference to radio or television reception, which can be determined by turning the equipment o and on, the user is encouraged to try to correct the interference by one or more of the following measures:•Reorient or relocate the receiving antenna.•Increase the separation between the equipment and the receiver.•Connect the equipment into an outlet on a circuit different from that to which the receiver is connected.•Consult the dealer or an experienced radio/TV technician for help.CAUTION: Changes or modifications to this device not expressly approved by Rupert Neve Designs LLC, could void the user's authority to operate the equipment under FCC rules.21. This apparatus does not exceed the Class A/Class B (whichever is applicable) limits for radio noise emissions from digital apparatus as set out in the radio interference regulations of the Canadian Department of Communications.ATTENTION — Le présent appareil numérique n’émet pas de bruits radioélectriques dépassant las limites applicables aux appareils numériques de class A/de class B (selon le cas) prescrites dans le réglement sur le brouillage radioélectrique édicté par les ministere des communications du Canada.22. Exposure to extremely high noise levels may cause permanent hearing loss. Individuals vary considerably in susceptibility to noise-induced hearing loss, but nearly everyone will lose some hearing if exposed tosufficiently intense noise for a period of time. The U.S. Government’s Occupational Safety and Health Administration (OSHA) has specifiedthe permissible noise level exposures shown in the following chart.According to OSHA, any exposure in excess of these permissible limitscould result in some hearing loss. To ensure against potentially dangerous exposure to high sound pressure levels, it is recommended that all persons exposed to equipment capable of producing highsound pressure levels use hearing protectors while the equipment is in operation. Ear plugs or protectors in the ear canals or over the ears must be worn when operating the equipment in order to preventpermanent hearing loss if exposure is in excess of the limits set forth here:Important Safety InstructionsWARNING — To reduce the risk of fire or electric shock, do notexpose this apparatus to rain or moisture.Duration, per day in hoursSound Level dBA, SlowResponse Typical Example 890Duo in small club 692495Subway Train3972100 Typical music via head phones 1.51021105Siren at 10 m distance 0.5 1100.25 or less 115Loudest parts at a rock concertThe lightning flash with arrowhead symbol within an equilateral triangle is intended to alert the user to the presence of uninsulated "dangerous voltage" within the product's enclosure, that may be of sufficient magnitude to constitute a risk of electric shock to persons.Le symbole éclair avec point de flèche à l'intérieur d'un triangle équilatéral est utilisé pour alerter l'utilisateur de la présence à l'intérieur du coffret de "voltage dangereux" non isolé d'ampleur suffisante pour constituer un risque d'éléctrocution.The exclamation point within an equilateral triangle is intended to alert the user of the presence of important operating and maintenance (servicing) instructions in the literature accompanying the appliance.Le point d'exclamation à l'intérieur d'un triangle équilatéral est employé pour alerter les utilisateurs de la présence d'instructions importantes pour le fonctionnement et l'entretien (service) dans le livret d'instruction accompagnant l'appareil.This symbol indicates that this product must not be disposed of with other waste. Instead, it is your responsibility to dispose of your waste equipment by handing it over to a designated collection point for the recycling of waste electrical andelectronic equipment. The separate collection and recycling of your waste equipment at the time of disposal will help conserve natural resources and ensure that it is recycled in a manner that protects human health and the environment. For moreinformation about where you can drop off your waste equipment for recycling, please contact your local city recycling office or the dealer from whom you purchased the product.Table of ContentsIntroductionBlock Diagram Newton Front Panel Newton Rear PanelNewton FeaturesSpecifications Limited Warranty 1 1 2 3 4 7 11N e w t o n C h a n n e l B l o c k D i a g r a mRupert Neve Designs Newton ChannelThank you for purchasing the Rupert Neve Designs Newton Channel. We hope you enjoy using this product as much as we have enjoyed designing and building it. The Newton Channel features Class-A analog signal paths, a 3-band discrete EQ section, a VCA compressor and custom Rupert Neve Designs transformer coupled outputs with variable SILK. The Newton Channel is designed to provide users with an intuitive, high-quality channel strip that is useful in a wide variety of recording and mixing applications.1N e w t o n C h a n n e l F r o n t P a n e l2N e w t o n C h a n n e l R e a r P a n e l3e v BNewton Channel Front Panel FeaturesMic Gain12-position rotary switch that controls the microphone preamp gain in 6dB steps. For line level input signals, set the Mic Gain to the “0dB” position.48VPush-button switch that illuminates RED when +48V Phantom Power is engaged.Ø (Polarity)Push-button switch that illuminates AMBER when engaged and inverts the phase of the preamp signal. TRIM31-detent potentiometer that allows the user to adjust the preamp gain within a range of +/- 6dB.HPFPush-button switch that illuminates GREEN when the variable high pass filter is engaged.FREQ31-detent potentiometer that allows the user to adjust the cutoff frequency of the variable high pass filter within a range of 20 Hz to 250 Hz.EQ INPush-button switch that illuminates GREEN when the EQ section is engaged.LF31-detent potentiometer that controls the amount of boost or cut for the low frequency shelf within a range of +/- 12dB.60/150Push-button switch that selects between the two available low frequency shelf frequencies: 60Hz (OUT) and 150Hz (IN).MID FREQ31-detent potentiometer that controls the frequency of the midband peaking EQ within a range of 220Hz to7kHz.MID31-detent potentiometer that controls the amount of boost or cut for the MID FREQ peaking EQ within a range of +/-12dB.8K/16KPush-button switch that selects between the two available high frequency shelf frequencies: 8kHz (OUT) and 16kHz (IN).4Newton Channel Front Panel Features (continued)HF31-detent potentiometer that controls the amount of boost or cut for the high frequency shelf within a range of +/-12dB.COMP INPush-button switch that illuminates GREEN when the compressor section is engaged.THRESHOLD31-detent potentiometer that controls the compressor threshold range from +20dBu to -30dBu. When the input signal rises above the set threshold level, compression begins with a soft-knee at a 2:1 ratio.RELEASE31-detent potentiometer that controls the compressor release time. The overall timing range available is 50mS (FAST) to 500mS (SLOW).GAIN31-detent potentiometer that controls the compressor make-up gain within a range of -6dB to +20dB.PRE EQPush-button switch that routes the compressor section ahead of the EQ section when engaged.SILKIlluminated push-button switch that toggles through the three available SILK modes: OFF, RED, and BLUE. RED enhances harmonic content in high mid and high frequencies. BLUE enhances harmonic content in low and low mid frequencies.TEXTURE31-detent potentiometer that controls the amount of SILK harmonics added within the transformer output stage when SILK is engaged.GR and OUT Metering8-segment LED meters that indicate compressor gain reduction (dB) and output level (dBu).POWERLED that illuminates GREEN when the Newton Channel is powered ON.5Newton Channel Rear Panel FeaturesPOWERIEC AC power inlet with integrated power switch. 100-240VAC at 50/60Hz. 35 Watts maximum AC power con-sumption.GROUND LIFTSlide switch that lifts XLR Pin 1 from chassis ground on the MAIN OUT and the -6dB OUT to help isolate from ground interference.-6dB OUTBalanced XLR output utilizing the center tap of a custom Rupert Neve Designs transformer.MAIN OUTBalanced XLR output utilizing a custom Rupert Neve Designs transformer.LINK1/4” TRS jack that allows two Newton Channel compressors to be linked together for stereo compressor operation. ONL Y INTENDED FOR USE WITH OTHER NEWTON CHANNEL LINK JACKS.INPUTBalanced XLR-1/4” TRS combo jack input that can be used for MIC or LINE level signals.6SpecificationsNote: All measurements typical, all measurements recorded using 25ft. XLR output cablesInput Impedance 8900 ohmsInput to Line Output (No Features Engaged, Un-weighted)Maximum Input Level +23.6 dBuNoise (Un-weighted)Line Out (Unity Gain) -102 dBu -6dB Line Out (Unity Gain) -107 dBu Line Out (+30dB Gain) -95 dBu Equivalent Input Noise @ +30dB Gain (EIN) -125 dBuMaximum Output Level @ 1kHz +23.6 dBuFrequency Response<10Hz to 30 kHz +/- 0.1 dB <5Hz to 70 kHz +/- 0.25 dB <5Hz to 140 kHz -3 dB THD+N BW (<10Hz to 22 kHz) 0 dBu at 1 kHz 0.0013 % +20 dBu at 1 kHz 0.0007 %Input to Line Output (Equalizer Engaged)Noise (BW <10 Hz to 22 kHz) -90 dBu THD+N @ 0 dBu (EQ Flat) 0.003% Input to Line Output (Compressor Engaged)Noise @ 0dB Make-Up Gain (BW <10 Hz to 22 kHz) -91 dBu THD+N @ 0 dBu (EQ Flat) 0.005% Compressor SectionAttack Time (fixed) 20mS Release Time (variable) 50mS (fast) to 500mS (slow) Product Dimensions (W x D x H) 19” (48.3 cm) x 8.125” (20.63 cm) x 1.75” (4.5 cm) Shipping Dimensions (W x D x H) 24” (61 cm) x 13” (33 cm) x 4” (10.2 cm) ShippingWeight 9 lbs. (4.1 kg)78M i c P r e a m p F r e q u e n c y R e s p o n s e G r a p h Z S O U R C E =150 o h m s , -45d B u I n p u t S i g n a l M e a s u r e m e n t s w e e p s t a k e n a t +6d B , +24d B , +42d B , a n d 60d B G A I N9E QF r e q u e n c y R e s p o n s eG r a p h10C o m p r e s s o r R a t i o S w e ep Z S O U R C E =150 o h m s , M e a s u r e m e n t s w e e p s t a k e n a t +10, 0, -10, -20, a n d -30d B u T h r e s h o l dPRODUCT WARRANTYRupert Neve Designs warrants this product to be free from defects in materials and workmanship for a period of three (3) years from date of purchase, and agrees to remedy any defect identified within such three year period by, at our option, repairing or replacing the product.LIMITATIONS AND EXCLUSIONSThis warranty, and any other express or implied warranty, does not apply to any product which has been improperly installed, subjected to usage for which the product was not designed, misused or abused, damaged during shipping, damaged by any dry cell battery, or which has been altered or modified in any way. This warranty is extended to the original end user purchaser only. A purchase receipt or other satisfactory proof of date of original purchase is required before any warranty service will be performed. THIS EXPRESS, LIMITED WARRANTY IS IN LIEU OF ALL OTHER WARRANTIES, EXPRESS OR IMPLIED, TO THE EXTEND ALLOWED UNDER APPLICABLE STATE LAW. I N NO EVENT SHALL RUPERT NEVE DESI GNS BE LI ABLE FOR ANY SPECI AL, I NCI DENTAL, OR CONSEQUENTIAL DAMAGES RESULTING FROM THE USE OF THIS PRODUCT. Some states do not allow the exclusion or limitation of consequential damages or limitations on how long an implied warranty lasts, so this exclusion may not apply to you.WARRANTY SERVICEIf you suspect a defect in this product, please contact our support staff for troubleshooting by phone (512-847-3013)oremail(**********************).Ifitisdeterminedthatthedeviceismalfunctioning,wewillissuea Return Material Authorization and provide instructions for shipping the device to our service department.Rupert Neve DesignsPO Box 1969Wimberley TX 78676tel: +1 512-847-3013fax: +1 512-847-8869775-00043 Rev A11。
3种音质音频文件制作说明

1、语音模块(YT07、YS07)音质可分高、中、低3个等级。
音质决定存储时间,从高到低依次为3分钟、6分钟、24分钟。
下面介绍获取相应音频文件。
2、WA V格式文件、音质参数(PCM Signed16bit,mono)为语音模块可识别的高音质音频信息。
获取方法如下
2.1打开GoldWave软件,打开一个任意格式的音频文件,如图:MP3格式文件
2.2在软件菜单项【效果】选择重新采样
2.3重新采样参数选择22050
2.4确定重新采样后,软件提示需要另存文件
2.5点击确定,选择【文件】菜单,另存为
2.6选择另存为wav文件格式,音质选择PCM Signed16bit,mono
2.7将处理完成的文件,复制到录音软件ADUIO目录下,即可识别。
3、WA V格式文件、音质参数(PCM Signed16bit,mono)为语音模块可识别的中音质音频信息。
获取过程和高音质一样,只是重新采样参数为11025,如下图
4、WA V格式文件、音质参数(IMA ADPCM11.025kHz,4位,单声道)为语音模块可识别的低音质音频信息。
获取方式如下
4.1打开GoldWave软件,打开一个任意格式的音频文件,如图:MP3格式文件
4.2在【文件】菜单下选择另存为
4.3选择另存为wav文件格式,音质选择(IMA ADPCM11.025kHz,4位,单声道)
4.4将处理完成的文件,复制到录音软件ADUIO目录下,即可识别。
WTV020使用说明书V2.01
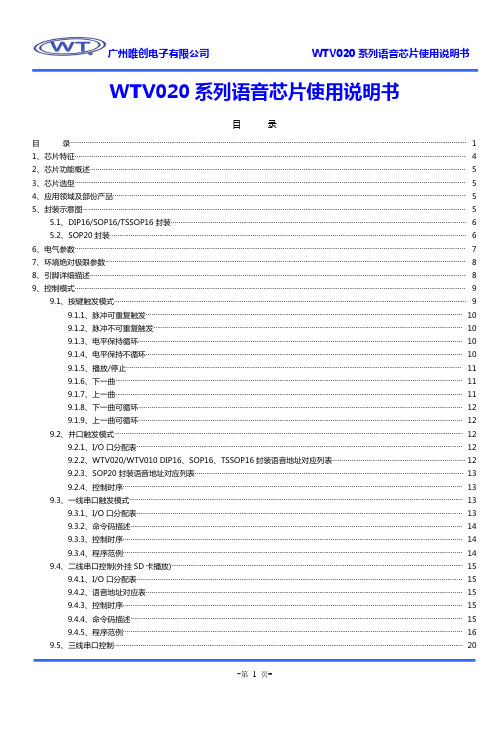
WTV020 系列语音芯片使用说明书
WTV020 系列语音芯片使用说明书
目
目
录
录................................................................................................................................................................................................................ 1 1、芯片特征............................................................................................................................................................................................................. 4 2、芯片功能概述..................................................................................................................................................................................................... 5 3、芯片选型.................................................................................................
启英泰伦语音AI平台高性能语音识别模块数据手册 CI-D0XGS07J-BT说明书

文档会不定期更新,获取最新文档请至启英泰伦语音AI平台()下载。
高性能语音识别模块数据手册CI-D0XGS07J-BT版本号:V1.1模块介绍概述本模块是针对低成本离线语音应用方案开发的一款通用、便携、低功耗高性能的语音识别模块,型号包括为:CI-D02GS07J-BT 和CI-D03GS07J-BT,两个型号管脚完全兼容,区别为主芯片型号不同,CI-D02GS07J-BT主芯片为CI1302,CI-D03GS07J-BT主芯片为CI1303。
CI-D03GS07J-BT中的主芯片CI1303比CI-D02GS07J-BT中的主芯片CI1302多2MB的Flash,可以实现更多命令词和算法功能。
图1 模块框图表1 模块选型表模块选型本地命令词300条以内本地命令词500条带插口单麦离线语音蓝牙模块CI-D02GS07J-BTCI-D03GS07J-BT该模块具有以下特点:模块体积小巧,长宽为37mm×40mm ,工作电压为 5.0V-5.5V ,一颗蓝牙5.0芯片和一颗音频功放芯片,带一路麦克风、一路喇叭和一路5V 电源及UART 的接口,此UART 接口也为5V 电平。
模块插入麦克风和喇叭直接供电即可使用,也可以直接通过接插件将UART 连接到产品主控板,由产品主控板的5V 电源进行供电,UART 通信或GPIO 控制,无需焊接。
模块包含2*3.5mm 螺丝孔,方便固定及安装。
模块主芯片支持离线神经网络计算,支持单麦克风降噪增强,单麦克风回声消除,360度全方位拾音,可抑制环境噪音,保证嘈杂环境中语音识别的准确性。
使用本模块进行离线语音识别不依赖网络,时延小,性能高,可实现97%以上的高识别率,10米超远距离识别,响应时间最快达到0.2S 。
模块可以应用于有能耗等级要求的产品和电池供电类产品中,运行功耗≤0.5W 。
模块带有一颗低功耗蓝牙芯片,兼容蓝牙5.0协议。
用户可通过手机等多媒体终端连接蓝牙播歌、接听电话和微信小程序控制等。
- 1、下载文档前请自行甄别文档内容的完整性,平台不提供额外的编辑、内容补充、找答案等附加服务。
- 2、"仅部分预览"的文档,不可在线预览部分如存在完整性等问题,可反馈申请退款(可完整预览的文档不适用该条件!)。
- 3、如文档侵犯您的权益,请联系客服反馈,我们会尽快为您处理(人工客服工作时间:9:00-18:30)。
设备ID为本语音模块设备编码,通过录音软件设定。取值范围0-255。
485网络中有多个语音模块,通过设备ID区别模块。
5.
工作电源电压:直流9~24V
最大电流:150MA
工作温度:-20~85℃
音频输出功率:8欧3W 4欧3W
6.常见问题和注意事项
4
指示灯待命时闪动,触发后也没有反应,仍然闪动。
1、设置的控制方式不对。
2、只有第一段声音有效:公共端是8号端子,可能是误把1号端子当成公共端了。
5
指示灯待命时闪动,触发后有一段时间常亮,但是没有一点声音。
1、调整蓝色可调电阻音量。逆时针音量增大。
2、喇叭未接好,需要连接8欧喇叭,接在指定的端子上。
图4-3:闭合播放一次
4.1.2
单个控制触点与公共触点保持闭合时,播放语音。播完一遍之后,检测触点如果仍然保持闭合,则继续播放。如果多个触点符合条件,只检测较靠前的触点。
图4-4:闭合循环播放
4.1.3
单个控制触点与公共触点由闭合跳变断开时,只触发一次播放。如果始终保持断开,不再触发播放。
图4-5:断开播放一次
2、模块录音过程中不能进行放音操作,电脑软件不要进行其他操作。只等录音完成。
3、放音时,手碰到电路上引起干扰,手移开杂音就可以消失。
4、有交流声杂音,电源绞波太大,更换电源或并联加大电容滤波。
语音模块使用说明书
(型号:YT07)
YT07语音模块是千目电子推出的一款普及型语音播放模块。具有价格低、稳定可靠、可重复录音、开关触点控制、宽电源电压、体积小等特点。主要控制放音有两种:通过7组触点控制、485串行总线。
主要应用范围:安装工程、报警提示、产品扩展语音功能等。
1.
●语音信息可分段录制、分段播放。
3、测量喇叭电阻,正常时有8欧.如果断路,说明喇叭损坏。
6
指示灯待命时闪动,触发后有一段时间常亮,声音只有一半,或只有开头一点点响声。
1、电源功率不足,YT07需要150mA电流。
2、喇叭阻抗太低。4欧或2欧喇叭需要的电源电流更大,我们不推荐使用。
7
指示灯正常,声音有杂音。
1、首先用电脑检查音源中有无杂音,如果有杂音,可用音频处理软件进行降噪处理。
4.1.4
单个控制触点与公共触点保持断开时,播放语音。播完一遍之后,检测触点如果仍然保持断开,则继续播放。如果多个触点符合条件,只检测较靠前的触点。
图4-6:断开循环播放
4.1.5
单个控制触点与公共触点由发生闭合或断开跳变时,只触发一次播放。如果始终保持状态,不再触发播放。
图4-7:触点变化播放
4.1.6
3.3
可以使用的工具:232转485、USB转485转换电路。使电脑的串口与模块建立串口通讯连接,模块供电9-24V直流电源。
注意:只给语音模块供电,485转换器不需要供应任何电源
连接示意图如下:
图3-10语音模块YT07和显示器、485连接示意图
录音跳线JP2置成闭合状态。
图3-11跳线状态
3.4
6.1注意事项
6.1.1 音频输出接口
2P蓝色音频输出接口,自带驱动,可直接驱动喇叭等设备。
常见喇叭8欧2W、8欧3W、8欧5W、8欧10W、8欧15W均可驱动。
6.1.2 音频输出接口
此接口只能外接功放设备才能听到声音,直接接喇叭或者耳机等不能听到声音。
用螺丝刀调整蓝色的可调电阻,顺时针旋转调整到音量适中即可。
可接喇叭等接线式放音设备。
2.3
标注单位:(毫米)
图2-2 YT07产品尺寸图
2.4
随意闭合任意一个开关,即可播放一段声音。
图2-3七路按键控制放音接线示意图
3.
3.1
准备WAV格式的音源文件。注意:本模块使用【IMA ADPCM 11.025KHZ 4位单声道】格式的wav文件,其他格式不能识别。下面介绍获取符合要求的音频文件。
触点1、2、3、4与5、6、7、8(COM)组成4行4列的矩阵键盘。可控16段语音。
图4-8矩阵键盘原理
例如:触点5与触点1对应键值是1,按下可播放第1段语音。其他键类似。
4.2 485
4.2.1 RS485
图4-9语音模块YT07应用示意图
4.2.2
通过RS485总线发送下面指令,即可控制模块播放音频信息。
播放不采样:正常播放声音时,不采样其它信号。如果此选项选中的话,其它信号抢先均无效。
抢先:播放其他声音,选择此选项可立即停止其它声音,播放此声音。
断停选择此选项,线路断开时,声音立刻停止。此功能只对闭合播一次和闭合循环播放有效。
4.1.1
单个控制触点与公共触点由断开跳变闭合时,只触发一次播放。如果始终保持闭合,不再触发播放。
●可用专用工具反复录制。
●控放音方式有:
7组触点控制,可接入常开或常闭触点控制,也可组成4*4矩阵键盘
485总线控制。适用于距离较远,或节点较多的情况。
●电源宽电压9~24V直流;
●板载FLASH存储器。成本更低,可靠性更好。
●存储24分钟的语音信息。
2.
2.1
图2-1 YT07产品外形和接口示意图
序号
常见问题
处 理 方 法
1
指示灯不亮
检查电源,YT07是9-24V电源。
模块设成节能2、节能3,在JP2跳线不插的时候,指示灯不亮是正常的。
2
指示灯正常闪动。与电脑软件连接不上,显示“端口错误”。
485转换器端口已经被其他软件占用,请关闭其他程序,重新运行录音软件。
USB-485转换器,已经拔出。请重新插上。
注意:所有录制的音频信息和相关参数设置完成以后,必须对模块重新上电,参数才会有效。
4.
4.1
统一设置和分路设置
选择统一设置时,播放语音为设置相同,软件右方窗口不弹开。
图4-1:统一设置
选择分路设置时,每段语音可按选项分别设置,软件右方窗口弹开。
图4-2:分路设置
七路触电信号可控制播放7段语音信息,共有6种采样方式可供选择。第1-5种方式,每个触点对应一段语音,触发后可播放。触点1对应录音时的第一段语音。触点2对应第2段,以此类推。
图3-3
上图【IMA ADPCM 11.025KHZ 4位单声道】格式注意:是IMA开头的。
下图【PCM 11.025KHZ 16位单声道】格式
图3-4
下图【PCM 22.050KHZ 16位单声道】
图3-5
选中【文件夹】标签里的【覆盖已经存在的文件】
图3-6
图3-7
点窗口下方的【开始】完成转换。
3.2
3.4.1
选择设备型号和通讯端口,点击【连接设备】按钮,设备连接正常,显示如下。
图3-12连接设备后,点【连接设备】
3.4.2
点击【连续录音】按钮此操作自动擦除原声音,并全把语音文件全部录制到模块中
图3-13点击连续录音
3.4.3
点击【单个放音】按钮,可以按顺序依次播放已经录制好的音频信息。
点击【按段放音】按钮,在数据栏内填入已录制音频信息的段号,即可播放该段。
3.1中处理好的音频文件必须保存在录音软件所在目录的.\AUDIO子目录中。建议文件名前面加01 02等。这个文件名的排序决定录音存储的顺序。
注意:AUDIO目录下,只能存储wav格式文件,不能有任何其他格式的文件。
AUDIO目录下文件最多不能超过8M。
图3-8录音软件所在目录的.\AUDIO子目录图3-9文件名的排序决定录音存储的顺序
3
指示灯正常闪动。与电脑软件连接不上,显示“搜索设备”。
JP2跳线要在模块上电之前连接上。
485转换器的A接语音模块的A;B接语音模块的B。485转换器上只接A、B两根线,不要连接其他线。
通讯端口要选择客户的485转换器所连接的端口,如果是USB-485转换器、一般端口要设成COM3以上。如果是USB-485,要先安装USB驱动,并在控制面板-设备管理器-端口里看到虚拟串口才正常。
2.2
2.2.1
七路开关信号接线端子,信号从上到下为1-8路,第8路为开关信号公共脚。
2.2.2
VCC、GND为模块供电接口,输入9-24V直流电源。
485-A、485-B为485总线控制接口,可通过485接口进行录音和放音操作。
2.2.3 3.5
可接3.5音频插头,用于音箱等设备放音。
2.2.4
如果485转换器不是我公司产品,可以作以下几种尝试:
有的485转换器达不到高速率,录音时使用低速。把模块的3-4端子短接、6-7端子短接,录音界面勾选【低速】选项。然后正常操作录音。
有的监控用485转换器,只能发,不能收,或者接收有问题。可以在录音界面勾选【无握手】选项。
有的监控专用485转换器,只能收,不能发。这种就没有办法了,只能更换485转换器了。
3.1.1
使用Goldwave(资料光盘中附带)软件,打开任意格式的音频文件。例如:MP3文件。如下图所示。
图3-1打开一个音频文件
3.1.2
打开一个任意格式音频文件
使用Goldwave(资料光盘中附带)软件,打开任意格式的音频文件。例如MP3格式文件,如下图所示:
图3-2批处理
点添加文件,加入需转换格式的音源文件。音源文件可以是任何格式。
6.1.3 非常规喇叭注意事项
如使用4欧阻抗或其他参数喇叭,放音时请随时注意喇叭温度,感觉温度过高,请立刻关闭模块,以免烧毁功放芯片。
6.2常见问题
检查指示灯。正常状态是:待命时闪动约3秒闪一次(节能2、3不亮),播放时常亮。
软件界面点“连接设备”,连接后正常状态应显示“已连接”。