Win8 TwentyOne已更新 添加OmniPos选项
Omni操作手册
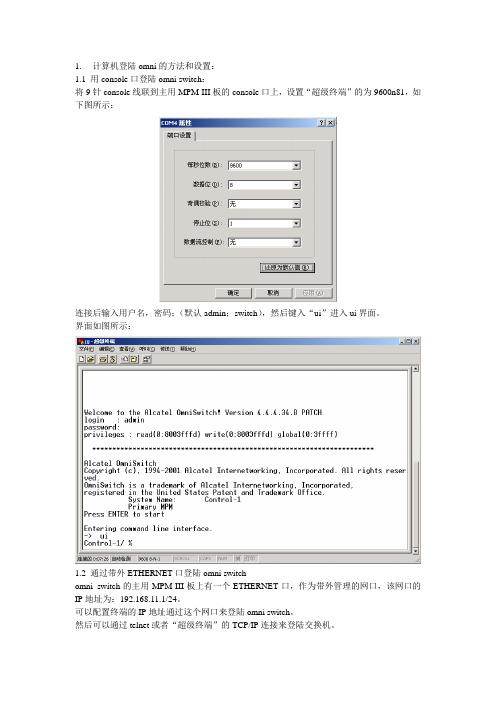
1.计算机登陆omni的方法和设置:1.1 用console口登陆omni switch:将9针console线联到主用MPM-III板的console口上,设置“超级终端”的为9600n81,如下图所示:连接后输入用户名,密码;(默认admin;switch),然后键入“ui”进入ui界面。
界面如图所示:1.2 通过带外ETHERNET口登陆omni switchomni switch的主用MPM-III板上有一个ETHERNET口,作为带外管理的网口,该网口的IP地址为:192.168.11.1/24。
可以配置终端的IP地址通过这个网口来登陆omni switch。
然后可以通过telnet或者“超级终端”的TCP/IP连接来登陆交换机。
2.要在omni建立连接的话需要进行哪些设置?2.1 建立基于SVC的PTOP Bridging。
2.1.1 建立Group 88;在C1节点:Control-1/ %crgpGROUP Number ( 7) : 88Description (no quotes) :Enable WAN Routing? (n):Enable A TM CIP? (n):Enable 1483 Routed Format? (n):Enable IP (y) :IP Address : 192.168.88.1IP Subnet Mask (0xffffff00) :IP Broadcast Address (192.168.88.255 ) :Description (30 chars max) :Disable routing? (n) :IP RIP mode {Deaf(d),Silent(s),Active(a),Inactive(i)} (s) :Default framing type {Ethernet II(e),fddi(f),token ring(t),Ethernet 802.3 SNAP(8),source route token ring(s)} (e) :Enable IPX? (y): nEnter a priority level (0...7)(0):Enable Group Mobility on this Group ? [y/n](n):This Group will not participate in Group MobilityDo you wish to configure the interface group for this V irtual LANat this time? (y) n(可以根据需要决定是否添加端口,以后也可以用addvp命令添加端口)GROUP 88 has been added to the system.Y ou may add interfaces to this group using the addvp command at a later date.For now, the GROUP is inactive until you add interfaces.在C2节点:Control-2/ %crgpGROUP Number ( 7) : 88Description (no quotes) :Enable WAN Routing? (n):Enable A TM CIP? (n):Enable 1483 Routed Format? (n):Enable IP (y) :IP Address : 192.168.88.2IP Subnet Mask (0xffffff00) :IP Broadcast Address (192.168.88.255 ) :Description (30 chars max) :Disable routing? (n) :IP RIP mode {Deaf(d),Silent(s),Active(a),Inactive(i)} (s) :Default framing type {Ethernet II(e),fddi(f),token ring(t),Ethernet 802.3 SNAP(8),source route token ring(s)} (e) :Enable IPX? (y): nEnter a priority level (0...7)(0):Enable Group Mobility on this Group ? [y/n](n):This Group will not participate in Group MobilityDo you wish to configure the interface group for this V irtual LAN at this time? (y) nGROUP 88 has been added to the system.Y ou may add interfaces to this group using the addvp command at a later date. For now, the GROUP is inactive until you add interfaces.2.1.2 在两台交换机上建立service。
Dell OpenManage 连接版本 2.0 for IBM Tivoli Netcool OM

Dell OpenManage Connection Version 2.0 For IBM Tivoli Netcool/ OMNIbus安装指南注、小心和警告注: “注”表示可以帮助您更好地使用计算机的重要信息。
小心: “小心”表示可能会损坏硬件或导致数据丢失,并说明如何避免此类问题。
警告: “警告”表示可能会造成财产损失、人身伤害甚至死亡。
© 2012 Dell Inc.本文中使用的商标:Dell™、Dell 徽标、Dell Boomi™、Dell Precision ™、OptiPlex™、Latitude™、PowerEdge™、PowerVault™、PowerConnect™、OpenManage™、EqualLogic™、Compellent™、KACE™、FlexAddress™、Force10™和 Vostro™是 Dell 公司的商标。
Intel®、Pentium®、Xeon®、Core®和 Celeron®是 Intel 公司在美国和其他国家/地区的注册商标。
AMD®是 Advanced Micro Devices 公司的注册商标,AMD Opteron™、AMD Phenom™和 AMD Sempron™是 AMD (Advanced Micro Devices) 公司的商标。
Microsoft®、Windows®、Windows Server®、Internet Explorer®、MS-DOS®、Windows Vista®和 Active Directory®是微软公司在美国和/或其他国家/地区的商标或注册商标。
Red Hat®和 Red Hat® Enterprise Linux®是 Red Hat 公司在美国和/或其他国家/地区的注册商标。
omniplan pro技巧

omniplan pro技巧
OmniPlan Pro是一款强大的项目管理软件,以下是一些使用OmniPlan Pro的技巧:
1. 创建任务和子任务:您可以使用回车键添加任务,也可以右击并选择“添加-任务”来添加任务。
要添加子任务,首先选中要添加子任务的任务,然
后按住Shift键并使用Control+Command+右箭头,或者右击并选择“添加-子项任务”。
2. 设置任务的开始日期、结束日期和持续时间:点击“标题”或“投入”处,然后右击,选择“开始/结束/持续时间”来进行设置。
3. 设置资源:在OmniPlan Pro中,您可以为任务分配资源,并设置资源的工作时间。
在日历视图中,绿色块表示工作时间段,您可以拖动块的边缘来设置日期和时间范围。
4. 设置工作日历:您可以在日历视图中为项目创建正常工作时间,描述在典型的一周内为资源分配而发生的工作日历。
您也可以设置资源的非工作时间,例如周末和节假日。
5. 使用检查器:检查器可以帮助您查看任务的详细信息,包括任务的开始日期、结束日期、持续时间、工作量等。
您可以在检查器中修改任务的属性,例如开始时间和结束时间。
6. 调整任务顺序:您可以使用网络视图来直观地查看项目的先后顺序,并进行调整。
您可以通过拖动任务来重新排序它们,也可以使用上下箭头键来微调它们的顺序。
7. 自定义视图:OmniPlan Pro提供了多种视图,例如日历视图、网络视图和甘特图视图。
您可以使用这些视图来更好地组织和可视化您的项目。
以上是使用OmniPlan Pro的一些技巧,希望对您有所帮助。
OmniLink Merchant Services 操作指南说明书

OmniLink Merchant ServicesOperation GuideM00122800 ENEpson OmniLink Merchant Services Operation GuideIntroductionIntroductionManualsThe following three manuals for OmniLink Merchant Services are provided.Development GuideThis manual provides necessary information to configure a development environment for developing OmniLink Merchant Services (cloud-based applications) and migration of developed services to production environments for system developers.Setup GuideThis manual is for an installer who installs TM printers in stores. Provides necessary information for setting up the printers to use the OmniLink Merchant Services.Operation Guide (this document)This document describes printer status monitoring performed daily, error handling procedures, and other aspects of service operation.Precautionso Unauthorized duplication, copying, reproduction, or modification of any part or all of this document is strictly prohibited.o Contents of this manual are subject to change without prior notice. Contact us directly for the most recent information.o Every effort is made to ensure that the contents of this manual are without error. Please contact us if any errors or other issues are found.o The previous statement notwithstanding, we will not be liable for any negative impact as a result of use.o Epson shall not be liable for any damages caused as a result of using this product incorrectly, failing to comply with the content of this document, or having repair or modifications performed by third parties other than Epson or those specified by Epson.o Epson shall not be liable for any issues as a result of installing optional parts or consumables that are not genuine Epson parts or parts certified by Epson.2Epson OmniLink Merchant Services Operation GuideIntroductionUsage LimitationsPlease use our products in environments and systems designed with consideration to safety and disaster recovery such as fail-safe configurations and redundant designs, for example, if this product is used in applications in which a high level of reliability and safety in functionality and precision is required such as in aircraft, trains, ships, automobiles and other transportation-related applications or in crime prevention equipment and safety equipment. This product is not intended for use in applications that require extremely high levels of reliability and safety such as in aerospace equipment, trunk-line communications equipment, nuclear power control equipment, and medical equipment.Consider your usage environment and requirements carefully before using this product in such applications. Terms and Symbols Used in the ManualsTermsDefinitions of the terms used in this document are as follows.Service providerA solutions provider who develops a cloud-based service using Epson Omnilink Merchant Service Web API and delivers it to customers.Deployment partnerAn installer who installs and sets up TM printers in stores, and configures the production environment.ServiceA cloud-based application such as sales analysis, reward point program, etc., that is developed by a Service provider.Meaning of SymbolsThe following symbols are used in this manual. Make sure to understand the meaning of these symbols before using the product.3Epson OmniLink Merchant Services Operation GuideContentsContentsIntroduction (2)Manuals (2)Precautions (2)Usage Limitations (3)Terms and Symbols Used in the Manuals (3)Terms (3)Meaning of Symbols (3)WorkFlow (5)Error Handling (5)N etwork Connection Errors (5)Receipt Mapping Errors (6)Checking Usage Status (7)Monitoring Printers (8)Receiving Error N otifications (8)Configuring Notification Email Reception Conditions (8)Configuring Receipt Mapping Error N otification Conditions (9)Monitoring Printer Connection Status (12)Monitoring Print/Receipt Mapping Status (15)Check the usage status (19)Appendix (21)Rights and Available Features (21)Rights (21)Rights and Correspondingly Available Features (21)Updating Printer Firmware/SSL Certificates (24)Update Firmware (24)Updating SSL Certificates (26)Updating Firmware and SSL Certificates in Batches (28)Operating Environment (34)Supported POS Systems (34)Supported TM Printers (34)Supported Browsers (34)Open Source Software License (36)OmniLink Merchant Services (36)TM-T88VI (36)TM-T88VI-iHUB (36)Trademarks (37)4Epson OmniLink Merchant Services Operation GuideWorkFlowWorkFlowError HandlingThe following section describes the process flow to resolve network issues with TM printers, significant changes in receipt mapping status, and other issues.Network Connection Errors5Epson OmniLink Merchant Services Operation GuideWorkFlowReceipt Mapping ErrorsRequest a Development partner or Service provider with the Administrator right to make any changes to receipt mapping configurations.6Epson OmniLink Merchant Services Operation GuideWorkFlow Checking Usage Status7Monitoring PrintersReceiving Error NotificationsNotifications can be sent via email when a printer experiences network connectivity issues, significant changes in receipt mapping status occur, etc.Configuring Notification Email Reception ConditionsThe following section describes the procedure to configure the type of notifications to be received and the frequency of notifications.A Access the OmniLink Management Console from the following URL, and sign in.North America regionhttps:///admin/loginEurope regionhttps://service.omnilinkmerchantservices.eu/admin/loginBClickat the upper-right of the screen.C Click My Account.Epson OmniLink Merchant Services Operation GuideMonitoring Printers8D Click Editin Notification Subscription.E Configure the type of notifications to be received and the frequency of notifications can be configured andthen click Save.Configuring Receipt Mapping Error Notification Conditions Administrator can configure receipt mapping error notifications for specific groups.A Access the OmniLink Management Console from the following URL, and sign in.North America regionhttps:///admin/loginEurope regionhttps://service.omnilinkmerchantservices.eu/admin/loginEpson OmniLink Merchant Services Operation GuideMonitoring Printers9B Click Group and Members.C Click Editin Group.D Configure the receipt mapping error notification conditions and then click Save.Epson OmniLink Merchant Services Operation GuideMonitoring Printers10Monitoring Printer Connection StatusThe following section describes the procedure to check network connection status for printers. The connection status for all printers can also be output as a CSV file.A Access the OmniLink Management Console from the following URL, and sign in.North America regionhttps:///admin/loginEurope regionhttps://service.omnilinkmerchantservices.eu/admin/loginB Click Monitoring.C Check the network connection status for printers.DailyHourlyMonitoring Print/Receipt Mapping StatusThe following section describes the procedure to check printer print/receipt mapping status. The print/receipt mapping for all printers can also be output as a CSV file.A Access the OmniLink Management Console from the following URL, and sign in.North America regionhttps:///admin/loginEurope regionhttps://service.omnilinkmerchantservices.eu/admin/loginB Click Monitoring.C Click Receipt Statistics.D Check the printer print/receipt mapping status.DailyHourlyCheck the usage statusThe following section describes the procedure to check the number of transactions at each store (number of receipts that are successfully parsed).AAccess the OmniLink Management Console from the following URL, and sign in.North America regionhttps:///admin/login Europe regionhttps://service.omnilinkmerchantservices.eu/admin/loginBClick Report.CCheck the print history.AppendixRights and Available FeaturesOmniLink Merchant Services has 3 user rights. The features available vary by right. RightsThe following table describes the three user rights.Rights and Correspondingly Available Features The following table describes the specific features available to each user right.: Available, Blank: Not availableUpdating Printer Firmware/SSL CertificatesUpdate FirmwareThis section describes the Remote Firmware update function of OmniLink Management Console.The function allows you to update the firmware of TM printer remotely. You can update the firmware just by selecting a target TM printer, firmware version, and specifying the date and time of update on OmniLink Management Console. Note:o OmniLink Management Console provides all data files necessary to update the firmware.o For information on the latest version of the firmware, please make an inquiry by emailing to *************************(NorthAmericaregion)/********************(Europeregion).A Access the OmniLink Management Console from the following URL, and sign in.North America regionhttps:///admin/loginEurope regionhttps://service.omnilinkmerchantservices.eu/admin/loginB From Team & Group , select the team and then the group for which you want to update the firmware.C Click the store for which you want to update the firmware.D In the Devices section, click the printer for which you want to update the firmware.E Click Printer Setting.F Click Choose Update Firmware in Firmware Status.G In the “Choose firmware“ field, specify the firmware version and the time period to update, then click Save.Note:o The TM printer will reboot after the firmware update. Make sure that the TM printer is not used while the printer is rebooting.o If the TM printer is not powered on or not connected to OmniLink Management Console correctly during the specified time period, the firmware update is not performed.H When the specified time period has passed, check the update result with the “Status“ message in the“Firmware status“ field.Updating SSL CertificatesSSL certificates installed in printers connected to OmniLink Merchant Services expire.Printers with SSL certificates that need to be updated will display the update message (See Step5) on the Device Detail screen. When this happens, update the SSL certificate promptly.A Access the OmniLink Management Console from the following URL, and sign in.North America regionhttps:///admin/loginEurope regionhttps://service.omnilinkmerchantservices.eu/admin/loginB From Team & Group , select the team and then select the group for which you want to update the SSLcertificate.C Click the store for which you want to update the SSL certificate.D In the Devices section, click the printer for which you want to update the SSL certificate.E Specify the date and time period to perform the update and then click Save.The certificate will be updated at the specified time.The update message disappears once the SSL certificate update completes.If the specified update period passes but the update message does not disappear, check the power to the printer and the connection to OmniLink Merchant Services. Then, try specifying the update date and time again.Note:o If an old SSL certificate expires, the printer will no longer be able to connect to OmniLink Merchant Services. As such, make sure to set the date/time and update the certificate as soon as possible.o The TM printer will reboot after the certificate update. Make sure that the TM printer is not used while the printer is rebooting.o If the TM printer is not powered on or not connected to OmniLink Management Services correctly during the specified time period, the certificate update is not performed.Updating Firmware and SSL Certificates in BatchesThe firmware and SSL certificates of multiple printers can be updated at the same time by uploading CSV files that contain update information for the firmware and SSL certificates.Note:Up to 2,000 printers can be updated at the same time.A Access the OmniLink Management Console from the following URL, and sign in.North America regionhttps:///admin/loginEurope regionhttps://service.omnilinkmerchantservices.eu/admin/loginB From Team & Group, select the team and then select the group for which you want to update the firmwareand SSL certificates at the same time.C Click Bulk Registration and then Download CSV under FW Update.The name of the CSV file downloaded will be in the following format: firmware_YYYYMMDDHHmmss.csv (YYYYMMDDHHmmss is the date and time when the file is downloaded).D Specify the CSV file directory and then click Save.E Open the downloaded CSV file on a PC and then edit printer information as described in “Format ofFirmware/SSL Certificates Information CSV Files” on page 31. Save the file.F Click Bulk Registration and then Upload CSV under FW Update.G Specify the CSV file edited in step 4 and click Open.Note:An error message appears if registration conditions are not satisfied, such as the maximum character count being exceeded. If an error message appears, edit the information in accordance with the error message content. No stores will be registered if there is even one error.H Confirm the uploaded content and then click OK.Format of Firmware/SSL Certificates Information CSV FilesThe following table describes the format in which printer information CSV files are to be edited. The character code is "UTF-8" and the line feed code is "LF" or "CRLF".*: Required when SerialNumber is not blank.Example Input:Operating EnvironmentSupported POS SystemsThis service can be used for POS systems that use TM-T88VI or TM-T88VI-iHUB printers and satisfy the following conditions.o The content of receipts printed by the printers is text data.o The printers are set to cut receipt paper after printing.Note:Use is not possible with a POS system that sends only graphic data or rasterized data.Supported TM PrintersNote:o This service requires a stable internet connection between the printer and the Epson Cloud Server.o This service uses port 443. Make sure that port 443 is allowing connection to the Epson Cloud Server. LimitationsTrue Type fonts cannot be used with the Advanced Printer Driver. Use device fonts instead.Supported BrowsersUse of OmniLink Management Console is required for configuring the service environment.OmniLink Management Console is an Epson website that is used for accepting applications for OmniLink services from stores, and used for managing information about the stores and their TM printers.OmniLink Management Console supports the latest versions of the following web browsers.o Microsoft Internet Explorer 11o Microsoft Edge o Google Chrome o Mozilla Firefox o Apple SafariOpen Source Software LicenseThe OmniLink Merchant Services use open source software other than software owned by Epson. The following is the information of the open source software.OmniLink Merchant ServicesThe full text of license agreement contract is available on the following website.North America regionhttps:///license/document/copyrightinfo.htmlEurope regionhttps://omnilinkmerchantservices.eu/license/document/copyrightinfo.htmlTM-T88VIThis product uses open source software in addition to Epson proprietary software.For information of the open source software used in this product, see the following URL.http://xxx.xxx.xxx.xxx/licenses.htmlNote:For “xxx.xxx.xxx.xxx“ in the above URL, input your printer‘s IP address.TM-T88VI-iHUBThis product uses open source software in addition to Epson proprietary software.For information of the open source software used in this product, see the following URL.http://xxx.xxx.xxx.xxx/webconfig/licenses.htmlNote:For “xxx.xxx.xxx.xxx“ in the above URL, input your printer‘s IP address.TrademarksEPSON is a registered trademark of Seiko Epson Corporation.EXCEED YOUR VISION is a registered trademark or trademark of Seiko Epson Corporation.OmniLink is a trademark of Epson America, Inc.Microsoft and Internet Explorer are registered trademarks of Microsoft Corporation in the United States and/or other countries.Google Chrome is a trademark of Google Inc.Firefox® is a registered trademark of Mozilla Foundation.Safari® is a trademark of Apple Inc. registered in the United States of America and other countries.QR Code is a registered trademark of Denso Wave Incorporated.All other trademarks are the property of their respective owners and used for identification purpose only.© Seiko Epson Corporation 2019. All rights reserved.。
OMNI 操作指导手册
模拟输入
数量:每个组合模块最多为 4
路
精度:14位二进制
准确度: 0.025%(+5℃至+50
℃)
类型:4-20mA或 1-5V差分输入,或 100欧 4线制 RTD(只在两个通道上)智能数字变送器:Honeywell
ST3000&SMV 系列 Rosemount3095FB
脉冲输入
数量:每个组合模块最多为 2
7
Create PDF with GO2PDF for free, if you wish to remove this line, click here to buy Virtual PDF Printer
用面板上的方向键可以控制光标的位置,按【Enter】键以便进入相应的条目。第一项 Misc Configuration 为混合配置。首先进入混合配置(Misc Configuration)项。界面如下图:
一般来说,OMNI流量计算机的至少要包含一块串口通讯板。默认的通讯板会安装在 OMNI 3000型计算机的 TB1上,通讯板 S-board会安装在 OMNI6000型流量计算机的 TB3和 TB4 上。如果需要以太网接口,则可以在 TB4插槽安装 SE板卡。下面是典型的串口通讯卡端子 示意图:OMNI流量计算机在出厂的时候第一块串口通讯板卡的第一个端口就是 RS-232通讯 口。制作一根 9针串口通讯电缆就可以实现 PC电脑与 OMNI流量计算机的通讯。TB3的端子 1、3、4分别对应着 9针串口端子 2、3、5.
3.1.3温度设置
将光标移至 Temperature Setup ,点击 Enter 进入温度的设置。依次输入温度的高低 限报警。高低限应依据温度变送器的标识牌上所示。
3.1.4压力设置
[win8.1升级助手使用方法]win8升级助手
![[win8.1升级助手使用方法]win8升级助手](https://img.taocdn.com/s3/m/6a5f4d661a37f111f0855b17.png)
[win8.1升级助手使用方法]win8升级助手
下载Windows8.1升级助手以后直接运行,工具会自动检查你当前的系统与WIN8.1的兼容性。
检查完成以后点击【下一步】
升级系统以后是否要留你个人的文件如:我的文档,收藏夹,桌面这一类的个人资料夹。
建议保留点击【下一步】
此时会提示适合你的Windows8.1的版本。
如果没有购买点击【订购】就成了。
现在购买WIN8.1还没有光盘的呢!直接下载就可以了。
点击【结账】
再输入账单邮寄地址,微软会快递发票之类的账单给你的。
再选择一个支付方式,现在只支持宝贝和信用卡两种支付方式。
如果有这两种支付工具的朋友可以继续操作。
如果没有的话建议就此打住,另找升级方法吧!
确认你的订单
再输入宝贝支付的相关信息或是用以前创建过的支付信息支付就可以了。
支付成功以后win8.1升级助手会自动检查,然后就会自动下载更新WINDOWS的。
感谢您的阅读,祝您生活愉快。
Win8开始按钮8StartButton已更新至2.0.1版本

Win8开始按钮8StartButton已更新至2.0.1版本
8StartButton对于Win8用户来说仍是顶级的开始菜单替换应用之一,所以许多运行微软新操作系统的用户都安装了这个应用程序。
8StartButton官方刚刚正式发布了2.0.1版本,新版本不仅可以以不同方式检测Win8版本,还添加了西班牙语言文件。
此外,新版本还进行了一些漏洞修复和功能改进,根据官方发布日志来看,如此小的改进直到您安装更新后才能体验到。
8StartButton也适用于Win8.1预览版,最近发布的一次更新重点是为了使其适用于这个新版本。
用户现可去Win8应用商店下载更新。
/news/76322.html。
Win8.1更新开机可自定义到桌面选项

Win8.1更新开机可自定义到桌面选项
微软已经在Win8.1更新中调整了开机默认到桌面选项以便更好地配置用户使用的设备,所以如果是在台式计算机上,该功能将快速跳过开始屏幕。
然而,微软似乎正研究如何为用户提供更多的自定义选择,尽管启动到桌面在Win8.1更新中有了一些变化,你仍然可以改变默认设置以匹配自己的爱好。
换句话说,如果你不想直接开机到桌面,而是想开机的时候看到开启屏幕,你也可以直接在桌面中更改。
微软的Brandon LeBlanc解释道:这是完全可以自定义的,如果你想保持开机到开始屏幕上,您可以在任务栏上右键单击,然后单击“属性”,并去“导航”选项卡。
Win8.1更新将会于明天发布给用户,所以请尽快确保您保持您的Internet连接处于活动状态,Win8.1更新是可以免费下载的,目前所有运行Win8.1的设备均可获得更新。
/news/122862.html。