Head_First设计模式
Head First 设计模式

编辑推荐本书荣获2005年第十五届Jolt通用类图书震撼大奖。
本书英文影印版被《程序员》等机构评选为2006年最受读者喜爱的十大IT图书之一 。
本书趋近完美,因为它在提供专业知识的同时,仍然具有相当高的可读性。
叙述权威、文笔优美。
本书共有14章,每章都介绍了几个设计模式,完整地涵盖了四人组版本全部23个设计模式。
前言先介绍这本书的用法;第1章到第11章陆续介绍的设计模式为Strategy、Observer、Decorator、Abstract Factory、Factory Method、Singleton、Command、Adapter、Facade、Templat Method、Iterator、Composite、State、Proxy。
最后三章比较特别。
第12章介绍如何将两个以上的设计模式结合起来成为新的设计模式(例如著名的MVC模式),作者称其为复合设计模式(这是作者自创的名称,并非四人组的标准名词),第13章介绍如何进一步学习设计模式,如何发觉新的设计模式等主题,至于第14章则很快地浏览尚未介绍的设计模式,包括Bridge、Builder、Chain of Responsibility、Flyweight、Interpreter、Mediator、Memento、Prototype、Visitor。
第1章还介绍了四个OO基本概念(抽象、封装、继承、多态),而第1章到第9章也陆续介绍了九个OO原则(Principle)。
千万不要轻视这些OO原则,因为每个设计模式背后都包含了几个OO原则的概念。
很多时候,在设计时有两难的情况,这时候我们必须回归到OO原则,以方便判断取舍。
可以这么说:OO原则是我们的目标,而设计模式是我们的做法。
本书作者Eric Freeman和Elisabeth Freeman是作家、讲师和技术顾问。
Eric拥有耶鲁大学的计算机科学博士学位,Elisabath拥有耶鲁大学的计算机科学硕士学位。
初始方案英文

Initial ProposalIntroductionIn this document, we will discuss the initial proposal for a new project. The purpose of this proposal is to outline the key details and objectives of the project, as well as provide a roadmap for its implementation. The project aims to address a specific problem and provide a solution that meets the needs of the stakeholders involved.Problem StatementThe first step in any project is to understand the problem it is trying to solve. In this case, the problem statement is as follows:The current system for managing employee records is inefficient and outdated. It lacks the necessary features and functionalities to meet the needs of the HR department and often results in errors in data entry and tracking.ObjectivesBased on the problem statement, the following objectives have been identified for the project:1.Develop a new employee record management system that is moreefficient and user-friendly.2.Improve the accuracy and reliability of employee data entry andtracking.3.Streamline HR processes and reduce administrative workload.Proposed SolutionTo address the above-mentioned objectives, we propose the following solution:1.Develop a web-based application that allows HR staff to easily manageemployee records.2.Incorporate features such as automated data entry, customizablefields, and real-time data updating to improve accuracy and reliability.3.Implement a user-friendly interface with intuitive navigation toenhance user experience and reduce the learning curve.4.Integrate the new system with existing HR tools and software tostreamline processes and increase efficiency.Implementation PlanTo ensure the successful implementation of the proposed solution, the following plan will be followed:1.Conduct a detailed analysis of the current system to identify itsstrengths and weaknesses.2.Gather feedback and requirements from the HR department tounderstand their needs and expectations.3.Design the information architecture and user interface of the newsystem based on the gathered requirements.4.Develop the web application using modern technologies and bestpractices in software development.5.Perform rigorous testing to identify and fix any bugs or issues.6.Deploy the application on a suitable server infrastructure and ensureits stability and scalability.7.Train the HR staff on how to use the new system effectively andprovide ongoing support and maintenance.TimelineThe following timeline provides an overview of the key milestones and deliverables for the project:Milestone DeadlineRequirements gathering Month 1System design Month 2Development and testing Month 3 - 5Deployment and training Month 6Ongoing support and maintenance After deploymentBudgetThe estimated budget for the project is as follows:Expense AmountDevelopment resources $50,000Server infrastructure $10,000Training and support $5,000Miscellaneous expenses $2,000Total $67,000ConclusionIn conclusion, the initial proposal for the new employee record management system aims to address the inefficiencies and limitations of the current system. The proposed solution focuses on developing a user-friendly web application that streamlines HR processes and improves data accuracy and reliability. The implementation plan outlines the key steps and timeline for the project, while the budget provides an estimate of the required resources.。
设计模式之鸭子模式

设计模式之鸭⼦模式这两天在看HeadFirst设计模式,第⼀种鸭⼦模式都不太理解。
后来在百度知道上看了某⼤神的解释明⽩了不少。
列出如下:假设我们需要设计出各种各样的鸭⼦,⼀边游泳戏⽔,⼀边呱呱叫。
很明显这时我们需要设计了⼀个鸭⼦超类(Superclass),并让各种鸭⼦继承此超类。
public abstract class Duck {public void Swim() {//会游泳}public abstract display();//各种外观不⼀样,所以为抽象public void Quack() {//会叫}}每⼀只鸭⼦就继承Duck类public class MallardDuck extends Duck {public void display() {// 外观是绿⾊的}}public class RedheadDuck extends Duck{public void display(){// 外观是红⾊的}}好了,我们完成这些后,但是发现我们需要有⼀些鸭⼦是会飞的,应该怎么修改呢?也许你要说这很简单,在Duck类⾥⾯直接加⼊⼀个fly()⽅法,不就可以了。
public abstract class Duck {public void Swim() {//会游泳}public abstract display();//各种外观不⼀样,所以为抽象public void Quack() {//会叫}public void fly(){//会飞}}这时你会发现所有的鸭⼦都变成了会飞的,很明显这是不对了,例如橡⽪鸭显然就不是了。
你也许想到了另⼀种⽅法,在会飞的鸭⼦类⾥才添加该⽅法不就可以了嘛,public class MallardDuck extend Duck{public void display(){// 外观是绿⾊的}public void fly(){//会飞}}这个⽅法看起来是很不错,可是有很多种鸭⼦都会飞的时候,代码的复⽤性很明显是不够好的,你不得不在每⼀个会飞的鸭⼦类⾥去写上同⼀个fly()⽅法,这可不是个好主意.可能你⼜想到另⼀个⽅法:采⽤继承和覆盖,在Duck类⾥实现fly()⽅法,在⼦类⾥如果不会飞的就覆盖它public abstract class Duck {public void Swim() {//会游泳}public abstract display();//各种外观不⼀样,所以为抽象public void Quack(){//会叫}public void fly(){//会飞}}//橡⽪鸭吱吱叫,不会飞public class RubberDuck extend Duck{public void quack(){//覆盖成吱吱叫}public void display{//外观是橡⽪鸭}public void fly{//什么也不做}}这样我们真实现了确实能飞的鸭⼦才可以飞起来了,看起来主意不错!问题到这⼉似乎得到了解决但我们现在有了⼀种新的鸭⼦,诱铒鸭(不会飞也不会叫),看来需要这样来写public class DecoyDuck extend Duck{public void quack(){//覆盖,变成什么也不做}public void display(){//诱饵鸭}public void fly(){//覆盖,变成什么也不做}}每当有新的鸭⼦⼦类出现或者鸭⼦新的特性出现,就不得不被迫在Duck类⾥添加并在所有⼦类⾥检查可能需要覆盖fly()和quark()...这简直是⽆穷尽的恶梦。
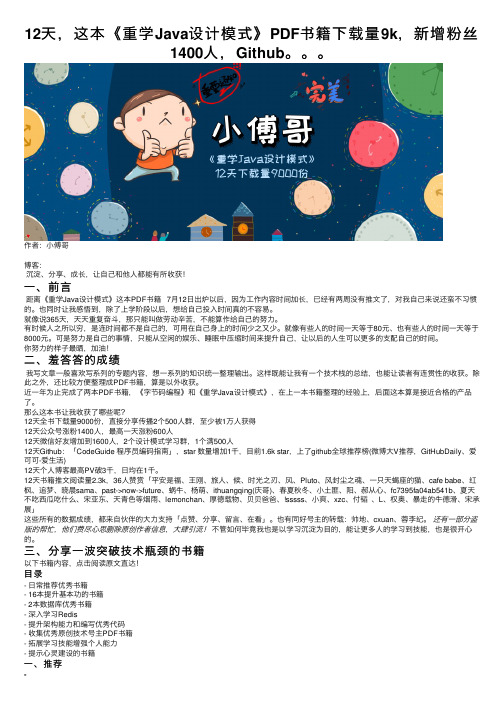
12天,这本《重学Java设计模式》PDF书籍下载量9k,新增粉丝1400人,Github。。。
矢泽久雄,曾在Software House做过程序员,电脑作家之友会会长。工作之余笔耕不辍,从电路到编程语言均有涉及。代表作有《程序是怎 样跑起来的》等。本书以图配文,以计算机的三大原则为开端、相继介绍了计算机的结构、手工汇编、程序流程、算法、数据结构、面向对
象编程、数据库、TCP/IP 网络、数据加密、XML、计算机系统开发以及SE 的相关知识。 浓缩了 CPU、内存、二进制、计算机硬件、应用、算法 的精华知识,以通俗易懂的形式给你讲出来,读者看完后一致好评,cxuan 呕心沥 血的作品,文字是一行一行写的,图是一笔一笔画的,强烈推荐给大家。
二、 Java
1. 如果不太熟悉jvm,这个读起来非常乏味(只有规范,没有多余解释),但如果阅读过相关深入java虚拟机,再读这个,会非常有亲切感。 2. 这是一部从工作原理和工程实践两个维度深入剖析JVM的著作,是计算机领域公认的经典,繁体版在台湾也颇受欢迎。作者周志明,是资深 Java技术、机器学习和企业级开发技术专家,现任远光软件研究院院长,人工智能博士在读。 3. 一份整理的蛮不错的Java核心知识点。覆盖了JVM、锁、并发、Java反射、Spring原理、微服务、Zookeeper、数据库、数据结构等大量知 识点。
算SQL 运行的CPU 时间及执行时间,帮助读者从原理上理解SQL、表及索引结构、访问方式等对关系型数据库造成的影响,并能够运用量 化的方法进行判断和优化,指导关系型数据库的索引设计。此书适用于已经具备了SQL 这一关系型语言相关知识,希望通过理解SQL 性能 相关的内容,或者希望通过了解如何有效地设计表和索引而从中获益的人员。
headfirst设计模式java_吐血整理HeadFirst设计模式大全

headfirst设计模式java_吐血整理HeadFirst设计模式大全首先,要理解Head First设计模式,需要明白设计模式的概念。
设计模式是在软件开发中经过实践验证的解决方案,它们是解决特定问题的经验总结。
Head First系列是一本非常经典的计算机科学图书系列,其中《Head First设计模式》专门介绍了23种常见的设计模式,并以Java语言进行讲解。
本书从实际问题出发,用生动形象的方式讲解设计模式,以帮助读者更好地理解和应用这些设计模式。
下面将介绍一些书中提到的设计模式和其在Java编程中的应用。
1. 策略模式(Strategy Pattern):策略模式将一组行为封装成策略类,使其在运行时可以相互替换。
在Java中,可以使用接口来定义策略,不同的策略类实现相同的接口,根据不同情况选择不同的策略。
2. 观察者模式(Observer Pattern):观察者模式定义了对象间的一种一对多的关系,当一个对象状态改变时,所有依赖它的对象都会被通知并自动更新。
在Java中,可以使用java.util.Observable类和java.util.Observer接口来实现观察者模式。
3. 装饰者模式(Decorator Pattern):装饰者模式动态地将责任附加到对象上,通过创建一个装饰者类来包装原始对象,以提供额外的功能。
在Java中,可以通过继承原始对象并添加额外功能的方式来实现装饰者模式。
4. 工厂模式(Factory Pattern):工厂模式定义了一个创建对象的接口,但由子类决定要实例化的类是哪一个。
在Java中,可以使用工厂方法模式来实现,通过定义一个工厂接口和具体的工厂类来创建实例。
5. 单例模式(Singleton Pattern):单例模式确保一个类只有一个实例,并提供一个全局访问点。
在Java中,可以使用私有构造函数和静态方法来实现单例模式。
以上只是其中一部分介绍的设计模式,还有其他如适配器模式、迭代器模式、模板方法模式等。
17种设计模式代码

1、适配器模式adapter#include <iostream>using namespace std;class Deque{public:void push_back(int x) { cout<<"Deque push_back"<<endl; } void push_front(int x) { cout<<"Deque push_front"<<endl; } void pop_back() { cout<<"Deque pop_back"<<endl; }void pop_front() { cout<<"Deque pop_front"<<endl; }};//顺序容器class Sequence{public:virtual void push(int x) = 0;virtual void pop() = 0;};//栈class Stack: public Sequence{public:void push(int x) { deque.push_back(x); }void pop() { deque.pop_back(); }private:Deque deque; //双端队列};//队列class Queue: public Sequence{public:void push(int x) { deque.push_back(x); }void pop() { deque.pop_front(); }private:Deque deque; //双端队列};int main(){Sequence *s1 = new Stack();Sequence *s2 = new Queue();s1->push(1); s1->pop();s2->push(1); s2->pop();delete s1; delete s2;return 0;}2、建造者模式building#include <iostream>using namespace std;class Builder{public:virtual void BuildHead() {}virtual void BuildBody() {}virtual void BuildLeftArm(){}virtual void BuildRightArm() {}virtual void BuildLeftLeg() {}virtual void BuildRightLeg() {}};//构造瘦人class ThinBuilder : public Builder{public:void BuildHead() { cout<<"build thin body"<<endl; }void BuildBody() { cout<<"build thin head"<<endl; }void BuildLeftArm() { cout<<"build thin leftarm"<<endl; }void BuildRightArm() { cout<<"build thin rightarm"<<endl; } void BuildLeftLeg() { cout<<"build thin leftleg"<<endl; }void BuildRightLeg() { cout<<"build thin rightleg"<<endl; } };//构造胖人class FatBuilder : public Builder{public:void BuildHead() { cout<<"build fat body"<<endl; }void BuildBody() { cout<<"build fat head"<<endl; }void BuildLeftArm() { cout<<"build fat leftarm"<<endl; }void BuildRightArm() { cout<<"build fat rightarm"<<endl; } void BuildLeftLeg() { cout<<"build fat leftleg"<<endl; }void BuildRightLeg() { cout<<"build fat rightleg"<<endl; } };//构造的指挥官class Director{private:Builder *m_pBuilder;public:Director(Builder *builder) { m_pBuilder = builder; }void Create(){m_pBuilder->BuildHead();m_pBuilder->BuildBody();m_pBuilder->BuildLeftArm();m_pBuilder->BuildRightArm();m_pBuilder->BuildLeftLeg();m_pBuilder->BuildRightLeg();}};int main(){FatBuilder thin;Director director(&thin);director.Create();return 0;}3、策略模式#include <iostream>using namespace std;class COperation{ public:int m_nFirst;int m_nSecond;virtual double GetResult(){double dResult=0;return dResult;}};//策略具体类—加法类class AddOperation : public COperation {public:AddOperation(int a,int b){m_nFirst=a;m_nSecond=b;}virtual double GetResult(){return m_nFirst+m_nSecond;}};class SubstrOperation : public COperation{public:SubstrOperation(int a,int b){m_nFirst=a;m_nSecond=b;}virtual double GetResult(){return m_nFirst-m_nSecond;}};class Context{private:COperation* op;public:Context(COperation* temp){op=temp;}double GetResult(){return op->GetResult();}};//客户端int main(){int a,b;char c;cin >> a >> b;cout<<"请输入运算符";cin>>c;switch(c){case '+':{Context *context1=new Context(new AddOperation(a,b));cout<< context1->GetResult() << endl;break;}case '-':{Context *context2=new Context(new SubstrOperation(a,b));cout<< context2->GetResult() << endl;break;}}return 0;}4、抽象模式#include <iostream>class Button{public:virtual void paint() = 0;};class WinButton : public Button{public:void paint (){std::cout << " Window Button \n";}};class MacButton : public Button{public:void paint (){std::cout << " Mac Button \n";}};class ScrollBar{public:virtual void paint() = 0;};class WinScrollBar : public ScrollBar{public:void paint (){std::cout << " Window ScrollBar \n";}};class MacScrollBar : public ScrollBar { public:void paint (){std::cout << " Mac ScrollBar \n";}};class GUIFactory{public:virtual Button* createButton () = 0;virtual ScrollBar* createScrollBar () = 0; };class WinFactory : public GUIFactory{public:Button* createButton (){return new WinButton;}ScrollBar* createScrollBar (){return new WinScrollBar;}};class MacFactory : public GUIFactory{public:Button* createButton (){return new MacButton;}ScrollBar* createScrollBar (){return new MacScrollBar;}};int main(){GUIFactory* guiFactory;Button *btn;ScrollBar *sb;guiFactory = new MacFactory;btn = guiFactory->createButton();btn -> paint();sb = guiFactory->createScrollBar();sb -> paint();guiFactory = new WinFactory;btn = guiFactory->createButton();btn -> paint();sb = guiFactory->createScrollBar();sb -> paint();return 0;}5、代理模式#include <iostream>#include <string>using namespace std;class BigImage{public:BigImage(string name): m_imageName(name) {} virtual ~BigImage() {}virtual void Show() {}protected:string m_imageName;};//真实类class RealBigImage: public BigImage{public:RealBigImage(string name):BigImage(name) {}~RealBigImage() {}void Show(){cout<<"Show big image : "<<m_imageName<<endl;}};//代理class Proxy: public BigImage{private:RealBigImage *m_bigImage;public:Proxy(string name):BigImage(name),m_bigImage(0){}~Proxy(){delete m_bigImage;}void Show(){if(m_bigImage == NULL){cout<<"please wait ..."<<endl;m_bigImage = new RealBigImage(m_imageName); //代理创建真实对象}m_bigImage->Show();}};int main(){BigImage *image = new Proxy("SomeBigPic.jpg"); //使用代理image->Show(); //代理的操作delete image;return 0;}6、非享元模式#include <iostream>#include <vector>#include <string>using namespace std;//棋子颜色enum PieceColor {BLACK, WHITE};//棋子位置struct PiecePos{int x;int y;PiecePos(int a, int b): x(a), y(b) {}};//棋子定义class Piece{protected:PieceColor m_color; //颜色PiecePos m_pos; //位置public:Piece(PieceColor color, PiecePos pos): m_color(color), m_pos(pos) {} ~Piece() {}virtual void Draw() {}};class BlackPiece: public Piece{public:BlackPiece(PieceColor color, PiecePos pos): Piece(color, pos) {}~BlackPiece() {}void Draw() { cout<<"绘制一颗黑棋"<<endl;}};class WhitePiece: public Piece{public:WhitePiece(PieceColor color, PiecePos pos): Piece(color, pos) {}~WhitePiece() {}void Draw() { cout<<"绘制一颗白棋"<<endl;}};class PieceBoard{private:vector<Piece*> m_vecPiece; //棋盘上已有的棋子string m_blackName; //黑方名称string m_whiteName; //白方名称public:PieceBoard(string black, string white): m_blackName(black), m_whiteName(white){} ~PieceBoard() { Clear(); }void SetPiece(PieceColor color, PiecePos pos) //一步棋,在棋盘上放一颗棋子{Piece * piece = NULL;if(color == BLACK) //黑方下的{piece = new BlackPiece(color, pos); //获取一颗黑棋cout<<m_blackName<<"在位置("<<pos.x<<','<<pos.y<<")";piece->Draw(); //在棋盘上绘制出棋子}else{piece = new WhitePiece(color, pos);cout << m_whiteName<<"在位置("<<pos.x<<','<<pos.y<<")";piece->Draw();}m_vecPiece.push_back(piece); //加入容器中}void Clear() //释放内存{int size = m_vecPiece.size();for(int i = 0; i < size; i++)delete m_vecPiece[i];}};int main(){PieceBoard pieceBoard("A","B");pieceBoard.SetPiece(BLACK, PiecePos(4, 4));pieceBoard.SetPiece(WHITE, PiecePos(4, 16));pieceBoard.SetPiece(BLACK, PiecePos(16, 4));pieceBoard.SetPiece(WHITE, PiecePos(16, 16));return 0;}7、工厂方法#include <iostream>using namespace std;class Button{public:virtual void paint() = 0;};class OSXButton: public Button{public:void paint(){cout << "OSX button \n";}};class WindowsButton: public Button {public:void paint(){cout << "Windows button \n";}};class GUIFactory{public:virtual Button *createButton() = 0; };class Factory1: public GUIFactory{public:Button *createButton(){return new WindowsButton;}};class Factory2: public GUIFactory{public:Button *createButton(){return new OSXButton;}};int main(){GUIFactory* guiFactory1,* guiFactory2;Button *btn1,*btn2;guiFactory1 = new Factory1;btn1 = guiFactory1->createButton();btn1 -> paint();guiFactory2 = new Factory2;btn2 = guiFactory2->createButton();btn2 -> paint();return 0;}8、观察者模式#include <iostream>#include <list>#include <string>using namespace std;class Observer{public:Observer() {}virtual ~Observer() {}virtual void Update() {}};//博客class Blog{public:Blog() {}virtual ~Blog() {}void Attach(Observer *observer) { m_observers.push_back(observer); } //添加观察者void Remove(Observer *observer) { m_observers.remove(observer); } //移除观察者void Notify() //通知观察者{list<Observer*>::iterator iter = m_observers.begin();for(; iter != m_observers.end(); iter++)(*iter)->Update();}virtual void SetStatus(string s) { m_status = s; } //设置状态virtual string GetStatus() { return m_status; } //获得状态private:list<Observer* > m_observers; //观察者链表protected:string m_status; //状态};//具体博客类class BlogCSDN : public Blog{private:string m_name; //博主名称public:BlogCSDN(string name): m_name(name) {}~BlogCSDN() {}void SetStatus(string s) { m_status = "CSDN通知: " + m_name + s; } //具体设置状态信息string GetStatus() { return m_status; }};//具体观察者class ObserverBlog : public Observer{private:string m_name; //观察者名称Blog *m_blog; //观察的博客,当然以链表形式更好,就可以观察多个博客public:ObserverBlog(string name,Blog *blog): m_name(name), m_blog(blog) {}~ObserverBlog() {}void Update() //获得更新状态{string status = m_blog->GetStatus();cout<<m_name<<"-------"<<status<<endl;}};//测试案例int main(){Blog *blog = new BlogCSDN("wuzhekai1985");Observer *observer1 = new ObserverBlog("tutupig", blog);blog->Attach(observer1);blog->SetStatus("发表设计模式C++实现(15)——观察者模式");blog->Notify();delete blog; delete observer1;return 0;}9、命令模式#include <iostream>#include <vector>using namespace std;class Command{public:virtual void execute() = 0;};class NoCommand : public Command{public:void execute() {};};class Light{public:Light(string location);void on();void off();private:string m_sLocation;};class LightOffCommand : public Command{public:LightOffCommand(string location):m_Light(location) {}void execute();private:Light m_Light;};class LightOnCommand : public Command{public:LightOnCommand(string location):m_Light(location) {}void execute();private:Light m_Light;};class Stereo{public:Stereo(string location);void on();void off();void setCD();void setDVD();void setRadio();void setVolume(int volume);private:string m_sLocation;};class StereoOnWithCDCommand : public Command{ public:StereoOnWithCDCommand(string location):m_Stereo(location) {}void execute();private:Stereo m_Stereo;};class StereoOffCommand : public Command{ public:StereoOffCommand(string location):m_Stereo(location) {}void execute();private:Stereo m_Stereo;};class RemoteControl{ public:RemoteControl();~RemoteControl();void setCommand(int slot, Command* pOnCommand, Command* pOffCommand);void onButtonWasPushed(int slot);void offButtonWasPushed(int slot);private:vector<Command*> m_OnCommands;vector<Command*> m_OffCommands;};Light::Light(string location){m_sLocation = location;}void Light::on(){printf("%s light is on\n",m_sLocation.c_str());}void Light::off(){printf("%s light is off\n",m_sLocation.c_str());}void LightOffCommand::execute(){m_Light.off();}void LightOnCommand::execute(){m_Light.on();}Stereo::Stereo(string location){m_sLocation = location;}void Stereo::on(){printf("%s stereo is on\n",m_sLocation.c_str());}void Stereo::off(){ printf("%s stereo is off\n",m_sLocation.c_str());}void Stereo::setCD(){printf("%s stereo is set for CD input\n",m_sLocation.c_str());}void Stereo::setDVD(){printf("%s stereo is set for DVD input\n",m_sLocation.c_str());}void Stereo::setRadio(){printf("%s stereo is set for Radio\n",m_sLocation.c_str());}void Stereo::setVolume(int volume){printf("%s Stereo volume set to %d\n",m_sLocation.c_str(),volume); }void StereoOnWithCDCommand::execute(){m_Stereo.on();m_Stereo.setCD();m_Stereo.setVolume(11);}void StereoOffCommand::execute(){m_Stereo.off();}RemoteControl::RemoteControl(){for (int i = 0; i < 7; i++){Command* noCommandOn = new NoCommand();m_OnCommands.push_back(noCommandOn);Command* noCommandOff = new NoCommand();m_OffCommands.push_back(noCommandOff);}}RemoteControl::~RemoteControl(){for (int i = 0; i < 7; i++){delete m_OnCommands.at(i);delete m_OffCommands.at(i);}m_OnCommands.clear();m_OffCommands.clear();}void RemoteControl::setCommand(int slot, Command* pOnCommand, Command* pOffCommand){delete m_OnCommands.at(slot);m_OnCommands.at(slot) = pOnCommand;delete m_OffCommands.at(slot);m_OffCommands.at(slot) = pOffCommand;}void RemoteControl::onButtonWasPushed(int slot){m_OnCommands.at(slot)->execute();}void RemoteControl::offButtonWasPushed(int slot){m_OffCommands.at(slot)->execute();}int main(){RemoteControl remoteControl;LightOffCommand* pLivingRoomLightOff = new LightOffCommand("Living Room");LightOffCommand* pKitchenLightOff = new LightOffCommand("Kitchen");LightOnCommand* pLivingRoomLightOn = new LightOnCommand("Living Room");LightOnCommand* pKitchenLightOn = new LightOnCommand("Kitchen");StereoOnWithCDCommand* pStereoOnWithCD = new StereoOnWithCDCommand("Living Room");StereoOffCommand* pStereoOff = new StereoOffCommand("Living Room");remoteControl.setCommand(0,pLivingRoomLightOn,pLivingRoomLightOff);remoteControl.setCommand(1,pKitchenLightOn,pKitchenLightOff);remoteControl.setCommand(2,pStereoOnWithCD,pStereoOff);remoteControl.onButtonWasPushed(0);remoteControl.offButtonWasPushed(0);remoteControl.onButtonWasPushed(1);remoteControl.offButtonWasPushed(1);remoteControl.onButtonWasPushed(2);remoteControl.offButtonWasPushed(2);return 0;}10、桥接模式#include <iostream>using namespace std;class OS{public:virtual void InstallOS_Imp() {}};class WindowOS: public OS{public:void InstallOS_Imp() { cout<<"安装Window操作系统"<<endl; }};class LinuxOS: public OS{public:void InstallOS_Imp() { cout<<"安装Linux操作系统"<<endl; }};class UnixOS: public OS{public:void InstallOS_Imp() { cout<<"安装Unix操作系统"<<endl; } };//计算机class Computer{public:virtual void InstallOS(OS *os) {}};class DellComputer: public Computer{public:void InstallOS(OS *os) { os->InstallOS_Imp(); }};class AppleComputer: public Computer{public:void InstallOS(OS *os) { os->InstallOS_Imp(); }};class HPComputer: public Computer{public:void InstallOS(OS *os) { os->InstallOS_Imp(); }};int main(){OS *os1 = new WindowOS();OS *os2 = new LinuxOS();Computer *computer1 = new AppleComputer();computer1->InstallOS(os1);computer1->InstallOS(os2);}11、外观模式#include <iostream>using namespace std;class Scanner{public:void Scan() { cout<<"词法分析"<<endl; }};class Parser{public:void Parse() { cout<<"语法分析"<<endl; }};class GenMidCode{public:void GenCode() { cout<<"产生中间代码"<<endl; } };class GenMachineCode{public:void GenCode() { cout<<"产生机器码"<<endl;} };//高层接口class Compiler{public:void Run(){Scanner scanner;Parser parser;GenMidCode genMidCode;GenMachineCode genMacCode;scanner.Scan();parser.Parse();genMidCode.GenCode();genMacCode.GenCode();}};int main(){Compiler compiler;compiler.Run();return 0;}12、享元模式#include <vector>#include <iostream>#include <conio.h>#include <string>using namespace std;class Flyweight{public:Flyweight(){}virtual ~Flyweight(){}virtual void Operation(const string extrinsicState) = 0;//接受客户的外部状态};class ConcreteFlyweight : public Flyweight{public:char _intrinsicState;ConcreteFlyweight(char intrinsicState){this->_intrinsicState = intrinsicState;cout<<intrinsicState<<" is created!"<<endl;}~ConcreteFlyweight(){}char GetIntrinsicState(){return this->_intrinsicState;}//返回内部状态变量void Operation(const string extrinsicState){if (!extrinsicState.empty()){cout<<"<"<<extrinsicState<<"> "<<_intrinsicState<<endl;}elsecout<<"<Normal> "<<_intrinsicState<<endl;}};class FlyweightFactory{public://作为对象池,存贮共享的Flyweight对象,也可用hash表等其它结构vector <ConcreteFlyweight *>_flyVector;FlyweightFactory(){}~FlyweightFactory(){}Flyweight * GetFlyweight(char key){//引入迭代器实现按顺序访问池中的各Flyweight对象vector <ConcreteFlyweight *>:: iterator it = _flyVector.begin();ConcreteFlyweight * flyTemp;if (_flyVector.size() == 0)//当容器内无任何对象时,先push一个对象{flyTemp = new ConcreteFlyweight(key);_flyVector.push_back(flyTemp);return flyTemp;}for (; it != _flyVector.end(); it++)//遍历对象{if ((*it)->GetIntrinsicState() == key)//若存在{cout<<key<<" is already existed.."<<endl;return *it;}flyTemp = new ConcreteFlyweight(key);_flyVector.push_back(flyTemp);return flyTemp;}}};int main(){FlyweightFactory * fac1 = new FlyweightFactory();Flyweight *fly1 = fac1->GetFlyweight('a');Flyweight *fly2 = fac1->GetFlyweight('b');Flyweight *fly3 = fac1->GetFlyweight('a');fly1->Operation("BigSize");fly2->Operation("");fly3->Operation("Rotated");getch();/*等待按键继续*/return 0;}13、修饰模式#include <iostream>#include <string>using namespace std;class Person{public:Person(){}Person(string str):name(str){}string GetName(){return name;}virtual void Show(){cout << "装扮的" << GetName() << endl;}private:string name;};// 装饰类class PStyle : public Person{public:void Decorator(Person *conponent){this->person = conponent;}void Show(){if (person != NULL){person->Show();}}protected:Person *person; // 记住,动态的条用虚函数必须通过对象的指针或者引用};// 具体装饰class TShirt : public PStyle{public:void Show(){cout << " T恤";PStyle::Show();}};// 具体装饰class Throuse : public PStyle{public:void Show(){cout << " c长裤子";PStyle::Show();}};class Sweter : public PStyle{public:void Show(){cout << " 大毛衣";PStyle::Show();}};void main(){Person xiaocai("小菜");TShirt tx;Throuse th;Sweter sw;tx.Decorator(&xiaocai);th.Decorator(&tx);sw.Decorator(&th);sw.Show();}14、原型模式#include <iostream>using namespace std;class Resume{protected:char *name;public:Resume() {}virtual ~Resume() {}virtual Resume* Clone(){ return NULL; }virtual void Set(char *n) {}virtual void Show() {}};class ResumeA : public Resume{public:ResumeA(const char *str); //构造函数ResumeA(const ResumeA &r); //拷贝构造函数~ResumeA(); //析构函数Resume* Clone(); //克隆,关键所在void Show(); //显示内容};ResumeA::ResumeA(const char *str){if(str == NULL) {name = new char[1];name[0] = '\0';}else {name = new char[strlen(str)+1];strcpy(name, str);}}ResumeA::~ResumeA() { delete [] name;} ResumeA::ResumeA(const ResumeA &r) {name = new char[strlen()+1];strcpy(name, );}Resume* ResumeA::Clone() {return new ResumeA(*this);}void ResumeA::Show() {cout<<"ResumeA name : "<<name<<endl;}int main(){Resume *r1 = new ResumeA("A");// Resume *r2 = new ResumeB("B");Resume *r3 = r1->Clone();// Resume *r4 = r2->Clone();r1->Show();//r2->Show();//删除r1,r2delete r1;//delete r2;r1 = NULL;// r2 = NULL;//深拷贝所以对r3,r4无影响r3->Show();//r4->Show();delete r3;//delete r4;r3 = NULL;// r4 = NULL;return 0;}15、职责连模式#include <iostream>#include <string>using namespace std;class Manager{protected:Manager *m_manager;string m_name;public:Manager(Manager *manager, string name):m_manager(manager), m_name(name){}virtual void DealWithRequest(string name, int num) {}};//经理class CommonManager: public Manager{public:CommonManager(Manager *manager, string name):Manager(manager,name) {}void DealWithRequest(string name, int num){if(num < 500) //经理职权之内{cout<<"经理"<<m_name<<"批准"<<name<<"加薪"<<num<<"元"<<endl<<endl;}elsecout<<"经理"<<m_name<<"无法处理,交由总监处理"<<endl;m_manager->DealWithRequest(name, num);}}};//总监class Majordomo: public Manager{public:Majordomo(Manager *manager, string name):Manager(manager,name) {}void DealWithRequest(string name, int num){if(num < 1000) //总监职权之内{cout<<"总监"<<m_name<<"批准"<<name<<"加薪"<<num<<"元"<<endl<<endl;}else{cout<<"总监"<<m_name<<"无法处理,交由总经理处理"<<endl;m_manager->DealWithRequest(name, num);}}};//总经理class GeneralManager: public Manager{public:GeneralManager(Manager *manager, string name):Manager(manager,name) {}void DealWithRequest(string name, int num) //总经理可以处理所有请求{cout<<"总经理"<<m_name<<"批准"<<name<<"加薪"<<num<<"元"<<endl<<endl;}};int main(){Manager *general = new GeneralManager(NULL, "A"); //设置上级,总经理没有上级Manager *majordomo = new Majordomo(general, "B"); //设置上级Manager *common = new CommonManager(majordomo, "C"); //设置上级common->DealWithRequest("D",300); //员工D要求加薪common->DealWithRequest("E", 600);common->DealWithRequest("F", 1000);delete common; delete majordomo; delete general;}16、状态模式#include <iostream>using namespace std;/*一个状态接口,不同的状态从该接口中继承出来,想要增加新的状态时,只需从此接口中派生出新的类即可,适合于当判断较多(多个状态切换频繁)的场合这里引入一个程序员写工程程序的例子,程序员在一天的不同时间会处于不同的状态如果程序写不完还得加班,即程序员的状态会随着时间发生改变*/class Work;/*状态接口State*/class State{public:virtual void WriteProgram(Work *w) = 0;//写程序的行为(与Work相关的行为)};//工作类class Work{private:State *current;//当前状态double hour;bool taskFinish;public:Work(){taskFinish = false;}void SetTime(double hour){this->hour = hour;}double GetTime(){return this->hour;}//设置状态void SetState(State *s){current = s;}//设置工程是否完成void SetFinish(){taskFinish = true;}bool GetFinish(){return taskFinish;}void WriteProgram(){current->WriteProgram(this);}};//下班休息状态class RestState : public State{public:void WriteProgram(Work *w){cout<<"当前时间:"<<w->GetTime()<<"点工作完成,下班回家了"<<endl;}};//睡眠工作状态class SleepingState : public State{public:void WriteProgram(Work *w){cout<<"受不了了,"<<w->GetTime()<<"点了,先睡吧"<<endl;}};//晚上工作状态class EveningState : public State{public:void WriteProgram(Work *w){//任务完成了,可以休息了if(w->GetFinish()){w->SetState(new RestState());w->WriteProgram();}else{if(w->GetTime()<21){cout<<"当前时间:"<<w->GetTime()<<"点加班了,疲惫至极"<<endl;}else{//找过21点w->SetState(new SleepingState());w->WriteProgram();}}}};//下午工作状态class AfternoonState : public State{public:void WriteProgram(Work *w){if(w->GetTime()<17){cout<<"当前时间:"<<w->GetTime()<<"点状态还不错,继续努力"<<endl;}else{w->SetState(new EveningState());w->WriteProgram();}}};//中午工作状态class NoonState : public State{public:void WriteProgram(Work *w){if (w->GetTime()<13)cout<<"当前时间:"<<w->GetTime()<<"点饿了,午饭:犯困,午休"<<endl;else。
head first 设计模式

Head First 设计模式介绍Head First 设计模式是一本由埃里克·弗里曼(Eric Freeman)、伊丽沙白·弗里曼(Elisabeth Freeman)、考思温·西迪(Kathy Sierra)和贾尼特·贝茨(Bert Bates)合著的图书,该书使用了一种独特的学习方式,通过大量的图表、示例和练习来帮助读者理解和实践面向对象设计模式。
本文档将对 Head First 设计模式进行简要概述,并介绍其中涵盖的几种常见的设计模式。
设计模式概述设计模式是在软件开发过程中经常出现的问题的解决方案。
它们旨在提供一种通用的方法,帮助开发人员解决特定类型的问题。
设计模式有助于提高软件的可重用性、可维护性和可扩展性。
Head First 设计模式一书介绍了23种常见的设计模式,分为三种类型:创建型模式、结构型模式和行为型模式。
•创建型模式:这些模式关注对象的创建过程,包括如何实例化对象和配置对象的创建流程。
•结构型模式:这些模式关注对象之间的组合,以建立更大的结构,并提供对象之间的简化操作。
•行为型模式:这些模式关注对象之间的交互和通信,以实现特定的行为和协作。
以下是 Head First 设计模式中介绍的一些常见设计模式:创建型模式单例模式单例模式确保一个类只有一个实例,并提供一个全局访问点来访问该实例。
通过单例模式,我们可以限制对某个类的实例化,避免多个对象同时存在。
工厂模式工厂模式是一种创建型模式,它定义了一个创建对象的接口,但将具体的实现交给了子类来决定。
工厂模式可以通过将对象的创建和使用解耦,从而提供一种灵活的方法来创建多个对象的实例。
结构型模式适配器模式适配器模式将一个类的接口转换为客户端所期望的另一个接口,从而使两个类能够协同工作。
适配器模式适用于需要将一个类集成到另一个类中,并且不能修改原有类的情况。
装饰器模式装饰器模式允许在不改变现有对象结构的情况下,动态地添加行为。
head first设计模式

Head First设计模式介绍Head First设计模式是一本由Eric Freeman、Elisabeth Robson、Kathy Sierra和Bert Bates合著的经典书籍,它以一种有趣且易于理解的方式介绍了软件设计模式的概念和实例。
该书通过生动的插图、真实的场景和互动式的内容,帮助读者更好地理解和应用设计模式。
本文将简要介绍Head First设计模式的主要内容,并通过几个设计模式示例来展示如何应用这些模式来解决常见的软件设计问题。
设计模式概述设计模式是一套经过反复验证的、可复用的解决方案,用于解决软件设计中的常见问题。
设计模式提供了一种共享的词汇,并描述了如何将这些词汇组合成解决方案。
设计模式通常可以分为三类:创建型模式、结构型模式和行为型模式。
•创建型模式关注如何创建对象,包括简单工厂模式、工厂方法模式、抽象工厂模式、单例模式、建造者模式和原型模式。
•结构型模式关注如何组织对象,包括适配器模式、装饰器模式、代理模式、外观模式、桥接模式、组合模式和享元模式。
•行为型模式关注对象之间的通信和职责分配,包括模板方法模式、策略模式、命令模式、迭代器模式、观察者模式、中介者模式、备忘录模式、状态模式、访问者模式和解释器模式。
接下来,我们将通过几个具体的设计模式示例来说明Head First设计模式的应用。
示例1:工厂方法模式工厂方法模式是一种创建型设计模式,它定义了一个用于创建对象的接口,但由子类决定要实例化的类是哪一个。
工厂方法模式将对象的实例化推迟到子类中,从而实现了解耦和灵活性。
public abstract class PizzaStore {public Pizza orderPizza(String type) {Pizza pizza = createPizza(type);pizza.prepare();pizza.bake();pizza.cut();pizza.box();return pizza;}protected abstract Pizza createPizza(String t ype);}在上面的代码中,我们定义了一个抽象的PizzaStore类,其中的createPizza()方法由子类来实现,用于创建具体的Pizza对象。
- 1、下载文档前请自行甄别文档内容的完整性,平台不提供额外的编辑、内容补充、找答案等附加服务。
- 2、"仅部分预览"的文档,不可在线预览部分如存在完整性等问题,可反馈申请退款(可完整预览的文档不适用该条件!)。
- 3、如文档侵犯您的权益,请联系客服反馈,我们会尽快为您处理(人工客服工作时间:9:00-18:30)。
《Head First设计模式》阅读笔记.全书总结文章分类:Java编程1、模式(Pattern)定义策略(Strategy)模式:定义一组算法族,分别封装起来,让各个算法之间可以相互替换。
此模式让算法的变化独立于使用算法的客户。
观察者模式:定义了对象之间的一对多依赖关系,当一个对象(主题对象)的状态改变时,它的所有依赖者(观察者对象)都会收到通知并自动更新。
装饰者模式:动态地将责任加到对象身上。
如果要扩展功能,装饰者模式提供了比继承更有弹性的替代方案。
*用静态方法定义的工厂被成为静态工厂,这样就不用使用创建对象的方法来实例化对象,使用方便。
但是这样做的缺点是无法通过继承来改变创建方法的行为。
*简单工厂不是一种设计模式,但是它比较常用。
*工厂方法用来处理对象的创建,并将这样的行为封装在子类中。
这样,客户程序中关于超类的代码就和子类对象的创建代码解耦(Decouple)了。
工厂方法的定义:abstract Product factoryMethod(String type);工厂(Factory Method Pattern)方法模式:定义了一个创建对象的接口,但是由子类来决定要实例化的类是哪一个。
它让类把实例化推迟到了子类。
抽象工厂模式:提供一个接口,用于创建相关或者依赖对象的家族,而不需要明确指定具体类。
单件(Singleton)模式:确保一个类只有一个实例,并提供一个全局访问点。
命令(Command)模式:将“请求”封装成对象,以便使用请求、队列或日志来参数化其它对象。
命令模式也支持可撤销的操作。
适配器模式:将一个类的接口,转换成客户希望的另一个接口。
适配器让原本接口不兼容的类合作无间。
外观模式:提供了一个统一的接口,用来访问子系统中的一群接口。
外观模式定义了一个高层接口,让子系统更容易使用。
迭代器模式:提供一种顺序访问集合对象中各个元素的方法,而又不暴露其内部的表示(也就是数据结构)。
组合模式:将对象组合成树状结构来表现“整体/部分”的层级结构,让客户以一致的方式来处理个别对象以及对象组合。
模板方法模式:在一个方法中定义了一个算法的骨架,而将一些步骤延迟到子类中。
模板方法可以让子类在不改变算法结构的情况下,重新定义算法中的某些步骤。
状态(State)模式:允许对象在内部状态改变时改变它的行为,对象看起来好像修改了它的类。
代理模式:为另一个对象提供替身或占位符以控制对这个对象的访问。
*复合模式在一个解决方案中结合两个或多个模式,以解决一般或重复发生的问题。
*视图(View):用来呈现模型。
视图通常直接从模型中取得它需要显示的数据和状态。
*控制器(Controller):取得用户的输入并解读其对模型的含义。
*模型(Model):模型持有所有的数据、状态和程序逻辑。
模型没有注意到视图和控制器,虽然它提供了操纵和检索状态的接口,并发送状态改变通知给观察者。
模式:是在某种情境下(Context),针对某个问题的某种解决方案。
反模式:告诉你如何采用一个不好的解决方案解决一个问题。
2、面向对象设计原则封装变化--把软件中那些在将来可能产生变化的地方独立出来,与其他部分分割以减少变化时对它们的影响。
这样的设计可以使系统变得有弹性,更好地应对变化。
针对接口编程,而不针对实现编程。
依据该原则,声明一个变量时要把它声明为超类型(接口或抽象类),而不是实现类。
多用组合,少用继承。
使用组合的方式可以实现代码的分割,使代码有更大的弹性,更好地提高了复用性。
努力在交互对象之间实现松耦合,使它们之间的互相依赖降到最低,从而提高可复用性。
类应该对扩展开放,对修改关闭。
这就是我们常说的开放-关闭原则。
要依赖抽象,不要依赖具体类。
这个原则又被称为“依赖倒置原则(Dependency Inversion Principle)”。
*遵循依赖倒置原则的三个指导方针:(1)变量不可以持有具体类的引用。
这可以通过使用工厂避开。
(2)不要让类派生自具体类。
否则就会依赖具体类,违反了“针对接口编程,而不是针对现实编程”的软件设计原则。
(3)不要覆盖基类中已实现的方法。
出现这样的情况就说明基类设计的有问题。
要减少对象之间的交互,只留下几个“密友”。
这个原则被称为“最少知识(Least Knowledge)原则”,它告诉我们只和自己的密友谈话。
*通过只调用以下几种范围内的方法可以做到尽量遵循“最少知识原则”:(1)该对象本身(2)被当做方法的参数而传递进来的对象(3)此方法所创建或实例化的任何对象(4)对象的任何组件,比如类或对象本身的变量,或常量*最少知识原则的不同名称:(Principal of) Least Knowledge,(The) Law of Demeter,迪米特法则,得墨忒耳法则一个类应该只有一个引起变化的原因。
别调用(打电话给)我们,我们会调用(打电话给)你。
这个原则被成为好莱坞原则。
3、模式使用事项*装饰者模式的几个缺点:(1)有时在设计中加入大量的小类,变得不容易理解。
(2)有的客户端代码依赖于特定的类型(这是个比较糟糕的习惯,违反了“针对接口编程,而不是针对实现编程”的设计原则),当服务器端引入装饰者模式时,客户端就会出现状况。
(3)装饰者模式使得实例化组件的复杂度提升。
PS:工厂(Factory)模式和生成器(Builder)模式对于装饰者(Decorator)模式的这些缺点会有所帮助。
*空对象(null object)可以用于返回无意义的对象时,它可以承担处理null的责任。
有时候空对象也被视为一种设计模式。
*宏命令(Macro Command)是一个命令队列,它包含了一组实现了同一个命令接口的类。
*在调用者中用一个堆栈记录连续执行的命令,这样就可以实现每按一次按钮就执行一次撤销操作的连续撤销功能。
*适配器(Adapter)类看起来很像命令(Command)模式中命令接口的实现类,只不过它不被作为参数传递。
*类适配器是基于多重继承实现的,因为Java不支持多重继承,因此无法做到。
*装饰者(Decorator)模式与适配器(Adapter)模式的区别(1)装饰者模式与“责任”相关,当涉及到装饰者时,就表示有一些新的行为或责任要加到设计中。
(2)适配器允许客户使用新的库和子集合,无须改变“任何”已存在的代码,由适配器负责转换即可。
(3)装饰者不会改变接口,而适配器会改变接口。
(4)装饰者的工作是扩展被包装对象的行为或责任,并不是“简单传递”就算了。
(5)装饰者(Decorator)模式与适配器(Adapter)模式的最大不同在于使用它们的意图(或目的)。
*使用最少知识原则的缺点是:更多的“包装类”被创造出来,以处理和其它组件的沟通。
这可能导致复杂度和开发时间的增加,并减低运行时的性能。
*组合(Composite)模式牺牲了单一责任设计原则,换取了透明性(Transprency)。
*空迭代器(Iterator)是空对象(null object)“设计模式”的又一个例子,之前的例子是“空命令(NullCommand)”。
*为了保证模板方法定义的算法步骤不被改变,模板方法被声明为final的。
*钩子(hook)就是回调函数,它可以作为条件影响模板方法类中算法的流程。
代理模式有很多变种,几乎都与控制访问有关,它控制访问的几种方式:一、远程代理控制远程对象的访问。
二、虚拟代理控制创建开销大的资源的访问。
三、保护代理基于权限控制对资源的访问。
*不把控制器的代码(解读视图的输入并操纵模型)放到模型中的原因有两个:一、会让模型的代码更复杂。
模型将具有两个责任,不但要管理用户界面,还要处理如何控制模型的逻辑。
二、会造成模型和视图之间的紧耦合,降低了可复用性。
通过模型和视图之间的解耦,使设计更有弹性和容易扩展,能容纳改变。
4、其他重要知识*面向对象(OO)的四个基本概念是:抽象、封装、继承、多态。
*继承的好处是实现了代码的复用。
*良好的OO设计必须具备可复用、可扩展、可维护三个特性。
*引起代码修改的几种情况:1)客户要求不同的做法或新功能。
2)数据库产品发生改变导致数据格式不兼容。
3)协议有了新版本。
4)开发人员水平有了提升,重新实现。
*观察者模式实现了主题对象与观察者对象之间的松耦合,当有新的观察者时,无需修改主题对象的代码,只需要新的观察者对象实现接口。
在程序运行的过程中,可以随时注册和删除观察者而不影响主题对象。
*Java内置了对观察者模式的支持:java.util.Observable类和java.util.Observer接口。
*java.util.Observable类的局限:一、它是一个类,而不是接口,由于Java不支持多重继承,所以主题类无法同时拥有它和另一个超类的行为,这限制了Observable类的复用潜力。
违反了“针对接口编程,而不是针对实现编程”的软件设计原则。
二、它的某些如setChanged()这样的方法被定义为protected,要使用它们就必须继承Observable类,这违反了“多用组合,少用继承”的软件设计原则。
如果上面两条限制妨碍了你的使用,就应该考虑自己设计实现观察者模式。
*在观察者模式中,传递数据的方式有“推”和“拉”两种,Java内置的实现支持这两种方式,然而较常用的为“推”数据。
*观察者模式以松耦合的方式在对象之间传递状态,MVC是其代表。
*利用组合(composition)和委托(delegation)可以在运行时实现继承行为的效果,动态地给对象加上新的行为。
*利用继承扩展子类的行为,是在编译时静态决定的;利用组合的做法,可以在运行时动态地扩展对象的行为。
*装饰者模式中,装饰者可以在被装饰者的行为之前或之后,加上自己的行为,以实现特性的目的。
*针对接口编程可以隔离掉系统以后可能发生的一大堆改变。
*所有工厂模式都用来封装对象的创建。
*工厂方法模式(Factory Method Pattern)通过让子类来决定该创建的对象是什么,来达到将对象的创建过程封装的目的。
*在工厂方法模式中包括创建者(Creator)类和产品(Product)类两种类型的类。
*工厂方法模式可以和策略(Strategy)模式结合起来,在运行时动态地更换工厂类,从而创建不同的产品对象,这是简单工厂所不具有的弹性。
*依赖倒置原则说明不能让高层组件依赖于底层组件,而是它们都应该依赖于抽象。
*抽象工厂模式是工厂方法模式的演变。
工厂方法模式中,创建者只生产一种类型的产品,而抽象工厂模式中,创建者生产一组不同类型的产品。
*所有工厂模式都通过减少应用程序和具体类之间的依赖来促进松耦合,即解耦(Decouple)。
*有些对象我们只需要一个,比如说:线程池(threadpool)、缓存(cache)、对话框(Dialog)、处理偏好设置的对象、处理注册表(register)的对象、日志对象,以及充当打印机、显卡等设备的驱动程序对象。