Cisco Route Netflow Configure
Cisco路由器配置命令
Cisco路由器配置命令Cisco路由器配置命令大全为方便考生复习思科路由器的配置,yjbys店铺为大家分享思科路由器配置命令如下,仅供参考!1. switch配置命令(1)模式转换命令用户模式----特权模式, 使用命令"enable"特权模式----全局配置模式, 使用命令"config t"全局配置模式----接口模式, 使用命令"interface+接口类型+接口号"全局配置模式----线控模式, 使用命令"line+接口类型+接口号"注:用户模式:查看初始化的信息.特权模式:查看所有信息、调试、保存配置信息全局模式:配置所有信息、针对整个路由器或交换机的所有接口接口模式:针对某一个接口的配置线控模式:对路由器进行控制的接口配置(2)配置命令show running config 显示所有的配置show versin 显示版本号和寄存器值shut down 关闭接口no shutdown 打开接口ip add +ip地址配置IP地址secondary+IP地址为接口配置第二个IP地址show interface+接口类型+接口号查看接口管理性show controllers interface 查看接口是否有DCE电缆show history 查看历史记录show terminal 查看终端记录大小hostname+主机名配置路由器或交换机的标识config memory 修改保存在NVRAM中的启动配置exec timeout 0 0 设置控制台会话超时为0service password-encryptin 手工加密所有密码enable password +密码配置明文密码ena sec +密码配置密文密码line vty 0 4/15 进入telnet接口password +密码配置telnet密码line aux 0 进入AUX接口password +密码配置密码line con 0 进入CON接口password +密码配置密码bandwidth+数字配置带宽no ip address 删除已配置的IP地址show startup config 查看NVRAM中的配置信息copy run-config atartup config 保存信息到NVRAM write 保存信息到NVRAMerase startup-config 清除NVRAM中的配置信息show ip interface brief 查看接口的谪要信息banner motd # +信息 + # 配置路由器或交换机的描素信息description+信息配置接口听描素信息vlan database 进入VLAN数据库模式vlan +vlan号+ 名称创建VLANswitchport access vlan +vlan号为VLAN为配接口interface vlan +vlan号进入VLAN接口模式ip add +ip地址为VLAN配置管理IP地址vtp+service/tracsparent/client 配置SW的VTP工作模式vtp +domain+域名配置SW的VTP域名vtp +password +密码配置SW的密码switchport mode trunk 启用中继no vlan +vlan号删除VLANshow spamming-tree vlan +vlan号查看VLA怕生成树议2. 路由器配置命令ip route+非直连网段+子网掩码+下一跳地址配置静态/默认路由show ip route 查看路由表show protocols 显示出所有的被动路由协议和接口上哪些协议被设置show ip protocols 显示了被配置在路由器上的路由选择协议, 同时给出了在路由选择协议中使用的定时器等信息router rip 激活RIP协议路由器的几个基本命令:Router>enable 进入特权模式Router#disable 从特权模式返回到用户模式Router#configure terminal 进入到全局配置模式Router(config)#interface ethernet 1 进入到路由器编号为1的以太网口exit 返回上层模式end 直接返回到特权模式========================================================注意:1、CISCO CATALYST(交换机),如果在初始化时没有发现“用户配置”文件,就会自动载入Default Settings(默认配置)文件,进行交换机初始化,以确保交换机正常工作。
深圳信狮思科基本命令
1、配置设备的准备工作(1).禁止设备返回初始界面sw1(config)#line con 0sw1(config-line)#exec-timeout 0 0(2).启用显示同步sw1(config)#line con 0sw1(config-if)#logging synchronous(3).禁止DNS查找sw1(config)#no ip domain-lookup(4).给路由器配置IP地址R1(confing)#interface fastethernetR1(config-if)#ip addressip-address subnet-maskR1(config-if)#no shutdownip address配置IP地址关键词ip-address表示分配给路由器接口的IP地址subnet-mask表示分配给IP地址的子网掩码no shutdown表示开启路由器的接口(5).配置交换机IP地址Sw1(config)#interface vlan 1Sw1(config-if)#ip addressip-address subnet-maskSw1(config-if)#no shutdown(6).查看arp缓存表R1#show arp2.静态路由和默认路由的配置(1).配置静态路由R1(config)#ip routenetwork mask{address | interface}network:目的网络地址mask:子网掩码address:到达目的网络经过的下一跳路由器的接口地址Interface:到达目的网段的本地接口(2).配置默认路由R1(config)#ip route 0.0.0.0 0.0.0.0 address0.0.0.0 0.0.0.0:代表任何网络address:到达目的网段经过的下一跳路由器的接口地址3.基础命令(1).show running-config(sh run)查看当前配置信息Sw1#sh run(2).show startup-config(sh star)查看已保存配置信息Sw1#show startup-config(3).copy running-config startup-config(wri)保存当前配置Sw1#copy running-config startup-config(4).erase nvram用于删除已保存的配置信息(delete nvram:startup-config)Sw1#erase nvram4.路由器,交换机的密码设置和恢复(1).配置Console口密码Sw1(config)#line console 0Sw1(config-line)#password123(设置密码为123)Sw1(config-line)#login(2).配置特权模式密码Sw1(config)#enable password123(设置明文密码为123)Sw1(config)#enable secret123(设置密文密码为123)(3).配置加密明文密码Sw1(config)#service password-encryption(4).路由器密码恢复1:重启路由器按下Ctrl+Breack键中断ios的加载2:将配置寄存器的值更改为0x2142表示启动时忽略startup-config的配置rommom>confreg 0x2142rommom>reset3:重启路由器进入配置模式后将配置文件手动加载进来R1#copy startup-config running-config4:重新配置密码在将配置寄存器的值修改回来R1(config)#config-register 0x2102R1(config)#exitR1#wri(copy running-config startup-config)(5).交换机密码恢复1:拔掉交换机电源插头2:重新插好电源按住交换机的mode键当出现switch命令时松开mode键3:在switch:命令行中输入flash_init初始化flashswitch:flash_init4:将config.text文件名改为config.old(文件名可以随便设置不影响后续操作)switch:rename flash:config.text flash:config.old5:重启交换机switch:boot6:把配置文件名改回来switch:renmane flash:config.old flash:config.text7:手动加载配置文件switch#copy flash:config.text system:running-config8:配置文件加载完成在修改密码并保存配置完成密码恢复。
思科路由器命令大全(完整版)
思科路由器命令大全(完整版)思科路由器命令大全(完整版)本文档旨在提供思科路由器命令的详细说明和使用指南,包括路由器配置、网络管理、安全性设置等内容。
每个章节都详细介绍了不同的命令和参数,以帮助用户更好地理解和使用思科路由器。
1:路由器基本配置1.1 主机名设置1.2 用户名和密码设置1.3 IP 地址和子网掩码配置1.4 默认网关配置2:接口配置2.1 以太网接口配置2.2 串行接口配置2.3 子接口配置2.4 虚拟局域网 (VLAN) 配置3:路由协议配置3.1 静态路由配置3.2 动态路由配置3.2.1 RIP 配置3.2.2 OSPF 配置3.2.3 BGP 配置4:网络管理4.1 SNMP 配置4.2 NetFlow 配置4.3 Syslog 配置4.4 路由器时间设置5:安全性配置5.1 访问控制列表 (ACL) 配置5.2 VPN 配置5.3 防火墙配置5.4 AAA 配置附件:本文档附带的附件包括示例配置文件、命令输出示例等,以帮助读者更好地理解和应用文档中的内容。
法律名词及注释:本文档所涉及的法律名词及其注释如下:1:主机名:指路由器的主机标识名称,用于在网络中识别路由器。
2:用户名和密码:用于登录和管理路由器的凭证信息。
3: IP 地址:网络协议中用于唯一标识设备的数字地址。
4:子网掩码:用于标识 IP 地址中网络部分和主机部分的分界线。
5:默认网关:用于转发网络流量的下一跳路由器。
6:以太网接口:用于连接局域网设备的物理接口。
7:串行接口:用于连接广域网设备的物理接口。
8:子接口:在一个物理接口上创建多个逻辑接口,用于实现VLAN 分隔等功能。
9:虚拟局域网 (VLAN):用于将局域网划分成多个逻辑网络的技术。
10:静态路由:手动配置的路由表项,用于指定数据包传输的路径。
11:动态路由:根据路由协议动态学习和更新的路由表项,用于自动路由选择。
12: RIP:路由信息协议,一种距离向量路由协议。
cisco netflow 配置介绍
Configuring NetFlowRelease 12.1January 8, 2001This chapter describes how to configure NetFlow in Cisco IOS Release 12.1 and Release 12.0S. For acomplete description of NetFlow commands used in this chapter, refer to the Cisco IOS SwitchingServices Command Reference. For documentation on other commands that appear in this chapter, youcan use the command reference master index or search online.NetFlow ImplementationWith NetFlow, you can export data (traffic statistics) to a remote workstation for processing.NetFlow does not involve any connection-setup protocol either between routers or to any othernetworking device or end station and does not require any change externally—either to the traffic orpackets themselves or to any other networking device. Thus, NetFlow is completely transparent to theexisting network, including end stations and application software and network devices like LANswitches.Also,because NetFlow is performed independently on each internetworking device,it does notneed to be operational on each router in the work planners can selectively invoke NetFlow(and NetFlow data export) on a router or interface basis to gain traffic performance, control, oraccounting benefits in specific network locations.Note NetFlow does consume additional memory and CPU resources;therefore,it is important tounderstand the resources required on your router before enabling NetFlow.NetFlow Configuration Task ListTo configure NetFlow, complete the tasks in the following sections. At a minimum, you must enableNetFlow. The remaining tasks are optional.•Enabling NetFlow (Required)•Exporting NetFlow Statistics (Optional)•Customizing the Number of Entries in the NetFlow Cache (Optional)•Managing NetFlow Statistics (Optional)•Configuring IP Distributed Switching and NetFlow on VIP Interfaces (Optional)•Configuring an Aggregation Cache (Optional)Configuring NetFlowNetFlow Configuration Task List •Configuring NetFlow Policy Routing (Optional)Enabling NetFlowTo enable NetFlow,first configure the router for IP routing as described in the IP configuration chapters in the Cisco IOS IP and IP Routing Configuration Guide . After you configure IP routing, use thefollowing commands beginning in global configuration mode:Exporting NetFlow StatisticsNetFlow information can also be exported to network management applications.To configure the router to export NetFlow statistics maintained in the NetFlow cache to a workstation when a flow expires,use one of the following commands in global configuration mode:Customizing the Number of Entries in the NetFlow CacheNormally the size of the NetFlow cache will meet your needs. However, you can increase or decrease the number of entries maintained in the cache to meet the needs of your NetFlow traffic rates.The default is 64K flow cache entries.Each cache entry is approximately 64bytes of storage.Assuming a cache with the default number of entries,approximately 4MB of DRAM would be required.Each time a new flow is taken from the free-flow queue,the number of free flows is checked.If there are only a few free flows remaining,NetFlow attempts to age 30flows using an accelerated timeout.If there is only one free flow remaining,NetFlow automatically ages 30flows regardless of their age.The intent is to ensure free flow entries are always available.CommandPurpose Step 1interface type slot /port-adapter /port (Cisco7500 series routers)interface type slot /port (Cisco 7200 seriesrouters)Specifies the interface, and enter interface configuration mode.Step 2ip route-cache flow Enables mandPurpose ip flow-export ip-address udp-port [version 1]Configures the router to export NetFlow cache entries to aworkstation if you are using receiving software that requiresversion 1. Version 1 is the default.ip flow-export ip-address udp-port version 5[origin-as |peer-as ]Configures the router to export NetFlow cache entries to aworkstation if you are using receiving software that acceptsversion 5. Optionally specify origin or peer autonomoussystem (AS). The default is to export neither AS whichprovides improved performance.Configuring NetFlowNetFlow Configuration Task List To customize the number of entries in the NetFlow cache, use the following command in globalconfiguration mode:Command Purposeip flow-cache entries number Changes the number of entries maintained in the NetFlowcache. The number of entries can be 1024 to 524288.The default is 65536.Caution We recommend that you not change the NetFlow cache entries.Improper use of this featurecould cause network problems. To return to the default NetFlow cache entries, use theno ip flow-cache entries global configuration command.Managing NetFlow StatisticsYou can display and clear NetFlow Flow statistics consist of IP packet size distribution,IPNetFlow cache information,and flow information such as the protocol,total flow,flows per second,andso forth. The resulting information can be used to find out information about your router traffic. Tomanage NetFlow statistics, use either of the following commands in privileged EXEC mode:Command Purposeshow ip cache flow Displays the NetFlow statistics.clear ip flow stats Clears the NetFlow statistics.Configuring IP Distributed Switching and NetFlow on VIP InterfacesOn Cisco 7500 series routers with a Route Switch Processor (RSP) and with Versatile InterfaceProcessor(VIP)controllers,the VIP hardware can be configured to switch packets received by the VIPwith no per-packet intervention on the part of the RSP. This process is called distributed switching.Distributed switching decreases the demand on the RSP.The VIP hardware can also be configured for NetFlow, a new high-performance feature that cachesinformation about the flow. NetFlow data can also be exported to network management applications.Refer to the Cisco Product Catalog for information about VIP port adapters used for distributedswitching.To configure distributed switching on the VIP, first configure the router for IP routing as described inthis chapter and the various routing protocol chapters, depending on the protocols you use.After you configure IP routing, use the following commands beginning in global configuration mode:Command PurposeStep1interface type slot/port-adapter/port Specifies the interface, and enter interface configurationmode.Configuring NetFlowNetFlow Configuration Task List When the RSP or VIP is using NetFlow, it uses a flow cache instead of a destination network cache to switch IP packets.The flow cache uses source and destination network address,protocol,and source and destination port numbers to distinguish entries.To export NetFlow cache entries to a workstation when a flow expires, use the following command in global configuration mode:Configuring an Aggregation CacheTo configure an aggregation cache,you must enter aggregation cache configuration mode,and you must decide which type of aggregation scheme you would like to configure:autonomous system,Destination Prefix, Prefix, Protocol Prefix, or Source Prefix aggregation cache. Once you define the aggregation scheme, define the operational parameters for that scheme.Verifying Aggregation Cache Configuration and Data ExportTo verify the aggregation cache information, use the following command in EXEC mode:Step 2ip route-cache distributed Enables VIP distributed switching of IP packets on the interface.Step 3ip route-cache flow Enables Netflow.CommandPurpose CommandPurpose ip flow-export ip-address udp-port Configures the router to export NetFlow cache entries to aworkstation.CommandPurpose Step 1Router(config)#ip flow-aggregation cache as Enters aggregation cache configuration mode and enables anaggregation cache scheme (as, destination-prefix, prefix,protocol-port, or source-prefix)Step 2Router(config-flow-cache)#cache entries 2046Specifies the number (in this example,2046)of cache entriesto allocate for the autonomous system aggregation cache.Step 3Router(config-flow-cache)#cache timeout inactive 199Specifies the number of seconds (in this example, 199) thatan inactive entry is allowed to remain in the aggregationcache before it is deleted.Step 4Router(config-flow-cache)#cache timeout active 45Specifies the number of minutes (in this example,45)that anactive entry is active.Step 5Router(config-flow-cache)#export destination 10.42.41.1 9991Enables the data export.Step 6Router(config-flow-cache)#enabledEnables aggregation cache mandPurpose show ip cache flow aggregation Displays the aggregation cache information.Configuring NetFlowNetFlow Configuration Task List To confirm data export, use the following command in EXEC mode:Command Purposeshow ip flow export Displays the statistics for the data export including the main cache andall other enabled caches.Configuring NetFlow Policy RoutingAs long as policy routing is configured, NetFlow policy routing is enabled by default and cannot bedisabled.That is,NPR is the default policy routing mode.No configuration tasks are required to enablepolicy routing in conjunction with CEF, dCEF, or NetFlow. As soon as one of these features is turnedon, packets are automatically subject to policy routing in the appropriate switching path.There is one new,optional configuration command(set ip next-hop verify-availability).This commandhas the following restrictions:•It can cause some performance degradation.•CDP must be configured on the interface.•The direct next hop must be a Cisco device with CDP enabled.•It is not available in dCEF, due to the dependency of the CDP neighbor database.It is assumed that policy routing itself is already configured.If the router is policy routing packets to the next hop and the next hop happens to be down, the routerwill try unsuccessfully to use Address Resolution Protocol(ARP)for the next hop(which is down).Thisbehavior will continue forever.To prevent this situation,you can configure the router to first verify that the next hop(s)of the route mapis the router’s CDP neighbor(s) before routing to that next hop.This task is optional because some media or encapsulations do not support CDP,or it may not be a Ciscodevice that is sending the router traffic.To configure the router to verify that the next hop is a CDP neighbor before the router tries to policyroute to it, use the following command in route-map configuration mode:Command Purposeset ip next-hop verify-availability Causes the router to confirm that the next hop(s) of the route mapis a CDP neighbor(s) of the router.If the command shown is set and the next hop is not a CDP neighbor,the router looks to the subsequentnext hop, if there is one. If there is none, the packets simply are not policy routed.If the command shown is not set, the packets are either successfully policy routed or remain foreverunrouted.If you want to selectively verify availability of only some next hops, you can configure differentroute-map entries(under the same route-map name)with different criteria(using access list matching orpacket size matching), and use the set ip next-hop verify-availability command selectively.Configuring NetFlow NetFlow Configuration ExamplesMonitoring NetFlow Policy RoutingTypically,you would use existing policy routing and NetFlow show commands to monitor these features.For more information on these show commands,refer to the policy routing and NetFlow documentation.To display the route map Inter Processor Communication(IPC)message statistics in the RP or VIP,usethe following command in EXEC mode:Command Purposeshow route-map ipc Displays the route map IPC message statistics in the RP or VIP.NetFlow Configuration ExamplesThis section provides the following basic configuration examples:•NetFlow Configuration Example•NetFlow Aggregation Configuration Examples•NetFlow Policy Routing ExampleNetFlow Configuration ExampleThe following example shows how to modify the configuration of serial interface 3/0/0 to enableNetFlow and to export the flow statistics for further processing to UDP port0on a workstation with theIP address of 1.1.15.1. In this example, existing NetFlow statistics are cleared to ensure accurateinformation when the show ip cache flow command is executed to view a summary of the NetFlowstatistics.configure terminalinterface serial 3/0/0ip route-cache flowexitip flow-export 1.1.15.1 0 version 5 peer-asexitclear ip flow statsNetFlow Aggregation Configuration ExamplesThis section provides the following aggregation cache configuration examples:•Autonomous System Configuration Example•Destination Prefix Configuration Example•Prefix Configuration Example•Protocol Port Configuration Example•Source Prefix Configuration ExampleConfiguring NetFlowNetFlow Configuration ExamplesAutonomous System Configuration ExampleThe following example shows how to configure an autonomous system aggregation cache with a cachesize of 2046, an inactive timeout of 200 seconds, a cache active timeout of 45 minutes, an exportdestination IP address of 10.42.42.1, and a destination port of 9992.Router(config)#ip flow-aggregation cache asRouter(config-flow-cache)#cache entries 2046Router(config-flow-cache)#cache timeout inactive 200Router(config-flow-cache)#cache timeout active 45Router(config-flow-cache)#export destination 10.42.42.1 9992Router(config-flow-cache)#enabledDestination Prefix Configuration ExampleThe following example shows how to configure a Destination Prefix aggregation cache with a cache sizeof2046,an inactive timeout of200seconds,a cache active timeout of45minutes,an export destinationIP address of 10.42.42.1, and a destination port of 9992.Router(config)#ip flow-aggregation cache destination-prefixRouter(config-flow-cache)#cache entries 2046Router(config-flow-cache)#cache timeout inactive 200Router(config-flow-cache)#cache timeout active 45Router(config-flow-cache)#export destination 10.42.42.1 9992Router(config-flow-cache)#enabledPrefix Configuration ExampleThe following example shows how to configure a Prefix aggregation cache with a cache size of2046,aninactive timeout of200seconds,a cache active timeout of45minutes,an export destination IP addressof 10.42.42.1, and a destination port of 9992.Router(config)#ip flow-aggregation cache prefixRouter(config-flow-cache)#cache entries 2046Router(config-flow-cache)#cache timeout inactive 200Router(config-flow-cache)#cache timeout active 45Router(config-flow-cache)#export destination 10.42.42.1 9992Router(config-flow-cache)#enabledProtocol Port Configuration ExampleThe following example shows how to configure a Protocol Port aggregation cache with a cache size of2046,an inactive timeout of200seconds,a cache active timeout of45minutes,an export destination IPaddress of 10.42.42.1, and a destination port of 9992.Router(config)#ip flow-aggregation cache protocol-portRouter(config-flow-cache)#cache entries 2046Router(config-flow-cache)#cache timeout inactive 200Router(config-flow-cache)#cache timeout active 45Router(config-flow-cache)#export destination 10.42.42.1 9992Router(config-flow-cache)#enabledConfiguring NetFlow NetFlow Configuration ExamplesSource Prefix Configuration ExampleThe following example shows how to configure a Source Prefix aggregation cache with a cache size of2046,an inactive timeout of200seconds,a cache active timeout of45minutes,an export destination IPaddress of 10.42.42.1, and a destination port of 9992.Router(config)#ip flow-aggregation cache source-prefixRouter(config-flow-cache)#cache entries 2046Router(config-flow-cache)#cache timeout inactive 200Router(config-flow-cache)#cache timeout active 45Router(config-flow-cache)#export destination 10.42.42.1 9992Router(config-flow-cache)#enabledNetFlow Policy Routing ExampleThe following example configures CEF and NetFlow.It also configures policy routing to verify that nexthop 50.0.0.8 of route map test is a CDP neighbor before the router tries to policy route to it.If the first packet is being policy routed via route map test sequence 10, the subsequent packets of thesame flow always take the same route map test sequence 10, not route map test sequence 20, becausethey all match or pass access list 1 check.ip cefinterface ethernet0/0/1ip route-cache flowip policy route-map testroute-map test permit 10match ip address 1set ip precedence priorityset ip next-hop 50.0.0.8set ip next-hop verify-availabilityroute-map test permit 20match ip address 101set interface Ethernet0/0/3set ip tos max-throughputThis document published January 8, 2001. Last content update: January 7, 2004。
思科路由器(CiscoRouter)常用配置命令大全
思科路由器(CiscoRouter)常用配置命令大全思科路由器(Cisco Router)常用配置命令大全1. Access-enable允许路由器在动态访问列表中创建临时访问列表入口2. Access-group把访问控制列表(ACL)应用到接口上3. Access-list定义一个标准的IP ACL4. Access-template在连接的路由器上手动替换临时访问列表入口5. Appn向APPN子系统发送命令6. Atmsig 执行ATM信令命令7. B 手动引导操作系统8. Bandwidth 设置接口的带宽9. Banner motd 指定日期信息标语10. Bfe 设置突发事件手册模式11. Boot system 指定路由器启动时加载的系统映像12. Calendar 设置硬件日历13. Cd 更改路径14. Cdp enable 允许接口运行CDP协议15. Clear 复位功能16. Clear counters 清除接口计数器17. Clear interface 重新启动接口上的件逻辑18. Clockrate 设置串口硬件连接的时钟速率,如网络接口模块和接口处理器能接受的速率19. Cmt 开启/关闭FDDI连接管理功能20. Config-register 修改设置寄存器设置21. Configure 允许进入存在的设置模式,在中心站点上维护并保存设置信息22. Configure memory 从NVRAM加载设置信息23. Configure terminal 从终端进行手动设置24. Connect 打开一个终端连接25. Copy 复制设置或映像数据26. Copy flash tftp 备份系统映像文件到TFTP服务器27. Copy running-config startup-config 将RAM中的当前设置存储到NVRAM28. Copy running-config tftp 将RAM中的当前设置存储到网络TFTP服务器上29. Copy tftp flash 从TFTP服务器上下载新映像到Flash30. Copy tftp running-config 从TFTP服务器上下载设置文件31. Debug 使用调试功能32. Debug dialer 显示接口在拨什么号及诸如此类的信息33. Debug ip rip 显示RIP路由选择更新数据34. Debug ipx routing activity 显示关于路由选择协议(RIP)更新数据包的信息35. Debug ipx sap 显示关于SAP(业务通告协议)更新数据包信息36. Debug isdn q921 显示在路由器D通道ISDN接口上发生的数据链路层(第2层)的访问过程37. Debug ppp 显示在实施PPP中发生的业务和交换信息38. Delete 删除文件39. Deny 为一个已命名的IP ACL设置条件40. Dialer idle-timeout 规定线路断开前的空闲时间的长度41. Dialer map 设置一个串行接口来呼叫一个或多个地点42. Dialer wait-for-carrier-time 规定花多长时间等待一个载体43. Dialer-group 通过对属于一个特定拨号组的接口进行设置来访问控制44. Dialer-list protocol 定义一个数字数据接受器(DDR)拨号表以通过协议或ACL和协议的组合来控制控制拨号45. Dir 显示给定设备上的文件46. Disable 关闭特许模式47. Disconnect 断开已建立的连接48. Enable 打开特许模式49. Enable password 确定一个密码以防止对路由器非授权的访问50. Enable password 设置本地口令控制不同特权级别的访问51. Enable secret 为enable password命令定义额外一层安全性(强制安全,密码非明文显示)52. Encapsulation frame-relay 启动帧中继封装53. Encapsulation novell-ether 规定在网络段上使用的Novell 独一无二的格式54. Encapsulation PPP 把PPP设置为由串口或ISDN接口使用的封装方法55. Encapsulation sap 规定在网络段上使用的以太网802.2格式Cisco的密码是sap56. End 退出设置模式57. Erase 删除闪存或设置缓存58. Erase startup-config 删除NVRAM中的内容59. Exec-timeout 设置EXEC命令解释器在检测到用户输入前所等待的时间60. Exit 退出所有设置模式或关闭一个激活的终端会话和终止一个EXEC61. Exit 终止所有设置模式或关闭一个活动的对话和结束EXEC62. format 格式化设备63. Frame-relay local-dlci 为使用帧中继封装的串行线路启动本地管理接口(LMI)64. Help 获得交互式帮助系统65. History 查看历史记录66. Hostname 使用一个主机名来设置路由器,该主机名以提示符或缺省文件名的方式使用67. Interface 设置接口类型并且输入接口设置模式68. Interface 设置接口类型和进入接口设置模式69. Interface serial 选择接口并且输入接口设置模式70. Ip access-group 控制对一个接口的访问71. Ip address 设定接口的网络逻辑地址72. Ip address 设置一个接口地址和子网掩码并开始IP处理73. Ip default-network 建立一条缺省路由74. Ip domain-lookup 允许路由器缺省使用DNS75. Ip host 定义静态主机名到IP地址映射76. Ip name-server 指定至多6个进行名字-地址解析的服务器地址77. Ip route 建立一条静态路由78. Ip unnumbered 在为给一个接口分配一个明确的IP地址情况下,在串口上启动互连网协议(IP)的处理过程79. Ipx delay 设置点计数80. Ipx ipxwan 在串口上启动IPXWAN协议81. Ipx maximum-paths 当转发数据包时设置Cisco IOS软件使用的等价路径数量82. Ipx network 在一个特定接口上启动互连网数据包交换(IPX)的路由选择并且选择封装的类型(用帧封装)83. Ipx router 规定使用的路由选择协议84. Ipx routing 启动IPX路由选择85. Ipx sap-interval 在较慢的链路上设置较不频繁的SAP(业务广告协议)更新86. Ipx type-20-input-checks 限制对IPX20类数据包广播的传播的接受87. Isdn spid1 在路由器上规定已由ISDN业务供给商为B1信道分配的业务简介号(SPID)88. Isdn spid2 在路由器上规定已由ISDN业务供给商为B2信道分配的业务简介号(SPID)89. Isdntch-type 规定了在ISDN接口上的中心办公区的交换机的类型90. Keeplive 为使用帧中继封装的串行线路LMI(本地管理接口)机制91. Lat 打开LAT连接92. Line 确定一个特定的线路和开始线路设置93. Line concole 设置控制台端口线路94. Line vty 为远程控制台访问规定了一个虚拟终端95. Lock 锁住终端控制台96. Login 在终端会话登录过程中启动了密码检查97. Login 以某用户身份登录,登录时允许口令验证98. Logout 退出EXEC模式99. Mbranch 向下跟踪组播地址路由至终端100. Media-type 定义介质类型101. Metric holddown 把新的IGRP路由选择信息和正在使用的IGRP路由选择信息隔离一段时间102. Mrbranch 向上解析组播地址路由至枝端103. Mrinfo 从组播路由器上获取邻居和版本信息104. Mstat 对组播地址多次路由跟踪后显示统计数字105. Mtrace 由源向目标跟踪解析组播地址路径106. Name-connection 命名已存在的网络连接107. Ncia 开启/关闭NCIA服务器108. Network 把一个基于NIC的地址分配给一个和他直接相连的路由器把网络和一个IGRP的路由选择的过程联系起来在IPX路由器设置模式下,在网络上启动加强的IGRP109. Network 指定一个和路由器直接相连的网络地址段110. Network-number 对一个直接连接的网络进行规定111. No shutdown 打开一个关闭的接口112. Pad 开启一个X.29 PAD连接113. Permit 为一个已命名的IP ACL设置条件114. Ping 把ICMP响应请求的数据包发送网络上的另一个节点检查主机的可达性和网络的连通性对网络的基本连通性进行诊断115. Ping 发送回声请求,诊断基本的网络连通性116. Ppp 开始IETF点到点协议117. Ppp authentication 启动Challenge握手鉴权协议(CHAP)或密码验证协议(PAP)或将两者都启动,并且对在接口上选择的CHAP和PAP验证的顺序进行规定118. Ppp chap hostname 当用CHAP进行身份验证时,创建一批似乎是同一台主机的拨号路由器119. Ppp chap password 设置一个密码,该密码被发送到对路由器进行身份验证的主机命令对进入路由器的用户名/密码的数量进行了限制120. Ppp pap sent-username 对一个接口启动远程PAP支持,并且在PAP对同等层请求数据包验证过程中使用sent-username和password121. Protocol 对一个IP路由选择协议进行定义,该协议能是RIP,内部网关路由选择协议。
cisco路由器flow调试指令

cisco路由器flow调试指令
思科制造的路由器、交换机和其他设备承载了全球80%的互联网通信,成为硅谷中新经济的传奇,那么你知道cisco路由器flow调试指令吗?下面是店铺整理的一些关于cisco路由器flow调试指令的相关资料,供你参考。
cisco路由器flow调试指令:
Netflow 校验
show ip flow interface
show ip flow export
show ip cache flow
show ip cache verbose flow
clear ip flow stats
debug ip flow export
Show ip cache flow
show ip cache verbose flow
Show ip cache flow 与show ip cache verbose flow唯一的不同,就是active flow多了几个域:
clear ip flow stat-----------清除neflow cache,使show ip cache flow里的各项累计值清0
debug ip flow export
Router# debug ip flow export
IP Flow export mechanism debugging is on
*Mar 6 22:56:21.627:IPFLOW:Sending export pak to 2001::FFFE/64 port 9999
*Mar 6 22:56:21.627:IPFLOW:Error sending export packet:Adjacency failure。
思科交换机路由基本配置命令
思科交换机路由基本配置命令常用命令1.配置接口:interface {interface_type} {interface_number}2.配置IP地址:ip address {IP_address} {subnet_mask}3.配置默认网关:ip default-gateway {default_gateway_IP}4.开启接口:no shutdown5.配置路由协议:router {routing_protocol}6.配置路由器ID:router-id {router_ID}7.配置路由信息:network {network_address} {subnet_mask}8.配置静态路由:ip route {destination_network} {subnet_mask}{next-hop_IP}9.配置动态路由:router {routing_protocol} {network_address}10.保存配置:copy running-config startup-config注意:上述命令仅作为参考,具体配置应根据实际环境和设备型号进行调整。
下面是一些基本的 Cisco 交换机路由配置命令:1.配置 hostname: hostname <name>2.配置 IP 地址: interface <interface> 后进入接口模式,再输入 ipaddress <ip address> <subnet mask>3.配置默认路由: ip route 0.0.0.0 0.0.0.0 <next hop IP>4.启用路由协议: router <protocol> (例如: router rip)5.配置路由连接: network <network address> (例如: network192.168.1.0)6.查看路由表: show ip routeCisco 交换机路由配置步骤1.进入配置模式:configure terminal2.配置 IP 地址和子网掩码:interface [interface-name] ; ip address[ip-address] [subnet-mask]3.配置默认路由:ip route 0.0.0.0 0.0.0.0 [next-hop-IP-address]4.启用路由协议:router [protocol-name] (如:router ospf)5.配置路由协议参数: [protocol-name] [process-id] (如:ospf 1)6.配置路由连接:network [network-address] [wildcard-mask] area[area-id] (如:network 192.168.1.0 0.0.0.255 area 0)7.保存配置:copy running-config startup-config8.退出配置模式:exit。
cisco netflow 部署说明
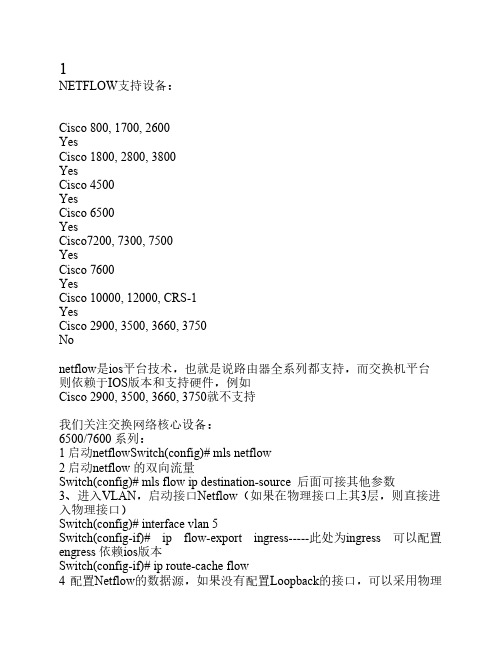
1NETFLOW支持设备:Cisco 800, 1700, 2600YesCisco 1800, 2800, 3800YesCisco 4500YesCisco 6500YesCisco7200, 7300, 7500YesCisco 7600YesCisco 10000, 12000, CRS-1YesCisco 2900, 3500, 3660, 3750Nonetflow是ios平台技术,也就是说路由器全系列都支持,而交换机平台则依赖于IOS版本和支持硬件,例如Cisco 2900, 3500, 3660, 3750就不支持我们关注交换网络核心设备:6500/7600 系列:1 启动netflowSwitch(config)# mls netflow2 启动netflow 的双向流量Switch(config)# mls flow ip destination-source 后面可接其他参数3、进入VLAN,启动接口Netflow(如果在物理接口上其3层,则直接进入物理接口)Switch(config)# interface vlan 5Switch(config-if)# ip flow-export ingress-----此处为ingress 可以配置engress 依赖ios版本Switch(config-if)# ip route-cache flow4 配置Netflow的数据源,如果没有配置Loopback的接口,可以采用物理接口,建议配置Loopback接口Switch(config)# ip flow-export source loopback 05 配置统计信息的输出目的,即采集服务器的ip和监听端口(config)#ip flow-export 10.1.200.201 99917. 配置输出版本,目前可支持版本1和5(config)#ip flow-export version 5下面为参考命令:Switch# show mls nde一般看到都是Netflow Data Export disabled 这说明Netflow都没有起来。