juniper路由器配置
Juniper 防火墙策略路由配置

Juniper 防火墙策略路由配置一、网络拓扑图要求:1、默认路由走电信;2、源地址为192.168.1.10 的pc 访问电信1.0.0.0/8 的地址,走电信,访问互联网走网通;二、建立extended acl1、选择network---routing---pbr---extended acl list,点击new 添加:Extended acl id:acl 编号Sequence No.:条目编号源地址:192.168.1.10/32 目的地址:1.0.0.0/8 Protocol:选择为any端口号选择为:1-65535 点击ok:2、点击add seg No.再建立一条同样的acl,但protocol 为icmp,否则在trace route 的时候仍然后走默认路由:3、建立目的地址为0.0.0.0 的acl:切记添加一条协议为icmp 的acl;命令行:set access-list extended 10 src-ip 192.168.1.10/32 dst-ip 1.0.0.0/8 src-port 1-65535 dst-port 1-65535 protocol any entry 10set access-list extended 10 src-ip 192.168.1.10/32 dst-ip 1.0.0.0/8 protocol icmp entry 20set access-list extended 20 src-ip 192.168.1.10/32 dst-ip 0.0.0.0/0 src-port 1-65535 dst-port 1-65535 protocol any entry 10set access-list extended 20 src-ip 192.168.1.10/32 dst-ip 0.0.0.0/0 protocolicmp entry 20三、配置match group:1、network---routing---pbr---match group,点击add:Match group 的作用就是关联acl按照同样的方法将两个acl 进行关联:命令行:set match-group name group_10set match-group group_10 ext-acl 10 match-entry 10set match-group name group_20set match-group group_20 ext-acl 20 match-entry 10四、配置action group:1、network---routing---pbr---action group,点击add:在这里指定下一跳接口和地址。
Juniper 常用配置
例:单区域
[edit]
user@host#set protocols ospf area 0 interface ge-0/0/0
[edit]
user@host#show protocols ospf
[edit]
lab@EX4200-1#edit system
[edit system]
lab@EX4200-1#set root-authentication plain-text-password
2.2
实例:
#"设置主机名为EX4200"
lab@EX4200-1#edit system
[edit system]
实例:
lab@EX4200-1#edit system service
[edit system services]
#打开Telnet服务
lab@EX4200-1#set telnet
#同时telnet的最大连接数范围1-250
lab@EX4200-1#set telnet connection-limit10
lab@EX4200-1#set description"Server VLAN"#"设置vlan描述"
lab@EX4200-1#set l3-interfacevlan.10#"将绑定三层逻辑子端口"——起三层
lab@EX4200-1#set interfacege-0/0/1.0#"将端口加入到VLAN中"
#配三层接口地址
3
Juniper--Juniper的基本配置
set interfaces se-0/0/3 unit 0 family inet address 10.0.16.1/24
set interfaces lo0 unit 0 family inet address 192.168.13.1/32
Wrote 433 lines of configuration to 'configuration-march02'
#察看保存过的文件用run file list命令
aviva@router1# run file list
/var/home/aviva:
.ssh/
configuration-march02
#配置fxp0 unit 0的接口地址,fxp0代表管理接口,unit 0代表子接口,inet代表是ipv4地址。
root@# set system backup-router 192.168.15.2
#backup-router是本路由器的直连路由器,在路由器启动的时候,
#JUNOS路由软件(routing protocol process, RPD)没有立即启动,
}
file interactive-commands {
interactive-commands any;
}
}
}
interfaces {
fxp0 {
unit 0 {
family inet {
address 10.1.1.1/24;
}
}
}
}
下面一种是interface视图,不同视图下,用show命令show出来的结果是不一样的。
Juniper路由器配置命令介绍
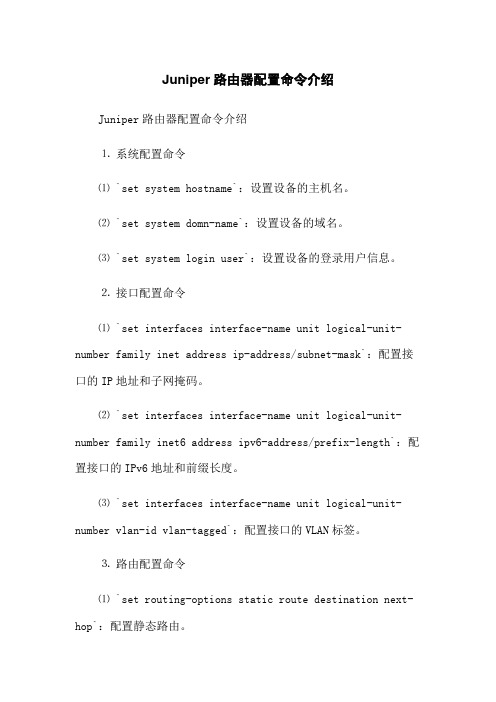
Juniper路由器配置命令介绍Juniper路由器配置命令介绍⒈系统配置命令⑴ `set system hostname`:设置设备的主机名。
⑵ `set system domn-name`:设置设备的域名。
⑶ `set system login user`:设置设备的登录用户信息。
⒉接口配置命令⑴ `set interfaces interface-name unit logical-unit-number family inet address ip-address/subnet-mask`:配置接口的IP地址和子网掩码。
⑵ `set interfaces interface-name unit logical-unit-number family inet6 address ipv6-address/prefix-length`:配置接口的IPv6地址和前缀长度。
⑶ `set interfaces interface-name unit logical-unit-number vlan-id vlan-tagged`:配置接口的VLAN标签。
⒊路由配置命令⑴ `set routing-options static route destination next-hop`:配置静态路由。
⑵ `set protocols ospf area area-id`:配置OSPF路由协议。
⒋安全配置命令⑴ `set security zones security-zone zone-nameinterfaces interface-name`:将接口分配给安全区域。
⑵ `set security policies from-zone source-zone to-zone destination-zone policy policy-name then permit`:配置安全策略以允许数据流动。
⒌ VPN配置命令⑴ `set security ike proposal proposal-name authentication-method pre-shared-keys`:配置IKE提议的预共享密钥认证方法。
Juniper路由器配置命令介绍
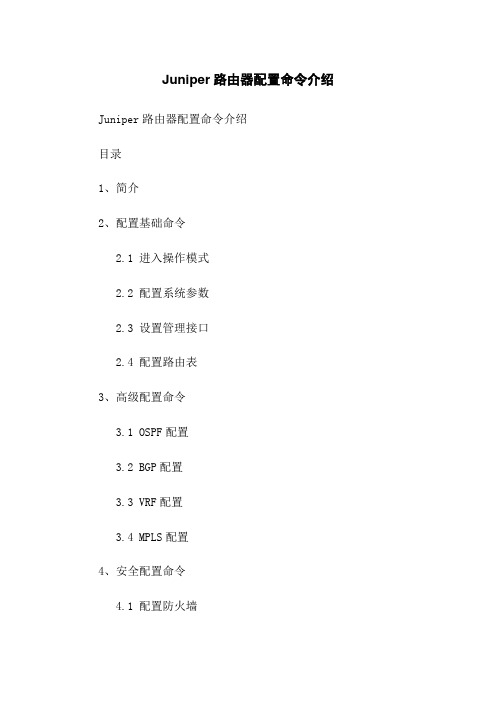
Juniper路由器配置命令介绍Juniper路由器配置命令介绍目录1、简介2、配置基础命令2.1 进入操作模式2.2 配置系统参数2.3 设置管理接口2.4 配置路由表3、高级配置命令3.1 OSPF配置3.2 BGP配置3.3 VRF配置3.4 MPLS配置4、安全配置命令4.1 配置防火墙4.2 配置安全策略4.3 配置VPN4.4 配置ACL5、故障排查命令5.1 显示命令5.2 路由故障排查5.3 硬件故障排查5.4 访问控制故障排查6、性能优化命令6.1 接口配置6.2 QoS配置6.3 缓存配置6.4 动态路由配置1、简介Juniper路由器是一种支持多种网络协议的高性能路由器。
本文档介绍了Juniper路由器的配置命令,并根据功能分类进行了细化。
2、配置基础命令2.1 进入操作模式- login:登录路由器- cli:进入命令行操作模式- configure:进入配置操作模式2.2 配置系统参数- set system hostname <hostname>:设置路由器主机名- set system domn-name <domn-name>:设置路由器域名- set system time-zone <time-zone>:设置时区- set system name-server <ip-address>:设置DNS服务器2.3 设置管理接口- set interfaces <interface> unit <unit> family inet address <ip-address/mask>:配置管理接口的IP地质- set interfaces <interface> unit <unit> family inet address dhcp:使用DHCP分配管理接口的IP地质2.4 配置路由表- set routing-options static route <destination> next-hop <next-hop>:配置静态路由- set routing-options router-id <id>:配置路由器ID- set protocols ospf area <area> interface <interface>:配置接口与OSPF区域的关联3、高级配置命令3.1 OSPF配置- set protocols ospf area <area> interface <interface>:配置接口与OSPF区域的关联- show ospf neighbor:显示OSPF邻居信息- show ospf route:显示OSPF路由表3.2 BGP配置- set protocols bgp group <group-name> neighbor<neighbor-address>:配置BGP邻居- set protocols bgp group <group-name> family <family>:配置BGP邻居的地质族- show bgp neighbor:显示BGP邻居信息- show bgp summary:显示BGP邻居摘要信息3.3 VRF配置- set routing-instances <instance-name> interface<interface>:配置接口与VRF的关联- set routing-instances <instance-name> routing-options static route <destination> next-hop <next-hop>:配置静态路由3.4 MPLS配置- set protocols mpls interface <interface>:启用接口的MPLS功能- set protocols mpls label-switched-path <LSP-name> to <destination-address> : 配置LSP的路径4、安全配置命令4.1 配置防火墙- set security policies from-zone <from-zone> to-zone <to-zone> policy <policy-name> match <match-conditions> then permit/deny:配置安全策略4.2 配置安全策略- set security zones security-zone <zone-name> address-book address <address-name> <ip-address>:配置地质对象- set security zones security-zone <zone-name> host-inbound-traffic system-services <services>:配置允许进入防火墙的服务4.3 配置VPN- set security ike proposal <proposal-name> authentication-method <method>:配置IKE提议- set security ike gateway <gateway-name> ike-policy <policy-name>:配置IKE网关- set security ipsec vpn <vpn-name> bind-interface<interface>:绑定VPN到接口4.4 配置ACL- set firewall family inet filter <filter-name> term <term-name> from protocol <protocol>:配置ACL规则- set firewall family inet filter <filter-name> term <term-name> then accept/discard:配置ACL规则动作5、故障排查命令5.1 显示命令- show interfaces <interface> detl:显示接口详细信息- show route <destination> : 显示路由信息- show chassis hardware:显示硬件信息5.2 路由故障排查- show bgp summary:显示BGP邻居摘要信息- show ospf neighbor:显示OSPF邻居信息- show route protocol <protocol>:显示指定协议的路由5.3 硬件故障排查- show chassis hardware:显示硬件信息- show log messages:显示系统日志消息- request support information:收集支持信息文件5.4 访问控制故障排查- show security policies from-zone <from-zone> to-zone <to-zone> policy <policy-name>:显示安全策略信息- show security zones interfaces:显示接口与安全域的关联信息6、性能优化命令6.1 接口配置- set interfaces <interface> mtu <mtu-size>:设置接口MTU大小- set interfaces <interface> description <description>:设置接口描述6.2 QoS配置- set class-of-service interfaces <interface> unit<unit> scheduler-map <map-name>:为接口配置调度器映射- set class-of-service scheduler-maps <map-name> forwarding-class <forwarding-class> scheduler <scheduler-name>:配置调度器映射6.3 缓存配置- set forwarding-options cache hit-cache-size <size>:设置缓存大小- set forwarding-options cache timeout <timeout-value>:设置缓存超时时间6.4 动态路由配置- set protocols ospf area <area> interface <interface> passive:将接口设置为OSPF被动接口- set routing-instances <instance-name> interface <interface> passive:将接口设置为VRF被动接口附件:无法律名词及注释:无。
Juniper路由器配置详解
Juniper路由器配置详解第一章:Juniper路由器概述Juniper Networks是全球知名的网络设备供应商之一,其路由器产品以高性能和可靠性而闻名。
本章将介绍Juniper路由器的基本概念和架构。
首先将介绍Junos操作系统,然后探讨Juniper路由器的不同系列和型号。
第二章:Juniper路由器接口配置Juniper路由器的接口配置非常重要,它决定了如何连接路由器以及与其他设备进行通信。
本章将详细讨论接口类型、接口配置命令以及不同接口的特性和用途。
第三章:基本路由配置路由是网络中数据包传输的基础,对于Juniper路由器的配置来说非常重要。
本章将介绍如何配置静态路由和动态路由,包括OSPF和BGP等常用路由协议。
第四章:高级路由配置高级路由配置允许更复杂的路由策略和动态路由选择。
本章将讨论路由策略配置和路由过滤列表等高级路由功能,以及如何实现路由红istribution和路由聚合。
第五章:安全配置网络安全对于任何企业来说都是至关重要的。
本章将介绍如何配置Juniper路由器的安全功能,包括防火墙、虚拟私有网络(VPN)和安全策略等。
我们还将谈及如何使用Juniper安全套件提供的高级保护机制来保护网络。
第六章:QoS配置服务质量(QoS)是保证网络性能的重要因素之一。
本章将详细讨论如何使用Juniper路由器的QoS功能来管理带宽、优化流量和提供最佳用户体验。
第七章:管理配置管理配置是确保Juniper路由器正常运行的关键。
本章将讨论如何配置远程访问、系统日志和故障排除等管理功能。
我们还将介绍如何使用Junos Space网络管理平台来实现集中化管理和配置。
第八章:高可用性配置高可用性是企业网络的重要要求之一。
本章将介绍如何配置Juniper路由器的高可用性功能,包括冗余路由器、Virtual Chassis和Link Aggregation等。
我们还将讨论如何实现网络故障恢复和负载均衡。
Juniper路由器配置操作手册
Juniper路由器配置操作手册ziJuniper OS 4.2R1.3 路由器配置操作手册1系统配置 (2)1.1系统信息基本配置 (2)1.2系统用户信息 (2)1.3系统服务配置 (3)2端口配置 (4)2.1juniper端口介绍 (4)2.2端口配置 (4)3SNMP配置 (6)4Routing-options配置 (7)4.1静态路由配置 (7)4.2route-id&as (7)4.3bgp聚合配置 (7)5Route protocal配置 (8)5.1Ospf配置 (8)5.2Bgp 配置 (9)6Policy 配置 (9)7Firewall 配置 (12)8Juniper与Cisco互连端口参数调整 (12)9Juniper备份结构与Cisco不同 (14)9.1console root登录 (14)9.2telnet登录 (14)Juniper所有配置,均在配置状态下进行。
分为由console进入和远程telnet进入。
由console进入JUNOS系统命令操作(由FreeBSD的简化系统)%cli 进入下面的用户操作hostname>edit 进入下面的用户配置hostname# 配置操作由远程telnet直接进入用户操作hostname>edit 进入下面的用户配置hostname# 配置操作1 系统配置1.1 系统信息基本配置#edit system 进入system配置菜单#set host-name axi580-a-hz1#set domain-name #set time-zone Asia/Shanghai# set system root-authentication plain-text-password (console登录,root口令缺省为空,虚设新口令)New password:******Retype new password:******#show 查看配置#commit 配置生效OR#commit confirmed 配置生效测试,5分钟后系统自动会滚,恢复原来配置。
juniper路由器配置
juniper路由器配置juniper路由器配置一.路由器网络服务安全配置:默认情况下,系统启动了许多无用服务,这些服务在占用系统资源的同时也造成一定的安全隐患,应该在尽可能的情况下停止或限制这些服务1. SNMP服务使用如下命令来停止SNMP服务:setsystemprocessessnmpdisable使用如下命令来设置SNMP通讯字符串:setsnmpcommunitymysnmpauthorizationread-only使用如下命令来在接口上设备SNMP通讯字符串:setsnmpinterfacefxp0communitymysnmp使用如下命令来在接口上禁止SNMP服务trap:setinterfacesfxp0unit0trapsdisable使用如下命令来限制SNMP的访问客户端:setsnmpcommunitymysnmpclients192.168.0.0/24 setsnmpcommunitymysnmpclients0.0.0.0/0restrict上述命令只允许192.168.0.0/24网段访问路由器的SNMP服务2.停止接口广播转发:广播转发容易造成smurf攻击,因此应该使用如下命令停止:setsystemno-redirects接口级别停止广播转发使用如下命令:setinterfacesfxp0unit0familyinetno-redirects3.停止dhcp-relay服务,dhcp-relay服务用于在不同网段使用同一个dhcp 服务器,如果没有使用,则应该使用如下命令停止:setsystemdhcp-relaydisable4.禁止IGMP服务,IGMP服务如果在没有使用的情况下应该使用如下命令禁止:setprotocolsigmpinterfacealldisable5.禁止PIM服务(?),PIM服务如果在没有使用的情况下应该使用如下命令禁止:setprotocolspimdisable6.禁止SAP服务(?),SAP服务如果在没有使用的情况下应该使用如下命令禁止:setprotocolssapdisable7.禁止IPSourceRouting源路由setchassisno-source-route二.路由器登录控制:1.设置系统登录Banner:setsystemloginmessageWarning:ifyouNOTauthorizedtoacce ssthissystem,dis connectNOW!2.设置登录超时时间:默认情况下,系统登录没有登录超时时间限制,应该将登录超时时间设置为15分钟:setcliidle-timeout153.建议采取用户权限分级管理策略setsystemloginclasstier1idle-timeout15setsystemloginclasstier1permissions[configureinterfacenetw orkroutings nmpsystemtraceviewfirewall]setsystemloginclasstier2idle-timeout15setsystemloginclasstier2permissionsallsetsystemloginuseradminfull-nameAdministrator setsystemloginuseradminuid2000setsystemloginuseradminclasstier2 setsystemloginuseradminauthenticationencrypted-password setsystemloginusertier1uid2001setsystemloginusertier1classtier1setsystemloginusertier2uid2002setsystemloginusertier2classtier24. 限制系统ssh、telnet服务连接数量:以下配置将ssh,telnet连接最大数量限制为10个,并且每分钟最多有5个可以连接:setsystemservicessshconnection-limit10rate-limit5 setsystemservicestelnetconnection-limit10rate-limit5 以下特性JUNOS5.0以上支持:setsystemservicesroot-logindeny(禁止root远程登陆)setsystemservicesprotocol-versionv2(使用sshv2)三.配置系统日志服务:1.设置系统kernel级警告发到console上setsystemsyslogconsolekernelwarning2.配置登录系统日志到单独的auth.log文件中setsystemsyslogfileauth.logauthorizationinfo3.配置系统配置更改日志到单独的change.log文件中setsystemsyslogfilechange.logchange-loginfo4.配置系统所有日志到日志服务器setsystemsysloghostx.x.x.x.anyinfo四.路由策略安全1.配置以下保留地址的黑洞路由setrouting-optionsoptionsno-resolvesetrouting-optionsoptionssyslogleveldebugsetrouting-optionsstaticroute0.0.0.0/8discardsetrouting-optionsstaticroute10.0.0.0/8discardsetrouting-optionsstaticroute20.20.20.0/24discardsetrouting-optionsstaticroute127.0.0.0/8discardsetrouting-optionsstaticroute169.254.0.0/16discardsetrouting-optionsstaticroute172.16.0.0/12discardsetrouting-optionsstaticroute192.0.2.0/24discardsetrouting-optionsstaticroute192.168.0.0/16discardsetrouting-optionsstaticroute204.152.64.0/23discardsetrouting-optionsstaticroute224.0.0.0/4discard2.设置strict模式的unicastRPFsetinterfacesso-0/0/0unit0familyinetrpf-check3.设置相应prefix-list,禁止保留地址访问setpolicy-optionsprefix-listreserved0.0.0.0/8setpolicy-optionsprefix-listreserved10.0.0.0/8setpolicy-optionsprefix-listreserved20.20.20.0/24setpolicy-optionsprefix-listreserved127.0.0.0/8setpolicy-optionsprefix-listreserved169.254.0.0/16setpolicy-optionsprefix-listreserved172.16.0.0/12setpolicy-optionsprefix-listreserved192.0.2.0/24setpolicy-optionsprefix-listreserved204.152.64.0/23setpolicy-optionsprefix-listreserved224.0.0.0/4 setfirewallfilterinbound-filterterm1fromprefix-listreserved setfirewallfilterinbound-filterterm1thencountspoof-inbound-reserved setfirewallfilterinbound-filterterm1thendiscard setinterfacesge-0/0/0unit0familyinetfilterinputinbound-filter五. Firewall-Policy设置Firewall-Policy可以限制进入及流量主机数据包的来源、目标地址、协议、端口号、流量等,应用Firewall-Policy可以实现类似于防火墙的性能,但一般不建议在骨干路由器上使用,以下是Firewall-Policy的使用方法:1.创建Firewall-Policy:setfirewallfilterlocal-sectermsec-in1fromdestination-porttelnet setfirewallfilterlocal-sectermsec-in1fromdestination-address172.16.0.1/32setfirewallfilterlocal-sectermsec-in1fromsource-address192.168.0.0/24 setfirewallfilterlocal-sectermsec-in1thenacceptsetfirewallfilterlocal-sectermsec-in2fromdestination-porttelnet setfirewallfilterlocal-sectermsec-in2fromdestination-address172.16.0.1/32setfirewallfilterlocal-sectermsec-in2thendiscardsetfirewallfilterlocal-sectermsec-in3fromsetfirewallfilterlocal-sectermsec-in1thenaccept2.应用到路由器的端口上:setinterfacesfxp0unit0familyinetfilterinputlocal-sec以上例子不允许除192.168.0.0/24网段外所有地址telnet访问172.16.0.1,但允许其它任何包通过。
Juniper MX路由器验收流程及详细的初始配置
Juniper MX路由器验收流程及详细的初始配置前提概要Juniper设备的整个项目的售前、售中、售后都是有一套严密的流程。
本文讲述的内容将涉及其中的售中及售后。
在客户下完订单后,厂家会根据需求来安排发货、清关等事项。
设备送达机房前,需要安排工程师去当地机房配合当地机房人员进行验收,拆箱,扫码入库、设备出库、上架安装、加电调试等。
其中设备初始调试如下:一、初始配置当MX设备的PSM电源线交叉插在机柜的A/B两路PDU上后,通电,并将所有的PSM电源模块的2个白色拨子都拨上去,即拨到“on”的位置。
如下图:操作完毕后,所有的PSM电源模块的PWR OK指示灯/INP0指示灯/INP1指示灯都显示绿灯常亮,而FAULT指示灯不亮。
设备开始正式启动。
整个操作环境准备好后,用console线的网口一端在设备的console口上,USB端插在笔记本电脑上。
同时,用一根网线一头插在电脑的网口,另一端插在MX设备的MGT口(管理端口)。
打开电脑桌面的SecureCRT,选择对应的serial口,进入CLI界面。
设备启动完毕后,进入root操作界面,输入cli进入root配置界面。
【1】配置设备的缺省账号及密码,命令如下:set system root-authentication plain-text-passwordset system login user XXX class super-user authentication plain-text-password【2】新建二个group组,配置主备引擎的缺省ip地址,命令如下:set groups re0 system host-name mx2000-re0set groups re0 interfaces fxp0 unit 0 family inet address xxxx.xxxx.xxxx.xxxxset groups re1 system host-name mx2000-re1set groups re1 interfaces fxp0 unit 0 family inet address xxxx.xxxx.xxxx.xxxxset apply-groups re0set apply-groups re1【3】配置ftp、ssh、telnet服务,命令如下:set system services ftpset system services sshset system services telnet【4】关闭管理口不插网线报警通知,命令如下:set chassis alarm management-ethernet link-down ignore【5】将配置同步到备引擎,命令如下:commit synchronize【6】配置机框模式为enhanced-ip ,命令如下:set chassis network-services enhanced-ip【7】重启设备,命令如下:request vmhost reboot二、版本升级设备重启后,整个初始配置加载完成。
JUNIPER路由器中常用命令总结
JUNIPER路由器中常⽤命令总结前些⽇⼦认真看了⼀下Juniper路由器的⼀些命令。
在这⾥总结⼀下。
⽅便以后使⽤Juniper路由器的命令主要分为两个部分,⼀个是operational,主要是复杂查看⽬前⽹络的配置情况(只能查看,不能修改。
感觉权限⽐较低);另⼀个是configuration,主要⽤来查看和修改配置(感觉权限⾼⼀些)。
刚进⼊到Juniper路由器时,默认进⼊的是operation,输⼊edit命令之后,就进⼊到了[edit]⽬录下,也就是进⼊了configuration。
基础配置命令(如未说明则在[edit]⽬录下)1、配置主机名字:set system host-name router12、配置域名: set system domain-name 3、配置fxp0接⼝(以太⽹中通过这个接⼝进⾏路由器的配置)。
Set interfaces fxp0 unit 0 family inet address 192.168.15.1/2 44、配置备份路由器:set system backup-router 192.168.15.25、配置DNS服务器:set system name-server 192.168.15.36、配置root⽤户的密码:set system root-authentication plain-text-password(密码中不可以全是⼤写、全是⼩写、全是数字)7、设置ntp服务器: set system ntp server 192.168.2.28、提交修改:commit9、查看提交是否合法: commit check10、在当天特定时间进⾏提交 commit at 22:4511、在特定⽇期的特定时间提交: commit at “2005-02-26 10:45”12、取消commit的操作 clear system commit13、为了避免提交带来意外的损害采⽤:commit confirmed,会在10分钟以后⾃动回滚14、与14相同,但在⼀分钟以后⾃动回滚:commit confirmed 115、提交信息,并同步到备份路由器上: commit synchronize配置服务:1、设置ssh服务:set system services ssh2、配置ftp服务: set system services ftp3、删除ftp服务: delete system services ftp权限设置:1、设置root⽤户ssh登录的密码:set system root-authentication ssh password2、禁⽌root⽤户使⽤ssh登录:[edit system ] set services ssh root-login deny3、设置密码要求:[edit system login] set password maximun-length 20 set password minimum-length 8 set password mi nimum-changes 24、设置密码加密算法:set system login password formate md55、查看⾃⼰的权限,以及可以设置的权限: show cli authorization进⼊与退出命令:1、Edit2、修改root的配置:configure3、避免多⼈修改导致设置丢失采⽤ configure exclusive4、查看⽬前修改区域有谁在线:[edit]status(只能看见⽐你先登录的⼈,后⾯登录的信息看不见)5、强制要求别⼈下线:request system logout user mike6、进⼊到根⽬录 top7、退出configuration 模块:quit8、退出configuration模块:exit configuration-mode9、提交并退出:commit and-quit10、退出当前⽬录:exit11、进⼊到某⽬录 edit ⽬录名字查看命令:1、查看当前⽬录地下的设置 [edit]show2、查看你设置的命令 show | display set3、查看你新增的命令 show | compare(+表⽰你增加的命令,-表⽰你删除的命令。
- 1、下载文档前请自行甄别文档内容的完整性,平台不提供额外的编辑、内容补充、找答案等附加服务。
- 2、"仅部分预览"的文档,不可在线预览部分如存在完整性等问题,可反馈申请退款(可完整预览的文档不适用该条件!)。
- 3、如文档侵犯您的权益,请联系客服反馈,我们会尽快为您处理(人工客服工作时间:9:00-18:30)。
juniper路由器配置一.路由器网络服务安全配置:默认情况下,系统启动了许多无用服务,这些服务在占用系统资源的同时也造成一定的安全隐患,应该在尽可能的情况下停止或限制这些服务1. SNMP服务使用如下命令来停止SNMP服务:setsystemprocessessnmpdisable使用如下命令来设置SNMP通讯字符串:setsnmpcommunitymysnmpauthorizationread-only使用如下命令来在接口上设备SNMP通讯字符串:setsnmpinterfacefxp0communitymysnmp使用如下命令来在接口上禁止SNMP服务trap:setinterfacesfxp0unit0trapsdisable使用如下命令来限制SNMP的访问客户端:setsnmpcommunitymysnmpclients192.168.0.0/24 setsnmpcommunitymysnmpclients0.0.0.0/0restrict上述命令只允许192.168.0.0/24网段访问路由器的SNMP服务2.停止接口广播转发:广播转发容易造成smurf攻击,因此应该使用如下命令停止:setsystemno-redirects接口级别停止广播转发使用如下命令:setinterfacesfxp0unit0familyinetno-redirects3.停止dhcp-relay服务,dhcp-relay服务用于在不同网段使用同一个dhcp 服务器,如果没有使用,则应该使用如下命令停止:setsystemdhcp-relaydisable4.禁止IGMP服务,IGMP服务如果在没有使用的情况下应该使用如下命令禁止:setprotocolsigmpinterfacealldisable5.禁止PIM服务(?),PIM服务如果在没有使用的情况下应该使用如下命令禁止:setprotocolspimdisable6.禁止SAP服务(?),SAP服务如果在没有使用的情况下应该使用如下命令禁止:setprotocolssapdisable7.禁止IPSourceRouting源路由setchassisno-source-route二.路由器登录控制:1.设置系统登录Banner:setsystemloginmessageWarning:ifyouNOTauthorizedtoaccessthissystem,dis connectNOW!2.设置登录超时时间:默认情况下,系统登录没有登录超时时间限制,应该将登录超时时间设置为15分钟:setcliidle-timeout153.建议采取用户权限分级管理策略setsystemloginclasstier1idle-timeout15setsystemloginclasstier1permissions[configureinterfacenetworkroutings nmpsystemtraceviewfirewall]setsystemloginclasstier2idle-timeout15setsystemloginclasstier2permissionsallsetsystemloginuseradminfull-nameAdministrator setsystemloginuseradminuid2000setsystemloginuseradminclasstier2 setsystemloginuseradminauthenticationencrypted-password setsystemloginusertier1uid2001setsystemloginusertier1classtier1setsystemloginusertier2uid2002setsystemloginusertier2classtier24. 限制系统ssh、telnet服务连接数量:以下配置将ssh,telnet连接最大数量限制为10个,并且每分钟最多有5个可以连接:setsystemservicessshconnection-limit10rate-limit5 setsystemservicestelnetconnection-limit10rate-limit5以下特性JUNOS5.0以上支持:setsystemservicesroot-logindeny(禁止root远程登陆)setsystemservicesprotocol-versionv2(使用sshv2)三.配置系统日志服务:1.设置系统kernel级警告发到console上setsystemsyslogconsolekernelwarning2.配置登录系统日志到单独的auth.log文件中setsystemsyslogfileauth.logauthorizationinfo3.配置系统配置更改日志到单独的change.log文件中setsystemsyslogfilechange.logchange-loginfo4.配置系统所有日志到日志服务器setsystemsysloghostx.x.x.x.anyinfo四.路由策略安全1.配置以下保留地址的黑洞路由setrouting-optionsoptionsno-resolvesetrouting-optionsoptionssyslogleveldebugsetrouting-optionsstaticroute0.0.0.0/8discardsetrouting-optionsstaticroute10.0.0.0/8discardsetrouting-optionsstaticroute20.20.20.0/24discardsetrouting-optionsstaticroute127.0.0.0/8discardsetrouting-optionsstaticroute169.254.0.0/16discardsetrouting-optionsstaticroute172.16.0.0/12discardsetrouting-optionsstaticroute192.0.2.0/24discardsetrouting-optionsstaticroute192.168.0.0/16discardsetrouting-optionsstaticroute204.152.64.0/23discardsetrouting-optionsstaticroute224.0.0.0/4discard2.设置strict模式的unicastRPFsetinterfacesso-0/0/0unit0familyinetrpf-check3.设置相应prefix-list,禁止保留地址访问setpolicy-optionsprefix-listreserved0.0.0.0/8setpolicy-optionsprefix-listreserved10.0.0.0/8setpolicy-optionsprefix-listreserved20.20.20.0/24setpolicy-optionsprefix-listreserved127.0.0.0/8setpolicy-optionsprefix-listreserved169.254.0.0/16setpolicy-optionsprefix-listreserved172.16.0.0/12setpolicy-optionsprefix-listreserved192.0.2.0/24setpolicy-optionsprefix-listreserved204.152.64.0/23setpolicy-optionsprefix-listreserved224.0.0.0/4 setfirewallfilterinbound-filterterm1fromprefix-listreserved setfirewallfilterinbound-filterterm1thencountspoof-inbound-reserved setfirewallfilterinbound-filterterm1thendiscardsetinterfacesge-0/0/0unit0familyinetfilterinputinbound-filter五. Firewall-Policy设置Firewall-Policy可以限制进入及流量主机数据包的来源、目标地址、协议、端口号、流量等,应用Firewall-Policy可以实现类似于防火墙的性能,但一般不建议在骨干路由器上使用,以下是Firewall-Policy的使用方法:1.创建Firewall-Policy:setfirewallfilterlocal-sectermsec-in1fromdestination-porttelnet setfirewallfilterlocal-sectermsec-in1fromdestination-address172.16.0.1/32setfirewallfilterlocal-sectermsec-in1fromsource-address192.168.0.0/24 setfirewallfilterlocal-sectermsec-in1thenacceptsetfirewallfilterlocal-sectermsec-in2fromdestination-porttelnet setfirewallfilterlocal-sectermsec-in2fromdestination-address172.16.0.1/32setfirewallfilterlocal-sectermsec-in2thendiscardsetfirewallfilterlocal-sectermsec-in3fromsetfirewallfilterlocal-sectermsec-in1thenaccept2.应用到路由器的端口上:setinterfacesfxp0unit0familyinetfilterinputlocal-sec以上例子不允许除192.168.0.0/24网段外所有地址telnet访问172.16.0.1,但允许其它任何包通过。
juniper\cisco 的mpls-vpn配置简单比较zai cisco下ip vrf testrd 1:1route-target 1:1ip route vrf test 192.168.3.0 255.255.255.0 192.168.2.1interface fa0/0/0ip vrf forwarding testrouter bgp 1no bgp default ipv4-unicastno bgp default route-target filterneighbor 10.1.1.1 remote-as 2address-family vpn4neighbor 10.1.1.1 activeneighbor 10.1.1.1 send-community extendedaddress-family ipv4 vrf testredistribute staticredistribute connect在juniper下Edit routing-instances test #test是vpn的名字{instance-type vrf; #指定routing-instances为vrfroute-distinguisher 4809:1; #rdvrf-target target:4809:1; #rtset interface fe-0/0/0 # 相当于cisco下的interface fa0/0/0 ip vrf forw testset routing-options static route 192.168.3.0/24 next-hop 192.168.2.1 # 相当于cisco中的 ip route vrf}Bgp的配置set protocols bgp group vpn type internal # 因为是internal 所以不需要配置peer-asset protocols bgp group vpn local-address 192.168.0.1set protocols bgp group vpn neighbor 192.168.0.2 family inet-vpn unicast juniper下不需要配置重分发,因为当你在一个vpn下的路由协议起来之后他默认进行。