XYZ-100G使用说明书(中英文)
X100说明书
感谢您购买本公司记录仪,本机采用高性能低照度“cmos wxga hd ”高清感光芯片,有独特的超便携式设计,使它可以应用在各个领域,为您带来方便,安全,丰富多彩的日常生活。
主用于车载摄像,是行车中安全事故取证的最佳帮手。
在使用本产品之前,请详细阅读此用户手册,并请保管好此手册。
我们希望本产品,能满足您的需求并长期服务于您!本使用手册在编写和印刷中,可能存在一定文字错误,请谅解。
使用手册印刷过程中,机器因外观和软件的修复过程导致了同该使用手册的部分操作的非一致性,本公司保持最终解释权。
安装记录仪1.关闭引擎,将锁匙从点火器上取出。
2.将tf卡插入记录仪卡槽中。
3.将记录仪用支架垫黏贴安装在汽车的挡风玻璃上或驾驶仪表台上。
4.用电源线将记录仪的usb终端和汽车点烟器连接起来。
5.调整摄像位置,以便获取最佳的拍摄范围。
6.发动引擎,检查机器是否已安装正确。
【注意】(1)请在光线充足、全安的地方安装记录仪。
(2)当机器安装正确,其系统状态led会变成蓝色及显示屏会显示。
使用简介一.使用自动录像功能1.安装完毕后,启动汽车引擎,记录仪将会自动开启并开启自动录像功能。
2.关闭汽车引擎,在6秒后,记录仪保存档并将会关闭。
【注意】记录仪摄像镜头正/反相切换方法,长按【mic键】并保持3秒钟进行切换反相摄像。
长按【录像键】并保持3秒钟进行切换正相摄像,切换正或反相后,关机会自动保存其操作设置。
二.使用手动录像功能1.长按记录仪上的【开启/关闭键】并保持3秒钟。
2.当记录仪启动后,自动开启录像功能。
3.记录仪摄像镜头正/反相切换方法,长按【mic键】并保持3秒钟进行切换反相摄像。
长按【录像键】并保持3秒钟进行切换正相摄像。
(切换正或反相后,关机会自动保存设置)。
4.当再次点擎【录像键】,记录仪将会停止录像功能。
三.使用拍照功能1.长按记录仪上的【开启/关闭键】并保持3秒钟。
2.当记录仪启动后,在自动开启录像功能的状态下。
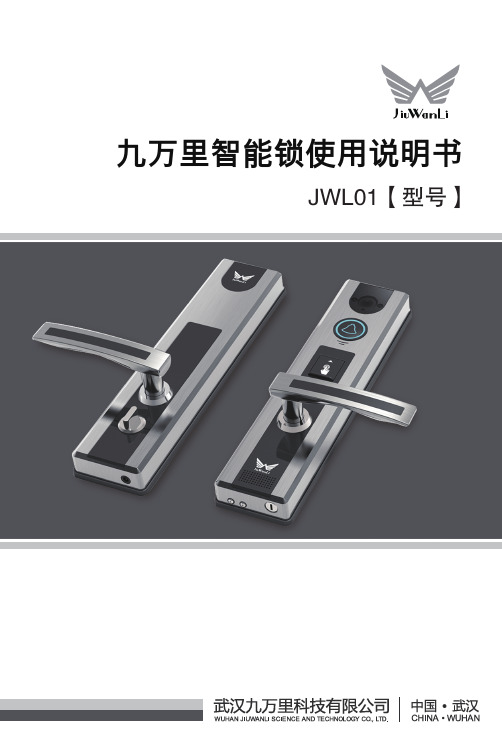
九万里智能锁使用说明书
1 按智能锁门铃键,接通视频,点击右上角“指纹管理”,进入指纹管理界面。 2 点击右上角“+”,根据手机端提示,打开室外端指纹滑盖根据语音提示请
按手指,两次需使用相同手指,两次采集成功则指纹录入完成。 3 录入成功后,输入用户名称即完成指纹录入。录入失败,请重复上述步骤。
4 指纹管理界面下,显示当前已录入指纹用户,滑动(苹果)/长按(安卓)即 可删除该用户所有指纹;点击进入当前用户指纹信息界面,可进行添加和删 除指纹操作。
刷新
WHJWL jiuwanli
JWL
2:36 PM
100%
九万里智能锁
选择网络
网络名称
提示
WHJWL
信号强度
jiuwanli
请输入WIFI密码
刷新
JWL 密码: 显示密码
取消
确定
2:36 PM
100%
九万里智能锁
选择网络
网络名称
信号强度
注册中…
WHJWL jiuwanli
刷新
大概所需1分钟,请耐心等候…
充电说明
智能锁电量低会通过智能锁端语音提醒及手机端消息推送,请及时充电。充 电完成,充电器LED指示灯由红色变成绿色。若未能及时充电,智能锁电量 耗尽,可外接9V应急电源。
01
//九万里智能锁使用说明书//
智能锁端单机指纹录入
注意:
首次使用智能锁,需要设置管理员指纹,第一个录入的指纹即为管理员指纹,普通 指纹录入需要验证管理员指纹。
JWL
选择您家的wifi网络
2:36 PM
100%
九万里智能锁
选择网络
网络名称
信号强度
刷新
提示
WHJWL
这份文档的中文名字为:XYZ品牌的音频设备说明书

Connect to the HDMI ARC or eARC output of your TV. Please consult your TV audio Left/Right Variable RCA Line OutConnect to other electronics(e.g. Powered Speakers, Power Amplifiers, or to use as a preamp or wireless streaming source for an existing audio system).Optical InputConnect to sources with an optical digital output such as a gaming console or TV. Please consult your TV audio output settings.3.5mm IR InputConnect to an external IR receiver or control system.Wi-Fi SetupEnables Wi-Fi set-up mode and shows status of the wireless connection. A pulsing green light indicates set-up mode, solid light means it’s set-up and ready to use.Bluetooth SetupEnables Bluetooth pairing mode and shows status of Bluetoothconnection. Flashing blue light indicates pairing mode, solid light means it’s connected and ready to use.AC Power Cord Input8910111213Headphone OutputConnect headphones for private listening.1. Connect your source device to the HDMI In (ARC / eARC)* 4, Optical Input 9, Left/Right RCA Line In inputs 2, or the 3.5mm Line Input 3 on your Prime Wireless Pro SoundBase. 2. Select the source input by rotating the left control knob or using your remote control. The source will be highlighted on the OLED display. 3. Start playback on your connected source device.4. Volume can be controlled from the SoundBase front panel, the included remote Connecting Source Devices via HDMI In (ARC / eARC), Optical, and Line In Inputs1. Connect RCA interconnect to Subwoofer RCA Input.2. Connect opposite end of RCA Interconnect to SoundBase RCA Sub Output 7.Connecting to a SubwooferConnections and Controls***********************(877) 626-5623Visit for online chat The full SVS Prime Wireless Pro SoundBase owner’s manual can be found here: /prime-wireless-pro-manualStanding by to help you with setup, 7-days-a-week.Live SVS Sound Experts Support79111012134358126*Important:HDMI ARC and eARC connections on TVs can work differently by brand and model. If the sound is distorted or you do not hear any sound, you may need to adjust your TV’s settings.Troubleshooting Tips:• Enable HDMI ARC, eARC, or CEC• Make sure “Audio Output” is set to “External Speaker” or similar • Set the audio output to Stereo or PCM Stereo• If you’re still having issues please consult the full product manual or contact the SVS Sound Experts The full SVS Prime Wireless Pro SoundBase owner’s manual can be found here: /prime-wireless-pro-manualfor updates.142536You’re ready to stream!Now that your SVS Prime Wireless Pro Soundbase is set up over Wi-Fi, you can access music from your devices and your favorite streaming services. You can also enjoy Hi-Res Critical Listening Mode, create a multi-room audio system, and more.Note: The Play-Fi app might require an update to the SoundBase software upon first connection to enable the latest features. The app will provide a notification if this occurs - this process can take 3-5 minutes.If your SVS Prime Wireless Pro SoundBase is not discovered by the Wi-Fi network, try moving it closer to your router or to a stronger signal area.Open the Play-Fi app and run through theSetup GuideEnter your WIFI passwordOpen the WIFI Settings of your device and connect to the Play-Fi DevicePress Setup to confirm and complete the setupprocessReturn to the Play-Fi app and connect to your WIFI NetworkSelect a name for your SoundBase and you are ready to goPlug in your SoundBaseDownload DTS Play-Fi App423Select the Play-Fi DeviceChoose your Wi-Fi network and name your device The “Speaker Password” is notrequiredAirPlay setup will configure your Play-Fi Device for yournetworkAirPlay Setup is completedevice, confirm the desired network, and enter the desired name for your SoundBase (e.g. SoundBase Lounge). You will get a confirmation screen when completed.Note that AirPlay setup requires iOS 11.4 or later. If you are using an older version of iOS go to step 4.Android users Setting up with an Apple Device。
XYZ稀油站通用说明书

XYZ系列稀油站说明书一、简介本装置主要适用于水泥、冶炼、轧制、矿山、能源、轻工、交通、运输、石化和电力等机械设备的稀油循环润滑系统中,向主机齿轮箱的齿轮和轴承等摩擦部位供送润滑油,起减摩擦和冷却润滑作用,保证供油和润滑质量,使主机设备连续正常运行。
其工作介质为N220~N320中负荷工业齿轮油或其它机械润滑油。
本装置由稀油润滑站,仪表盘,电控柜配套组成。
型号说明: 选型时采用XYZ- ※※P: PLC控制省略:继电器、接触器控制流量:L/min稀油站如:稀油站,公称流量125L/min,用PLC控制,则选型:XYZ-125P三、工作原理与结构特点稀油站由油箱、油泵装置、油冷却器、油滤器以及电控柜、仪表盘、管道、阀门等组成。
工作时,油液由齿轮泵从油箱吸出,经单向阀、双筒网片式油滤器、列管式油冷却器,被直接送到设备的润滑点进行润滑,然后经系统回油管流回油箱。
油站的最高工作压力为0.4MPa,最低工作压力为0.2MPa(视现场情况可重新设定),根据润滑点的要求,通过调节安全阀确定使用压力。
当油站的工作压力超过安全阀的调定压力时,安全阀将自动打开,多余的油液流回油箱。
稀油站具有过滤、冷却、加热等装置和安全、自控、报警等功能。
本稀油站有以下结构特点:1.设有备用油泵。
稀油站有两台油泵,一台工作,一台备用,正常情况下工作油泵运行,当系统压力低于压力调节器调定值时,备用泵投入运行,保证向主机继续供送润滑油。
2.采用双筒网片式油滤器。
双筒网片式油滤器有两组过滤滤芯。
一组滤芯工作,一组滤芯备用。
当工作滤芯需要更换时,可不停机,用转换阀使备用滤芯工作,即可取出原工作滤芯,更换滤片。
此油滤器结构紧凑,接管简单,不设旁路,更换方便。
3.采用GLCQ、GLLQ型列管式油冷却器。
换热管为紫铜管,冷却效果较好,体积小,重量轻,阻力降大大小于板式换热器,在工作压力本身不高的稀油润滑系统中使用是比较合理的。
4.回油口设有磁性过滤器。
力普LP-100G变频器英文说明书

The cooling fan does not run. Check it and repair.
The carrier frequency is too Check the setting value of function F028.
high
circuit.
U.V or W terminals produce no output or abnormal output.
Check the set control mode and frequency parameter. Check the terminal condition if it is operated by an external terminal.
U/ W
7
4 Ope rating keyboard
运行方向指示灯
FOR灯亮表示变频器处于正转运 行状态 REV灯亮表示变频器处于反转运 行状态
故障指示灯
故障保护状态时此灯亮
键盘电位器
功能键
运行状态下按此键可以进行运行 监视模式切换 设置状态下按此键可以进行功能 与数据模式切换
功能模式指示灯
灯亮表示可以转换功能号
forward reverse
JOG
Multi-step speed 1 Multi-step speed 2 Input select command/ Multi-step speed 3
restore/ free run common point
MCCB
Rb R S T
FOR REV JOG SS1 SS2 SS3 FRE COM
参数修改状态
修改参数至所需值
存储 #显示
约1秒表示数据已存储
九万里智能锁使用说明书
锁定状态 使用状态
6 开锁密码设置
返回到九万里智能锁主界面,点击开锁密码,可以设置四位数的开锁密码, 当有人按门铃时,接到智能锁端来电,进行视频语音通话若需对锁进行操 作则需输入之前设置的密码。开锁密码可根据个人需求选择开启或关闭。
08
//九万里智能锁使用说明书//
2:36 PM
100%
九万里智能锁
取消
管理员锁
2:36 PM
智能锁设置
100%
家 添加智能锁
注册智能锁成功
自动返回智能锁设置 主界面
关闭智能锁“家”
注意:
智能锁开启关闭滑动键,开启即智能锁处于使用状态; 若关闭,锁将进入锁定状态,手机端将不能操控智能锁.
锁定状态 使用状态
5
5 管理员用户点击安装好的智能锁,进入用户界面,点击右上角“+”即可添 加新用户。
指纹录入中
开门
转接
待接通视频 点击右上角指纹管理
其他指纹
点击右上角“+”按钮
取消
2:36 PM
指纹录入
100%
请在产品指纹采集处输入指纹,两次采集成功即成功录入
指纹录入中
指纹录入成功
进入指纹等待界面
取消
2:36 PM
指纹录入成功
请用户名称
100%
完成
阿姨
根据语音提示录入指纹
A 阿姨
2:36 PM
指纹管理
100%
开始注册
当前连接AP:REDPINE_XXXXXX
请按智能锁端Reset键2-4s 进入网络设置选择 REDPINE_XXXXXX 进行连接
长按Reset键7-10秒系统会自动恢复出厂设置 请谨慎操作!
XYZ 品牌 空气净化器 安全说明书

IMPORTANT SAFETY INSTRUCTIONS READ AND SAVE THESE SAFETY INSTRUCTIONS BEFORE USING THIS AIR PURIFIERWhen using electrical appliances, basic precautions should always be followed to reduce the risk of fire, electric shock, and injury to persons, including the following: 1.Read all instructions before operating the airpurifier.2.Place air purifier where it is not easily knockedover by persons in the household.3.Always turn the air purifier to the OFF position andunplug from the wall outlet when not in use.4. To disconnect the air purifier, press the Power( c!)) button or turn the knob to the off position(0) to turn the air purifier off, grip the plug andpull it from the wall outlet. Never pull by the cord.5. Oo not use any product with a damaged cord orplug or if product malfunctions, is dropped ordamaged in any manner. Keep the cord awayfrom heated surfaces.6.Do not use air purifier outdoors.7.Never use air purifier unless it is fullyassembled.8. Do not run power cord under carpets, and donot cover with throw rugs. A rrange cord suchthat it will not be tripped over.9.Do not use air purifier where combustiblegases, vapors or an oxygen rich environmentare present.10.Do not expose the air purifier to rain, or usenear water, in a bathroom, laundry area or other damp location.HoneywellQUIETCLEAN® AIR PURIFIERSModels HHT-215, HHT-217, HHT-219 Series Models HFD-010, HFD-015, HFD-110,HFD-112, HFD-116 Series11.The air purifier must be used in its uprightposition.12.Do not allow foreign objects to enter ventilationor exhaust opening as this may cause electricshock or damage to the air purifier. Do notblock air outlets or intakes.13.Locate air purifier near the outlet and avoidusing an extension cord.14.This appliance has a polarized plug (one bladeis wider than the other). To reduce the risk ofshock, this plug is intended to fit only one wayin a polarized outlet. If the plug does not fit fullyin the outlet, reverse the plug. If it still does notfit, contact a qualified electrician.00 NOT attempt to defeat this safety feature. 15.A loose fit between the AC outlet (receptacle)and plug may cause overheating and adistortion of the plug. Contact a qualifiedelectrician to replace loose or worn outlet.16. Do not sit, stand or place heavy objects on theair purifier.17. Disconnect power supply before servicing.18. WARNING: To Reduce the risk of fire or electricshock, do not use this air purifier with anysolid-state speed control device.19.The sealed UV bulbs contain a small amount ofmercury. Dispose of these items at householdhazardous waste collection sites only. If the UVbulb breaks, do not vacuum or handle with yourbare hands. (HHT-215, HHT-217 or HHT-219 only.)20. This product contains a built-in ionizer. Whilethe output of ozone of this product is extremelylow, if you have asthma symptoms or breathingdisorders that can be triggered by the presenceof an ionizer, we recommend that you do notuse any type of ionizing or ionic air purifiers.Only HEPA filtration (non-ionizing) productsare recommended.21.SAVE THESEINSTRUCTIONSFAGTS ABOUT YOUR AIR PURIFIERHFD-010HFD-015HHT-217HFD-110 HHT-215HFD-112 HHT-219HFD-116ifD'" Micro-Filter Technology -The advanced ifO'" Micro-filter technology offersthe latest advances in air cleaning technology../ ./ ./ This filter effectively captures 99% of microscopicparticles, 2 microns or greater, from the air thatpasses through the unit. ifO'" stands for IntenseField Dielectric and offers outstanding highefficiency pertormance while being energy efficient.*ifD'" Micro-Filter -The ifO'" Micro-filter in this product is permanent,./ ./ ./ and easy to clean. Simply remove the filter andrinse it under the faucet for many years of aircleaning operation. Typically, the filter will onlyneed to be washed once every 3 months.**UV Light Technology-./ ./ Ultraviolet light helps reduce germs such asbacteria, viruses, fungi and mould***Independently Tested and Verified -./ ./ ./ AHAM Certified -(Association of Home ApplianceManufacturers) the products clean air delivery ratehas been verified through a third party laboratory.Odor-Lock'" Pre-FiltersT he Odor-Lock'" pre-filters help ./ ./reduce odours. The filters aremade of carbon and zeolite-(HFD-012 only)elements found to break downand adsorb common odours.*From the a i r that passes through the filler. 99% e f ficiency at .2 microns on low speed."" Permanent clalm Is based on normal household usage, washed 4 times per y ear for 5 years.***Based on independenl testing, report 3102892-01. Results are based on the testing o f the r e d u ction of the following bacteria, mould, fungi and viruses Jn the a ir after 2 hours of use with UV turned on, operated at high setting:Bacteria: Escheria Coli -100%Mould Spores: Peniciflium ci trinum -84.8%Fungi: Asperglllus nlger 98%Viruses: M S2 -98.6%Thank you for purchasing the Honeywell QuietClean• High Performance Air Purifier with a breakthrough technology in air purification. Please read below on how to operate and care for your new air purifier.Ass e mbly UV Bulb � Cartridges* (2) UV Bulb Housing ,,.Micro-��-rn Prefilter Frame Model HFD-010 and HFD-015 onlyHHT-215, HHT-217 and HHT-219 only.** ifD"' =Intense Field Dielectric Micro-Rltration Breakthrough filter technology ifD"MicraFilter** l Pre-filter Frame• Outstanding Performance in capturing microscopic particles • Easy to clean-·Model HF0-010 and HFD-015only has 1 ifD"'Micro-filter and 1 Pre-filter.t HHT-217, HHT-219 and HFD-112 only, WashablePre-filters (2)-IIWashablePre-filter""*Odor-Lock"Pre-filterstII HHT-217 and HHT-219 ONLYOdor-Lock"Pre-filterstHFD-012ONLYSome air purifiers (model HFD-112, HHT-217 and HHT-219) include special odor reducing pre-filters. In order to enjoy the benefits of enhanced odor control, ensure that the Odor-Lock-pre-filtersare installed in the unit. (See "Installing The Odor-Lock" Pre-filters")For optimal performance, the filters are wrapped in plastic to keep them fresh. If you choose to use the Odor-Lock" pre-filters, replacement timing will be approximately every 3 months, depending on use.• Select a firm, level and flat location. For proper air flow, locate the unit at least 3 feet (1 M) from the wall or furniture.• Ensure the exit grill faces away from the closest wall or furniture.• Ensure no grilles are blocked.• Plug into a grounded 120V outlet. See IMPORTANT SAFETY INSTRUCTIONS.• Press the power ( <!J) button to turn the air purifier on (Fig. 1).• The LCD screen will display Medium(�).• To change air cleaning power setting, press the up( ....+) ordown ( ....-) buttons (Fig. 2). The display will indicate thecurrent setting: Low (�o), Medium(�). High(•\).• For maximum cleaning power, set the unit to operate at theHigh (.\)setting. For quieter settings, or during sleep,set the unit to Medium(�) or Low(�).• To turn the unit off, touch the Power ( <!J) button.Timer OperationOnce the air purifier is turned on, you can program it to turn offautomatically after a set amount of time.• Press the Timer button ( �) the LCD screen flashes thenumber "8" (Fig. 3).• Press the timer plus ( 0+) or timer minus ( 0-) buttons toincrease or decrease the desired number of hours (1 to 18).The selected number will flash for a few seconds -once it stopsflashing, the air purifier is in Timer mode and will automaticallyshut off after the specified amount of time.(Example: If you want the unit to turn off in 6 hours, touch theTimer button, then press the timer minus ( 0-) button until thenumber "6" is displayed.)• To turn the Timer mode off, press the Timer button twice.NOTE: Removing the ifD-Micro-filter assembly or turning the unit off will cancel the Timer function.Dual UV Lamp Operation• Press the UV button (UV) to turn the Lamps on or off(Fig. 4).• The Lamps will light and you will see a faint blue glow along the front of the unit above the grille.• The display will say "UV" in the bottom row.NOTE: Removing the ifD'" filter assembly or turning the unit off will cancel the UV Lamp function.• Ensure the unit is in the OFF (0) position and then plug into a working outlet• Rotate the control knob to the desired speed level: High (:) or Low(•) (Fig. 5).• The indicator light will illuminate when the power is on.• Turn the control knob to the Off (0) position to turn off theair purifier.Timer Operation• Press the Timer ( 0) button to select 4, 8 or 12-hour operation (Fig. 8). The timer indicators will illuminate to reflect theselected time. The air purifier will automatically turn off when time runs out.• The timer can be turned off by repeatedly pressing the Timer ( 0) button until all of the timer indicator lights go out.NOTE: Removing the ifD'" Micro-filter assembly or turning the unit off will cancel the Timer function.This air purifier is equipped with an electronic filter clean monitor to serve as a convenient guideline for cleaning the ifD-Micro-filter and pre-filter based on the air purifier's hours of use and operating power level. This is beneficial because a filter's life depends on the amount of air and contaminants drawn through it. As you operate your QuietClean• Air Purifier, the filter clean monitor barwill fill-up from left to right. The bar will continue to fill as you use the unit. Oncethe bar is completely full, the Filter Reset button will illuminate -it is time to cleanthe filters and reset the filter clean monitor.Resetting the Filter Clean Monitor (HHT-215, HHT-217, HHT-219 Only)After cleaning the ifD-filter, you need to reset the filter clean monitor.• Once the ifD'" Micro-filter has been checked and cleaned, the filter cleanmonitor will need to be reset.• With the air purifier unit powered on, press and hold the Filter Reset button forapproximately 1 O seconds or until the filter bar is clear (Fig. 9a) and LED light goes out.Filter Clean Indicator Operation (HFD-015, HFD-110, HFD-112, HFD-116 Only)• When the filter clean indicator light illuminates, (Fig. 9b) it is time to inspect/cleanthe ifD'" Micro-filter.• Once you have cleaned the filter, press and hold the Filter Reset button until the LED light goes out. NOTE: Depending upon your individual usage (environment, hours and power level of operation), you may need to check and clean the filters more or less frequently.To remove the ifD'" Micro-filter:Make certain that U1e air purifier is OFF and the unit isunplugged.• Push the Filter Release button and then gently lift thefilter assembly (Fig. 1 O a & 1 O b). The filter assembly willonly release if the button is pushed.• Remove the pre-filter (see "Cleaning the Pre-fi/tef'),and set aside.To clean the ifD-Micro-filter:• (Optional) After removing the ifD-Micro-filter from the air purifier, gently runa vacuum cleaner with a nozzle or brush attachment along the filter to pick-uptiny particles (Fig. 11). Repeat on both sides.If your ifD'" Micro-filter appears to have dirt that has not been removed byvacuuming, or if you choose not to vacuum the filter first, please follow the stepsbelow to wash the ifD'" Micro-filter.• Turn the power off and unplug the air purifier.• Remove the ifD-Micro-filter from the unit.• You can simply rinse the ifD'" M icro-filter under the faucet, or for more thoroughcleaning, fill the sink with lukewarm water and add a few drops of mild dishsoap (Fig. 12).• Gently swish the filter in the soap solution to clean.• Soak the filter for 2-3 minutes. Do not leave for an extended period of time.• Rinse the filter with clean tap water.• Shake the filter to remove any excess water.• Place the filter with the honeycomb side down on a plush towel (Fig. 13).• Note that the filter may still be discolored even after washing.This is acceptable and will not affect performance.• Allow the ifD™ Micro-filter to dry for a few hours or overnight.• When the ifD™ Micro-filter is completely dry, place back into the air purifier.Make sure you insert the filter according to the directional arrows on the filter.CAUTION:• Never place a wet ifD'" Micro-filter in your air purifier.• Do not use any solvents, strong cleaning agents or flammable liquids to clean the i!D™ Micro-filter.To remove the pre-filter:Press the top tab to release the pre-filter from the filterassembly (Fig. 14).To clean the pre-filter:The particle pre-filter helps pick-up large airborne particlesthat enter the filter. The pre-filter can be removed and rinsedby hand under warm water (Fig. 15). Let the pre-filter drycompletely before inserting it back into the unit.• To replace the permanent, washable pre-filters with theOdor-Lock'" pre-filters, remove the standard washablepre-filter assembly by pushing on the top tab (Fig.16).• The pre-filter assembly has two pre-filters that will needto be popped out of the pre-filter frame. Hold the framesteady from the side while pushing in the center of eachpre-filter from the back side of the frame (Fig.17). Thiswill separate the pre-filter from the frame and you canthen pull it completely away from the frame (it will snapout) (Fig.18). Save the permanent washable pre-filtersas you may choose to use them in the future:• To insert the Odor-Lock™ pre-filters into the pre-filterframe, line the tabs on the pre-filter up with the framenotches and snap into place (Fig.19).• Install the Odor-Lock'" filter assembly by inserting thelower tab of the pre-filter frame into the filter assemblyuntil you hear a "click" (Fig. 20).• Align the complete filter assembly with the opening inthe unit and insert back into the unit (Fig. 21).NOTE: The Odor-Lock'" filters are not washable.NOTE: I f you choose to re-insert the standard washable pre-filter in lieu of the Odor-Lock� pre-filter, they are removed and inserted in the same way that the Odor-Lock'"filters are installed. They will not help reduce odours but will be effective at capturing larger particles like dust, lint and pet fur.The UV Reset LED light will illuminate when it is time toreplace the dual UV bulbs.• Be sure to turn off and unplug your air purifier.• Press the Filter Release button and remove the filterassembly.• The UV bulb housing is on the left and has a fingergrip for ease of removal (Fig. 22). Gently remove theUV bulb housing.• Turn the tab towards the unlock symbol (O') (Fig 23).• Gently grasp the top of the tab and pull the bulb cartridge straight out of the UVsocket. Do not touch the bulb directly with your hands.• D o the same for the bottom tab and pull the bulb cartridge out of the UV socket.• Replace the top and lower UV bulb sockets.• The bulb cartridge will only fit one way; if it does not fit, turn the bulb cartridgethe other way (with the arrow pointing to the center of the unit) and insert.• Push down gently so that the bulb cartridge engages with the unit. Turn arrow to the lock position ( 6 ).• Place UV bulb housing back in air purifier housing and then insert ifD� filter assembly.• With the air purifier powered on, press and hold the UV reset button (Fig. 24) until theLED light goes out.NOTE: Discard the old UV bulb cartridge at a household hazardous waste collection site,Bulb and bulb housing are not intended for use with any other product or purpose.Please make certain that the unitis OFF and unplugged.To install the ifD'" Riter and pre-filter:• Insert the lower tab of the pre-filterframe into the filter assembly(Fig. 25) and press the top tab intothe filter assembly until you heara "click" (Fig_ 26).• Align the filter assembly with the opening in the unit and insert back into the unit (Fig. 27).Press until it is flush and you hear a "click."• Use a clean, dry cloth to wipe the external surfaces of the air purifier. DO NOT USE WATER, GASOLINE, POLISH, OR ANY CHEMICAL SOLUTION.• The ifD™ filter and pre-filter should be cleaned at least once every three months, or sooner depending on the air quality of the room (See "Removing/Gleaning the ifD™ Filter" o r "Gleaning the Pre-Filter"respectively).NOTE: If you smoke, burn candles or oil lamps in your home, it is recommended that you wash your filter more frequently. When burned in an enclosed space, candles and oil lamps have a tendency to introduce soot into the air.How often is cleaning required?The ifD"" filter reset light will illuminate to indicate that the ifD'" filter should be cleaned. Werecommend cleaning the filter about once a month depending on the air quality of the room.I j ust cleaned my filter but the filter indicator is still showing it is dirty. what's wrong?Each time you clean your filter you must reset the filter clean monitor. It is a timer driven monitor to be used as a guideline, but does not represent the actual amount of dirt in the ifD'" filter. With the unit running, press and hold the filter reset button for up to 1 O seconds and when you let go, the filter clean monitor should be reset.The filter bar on my unit is completely full but my filter doesn't really look dirty.(HHT-215, HHT-217 or HHT-219 Only)The filter clean monitor on your unit is timer-based and does not measure the amount of particles in the ifD'" filter. It is possible that your filter monitor could indicate that the filter is dirty but some particles are so small that they cannot be seen but are present in the filter. We recommend cleaning the ifD'" filter (see Removing/Gleaning the ifD'" Filter in the manual).My filter bar says my filter is still relatively clean but when I checked my filter it was really ditty. (HHT-215, HHT-217 or HHT-219 Only)In conditions where smoke, pets or air with a lot of contaminants are present it is possible that the filter could be dirty sooner than indicated on the filter clean monitor bar. The filter clean monitor on your unit runs on a timer and if there are more particles in your air than in an average home, your filter could capture airborne particles sooner than indicated on the display. The monitor is intended to be used as a guideline and individual environmental conditions will vary.Is my Air Purifier considered an ozone generator?No. Ozone generators produce large amounts of ozone as the primary way to clean the air. The EPA does not endorse these products because they can cause ozone related health problems. The air purifier does not use ozone as the primary method to clean the air. It cleans the air by using ifD'" technology (Intense Field Dielectric) which only generates trace amounts of ozone, substantially below the limits established by the EPA and FDA.。
AGE-S-XYZ 100 - 200 舱内舱外编程单位操作手册说明书

Translation of the original manualCompensation Unit in X-, Y-, and Z-DirectionAGE-S-XYZ 100 - 200Assembly and Operating ManualSuperior Clamping and GrippingImprint2ImprintCopyright:This manual remains the copyrighted property of SCHUNK GmbH & Co. KG. It is solely supplied to our customers and operators of our products and forms part of the module. This documentation may not be duplicated or made accessible to third parties, in particu-lar competitive companies,without our prior permission.Technical changes:We reserve the right to make alterations for the purpose of technical improvement. Document number: 0389004Edition: 3.02 |05/07/2013|en© SCHUNK GmbH & Co. KGAll rights reserved.Dear customer,congratulations on choosing a SCHUNK product. By choosing SCHUNK, you have opted for the highest precision,top quality and best service.You are going to increase the process reliability of your production and achieve best machining results – to the customer's complete satisfaction.SCHUNK products are inspiring.Our detailed assembly and operation manual will support you.Do you have further questions? You may contact us at any time – even after purchase.Kindest Regards Yours SCHUNK GmbH & Co. KGSpann- und GreiftechnikBahnhofstr. 106 – 134D-74348 Lauffen/NeckarTel. +49-7133-103-2503Fax +49-7133-103-2189**************.comTable of contents3Table of contents1 About this manual (4)1.1 Warnings (4)1.1.1 Key words (4)1.1.2 Symbols (4)1.2 Applicable documents (4)2 Basic safety notes (5)2.1 Intended use (5)2.2 Not intended use (5)2.3 Environmental and operating conditions (5)2.4 Product safety (6)2.4.1 Protective equipment (6)2.4.2 Constructional changes, attachments, or modifications (6)2.5 Personnel qualification (6)2.6 Using personal protective equipment (7)2.7 Notes on particular risks (7)3 Warranty (9)4 Scope of delivery (9)5 Technical Data (10)6 Mounting and commissioning (11)6.1 Assembly (11)6.2 air connection / media connection (12)6.3 Mounting of the sensors (14)7 Troubleshooting (19)7.1 Problem analysis (19)8 Maintenance and care (19)8.1 Maintenance intervals (19)9 Assembly drawing (20)9.1 AGE-XYZ (20)9.2 AGE-XY (21)9.3 AGE-Z (22)10 Accessories kit (23)11 Translation of original declaration of incorporation (24)About this manual4 3.02|AGE-S-XYZ 100 - 200|enAbout this manualThis instruction is an integral part of the product and contains im-portant information for a safe and proper assembly, commission-ing, operation, maintenance and helps for an easier trouble shoot-ing.Before using the product, read and note the instruction, especially the chapter "Basic safety notes".WarningsThe following signal words and symbols are used to highlight dan-gers.Key wordsSymbolsGeneral mandatory sign to prevent material damage Applicable documents• SCHUNK catalogRobot accessories• Assembly and Operating Manuals of the accessories • General terms of businessThe documents listed here, can be download on our homepage 1 1.1 1.1.1 1.1.2 1.2 Basic safety notes5Basic safety notesIntended useThe unit was designed for mechanical adjustment and storing a fixed positioning point of workpieces or objects.The module is intended for installation in a machine/system. The requirements of the applicable guidelines must be observed and complied with.The module may be used only in the context of its defined applica-tion parameters (☞ 5, Page 10). To use this unit as intended, it is also essential to observe the technical data and installation and operation notes in this manual and to comply with the maintenance intervals.Not intended useIt is not an intended use if the module is used, for example, as a pressing tool, stamping tool, lifting gear, guide for tools, cutting tool, clamping device or a drilling tool.Environmental and operating conditions• Ensure that the module and the top jaws are adequately di-mensioned according to the application• Ensure that the environment is clean. Observe the mainten-ance and lubrication intervals "Maintenance intervals" (☞ 8.1, Page 19)• Ensure that the environment is free of splashing water and va-pors, and also of abrasive dust and process dust. Excepted are modules that are designed especially for contaminated en-vironments.2 2.1 2.2 2.3 Basic safety notes6Product safetyDangers arise from the module, if:• the module is not used in accordance with its intended pur-pose.• the module is not installed or maintained properly.• the safety and installation notes are not observed.Avoid any manner of working that may interfere with the function and operational safety of the module.Wear protective equipment.NOTEMore information are contained in the relevant chapters.Protective equipmentProvide protective equipment per EC Machinery Directive.Constructional changes, attachments, or modificationsAdditional drill holes, threads, or attachments that are not offered as accessories by SCHUNK may be attached only with permission of SCHUNK.Personnel qualificationThe assembly, initial commissioning, maintenance, and repair of the module may be performed only by trained specialist person-nel. Every person called upon by the operator to work on the module must have read and understood the complete assembly and operating manual, especially the chapter "Basic safety notes" ( 2, Page 5). This applies particularly to personnel only used oc-casionally, such as maintenance personnel.2.4 2.4.1 2.4.2 2.5 Basic safety notes7Using personal protective equipmentWhen using this product, observe the relevant industrial safety regulations and use the personal protective equipment (PPE) re-quired!• Use protective gloves, safety shoes and safety goggles. • Observe safe distances.• Minimal safety requirements for the use of equipment.Notes on particular risksGenerally valid:• Remove the energy supplies before installation, modification, maintenance, or adjustment work.• Make sure, that no residual energy remains in the system. • Do not move parts by hand when the energy supply is con-nected.• Do not reach into the open mechanism or the movement area of the module.• Perform maintenance, modifications, and additions outside the danger zone.• For all work, secure the unit against accidental operation. • Take a precautionary approach by maintenance and disassem-bly.• Only specially trained staff should disassemble the module. 2.6 2.7 Basic safety notes8 3.02|AGE-S-XYZ 100 - 200|enScope of delivery9WarrantyThe warranty is valid for 24 months from the delivery date to the production facility under the following conditions:• Intended use in 1-shift operation• Observe the mandatory maintenance and lubrication intervals • Observe the environmental and operating conditionsParts touching the work piece and wear parts are not part of the warranty.Scope of deliveryThe scope of delivery includes:• Compensation Unit in X-, Y-, and Z-Direction AGE-S-XYZ in the ordered model.• Accessory pack3 4 Technical Data10 Technical DataFurther technical data can be found in the catalog data sheet. The most recent version applies.5 Mounting and commissioning3.02|AGE-S-XYZ 100 - 200|en 11Mounting and commissioningAssemblyThe connection dimensions can be found in the corresponding drawings in the current catalog; or you can make use of our CAD data service on the web (Link unter ).Before starting assembly of the unit, the power supply must be switched off. (☞ 2, Page 5).Fig. 1Position of the position numbers (☞ 9, Page 20)The compensation units can be mounted using the pre-mounted screws (101, 102, 103, 104 depending on the type). For reliable transmission of lateral forces and positioning of the unit, use a cy-lindrical pin (105). "Accessories kit" (☞ 10, Page 23).hexagon socket of the screw6 6.1 Mounting of the unit Mounting and commissioning123.02|AGE-S-XYZ 100 - 200|enThe compensation units are equipped with interfaces in accor-dance with ISO/DIS 9409-1air connection / media connectionThe connection dimensions can be found in the corresponding drawings in the current catalog; or you can make use of our CAD data service on the web (Link unter ).NOTE• Only open the air connections required.• For hose-free direct connections use the two O-rings from the accessories kit.• Lock the not required air connections with suitable lock screws.Special Connection Dimensions 6.2 Mounting and commissioning3.02|AGE-S-XYZ 100 - 200|en13Mounting and commissioning14Mounting of the sensorsThe magnetic switches are accessories and must be ordered sepa-rately. The units have been prepared by SCHUNK for the use of type MMS-K 65 magnetic switches and INK/INW 80.Electronic magnetic switch (MMS-K 65) for piston stroke controlfor XY typesbraun / brown schwarz / black blau / blueLast Payload+-Schließer CloserThe switching function is shown in undamped condition.NOTICESensor can be damaged during assembly.Do not exceed the maximum tightening torque of 10 Ncm for the set screws.6.3 MMS-K 65 Mounting and commissioning3.02|AGE-S-XYZ 100 - 200|en15NOTEFerromagnetic material changes the switching positions of the sensor. For example: Adapter plate made of ordinary steel. At ferromagnetic adapter plates:• The module must firstly be mounted on the adapter plate • Then, the positions of the magnetic switch have to be setElectronic proximity switch (INK/INW -80) for stroke control in Z-directionFig. 5braun / brown schwarz / black blau / blueLast Payload+-Schließer CloserThe switching function is shown in undamped condition.The inductive proximity switches used are equipped with reverse polarity protection and are short-circuit-proof.Make sure that you handle the proximity switches properly: • Do not pull on the cable.• Do not allow the sensor to dangle from the cable. • Do not overtighten the mounting screw or mounting clip. • Please adhere to a permitted bend radius of the cable. (☞ catalog) • Avoid contact of the proximity switches with hard objects and with chemicals, in particular nitric acid, chromic acid and sul-phuric acid.INK/INW-80 Mounting and commissioning16The inductive proximity switches are electronic components, which can react sensitively to high-frequency interference or elec-tromagnetic fields.• Check to make sure that the cable is fastened and installed cor-rectly. Provide for sufficient clearance to sources of high-frequency interference and their supply cables. • Parallel switching of several sensor outputs of the same type (npn, pnp) is permissible, but does not increase the permissible load current. • Note that the leakage current of the individual sensors (ca. 2 mA) is cumulative.1 Push the proximity switch (M3) into the mount (54) and fasten it by tightening the screw.2 Press the AGE together to achieve the desired Z-stroke and turn the screw (55) out of the mount (16) until the proximity switch (M3) switches.3 Turn the screw (55) about one more revolution.4 Check the function by releasing the AGE and then pressing it together in Z-direction again.AGE-Z with INW/INK 80Mounting and commissioning3.02|AGE-S-XYZ 100 - 200|en 17NOTEHoles are provided in the housing for mounting the magnetic switches.Proceed as follows to set a switching position (piston stroke con-trol):Compensation unit unlocked: 1 Unlock the compensation unit.2 Push O-ring (58) onto the magnetic switch (M1).3 Place the cable of the magnetic switch in the groove of the clamping element (17). (The O-ring (58) should be between the magnetic switch and the clamping element (17)).4 Push the magnetic switch 1 (see drawing) with the clamping element (17) into the hole on the housing until the magnetic switch reaches the bottom of the hole.5 Turn the magnetic switch at the cable on its own axis until it switches.6 Fasten the magnetic switch (M1) in this position by tightening the screw (59).7 Test the function by locking the compensation unit and then unlocking it again.AGE-XY with MMS-K 65/SMounting and commissioning18Compensation unit locked: 1 Lock the compensation unit.2 Push O-ring (58) onto the magnetic switch (M2).3 Place the cable of the magnetic switch in the groove of the clamping element (17). (The O-ring (58) should be between the magnetic switch and the clamping element (17)).4 Push the magnetic switch 2 (see drawing) with the clamping element (17) into the hole on the housing until the magnetic switch reaches the bottom of the hole.5 Turn the magnetic switch at the cable on its own axis until it switches.6 Fasten the magnetic switch (M2) in this position by tightening the screw (59).7 Test the function by unlocking the compensation unit and then locking it again.Maintenance and care3.02|AGE-S-XYZ 100 - 200|en 19TroubleshootingProblem analysisMaintenance and careMaintenance intervalsThe AGE should be sent back to SCHUNK every 3 million cycles for inspection and replacement of wearing parts.7 7.1 8 8.1 Assembly drawing203.02|AGE-S-XYZ 100 - 200|enAssembly drawingAGE-XYZ9 9.1 Assembly drawing9.2AGE-XYFig. 10Assembly drawing9.3AGE-ZAccessories kit 10Accessories kitTranslation of original declaration of incorporationTranslation of original declaration of incorporationWe hereby declare that the following product: Product designation: Compensation Unit in X-, Y-, and Z-Direction /AGE-S-XYZ 100 - 200 / pneumaticID number0324500,0324502,0324503,0324504,0324525,0324527,0324528,0324529,0324560,0324562,0324563,0324564,0324600,0324602,0324603,0324604The manufacturer agrees to forward on demand the special technical documents for the incomplete machine to state offices.The special technical documents according to Annex VII, Part B, belonging to the incom-plete machine have been created.Person responsible for documentation: Mr. Robert Leuthner, Address: see address of the manufacturerRalf Winkler;Business Unit ManagerR & D Mechanical Gripping Systems11。
- 1、下载文档前请自行甄别文档内容的完整性,平台不提供额外的编辑、内容补充、找答案等附加服务。
- 2、"仅部分预览"的文档,不可在线预览部分如存在完整性等问题,可反馈申请退款(可完整预览的文档不适用该条件!)。
- 3、如文档侵犯您的权益,请联系客服反馈,我们会尽快为您处理(人工客服工作时间:9:00-18:30)。
Instructions for Lubrication Oil StationXYZ-100GDesigner:Inspector:Administrator:China Luoyang Wanli Metallurgical&Machinery Co., LtdMarch, 2013 CatalagueⅠ. Brief IntroductionⅡ. Main SpecificationsⅢ. Work Theory& Structural FeatureⅣ. Installation-Adjustment& Test RunningⅤ. Maintain & Safety SkillsⅠ. Brief IntroductionThe station is mainly applied in the field of Cement, metallurgy, Rolling, Mining, Energy, Light Industry, Communication& Transportation, Petrol-chemical and electrical fields. Through Circulating Thin Oil System, the stations supply lubricant to friction sections as gears and bearings of host gearboxes for mechanic equipment which can reduce the attrition and cool equipments so that the equipments can function properly and continuously.The station use N220-N320 medium-workload industrial gear oil or other mechanical lubricant oil as its work media.This device consists of a lubrication oil station, a panel and an electronic control box. The oil supply pressure≤0.4MPa; Oil Supply Temperature: 40±3℃; Filter Accuracy: 0.08-0.12mm; Temperature of Cooling Water≤30℃; Pressure of Cooling Water: 0.2~0.3MPa; Oil supply temperature of Heat Exchanger is about 50℃; Temperature Drop≤8℃.Ⅱ. Main SpecificationsNominal Flow Rate 100L Nominal Pressure 0.4Mpa Oil Tank Capicity 1400L Oil Supply Temperature 37~43℃Oil Pump Type BB-B100 Electric Motor Type Y112M-4 Electric Motor Power 4kW Filter Type SPL-40 Filter Accuracy 0.12mm Cooler Type GLC3-6/0.6 Cooler Area 6m2 Heater Power 12kW Oil Supply Pipe 40mm Oil Return Pipe 80mm Lubricant Oil N220~N320 medium-workload industrial gear oilⅢ. Work Theory& Structural FeatureWork TheoryDuring operation, the gear-wheel pump absorbs the oil from the tank, then the oil will be supplied directly to lubricating point through the one-way valve, the center valve and pipe of the duplex filter and tubular- type oil cooler,.The maximum operating pressure of the lubrication oil station is0.4MPa. According to the requirement of lubricating point, safety valve should be adjusted to choose the work pressure, when the pump pressure exceeds the setting pressure, the safety valve will be opened automatically, and oil will return to the tank.Normally, one pump works, the other for spare. The spare pump will automatically supply the lubricant when the system pressure falls to the setting pressure due to some reasons. The spare pump will stop working until the pressure is normal; however, when the pressure continues to reduce to the other setting pressure, the warning signal will indicate alarm and stops the mainframe. So as oil filter, one for work, the other is spare. Also, there is a pressure-difference controller installed on the input and output gate. When the pressure-difference is over 0.1MPa, the spare filter will work by manual work, then taking out and cleaning or changing filtering element.There are two pressure-type temperature controllers installed to maximum and minimum two boundaries according to oil supply temperature. That is, under low temperature circumstance, the signal light shines, operate manually the heater to heat; when the oil temperature reaches the maximum point, cut off the heater automatically and stop heating; when the oil outlet temperature is high, the signal turns light, alarm bell rings and turn on the cooler;There places a bypass straight pipe beside the cooler. When there is no need for cooler or it need inspecting, the valve can be closed and the bypass should be opened so that the oil flows out directly through the straight pipe and repair the cooler, which will not affect the normal work of oil lubrication station.The oil lubrication station is an integral structure which adopts electrical heating and all parts are installed on the oil tank.Structural Feature1.Installing Spare PumpThere has two oil pumps for the station, one pump works, the other for spare. Normally, one pump works, the spare pump start when the system pressure falls to the setting pressure in order to supply lubricant oil continuously.2.Adopting duplex oil filter.There two filter element in the duplex oil filter, one for work and the other one for spare. It doesn’t need to stop the mainframe when change the element by using the switch valve to take out the original filter element and start the spare one. The filter without bypass has a compact structure, which can be connected and exchanged easily.It can improve the filtering ability by placing the filter in front of coolers; lubricant with higher viscosity can also get through.3.Adopting GLC tubular- type oil cooler.Copper-heater exchanger- tube has fine cooling effects with a small volume and light weight, and has much less resistance than plate heater exchangers, so it is relatively adoptable to use in the Lubrication Oil System which has no intense pressure.4.Installing magnetic filter in the gate of oil returning.This may keep the oil clean by adsorbing and filtering small ferromagnetic substances.5.Installing bypass valveOpen the bypass valve when heating, so that oil can keep flowing and even heating, also to avoid aging of the oil for the too high temperature partially.9. Installing dashboard and electric cabinet, by the device running parameter can be viewed easily, also for automatic controlling and emergency warning.Ⅳ. Installation-Adjustment& Test RunningThis integral lubrication oil station doesn’t need to be fixed by foot screw but just placed on a flat ground or the hole beside the mainframe. It can be carried when hang the four lifting lug on the oil tank.The station has been passed performance test before out of our factory, so it can work well after connecting with oil supplying pipe, oil returning pipe, water pipe, electric cabinet and after trial running.Pipes should be pickled to remove rusts or phosphate treated, neutralized by lime water, rinsed by clean water and dried by compressed air before connecting with equipments.Operation Manuel1.Set the pressure controller and temperature according to the system pressure andoil temperature, then turn on the oil, water and pressure of the station;2.Set the duplex to the operating place of one filter and check whether theconnection of the cooler is tight or not, and fasten if necessary;3.Turn on the electric heater to heat the oilaccording to the oil temperature required ,and the oil should be kept flowing when being heated;4.Start the oil pump before the mainframe works, only the system temperature isachieved can the mainframes begin to work. When stop the machine, mainframe should be stopped firstly and then the pump.5.During the operating of the lubrication oil station, there will be signal lightslighting and alarm sound if the oil pressure/ temperature/ level on the irregular place, then turn off the alarm and remove the failure according to the signal light.6.It should move the change valve immediately when the pressure difference is over0.1MPa, then start the spare filter and take out the filtering element from theoriginal (the work one) and clean or exchange the filter.7.When the supplying oil temperature is over 45℃, the cooler could turned on, atthe same time it should open the water valve, the oil valve and close the bypass valve of the cooler. Otherwise, the water valve and the oil valve should be closedand the bypass valve should be opened if not use the cooler long-term.Ⅴ. Maintain & Safety Skills1.The seal gasket of the gear- wheel should be checked frequently, any leakage ordamage should be replaced in time;2.According to the water quality, coolers should be inspected and cleaned every5-10 months;3.The duplex filter should be cleaned to remove the dirt deposited inside every 3months, and replaced according to the sealing condition;4.The Magnetic Filter should be cleaned every 3 months;5.Pay attention to the oil level, once there is water, it should be discharged by loosethe two oil screws;Lubricant oil in oil box should be sampled and tested every month to decide whether to be exchanged according to the oil quality。