Lexium 28运动控制产品样本V2.3 CN
三星RF28HMEDBSR 28 cu. ft. 4-Door French Door Refrig

RF28HMEDBSR28 cu. ft. 4-Door French Door Refrigerator with Counter Height FlexZone ™ Drawer Features• Large Capacity – 28 cu. ft.• F lexZone™ Drawer with 4 Temperature Control Settings and Smart Divider • Twin Cooling Plus™• ENERGY STAR ® Compliant• Ice Master Ice Maker in the Refrigerator • P remium External Filtered Water and Ice Dispenser• High-Efficiency Top and Side LED Lighting • Adjustable Shelf for Tall Oversized Items • S tainless Steel Accents on Interior Shelving and Door Bins• E Z-Open Handle™ on Freezer Door and FlexZone™ Drawer• Two Humidity-Controlled Crispers • Tempered Glass Spill-Proof Shelves • Gallon Door Bins• Auto Pull-Out Upper Freezer Drawer • Easy-to-Access Water FilterConvenience• CoolTight Door• Water Filter Indicator • Door AlarmENERGY STAR ® Rated: CEE Tier 1(10% more efficient than Federal Standard)722 kWh/yrSignature FeaturesIce MasterFlexZone™ DrawerFLEXZONE™ DRAWER• A djustable Smart Divider creates four flexible-size compartments.• F our customizable temperature settings: meats at 29°F, cold drinks at 33°F, deli/snacks at 37°F, and party dishes at 42°F.• C onvenient, counter-height drawer easily accessible for kids.TWIN COOLING PLUS™• K eeps food fresher longer – Twin Cooling Plus™ humidity levels up to 3.6x higher than single cooling.• R efrigerator air is kept at higher, near commercial-grade humidity levels to keep perishable fruits and vegetables fresher longer.• D rier freezer air means less freezer burn for better-tasting frozen foods.ICE MASTER• Produces 10 lbs. of ice per day and stores 4.2 lbs.• Space-saving design leaves more room in the refrigerator.Ranked “Highest in Customer Satisfaction with French Door Refrigerators, in a Tie.” *– J.D. PowerWhiteAvailable ColorsStainless SteelBlack Stainless Steel* Actual color may vary. Design, specifications, and color availability are subject to change without notice. ©2014 Samsung Electronics America, Inc. 85 Challenger Road, Ridgefield Park, NJ 07660. Tel: 800-SAMSUNG. . Total Capacity: 28.15 cu. ft.Refrigerator: 15.98 cu. ft.• Premium External Filtered Water and Ice Dispenser– Crushed or Cubed Ice • Ice Master Ice Maker• 2 Humidity-Controlled Crispers• 5 Tempered Glass Spill-Proof Shelves• Adjustable Shelf for Tall Oversized Items • 6 Clear Door Bins– Right Door: 3 Gallon Bins – Left Door: 3 Regular Bins• High-Efficiency Top and Side LED Lighting FlexZone™ Drawer: 3.82 cu. ft.• EZ-Open Handle™• 4 Temperature Settings with Smart Divider: – Meat/Fish (29°F)– Cold Drinks (33°F)– Deli/Snacks (37°F)– Wine/Party Dishes (42°F)Freezer: 8.35 cu. ft.• EZ-Open Handle™• 1 Drawer Divider• High-Efficiency LED Lighting Accessories Water Filter: HAF-CIN Warranty One (1) Year Parts and Labor on Refrigerator Five (5) Years Parts and Labor on Sealed Refrigeration System Only*Ten (10) Years Parts and Five (5) Years Labor on Digital Inverter Compressor*Compressor, evaporator, condenser, drier, connecting tubingProduct Dimensions & WeightDimensions (WxHxD with hinges, handles and doors):353/4" x 70" x 361/2"Dimensions (WxHxD without hinges and door):353/4" x 687/8" x 293/8"Dimensions (WxHxD with hinge and door, no handle): 353/4" x 70" x 34"Weight: 374 lbs.Shipping Dimensions & Weight (WxHxD)Dimensions: 381/4" x 76" x 367/8" Weight: 403 lbs.Color Model # UPC CodeStainless Steel RF28HMEDBSR 887276966052Black Stainless Steel RF28HMEDBSG 887276247458White RF28HMEDBWW 887276967653Measure height including flooring.Be sure to allow for hinge clearanceheight if needed.Measure widthincluding countertop overhang.Measure depthincluding molding or trim.21 3/8"3 3/8"35 3/4"7⁄16"55 1/8"29 7/8"33 3/4"36 1/4" 1 3/8"22 14"9 116"69 78"35 18"5/8"7/16"2 3/8"Installing Your RefrigeratorDimensionsDimensions Measure Height including flooring. Be sure to allow for hinge clearance height if needed Measure Width including countertop overhangMeasure Depth includingmolding or trimRefrigerator: 16.3 cu. ft.· P remium External Filtered Water andIce Dispenser- Crushed or Cubed Ice· Surround Air Flow · 2 Humidity Controlled Crispers · 5 Tempered Glass Spill Proof Shelves· Right Door: 2 Gallon Bins and 1 Door Bin · Left Door: 3 Door Bins · LED Lighting FlexZone Drawer: 4.0 cu. ft.· Easy Open HandleTM· 4 Temperature Zones with Smart Dividers: - Meat / Fish (29°F) - Cold Drinks (33°F) - Deli / Snacks (37°F) - Wine / Party Dishes (42°F)Freezer: 7.7 cu. ft.· Easy Open Handle TM· 1 Drawer Divider · In-Door Pizza Pocket· LED LightingAccessories:Water Filter: HAF-CINWarrantyOne (1) Year All Parts and LaborFive (5) Years Sealed System Parts and Labor Product Dimensions + WeightDimensions: (WxHxD)(without hinges): 35 3⁄4" x 68 1⁄2" x 29 7⁄8" (with hinges*) 35 3⁄4" x 69 7⁄8" x 33 3⁄4" (with handles) 35 3⁄4" x 69 7⁄8" x 36 1⁄4" Weight: 361.1 lbs /164.3 kgShipping Dimensions + WeightDimensions: (WxHxD) 38 5⁄8" x 75 3⁄4" x 36 1⁄4" Weight: 401.2 lbs /182 kg Color Model #UPC CodeStainless Steel RF4287HARS ************White RF4287HAWP ************Black RF4287HABP ************21 3/8"3 3/8"35 3/4"7⁄16"29 7/8"33 3/4"36 1/4" 1 3/8"2 1⁄4"91⁄16"69 7⁄8"35 1⁄8"5/8"7/16"2 3/8"1. M easure the height, width and depth of the opening, making sure to include baseboards, molding tile, countertop overhang, etc. Check to be sure there is enough room to open the door (consider walls, islands or other obstacles when measuring).2. Refer to illustration below to determine dimensions.3. A llow 2.5" of clearance on hinge side of refrigerator when installing next to a wall where handle may make contact.4. A llow 1" minimum clearance at rear for proper air circulation and water/electrical connections. Allow a 3/8" minimum clearance at sides and top for ease of installation.5. E nsure each door and entryway in the home is wide enough for the refrigerator to be moved through easily.For optimal usage and to be able to open refrigerator doors completely, do not install next to a wall.Please note: The following dimension and cutout information is for planning purposes only. For complete installation details, consult manual packed with product, or download manual online at .RF28HMEDBSR 28 cu. ft. 4-Door French Door Refrigerator with Counter Height FlexZone ™ Drawer361/2"34"70"351/8"229/16"85/16"2"5/8"7/16"11/4"353/4"7/16"291/2"203/4"47/8"S amsung received the highest numerical score for French door refrigerators in a tie in the proprietary J.D. Power2014 Kitchen Appliance Study SM . Study based on 15,380 total responses measuring 10 French door refrigerators brands and measures opinions of consumers about their new appliance purchased in the past 24 months.Proprietary study results are based on experiences and perceptions of consumers surveyed in January-March 2014. Your experiences may vary. Visit .Non-metric weights and measurements are approximate.©2018 Samsung Electronics America, Inc. 85 Challenger Road, Ridgefield Park, NJ 07660. Tel: 800-SAMSUNG. . Samsung is a registered trademark of Samsung Electronics Co. Ltd.。
施耐德 LXM28AU04M3X 伺服驱动器- Lexium 28 数据表
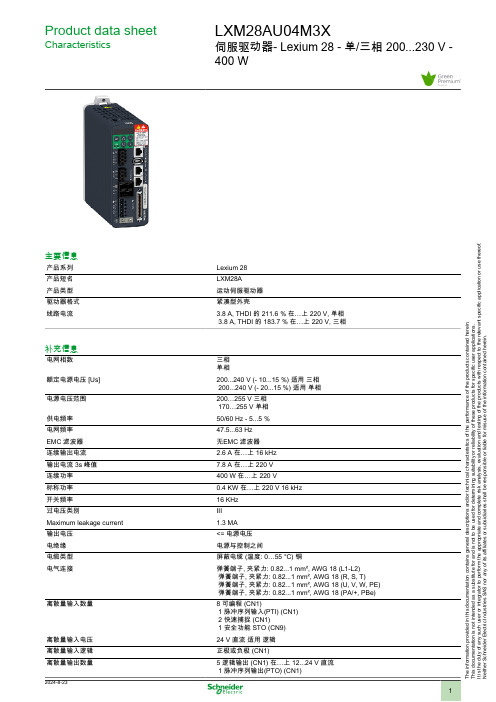
Product data sheetCharacteristicsLXM28AU04M3X伺服驱动器- Lexium 28 - 单/三相 200...230 V -400 W主要信息产品系列Lexium 28产品短名LXM28A 产品类型运动伺服驱动器驱动器格式紧凑型外壳线路电流3.8 A, THDI 的 211.6 % 在…上 220 V, 单相 3.8 A, THDI 的 183.7 % 在…上 220 V, 三相补充信息电网相数三相单相额定电源电压 [Us]200...240 V (- 10...15 %) 适用 三相 200...240 V (- 20...15 %) 适用 单相电源电压范围200…255 V 三相 170…255 V 单相供电频率50/60 Hz - 5...5 %电网频率47.5...63 Hz EMC 滤波器无EMC 滤波器连续输出电流 2.6 A 在…上 16 kHz 输出电流 3s 峰值7.8 A 在…上 220 V 连续功率400 W 在…上 220 V 标称功率0.4 KW 在…上 220 V 16 kHz 开关频率16 KHz 过电压类别III Maximum leakage current 1.3 MA 输出电压<= 电源电压电绝缘电源与控制之间电缆类型屏蔽电缆 (温度: 0…55 °C) 铜电气连接弹簧端子, 夹紧力: 0.82...1 mm², AWG 18 (L1-L2) 弹簧端子, 夹紧力: 0.82...1 mm², AWG 18 (R, S, T)弹簧端子, 夹紧力: 0.82...1 mm², AWG 18 (U, V, W, PE) 弹簧端子, 夹紧力: 0.82...1 mm², AWG 18 (PA/+, PBe)离散量输入数量8 可编程 (CN1)1 脉冲序列输入(PTI) (CN1)2 快速捕捉 (CN1)1 安全功能 STO (CN9)离散量输入电压24 V 直流 适用 逻辑离散量输入逻辑正极或负极 (CN1)离散量输出数量5 逻辑输出 (CN1) 在…上 12...24 V 直流 1 脉冲序列输出(PTO) (CN1)T h e i n f o r m a t i o n p r o v i d e d i n t h i s d o c u m e n t a t i o n c o n t a i n s g e n e r a l d e s c r i p t i o n s a n d /o r t e c h n i c a l c h a r a c t e r i s t i c s o f t h e p e r f o r m a n c e o f t h e p r o d u c t s c o n t a i n e d h e r e i n .T h i s d o c u m e n t a t i o n i s n o t i n t e n d e d a s a s u b s t i t u t e f o r a n d i s n o t t o b e u s e d f o r d e t e r m i n i n g s u i t a b i l i t y o r r e l i a b i l i t y o f t h e s e p r o d u c t s f o r s p e c i f i c u s e r a p p l i c a t i o n s .I t i s t h e d u t y o f a n y s u c h u s e r o r i n t e g r a t o r t o p e r f o r m t h e a p p r o p r i a t e a n d c o m p l e t e r i s k a n a l y s i s , e v a l u a t i o n a n d t e s t i n g o f t h e p r o d u c t s w i t h r e s p e c t t o t h e r e l e v a n t s p e c i f i c a p p l i c a t i o n o r u s e t h e r e o f .N e i t h e r S c h n e i d e r E l e c t r i c I n d u s t r i e s S A S n o r a n y o f i t s a f f i l i a t e s o r s u b s i d i a r i e s s h a l l b e r e s p o n s i b l e o r l i a b l e f o r m i s u s e o f t h e i n f o r m a t i o n c o n t a i n e d h e r e i n .离散量输出电压12...24 V DC离散量输出逻辑正极或负极 (CN1)模拟量输入数量2绝对准确度误差0.1 %模拟量输入类型V_REF 电压模拟输入: - 10...10 V, 阻抗: 10 kOhm, 分辨率: 14 bitsT_REF 电压模拟输入控制信号类型伺服电机编码器反馈 CN2保护类型防止电压反接: 输入 信号防止短路输出信号: 输出信号过流保护: 马达过电压: 马达欠电压: 马达过热: 马达过载: 马达超速: 马达安全功能STO(安全扭矩中断), 集成安全等级SIL 2 符合 IEC 61800-5-2: 2007SIL 2 符合 IEC 61508-1: 2010PL d/category 3 符合 ISO 13849-1: 2008SIL 2 符合 ISO 13849-1: 2009/ACSIL 2 符合 IEC 60204-1: 2006SIL 2 符合 IEC 60204-1: 2009/A1SIL 2 符合 IEC 60204-1: 2010/ACSIL 2 符合 IEC 62061: 2012通讯界面CANopen, 集成CANmotion, 集成端口类型RJ45 (CN4) 适用 CANopen, CANmotion访问方法从(站)传输率250 kbit/s 用于总线长度为… 100…250 m 适用 CANopen, CANmotion500 kbit/s 用于总线长度为… 4…100 m 适用 CANopen, CANmotion1 Mbit/s 用于总线长度为… 4 m 适用 CANopen, CANmotion地址数1…127 适用 CANopen, CANmotion物理接口RS485 适用 Modbus 串行线 从LED状态LED (红色) 充电LED (绿色) RUNLED (红色) 错误信号传输功能伺服状态和故障代码 5 7-段显示单元标识CSACECULus冷却方式自然通风操作位置垂直适用范围伺服电机 BCH2 (60 mm, 2 电机堆栈) 在…上 400 W伺服电机 BCH2 (80 mm, 1 电机堆栈) 在…上 400 W伺服电机 BCH2 (130 mm, 1 电机堆栈) 在…上 300 W宽度55 Mm高度150 Mm深度146 Mm净重1 Kg输出电流 3s 峰值 27.8 A 在…上 220 V输出电流 3s 峰值 37.8 A 在…上 220 V环境电磁兼容性传导辐射 - test level: 级别 3 C3类 conforming to IEC 61800-3符合标准IEC 61800-5-1产品认证cULus[RETURN]CSA[RETURN]CEIP 等级IP20抗振动3M4 振幅 = 3 mm (f = 9…200 Hz) 符合 IEC 60721-3-3抗冲击10 gn, 类型 I 符合 IEC 60721-3-3相对湿度5…95 % 无凝结运行温度0…55 °C贮存环境温度-25…65 °C工作海拔<= 1000 m 无降容> 1000, < 2000 1 %/100 m包装单位Unit Type of Package 1PCENumber of Units in Package 11Package 1 Height7.594 CmPackage 1 Width23.001 CmPackage 1 Length23.564 CmPackage 1 Weight 1.31 KgUnit Type of Package 2S03Number of Units in Package 25Package 2 Height30 CmPackage 2 Width29.9 CmPackage 2 Length39.8 CmPackage 2 Weight7.211 KgUnit Type of Package 3P06Number of Units in Package 340Package 3 Height80 CmPackage 3 Width80 CmPackage 3 Length60 CmPackage 3 Weight66.924 Kg可持续性产品类型Green Premium 产品REACh法规REACh 声明REACh(不含 SVHC)是欧盟ROHS指令主动合规性(超出欧盟 RoHS 法定范围的产品)无汞是中国 ROHS 管理办法中国 ROHS 声明RoHS 豁免信息是环境披露产品环境文件流通资料产品使用寿命终期信息WEEE该产品必须经特定废物回收处理后弃置于欧盟市场,绝不可丢弃于垃圾桶中。
研控科技 ESS28-R 系列 总线型集成式电机 用户手册说明书
目录前言 (1)1概述 (2)1.1产品介绍 (2)1.2特性 (2)1.3应用领域 (2)1.4 产品命名规则 (2)2性能指标 (3)2.1电气特性 (3)2.2使用环境 (3)3安装 (4)3.1安装尺寸 (4)3.2安装方法 (4)4端口与接线 (5)4.1接线示意图 (5)4.2端口定义 (6)4.2.1状态指示灯 (6)4.2.2输入/输出端口 (6)4.3控制信号连接 (7)4.3.1输入信号 (7)4.3.2输出信号 (7)5适配电机 (8)5.1技术规格 (8)6 MODBUS通讯协议 (9)6.1 MODBUS寄存器地址定义 (9)6.2 MODBUS常用功能码 (16)6.2.1读保持寄存器命令03 (16)6.2.2写单个寄存器命令06 (17)6.2.3写多个寄存器命令16 (17)6.2.4通讯错误码 (17)6.2.5应用示例 (19)7运动控制功能介绍 (21)7.1位置模式 (21)7.2速度模式 (22)7.3多段位置模式 (22)7.3.1 位置段参数介绍 (22)7.3.2 多段位控制方式 (23)7.4多段速度模式 (24)7.4.1 速度段参数介绍 (24)7.4.2 多段速度控制方式 (24)7.5回原点功能 (25)7.6 运动控制命令 (27)7.6.1 启动命令(0x0027) (27)7.6.2 停止命令(0x0028) (27)7.6.3 回原点命令(0x0030) (28)8报警排除 (29)9版本修订历史 (30)10保修及售后服务 (31)10.1保修 (31)10.2售后服务 (31)前言感谢您使用本公司总线型集成式电机。
在使用本产品前,请务必仔细阅读本手册,了解必要的安全信息、注意事项以及操作方法等。
错误的操作可能引发极其严重的后果。
声明本产品的设计和制造不具备保护人身安全免受机械系统威胁的能力,请用户在机械系统设计和制造过程中考虑安全防护措施,防止因不当的操作或产品异常造成事故。
PO-28机器人用户指南说明书

folding standpatternto select pattern hold pattern and press 1-16bpmpress to select tempomhold to set master volume 1-16hold step 1-16 + mto set multipliersoundto select sound hold sound and press 1-16alarm selected tempoPO-28 robot manualsound 1-16e ect 1-161. distorted filter2. distorted sweep3. repeat 44. repeat 25. lowpass slow sweep6. lowpass fast sweep7. hipass filter8. hipass sweep9. fill-in10. fill-in (fast)11. retrigger12. retrigger (fast)13. glitch14. glitch (fast)15. blinds16. noise e ect1. LFO pulse wave2. pulse wave3. mixed wave4. triangle wave5. echo6. arpeggio7. vibrato8. 4-bit triangle9. LFO pulse wave 10. pulse wave 11. mixed wave 12. triangle wave 13. echo 14. arpeggio 15. vibrato16. micro drum kitsound key 16 is a micro drum machinethe unit auto powers o when no buttons are pressed for a while, only powering the display to show time.press sound + bpm to show battery status. press sound + write to manually power o . this ensures that recent modificationsto pattern data will survive a loss of power.sound 1-16e ect 1-161. getting startedpower-upinsert two fresh AAA batteries.pay attention to plus and minus terminals.set clockset time by turning knob A for hours and knob B for minutes. press any key to confirm and exit. alarm clockpress sound + pattern. set alarm clock by turning A for hours and B for minutes. (disable by turning knob A all the way down.) press any key 1-16 to set pattern for the alarm. to stop alarm press any key. reset clockreset the clock by removing the batteries and start over.2. live playselect soundhold sound and press any key 1-8 to select a sound in the high-octave range. hold sound and press any key 9-15 to select a sound in the low-octave range.play melodiespress keys 1-16 to play notes from a fixed scale.tweak the soundknob A controls the timbre of the current sound. knob B controls the release rate.auto vibratohold glide and tweak knobs to control automatic vibrato. vibrato is applied a short while after the onset of every live note. knob A controls vibrato depth, and knob B controls the rate. to turn o this feature, turn knob A all the way to the left.add expressionhold glide and press any key 1-16 to glide up to a note.hold glide while releasing a note key to activate a falling chromatic scale e ect.micro drum kithold sound and press 16 to select the micro drum kit.press keys 1-16 to trigger an assortment of 8-bit drum sounds.3. sequencerthe device is equipped with a16-step, 2-channel sequencer. the first sequencer channel is for melodies, and the second is for drums.playbackhold pattern and press any key1-16 to select pattern. blinking led indicates active pattern. press play to start and stop playback. making a beatpress write (rec symbol appears) to edit the contents of a pattern. enter notes/sounds in the grid. active steps will be lit. press play to listen to your pattern. when sound 16 is selected, the grid re-presents the drum channel. whenany other sound is selected, thegrid represents the melody channel.select soundwhile write mode is active, holdsound and press any key 1-8 (or9-15) to select a sound for themelody channel.parameter lockingduring play, hold write whileturning knobs to write soundparameter changes over time.set note / drumwhile write mode is active, hold alit step and turn knob A to set notevalue or to select drum sound.fine-tuning the patternwhile write mode is active, hold alit step and turn knob B to modifythe release rate on that step.hold a lit step and press glide totoggle the glide-up e ect on thatstep. hold an unlit step and pressglide to toggle the glide-downe ect on that step.4. e ectswhile playing, hold FX and pressany key 1-16 to punch in e ects.hold FX without pressing any keyto clear e ects. see reference onopposite page. the filter e ectsalso work in live mode when thesequencer is stopped. hold FX andpress the corresponding key toactivate the e ect. press FX brieflyto deactivate it.5. tempo and swingpress bpm to switch tempo. thebpm will be displayed in the upperright corner of the screen.HIP HOP (80 bpm)DISCO (120 bpm)TECHNO (140 bpm)hold bpm and turn A to adjustthe swing. hold bpm and turn B tofine-tune tempo from 60 to 240 bpm.6. volumehold bpm and press any key 1-16to adjust master volume.7. live recordwhile playing, except in writemode, hold write and press anykey 1-16 to punch in notes.notes will be quantized accordingto the current swing setting.8. step multiplierin write mode, ensure that themicro drum kit (sound 16) isselected, so that the gridrepresents the drum channel.hold a lit step, and press bpmto insert a re-trig on that step.press bpm multiple times to switchbetween 2, 3, 4, 6 or 8 multiplier.9. making a songcopy patternhold write + pattern and press1-16 to paste the active pattern tothe corresponding new slot.clear patternhold glide and press pattern toclear the active pattern.chain patternhold pattern and press a sequenceof keys 1-16 to create a chain ofup to 128 patterns. one patterncan be selected multiple times.example: 1, 1, 1, 4 plays pattern 1three times then moves on to pattern4. the entire sequence then repeats.11. sync multiple unitsconnect a standard stereo audiocable between the units. themaster unit will control the tempoof the slave unit. hold glide andpress bpm on master unit totoggle sync modes. pressrepeatedly to toggle betweendi erent modes displayed in theupper right corner of the screen.press play on slave unit to wait formaster clock sync. press play onmaster to start.sync modesthere are 5 sync modes. defaultmode is SY0. when sync is usedthe signal will be split betweenaudio (right) and sync (left).sync scenariosexample Achain: PO-28 PO-20 PO-12example Bchain: external PO-28SY2iphonecomputersynckontrolexample Cchain: ext. PO-28 PO-14setting:example Dchain: PO-28setting:disclaimeralthough teenage engineering will use all reasonableendeavours to ensure the accuracy and reliability ofthis product, neither teenage engineering nor anythird party supplier will be liable for any loss ordamage in connection with the sale or use of theproduct except for: a) personal injury caused by ournegligence or that of our employees or agents whenacting in the course of their employment withourselves and; b) any other direct loss or damagecaused by our gross negligence or wilfulmisconduct.ALL EXPRESS OR IMPLIED CONDITIONS,WARRANTIES OR UNDERTAKINGS (OTHER THANCONDITIONS, WARRANTIES OR UNDERTAKINGSEXPRESSLY STATED, OR IMPLIED BY STATUTEAND WHICH CANNOT BE EXCLUDED), WHETHERORAL OR IN WRITING, INCLUDING WARRANTIESAS TO SATISFACTORY QUALITY AND FITNESS FORA PARTICULAR PURPOSE, ARE EXCLUDED.©2016 teenage engineering ab.all rights reserved.。
QSH2818家族移动控制器手册说明书

QMot QSH2818 familyManualV1.042010-OCT-19Trinamic Motion Control GmbH & Co. KGSternstraße 67D – 20357 Hamburg, GermanyTable of contents1Life support policy (3)2Features (4)3Order codes (5)4Mechanical dimensions (6)4.1Lead wire configuration (6)4.2Dimensions (6)5Torque figures (7)5.1Motor QSH2818-32-07-006 (7)5.2Motor QSH2818-51-07-012 (7)6Considerations for operation (8)6.1Choosing the best fitting motor for an application (8)6.1.1Determining the maximum torque required (8)6.2Motor current setting (9)6.2.1Choosing the optimum current setting (9)6.2.2Choosing the standby current (9)6.3Motor driver supply voltage (10)6.3.1Determining if the given driver voltage is sufficient (10)6.4Back EMF (BEMF) (11)6.5Choosing the commutation scheme (11)6.5.1Fullstepping (12)6.5.1.1Avoiding motor resonance in fullstep operation (12)6.6Optimum motor settings (12)6.6.1Settings for the TRINAMIC TMCL™ modules (12)7Revision history (13)7.1Documentation revision (13)8References (14)List of figuresFigure 4.1: Lead wire configuration (6)Figure 4.2: Dimensions (all values in mm) (6)Figure 5.1: QSH2818-32-07-006 speed vs. torque characteristics (7)Figure 5.2: QSH2818-51-07-012 speed vs. torque characteristics (7)List of tablesTable 2.1: Motor technical data (4)Table 4.1: Lead wire configuration (6)Table 6.1: Motor current settings (9)Table 6.2: Driver supply voltage considerations (10)Table 6.3: Comparing microstepping and fullstepping (11)Table 6.4: Optimum motor settings (12)Ta ble 5.5: Optimum motor settings for TMCL™ modules (tested with TMCM-110) (12)Table 6.1: Documentation revision (13)1Life support policy TRINAMIC Motion Control GmbH & Co. KG does not authorize or warrant any of its products for use in life support systems, without the specific written consent of TRINAMIC Motion Control GmbH & Co. KG.Life support systems are equipment intended to support or sustain life, and whose failure to perform, when properly used in accordance with instructions provided, can be reasonably expected to result in personal injury or death.© TRINAMIC Motion Control GmbH & Co. KG 2010Information given in this data sheet is believed to be accurate and reliable. However neither responsibility is assumed for the consequences of its use nor for any infringement of patents or other rights of third parties, which may result from its use.Specifications are subject to change without notice.2FeaturesThese two phase hybrid stepper motors are optimized for microstepping and give a good fit to the TRINAMIC family of motor controllers and drivers.Main characteristics:∙NEMA 11 mounting configuration∙flange max. 28.0mm * 28.0mm∙5mm axis diameter, 20mm axis length∙step angle: 1.8˚∙optimized for microstep operation∙optimum fit for TMC222 / TMC236 / TMC246 / TMC262 based driver circuits∙ 4 wire connection∙CE approvedTable 2.1: Motor technical data3Order codesTable 3.1: Order codes4 Mechanical dimensions4.1 Lead wire configurationblackr e db l uFigure 4.1: Lead wire configuration4.2 DimensionsFigure 4.2: Dimensions (all values in mm)Table 4.1: Lead wire configuration5Torque figuresThe torque figures detail motor torque characteristics for half and full step. For half and full step operation there are always a number of resonance points (with less torque) which are not depicted. These will be minimized by microstep operation in most applications.5.1Motor QSH2818-32-07-006Testing conditions: VM: 24V 0.67A /Phase Driver, SMD 103Figure 5.1: QSH2818-32-07-006 speed vs. torque characteristics5.2Motor QSH2818-51-07-012Testing conditions: VM: 24V 0.67A /Phase Driver, SMD 103Figure 5.2: QSH2818-51-07-012 speed vs. torque characteristics6Considerations for operationThe following chapters try to help you to correctly set the key operation parameters in order to get a stable system.6.1Choosing the best fitting motor for an applicationFor an optimum solution it is important to fit the motor to the application and to choose the best mode of operation. The key parameters are desired motor torque and velocity. While the motor holding torque describes the torque at stand-still, and gives a good indication for comparing different motors, it is not the key parameter for the best fitting motor. The required torque is a result of static load on the motor, dynamic loads which occur during acceleration/deceleration and loads due to friction. In most applications the load at maximum desired motor velocity is most critical, because of the reduction of motor torque at higher velocity. While the required velocity generally is well known, the required torque often is only roughly known. Generally, longer motors and motors with a larger diameter deliver a higher torque. But, using the same driver voltage for the motor, the larger motor earlier looses torque when increasing motor velocity. This means, that for a high torque at a high motor velocity, the smaller motor might be the better fitting solution.Please refer to the torque vs. velocity diagram to determine the best fitting motor, which delivers enough torque at your desired velocities.6.1.1Determining the maximum torque requiredTry a motor which should roughly fit. Take into consideration worst case conditions, i.e. minimum driver supply voltage and minimum driver current, maximum or minimum environment temperature (whichever is worse) and maximum friction of mechanics. Now, consider that you want to be on the safe side, and add some 10 percent safety margin taking into account unknown degradation of mechanics and motor.6.2Motor current settingBasically, the motor torque is proportional to the motor current, as long as the current stays at a reasonable level. At the same time, the power consumption of the motor (and driver) is proportional to the square of the motor current. Optimally, the motor should be chosen to bring the required performance at the rated motor current. For a short time, the motor current may be raised above this level in order to get increased torque, but care has to be taken in order not to exceed the maximum coil temperature of 130°C respectively a continuous motor operation temperature of 90°C.Table 6.1: Motor current settings6.2.1Choosing the optimum current settingGenerally, you choose the motor in order to give the desired performance at nominal current. For short time operation, you might want to increase the motor current to get a higher torque than specified for the motor. In a hot environment, you might want to work with a reduced motor current in order to reduce motor self heating.The TRINAMIC drivers allow setting the motor current for up to three conditions:-Stand still (choose a low current)-Nominal operation (nominal current)-High acceleration (if increased torque is required: You may choose a current above the nominal setting, but be aware, that the mean power dissipation shall not exceed the motors nominal rating)If you reach the velocity limit, it might be a good idea to reduce the motor current, in order to avoid resonances occurring. Please refer to the information about choosing the driver voltage.6.2.2Choosing the standby currentMost applications do not need much torque during motor stand-still. You should always reduce motor current during stand still. This reduces power dissipation and heat generation. Depending on your application, you typically at least can half power dissipation. There are several aspects why this is possible: In standstill, motor torque is higher than at any other velocity. Thus, you do not need the full current even with a static load! Your application might need no torque at all, but you might need to keep the exact microstep position. Try how low you can go in your application. If the microstep position exactness does not matter for the time of standstill, you might even reduce the motor current to zero, provided that there is no static load on the motor and enough friction in order to avoid complete position loss.6.3Motor driver supply voltageThe driver supply voltage in many applications cannot be chosen freely, because other components have a fixed supply voltage of e.g. 24V DC. If you have possibility to choose the driver supply voltage, please refer to the driver data sheet, and consider that a higher voltage means a higher torque at higher velocity. The motor torque diagrams are measured for a given supply voltage. You typically can scale the velocity axis (steps/sec) proportionally to the supply voltage to adapt the curve, e.g. if the curve is measured for 48V and you consider operation at 24V, half all values on the x-Axis to get an idea of the motor performance.For a chopper driver, consider the following corner values for the driver supply voltage (motor voltage). The table is based on the nominal motor voltage, which normally just has a theoretical background in order to determine the resistive loss in the motor.Comment on the nominal motor voltage: Array(Please refer to motor technical data table.)Table 6.2: Driver supply voltage considerations6.3.1Determining if the given driver voltage is sufficientTry to brake the motor and listen to it at different velocities. Does the sound of the motor get raucous or harsh when exceeding some velocity? Then the motor gets into a resonance area. The reason is that the motor back-EMF voltage reaches the supply voltage. Thus, the driver cannot bring the full current into the motor any more. This is typically a sign, that the motor velocity should not be further increased, because resonances and reduced current affect motor torque.Measure the motor coil current at maximum desired velocityFor microstepping: If the waveform is still basically sinusoidal, the motor driver supply voltage is sufficient.For Fullstepping: If the motor current still reaches a constant plateau, the driver voltage is sufficient.If you determine, that the voltage is not sufficient, you could either increase the voltage or reduce the current (and thus torque).6.4Back EMF (BEMF)Within SI units, the numeric value of the BEMF constant has the same numeric value as the numeric value of the torque constant. For example, a motor with a torque constant of 1 Nm/A would have a BEMF constant of 1V/rad/s. Turning such a motor with 1 rps (1 rps = 1 revolution per second = 6.28 rad/s) generates a BEMF voltage of 6.28V.The Back EMF constant can be calculated as:is multiplied by 2 in this The voltage is valid as RMS voltage per coil, thus the nominal current INOMformula, since the nominal current assumes a full step position, with two coils switched on. The torque is in unit [Nm] where 1Nm = 100cNm = 1000mNm.One can easily measure the BEMF constant of a two phase stepper motor with a (digital) scope. One just has to measure the voltage of one coil (one phase) when turning the axis of the motor manually. With this, one gets a voltage (amplitude) and a frequency of a periodic voltage signal (sine wave). The full step frequency is 4 times the frequency the measured sine wave.6.5Choosing the commutation schemeWhile the motor performance curves are depicted for fullstepping and halfstepping, most modern drivers provide a microstepping scheme. Microstepping uses a discrete sine and a cosine wave to drive both coils of the motor, and gives a very smooth motor behavior as well as an increased position resolution. The amplitude of the waves is 1.41 times the nominal motor current, while the RMS values equal the nominal motor current. The stepper motor does not make loud steps any more – it turns smoothly! Therefore, 16 microsteps or more are recommended for a smooth operation and the avoidance of resonances. To operate the motor at fullstepping, some considerations should betaken into account.Table 6.3: Comparing microstepping and fullsteppingMicrostepping gives the best performance for most applications and can be considered as state-of-the art. However, fullstepping allows some ten percent higher motor velocities, when compared to microstepping. A combination of microstepping at low and medium velocities and fullstepping at high velocities gives best performance at all velocities and is most universal. Most Trinamic driver modules support all three modes.6.5.1FullsteppingWhen operating the motor in fullstep, resonances may occur. The resonance frequencies depend on the motor load. When the motor gets into a resonance area, it even might not turn anymore! Thus you should avoid resonance frequencies.6.5.1.1Avoiding motor resonance in fullstep operationDo not operate the motor at resonance velocities for extended periods of time. Use a reasonably high acceleration in order to accelerate to a resonance-free velocity. This avoids the build-up of resonances. When resonances occur at very high velocities, try reducing the current setting.A resonance dampener might be required, if the resonance frequencies cannot be skipped6.6Optimum motor settingsThe following table shows the settings for the highest reachable fullstep velocities.Table 6.4: Optimum motor settings6.6.1Settings for the TRINAMIC TMCL™ modulesFollowing TMCL™ settings apply best for highest motor velocities and smooth motor behavior at low velocities. They are intended for the use with TRINIMICs controller modules.Mixed decay should be switched on constantly. Microstep resolution is 4 (TMCL™), this is 16 times microstepping. The pulse devisor is set to 3. With a 64 microstep setting the same values are valid with the pulse divisor set to 1.Table 6.5: Optimum motor settings for TMCL™ modules (tested with TMCM-110)7Revision history 7.1Documentation revisionTable 7.1: Documentation revision8References[TMCL™] TMCL TM manual, 。
Ashcroft 28HPX高纯度压力计说明书

Table of contents:1. INTRODUCTION (1)2. APPLICATION (1)3. T RANSPORTATION, STORAGE, UNPACKING PRECAUTION ...................................................................1-24. DRAWING (2)5. INSTALLATION (2)6. OPERATION (2)7. MAINTENANCE (2)8. TROUBLESHOOTING ......................................................2-3 1. I NTRODUCTIONPressure measurement is an important aspect of manufac-turing. Advancement of equipment and plant engineering technology requires higher performance and more versatile instrument functions.The Ashcroft model 28HPX High-Purity pressure gauge is similar to an ordinary instrument, yet has been assembled under a significantly different process where treatment, control, and inspection are rigidly maintained. This manual describes the basic operation of this product for the semi-conductor industry while adhering to the following instruc-tions will ensure its proper and effective application. [Before Using Pressure Gauge]It is highly recommended that this instruction manual be thoroughly reviewed to prevent improper instrument handling and/or implementation. Consult Ashcroft on related topics not covered within this document.[Warranty]Instruments are repaired or replaced, at no cost, if deter-mined to be within the 1-year warranty period and non-con-forming in accordance with defects due to design or manu-facture by Ashcroft. Please note that the following instances are excluded.1. D elivered products are disassembled, altered, partsreplaced, or where any new function is added by the user or any third party.2. D irections described within the instruction manual or cata-log have not been observed.3. N on-conformance is caused by deterioration due to use,natural disaster, fire or other force majeure events.4. S econdary damage caused by the non-conformance ofthe products including the above.R egardless of recognized mishandling, any apparent evi-dence of deformation, abrasion, burnout, or other identified issue shall be excluded from the warranty scope with the cost being incurred by the customer.[Definition of Safety Terms]Safety precautions within this manual have been classified as follows:D ANGER - Ignoring this warning may result in seriousinjury or death.W ARNING - Ignoring this warning may result in serious injury or death.C AUTION - Ignoring this warning may result in the materialdamage and render instrument performance defective.2. A PPLICATIONThis pressure gauge has an electropolished wetted sur-face for measuring materially-compatible gas pressure (EP grade). The pressure gauge is fabricated in accordance with high cleanliness and tightly sealed standards. Consequently, the model 28HPX High-Purity pressure gauge is ideally suited for pressure measurement within the semiconductor production process, etc.The product footprint design is ultra-compact and incor-porates a 1.125˝ surface mount. The pressure element is a diaphragm which facilitates easy maintenance for cleaning and gas flushing.The instrument’s pressure element is a thin wall diaphragm. Do not use the pressure gauge with the wetted material exposed to any corrosive gas or atmosphere. Additionally, it is industry practice for the gas detector’s to be installed within the same environment; this will provide an alert to escaping gas that may adversely affect people and/or equipment3. T RANSPORTATION, STORAGE, UNPACKING PRECAUTION 3.1 TransportationUnits should be handled the same as electronic or test mea-surement instruments. Be very careful not to apply vibration to the pressure gauge during transportation.Never hit or drop the pressure gauge.CAUTIONThe instrument may incur damage if dropped/impacted. 3.2 S torageStore in a temperature-controlled environment free from dust, humidity, and vibration. Prevent temperature variances as this may result in condensation developing in the product.28HPX High Purity Gauges3-3 UnpackingHandle product with great care during unpacking.Verify the product has not been damaged and that theinstrument fulfills the required specifications. Please con-tact the dealer or Ashcroft if an issue exists.4. D RAWING4.1 UnpackingDisplacement occurs in the diaphragm once the pressureis applied via the process connection. The pressure is then transmitted to the movement with the pressure being indi-cated by the movement of the pointer.5. I NS TALLATION5.1 Install the instrument where the environment is free from vibration, humidity, dust and high temperature.5.2 The pressure gauge is packaged in a hermetically-sealed polyethylene bag. To avoid contamination, only remove the unit from the bag immediately before use/installation.5.3 Take care not to damage the diaphragm surface.W ARNINGScratches or scoring of the swivel coupling can result in leaking of the measuring device. This may prove hazard-ous, though this would depend upon the type of applica-tion being measured.5-4 Install the pressure gauge where it is held in a stable position.5-5 Utilize a wrench to tighten the process connection cou-pling nut. Only apply a wrench to the coupling flats; no force should be applied to the gauge housing.C AUTIONDo not apply force to the gauge housing as this can result in damage and adversely affect product performance.5-6 Reduce pressure pulsation to an absolute minimum.6. O PERATION6.1 Before applying pressure to the gauge, make sure that the pointer is positioned at “0” pressure.6.2 Raise and lower pressure slowly, while avoiding sudden increase/decrease of pressure.6.3 Never apply pressure in excess of the unit’s pressure rating.6.4 Use the pressure gauge for measuring pressure less than ½ to 2⁄3 of the full-scale range.W ARNINGNever apply pressure beyond the maximum pressure (i.e., the full-scale value). Injury and/or damage may occur if pressure element ruptures due to extreme pressure in excess of its pressure rating.6.5 Measured fluids, gas or liquid, should be compatible and not corrosive to SUS316L.W ARNINGDo not use this pressure gauge with fluids that may corrode the instrument’s wetted parts.If corrosive fluid flows through this pressure gauge, the pressure element (diaphragm) may be damaged or burst and it flows out, resulting in injury or damages to the peripheral device and equipment.7. MAINTENANCE7.1 Check the gauge accuracy regularly to ensure correct indication; this is recommended to be once or more per year.7.2 Pressure indication error of approximately 1 graduation is repairable, though units must be replaced when the error is identified as substantial.8. T ROUBLES HOOTINGRefer to the accompanying table and implement appropriate countermeasures. Contact Ashcroft in the event the issue persists.8.1 Refer to the accompanying table and implement countermeasures. Please contact Ashcroft in the event theissues persist.。
28 II Ex用户指南补充件说明书

Manual Supplement© 2012-2013 Fluke Corporation. All rights reserved.Manual Title: 28 II Ex Users Supplement Issue: 4 Print Date: November 2011 Issue Date: 6/13 Revision/Date: Page Count: 9This supplement contains information necessary to ensure the accuracy of the above manual. This manual is distributed as an electronic manual on the following CD-ROM:CD Title: 28 II Ex CD Rev. & Date: 11/2011 CD PN: 394576528 II EX Users Manual Supplement1 6/13Change #1, 60849 & 60854On page 1, replace the second paragraph with:The Product is designed for operation in potentially explosive areas of Zone 1, 2, 21, 22, and M1 as specified in Directive 1999/92/EC and 94/9/EC (ATEX). There can be dangerous consequences if you do not follow these instructions .On page 7, replace the entire page with:Ex-Certification Data∙Ex-Type certificate no: PTB 11 ATEX 2028 X IECEx PTB 11.0080X∙Ex-Designation: ATEX: II 2G Ex ia IIC T4 Gb II 2D Ex ia IIIC T130 ︒C DbI M1 Ex ia I MaIECEx: Ex ia IIC T4 GbEx ia IIIC T130 ︒C DbEx ia I Ma∙ CE:CE0102∙ OperatingTemperature: -15 ︒C to 50 ︒C∙Storage Temperature: -40 ︒C to +60 ︒C∙Batteries: 3 AAA Alkaline batteries, NEDA 24A IEC LR03. Table 7 shows the approved batteries for this Product.For connections to intrinsically-safe circuits, observe these Product connections:Voltage – measurement input U i = 65 V:U0 = 9.54 VC i =negligibleI0 = 3.7 mA I i=negligibleL i =negligible P0 = negligible Ri = 2.47KLo/CoLo/mH 1000 100 2 0.5 0.1 0.01Co/μF 0 0.61 1 1.4 2.1 3.6Current – measurement input I i = 5 A:U0 = 0 V U i =65 VC0 = 1000 μF C i =negligibleI0 = 0mAL0 = 1000 mH L i =negligibleP0 = 0 mWmA/μA JackU0 = 1.95 V U i =65 VC i =negligibleI0 = 9.7 μA I i= Internally limited by a 440 mA fuse L i =negligibleP0 = negligible4/12 2Lo/CoLo/mH 1000 100 5 1 0.5 0.005Co/μF 0 14 19 25 30 1000For measurements on protected electric circuits:∙Approved for Zones 2 and 1, device group II,explosion group IIC (explosive gases, vapors andmist), temperature class T4.∙Approved for Zones 21 and 22, device group II,explosion group IIIC, conducting and non-conducting dust, fibers, and flyings.∙Approved for use in mines. Device group I,explosion group I, methane, and coal dust.4/12 328 II EX Users Manual Supplement4/12 4On page 43, replace Table 10 with :Table 10. Replacement PartsDescription Qty.Fluke Part orModel NumberFuse, 11 A, 1000 V, FAST 1 803293 28 II Ex Fuse Assembly 1 4016494 Alligator Clip, Black 1 AC172 or AC175Alligator Clip, Red 1 Test Lead Set1 TL175 28 II Ex Manual Information Pack (Includes Users Manual, CD & Getting Started Manual) 1 4013990 Fluke Input Cap, Amp Jack Plugs for DMM’s (10 packs)14145825To ensure safety, use exact replacement only.On page 44, replace Figure 12 with:28 II EX Users Manual Supplement5 4/12grt11.epsFigure 12. Replacement Parts28 II EX Users Manual Supplement4/12 6On page 45, Replace Table 11 with:Table 11. AccessoriesItem Description AC172 or AC175 Alligator ClipsTL175 Silicone test lead set with probes Amp Jack Plug Set 2 Pack for DMM’s I400 AC Current Clamp [1] 80PK-27Temperature Probe [2]All accessories in this table are approved for use in explosive hazardous environments. Fluke accessories are available from an authorized Fluke distributor.[1] Warning - To prevent personal injury or property damage, do not use this accessory in hazardous areas wheredust is moved, transported, or conveyed.[2] Warning - To prevent personal injury or property damage, do not use this accessory in dust hazardous areas.28 II EX Users Manual Supplement7 8/12On page 46, under Temperature replace Storage with:Storage -40 ︒C to +85 ︒C (without battery)-40 ︒C to +60 ︒C (with battery)Change #2, 62942On page 53, replace Duty Cycle (Vdc and mVdc) with:Duty Cycle (Vdc and mVdc)Range Accuracy 0.0 % to 99.9 %[1]Within ± (0.2 % per kHz + 0.1 %) for rise times <1 μs. [2][1] 0.5 Hz to 200 kHz, pulse width >2 μs. Pulse width range is determined by the frequency by the frequency of the signal.[2] For 6 V dc range accuracy is unspecified.On page 54, under MIN MAX Recording change:From:250 μs (peak)[1]Specified accuracy ±100 counts for changes >250 μs in duration (add ±100 counts for readings over 6000 counts) (add ±100 counts for readings in Low Pass mode)To:250 μs (peak)[1]Specified accuracy ±200 counts for changes >250 μs in duration (add ±100 counts for readings over 6000 counts) (add ±100 counts for readings in Low Pass mode)Manual Supplement 28 II EX Users6/13 8Change #3, 65782On page 2, under Safety Information remove The Product complies with: and all the bullets. On page 8, in the Symbols table, remove CAT III, CAT IV and CSA C1 and add:Conforms to relevant North American Safety StandardsConforms to relevant South Korean EMC StandardsCAT II Measurement Category II is applicable to test and measuring circuits connected directly to utilization points (socket outlets and similar points) of the low-voltage MAINS installation.CAT III Measurement Category III is applicable to test and measuring circuits connected to the distribution part of the building’s low-voltage MAINS installation.CAT IVMeasurement Category IV is applicable to test and measuring circuits connected at the source of the building’s low-voltage MAINS installation.On page 47, replace Electromagnetic Compatibility and IP Rating with the following, and remove Shock, Safety Compliance and Certifications and add:IP Rating .......................................................... IEC 60529: IP67 (Non-operating)Safety ............................................................... IEC 61010-1: 600 V CAT IV / 1000 V CAT III, Pollution Degree 2 Electromagnetic Environment ....................... IEC 61326-1: PortableElectromagnetic Compatibility ...................... In an RF field of 3 V/M, accuracy = specified accuracy +20 counts, except 600 Adc range total accuracy = specified accuracy +60 counts. Temperature not specifiedApplies to use in Korea only. Class A Equipment (Industrial Broadcasting &Communication Equipment)[1]28 II EX Users Manual Supplement9 6/13[1]This product meets requirements for industrial (Class A) electromagnetic wave equipment and the seller or user should take notice of it. Thisequipment is intended for use in business environments and is not to be used in homes.。
LXM28简易文档

A.KNLD 调整电流输出响应。
因为这个值越大,电机刚性越好,一般应增大这个值直到电机电流震动显著,一般在5%-10%的波动范围
B. NLFILTT1和NLTILFDANMING调整电流环低通滤波器。
C. 如果真的调整了电流环低通滤波器的值,可能还需要回头再次调整KNLD,进一步增强响应或者削弱响应以获得稳定。
D. KNLP 调整位置误差。
E. KNLIV 进一步调整位置误差。
这个参数可以同时调整在运动过程中和稳态时的位置误差,这个值的范围一般在比例增益的一半至两倍之间,KNLIV调整之后,位置误差在加减速阶段和稳态阶段都显著减小。
应一边尝试调整一边观察位置误差曲线在稳态时的震荡,以及尽量控制速度变化末端的位置误差超调。
F. KNLI 调整位置误差收敛
这个参数可以控制静止时的位置误差波动,如果在电机静止时有较大的位置误差波动,可以调整加大这个参数,收敛静止时的位置误差
G.KNLAFRC 控制加速和减速过程中的位置误差和位置超调等。
- 1、下载文档前请自行甄别文档内容的完整性,平台不提供额外的编辑、内容补充、找答案等附加服务。
- 2、"仅部分预览"的文档,不可在线预览部分如存在完整性等问题,可反馈申请退款(可完整预览的文档不适用该条件!)。
- 3、如文档侵犯您的权益,请联系客服反馈,我们会尽快为您处理(人工客服工作时间:9:00-18:30)。
产品目录
施耐德电气
善用其效 尽享其能
全球能效管理专家施耐德电气为世界100多个国家提供整体解决方案,其中在能源与基 础设施、工业过程控制、楼宇自动化和数据中心与网络等市场处于世界领先地位,在 住宅应用领域也拥有强大的市场能力。致力于为客户提供安全、可靠、高效的能源, 施耐德电气 2013 年的销售额为 250 亿欧元,拥有超过 160,000 名员工。施耐德电气助 您——善用其效,尽享其能!
络。施耐德电气中国目前员工数近28,000人。通过与合作伙伴以及大量经销商的合作,施耐德电气 为中国创造了成千上万个就业机会。
发中心,1000多名研发工程师,1 个实验室,1 所能源大学,700多家分销商和遍布全国的销售网
施耐德电气
能效管理平台
凭借其对五大市场的深刻了解、对集团客户的悉心关爱,以及在能效管理领域的丰富经验,施耐德电 气从一个优秀的产品和设备供应商逐步成长为整体解决方案提供商。2010年,施耐德电气首次集成其 在建筑楼宇、IT、安防、电力及工业过程和设备等五大领域的专业技术和经验,将其高质量的产品和解 决方案融合在一个统一的架构下,通过标准的界面为各行业客户提供一个开放、透明、节能、高效的 能效管理平台,为企业客户节省高达30%的投资成本和运营成本。
概述 ..............................................................................................................................................2 - 5 应用 ...................................................................................................................................................6 功能 ................................................................................................................................................... 7
1 2 3 4 5 6 7 8 9 10
Lexium 28 伺服驱动器
Lexium 28 伺服驱动器 - 选型组合配比表 ........................................................................................................................8 - 产品说明,产品型号,规格尺寸 ........................................................................................9 配置工具 SoMove 设置软件 ........................................................................................................................10 Multi-Loader 配置工具 ..............................................................................................................10 直流母线附件以及I/O附件 ........................................................................................................11 通信:CANopen 与 CANmotion 现场总线 - 产品介绍 ................................................................................................................................... 12 - 产品型号 ................................................................................................................................... 13 制动电阻 ........................................................................................................................................ 14 外接 EMC 输入滤波器 ................................................................................................................ 15 熔断器............................................................................................................................................. 16 电机制动抱闸控制器.................................................................................................................. 17
施耐德电气在中国
1987 年,施耐德电气在天津成立第一家合资工厂梅兰日兰,将断路器技术带到中国,取代传统保险 丝,使得中国用户用电安全性大为增强,并为断路器标准的建立作出了卓越的贡献。90年代初,施耐 德电气旗下品牌奇胜率先将开关面板带入中国,结束了中国使用灯绳开关的时代。 施耐德电气的高额投资有力地支持了中国的经济建设,并为中国客户提供了先进的产品支持和完善的技 术服务,中低压电器、变频器、接触器等工业产品大量运用在中国国内的经济建设中,促进了中国工业 化的进程。 目前,施耐德电气在中国共建立53个办事处,30家工厂,8个物流中心,1 个研修学院,3个主要研