科密pb8001说明书
无纸记录仪 说明书

目录安全注意标志 (1)第一章概述 (2)第二章 技术指标 (3)2.1通道数 (3)2.2输入 (3)2.3输出 (3)2.4精度 (3)2.5记录间隔 (3)2.6记录容量 (3)2.7记录时间 (4)2.8屏幕 (4)2.9供电 (4)2.10尺寸 (4)2.11净重 (4)2.12保存条件 (4)2.13工作条件 (4)第三章 安装与接线 (6)3.1装箱单 (6)3.2外形和开孔尺寸 (7)3.3端子布置 (7)3.4接线 (8)3.4.1电源接线 (8)3.4.2输入信号接线 (8)3.4.3输出信号接线 (9)3.4.4热电偶补偿接线 (9)3.4.5通讯打印接线 (10)第四章键盘操作 (11)第五章运行与组态操作 (13)i5.1菜单条画面 (14)5.1.1主菜单条画面 (14)5.1.2信息画面子菜单条画面 (14)5.1.3累积画面子菜单条画面 (15)5.2运行画面 (15)5.2.1 总貌画面 (15)5.2.2 棒图画面 (16)5.2.3 数显画面 (17)5.2.4 实时趋势 (18)5.2.5 信息画面 (19)5.2.6 历史趋势 (21)5.2.7 累积画面 (23)5.2.8 调节画面 (25)5.3组态画面 (27)5.3.1 主组态画面 (28)5.3.2 系统组态 (29)5.3.3 通道组态 (32)5.3.4 AO通道组态 (36)5.3.5 PI采样范围组态 (36)5.3.6 电阻采样范围组态 (37)5.3.7 位号修改 (38)5.3.8 报警组态 (42)5.3.9 算法组态 (44)5.3.10 显示组态 (60)5.3.11 数据备份 (62)5.3.12 数据打印 (63)第六章 故障分析及排除 (66)真彩无纸记录仪服务指南 (67)ii安全注意标志在阅读说明书时会出现以下标志,分别表示“危险”、“注意”。
1第一章 概 述感谢您使用真彩无纸记录仪。
NT8001控制器使用说明书
-Ⅰ-
6.3.4 “网络设置”的说明 ............................................. - 32 6.3.5 “手控点号”的说明 ............................................. - 34 6.3.6 “广播分区”的说明 ............................................. - 35 6.3.7 “空码查询”的说明 ............................................. - 35 6.4 手动控制功能:“操作”菜单的说明 ................................... - 35 6.4.1 “器件曲线”的说明 ............................................. - 35 6.4.2 “自检操作”的说明 ............................................. - 36 6.4.3 “点确认灯”的说明 ............................................. - 37 6.4.4 “启停设备”的说明 ............................................. - 37 6.4.5 “屏蔽操作”的说明 ............................................. - 38 6.4.6 “时钟设置”的说明 ............................................. - 39 6.4.7 “重启音响”的说明 ............................................. - 39 6.4.8 “关闭音响”的说明 ............................................. - 40 6.5 历史记录查询与打印功能:“记录”菜单的说明.......................... - 40 6.6 突发事件介绍 ...................................................... - 42 6.6.1 “火警页面”的说明 ............................................. - 43 6.6.2 “监管页面”的说明 ............................................. - 44 6.6.3 “自检页面”的说明 ............................................. - 44 6.6.4 “故障页面”的说明 ............................................. - 45 6.6.5 “屏蔽页面”的说明 ............................................. - 45 6.7 直控点说明 ........................................................ - 45 6.7.1 功能概述 ....................................................... - 45 6.7.2 主要技术指标 ................................................... - 45 6.7.3 面板说明 ....................................................... - 46 6.7.4 内部结构说明 ................................................... - 46 6.7.5 安装与布线 ..................................................... - 46 6.8 在实际操作中还有一些需要注意的地方 ................................ - 46 七、安装接线图 .......................................................... - 47 7.1 外形尺寸图 ........................................................ - 47 7.2 内部接线图 ........................................................ - 49 7.3 接线端子说明 ...................................................... - 51 7.3.1 交流 220V ...................................................... - 51 7.3.2 通讯插箱: ..................................................... - 51 7.3.3 回路总线: ..................................................... - 51 7.3.4 直控点: ....................................................... - 51 7.3.5 通讯: ......................................................... - 52 八、注意事项 ............................................................ - 52 -
科密T消费机功能及使用说明

科密T1消费机功能清单初次使用步骤介绍系统安装完毕后初次使用的步骤,包括:流程图步骤说明注意事项警告相关主题1. 流程图2. 步骤说明1> 在录入人员之前需先录入机构;2> 录入人员后可按照人员列表批量制卡,在制卡时可设置期初金额;3> 在初次使用消费机前必须先初始化设备4> 定期备份数据库;机构设置功能介绍一般使用步骤日常操作常见问题解答注意事项警告相关主题1. 功能介绍机构设置用于设置公司的机构架构,包括机构的编号、机构名称、备注,并可设置各机构之间的层次结构。
2. 一般使用步骤1> 初次使用时,机构树状结构仅显示的跟节点的单位名称,就是系统配置设置的单位简称。
2> 根据单位的组织架构,点击“增加”,选择上级机构,输入机构名称,若无上级,则选中公司名称,单击“保存”按钮即可。
3> 需要修改机构编号、名称、上级机构时,先在左边树状结构中单击选中要修改的机构,单击“编辑”,修改右边的信息,单击“保存”即可。
4. 常见问题解答1> 为什么不能删除机构?答:当要删除的机构下面有子机构或有人员属于该机构时不允许删除,可先删除子机构,或将该机构的人员移到其它机构。
设备设置功能介绍一般使用步骤日常操作常见问题解答注意事项警告相关主题1. 功能介绍1、添加/修改设备2、服务器初始化3、服务器设置4、窗口机设置5、强制清除服务器数据6、上传服务器注册信息2. 一般使用步骤进入“设备设置”主界面1、添加/修改设备1> 按进入“添加/修改设备”界面2> 选择串口、通讯方式、波特率,输入设备搜索范围(0~99),按,弹出搜索结果对话框。
3> 按,进入“在线设备设置”,在表格内单击可以设置各项的内容。
4> 按,进入“操作完成”界面,按,完成添加/修改设备操作,在搜索到设备的情况下出现如下界面。
2、服务器初始化(注意:初始化后,所有对设备的设置将恢复到出厂时的设置状态):新的设备都要进行初始化操作1> 在“设备设置”主界面中,按。
8001透氧仪中文说明书

Illinois Instruments, Inc. 8001 Oxygen Permeation Analyzer Operator’s Manual 8001 使用说明Illinois Instruments, Inc2401 Hiller Ridge RoadJohnsburg, IL 60050Tel: 815-344-6212Fax: 815-344-6332Web: 8001 IM Ver. 00 1 of 65Updated 02/20/04Illinois Instruments, Inc. 8001 Oxygen Permeation Analyzer Operator’s Manual目录第一章:简介第二章:操作原理第三章:安装3.1 电压选择器/保险盒3..2 连接气路3.2连接冷却循环器3.4 安装串行口控制器第四章:软件4.1 系统配置4.2 安装4.3 连接仪器第五章:系统校对5.1 用薄膜进行校对5.2用气体进行校对5.3BASELINE第六章:渗透测试6.1 测试设置6.2 预备薄膜6.3开始测试6.4结束测试6.5报告生成8001 IM Ver. 00 2 of 65Updated 02/20/04Illinois Instruments, Inc. 8001 Oxygen Permeation Analyzer Operator’s Manual 第七章:流速调节和RH(相对湿度)调节7.1流速调节7.2RH调节第八章:故障分析第九章:附件和更换零件第十章:维护和保修10.1 维护10.2 保修第十一章:技术指标8001 IM Ver. 00 3 of 65Updated 02/20/04Illinois Instruments, Inc. 8001 Oxygen Permeation Analyzer Operator’s Manual1.0简介谢谢你购买我们的仪器。
科密点钞机培训手册

2023-11-04•科密点钞机简介•安装与调试•使用与操作目录•维护与保养•安全与注意事项•培训方案与实施01科密点钞机简介科密点钞机采用高效的设计,使得点钞过程更加快速,提高了工作效率。
高效稳定便捷科密点钞机采用高品质的硬件和软件,确保了点钞过程的稳定性和准确性。
科密点钞机具有简单易用的操作界面,使得操作更加便捷。
03产品特点0201科密点钞机需要接入220V电源。
电源科密点钞机的尺寸为长40c m x 宽30c m x 高15cm。
尺寸科密点钞机的重量为5kg。
重量技术参数首先按下科密点钞机的电源开关,等待机器启动。
开机将需要点数的钞票放入进钞口,钞票面向上放置。
放钞按下操作面板上的“开始”按钮,科密点钞机将自动进行点钞。
点钞点钞完成后,科密点钞机会在屏幕上显示点钞结果,包括点钞数量和真伪情况。
显示结果操作流程02安装与调试安装步骤开始点钞按下点钞机的启动按钮,开始点钞。
调整设置根据使用说明书调整点钞机的各项设置。
放置纸币将纸币放入点钞机的进钞口。
准备工具和材料科密点钞机、电源线、使用说明书等。
连接电源将点钞机连接到稳定的电源。
调试方法确保点钞机连接的电源稳定,避免因电源问题导致点钞机工作异常。
检查电源纸币识别声音问题显示屏问题如果点钞机无法正确识别纸币,可以尝试调整点钞机的识别设置或者清洁纸币识别器。
如果点钞机发出异常声音,可以检查点钞机是否卡纸或者调整声音设置。
如果点钞机的显示屏不亮或者显示异常,可以检查显示屏是否损坏或者连接线是否接触良好。
常见问题与解决方案检查电源是否连接正常,检查保险丝是否熔断。
无法启动检查进纸口是否有异物堵塞,检查纸张质量是否过差。
卡纸检查纸币是否有污渍、残破等情况,检查点钞机的识别设置是否正确。
无法识别的纸币检查点钞机是否有卡纸情况,清洁计数器感应器。
计数不准确03使用与操作连接电源开始点钞将点钞机电源线插入电源插座,并确保电源正常工作。
按下点钞机上的“开始”按钮,机器将开始进行点钞和计数。
科密考勤机说明书-科密指纹机说明书
科密考勤机说明书-科密指纹机说明书指纹机使用说明书指纹考勤机使用的时要注意的地方(仅适用于IT-100/200型)首先请根据您自己手上的设备来确定您需要使用的连接方法,以实物为准!装箱清单:指纹机1个电源适配器1个RS232数据线1个RS485 转换头1个电话线一截合格证1个软件光盘1个快速连接指南1张用户手册1本全国联保通讯录1本安装螺钉1袋USB数据线一根特别环保说明1个功能介绍:IT-100 可容纳1500枚指纹50000条记录支持RS232 /RS485连接方式IT-200 可容纳2200枚指纹80000 条记录支持RS232/RS485 USB连接方式以下仅仅讲解RS232的连接方式和操作方法。
,先连接数据线。
最后连接指纹机电源线。
最先将考勤软件安装到你的电脑。
如果你的电脑没有光驱,可以那么就到我公司网站http:///ehibition/去下载大小为的那个文件就是考勤软件的安装程序。
1连接方式介绍:IT-100/200用RS232,指纹机上的具体是如下操作:在指纹机上按MENU之后选择设置OK 通讯设置之后如下选择波特率115200RS232是注:上面的RS232/RS485等代表通讯方式,用户根据自己连接的方式选择“是”或“否”设置好以后选择保存就可以了指纹采集器的清洁方法:用封箱胶带粘上去撕下在,多次。
绝对不能用酒精擦.湿纸巾.以及任何化学药品等其他东西来进行清洁和擦拭。
2 软件的安装:把光盘放入电脑,双击“我的电脑——点SETUP运行,下一步,我同意,下一步…..就可以了。
如果不愿选择默认安装,就修改安装到其它盘就可以了。
如果你用的是商务电脑,那么就到我公司网站http:///ehibition/上下载大小为的考勤软件,安装到你的电脑上就可以了指纹的录入:录入指纹有2种方式第一种:要求:电脑是一台独立的电脑。
首先在电脑上操作我的电脑-----属性---硬件---设备管理器---端口---COM1---属性----端口设置----每秒传输位------修改成115200---确认1.打开软件以后“打开下图之后点总公司--如上图之后找到下图里填写登记号码,姓名以及你需要的人事资料等,2.在图中根据你所使用指纹机的型号和所连接的方式找到如下位置,来确定下图的连接方式1/2来确定你选择中的1/2然后连接登记设备,3连接成功以后。
汉王 ebook 文阅8001掌上无线 说明书

使用前注意事项●避免本机跌落地面或受到其它强烈冲击。
●不要在过冷、过热、过于潮湿、多尘的环境下长期使用;不要让本机在阳光下曝晒。
●尽量避免在强磁、强静电环境下使用本机。
●一旦有水和其它液体泼洒到本机上,应立即关掉电源开关,将本机擦拭、晾干后才可使用。
●切勿使用任何含化学成份的清洁剂或其它液体擦拭本机,避免因腐蚀和受潮造成损坏,如确实有清洁必要,请用干燥的软布或纸巾擦拭。
●本公司对于因软件的误操作、电池更换误操作、维修或其他意外情况导致的机内资料损失或删改不负责任,也不对因此导致的其它间接损失负责。
●请随时备份您的重要资料,以免丢失。
●请不要自行拆卸本机,否则会失去保修的权利。
●请不要在过马路、骑自行车或开车时使用耳机听音乐。
●听音乐时,音量不要太大,音量过大可能对听力造成影响。
●不要长时间使用播放器,使用时间过长可能导致听力下降。
●本手册及相关软件随时更新,恕不另行通知。
如发现说明书与实物不符,请以实物为准。
RoHS 一致性为满足中国《电子信息产品污染控制管理办法》(信息产业部第39号令)的相关规定和要求,我司对所生产及销售的平板电脑产品中有毒有害物质,按部件分类,声明如下:目录主要功能 (4)包装内容 (4)按键说明 (4)充电 (5)连接电脑传输文件 (5)插入存储卡 (6)开/关机 (6)主界面 (6)自定义主界面 (7)使用触摸屏或按键 (8)阅读电子书 (8)无线上网 (10)使用虚拟键盘 (12)文件管理器 (12)播放视频 (14)播放音乐 (15)浏览图片 (18)收发电子邮件 (19)管理第三方应用软件 (20)系统设置 (21)故障诊断 (21)技术规格 (21)主要功能∙Wi-Fi无线互联使用内置的Wi-Fi无线技术,您可以随时随地连接至Internet,享受更便捷的上网体验。
∙8.4英寸触摸屏感应灵敏的触摸屏,使您无需进行繁琐的按键操作,更简便、更直观。
∙第三方软件支持支持大量第三方软件,您可以从网上下载各种应用程序并安装在本机上。
热敏打印机使用手册说明书
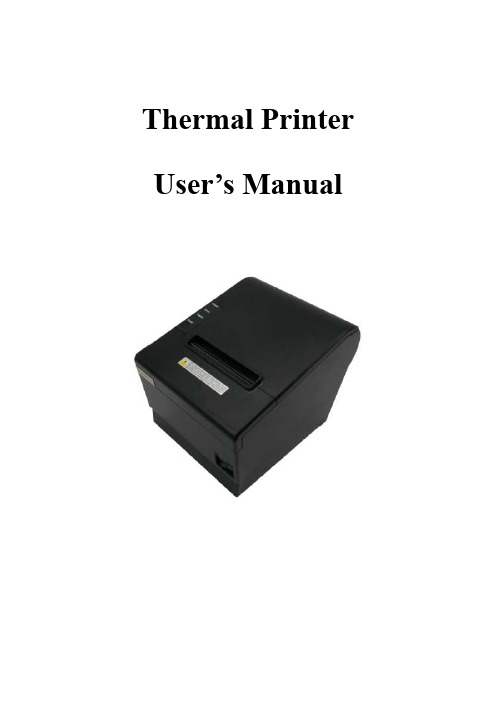
Thermal Printer User’s ManualCatalogue1 Introduction (2)1.1 Brief introduction (2)1.2 Main features (2)2 Specification (3)2.1 Specification (3)2.2 Printing material requirements (5)2.2.1 Paper parameters (5)2.2.2 Mark paper parameters (5)2.2.3 Paper using attention (5)2.3 Printing and paper cutting position (6)2.3.1 Printing position (6)2.3.2 Paper cutting position (6)3 Appearance and components (7)3.1 Appearance and components (7)3.2 Indicator and buzzer instruction (8)4 Printer installation (9)4.1 Open the package (9)4.2 Requirements of installation position (9)4.3 Connect to power adapter (9)4.4 Connect Communication cables (9)4.5 Connect to cash drawer (9)4.6 Paper roll loading (10)4.6.1 Printing paper type confirmation (10)4.6.2 Loading or change paper roll (10)4.7 DIP switch setting (12)4.8 Printing self-test page (12)4.9 Set Ethernet port IP Address. (12)5 Interface pin definitions (14)5.1 Parallel interface pin definition(DB25M) (14)5.2 USB interface pin definition(standard B type female base) (14)5.3 Power interface pin definition(MPC-3-001B) (15)5.4 Cash drawer interface pin definition(RJ11-6P6C) (15)5.5 Serial port pin definition(DB9F) (16)5.6 Ethernet interface pin definition(RJ45) (16)6 Faults handling (17)6.1 Printer does not work (17)6.2 Indicator error and buzzer warning (17)6.3 Problems when it is printing (17)6.4 Problems when cutting paper (18)6.5 Paper jam and cutter retraction troubles removal (18)1 Introduction1.1 Brief introductionCB821 is a thermal POS printer with auto-cutter. It has good printing quality, high printing speed and high stability, which is widely used in POS system, food service industry and many other fields.CB821 connects other devices via USB, Serial, Ethernet port. It offers drivers for WINDOWS and LINUX operating systems.The supported operating systems are as below:WINDOWS XPWINDOWS 7 32/64WINDOWS 8WINDOWS 10UBUNTU 12.04 32/64UBUNTU 14.04 32/64MAC OS1.2 Main features·Low noise, high-speed printing, 250mm/s·With auto-cutter·With cash drawer interface·USB, Serial, Ethernet port communication, Bluetooth optional.Long-life, high print quality, durable performance.Support mark paper and continuous paper printing.Easy paper loading design, widely used in various industries2 Specification2.1 SpecificationItem ParameterPrinting parameter Printing method Thermal printingResolution 203DPI,8 dots/mmPrinting width 72mm(576 dots)Printing speed About 250 mm/sInterfacesStandard: cash drawer / USB/ serial/ EthernetOptional Wireless Communication: BluetoothPage mode / SupportCommand set / ESC/POS compatible commandsStorageRAM RAM 8M bytes, receive buffer area 1M bytes FLASH FLASH 4M bytes, NV bitmap 256K bytescharactersChinese GB18030 24×24Words, figures ASCII 9×17,12×24User-defined SupportCode pagesOptional international character sets 45TRADITIONAL CHINESECHINESECP437 [U.S.A., Standard Europe]KatakanaCP850 [Multilingual]CP860 [Portuguese]CP863 [Canadian-French]CP865 [Nordic]WCP1251 [Cyrillic]CP866 Cyrillic #2MIK[Cyrillic /Bulgarian]CP755 [East Europe,Latvian 2]IranCP862 [Hebrew]WCP1252 Latin IWCP1253 [Greek]CP852 [Latina 2]CP858 Multilingual Latin Ⅰ+Euro)Iran IILatvianCP864 [Arabic]ISO-8859-1 [West Europe]CP737 [Greek]WCP1257 [Baltic]ThaiCP720[Arabic]CP855CP857[Turkish]WCP1250[Central Europe] CP775WCP1254[Turkish]WCP1255[Hebrew]WCP1256[Arabic]WCP1258[Vietnam]ISO-8859-2[Latin 2]ISO-8859-3[Latin 3]ISO-8859-4[Baltic]ISO-8859-5[Cyrillic]ISO-8859-6[Arabic]ISO-8859-7[Greek]ISO-8859-8[Hebrew]ISO-8859-9[Turkish]ISO-8859-15 [Latin 3] Thai2CP856Chart / Supports different density dots and images printingsSupports grating bitmap printingSupports download bitmap printing, every bitmap size should less than 256K, and the total capacity of download bitmap is 256K.Bar codes 1DUPC-A、UPC-E、EAN-8、EAN13、CODE39、ITF、CODEBAR、CODE128、CODE932D PDF417、QR CodeDetection function Sensor Paper out, cover opened, un-take out printed paper(optional)LED indicatorPower indicator Green Paper out indicator Red Error indicator RedPaper RequirementType Standard thermal receipt paper Width 79.5±0.5mmThickness 0.056~0.1mmDiameter 80mm(Max.)Physical characteristicsPaper loading Easy paper loadingPaper cutting Manual or automatically cut paper Operating condition -10℃~ 50℃,25% ~ 80%RH Storage condition ~40℃~ 70℃,≤93%RH(40℃)Outline dimension 145mm×195mm×144mm(W×L×H)Weight 1.8KgReliabilityTPH life 100kmCutter life 1,000,000 times Motor life 360,000 hoursSoftware function Driver procedure Windows(WIN7/WIN8/WIN10/Vista/XP/2000)Ubuntu 12.04 32/64, Ubuntu 14.04 32/64 MAC OS2.2 Printing material requirements2.2.1 Paper parameters1)Paper type: thermal receipt paper/thermal black mark paper2)Paper width:80±0.5 mm3)Paper roll diameter: 80 mm (Max.)4)Paper thickness:0.065 ~ 0.10mm2.2.2 Mark paper parametersBlack mark imprint position is on the front side of the receipt when using mark paper. The black mark reflectivity is no more than15%, the other parts of paper reflectivity should be more than 85%.There are not any patterns in black mark area, such as ad, and the mark size shall be satisfied with requirements as below:2.2.3 Paper using attentionNote:1)Please use good quality paper, otherwise, it will effect printing quality and even reduce printer head life.2)Don’t make the paper stick on axis.3)Paper will be fading out or reduced thermal sensitivity if it is polluted by chemical or oil, which will affectprinting effects.4)Don’t use nail or hard things to clash printing paper, otherwise, it will be fade out.5)Paper will be fading out if the environment temperature exceeds 70°C. So please take note the temperature,humidity and illumination effects.2.3 Printing and paper cutting position2.3.1 Printing positionL1-Paper storehouse’s width: 82±0.5mmL2-Effective printing width: 80mmL3-Distance between print head to paper storehouse’s left edge (fixed width): 3±0.3mmL4-Distance between print head to paper storehouse’s right edge (fixed width): 3±0.3mmL5-Left margin: Default is 4mmL6-Printing area width: it is set by commands (refer to programming manual). Default is 72mm. L7-Right margin: Default is 4mm.2.3.2 Paper cutting positionThe distance between print head to cutter: 12.5mm3 Appearance and components 3.1 Appearance and componentsFunction instruction of components1)Power switchPress “O” side to power off, press “I” side to power on.2)Power indicator(green)The indicator is on when power on, and it is off when power off.3)Error indicator (Red)Error indicator is on when it detects error. Such as: paper out, upper cover is open and cutter is stocked. 4)Paper indicator(red)Paper out indicator is on when it detects the paper is out. Please put a new paper roll to printer inside then.3.2 Indicator and buzzer instruction1)Function instruction of indicators and buzzerName Status InstructionPower indicator (Power) On Printer is power on Off Printer is power offError indicator (Error) On Printer is in error status Off Printer is in normal statusPaper out indicator (Paper)On Printer is in paper out status Off Printer is in normal statusDescription Power Indicator Error Indicator Paper Indicator Buzzer Open printer cover On On On It rings 6 times by 1.5s.Paper is enough On Off Off Silent Paper out On On On It rings 3 times by 1.5s.Note: Printer detects printer head temperature via thermal resistance. It will cut off print head powerand stop printing if print head is overheat. The print head protection temperature is 80℃.4 Printer installation4.1 Open the packagePlease make sure everything is in good status when you open the package. Otherwise, please contact to distributor in time.4.2 Requirements of installation position1)Put the printer on a stably place.2)Let the printer far away from water, fire, and sunlight.3)Avoid to put it on oscillatory and impassive place.4)Make sure to connect printer with ground safety4.3 Connect to power adapter1)Make sure the printer is power off.2)Connect power adapter’s DC output plug to the printer.3)Connect power adapter’s AC input plug to a power outlet.4)Please be careful to operate correctly when plug out the plug of power cord to avoid damage.4.4 Connect Communication cables1)Make sure the printer is power off.2)Connect communication cable to the printer’s port, and fix it as plug lag spike (or snap spring).3)Connect communication cable to the other side host.4.5 Connect to cash drawer1)Make sure the printer is power off.2)Connect cash drawer to cash drawer port behind the printer.Warning: The Voltage of cash drawer port is 24V. (It cannot connect to telephone cable.)4.6 Paper roll loading4.6.1 Printing paper type confirmationYou can load paper roll to print after connecting power adapter and communication cables. Please make sure the printing paper type before printing. The default paper type is continuous thermal receipt paper.4.6.2 Loading or change paper roll1)Power off the printer.2)Slide or press paper roll storehouse button, and then open storehouse cover.3)Draw out paper roll tap, and load paper roll as below.4)Draw out a printing paper, and leave some on the paper out month, then close the storehouse cover.Warning: Please make sure the paper roll in tense status, if not, it maybe cause paper jam or other problems.5)The status after paper loading4.7 DIP switch settingDIP switch Switch Function On Off Default 1 Cutter Forbidden Enable Off 2 Buzzer Enable Forbidden On 3 Printing density DarkLight Off 4 Multi-byte encoding Single-byte encodingmulti-byte encodingOff 5 Max. number of Printing characters in each line42 48 Off 6 Cash drawer EnableForbiddenOn 7 Baud rate options (bps)Ref. Chart 1Off 8OffChart 1:Baud rate optionsBaud rate Switch 7 Switch 8 Default9600 On Off 19200 19200 Off Off 38400 On On 115200Offon4.8 Printing self-test page1) Make sure the printer loaded paper roll correctly.2) Press down [FEED] button and hold on, then power on the printer, the printer will print a self-test page.4.9 Set Ethernet port IP Address.The printer ’s Ethernet IP address can be set directly via printer inserted web setting page. The operation steps are as below:1. Connect printer and PC in a same Ethernet LAN.2. Print a printer self-test page to get printer recent IP address (self-test page printing operation method refers to “4.8 printer self-test ” instruction):You can find the printer ’s IP address is same as 192.168.1.87 in self-test page “IP address: 192.168.1.87” 3. Set network card IP address in PC and printer IP address as different IP address in the same networksegment.(Such as 192.168.1.xxx, xxx is a number among 1 to 254);4. Please enter address “http://printer IP address ” in browse of PC after making sure that printer connects with Ethernet.(e.g.: If printer IP address is “192.168.1.87”, please enter “http://192.168.1.87”), then press Enter key,open Ethernet port setting page in browser as below:5. Click “Configure Interface” link in the left side, then enter the modified target IP and click “save” button tosave setting. Click “Reboot” button to reset printer if you want the setting to take effect.6. Enter the new IP address as the above step 4 procedure, and re-open printer Ethernet port setting web page, then click “Printer Status” link in the left side. And click “Printer Test Page” button to print self-test page, andcheck the IP Address contents in the self-test page is right or not.5 Interface pin definitionsThe printer has a cash drawer driver interface and many kinds of communication interfaces: parallel, serial (RS-232), USB and Ethernet ports. USB port and cash drawer interfaces are standard interfaces, and it has Ethernet, serial and parallel ports as optional.5.1 Parallel interface pin definition(DB25M)Number Signal Function Number Signal Function1 /STROBE Gate. Low level is10 /ACK Confirm. Low level is effectiveeffective2 DATA0Data bit is 011 BUSY Busy3 DATA1Data bit is 112 PE Paper out4 DATA2Data bit is 213 SEL Choose5 DATA3Data bit is 314 /AUTOFEED Change line automatically. Lowlevel is effective6 DATA4Data bit is 415 /ERROR Error. Low level is effective7 DATA5 Data bit is 516 /INIT Initialize. Low level is effective8 DATA6 Data bit is 617 /SELIN Choose input. Low level iseffective9 DATA7 Data bit is 718-25 GND Ground wire5.2 USB interface pin definition(standard B type female base)1)Pin definitionPin Number Signal name Typical wire color1 VBUS Red2 D- White3 D+ Green4 GND Black5.3 Power interface pin definition(MPC-3-001B)1)Pin definitionPin number Signal name1 +24V2 GND3 N.CSHELL F.G5.4 Cash drawer interface pin definition(RJ11-6P6C)1)Electrical specificationDriver voltage: DC24VDriver current: Max. 0.8A (within 510ms)Cash drawer status tests signal: “L” = 0~0.5 V ; “H” = 3~5 V2)Cash drawer interface socket uses RJ-11 6P type connector;3)Interface signal definitionPin number Signal function1 FG Printer cover2 DRAWER 1 Cash drawer 1 driver signal3 DRSW Cash drawer status detection signal4 VDR Cash drawer driver power5 DRAWER 2 Cash drawer 2 driver signal6 GND Common ground circuitNotes:1) Prohibit socket with power to pull out communication wire plug.2) Please avoid to parallel with strong power when wring communication cables av通讯线布线时应避免和强电并行;3) Communication cables use with shielded cables.5.5 Serial port pin definition(DB9F)Printer serial port is compatible with RS-232, the interface socket is DB9 female socket.User can check interface setting status via printing setting self-test page. Printer default serial interface is set as: baud rate 19200bps, 8 bit data bits, no parity,1 bit stop bit, and the handshakes method is DTR/DSR。