Office 365安装部署手册
Office 365 安装部署手册
本手册适合世纪互联运营的Office 365微软运营的Office 365Office 365安装部署手册Office 365安装部署手册目录01登录Office 365管理中心 (02)02配置自定义域名 (03)2.1 指定自定义域名并确认所有权 (03)2.2 配置Exchange Online和L ync Online采用自定义域名 (05)2.3 配置Sha r e P oint Online公共网站采用自定义域名 (07)03AD用户同步 (12)04单点登录 (17)4.1 添加功能 (17)4.2 证书 (18)4.3 安装AD F S 2.0 (20)4.4 验证SSO (27)05在Office 365中建立账号 (29)5.1 添加单个用户 (29)5.2 批量添加用户 (31)06邮箱批量迁移 (34)6.1 比较迁移类型 (34)6.2 远程移动迁移 (35)6.3 暂存Exchange迁移 (35)6.4 直接转换Exchange迁移 (35)6.5 IMAP迁移 (36)6.6 Mic rosof t Exchange PST Captu r e (38)07服务设置 (39)7.1 服务设置概览 (39)7.2 服务设置详细说明 (41)08查看报告 (42)09查看服务运行状况 (44)10在PC或平板电脑上配置和使用Office 365 (45)10.1 登录Office 365并修改密码 (45)10.2 修改站点的语言 (45)10.3 下载Office软件安装包 (47).10.4 安装配置Office软件 (48)10.5 从本地位置批量部署 Office 365客户端 (O D T) (51)10.6 访问Sha r e P oint Online网站 (53)10.7 访问邮箱 (54)10.8 使用Skype for Business (55)032配置自定义域名021 登录Office 365管理中心登录Office 365管理中心1. 在浏览器地址栏输入以下登录地址:世纪互联运营的Office 365:https:// 微软运营的Office 365:https:// 2. 输入您的Office 365管理员账号和密码进行登录。
使用OfficeDeploymentTool离线安装Office365
使⽤OfficeDeploymentTool离线安装Office365众所周知Office 365的安装⽅法与传统的office不同。
传统的office软件有软件包或光盘,双击安装⽂件即可启动安装程序,⽽office 365因为更新速率快,没有对外发布的即点即⽤的软件包,普通⽤户只能通过在线安装程序,边下载边安装,以确保⽤户安装的office程序永远是最新的。
但是这样存在⼀个问题就是在线安装的效果受⽹络环境影响⼤,⽹络不稳定或者并发请求数量⼤的时候,安装速度⾮常慢。
其实,还有⼀个办法就是⽤office deployment tool(ODT)来离线安装office 365。
使⽤ODT,只需下载⼀份安装源⽂件,可为公司内所有⽤户离线安装office 365,安装office软件仅需10分钟左右,且不占⽤公司的带宽资源。
以下是如何使⽤ODT安装Office 365的步骤:你可以创建⼀个⽂件夹保存你下载的内容,下载完成后你应该可以看到以下4个⽂件2、修改XML⽂件⾥的地址为你存放的实际地址:例如你想安装64bit的office,请打开64的XML⽂件,将sourcepath改成你的地址,例如我将它放在C盘,users\susan\downlaods⽂件夹下,就改成sourcepath="C:\Users\susan\downloads\office2016_365"。
另外将不不要的信息都删除。
仅保留:<Configuration><Add OfficeClientEdition="64" sourcepath="C:\Users\susan\downloads\office2016_365" Channel="Monthly"><Product ID="O365ProPlusRetail"><Language ID="zh-cn" /> -----这⾥可修改语⾔</Product></Add><!-- <Updates Enabled="TRUE" Channel="Monthly" /> --><!-- <Display Level="None" AcceptEULA="TRUE" /> --><!-- <Property Name="AUTOACTIVATE" Value="1" /> --></Configuration>3、使⽤CMD运⾏命令 cd +你存放ODT的地址,⽰例:cd c:\users\susan\dowanloads\office2016_365setup.exe /configure +tab键⾃动弹出“configuration-office365-x64.xml4、然后就会看到如下画⾯,开始安装了。
办公软件安装教程
办公软件安装教程办公软件是现代办公中不可缺少的工具,它能够提高办公效率,简化工作流程。
在使用办公软件之前,我们首先需要完成软件的安装。
本文将为大家详细介绍办公软件的安装教程。
一、准备工作:1. 确定所需的办公软件,如Office套件、谷歌文档等。
根据个人或办公需求选择所需软件。
2. 确认计算机的操作系统,Windows、Mac或其他操作系统,选择与之兼容的软件版本。
二、下载软件:1. 在计算机的浏览器中打开软件官方网站。
2. 寻找并点击下载按钮,下载所需的软件安装包。
安装包一般以.exe或.dmg为后缀。
三、安装步骤:1. 双击安装包,启动安装程序。
2. 阅读软件许可协议,并勾选同意协议。
3. 选择安装路径,一般默认为“C:\Program Files”或“Applications”文件夹。
4. 选择安装选项。
有时软件会提供如“完全安装”、“自定义安装”等选项,根据个人需求选择对应选项。
5. 点击“下一步”或“安装”按钮,开始安装过程。
6. 等待安装程序完成。
安装时间根据软件大小和电脑性能而异。
7. 完成安装后,可以选择是否创建桌面快捷方式。
一般建议创建,以便快速启动。
四、激活软件:1. 安装完成后,打开软件。
2. 根据软件要求输入或选择激活方式。
一般有激活码、许可证文件等多种激活方式。
3. 如果需要输入激活码,将激活码复制或输入到相应位置。
激活码一般是一串数字和字母的组合。
4. 点击“激活”按钮,完成激活。
五、更新软件:1. 打开已安装的办公软件。
2. 在菜单栏或设置中找到“更新”选项。
3. 点击“更新”按钮,软件会自动检查并下载最新版本。
4. 完成更新后,重启软件使更新生效。
六、常见问题及解决方法:1. 安装过程中出现报错信息,一般会有错误码。
可以将错误码复制并搜索解决方法,或尝试重新安装软件。
2. 激活失败,检查激活码是否正确,是否有网络连接等问题。
如问题依然存在,联系软件厂商的客服进行解决。
Office365完整离线安装包下载及自定义安装教程
Office365完整离线安装包下载及⾃定义安装教程Office 365是微软打造的⼀款适⽤于教育机构使⽤的office办公软件,这⾥为⼤家提供了⼀个Office 365离线安装包下载⼯具,让office 365离线包下载到本地再安装,⽽不是联⽹下载安装,避免有多台设备需要安装时耗时占⽤宽带,且⽅便⾃定义,欢迎下载使⽤。
Office365部署⽅法概要提⽰:全⽂内容归结起来其实也就2条命令下载:D:\365\setup.exe /download D:\365\Configuration.xml(此命令为1条,不可以拆分为2⾏输⼊)安装:D:\365\setup.exe /configure D:\365\Configuration.xml(此命令为1条,不可以拆分为2⾏输⼊)⼀、请到如下⽹址下载最新部署⼯具(Office Deployment Tool for Click-to-Run)三、简要使⽤⽅法,包括下载及安装,以及组件⾃定义以及版本号⾃定义1.下载①⾸先运⾏部署⼯具,这时候会⾃动解压到您指定的⽂件夹,包含2个⽂件(setup.exe和configuration.xml),假设解压到D盘365⽂件夹②Configuration.xml可以通过记事本进⾏编辑,默认内容如下:以上图⽚内容简单说明:SourcePatch是下载路径,OfficeClientEdition是版本类型如32bit或者64bit,Product ID是下载的产品,Language ID是语⾔,即点即⽤Office 365产品⽀持的 ProductRelease ID 如下所⽰:O365ProPlusRetailVisioProRetailProjectProRetailSPDRetail (SharePoint Designer)如果未设置 ID,则操作会失败并指⽰输⼊⽆效。
下⾯假如我们需要把下载⽂件放在D盘的365down⽂件夹,并下载64bit简体中⽂,那么xml配置⽂件修改为如下:<Configuration><Add SourcePath="D:\365down\" OfficeClientEdition="64" ><Product ID="O365ProPlusRetail"><Language ID="zh-cn" /></Product></Add></Configuration>③配置⽂件设置好之后保存并关闭,接下来就是下载365的命令打开命令提⽰符,Win+R,输⼊CMD即可可以复制以下命令到命令提⽰符窗⼝D:\365\setup.exe /download D:\365\Configuration.xml回车后,命令提⽰符窗⼝光标闪烁,图中路径本⼈为e盘,请勿介意在下载完成之前,光标⼀直停留在configuration.xml的后边,当下载完成之后,如下图此时你可以在D:\365down⽂件夹下看到如下内容这就是我们下载好的365安装⽂件,但此⽂件并不能像我们平时那样去双击运⾏,需要配合命令⾏进⾏安装2.安装打开命令提⽰符,Win+R,输⼊CMD即可可以复制以下命令到命令提⽰符窗⼝D:\365\setup.exe /configure D:\365\Configuration.xml3.组件⾃定义很多时候我们并不需要安装那么多的office组件,那么可以通过以下配置⽂件对不需要的组件进⾏排除,假如不需要Access和InfoPath,那么⽂章开头的配置⽂件如下:<Configuration><Add SourcePath="D:\365down\" OfficeClientEdition="64" ><Product ID="O365ProPlusRetail"><Language ID="zh-cn" /><ExcludeApp ID="Access" /><ExcludeApp ID="InfoPath" /></Product></Add></Configuration>以下是受⽀持的 ID 值的列表:AccessExcelGrooveInfoPathLyncOneNoteOutlookPowerPointProjectPublisherSharePointDesignerVisioWord“Groove”值⽤于排除 OneDrive for Business。
Office 365 微助理安装手册
Office 365 微助理用户使用手册2017/12/7Version 1.0目录⏹准备⏹个人助理目录⏹团队会话⏹企业资讯⏹Office资源汇LoginStep 1获取企业号二维码(从管理员的邀请邮件、从同事分享的企业号名片、或企业内部资料中获取)Step 2微信扫描二维码并登陆(使用手机号,或Office 365邮箱进行企业微信的身份验证)如何登录企业号?绑定Office 365后,可以使用Office 365 微助理更多功能。
绑定方法1:进入任意应用,点击欢迎语底部的链接,输入Office 365 账号和密码,登录Office 365账号。
绑定方法2:进入任意应用,点击【技能】或【更多】菜单,选择【登录】,输入Office 365 账号和密码,登录Office 365账号。
如出现【您已登录Office365,解锁了我的全部功能】,说明登录成功。
如何绑定Office 365个人助理你可以在应用中处理邮件,安排日程,浏览云盘文件,搜索工作信息,收集碎片信息等。
团队会话你可以在应用中进行工作群聊,查看同事信息等。
企业资讯你可以在应用中查看企业新闻公告,在同事圈与朋友分享灵感,使用FAQ 问答机器人解决工作中的问题。
Office 资源汇你可以在应用中学习高效办公技巧,使用人工智能工具提高工作效率。
四大应用介绍Personal Assistant企业微信内收发并管理Office 365邮件和会议邀请;集成了OneDrive for business,便于文件的安全分享;每日日程提醒让您一天日程早知道。
进入【个人助理】应用。
点击【技能】菜单,进入【设置】。
【接收新邮件通知】点击开启邮件提醒。
【仅接收重要邮件】AI学习邮件阅读习惯,帮助你专注于你最在乎的邮件。
邮件提醒One如何开通邮件提醒进入【个人助理】应用点击【我的】菜单,进入【待回】/【未读】【待回】:今天还有没回复的所有邮件。
【未读】:今天还没有阅读的所有邮件。
Office 365混合架构与部署指南说明书

No integration to on-premises* Federated ID scenario can use Azure AD Sync as a backup in case of a Federation platform outage on-premOn-premises Exchange organizationSharing (free/busy, Mail Tips, Archive, PF, etc.)On-premises Lync organizationMigration of Data (Contact Lists / Scheduled Meetings)Lync On-Prem andExchange On-PremDelegate schedules meeting on-behalf of Boss *Publish status based on Outlook calendar free/busy* Supported only when both users are homed online in the same forest or both are homed on-premises.for on-premises/cloudEnables free/busy,flow between on-premises and whether cloud or on-On-Premises ExchangeE-mail Address Policies) 1 2 4 554Update-HybridConfiguration on-premises Exchange andthe on-premises Exchange to both the on-premises and 3 3Multi-Org Hybrid SupportOrg Relationship (F/B, Sharing)Get-Federation Information fallback logicIf the on-premises Autodiscover endpoint is not published properly when the wizard executes, it will warn not fail.Set-HybridConfiguration -Domains ", , autod:"-EmailAddressPolicy.Only missing proxies will be added. No addresses will be changed/removed.http://aka.ms/hybridkey(http://aka.ms/hybridkey)You have an existing, non-trial, Office 365 Enterprise subscriptionYou currently do not have a licensed Exchange 2013 or Exchange 2010 SP3 server in your on-premisesYou will not host any on-premises mailboxes on the Exchange 2013 or Exchange 2010 SP3 server on which youhttp://aka.ms/hybridkey/kb/2939261So, just cause you have 2010 and/or 2007 you cannot useSearch Exchange on-premises mailboxes and Exchange Online mailboxes in the same eDiscovery search initiated from the Exchange on-premises organization.Search Exchange on-premises mailboxes that use Exchange Online Archiving for cloud-based archive mailboxes.Search Exchange Online mailboxes from an eDiscovery search initiated from the Exchange on-premises organization by an Search on-premises mailboxes using an eDiscovery search initiated from the Exchange on-premises organization by an administrator1 2 3 41 201323 20102013 2010 1 2 312 20132007123Test-OAuthConnectivity -Service EWS -TargetUri https:///ews/exchange.asmx -Mailbox <On-Premises Mailbox> -Verbose | flTest-OAuthConnectivity -Service EWS -TargetUri <external hostname authority of your Exchange On-Premises deployment> -Mailbox <Exchange Online Mailbox> -Verbose | flRunning Get-AuthServer from the on-premises environment will yield the metadata and trust information used AuthMetadatURL- is the tenants specific endpoint for token validationCertificateString- is similar to the certificate Metadata exchange we do with the traditional MFG trustRunning Get-ExchangeCertificate will reveal that a new self signed certificate is created for OAUTHRunning Get-IntraOrganizationConfiguration from both on-Running Get-IntraOrganizationConnector from both premises shows the rest of the configuration DiscoveryEndpoints- are obtained from the IntraOrgConfigTargetAddressDomain- means the same thing it meant in org relationship, the domain name this IOC applies toOption 1: O365 mailboxes access legacy PFs on-premOption 2: O365 mailboxes access Modern PFs on-premOption 3: Exchange 2013 on-prem mailboxes access Modern PFs in O365 2007 On-Premises 2010 On-Premises 2013 On-Premises1. 2.3. 4.5.On-premises <SmtpAddress>**********************</SmtpAddress>PF/CAS instead of the CASArray1.2.3.4.5.Set-OrganizationConfigSolution: Update to CU6 / CU7Content: /kb/2977293/en-us/library/dn497703(v=exchg.150).aspx /kb/2937358/kb/2860844/en-us/wikis/exchange/1042.aspx?sort=mostrecent&pageindex=1/en-us/wikis/exchange/office-365-move-mailbox-fails-with-transient-exception.aspx/kb/2615183/en-us/library/hh529912(v=exchg.150).aspx。
Microsoft Office 365和FortiMail的部署指南说明书
SIMPLE, SCALABLE, SECURE EMAIL WITH OFFICE 365 AND FORTIMAILMOVING TO THE CLOUD DOESN’T NEED TO BE SCARYEnterprises and businesses world over are taking a good look at the cloud and cloud services such as Microsoft Office 365 email. Extremely capable of providing an edge over the competition, the cloud helps organizations scale, in a fast and simple manner, while simultaneously bringing down costs. While it does have these wonderful advantages, the primary concern for these organizations during this transition is security. Servers and intellectual property, the lifeblood of the organization, are no longer under lock and key in a building somewhere, but hosted in the cloud.With Fortinet’s slew of virtual appliances, the cloud need not be scary anymore. While FortiGate and FortiWeb can be used to protect the cloud deployment and web resources, respectively, FortiMail is able to protect email, which is the most important productivity tool for any organization.As more and more organizations move from traditional Microsoft Exchange servers to Office 365 email services, they can completely rely on FortiMail to protect this attack surface. FortiMail has been validated by third-party testing houses such as Virus Bulletin, which has given it the coveted VBSpam+ rating.Moreover, deploying FortiMail Office 365 email integration is very easy and provides great flexibility in terms of options.SO WHA T ARE MY OPTIONS?FortiMail allows for a very flexible set of options.n FortiMail is available as hardware appliances and virtual appliances for the private data center. Both of these can be used for deployments nwhere it is preferred to use the private data center as the hub to secure your deployment.nn Available as a VM in both Amazon Web Services and Microsoft Azure, FortiMail provides flexible sizing options to protect Office 365 email in a scalable fashion. It also has the added advantage of being at a co-located data center.n For organizations that like the simplicity of Software-as-a-Service (SaaS) applications, they also have the option of using FortiMail Cloud, nFortinet’s Cloud-Hosted Email Security offering.HOW DOES IT WORK?In order to protect your Office 365 deployment using FortiMail’s Enterprise Class Security, it is important to have FortiMail act as a gateway to your Office 365 deployment. By doing this, you are able to ensure that any email threats attempting to get to your organization will always need to be inspected by FortiMail to ensure it does not carry any threats.The deployment looks as follows:We will now look at how to protect your Office 365 deployment using FortiMail running in Microsoft Azure.It is important to note that while this is the method used in this document, it can just as easily be carried out using FortiMail running in a private data center or using FortiMail Cloud.Preparing Office 365—For the scope of this discussion, we assume that the domain has already been added onto Office 365 and we have an existing Office 365 email deployment. There are URLs to additional documents at the end of this guide, which go into deeper detail about how to deploy Office 365 email from scratch.Checking your domains:1. Log onto Office 365 Admin center.2. Click on Domains.3. Check that your domain has already been added and is completely set up.If the setup has been correctly executed, you will see the screen shown below with your domain available and showing as Setup complete.If necessary, you can also set up your domain by clicking on Add domains and following the wizard.This allows FortiMail to perform the necessary inspections on any inbound Office 365 email.We will first do a quick walkthrough of FortiMail on Microsoft Azure. Deploying Azure on FortiMail is very easy and can be carried out in a few quick steps.Once logged into Azure, it is very simple to deploy a FortiMail-VM. All one needs to do is go to the marketplace and search for Fortinet to find all the Fortinet Virtual Machines.Select the FortiMail-VM for Azure and continue.A few settings would be required, including the VM name, passwords, and the resource group this VM belongs to.This will be followed by selecting the instance sizes for FortiMail-VM on Azure. There is a wide array of instance sizes supported for Azure, and it is important to keep in mind the number of users and expected email traffic to ensure the VM is of the correct size and capacity to support this deployment.Please refer to your Deployment Guide or contact your Fortinet Representative to better understand your VM sizing.Configuring the VM and Selecting the SizeOther key information to be provided includes IP address and storage information.Configuring IP and ValidationWith this, your FortiMail-VM should be ready. By selecting the deployment location, it is possible to select a co-located data center to ensure minimum latency and performance impact on integrating the FortiMail-VM.PROTECTING OFFICE 365 USING A FORTIMAIL-VM RUNNING ON AZUREConfiguring FortiMail—The first step in bringing up the integration is to prep FortiMail to receive Office 365 mail. To do this, log into FortiMail and add a new domain for the Office 365 account. This includes your domain name, which needs to be protected, and the SMTP server’s details.Configuring Office 365; Protecting Inbound Email—The next step is to configure the Office 365 console to accept FortiMail.To do this, create a rule under Admin center to accept email coming in from FortiMail. This will allow FortiMail email to be accepted in Office 365.To do this, under Admin center > Exchange >Select Mail Flow > Rules > +Doing this lets Office 365 know that only accepted email needs to be coming in from FortiMail. Any other inbound email is erroneous and should be deleted, as it could be a threat. Select Enforce this policy to ensure it takes effect.Configuring Office 365—Set up Office 365 to relay email.Now we are ready to receive email. As for outgoing email,Under Mail Flow > ConnectorsSelect +This sets up a rule to ensure that any outgoing email within this organization can be inspected using FortiMail.To do this, follow the steps below.Once this is validated, Office 365 is ready to send your email to FortiMail when it is destined for your organization.Managing MX Records—Configure your DNS server.The final step to prepare your entire setup and have mail forwarded as needed involves setting up the MX record so that it points to FortiMail.Copyright © 2017 Fortinet, Inc. All rights reserved. Fortinet , FortiGate , FortiCare and FortiGuard , and certain other marks are registered trademarks of Fortinet, Inc., and other Fortinet names herein may also be registered and/or common law trademarks of Fortinet. All other product or company names may be trademarks of their respective owners. Performance and other metrics contained herein were attained in internal lab tests under ideal conditions, and actual performance and other results may vary. Network variables, different network environments and other conditions may affect performance results. Nothing herein represents any binding commitment by Fortinet, and Fortinet disclaims all warranties, whether express or implied, except to the extent Fortinet enters a binding written contract, signed by Fortinet’s General Counsel, with a purchaser that expressly warrants that the identified product will perform according to certain expressly-identified performance metrics and, in such event, only the specific performance metrics expressly identified in such binding written contract shall be binding on Fortinet. For absolute clarity, any such warranty will be limited to performance in the same ideal conditions as in Fortinet’s internal lab tests. Fortinet disclaims in full any covenants, representations, and guarantees pursuant hereto, whether express or implied. Fortinet reserves the right to change, modify, transfer, or otherwise revise this publication without notice, and the most current version of the publication shall be applicable. Fortinet disclaims in full any covenants, representations, and guarantees pursuant hereto, whether express or implied. Fortinet reserves the right to change, modify, transfer, or otherwise revise this publication without notice, and the most current version of the publication shall be applicable.GLOBAL HEADQUARTERSFortinet Inc.899 Kifer RoadSunnyvale, CA 94086United StatesTel: +1.408.235.7700/sales EMEA SALES OFFICE 905 rue Albert Einstein 06560 Valbonne France Tel: +33.4.8987.0500APAC SALES OFFICE 300 Beach Road 20-01The Concourse Singapore 199555Tel: +65.6513.3730LATIN AMERICA HEADQUARTERS Sawgrass Lakes Center 13450 W. Sunrise Blvd., Suite 430Sunrise, FL 33323Tel: +1.954.368.9990June 23, 2017 9:47 AMBy default when set up, the MX record would have been programmed such that it redirects any MX records to your Exchange server. At present, any such incoming mail will be dropped as per our configuration. So we should configure the DNS server to redirect the MX record across to FortiMail Instead. FortiMail will then inspect any incoming email before sending it across to the Office 365 instance.And voila, you have a fully protected Office 365 email deployment.THA T’S AWESOME, BUT WHY FORTINET?When it comes to security, Fortinet is an industry leader. Using intelligence from the respected and renowned FortiGuard Labs, FortiMail is able to protect Office 365 from all kinds of threats. FortiMail is regularly one of the most successful participants in Virus Bulletin’s Anti-SpamTesting, receiving the coveted VB Verified Spam+ rating.Beyond this, by means of FortiSandbox integration, FortiMail is able to protect against the latest threats, including zero-day vulnerabilities. This is essential in this day and age when a majority of organizations are hit by threats and malware unique to that organization.This integration can be carried out with either a dedicated FortiSandbox Appliance or using the FortiSandbox Cloud offering, both of which received “Recommended” ratings in NSS Labs’ 2016 BDS Testing.SUMMARYWhen it comes to simplicity and scale, Office 365 is a great offering. With FortiMail’s best-in-class protection, your Office 365 email deployment and your organization as a whole can be secure. So while email has always been one of the most popular attack vectors, protecting against email attacks has never been easier using FortiMail protection for Office 365.。
微软Office365安装配置指南说明书
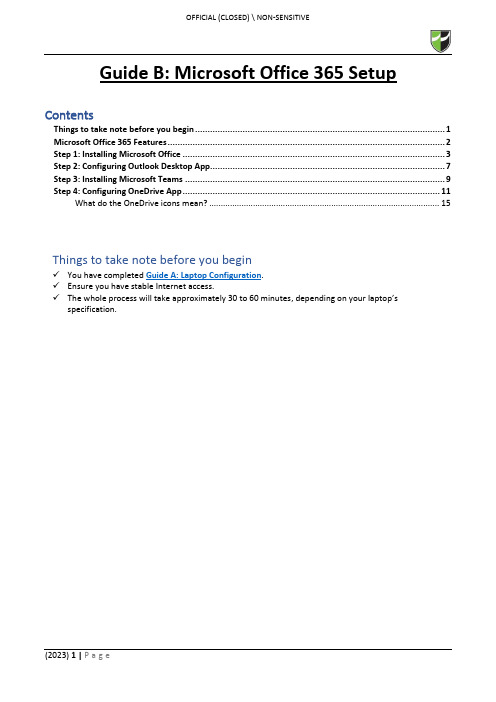
Guide B: Microsoft Office 365 Setup ContentsThings to take note before you begin (1)Microsoft Office 365 Features (2)Step 1: Installing Microsoft Office (3)Step 2: Configuring Outlook Desktop App (7)Step 3: Installing Microsoft Teams (9)Step 4: Configuring OneDrive App (11)What do the OneDrive icons mean? (15)Things to take note before you begin✓You have completed Guide A: Laptop Configuration.✓Ensure you have stable Internet access.✓The whole process will take approximately 30 to 60 minutes, depending on your laptop’s specification.Office 365 is a service portal provided by Microsoft to you and is subjected to their terms of usage. By using the Office 365, do note that you have agreed to Microsoft’s terms of usage.Before you begin to use Office 365, please kindly read the terms of usage via https:///en-sg/servicesagreementStep 1: Installing Microsoft Office1.1 Go to https:// and login using your RP credentials.1.2 Click “Install apps” > “Microsoft 365 apps”.1.3 You will receive a prompt to download the file.Click “Open file”.1.4 After the installer in downloaded, you will get an UAC prompt as shown below.Click “Yes” to allow the installation to begin.1.51.6 Once the installation is completed, click “Close”.1.7 Go to Start Menu and search for Word.Click on the application to launch it.1.8 Once launched, a prompt will pop up to accept the license agreement to use Office 365.Click “Accept ”.1.9To ensure that your Office 365 is activated, go to “File ” > “Account ” and verify that product is activated as per below screenshot.On completion of Step 1, you have successfully installed Microsoft Office.On completion of Step 1, you have successfully installed Microsoft Office 365.Step 2: Configuring Outlook Desktop App2.1 Go to Start Menu and search for Outlook.Click on the application to launch it.2.2 Outlook will automatically detect your RP email address and enter your credentials if it prompts tologin. Click “Connect” and it will start to connect to the server to retrieve your email configuration details.2.3 After successfully connected to your RP email, the below screen will show.Uncheck “Set up Outlook Mobile on my phone, too” and click “Done”.2.4 Outlook will then load your mailbox and your emails will begin synchronization.Please note that it will take a while for Outlook to communicate with the server to retrieve your details.Step 3: Installing Microsoft Teams3.1 Download Microsoft Teams (for work or school) from this link.3.2 Click “Download for desktop”.3.3 Click “Download Teams” and it will download an TeamsSetup_c_w_.exe installer to your Downloadsfolder.3.4 Double-click on the TeamsSetup_c_w_.exe installer from your Downloads folder and let MicrosoftTeams install.3.5 Upon successful installation, locate the Microsoft Teams icon on your taskbar and click to open.3.6 To confirm that you are signed in, click on the profile icon found on the top-right corner > your nameand RP email address should appear.Step 4: Configuring OneDrive App4.1 Go to Start Menu and search for OneDrive.Click on the application to launch it.4.2 Enter you RP email address and click “Sign in”.4.34.4 Choose which folders (Desktop, Documents and Pictures only) you want to backup automatically toOneDrive.*Note: It is highly encouraged to backup all folders to OneDrive as it will be saved to the cloud so in case any Hardware related issue happens to your laptop and/or you are unable to backup your files, at least you would have a copy of it in OneDrive.4.5Click “Next ” all the way.4.6Click “Later”.4.7 Click “Open my OneDrive folder”.4.8 It will redirect you to the OneDrive folder in File Explorer.Default path: C:\Users\<Student ID>\OneDrive – Republic PolytechnicRed circle with white crossPress OneDrive icon with sync pending arrows。
- 1、下载文档前请自行甄别文档内容的完整性,平台不提供额外的编辑、内容补充、找答案等附加服务。
- 2、"仅部分预览"的文档,不可在线预览部分如存在完整性等问题,可反馈申请退款(可完整预览的文档不适用该条件!)。
- 3、如文档侵犯您的权益,请联系客服反馈,我们会尽快为您处理(人工客服工作时间:9:00-18:30)。
Office 365安装部署手册2014年9月目录Office 365安装部署手册 (1)登录Office 365管理中心 (4)配置自定义域名 (4)指定自定义域名并确认所有权 (5)配置Exchange Online和Lync Online采用自定义域名 (8)配置SharePoint Online公共网站采用自定义域名 (11)AD用户同步 (17)单点登录 (24)添加功能 (24)证书 (26)安装AD FS 2.0 (29)验证SSO (42)在Office 365中建立账号 (44)添加单个用户 (44)批量添加用户 (47)邮箱批量迁移 (51)比较迁移类型 (52)远程移动迁移 (52)暂存Exchange迁移 (53)直接转换Exchange迁移 (53)IMAP迁移 (53)IMAP邮箱批量迁移方法 (54)停止迁移批次 (56)重新启动迁移批处理 (57)创建和启动其他迁移批处理。
(57)配置MX 记录以指向Office 365的电子邮件组织 (57)删除迁移批处理 (57)Microsoft Exchange PST Capture (57)服务设置 (58)服务设置概览 (58)服务设置详细说明 (61)Exchange Online服务设置 (61)Lync Online服务设置 (61)SharePoint Online服务设置 (61)查看报告 (61)查看服务运行状况 (63)在PC或Surface Pro上配置和使用Office 365 (64)登录Office 365并修改密码 (64)修改站点的语言 (65)下载Office软件安装包 (67)安装配置Office软件 (68)从本地位置批量部署Office 365客户端(ODT) (73)访问SharePoint Online网站 (76)方法一 (76)方法二 (77)访问邮箱 (77)使用Lync (78)当您在试用或购买Office 365之后,可按照本手册完成安装和部署工作。
本手册适合于世纪互联运营的Office 365和微软运营的Office 365。
由于Office 365不断在用户界面和功能上推出更新,本手册的截图和界面可能与您实际看到的略有不同。
登录Office 365管理中心1.在浏览器地址栏输入以下登录地址:世纪互联运营的Office 365:https://微软运营的Office 365:https://2.输入您的Office 365管理员账号和密码进行登录。
3.登录成功后,通常可直接进入到Office 365管理中心。
4.在登录成功后,如果您是在其他工作界面下,希望快速访问Office 365管理中心时,可在窗口右上角点击“管理员”-“Office 365”。
5.如果您是首次登录,可参照下面的内容修改密码和站点语言:在PC或Surface Pro上配置和使用Office 365配置自定义域名在申请或购买Office365服务后,系统会提供一个Office 365的域名。
通常,您会希望将此域名更改为您的组织的域名。
世纪互联运营的Office 365的域名为:您的域名。
微软运营的Office 365的域名为:您的域名。
当您希望将此域名改为您自己的域名,例如:,请按照下述方法进行操作。
此方法对于世纪互联和微软运营的Office 365同样适用。
请确保您已经拥有此域名,域名的申请并非由Office 365提供,您需要通过域名注册服务商获得域名。
指定自定义域名并确认所有权1.进入Office365管理中心,在左侧导航单击“域”,再单击“添加域”。
2.单击“开始步骤1”。
3.输入您自己的域名,例如:,单击“下一步”。
4.此时,需要您选择域名解析服务商(DNS托管提供者),或选择“常规说明”,查看操作方法。
5.在“常规说明”中,详细介绍了如何在DNS托管提供者处创建验证记录的方法。
在点击“完成,立即验证”之前,请跳到下一步操作。
6.根据“常规说明”提供的TXT和MX信息,登录到为您提供域名解析的服务商(DNS托管提供者)的网站,在这里可以修改您的域名解析列表(不同的域名解析服务商提供的域名解析管理界面会有所不同,此处为示例)。
在您帐户的DNS 管理区域中,选择为您的域添加DNS 记录的相应选项,创建TXT和MX记录。
7.添加的TXT和MX记录生效后,返回到Office365管理中心(参见第5步的图示),单击“完成,立即验证”,此时域名即添加完成。
8.单击“完成”,返回到“将域添加到Office 365”的向导。
配置Exchange Online和Lync Online采用自定义域名1.在“将域添加到Office 365”的向导中,单击“开始步骤2”,添加用户并分配许可。
2.您可以稍后再添加用户,可选择“我不想立即添加用户”,单击“下一步”。
3.勾选“ExchangeOnline”和“LyncOnline…”,单击“下一步”。
4.此时会显示添加DNS记录的方法,提供MX、CNAME、TXT、SRV的记录信息表。
在单击“已完成,进行检查“之前,请跳到下一步操作。
5.登录到为您提供域名解析的服务商(DNS托管提供者)的网站,在域管理中心添加表中的值,下图为示例。
6.添加完成后,返回Office365管理中心(参见第4步的图示),单击“已完成,进行检查”。
7.检查通过后,Exchange Online邮件和Lync Online即时通讯的账号即可采用您的自定义域名。
配置SharePoint Online公共网站采用自定义域名1.进入Office365管理中心,在左侧导航中单击“域”,再单击“添加域”。
这次需要添加SharePoint Online公共网站子域,如:。
这个网站可作为您的机构对外呈现的网站。
2.单击“开始步骤1”。
3.输入域名,例如:,单击“下一步”。
4.单击“完成”,子域添加完成。
5.单击“开始步骤2”。
6.选择“我不想立即添加用户”,单击“下一步”。
7.勾选“SharePointOnline”点击“下一步”。
8.如果您不希望现在进行“设计网站”或“在线进行操作”设置,可以直接单击“下一步”,跳到“更改地址”,如下图。
此时需要在另一个窗口进入SharePoint管理中心进行操作。
9.在当前浏览器的选项卡上单击右键,选择“重复打开选项卡”,以便保留当前窗口留待后续操作。
在新打开的选项卡中,单击右上角“管理员”-“SharePoint”,进入SharePoint管理中心。
10.在SharePoint管理中心的“网站集”中,勾选公共网站的地址(通常是域名中包含public的地址),单击“重命名网站”。
11.在“新域”中,单击下拉箭头,选择自定义的域名,例如:,单击“确定”。
12.在网站集列表中,提示原有的公共网站地址已删除。
13.刷新页面后,显示新的公共网站地址。
14.切换窗口,回到Office 365管理中心(第8步图示),单击“下一步”。
此时,会显示DNS更改记录的相关信息(下图)。
请访问为您提供域名解析的服务商(DNS托管提供者)的网站,在域管理中心添加下图中的值。
之后,在下图中单击“已完成,进行检查”。
15.至此,SharePointOnline公共网站的域名已改成您的自定义域名。
AD用户同步很多机构在内部部署中使用Active Directory (AD)来存储和管理身份相关的数据。
用户、联系人、组和资源是Active Directory 通常所管理的常见数据类型。
可将内部部署Active Directory中的用户身份同步到Office 365 中,实现用户身份的统一管理。
注:如果您的机构没有建立ActiveDirectory,则可忽略此步骤,可参考在Office 365中建立账号的方法添加用户。
1.进入Office365管理中心,在左侧导航中单击“用户”-“活动用户”,单击“设置”。
2.在下图中,第1步“准备目录同步”,通常只需确认本地部署的AD服务器可正常运行即可。
如希望了解准备目录同步的先决条件,请参考:/zh-cn/library/jj1518313.第2步“验证域”,需要您首先完成在Office365中添加自定义域名。
请参考本手册配置自定义域名部分。
4.确认前2步准备就绪后,在第3步“激活ActiveDirectory同步”中,单击“激活”。
5.在确认对话框中,单击“激活”。
6.AD同步激活后,可在第3步下看到“ActiveDirectory同步已激活”的提示。
此时,可以进行第4步“安装和配置目录同步工具”,单击“下载”。
7.下载完毕,需要在本地部署的AD服务器上安装目录同步工具。
安装完成时勾选“立即启动配置向导”,单击“完成”。
8.在配置向导中单击“下一步”。
9.输入Office365管理员的用户名和密码,单击“下一步”。
10.输入域的管理员用户名和密码,单击“下一步”。
11.勾选“启用混合模式”,单击“下一步”。
12.勾选“启用密码同步”,单击“下一步”。
13.勾选“立即同步目录”,单击“完成”。
14.稍等片刻后,在Office365管理中心可以看到AD中的用户已经同步到Office365中。
15.同步后的用户,即可用其原来的用户名访问Office365。
单点登录为了让用户能够更方便地使用其现有Active Directory 企业凭据无缝访问云服务(例如Office 365 或Windows Intune)时,在设置了AD用户同步后,您还需要在AD服务器上设置单点登录。
添加功能1.登录AD服务器的服务器管理器,导航到“功能”,单击“添加功能”。
2.勾选要添加的功能,“NETFramework3.5.1功能”和“WindowPowerShell集成脚本环境(ISE)”,单击“下一步”。
3.勾选“Web服务器”角色,单击“下一步”。
4.确认要添加的功能,单击“安装”。
证书1.进入Internet信息服务(IIS)管理器,双击“服务器证书”。
2.进入“服务器证书”,单击“创建证书申请”。
3.输入相关信息,单击“下一步”。
4.选择加密服务提供程序和位长,单击“下一步”。
5.浏览到文件保存的位置,并自定义名称,单击“完成”。
6.在“服务器证书”窗口单击“完成证书申请”,浏览到包含证书颁发机构相应的文件名,自定义一个好记名称,单击“确定”,完成证书申请(此处的证书是公网证书,需根据自己的需要从有关机构购买)。
7.导航到“Internet信息服务(IIS)管理器”—“网站”—“DefaultWebSite”,单击“绑定”,再单击“添加”,选择“SSL证书”,单击“确定”。
安装ADFS2.01.下载ADFS2.0(/zh-cn/download/details.aspx?id=10909),并运行安装向导。