IBM XIV系列存储快速维护手册
IBM服务器及存储设备维护方案V
XXXX公司IBM服务器和存储设备维护方案目录前言 (3)项目背景和需求 (3)一、服务方案制定原则 (3)二、保修服务内容和标准 (4)1) 故障排除 (4)2) 定期巡检 (4)3) 培训 (4)4) 增值服务 (4)服务标准 (5)三、服务实施细则 (5)1) 前期工作 (5)2) 故障预防建议 (5)3) 故障排除 (6)4) AIX常用故障诊断技术 (6)5) 巡检 (8)6) 备份与恢复策略 (9)7) 项目实施计划 (11)8) 工作结果与工作报告 (11)四、服务保障措施 (12)1) 备件保障 (12)2) 本地化服务 (13)3) 组织和人员保障 (13)4) 安全条款 (15)5) 巡检 (15)6) 服务监督 (15)五、应急预案 (16)1) 备机替换 (16)2) 紧急调用工程师 (16)3) 紧急调用备件 (16)4) 紧急调用第三方资源 (16)5) 远程诊断 (17)六、本公司在本项目中的优势 (18)1)悠久的服务历史 (18)2)切实有效的服务保障方案 (19)前言非常感谢XXXX公司领导给予我公司的机会,我们怀着极大的热情精心组织、精心设计有关XXXX公司IBM小型机和相关存储的保修方案,特提交此保修服务方案建议书供领导和相关专家参阅。
项目背景和需求中国XXXX公司为了满足业务需要,采用了大量的IBM小型机和相关存储设备。
为了保证业务的可持续运行,需要有专业的厂商提供保证硬件环境7X24可用性的能力。
而作为上市公司,XXXX公司希望在保证满足质量要求的前提下有更合理的最具性价的服务方案和相关厂商。
人民币金额(大写):叁万捌仟壹佰元整一、服务方案制定原则本方案主要针对XXXX公司的IBM服务器主机和相关的操作系统、数据库、系统软件制定合理科学的维保策略。
方案的制定遵循以下原则:●业务为中心:本项目的最终目标是保证业务系统的安全和可靠运行。
包括计算机系统的可靠运行和业务数据的安全保证,我们将动用一切有效的措施手段,力求业务系统万无一失,我们的目标是:“非正常性停机时间为零”。
ibmxiv ups指导手册
ibmxiv ups指导手册摘要:1.IBM XIV 存储系统的概述2.UPS 的使用方法和注意事项3.UPS 的维护和故障处理正文:一、IBM XIV 存储系统的概述IBM XIV 存储系统是一种高性能、高可靠性的存储解决方案,广泛应用于企业级数据中心。
该系统采用了先进的存储技术和独特的架构设计,提供了卓越的存储能力和数据处理速度。
为了确保系统的稳定运行,IBM XIV 存储系统配备了不间断电源(UPS)设备,以保障在突发电力故障时数据不会丢失。
二、UPS 的使用方法和注意事项1.UPS 的开机和关闭:在启动UPS 时,应先开启UPS 的控制面板,然后按下“开”键,待UPS 完全启动后再接通电源。
关闭UPS 时,应先切断电源输入,再关闭UPS 控制面板。
2.UPS 的负载连接:将UPS 的输出端口与计算机或其他电子设备相连接,确保连接处牢固可靠。
同时,不要超过UPS 的最大负载能力。
3.UPS 的监控:通过UPS 控制面板或专用监控软件,实时查看UPS 的运行状态,包括电池剩余电量、负载情况等。
4.注意事项:在UPS 运行过程中,避免频繁地开启和关闭UPS,以免影响UPS 的使用寿命。
同时,应定期检查UPS 的电池状态,确保电池能够正常工作。
三、UPS 的维护和故障处理1.UPS 的维护:定期对UPS 进行维护,包括清洁、检查连接线、更换电池等。
确保UPS 处于良好的工作状态。
2.UPS 的故障处理:当UPS 出现故障时,应立即切断电源,并联系专业技术人员进行维修。
在维修过程中,切勿擅自拆卸UPS,以免造成不必要的损失。
总之,IBM XIV 存储系统配备了UPS 设备,为用户提供了安全可靠的存储解决方案。
IBM小型机维护指导书V1[1].0
![IBM小型机维护指导书V1[1].0](https://img.taocdn.com/s3/m/85c8cc8252d380eb63946d37.png)
江西建行IBM小型机日常维护第一篇:日常维护部分第二篇:故障处理部分第三篇:安图特公司技术支持电话第一篇日常维护部分目录第1章AIX系统管理日常工作(检查篇) (1)1.1 常用的命令 (1)1.2 语法介绍 (1)1.2.1 vmstat:检查内存、CPU、进程状态 (1)1.2.2 sar:检查CPU、IO (2)1.2.3 PS:检查进程状态命令 (3)1.2.4 svmon:显示进程占用内存 (3)1.2.5 iostat:显示磁盘IO (4)1.2.6 netstat, entstat:显示网卡信息 (4)1.2.7 no:显示tcpip参数设置 (5)1.2.8 其它命令 (5)第2章AIX系统管理日常工作(LV篇) (6)2.1 IBM AIX系统管理的日常工作 (6)2.1.1 开关机步骤 (6)2.1.2 用户组及用户管理 (6)2.1.3 文件系统维护 (6)2.1.4 系统日常管理 (7)2.1.5 系统备份 (7)2.1.6 定时清洗磁带机 (7)2.1.7 定时检查设备指示灯状态 (7)2.1.8 简单故障的判断 (7)2.1.9 熟悉ibm aix操作系统 (7)2.2 关于IBM AIX的逻辑卷管理 (7)2.3 LVM命令 (8)第3章AIX系统管理日常工作(关键参数检查篇) (10)3.1 AIO参数检查 (10)3.2 磁盘阵列QUEUE_DEPTH参数检查 (11)3.3 用户参数检查 (11)3.4 激活SSA F AST-W RITE C ACHE (12)3.5 IO参数设置 (12)3.6 SYNCD DAEMON的数据刷新频率 (12)3.7 检查系统硬盘的镜像 (12)第4章AIX系统管理日常工作(性能分析篇) (13)4.1 性能瓶颈定义 (13)4.2 性能范围 (14)第5章AIX系统管理日常工作(SHUTDOWN篇) (14)5.1 概念 (14)5.2 关机命令 (14)第6章AIX系统管理日常工作(备份与恢复篇) (15)6.1 用SMIT备份 (15)6.2 手工备份 (15)6.3 恢复系统 (15)第7章HACMP的双机系统的管理和维护 (15)7.1 HACMP双机系统的启动 (15)7.2 HACMP双机系统的关闭 (16)7.3 察看双机系统的当前状态 (16)7.4 HACMP环境下的排错 (17)7.4.1 了解问题的存在 (17)7.4.2 判断问题的出处 (18)第1章AIX系统管理日常工作(检查篇)1.1常用的命令1.2语法介绍1.2.1vmstat:检查内存、CPU、进程状态# vmstat 1 15kthr memory page faultscpu----- ----------- ------------------------ ------------ -----------r b avm fre re pi po fr sr cy in sy cs ussy id wa1 0 28132 81277 0 0 0 0 0 0 132 375 67 65 134 02 0 28132 81277 0 0 0 0 0 0 127 338 131 99 00 02 0 28132 81277 0 0 0 0 0 0 132 316 131 99 00 02 0 28132 81277 0 0 0 0 0 0 120 317 126 99 00 02 0 28132 81277 0 0 0 0 0 0 146 316 127 99 00 02 0 28132 81277 0 0 0 0 0 0 130 317 125 99 00 02 0 28132 81277 0 0 0 0 0 0 135 316 127 99 00 02 0 28132 81277 0 0 0 0 0 0 129 317 124 99 00 02 0 28132 81277 0 0 0 0 0 0 133 304 127 99 00 0r:正在运行的进程b:被阻挡的进程avm:活动的虚内存,单位4kbfre:自由列表,位4kbpo:页换出pi:页换入sy:系统占用CPUid:空闲CPUwa:等待的CPU1.2.2sar:检查CPU、IO例如:sar -u 1 30sar -P ALL 1 10语法:sar -[abckmqruvwyA] inteval repetition-b buffer 活动-c 系统调用-k 内核进程统计.-m 消息及信号量活动-q 正在运行的队列数及等待队列数-r 页交换统计-u CPU利用-P CPU负载.1.2.3PS:检查进程状态命令ps:显示当前SHELL重所有进程ps -ef :显示系统中所有进程,-f显示更详细信息ps -u oracle:显示oracle用户进程ps –emo THREAD:显示线程信息ps au;ps vg:按使用时间显示进程(最近一次调用)ps aux:按使用时间显示进程(进程启动)1.2.4svmon:显示进程占用内存svmon –G:显示系统占用内存svmon -C command_name:显示某个用户进程占用内存svmon -P pid显示某个进程占用内存svmon –S:显示段占用内存1.2.5iostat:显示磁盘IOtty: tin tout avg-cpu: % user % sys % idle %iowait0.0 4.0 0.9 1.3 95.4 2.5Disks: % tm_act Kbps tps Kb_read Kb_wrtnhdisk0 58.4 218.3 41.2 172 920hdisk1 16.8 85.6 21.4 428 0hdisk2 50.6 223.9 55.6 1100 20hdisk3 16.8 85.6 21.4 428 0hdisk4 0.0 0.0 0.0 0 0hdisk5 43.4 279.1 69.8 1396 0hdisk6 0.0 0.0 0.0 0 0hdisk7 16.4 27.2 20.2 0 136hdisk8 0.0 0.0 0.0 0 0hdisk9 9.4 156.0 11.4 0 780hdisk10 16.4 27.2 20.2 0 136cd0 0.0 0.0 0.0 0 01.2.6netstat, entstat:显示网卡信息netstat en0:显示en0信息netstat –s:显示网络信息netstat -m显示网络buffers.netstat -i显示网卡状态netstat -I en0 1显示eno网卡塞(1秒间隔)1.2.7no:显示tcpip参数设置no –a:显示tcpip所有参数当前设置no -o tcp_keepalivetime=7200000设置tcp_keepalivetime等于3600000秒no -d 恢复默认值注:该方法在重启后失效1.2.8其它命令第2章AIX系统管理日常工作(LV篇)2.1 IBM AIX系统管理的日常工作系统管理员对小型机系统的正确管理是系统稳定运行的保障,作为系统管理员应注意以下几个方面:2.1.1开关机步骤在系统管理员控制下进行正确的操作。
IBM小型机、存储设备简易维护手册
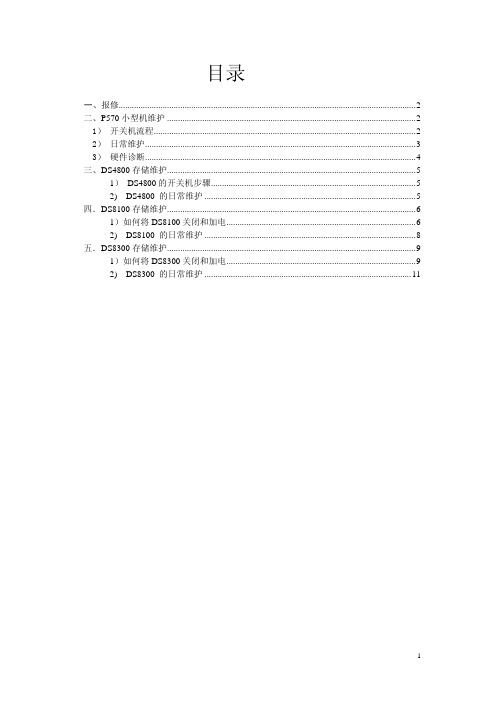
目录一、报修 (2)二、P570小型机维护 (2)1) 开关机流程 (2)2) 日常维护 (3)3) 硬件诊断 (4)三、DS4800存储维护 (5)1) DS4800的开关机步骤 (5)2) DS4800 的日常维护 (5)四.DS8100存储维护 (6)1)如何将DS8100关闭和加电 (6)2) DS8100 的日常维护 (8)五.DS8300存储维护 (9)1)如何将DS8300关闭和加电 (9)2) DS8300 的日常维护 (11)IBM小型机简易维护手册 一、报修如果碰到硬件或者软件故障,请打IBM 800免费报修电话IBM硬件报修电话8008106677IBM软件报修电话8008101818报修前需要准备:1)机器序列号(如9113-550 10-593ED)如图所示:2)客户单位3)客户联系人及电话4)机器所在城市5)问题描述6)相关日志二、P570小型机维护1) 开关机流程1.开机A 无分区:1)检查电源是否插好2)液晶面板出现“OK”字样,指示灯2秒钟闪烁一次,表示机器此时处在关机状态。
3)按下前面板上白色按钮后,主机会进入硬件自检和引导阶段;液晶面板会显示开机过程码,每一代码表示自检或引导的不同阶段,引导结束时,液晶面板代码消失,终端上有显示,进入AIX操作系统初始化,最后会出现登录提示。
4)如果主机长时间停留在某一代码上(大于20分钟),说明主机或操作系统有故障,请打IBM硬件保修电话8008106677,并提供相关代码。
B 有分区:1)检查电源是否插好2)在HMC中看Service Management里面对应服务器的状态,应为Power off状态3)选中对应的服务器,选中Power On, 选项为Partition to Standby,点击OK4)主机开始硬件自检,启动结束后,在HMC中看到对应的服务器为Standby状态5)选中该主机的对应分区,点击“Active”,启动分区2 关机A 无分区:1)停应用2)shutdown -F停操作系统,如果机器全分区,液晶面板会显示停机过程码,最后出现“OK”字样,指示灯2秒钟闪烁一次。
IBM小型机维护指导书V1[1].0
![IBM小型机维护指导书V1[1].0](https://img.taocdn.com/s3/m/caae74a8a300a6c30d229f7e.png)
建行IBM小型机日常维护第一篇:日常维护部分第二篇:故障处理部分第三篇:安图特公司技术支持第一篇日常维护部分目录第1章AIX系统管理日常工作(检查篇) (1)1.1 常用的命令 (1)1.2 语法介绍 (1)1.2.1 vmstat:检查存、CPU、进程状态 (1)1.2.2 sar:检查CPU、IO (2)1.2.3 PS:检查进程状态命令 (3)1.2.4 svmon:显示进程占用存 (3)1.2.5 iostat:显示磁盘IO (4)1.2.6 netstat, entstat:显示网卡信息 (4)1.2.7 no:显示tcpip参数设置 (5)1.2.8 其它命令 (5)第2章AIX系统管理日常工作(LV篇) (6)2.1 IBM AIX系统管理的日常工作 (6)2.1.1 开关机步骤 (6)2.1.2 用户组及用户管理 (6)2.1.3 文件系统维护 (6)2.1.4 系统日常管理 (7)2.1.5 系统备份 (7)2.1.6 定时清洗磁带机 (7)2.1.7 定时检查设备指示灯状态 (7)2.1.8 简单故障的判断 (7)2.1.9 熟悉ibm aix操作系统 (7)2.2 关于IBM AIX的逻辑卷管理 (7)2.3 LVM命令 (8)第3章AIX系统管理日常工作(关键参数检查篇) (10)3.1 AIO参数检查 (10)3.2 磁盘阵列QUEUE_DEPTH参数检查 (11)3.3 用户参数检查 (11)3.4 激活SSA F AST-W RITE C ACHE (12)3.5 IO参数设置 (12)3.6 SYNCD DAEMON的数据刷新频率 (12)3.7 检查系统硬盘的镜像 (12)第4章AIX系统管理日常工作(性能分析篇) (13)4.1 性能瓶颈定义 (13)4.2 性能围 (14)第5章AIX系统管理日常工作(SHUTDOWN篇) (14)5.1 概念 (14)5.2 关机命令 (14)第6章AIX系统管理日常工作(备份与恢复篇) (15)6.1 用SMIT备份 (15)6.2 手工备份 (15)6.3 恢复系统 (15)第7章HACMP的双机系统的管理和维护 (15)7.1 HACMP双机系统的启动 (15)7.2 HACMP双机系统的关闭 (16)7.3 察看双机系统的当前状态 (16)7.4 HACMP环境下的排错 (17)7.4.1 了解问题的存在 (17)7.4.2 判断问题的出处 (18)第1章AIX系统管理日常工作(检查篇)1.1常用的命令1.2语法介绍1.2.1vmstat:检查存、CPU、进程状态# vmstat 1 15kthr memory page faultscpu----- ----------- ------------------------------------ -----------r b avm fre re pi po fr sr cy in sy csus sy id wa1 0 28132 81277 0 0 0 0 0 0 132 375 67 65 1 342 0 28132 81277 0 0 0 0 0 0 127 338 131 99 0 02 0 28132 81277 0 0 0 0 0 0 132 316 131 99 0 02 0 28132 81277 0 0 0 0 0 0 120 317 99 0 0 02 0 28132 81277 0 0 0 0 0 0 146 316 127 99 0 02 0 28132 81277 0 0 0 0 0 0 130 317 125 99 0 02 0 28132 81277 0 0 0 0 0 0 316 127 99 0 0 02 0 28132 81277 0 0 0 0 0 0 129 317 124 99 0 02 0 28132 81277 0 0 0 0 0 0 304 127 99 0 0 0r:正在运行的进程b:被阻挡的进程avm:活动的虚存,单位4kbfre:自由列表,位4kbpo:页换出pi:页换入sy:系统占用CPUid:空闲CPUwa:等待的CPU1.2.2sar:检查CPU、IO例如:sar -u 1 30sar -P ALL 1 10语法:sar -[abckmqruvwyA] inteval repetition-b buffer 活动-c 系统调用-k 核进程统计.-m 消息及信号量活动-q 正在运行的队列数及等待队列数-r 页交换统计-u CPU利用-P CPU负载.1.2.3 PS:检查进程状态命令ps:显示当前SHELL重所有进程ps -ef :显示系统中所有进程,-f显示更详细信息ps -u oracle:显示oracle用户进程ps –emo THREAD:显示线程信息ps au;ps vg:按使用时间显示进程(最近一次调用)ps aux:按使用时间显示进程(进程启动)1.2.4 svmon:显示进程占用存svmon –G:显示系统占用存svmon -C command_name:显示某个用户进程占用存svmon -P pid显示某个进程占用存svmon –S:显示段占用存1.2.5iostat:显示磁盘IOtty: tin tout avg-cpu: % user % sys % idle %iowait0.0 4.0 0.9 1.3 95.4 2.5Disks: % tm_act Kbps tps Kb_read Kb_wrtnhdisk0 58.4 218.3 41.2 172 920hdisk1 16.8 85.6 21.4 428 0hdisk2 50.6 223.9 55.6 1100 20hdisk3 16.8 85.6 21.4 428 0hdisk4 0.0 0.0 0.0 0 0hdisk5 43.4 279.1 69.8 1396 0hdisk6 0.0 0.0 0.0 0 0hdisk7 16.4 27.2 20.2 0 136hdisk8 0.0 0.0 0.0 0 0hdisk9 9.4 156.0 11.4 0 780hdisk10 16.4 27.2 20.2 0 136cd0 0.0 0.0 0.0 0 01.2.6n etstat, entstat:显示网卡信息netstat en0:显示en0信息netstat –s:显示网络信息netstat -m显示网络 buffers.netstat -i显示网卡状态netstat -I en0 1显示eno网卡塞(1秒间隔)1.2.7n o:显示tcpip参数设置no –a:显示tcpip所有参数当前设置no -o tcp_keepalivetime=7200000设置tcp_keepalivetime等于3600000秒no -d 恢复默认值注:该方法在重启后失效1.2.8其它命令第2章AIX系统管理日常工作(LV篇)2.1IBM AIX系统管理的日常工作系统管理员对小型机系统的正确管理是系统稳定运行的保障,作为系统管理员应注意以下几个方面:2.1.1开关机步骤在系统管理员控制下进行正确的操作。
第2章IBMXIV存储系列方案概述
IBM XIV存储系统方案建议书目录第1章客户需求概述 (1)1.1 为什么您需要XIV存储系列产品 (1)1.2 XIV存储方案简述 (1)1.3 XIV存储系统价值 (1)1.4 XIV存储系统优势 (2)第2章IBM XIV存储系列方案概述 (3)第3章为什么选择IBM (6)第1章客户需求概述1.1为什么您需要XIV存储系列产品在当前信息瞬息万变的商业环境下,如何有效地利用信息已经成为一个具挑战性的任务。
信息变化如此之快,信息量如此之大,企业所面对的问题不仅仅是如何进行有效的信息交互,更重要的问题是IT系统可能会变成您业务发展的障碍。
为了防患于未然,就需要为企业提供完善的IT基础架构,以满足日益增长的业务需求。
IBM公司提供的XIV系列存储解决方案帮助您实现业务目标。
该方案帮助您管理信息,使信息像其他业务资产一样有效地增长。
这是一个开放的,具有很好兼容性的存储解决方案。
该存储解决方案不仅能帮助您解决现在的问题,并能满足未来业务增长的需求。
它还可以满足顺序读写操作的需求,减少开销及资源浪费,同时减少在管理跨多种操作系统平台的企业系统和信息孤岛时的众多难题。
1.2XIV存储方案简述IBM XIV 系统基于SATA 磁盘,运用了一种独特的并行架构及缓存算法,不但消除了热点,其性能水平也远远超出那些基于 FC 的磁盘系统。
IBM XIV® 存储系统是一款创新的高端开放式磁盘存储系统。
通过创新的冗余配置,能够以超快的重建时间实现自动化自修复,从而提供卓越的可用性与可靠性。
此外,包括快照功能、自动精简配置与远程镜像在内的软件功能帮助进一步简化配置,保护业务数据以防意外中断。
IBM XIV 存储系统能够帮助客户部署可靠、多用途、可用的信息基础结构,同时可提升存储管理、配置,以及改进的资产利用率。
作为 IBM 全系列系统存储与 SAN 产品的一部分,XIV 存储系统是一款创新的、基于一系列的标准化现成硬件组件的企业级磁盘系统。
IBM 系统存储 XIV 系统产品说明说明书

I B M X I V®S t o r a g e S y s t e m Performance ReinventedW h i t e P a p e rSeptember 2008Copyright IBM Corporation 2008IBM, the IBM logo, , System Storage, XIV, and the XIV logo are trademarks or registered trademarks of International Business Machines Corporation in the United States, other countries, or both These and other IBM trademarked terms are marked on their first occurrence in this information with the appropriate symbol (® or ™), indicating US registered or common law trademarks owned by IBM at the time this information was published. Such trademarks may also be registered or common law trademarks in other countries. A current list of IBM trademarks is available on the Web at /legal/copytrade.shtml .Other company, product, or service names may be trademarks or service marks of others.This document could include technical inaccuracies or typographical errors. IBM may not offer the products, services or features discussed in this document in other countries, and the product information may be subject to change without notice. Consult your local IBM business contact for information on the product or services available in your area. Any statements regarding IBM’s future direction and intent are subject to change or withdrawal without notice, and represent goals and objectives only. The information contained in this document is current as of the initial date of publication only and is subject to change without notice. All performance information was determined in a controlled environment. Actual results may vary. Performance information is provided “AS IS” and no warranties or guarantees are expressed or implied by IBM. Information concerning non-IBM products was obtained from the suppliers of their products, their published announcements or other publicly available sources. Questions on the capabilities of the non-IBM products should be addressed with the suppliers. IBM does not warrant that the information offered herein will meet your requirements or those of your distributors or customers. IBM provides this information “AS IS” without warranty. IBM disclaims all warranties, express or implied, including the implied warranties of noninfringement, merchantability and fitness for a particular purpose or noninfringement. IBM products are warranted according to the terms and conditions of the agreements under which they are provided.*******************ContentsIntroduction (1)The XIV System: Architecture and Performance (1)Optimal Exploitation of All System Resources (1)Integrating Cache and Disk in Each Module (2)Huge CPU Power (2)High Performance without Management Effort (2)High Performance with Snapshots (2)Disk Mirroring vs. Parity-based Protection (3)Maintaining Performance Consistency through Failures (5)Traditional storage: Degradation during the Rebuild Process (5)Traditional storage: Degradation Due to Write-through Mode (5)The XIV System: Performance in the Field (6)Scenario #1: Write-intensive Database (6)Scenario #2: E-mail Appliances (6)Scenario #3: Voice-recording Application (7)Scenario #4: E-mail Server (7)Summary (7)IntroductionOne of the major requirements of any SAN administration team is to provide users and applications with adequate performance levels. This task becomes increasingly difficult with demands for high performance growing while budgets for storage systems, administration efforts, and power consumption are diminishing.This document describes how the IBM® XIV™ Storage System provides an outstanding and in many ways unprecedented solution to today's performance requirements. It does so by achieving the following:►Providing high performance through a massively parallelized architecture, optimal exploitation of all system components (including disks, CPUs, andswitches), and an innovative cache design.►Ensuring that performance levels are kept intact when adding storage capacity, adding volumes, deleting volumes, or resizing volumes.►Guaranteeing the same performance level, even throughout variations of the applications' access patterns►Providing high performance without any planning or administration efforts►Providing consistent performance levels even through hardware failures►Maintaining high performance even while using snapshotsThe XIV System: Architecture and Performance Optimal Exploitation of All System ResourcesEach logical volume in the XIV system is divided into multiple stripes of one megabyte. These stripes are spread over all the disks in the system, using a sophisticated pseudo-random distribution mechanism.This revolutionary approach ensures that:►All disks and modules are utilized equally, regardless of access patterns.Despite the fact that applications may access certain volumes more frequently than other volumes or access certain parts of a volume more frequently than other parts, the load on the disks and modules remains balanced perfectly.►Pseudo-random distribution ensures consistent load balancing even after adding, deleting, or resizing volumes, as well as after adding or removinghardwareIntegrating Cache and Disk in Each ModuleUnlike traditional storage systems, the XIV system’s design embeds the read/write cache in the same hardware module as the disks. This unique design aspect has several advantages:►Distributed Cache. The cache is implemented as a distributed cache, so that all cache units can concurrently serve host I/Os and perform cache-to-disk I/O. This ensures that cache never becomes a bottleneck. In contrast, traditional storage systems use a central memory architecture, which has significant overhead due to memory locking.►High Cache-to-Disk Bandwidth. Aggressive prefetching is enabled by the fact that cache-to-disk bandwidth is the internal bandwidth of a module, providingdozens of gigabytes per second for the whole system.►Powerful Cache Management. Its unique cache design enables the XIV system to read a large cache slot per each disk read, while managing least-recently-used statistics in small cache slots. This unique combination is made possible by the system’s huge processing power and high cache-to-disk bandwidth.Huge CPU PowerEach data module has its own quad-core processor, giving the XIV system dozens of CPU cores. The system uses this vast processing power to execute advanced caching algorithms that support small cache slots, enable powerful snapshot performance, and so on. The massive CPU power ensures high performance through high cache-hit rates and minimal snapshot overhead.High Performance without Management EffortUnlike other storage systems, the XIV system is fully virtualized. The user has no control over the allocation of volumes to physical drives. As a result, the XIV system's high performance is gained with no planning efforts. The user does not have to allocate volumes to specific disk drives or shelves, nor is there a need to reconsider these decisions when new volumes are required, new hardware is added, or application access patterns change.Instead, the XIV system always ensures optimal utilization of all resources in a way that is transparent to the hosts and storage administration team.High Performance with SnapshotsMany storage systems can provide the required performance levels as long as snapshots are not defined. This is because snapshot functionality was added to these systems long after their initial design. As soon as snapshots are defined, performance levels in many cases degrade to unacceptable levels. Some systems solve this problem by using full copies instead of differential snapshots.The XIV system has been designed from inception to support snapshots. Its combination of innovative replication algorithms and massive CPU and cache power keep the impact of snapshots on performance to a minimum. Specifically, it achieves this as follows:►The traditional copy-on-write technique is replaced by the more efficient redirect-on-write technique, eliminating unnecessary copies►Redirect-on-write is always performed within the same module where data is being copied between disks. This architecture provides a huge performanceboost compared with the traditional method of copying between modules.►Snapshot write overhead does not depend on the number of snapshots or volume size►Zero read overhead for volumes and snapshots►Zero overhead when writing in unformatted areasDisk Mirroring vs. Parity-based ProtectionToday’s storage administrators face the dilemma of deciding which protection scheme to choose for their data: mirroring or parity-based. The XIV system uses mirroring protection, in which each piece of data is written on two disks. When comparing the XIV system to other systems, keep in mind that the propose configurations of other systems often involve RAID-5 or even RAID-6 protections, which create several performance problems:►Each host write translates into two disk writes and two disk reads (or even three writes and three reads in RAID-6) compared to two disk writes in mirroring.►RAID-5/6-based rebuild time is much longer, hence extending the time of reduced performance due to disk rebuild whenever a disk fails.►With RAID-5/6, upon a rebuild, each read request to the failed area is served through multiple reads and computing an XOR, creating a huge performanceoverhead.The XIV system architecture is shown in the following diagram:Figure 1: XIV ArchitectureMaintaining Performance Consistency through FailuresIn many storage systems, even those considered tier-1, performance levels can degrade significantly upon a hardware failure. This is unacceptable in today's world, since a reduction in performance levels means, in many cases, downtime for the applications.This section shows how traditional architectures create performance degradation due to hardware problems and how the XIV system solves this problem.Traditional storage: Degradation during the Rebuild ProcessThe current, traditional storage implementation of redundancy involves a redundant disk group, either mirrored pairs of disks or RAID-5 disk groups. Each such group has a hot spare disk, which is used to rebuild the redundancy upon a failure.The enormous increase in disk capacity in recent years has not, unfortunately, been matched by an increase in disk bandwidth. As a result, disk rebuild time has increased to several hours, to as many as 15, depending on disk size and protection scheme. During this time, the system suffers from severe performance degradation due to the heavy I/O requirement of the rebuild process. Some systems offer a way to limit the resources allocated for a rebuild, thus ensuring more system performance, but wind up increasing rebuild time, thereby increasing exposure to double failure.The XIV system's disk failure protection scheme enables a distributed rebuild mechanism in which all disks participate. This ensures an extremely short rebuild time, 30 minutes for a 1 TB drive. Furthermore, the overhead of the rebuild process is minimal, since all disks participate in the rebuild and each disk only needs to rebuild a small portion. This ensures that performance levels at rebuild time remain intact. Another problem with a RAID-5 or RAID-6-based rebuild is that until the rebuild process is over, each request to read data from the failed disk must be served via multiple reads from all the disk groups and computing XOR. This creates a huge performance impact on serving read requests. The XIV system's mirrored protection ensures that even while a rebuild is in progress, read requests are served without any overhead.Traditional storage: Degradation Due to Write-through ModeModern redundant storage architectures require that each write command be written in two cache units before the host is acknowledged. Otherwise, a single failure in the cache module would create data loss. Furthermore, they require redundant protection of power supply to these cache units.Unfortunately, many storage architectures cannot guarantee protected cache after certain types of failures. A typical example is the failure of a cache module, which leaves the peer cache module exposed to a single failure. Another example is the failure of a UPS module, which makes the system vulnerable to power failures.The common solution to this problem is to use write-through mode, in which a host is acknowledged only after the information has been written to two disks and without using write-cache. This mode has a severe impact on performance and usually means a slowdown or stoppage of service to the application host. Unfortunately, it takes a technician’s visit to overcome such a problem.With the XIV system, write-through mode is never used. Even after the failure of a UPS unit or module, a write request is written to a cache in two different modules. The XIV System: Performance in the FieldThe performance of the XIV system has been proven in the field, demonstrating dramatic increases in comparison to other tier-1 storage systems. Several examples are given below.Scenario #1: Write-intensive DatabaseA leading bank was trying to contend with a performance-demanding application based on a 7 TB Oracle database with an extremely write-intensive I/O. The application practically failed when running on a leading tier-1 storage system. When migrated to another tier-1 storage system, equipped with 240 FC 146 GB 15K ROM drives, the application managed to provide an adequate performance level, but no more. Snapshots were not possible without compromising performance to unacceptable levels; as a result, backup procedures were complex and limited. Migrating the application to the XIV system gave the customer a dramatic increase in performance (for example, queries could now be performed in one-third of the time), while enabling the ongoing use of 28 differential snapshots. The gains were many: a much better response time to users, simplified physical backup procedures, and 28 levels of logical backup snapshots.Scenario #2: E-mail AppliancesTwo leading ISPs compared the XIV system against a well-known tier-1 system running POP e-mail storage for a group of e-mail appliances. The existing system required an independent interface card per each e-mail appliance, making the solution much more expensive and complex.The XIV system was able to handle five e-mail appliances on a single interface port, with no degradation in performance.Scenario #3: Voice-recording ApplicationA world leader in voice recording systems compared the XIV system with a system made up entirely of 146GB 15K RPM FC drives. The customer found that, with the XIV system, the same set of servers could support three times more clients (12,000 instead of 4,000), consequently reducing the total cost of the solution by an order of magnitude.Scenario #4: E-mail ServerA leading telecom company tested Microsoft® Exchange server performance on various storage systems and saw a striking gap between XIV and another leading tier-1 system. After sharing this information with that vendor’s top support engineers, the customer was told that since the Exchange metadata was spanned across only 18 disk drives, performance was limited. The customer asked the vendor to lay out the volume on more disk drives. The response was that doing so was technically impossible. This example illustrates how XIV’s ease of management provided real life high performance, while other vendors did not manage to exploit the full power of the physical components due to management limitations.SummaryAs presented above, the XIV system provides:►Unmatched performance levels, setting a new standard for SAN storage►High performance levels without manual planning or a configuration process►High performance levels that are consistently maintained, even upon hardware failure►Industry breakthrough: snapshots with high performance。
IBM N Series 快速维护手册 v1.3
IBM N Series快速维护手册V1.3目录版本历史: (3)IBM官方服务文档内容介绍: (4)1.NAS 产品系列、型号与对应关系。
(7)2.NAS安装所涉及的内容 (8)2.1.Filer的安装 (8)2.2.Gateway的安装 (8)3.NAS 的访问管理方式 (9)3.1.对NAS进行管理,可以通过以下的六种方式,常用的是Fileview , Telnet , SSH 。
93.2.Console 连接: (9)3.3.Filerview 是NetApp 提供的图形管理接口,可以方便地实现对NetApp 的存储设备的管理。
(9)3.4.命令行(CLI ) (10)3.5.SSH ( 利用RLM进行管理): (10)3.6.NAS下的文件编辑功能 (11)3.7.缺省设置 (11)4.NAS故障数据的格式和上传方法 (12)4.1.Auto Supprt的介绍 (12)4.2.如何force生成新的autosupport (12)4.3.如何收取ASUP、Messages等日志 (12)4.4.Core files 介绍 (13)4.5.如何检查系统panic 的信息 (13)5.如何给NAS升级微码 (15)6.NAS日常监控 (16)6.1.首先进行指示灯和LCD 面板检查,判断是否有异常情况发生 (16)6.2.硬件状态检测: (16)6.3.检测网络是否正常: (16)6.4.检查cluster 状态是否正常: (16)6.5.检查卷的容量: (16)6.6.性能检查: (16)6.7.日志文件检查: (16)6.8.收集autosupport 信息: (16)7.NAS 常见问题 (17)7.1.关于FCP Port是用于连接扩展盘柜还是Host ? (17)7.2.使用FCP时光纤的连接方式及Filer该如何设置? (18)7.3.创建Qtree时Security Style的设置有何考虑? (20)7.4.关于Logical Configuration时Performance有何考虑? (20)7.5.使用fcadmin config无法将target模式的adapter Online (21)7.6.IBM N5000 Hardware and Service中更换NVRAM5 Adapter步骤有错 (21)7.7.无法使用HTTP访问FilerView管理界面。
- 1、下载文档前请自行甄别文档内容的完整性,平台不提供额外的编辑、内容补充、找答案等附加服务。
- 2、"仅部分预览"的文档,不可在线预览部分如存在完整性等问题,可反馈申请退款(可完整预览的文档不适用该条件!)。
- 3、如文档侵犯您的权益,请联系客服反馈,我们会尽快为您处理(人工客服工作时间:9:00-18:30)。
IBM XIV系列存储快速维护手册目录一、XIV的基本架构和组成: (3)二、XIV的基本管理: (5)三、XIV的安装环境要求: (6)四、XIV安装上电 (8)五、如何升级XIV的微码 (11)六、如何收集XIV的System Data(XRAY) (11)七、如何通过GUI更换单个的DDM (15)八、如何通过GUI更换一个模块(Interface Module 或Data Module) (20)附录A:参考文档: (25)一、XIV的基本架构和组成:IBM的XIV系统存储2810-A14,提供了高性能、可扩展性、易于管理功能。
同时采用了SATA磁盘,更加降低了单位容量的成本。
XIV存储主要包括以下组成部分:1.6个主机系统接口模块(Interface Module),它提供FC以及iSCSI接口,同时每个模块包括了12块1TB的SATA硬盘。
2.9个数据模块(Data Module),每个模块包括了12块1TB的SATA硬盘。
3.3组不间断电源模块(UPS),提供掉电保护功能。
4.2个以太网交换机,提供模块间的数据交换功能。
5.一个维护模块(Maintenance Module)6.一个自动电源分配管理模块(ATS),管理外部输入电源的冗余。
7.一个Modem,连接到维护模块,提供CallHome和远程维护。
除此之外,为了方便和外部系统相连接,XIV将所有要和外部相连接的端口都集中到了一个叫Patch Panel的模块。
Patch Panel位于机柜后面右上角。
具体的端口定义如下图。
二、XIV的基本管理:XIV主要是通过XIV Storage Manager GUI进行管理的。
通过GUI完成以下的管理功能:1.XIV硬件的维护和备件的更换2.XIV存储容量的逻辑划分3.XIV和主机系统连接的配置管理4.系统性能的检测5.系统快照、拷贝、远程拷贝、数据迁移功能的管理除此之外XIV还提供了命令行方式的管理XCLI,所有能在GUI中完成的功能也都够通过XCLI完成。
XCLI软件包是和GUI一起安装的。
如果没有安装GUI,也可以单独安装XCLI。
以下是GUI的界面:三、XIV的安装环境要求:1.电源要求:XIV使用双路单项电源,180-264VAC,50/60Hz,最大电流60A。
2.环境温度要求:发热量:15Module:26K BTU/小时;6Module:10.5K BTU/小时。
空气循环:冷却风从前面进入机柜,从机柜后面排出。
空气流量:15Module:750cfm;6Module:300cfm。
运行环境:温度:10-35℃(50-95℉)相对湿度:25-80%最高海拔:2133M(7000Ft)3.物理空间和承重要求:机器尺寸:1991(高)×600(宽)×1091(深)机器重量:876KG走线方式:XIV和外部连线可以上走线和下走线。
如果是下走线,地板开口在机柜后部。
安装位置要求:4.四、XIV安装上电1. XIV电源的准备:XIV的电源配置通常有两种,一种是2路220V 60A的,一种是4路220V 30A的。
根据配置不同按照以下的安装图进行电源线的准备:电源线的线序分别如下图:2. 确认电源的零-地电压小于1V,接地电阻小于1OHM。
3. 连接电源线到相应的ATS或UPS电源接口。
4. 将ATS上的3个开关打到“ON”的位置,ATS上的绿色电源指示灯应该亮起。
5. 将3个UPS的前面板卸下。
检查UPS上的电池组的是否正确连线,在运输过程中,有一组电池会没有连线。
将其连线连好并紧固。
6. 当电池组的连线都连接好后,3个UPS前面的风扇会转起。
如果没有转,检查UPS后面的电源连线和ATS开关的状态是否在“ON”的位置。
7. 重新安装上UPS的前面板。
8. 检查3个UPS后面的输出的开关,应该在“ON”的位置。
9. 检查3个UPS后面的“Online/Bypass”开关应该设置在“Online”的位置。
10.按下3个UPS的“test”按钮。
整个XIV开始上电自检。
如果XIV正常上电自检完成就可以用lantop连接到patchpanal上module 5 laptop port通过GUI或XCLI进行逻辑安装配置了。
五、如何升级XIV的微码XIV的微码升级是通过一个“IBM-XIV Technician Assistant utility”的工具来完成的。
XIV 的微码文件、升级手册和IBM-XIV Technician Assistant utility的下载地址:https:///webapp/iwm/int/reg/pick.do?source=IIPxiv 除此之外,升级微码还需要准备putty和pscp或者WinSCP工具。
Putty的下载地址:http://the.earth.li/~sgtatham/putty/latest/x86/putty.exeWinSCP下载地址:/eng/download.php微码升级步骤根据初始微码版本和要升级的微码版本的不同,步骤不完全一样。
具体的升级步骤参考各微码版本对应的升级手册。
六、如何收集XIV的System Data(XRAY)在出现复杂的情况,不能马上找到问题时,SSR需要收集XIV的System Data提供个support 进行分析。
此System Data类似于DS8000的papkg。
在XIV里称为XRAY。
XRAY的收集是SSR通过安装有XCLI的laptop生成和收集的。
1.将laptop连接到Patch panel上的module 5 laptop port。
通常DHCP会分配给laptop 一个14.10.202.xx的地址。
如果没有分配到地址,手工将laptop的地址设成14.10.202.1。
用“ping”命令检查和14.10.202.250地址是否可以通讯。
2.在laptop的命令行执行收集程序,即运行xray_collect IP 来收集XRAY,这里的IP是直连时的IP(即14.10.202.250)。
注:如果XIV 的微码是10.1或以上的,使用xray_collect_v2.0.1.exe文件。
否者使用xray_collect.exe文件。
(xray_collect.exe 和xray_collect_v2.0.1.exe 文件在对应的微码的包里面)XRAY收集完成后会自动Offload到lantop上运行xray_collect.exe的目录下,是一个压缩包。
文件名类似system_xray_2810A147801224_2009-12-04-1441.tar.bz2。
如果Xray文件没有能够正常地offload到lantop,可以采用以下的从GUI的方式Offload。
Xray的文件可以直接上传到PFE的website。
在XIV GUI2.4.1版本开始,XIV支持用GUI的方式收集XRAY。
在GUI界面中用technician用户登录(密码是:teChn1cian),选中要收集XRAY的XIV 系统。
选择菜单中的“Help” “Support Logs…”选择选中要要download的XRAY文件和保存的目录。
七、如何通过GUI更换单个的DDM1.将laptop连接到Patch panel上的module 5 laptop port。
通常DHCP会分配给laptop 一个14.10.202.xx的地址。
如果没有分配到地址,手工将laptop的地址设成14.10.202.1。
用“ping”命令检查和14.10.202.250地址是否可以通讯。
2.在laptop上打开XIV Storage Manager GUI,输入用户名:technician,密码:teChn1cian。
(注意区分大、小写)3.进入后选择对应的XIV和要更换的DDM,点击鼠标右键,选择“Phase out -> Failed”:4.这时可以看到整个XIV的容量已经由79302GB减少到78907GB。
系统的状态也由原来的Full Redundancy变成了Redistributing。
表示系统在将数据进行重新分布,重新分布的时间取决于损坏的DDM上数据的多少。
5.这时的DDM的状态已经变成了“Failed”,Functioning是“no”。
6.将Failed的DDM拔出来,插入新的DDM。
这时在GUI上选择对应的DDM查看,Functioning状态变成了“yes”。
7.再选择对应的DDM,选择鼠标右键。
选择“Test”。
等完成后,DDM的状态会变成“Ready”8.再次在对应的DDM上选择鼠标右键,选择“Phase in”。
这时系统又开始进行“Redistributing”9.等到“Redistributing”完成,系统再次恢复到“Full Redundanc”。
系统总容量也恢复到79302GB。
更换DDM工作完成。
八、如何通过GUI更换一个模块(Interface Module 或Data Module)1.将laptop连接到Patch panel上的module 5 laptop port。
通常DHCP会分配给laptop 一个14.10.202.xx的地址。
如果没有分配到地址,手工将laptop的地址设成14.10.202.1。
用“ping”命令检查和14.10.202.250地址是否可以通讯。
2.在laptop上打开XIV Storage Manager GUI,输入用户名:technician,密码:teChn1cian。
(注意区分大、小写)3.进入后选择对应的XIV和要更换的Module,点击鼠标右键,选择“Phase out -> Failed”:4.这时可以看到整个XIV的容量已经由79302GB减少到73392GB。
系统的状态也由原来的Full Redundancy变成了Redistributing。
表示系统在将数据进行重新分布,重新分布的时间取决于损坏的Module上数据的多少。
5.等待Phase out完成,在GUI上Module由桔黄色变成红色。
这时的Module的状态已经变成了“Failed”。
6.按照Service Guide的步骤将Failed Module从机柜中取出,将新更换的Module插入机柜,并将原Module中的DDM插回新更换的Module。
这时在GUI上选择对应的Module,选择鼠标右键。
选择“Test”。
这时新Module开始Initializing。
7.等待Initializing完成后,Module的状态会变成“Ready”。
8.再次在对应的Module上选择鼠标右键,选择“Phase in”。