SmartSymbolsv10_中间文件定义V2.0
ARM汇编手册
ARM 汇编手册
版权声明
本手册为北京顶嵌开源科技有限公司内部培训资料,仅 供本公司内部学习使用,在未经本公司授权的情况下,请勿 用作任何商业用途。
400-661-5264
专注嵌入式 Linux 技术
北京顶嵌开源科技有限公司
目录
寄存器装载和存储.............................................................................................................................5 传送单一数据.............................................................................................................................5 传送多个数据.............................................................................................................................7 SWP : 单一数据交换................................................................................................................ 9
乘法指令........................................................................................................................................... 19 MLA : 带累加的乘法..............................................................................................................19 MUL : 乘法..............................................................................................................................19
解析博图数据块(昆仑通态触摸屏自动命名)
解析博图数据块(昆仑通态触摸屏自动命名)1,博图数据块的数据排列原则:数据对齐算法:•将当前地址对齐到整数:numBytes = (int)Math.Ceiling(numBytes);•将当前地址对齐到偶整数:numBytes = Math.Ceiling(numBytes);if ((numBytes / 2 - Math.Floor(numBytes / 2.0)) > 0)numBytes++;2,数据对齐的原则,如果当前的数据类型是:1.bool,则使用当前地址.2.byte,则使用对齐方式13.其他,则使用对齐方式2,即偶数对齐的方法.3,如何从地址和bool进行设定和取值,假设我们有一个byte[]数组代表整个DB,和一个浮点数代表bool的地址?•取值:int bytePos = (int)Math.Floor(numBytes);int bitPos = (int)((numBytes - (double)bytePos) / 0.125);if ((bytes[bytePos] & (int)Math.Pow(2, bitPos)) != 0)value = true;elsevalue = false;•赋值bytePos = (int)Math.Floor(numBytes);bitPos = (int)((numBytes - (double)bytePos) / 0.125);if ((bool)obj)bytes[bytePos] |= (byte)Math.Pow(2, bitPos); // is true elsebytes[bytePos] &= (byte)(~(byte)Math.Pow(2, bitPos)); // isfalse思路:获取当前bit所在的字节地址.然后使用(注意位是从0开始的.位0..位15..位31.)t=t | 1<<(bitPos)来进行置位单个位. (掩码置位,使用|,所有为1的位进行置位)t=t &(~1<<(bitPos)来进行复位单个位,(掩码复位,使用 &(~掩码),则所有位1的掩码进行复位)t=t^(1<<(bitPos) 来进行异或运算(,掩码的1所在的位进行取反操作.)t=t&(1<<(bitPos))来判断某个位是否为1或为0.2,迭代解析numbytes: 迭代的plc地址itemInfos:迭代的信息存储的列表preName:迭代的名称.ElementItem:用于解析的元素.public static void DeserializeItem(ref double numBytes, List<ItemInfo> itemInfos, string preName, ElementItem item) {var PreName = (string.IsNullOrEmpty(preName)) ? "" : preName + "_";var Info = new ItemInfo() { Name = PreName + , Type = item.Type };switch (item.GetTypeInfo()){case PlcParamType.BaseType:switch (item.Type){case "Bool":Info.Addr = ParseAddr(numBytes, item);numBytes += 0.125;break;case "Char":case "Byte":numBytes = Math.Ceiling(numBytes);Info.Addr = ParseAddr(numBytes, item); numBytes++;;break;case "Int":case "UInt":case "Word":numBytes = Math.Ceiling(numBytes);if ((numBytes / 2 - Math.Floor(numBytes / 2.0)) > 0) numBytes++;Info.Addr = ParseAddr(numBytes, item); numBytes += 2;;break;case "DInt":case "UDInt":case "DWord":case "Time":case "Real":numBytes = Math.Ceiling(numBytes);if ((numBytes / 2 - Math.Floor(numBytes / 2.0)) > 0) numBytes++;Info.Addr = ParseAddr(numBytes, item); numBytes += 4;;break;default:break;}itemInfos.Add(Info);break;case PlcParamType.String:numBytes = Math.Ceiling(numBytes);if ((numBytes / 2 - Math.Floor(numBytes / 2.0)) > 0) numBytes++;//----------Info.Addr = ParseAddr(numBytes, item); numBytes += item.GetStringLength(); itemInfos.Add(Info);break;case PlcParamType.Array://------------原程序的可能是个漏洞.numBytes = Math.Ceiling(numBytes);if ((numBytes / 2 - Math.Floor(numBytes / 2.0)) > 0)numBytes++;//-------------var elementType = item.GetElementType();for (var i = 0; i < item.GetArrayLength(); i++){var element = new ElementItem() { Name = + $"[{i}]", Type = elementType };DeserializeItem(ref numBytes, itemInfos, PreName, element);}break;case PlcParamType.UDT:numBytes = Math.Ceiling(numBytes);if ((numBytes / 2 - Math.Floor(numBytes / 2.0)) > 0)numBytes++;//格式foreach (var element in item.GetElementItems(Dict)){DeserializeItem(ref numBytes, itemInfos, PreName + , element);}break;default:throw new ArgumentException("do not find type");}}思路: 如果元素的类型是基本类型:比如bool,int,time...等等,则直接生成一条ItemInfo记录如果元素的类型是数组,则获取数组的长度和获取数组的元素类型,然后进行迭代解析.如果元素是UDT类型,也就是自定义的类型.那么就迭代获取元素,并且迭代解析.----------------------所有的这一切,源于一个Dictionary<string,List<ElementItem>>对象.这个对象存储了自定义的类别的名称和其子元素比如有以下的一个DB导出文件;则可以看到其有 "step"类型元素有element1.....type为 int...还有 "Recipe"类型还有 "test1"类型还有一个DataBlock,就是这个数据库,也将它当作一个类型,其type就是"数据块_1" ,其元素就是名称类型Recipe1 Recipe(这个可以在上面找到)关键是其内部的Struct结构,对于这个结构,我们自定义生成其类型为 Name_Struct.TYPE "step"VERSION : 0.1STRUCTelement1 : Int;element2 : Int;element3 : Int;element4 : Int;element5 : Int;element6 : Int;element7 : Real;element8 : Real;element9 : Real;element10 : Real; element11 : Real; element12 : Real; element13 : Real; element14 : Bool; element15 : Bool; element16 : Int;END_STRUCT;END_TYPETYPE "Recipe"VERSION : 0.1STRUCT"Name" : String[20];steps : Array[0..29] of "step"; END_STRUCT;END_TYPETYPE "test1"VERSION : 0.1STRUCTb : Bool;END_STRUCT;END_TYPEDATA_BLOCK "数据块_1"{ S7_Optimized_Access := 'FALSE' } VERSION : 0.1NON_RETAINSTRUCTRecipe1 : "Recipe";AAA : "Recipe";aa : String;adef : Structa : Bool;b : Bool;c : Int;bool1 : Bool;bool2 : Bool;ffff : Structttt : Bool;aaa : Bool;fff : Bool;eefg : Bool;END_STRUCT;afe : Bool;aaaaaaa : "test1";x1 : "test1";x2 : "test1";x3 : Array[0..1] of Byte;abcef : Array[0..10] of Structaef : StructStatic_1 : Bool;Static_2 : Bool;END_STRUCT;eef : Bool;affe : Bool;END_STRUCT;END_STRUCT;END_STRUCT;BEGINRecipe1.steps[29].element14 := FALSE;END_DATA_BLOCK3,从db文件中读取类信息.//从db文件中读取类信息,并且放入到Dict之中,同时填充MainBlock信息,如果有的话.public static void GetTypeFromFile(Dictionary<string, List<ElementItem>> Dict, string path, out ElementItem MainBlock){MainBlock = new ElementItem();//生成Block对象.using (Stream st = new FileStream(path, FileMode.Open))//读取文本文件DB块中的数据.{StreamReader reader = new StreamReader(st);List<ElementItem> list;while (!reader.EndOfStream){string line = reader.ReadLine();//读取一行数据进行判断switch(GetReaderLineTYPE(line))//通过解析函数解析这一行的数据是什么类型.{case "TYPE"://如果是类型对应 db文件里面 TYPE xxxx 的格式list = new List<ElementItem>();//则创建一个列表准备容纳该TYPE的ELementItem,也就是元素集.string tn = GetReaderLineName(line);//解析type行的名称.也就是该type的名称.GetElementsFromReader(reader, list, tn, Dict);//然后调用函数进行将元素放入列表,最后哪个Dictionary参数用于接受内联Struct类型.Dict[tn] = list;//将该类型在字典中生成名值对,也就是Type名称,List<elementItem>作为值.break;case "DATA_BLOCK":MainBlock = new ElementItem();string bn = GetReaderLineName(line); = bn;MainBlock.Type = bn;list = new List<ElementItem>();GetElementsFromReader(reader, list, bn, Dict);//如果是DB块,则填充Main Block(备用),剩下的根上面一样).Dict[bn] = list;break;default:break;}}}}4, 辅助的读取迭代函数,实现的关键...public static void GetElementsFromReader(StreamReader reader, List<ElementItem> list, string type_name, Dictionary<string, List<ElementItem>> Dict){ElementItem item;Tuple<string, string> tp;while (!reader.EndOfStream){string line = reader.ReadLine();//首先,其必须是一个解析Type 或者DataBlock的过程,因为只有这两处调用它.switch (GetReaderLineTYPE(line))//解析每行的类别.{case"ELEMENT"://当解析到该行是元素的时候.就将该行加入到列表中.item = new ElementItem();tp = GetElementInfo(line); = tp.Item1;item.Type = tp.Item2;list.Add(item);break;case"StructELEMENT"://当解析到该行是Struct时,也就是元素类型时Struct的时候,item = new ElementItem();tp = GetElementInfo(line); = tp.Item1;item.Type = tp.Item2.Remove(stIndexOf("Struct"));//由于Array Struct的存在,将该元素类型从....Struct//替换为 .... elementName_Structitem.Type = item.Type + type_name + "_" + + "_" + "Struct";//string structType = type_name + "_" + + "_" + "Struct";//该名称为其新的类别.list.Add(item);//首先将该元素加入列表.List<ElementItem> sub = new List<ElementItem>();//将该子类别(我们自定义的类别,添加到字典中.GetElementsFromReader(reader, sub, structType, Dict);Dict[structType] = sub;break;case "END_STRUCT"://当接受到这个时,表明一个Type或者一个DataBlock的解析工作结束了,返回上层对象.return;default:break;}}}5,工具函数1,用于帮助判断DB文件每行的信息.private static Tuple<string, string> GetElementInfo(string line){if(!GetReaderLineTYPE(line).Contains("ELEMENT")) throw new Exception("this line is not element " + line);int pos = line.IndexOf(" : ");string Name = line.Remove(pos).Trim(' ', ';');var t = Name.IndexOf(' ');if (t > 0)Name = Name.Remove(t);string Type = line.Substring(pos + 3).Trim(' ', ';');if(Type.Contains(":=")) Type = Type.Remove(Type.IndexOf(" :="));return new Tuple<string, string>(Name, Type);}private static string GetReaderLineName(string line){if((GetReaderLineTYPE(line) != "TYPE") && (GetReaderLineTYPE(line) != "DATA_BLOCK")) throw new Exception("not read name of " + line);return line.Substring(line.IndexOf(' ')).Trim(' ');}private static string GetReaderLineTYPE(string line){//Console.WriteLine(line);if (line.Contains("TYPE ")) return "TYPE";if (line.Contains("DATA_BLOCK ")) return "DATA_BLOCK";if (line.Contains("END_STRUCT;")) return "END_STRUCT";if (line.Trim(' ') == "STRUCT") return "STRUCT";if (line.EndsWith("Struct")) return "StructELEMENT";if ((line.EndsWith(";"))) return "ELEMENT";return null;}6,从之前生成的字典和MainDataBlock中生成 List<Item Infos>也就是展开DB块信息.public static void DeserializeItem(ref double numBytes, List<ItemInfo> itemInfos, string preName, ElementItem item) {var PreName = (string.IsNullOrEmpty(preName)) ? "" : preName + "_";//如果前导名称不为空,则添加到展开的名称上去.//这里是个bug,最后将这行放到string生成,或者BaseType生成上,因为会出现多次_var Info = new ItemInfo() { Name = PreName + , Type = item.Type };switch (item.GetTypeInfo())//解析这个元素的类别{case PlcParamType.BaseType://基类直接添加.switch (item.Type){case "Bool":Info.Addr = ParseAddr(numBytes, item);numBytes += 0.125;break;case "Char":case "Byte":numBytes = Math.Ceiling(numBytes);Info.Addr = ParseAddr(numBytes, item); numBytes++;;break;case "Int":case "UInt":case "Word":numBytes = Math.Ceiling(numBytes);if ((numBytes / 2 - Math.Floor(numBytes / 2.0)) > 0) numBytes++;Info.Addr = ParseAddr(numBytes, item); numBytes += 2;;break;case "DInt":case "UDInt":case "DWord":case "Time":case "Real":numBytes = Math.Ceiling(numBytes);if ((numBytes / 2 - Math.Floor(numBytes / 2.0)) > 0) numBytes++;Info.Addr = ParseAddr(numBytes, item); numBytes += 4;;break;default:break;}itemInfos.Add(Info);break;case PlcParamType.String://string类型.直接添加numBytes = Math.Ceiling(numBytes);if ((numBytes / 2 - Math.Floor(numBytes / 2.0)) > 0)numBytes++;//----------Info.Addr = ParseAddr(numBytes, item);numBytes += item.GetStringLength();//如果是string,则加256,否则加 xxx+2;itemInfos.Add(Info);break;case PlcParamType.Array://数组则进行分解,再迭代.//------------原程序的可能是个漏洞.numBytes = Math.Ceiling(numBytes);if ((numBytes / 2 - Math.Floor(numBytes / 2.0)) > 0)numBytes++;//-------------var elementType = item.GetElementType();for (var i = 0; i < item.GetArrayLength(); i++){var element = new ElementItem() { Name = + $"[{i}]", Type = elementType };DeserializeItem(ref numBytes, itemInfos, PreName, element);}break;case PlcParamType.UDT://PLC类型,进行分解后迭代.numBytes = Math.Ceiling(numBytes);if ((numBytes / 2 - Math.Floor(numBytes / 2.0)) > 0)numBytes++;//格式foreach (var element in item.GetElementItems(Dict)){DeserializeItem(ref numBytes, itemInfos, PreName + , element);}break;default:throw new ArgumentException("do not find type");}}注意,每条信息组成:(spublic class ItemInfo{public ItemInfo()}public string Name { get; set; }//element的名称public string Type { get; set; }//element的类别(基类别,比如字符串,byte,bool之类.public object Addr { get; internal set; }//地址;比如dbx0.0之类.//综合就是给出 PLC变量名 PLC变量类型 PLC变量地址的一个列表.}7,功能扩展,支持多个db文件的解析操作// MainFunction to read message from dbs.//迭代解析多个db文件.public static void GetDBInfosFromFiles(string path, Dictionary<string, List<ElementItem>> Dict, Dictionary<string, List<ItemInfo>> DataBlocks){DirectoryInfo dir = new DirectoryInfo(path);FileInfo[] files = dir.GetFiles("*.db");List<ElementItem> blocks = new List<ElementItem>();foreach (var file in files)//将每个文件的db块加入到 db数组中,再将解析的TYPE都加入到字典中.{ElementItem MainBlock;GetTypeFromFile(Dict, file.FullName, out MainBlock);if (MainBlock != null){ = .Remove(.IndexOf('.'));blocks.Add(MainBlock);}foreach (var block in blocks)//然后迭代解析每个DB块的信息,将求加入到第二个字典中.{double numBytes = 0.0;List<ItemInfo> itemInfos = new List<ItemInfo>();DeserializeItem(ref numBytes, itemInfos, "", block);DataBlocks[] = itemInfos;}}8,使用CSVHELPER类从昆仑通态导出的文件中来读取信息public static MacInfos[] GetCSVInfosFromFile(string path,string[] infos){//用csvhelper类读取数据:注意,必须用这个方法读取,否则是乱码!using(var reader = new StreamReader(path, Encoding.GetEncoding("GB2312"))){using(var csv = new CsvReader(reader, CultureInfo.InvariantCulture)){//读取4行无效信息.............csv.Read();infos[0] = csv.GetField(0);csv.Read();infos[1] = csv.GetField(0);csv.Read();infos[2] = csv.GetField(0);csv.Read();infos[3] = csv.GetField(0);//读取所有的数据放入一个数组中.标准用法.var records = csv.GetRecords<MacInfos>().ToArray();return records;}}}9,将CSV文件的变量名进行填充,即将Dict之中的变量名填充到CSV的变量名之中.//用于将填充完的信息数组反写回csv文件.public static void WriteIntoCSVOfMAC(string path){string csvpath = FindFiles(path, "*.csv").First();//找到csv文件.string[] strinfos = new string[4];//填充无效信息的4行MacInfos[] macInfos = GetCSVInfosFromFile(csvpath,strinfos);//获取MacInfos数组和无效信息字符串数组.foreach(var key in DBInfos.Keys)//轮询每个DB块.{var infos = (from info in macInfoswhere GetDBFromMacInfo(info) == key.Remove(key.IndexOf('_'))select info).ToArray();//将找到的Macinfo中再去查找对应的DB 块的Macinfos[]数组.WriteDBToMacInfos(key, infos);//然后将对应的db块的信息,(找到其中的元素的名称,一一写入对应infos的变量名之中.}//填充完所有的Macinfos数组后,将这个数组反写回CSV文件.using (var writer = new StreamWriter(new FileStream(csvpath, FileMode.Open), Encoding.GetEncoding("GB2312")))using(var csv = new CsvWriter(writer, CultureInfo.InvariantCulture)){//将原来的无效信息反填充回去.csv.WriteField(strinfos[0]);csv.NextRecord();//转移到下一行.去读写数据.csv.WriteField(strinfos[1]);csv.NextRecord();csv.WriteField(strinfos[2]);csv.NextRecord();csv.WriteField(strinfos[3]);csv.NextRecord();//然后填充数组.csv.WriteRecords(macInfos);}}10,结论:1,在使用的时候,首先导出DB块的块生成源,2,然后将所有的*.db文件们放入c:\macfile文件夹之中.3,使用昆仑通态软件导入标签功能,导入db块和导入utc块,将变量导入到软件中,这个时候,变量名一栏是空的.4,使用导出设备信息,将导出一个csv文件.5,运行小软件.结束.附上Git地址和我的邮箱地址,有喜欢工控软件开发的多多沟通交流.。
Symbol 移动计算系统MC 50 说明书
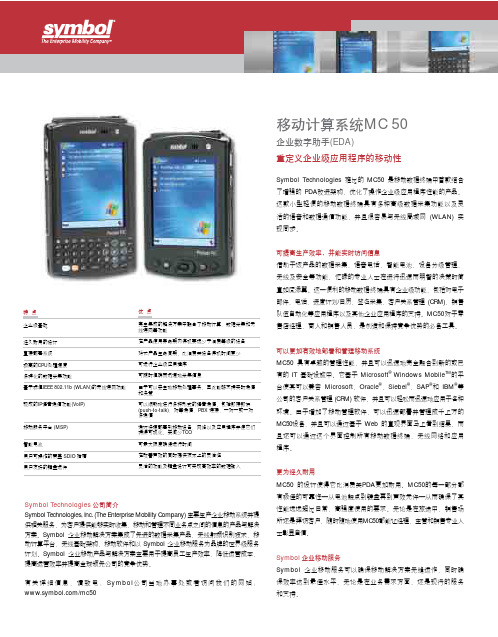
移动计算系统MC 50重定义企业级应用程序的移动性企业数字助手(EDA)Symbol T echnologies 推出的 MC50 是移动数据终端中首款结合了增强的 PDA 改进架构,优化了操作企业级应用程序性能的产品。
这款小型轻便的移动数据终端具有多种高级数据采集功能以及灵活的语音和数据通信功能,并且很容易与无线局域网 (WLAN) 实现同步。
可提高生产效率,并能实时访问信息借助于该产品的数据采集、语音电话、智能电池、设备分级管理、无线及安全等功能,忙碌的专业人士在进行迅速而明智的决策时简直如虎添翼。
这一便利的移动数据终端具有企业级功能,包括对电子邮件、电话、进度计划/日历、签名采集、客户关系管理 (CRM)、销售队伍自动化等应用程序以及其他企业应用程序的支持。
MC50对于零售店经理、商人和销售人员,是创造和保持竞争优势的必备工具。
可以更加有效地部署和管理移动系统MC50 具有卓越的管理性能,并且可以迅速地完全融合到新的或已有的 IT 基础设施中。
它基于 Microsoft ® Windows Mobile TM 的平台使其可以兼容 Microsoft ,Oracle ®、Siebel ®、SAP ®和 IBM ®等公司的客户关系管理 (CRM) 软件,并且可以轻松而迅速地应用于各种环境。
由于增加了移动管理软件,可以迅速部署并管理成千上万的MC50设备,并且可以通过基于 Web 的直观界面马上看到结果,而且还可以通过这个界面控制所有移动数据终端、无线网络和应用程序。
更为经久耐用MC50 的设计使得它比消费类PDA 更加耐用。
MC50的每一部分都有极佳的可靠性—从电池触点到键盘再到声效元件—从而确保了其性能远远超出日常、高强度使用的要求。
无论是在旅途中、销售场所还是拜访客户,随时随地使用MC50都能让经理、主管和销售专业人士彰显自信。
Symbol 企业移动服务Symbol 企业移动服务可以确保移动解决方案无缝运作,同时确保效率达到最佳水平,无论是在业务需求方面,还是现行的服务和支持。
BG-UHD-DA1X16 HDMI V2.0 1x16 分裂器分辨率下调与AOC支持用户手册说明书
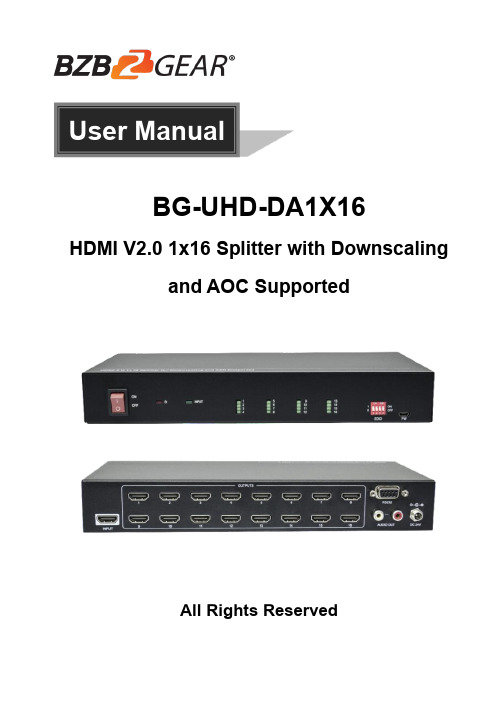
User ManualBG-UHD-DA1X16HDMI V2.0 1x16 Splitter with Downscalingand AOC SupportedAll Rights ReservedTable of Contents1. Product Introduction (1)1.1 Features (1)1.2 Package List (1)2. Specification (2)3. Panel Description (4)3.1 Front Panel (4)3.2 Rear Panel (4)4. System Connection (5)5. DIP Switch Operation (6)6. RS232 Control (7)6.1 System Commands (7)6.2 Setting Commands (8)7. Firmware Upgrade (9)8. Warranty (10)9. Mission Statement (10)1. Product IntroductionThank you for choosing our HDMI V2.0 1x16 Splitter, which can distribute one HDMI input to sixteen HDMI outputs. The splitter supports 4K signals up to 4K@60Hz 4:4:4, HDR 10, Dolby Vision and features advanced EDID management option using 4-pin DIP switch on the front panel of the unit. It also supports downscaling so a 4K video input can automatically be down scaled to a 1080p output when connecting a display that only supports resolution up to 1080p. Stereo analog L/R audio output is provided for audio de-embedding from HDMI input and the splitter supports CEC and RS232 control.1.1 FeaturesHDMI V2.0, 4K@60Hz 4:4:4 8bit, HDR 10, Dolby Vision.HDCP 2.2 compliant.Compatible with HDMI AOC cable, provides up to 5V100mA power on each output.Auto 4K to 1080p downscaling.Stereo analog L/R audio output for audio de-embedding from HDMI input.Smart EDID management and HDCP management.CEC and RS232 control.1.2 Package List1x 1x16 Splitter2x Mounting Ears with 4 Screws4x Plastic Cushions1x RS232 Cable (Female DB9 to Male DB9)1x Power Adapter (24V DC, 1.25A)1x User ManualNote: Please contact your distributor immediately if any damage or defect in the components is found.2. SpecificationVideoInput (1) HDMIInput Connector (1) Type-A female HDMIInput Video Resolution Up to 4K@60Hz 4:4:4 8bit, HDR10, Dolby Vision Output (16) HDMIOutput Connector (16) Type-A female HDMIOutput Video Resolution Up to 4K@60Hz 4:4:4 8bit, HDR10, Dolby Vision, supports 4K to 1080p down-scaling.HDMI Output Supports up to 5V100mA power for AOC cable. HDMI Standard V2.0HDCP Version 2.2HDMI Audio Signal LPCM 7.1 audio, Dolby Atmos®, Dolby® TrueHD, Dolby Digital® Plus, DTS:X™, and DTS-HD® Master Audio™ pass-through.Analog Audio OutputOutput (1) AUDIOOutput Connector (1) RCA (L+R) Frequency Response 20Hz~20kHz, ±1dBMax output level 2.0Vrms ± 0.5dB. 2V=16dB headroom above-10dBV (316mV) nominal consumer line level signalTHD+N < 0.05%, 20Hz~20kHz bandwidth, 1kHz sine at 0dBFS level (or max level)SNR > 80dB, 20Hz~20kHz bandwidthCrosstalk isolation < -80dB, 10kHz sine at 0dBFS level (or max level before clipping) L-R level deviation < 0.05dB, 1kHz sine at 0dBFS level (or max level before clipping) Output load capability 1Kohm and higher (supports 10x paralleled 10Kohm loads) Noise Level- 80dBControl PartControl Port(1) EDID Switch, (1) FW, (1) RS232Control Connector(1) 4-pin DIP switch, (1) Micro-USB, (1) Female DB9GeneralBandwidth18GbpsOperation T emperature-5℃~ +55℃Storage Temperature-25℃~ +70℃Relative Humidity10%-90%External Power Supply Input: AC 100~240V, 50/60Hz; Output: 24V DC 1.25APower Consumption 26W (Max)Dimension (W*H*D) 268mm x 40mm x 125mmNet Weight 1.14KGVideo Resolution Down-scaling:The splitter supports video resolution downscaling, the 4K input can be automatically degraded to 1080p output for compatibility with 1080p display, shown in the below chart.Input Output#Resolution Refresh ColorSpaceDownscale1080p Specs13840x216060Hz4:4:4Support1080p@60Hz 4:4:4 23840x216050Hz4:4:4Support1080p@50Hz 4:4:4 33840x216030Hz4:4:4Support1080p@30Hz 4:4:4 43840x216025Hz4:4:4Support1080p@25Hz 4:4:4 53840x216024Hz4:4:4Support1080p@24Hz 4:4:4 63840x216023Hz4:4:4Support1080p@23Hz 4:4:4 73840x216060Hz4:2:0Support1080p@60Hz 4:4:4 83840x216050Hz4:2:0Support1080p@50Hz 4:4:4 93840x216030Hz4:2:0Support1080p@30Hz 4:4:4 103840x216025Hz4:2:0Support1080p@25Hz 4:4:4 113840x216024Hz4:2:0Support1080p@24Hz 4:4:4 123840x216023Hz4:2:0Support1080p@23Hz 4:4:43. Panel Description3.1 Front Panel① POWER SWITCH: Power on/off the splitter.② POWER LED: Illuminates red when the device is powered on. ③ INPUT LED: Illuminates green when there is HDMI input.④ OUTPUT LEDs (1~16): Illuminates green when there is HDMI output on thecorresponding channel. ⑤ EDID: 4-pin DIP switch for EDID setting and HDCP mode selection. Please refer tothe chapter DIP Switch Operation for more details. ⑥ FW: Micro-USB port for firmware upgrade.3.2 Rear Panel① INPUT: Connect HDMI source.② OUTPUTS: Total sixteen HDMI outputs to connect HDMI displays.③ AUDIO OUT: Connect audio device (e.g. Amplifier) for audio de-embedding fromHDMI input. ④ RS232: Connect control device (e.g. PC) to control the splitter by sending RS232commands. ⑤ DC 24V: DC connector for the power adapter connection.123456123454. System ConnectionThe following diagram illustrates the typical input and output connection of the splitter:Amplifier4K TV4K1080p TV1080p4K TV4K1080p TV1080pHDMI:RS232:Audio:Blue-Ray Central Control System5. DIP Switch OperationThe 4-pin DIP switch on the front panel of the unit is used for EDID management and HDCP management. It represents “0” when in the lower (OFF) position, and it represents “1” while putting the switch in the upper (ON) position.Switch 1~3 are used for EDID setting. The switch status and its corresponding setting are shown at the below chart.Switch Status(PIN 1~3)EDID Value123000Obtains EDID from the first detected display starting at HDMI OUT1>OUT2>.........>OUT16.0011920x1080@60Hz 8bit Stereo0101920x1080@60Hz 8bit High Definition Audio0113840x2160@30Hz 8bit Stereo Audio1003840x2160@30Hz Deep Color High Definition Audio1013840x2160@60Hz Deep Color Stereo1103840x2160@60Hz Deep Color HDR LPCM 6CHSwitch 4 is used for HDCP setting. The switch status and its corresponding setting are shown at the below chart.Switch 4 Status HDCPOFF (0)Automatically follows the HDCP version of display device. When display device has no HDCP, if source device have no HDCP content, the video output has no HDCP content; if source device has HDCP content, there are no video output.ON (1)Automatically follows the HDCP version of source device. Note: The factory default switch status is “0000”, and it needs to be set to “1111” when enable RS232 control to set EDID and HDCP.6. RS232 ControlConnect the RS232 port to control device (e.g. PC) with RS232 cable. The splitter can be controlled by sending RS232 commands.RS232 CommandsThe command lists are used to control the splitter. The RS232 control software (e.g. docklight) needs to be installed on the control PC to send RS232 commands.After installing the RS232 control software, please set the parameters of COM number, bound rate, data bit, stop bit and the parity bit correctly, and then you are able to send command in command sending area.Baud rate: 9600Data bit: 8Stop bit: 1Parity bit: noneNote:All commands need to be ended with “<CR><LF>”.In the commands, “[”and “]” are symbols for easy reading and do not need to be typed in actual operation.Type the command carefully, it is case-sensitive.6.1 System CommandsCommand Description Command Example and Feedback>GetFirewareVersion Get firmware version. <V1.0.0>SetFactoryReset Reset to factory default. <FactoryReset_True >SetReboot System reboot. <Reboot_EN>SetHelp [Param] Get the command details.[Param]= Any command.>SetHelpSetHdcpActiveMode<Set the HDCP bypass fromSRC or SINK>SetHdcpActiveModeParamParam = Src,SinkSrc - Active by srcSink - Active by Sink6.2 Setting CommandsCommand Description Command Example and Feedback>SetUpdateEdid Upload user-defined EDID. The EDIDDIP switch must be set as “1111”.<User edid ready,Pleasesend edid data in 10s.<SetUpdateEdid_True/False/<Time out to send edid>SetInPortEdid [Param] Set the EDID to [Param].[Param]=0~7.0 - BYPASS1 - 1920x1080@60 8bit Stereo2 - 1920x1080@60 8bit High DefinitionAudio3 - 3840x2160@30Hz 8bit Stereo Audio4 - 3840x2160@30Hz Deep Color HighDefinition Audio5 - 3840x2160@60Hz Deep ColorStereo Audio6 - 3840x2160@60Hz Deep Color HDRLPCM 6CH7 - USER EDIDThe EDID DIP switch should be set as“1111”.>SetInPortEdid 0<InPortEdid 0>GetInPortEdid Get the EDID. <InPortEdid 0>SetHdcpActiveMode [Param] Set the HDCP active mode.[Param]=Src, SinkSrc - Active by Src. Follow source.Sink - Active by Sink. Follow display.Note: The EDID switch must bes witched to “1111” before sending thecommand.>SetHdcpActiveMode Src<HdcpActiveMode Src>GetHdcpActiveMode Get the HDCP active mode. <HdcpActiveMode Src>SetVideoOutput [Param1],[Param2] Enable or disable video output.[Param1]=1~16. Output port.[Param2]=EN, DisDis - DisableEn - Enable>SetVideoOutput 1,EN<VideoOutput 1 True>GetVideoOutput Get video output status.>GetVideoOutput 1[Param] [Param]=1~16.Output port.<VideoOutput 1 True>SetAutoDownScaler [Param] Enable/disable 4K to 1080p down-scaling function.[Param]=EN, DisDis - DisableEn - Enable>SetAutoDownScaler EN<AutoDownScaler True>GetAutoDownScaler Get the on-off status of down-scalingfunction.<AutoDownScaler True>SetRS232Baudrate [Param] Set the baud rate to [Param].[Param]=1~71 - 1152002 - 576003 - 384004 - 192005 - 96006 - 48007 - 2400>SetRS232Baudrate 1<RS232Baudrate 1>GetRS232Baudrate Get the RS232 baud rate. <RS232Baudrate 17. Firmware UpgradePlease follow the below steps to upgrade firmware by the Micro-USB port:1) Prepare the latest upgrade file (.bin) and rename it as “FW_MV.bin” on PC.2) Power off the splitter and connect the Micro-USB (FW) port of splitter to the PC withUSB cable.3) Power on the splitter and then the PC will automatically detect a U-disk named of“BOOTDISK”.4) Double-click to open the U-disk, a file named of “READY.TXT” will be showed.5) Directly copy the latest upgrade file (.bin) to the “BOOTDISK” U-disk.6) Reopen the U-disk to check whether there is a filename “SUCCESS.TXT”, if yes,the firmware was updated successfully, otherwise, the firmware updating is fail, the name of upgrade file (.bin) should be confirmed again, and then follow the above steps to update again.7) Remove the USB cable and reboot the splitter after firmware upgrade.8. WarrantyBZBGEAR wants to assure you peace of mind. We're so confident in the quality of our products that along with the manufacturer's one-year limited warranty, we are offering free second-year warranty coverage upon registration*!Taking advantage of this program is simple, just follow the steps below:1. Register your product within 90 days of purchase by visiting/warranty.2. Complete the registration form. Provide all necessary proof of purchase details, including serial number and a copy of your sales receipt.Forquestions,**************************************************.For complete warranty information, please visit /warranty or scan the QR code below.*Terms and conditions apply. Registration is required.9. Mission StatementBZBGEAR manifests from the competitive nature of the audiovisual industry to innovate while keeping the customer in mind. AV solutions can cost a pretty penny, and new technology only adds to it. We believe everyone deserves to see, hear, and feel the advancements made in today’s AV world without having to break the bank. BZBGEAR is the solution for small to medium-sized applications requiring the latest professional products in AV.We live in a DIY era where resources are abundant on the internet. With that in mind, our team offers system design consultation and expert tech support seven days a week for the products in our BZBGEAR catalog. You’ll notice comparably lower prices with BZBGEAR solutions, but the quality of the products is on par with the top brands in the industry. The unparalleled support from our team is our way of showing we care for every one of our customers. Whether you’re an integrator, home theater enthusiast, or a do-it-yourselfer, BZBGEAR offers the solutions to allow you to focus on your project and not your budget.。
实验方法与基本要求
实验的基本要求与方法1.1 实验目的与要求一、实验目的学习程序设计的基本方法和技能,进一步加深对微机接口芯片原理及工作过程的理解,熟练掌握用汇编语言设计、编写、调试和运行程序的方法。
为后继课程打下坚实的基础。
二、实验要求1. 上机前要做好充分的准备,包括程序框图、源程序清单、调试步骤、测试方法、对运行结果的分析等。
2. 上机时要遵守实验室的规章制度,爱护实验设备。
要熟悉与实验有关的系统软件(如编辑程序、汇编程序、连接程序和调试程序等)的使用方法及实验仪器。
在程序的调试过程中,有意识地学习及掌握debug程序的各种操作命令,以便掌握程序的调试方法及技巧。
为了更好地进行上机管理,要求用硬盘储存程序,并建立和使用子目录,以避免文件被别人删除。
有关目录及文件操作的DOS命令见附录1。
此外,为了便于统一管理硬盘中的文件,要求实验者按以下形式命名实验文件:字母学号.asm其中字母取a~z中的一个字母,按实验顺序从a至z排列。
如学号为850431学生的第二个实验程序所对应的文件名应为b850431.asm。
3.程序调试完后,须由实验指导教师在机器上检查运行结果。
每个实验完成后,应写出实验报告。
实验报告的要求如下:①设计说明:用来说明设计的内容、硬件原理图。
它包括:程序名、功能、原理及算法说明、程序及数据结构、主要符号名的说明等。
②调试说明:便于学生总结经验提高编程及调试能力。
它包括:调试情况,如上机时遇到的问题及解决办法,观察到的现象及其分析,对程序设计技巧的总结及分析等;程序的输出结果及对结果的分析;实验的心得体会等。
③程序框图。
④程序清单。
1.2 实验方法一、用编辑程序建立asm文件用文字处理软件编辑源程序。
常用编辑软件有:EDIT.EXE、记事本、WORD等。
无论采用何种编辑工具,生成的文件必须是纯文本文件,且文件扩展名为asm。
下列程序完成两个字节数相加,并将和存于SUM变量中。
用编辑软件建立以abc.asm 为文件名的源程序文件。
InTouch 9[1].5新功能介绍V1
![InTouch 9[1].5新功能介绍V1](https://img.taocdn.com/s3/m/3865760616fc700abb68fc61.png)
InTouch 9.5简介上海蓝鸟机电有限公司InTouch 9.5►主要的设计目标▪提高生产力▪增强ArchestrA 综合能力InTouch 9.5 功能增强如下:►实用性增强►脚本和动画功能增强►报警增强►增加I/O 失效转移功能►运行期间的语言切换InTouch 应用程序管理►采用XP 的外观(同样可见WindowMaker)►更新显示区域风格►可以设置缺省的应用程序目录►实用性上▪采用XP 主题▪增加字体设置▪编辑功能的加强▪图形对象的移动缩放►采用了更新的外观►使用XP 主题(仅限于WindowMaker)▪采用按钮, 复选框, 单选按钮等▪重点突出标题列►提供了更多的字体选择▪可设置应用程序的缺省字体▪按钮和文本可分开设置▪支持True type字体►增强了编辑能力▪可利用修改坐标值来改变位置►增加了移动缩放功能▪点击缩放▪橡皮圈缩放▪平移窗口►脚本和动画功能增强▪鼠标点击事件(左, 右, 中)▪鼠标划过事件▪工具提示►脚本和动画功能增强QuickScript编辑器支持脚本打印►Hotlink 性能控件▪Hotlinks 可以选择性的显示”晕轮”▪晕轮区域可以按照对象的形状进行显示►密码域的支持▪输入域可选择密码型字符▪输入可被加密屏幕键盘►支持三个键盘▪标准的InTouch键盘▪Microsoft 提供的Windows 键盘▪大小可调的InTouch键盘(新的Wonderware 键盘)SmartSymbols►SmartSymbols 可以直接创建►SmartSymbols 可与常规图形区分►SmartSymbols 大小可调报警►报警分析性能增强:▪更新AlarmViewer•排序•更新查询▪更新Alarm Manager •配置Database▪更新Alarm DB View •配置Database▪新的Alarm 控件•Pareto•Tree View▪改变热备份报警显示►允许设置默认二级排序列►报警查询功能增强例:\InTouch!$System!Boiler*Alarm DB Manager►支持命名数据库►返回数据性能可搜索1,000,000 记录< 8 秒Alarm DB View 控件►Alarm DB View 增强▪可选择数据库名称▪配置”无数据”库信息▪查询收藏功能增强•开发时查询时间编辑功能•运行时选择既定查询方案▪排序功能增强报警控件►新的控件▪Alarm 树形视图▪Pareto报警(芭蕾托)报警热备份►扩展和改进▪可以配置两个节点的报警热备份▪更好的ACK 时间同步。
施耐德电气PowerChute Business Edition v10.0.4发布说明说明书
PowerChute™ Business Edition v10.0.4 Release NotesIntroductionThe PowerChute Business Edition Release Notes have the following sections:•What’s new in this release•Known IssuesAdditional resources:•The Product Center page contains links to PowerChute-related Knowledge Base articles•The Troubleshooting section of the Installation Guide provides additional troubleshooting information•To validate the authenticity of software downloads, see the MD5/SHA-1/SHA-256 Hash Signature Reference Guide.How to Log OnYou can access the user interface of the PowerChute Business Edition Agent in two ways, locally and remotely. To access the PowerChute Business Edition Agent on a local Windows computer, select theWindows start button, then select PowerChute Business Edition > PowerChute Business Edition.To access the PowerChute Agent remotely, in a Web browser type the servername or Agent IP address and port: https://servername:6547https://agentipaddress:6547For example, if your server is named COMP1, enter:https://COMP1:6547If you have forgotten the username or password created during installation, you can reset the credentials by using the PowerChute configuration file. See Resetting your Username and Password in the User Guide.What’s new in this releaseThe following features are new to PowerChute Business Edition v10.0.4:•Support added for UPS devices with the SRTL, SMT, and SMC prefix, including SRTL3KRM1UNC, SRTL3KRM1UC, SMT750I-CH, SMT3000UXI-CH, and SMC750I-CH.•Support added for the PowerChute Customer Experience Improvement Program (CEIP). The CEIP collects information on how you configure and use PowerChute in your environment. The CEIP enables us to improve our product and helps us to advise you on how best to deploy and configure PowerChute.o The information collected is completely anonymous and cannot be used to personally identify any individual. For more information, please refer to the CEIP Frequently Asked Questions.•Support added for the PowerChute Updates feature. PowerChute automatically checks for updates and informs you if a new version of PowerChute is available to download.o This update check sends anonymous PowerChute environment data to the Schneider Electric update server.•The PowerChute UI can now only be accessed by one user at a time. Multiple logins are not supported, and login attempts while the user is already logged in will be unsuccessful.o Logins, logouts, and unsuccessful login attempts to the PowerChute UI are logged in the Event Log and configurable events in the Event Configuration screen. For more information, see theUser Guide.•Security fixes and library updates, including:o The PowerChute jar files in the lib directory are now digitally signed. NOTE: Third-party jar files are not digitally signed.o Following an upgrade to v10.0.4, old versions of third-party libraries are no longer retained.o Upgrading the OpenJDK version bundled with PowerChute to OpenJDK 16.0.2.o Upgrading Jetty version bundled with PowerChute to Jetty 9.4.43.Known IssuesProblem/Issue:When attempting to uninstall PowerChute v10.0.4, the PowerChute installer may incorrectly run.Description/ResolutionThis issue is more common with Windows 2022 and Windows 10 W0H2. To resolve the issue, manually uninstall PowerChute following the steps outlined in Knowledge Base article FA159894.Problem/Issue:PowerChute loses communications with SMTL1500RM3UC, SMT1500RM2UC, and SMT700X167 UPS devices when connected via a serial communications cable and an “On Battery” or “[Outlet Group] commanded to: shutdown using delay” event is resolved.Description/ResolutionThis issue is specific to these UPS devices when connected to PowerChute with a serial communications cable. To resolve the issue, manually restart the PowerChute service.Problem/Issue:PowerChute loses communications when the Internet Expander 2 (IE2) card is disconnected and reconnected from the UPS SmartSlot.Description/ResolutionDisconnect and reconnect the IE2 card twice to regain communications.The below SNMP OIDs do not work as expected in a MIB browser: upsAdvBatteryNumOfBattPacks, upsAdvTestCalibrationResults, upsAdvTestDiagnosticSchedule, upsOutletGroupConfigLoadShedControlSkipOffDelay.Description/ResolutionMake the necessary configuration changes via the PowerChute Web UI instead of a MIB browser for the affected OIDs.Problem/Issue:When the PowerChute service is stopped or restarted, an error may be displayed in the Windows Event Viewer: Windows could not stop the APC PBE Agent service on Local Computer. Error 1053: The service did not respond to the start or control request in a timely fashion.Description/ResolutionThis issue is specific to Windows Server 2022 and Windows 10 systems and does not affect any functionality. Problem/Issue:When the serial communications cable is disconnected and reconnected multiple times from UPS devices with the SRTL prefix, e.g. SRTL3KRM1UNC, SRTL3KRM1UC, communications may be lost with the UPS. Description/ResolutionThis issue is specific to these UPS devices. It is highly recommended you do not quickly disconnect and reconnect the communications cable. To resolve the issue, uninstall and reinstall PowerChute to regain communications with the UPS ensuring that the communications cable is connected.Problem/Issue:During an install, upgrade, or uninstall, an error may occur.Description/ResolutionEnsure the APC folder is not open in Explorer or the command line and click “Try again” in the error dialog box. Problem/Issue:When the Windows installer is left idle for 10 minutes, the PowerChute service may not start after installation is complete.Description/ResolutionThe PowerChute Windows installer must be run from start to finish without any delays or interruptions. Problem/Issue:When the pcbeproxy.ini file is edited to add incorrect values, the “Account Lockout” event is logged to the PowerChute Event Log.Description/ResolutionThis issue only occurs when incorrect values are added to the UPSSleep section of the pcbeproxy.ini file. No workaround – this issue does not impact functionality.Problem/Issue:When PowerChute is installed on Linux using a non-default location, the jre directory(APC/PowerChuteBusinessEdition/jre) is not removed following an uninstallation.Description/ResolutionThis issue only occurs in the above scenario. You must manually delete the jre directory and its contents.Following an upgrade to PowerChute v10.0.4, PowerChute does not retain the OpenJDK version used if it was changed via the Java Upgrade feature. After the upgrade, PowerChute will use OpenJDK 16.0.2. which is bundled with v10.0.4.Description/ResolutionNo workaround.Problem/Issue:When the OpenJDK version is upgraded in an RHEL 7.x environment, an error is displayed in the terminal pointing to line 206 in the config.sh script:No such file or directoryDescription/ResolutionYou must manually edit line 206 of the config.sh script to add the new JDK path. For more information, see Knowledge Base article FA413923 on the APC website.Problem/Issue:When PowerChute is installed on an RHEL 7.x system, the Java CPU utilization may increase to 100% in 3-5 days.Description/ResolutionTo resolve the issue, it is recommended you remove any files in the /temp directory and restart the PowerChute service regularly. For more information, see Knowledge Base article FA414047 on the APC website.Problem/Issue:During PowerChute installation on a Japanese or Chinese Windows Server Core 2016 system, theChinese/Japanese symbols do not display correctly in the installer.Description/ResolutionNo workaround – this issue only occurs on Windows Server Core 2016 systems.Problem/Issue:When a shutdown is initiated via the Shutdown Now screen in the PowerChute UI, an error may be displayed in the Windows Event Viewer:The APC PBE Agent service terminated unexpectedly.Description/ResolutionThis issue occurs due to a timing issue with the PowerChute shutdown process and active threads. This issue is specific to Windows Server Core systems and does not affect any functionality.Problem/Issue:When the PowerChute service is stopped, an error may be displayed in the Windows Event Viewer:Timed out(30000 msec) occurred while waiting for the transaction response from APCPBEAgent service. Description/ResolutionThis issue occurs due to a timing issue with the PowerChute shutdown process and active threads. This issue is specific to Windows Server Core systems and does not affect any functionality.Problem/Issue:For some UPS devices with the XU prefix, e.g. XU1K3LLXXRCC, XU2K0LLXXRCC, whe n the UPS shuts down following a critical event (e.g. Low Battery), communications are not re-established after the critical event is resolved.Description/ResolutionThis issue is specific to these UPS devices. To work around the issue, manually restart the PowerChute service.When registering an ESXi host via the vifp addserver command, the following error may display:Failed to add ESXi host.Description/ResolutionThis error erroneously displays and can be ignored. Verify that the ESXi host was successfully added using the vipf listservers -l command.Problem/Issue:When PowerChute is configured with a Smart-UPS 1000X, the PowerChute UI incorrectly reports the UPS Model as a Smart-UPS 1000XL.Description/ResolutionNo workaround – this issue does not impact functionality.Problem/Issue:After installing PowerChute on vSphere Management Assistant (vMA) 6.5, the PowerChute UI is inaccessible until vMA is restarted.Description/ResolutionNo workaround – you must manually restart vMA. For more information, consult your VMware documentation. Problem/Issue:During installation on Hyper-V 2016 Server systems, a popup dialog may appear asking you to install the C++ redistributable package when the package is already installed on your system.Description/ResolutionThis issue occurs when PowerChute is uninstalled and later re-installed on the same system. When PowerChute is uninstalled, the C++ redistributable package is not automatically uninstalled. The popup dialog asking you to install the C++ package can be ignored.Problem/Issue:Java upgrades do not complete on vSphere Management Assistant (vMA) 6.5.Description/ResolutionThis is due to the space requirements for a Java upgrade and the limited disk space available on vMA. For information on how to resolve this issue, see Knowledge Base article FA365729.Problem/Issue:PowerChute Business Edition does not support VMware ESXi 6.7 and above.Description/ResolutionFor more information on the supported versions of ESXi, refer to the Operating System, Processor, JRE and Browser Compatibility Chart.Problem/Issue:Initiating a shutdown through the Shutdown Now screen does not shut down the UPS if an Interface Expander 2 (IE2) card is inserted.Description/ResolutionThis is an issue with the IE2 card for both Smart and Simple Signaling configuration with PowerChute Business Edition.Some UPS devices with the SMX and SMC prefix, e.g. SMX3000LVNC, SMX3000HVNC, SMC1500I, do not allow the values for High and Low Transfer Values to be edited in the UPS Settings screen.Description/ResolutionThis issue is specific to these UPS devices. When the values are edited and saved, the new values do not persist and instead, the previous values remain. To work around this, you can change these values using a Network Management 2 (NMC2) card.Problem/Issue:Some UPS devices with the RT prefix, e.g. RT 2200 XL, RT 1000 XL, display some events in the Event Configuration screen that are not supported by these models. For example: AVR Boost Enabled, AVR Trim Enabled, AVR Boost Not Enabled, AVR Trim Not Enabled, Extended Undervoltage, Extended Overvoltage, Frequent Undervoltage, and Frequent Overvoltage.Description/ResolutionThis issue is specific to these UPS devices and does not affect any functionality.Problem/Issue:No record is logged in the Event Log if you try to put your UPS into bypass mode, and it is unsuccessful. Description/ResolutionThis issue is specific to UPS devices that support bypass.Problem/Issue:If a "Power Failed" or "Low Battery" event is triggered on some UPS devices with the C postfix, e.g. SMT 750 C, SMC 1500C, the UPS does not shut down.Description/ResolutionThe outlet group(s) connected to the UPS do shut down; however, the UPS itself does not. Manually turn off the UPS until these power-related events are resolved, i.e. when the power returns.Problem/Issue:On some UPS devices with the SUA prefix, e.g. SUA3000RM, the "Replace Battery" event is logged inthe Event Log and the UPS status changes to "Replace Battery" in the Battery Management page after a "Self Test Failed" event.Description/ResolutionThis issue is specific to this UPS model.Problem/Issue:On Type B UPS devices, except models with the SRC prefix, e.g. SRC1K1, SRC2KI, SRC1K1-IN, andSRC1KUXI, a self test can be initiated if the battery percentage is below 70%.Description/ResolutionThis issue is specific to Type B UPS devices. Visit Knowledge Base article FA315835 to find out more about UPS model types.Problem/Issue:Bypass-related events are not shown in the Event Configuration screen for some UPS devices with the SRC prefix and UXI postfix, e.g. SRC2KUXI, SRC2000UXI, SRC3000UXI.Description/ResolutionThis issue is specific to these UPS models only.Some fields in the Predictive Battery Replacement section of the Battery Management page may behave differently for UPS devices with the SRT prefix and LI postfix, e.g. SRT1500UXI-LI, SRT1000RMXLI. Description/ResolutionThe "Battery Installation Date" field cannot be modified, and the date might not reflect the correct factory installation date. The "Predicted Replacement Date" field shows the manufacture date of the battery pack instead of the battery replacement date.Problem/Issue:No events are logged in the Event Log for Runtime Calibration if PowerChute is configured with Simple Signaling and communicating with a 990-0128D cable.Description/ResolutionThis issue is specific to using the 990-0128D cable with Simple Signaling.Problem/Issue:PowerChute reports an unsuccessful SNMPv3 connection attempt in the Event Log, though the SNMPv3 connection has been successful.Description/ResolutionCertain MIB browsers attempt initial connections before using the correct username specified in PowerChute. SNMPv3 connection has been successful, and Event Log reports indicating an unsuccessful connection attempt can be disregarded in this scenario.Problem/Issue:The 940-0023 cable does not perform properly with a Back-UPS or a UPS using Simple Signaling. Description/ResolutionPowerChute Business Edition requires the 940-0020 or the 940-0128 cable for UPS communications using Simple Signaling. If you were using the 940-0023 cable with a previous PowerChute product, you must replace it with the 940-0020 or 940-0128 cable when you use PowerChute Business Edition.Problem/Issue:PowerChute Business Edition Agent does not install on a system that is using the SJIS locale.Description/ResolutionThe SJIS locale is not supported by PowerChute Business Edition. The Japanese local supported by PowerChute is euc and UTF-8.Problem/Issue:During the boot process, the server momentarily pauses and displays messages similar to below: modprobe: modprobe: can't locate module char-major-4Description/ResolutionThis is an issue that will not affect the performance of PowerChute.Problem/Issue:RPM uninstaller reports:error: cannot remove /opt/APC/PowerChuteBusinessEditionAgent directory not emptyDescription/ResolutionThis is inaccurate. The directory is properly removed during the uninstall.Following a power failure event, UPS devices with the SRC prefix, e.g. SRC1KI, SRC2KI, do not automatically turn on when power is restored before the UPS turns off. You can configure power failure events throughthe Shutdown Settings screen and select one of the following options: "Immediately", "After UPS has been on battery for", or "At runtime limit".Description/ResolutionManually turn the UPS on after the power failure event is resolved. If the power failure was caused by the removal of the power cable, reconnect the cable after the UPS turns off.Problem/Issue:An error message is shown after stopping or restarting the PowerChute service on Windows operating systems: Windows could not stop the APC PBE Agent service on Local Computer.Error 1053: The service did not respond to the start or control request in a timely fashion.Description/ResolutionThis error message can be ignored. PowerChute continues to operate after the service is started.。
2021学年人教版七年级下册英语复习Unit 5--6重难点(含答案)
Unit 5 Why do you like pandas ?Section A【知识点概述】1.Let's see the pandas first.我们先看熊猫吧。
first adv.首先,先(作状语,可放在句首/句末) adj.第一的,首先的(作定语) Let the girls come in _____(one).让女孩们先进来。
(状语)Jack is the _____(one) student to come to school.杰克是第一个到学校的学生。
(定语)2.They're my favorite animals.它们是我最喜欢的动物。
favorite adj.最喜欢的(=like...best)n.最喜欢的人/物句型:What's one's favorite...?What...do/does sb.like best?某人最喜欢什么?3.Because they're very cute.因为它们很可爱。
because连词,“因为”(注意:because和so不能出现在同一个句子里。
)Because he is ill,he can't go to school.=He is ill,so he can't go to school.辨析:because 连词,后接句子。
because of介词短语,后接名词/代词/动名词。
He can't take a walk ________ it is raining.=He can't take a walk ________________ the rain.4.They're kind of interesting.它们有点儿有趣。
kind of有点儿,稍微(其后+adj.,=a little/a bit)kind n.种类,类型(a kind of 一种;all kinds of 各种各样的;different kind of 不同种类的)adj.和蔼的,亲切的句型:It's kind of sb.to do sth.某人做某事真是太好了。
- 1、下载文档前请自行甄别文档内容的完整性,平台不提供额外的编辑、内容补充、找答案等附加服务。
- 2、"仅部分预览"的文档,不可在线预览部分如存在完整性等问题,可反馈申请退款(可完整预览的文档不适用该条件!)。
- 3、如文档侵犯您的权益,请联系客服反馈,我们会尽快为您处理(人工客服工作时间:9:00-18:30)。
北京神州数码融信软件有限公司密级:机密文档编号:DCFS-SLT-001Sm@rtSymbolsV10.0核心业务系统数据移植之中间文件定义(V2.0)All rights reserved版权所有,侵权必究文档修订记录目录1前言 (8)1.1内容概要 (8)1.2数据约定 (8)1.3预期读者 (10)2 CIF模块 (11)2.1模块说明 (11)2.2业务名词 (11)2.3数据关系图 (11)2.3.1 数据接口列表 (11)2.3.2 数据接口关系 (12)2.4 数据接口 (12)2.4.1 DCIF_FM_CLIENT (12)2.4.2 DCIF_FM_CLIENT_CORP (16)2.4.3 DCIF_FM_CLIENT_INDVL (17)2.4.4 DCIF_FM_CLIENT_DOCUMENT (18)2.4.5 DCIF_FM_CLIENT_CONTACT_TBL (19)2.4.6 DCIF_FM_CROSS_RELATIONS.......................................................................................... 错误!未定义书签。
2.4.7 DCIF_FM_CLIENT_INDVL_AINFO (20)3 GL模块 (22)3.1模块说明 (22)3.2业务名词 (22)3.3数据关系图 (22)3.3.1 数据接口列表 (22)3.3.2 数据接口关系 (23)3.4 数据接口 (23)3.4.1 DCIF_GL_ACCT (23)3.4.2 DCIF_GL_POST................................................................................................................ 错误!未定义书签。
3.4.3 DCIF_GL_MONTH_BASE (26)4 CL模块 (27)4.1 模块说明 (27)4.2 业务名词 (27)4.3 数据关系图 (27)4.3.1 数据接口列表 (27)4.3.2 数据接口关系 (28)4.4 数据接口 (28)4.4.1 DCIF_CL_LOAN (28)4.4.2 DCIF_CL_DRAWDOWN_TBL (34)4.4.3 DCIF_CL_REPAY_TBL (39)4.4.4 DCIF_CL_INVOICE_TBL (40)4.4.5 DCIF_CL_AUTO_SETTLE_REC (41)4.4.6 DCIF_CL_ACCRUALS_TBL (43)4.4.7 DCIF_CL_DD_SUSPENSE_TBL (45)4.4.8 DCIF_CL_RECEIPT_TBL (45)4.4.9 DCIF_CL_PAID_INVOICE_TBL (46)4.4.10 DCIF_CL_PAUSE_INT_TBL (47)5 RB模块 (48)5.1模块说明 (48)5.2业务名词 (48)5.3数据关系图 (48)5.3.1 数据接口列表 (48)5.3.2 数据接口关系 (49)5.4 数据接口 (50)5.4.1 DCIF_RB_ACCT (50)5.4.2 DCIF_RB_TDA (53)5.4.3 DCIF_RB_TDA_HIST (55)5.4.4 DCIF_RB_TD_CALL_HIST (56)5.4.5 DCIF_RB_AGREEMENT_TERM (57)5.4.6 DCIF_RB_TAX_DETAIL (57)5.4.7 DCIF_RB_RESTRAINTS (58)5.4.8 DCIF_RB_VOUCHER_RD_DTL (59)5.4.9 DCIF_RB_PASSWORD (60)5.4.10 DCIF_RB_STMT (61)5.4.11 DCIF_RB_TRAN_HIST.................................................................................................... 错误!未定义书签。
5.4.12 DCIF_RB_VOUCHER_LOST (61)5.4.13 DCIF_RB_PB_CONTENT.................................................................................................. 错误!未定义书签。
5.4.14 DCIF_OTH_CARD_ACCT (63)5.4.15 DCIF_RB_CHEQUE_DETAIL (63)5.4.16 DCIF_RB_FIN_REG_TBL................................................................................................ 错误!未定义书签。
5.4.17 DCIF_RB_FIN_TRAN_MAIN............................................................................................ 错误!未定义书签。
5.4.18 DCIF_RB_FIN_TRAN_HIST............................................................................................ 错误!未定义书签。
5.4.19 DCIF_RB_AIO_RESTRAINTS (66)5.4.20 DCIF_RB_CHANNEL_HIST.............................................................................................. 错误!未定义书签。
5.4.21 DCIF_RB_ACCT_DOSS.................................................................................................... 错误!未定义书签。
6 MM模块................................................................................................................................................... 错误!未定义书签。
6.1模块说明..................................................................................................................................... 错误!未定义书签。
6.2业务名词..................................................................................................................................... 错误!未定义书签。
6.3数据关系图................................................................................................................................. 错误!未定义书签。
6.3.1 数据接口列表................................................................................................................ 错误!未定义书签。
6.3.2 数据接口关系................................................................................................................ 错误!未定义书签。
6.4 数据接口.................................................................................................................................... 错误!未定义书签。
6.4.1 DCIF_MM_TP_MASTER...................................................................................................... 错误!未定义书签。
1前言1.1内容概要本文档是SYMBOLS数据接口,每个章节由模块说明、业务名词、数据关系图和数据接口(即中间文本,下同)四部分组成。
其中第一部分的“模块说明”简单介绍该模块所支持功能,第二部分“业务名词”则是阐述该模块中出现的专用名词,第三部分“数据关系图”描述对数据接口关系进行描述,最后一部分“数据接口”说明各表的主键信息、字段信息以及注意事项等。
其中“数据接口”定义又由七个部分组成,具体事项如下表所示:1.2数据约定(1)数据类型约定VARCHAR2(n):可变长的字符数据类型,数据的最大长度为n;例如:VARCHAR2(3),最多可以存储3个字节长度的字符;NUMBER(n):金额数据类型,整数位和小数位的总长度不能大于n,若存在小数位,保留小数点后两位,否则不带小数,例如:10020;NUMBER(m,n):金额数据类型,指定数据精度为n,并且整数位和小数位的总长度不能大于m,m不能小于n,m不能大于38,n不能大于8;NUMBER:金额数据类型,整数位和小数位的总长度不能大于38,若存在小数位,保留小数点后两位,否则不带小数;DATE:日期数据类型,长度为8个字节,格式为:YYYYMMDD,例如2002年12月12日表示为“20021212”(2)分割符约定在数据接口中,每个字段之间使用“|”分割,组成一条完整的记录。
