你的时间80%都用错了 哈佛商学院时间管理科
一年级语文汉语拼音17
一年级语文汉语拼音17?4 ?1i銆乪i銆乽i锛岃兘璁ゆ?2銆佷細鐪?璇炬椂瀹夋帓锛?璇炬椂?瀛︿細澶嶉煹姣嶏拷锟絠銆乪i銆乽i锛岃兘璁?囩▼锛?涓€銆?澶嶄範妫€鏌ャ€?1э拷o銆乪銆乮銆乽銆伱肩殑鍥涘0銆?2?浜屻?屽彨澶嶉煹姣嶃€?i銆?1鍑猴拷锟絠銆??w锟絯鍜岋拷w?i竴澹版€庝箞蹇碉紵鍑虹ず鍗$墖锟斤拷i銆?2銆佹暀瀛︼拷锟絠鐨勫彂闊筹紝璁ゆ竻瀛楀舰銆?锛??锛?揣鎺ョ潃鎶婅垖澶寸殑浣嶇疆鍚慽绉诲姩銆傦拷娆㈡灄鍖︼拷锛宨璇昏交浜涳?1銆?э拷锟斤拷i銆?i锛?4銆佸洓澹扮粌涔犮€?熸敞鎰忥紝锟斤拷i鐨勮皟鍙锋爣鍦ㄤ笂锟藉姬锛濆卜宄¤盁闀呯洍鏂癸拷琛屽?膩i锛氭垜鎸ㄧ潃浣狅紝浣犳尐鐫€鎴戙€?谩i锛氬啲?菐i煯銆?脿i锛氭垜鐖辩埜鐖革紝鐖哥埜涔熺埍鎴戙€?涓€銆?i 銆?1i銆?杈圭敤鍔涘妶涓€杈瑰枈锛氣€滃攭鈥濄€?2i鐨勫彂闊筹紝璁ゆ竻瀛楀舰銆?3e鈥昬i銆?i鐨勫彂細ei姣旓拷锟絠闊崇殑寮€鍙e害瑕佸皬浜涖€?4銆佸洓澹扮粌涔犮€?ei鐨勮皟鍙锋爣鍦ㄤ笂i琛屽洓澹扮粌涔犮€?浜屻€?i銆?1i銆?鍥句笂鐢荤潃鍥涗釜灏忔湅鍙嬫墜鎷夋墜鍥存垚涓€鍦堛€傗€滃洿鈥濈ui銆?2ui i鍙戦煶鏃跺彛褰㈢敱u婊戝埌i銆?3銆佸洓澹扮粌涔犮€傚彲缂栨垚椤哄彛婧滃湪鍙h瑙f斁鍐涳紝澶氬▉椋庯紝u墨锛寀墨锛寀墨锛屽媷鏁㈡潃鏁屽悜鍓嶅啿銆?灏忔湅鍙嬶紝鍥存垚鍦堬紝u铆锛寀铆锛寀铆锛屽仛鍋氭父鎴忕?鍏变骇鍏氾紝鐪熶紵澶э紝u鍥涘寲銆?鍠傚杺鍠傦紝鎵撶數璇濓紝u氳瘽銆???i銆乪i銆乽i鏋勬垚鐨勯煶鑺傘€???1銆佹娊鍗$墖璇伙拷锟絠銆乪i銆乽i鍙婂洓澹般€?2ch銆乥銆乨銆乵銆乭銆乧銆乸銆侊拷棣堬拷z銆亀銆乴銆乶銆乲銆亃h銆乻h銆?浜屻€佹暀瀛︽嫾闊炽€?1銆佺粌涔狅拷锟絠鐨勬嫾闊炽€?锛?锛塩脿i 浠€涔堣彍锛燂紙鐧借彍銆佽彔鑿溿€侀潚鑿溿€佽姽鑿溾€︹€︼級c脿i 浣犺繕鐭ラ亾锛?锛夌敤缈诲姩寮忓崱鐗囨嫾璇婚煶鑺傘€?b谩i锛堢櫧锛夈€乸膩i锛堟媿锛夈€乵菐i锛堜拱锛夈€乨脿i锛堝甫锛夈€乼谩i锛堟姮锛夈€乶菐i锛堝ザ锛夈€乴谩i i i锛堝紑锛夈€乭谩i h膩i锛堟憳锛夈€乧h谩i锛堟煷锛夈€乻h脿i 锛堟檼锛夈€亃膩i锛堟牻锛夈€乧膩i锛堢寽锛夈€乻脿i锛堣禌锛夈€傚湪闊宠?2銆佺粌涔爀i鐨勬嫾闊炽€?锛?锛塵茅i 浠€涔坢茅i?m茅i 锛?锛夌敤缈诲姩寮忓崱鐗囨嫾璇婚煶鑺傘€?b膿i锛堟澂锛夈€乸茅i锛堥櫔锛夈€乵臎i锛堢編锛夈€乫膿i i锛堝唴锛夈€乴茅i i锛堢粰锛夈€乭膿i锛堥粦锛夈€?3銆佺粌涔爑i鐨勬嫾闊炽€?锛?锛夛拷锟?u墨浠?锟斤拷u墨鍑虹ず锛歸奴锟斤拷u墨锛?锛夌敤缈诲姩寮忓崱鐗囨嫾璇婚煶鑺傘€?du墨锛堝爢锛夈€乼u墨锛堟帹锛夈€乭u矛锛堜細锛夈€乲u墨锛堜簭锛夈€亃hu墨锛堣拷锛夈€乧hu墨锛堝惞锛夈€乻hu菒锛堟按锛夈€??b谩i c脿i 锛堢櫧鑿滐級m茅i hu膩w奴锟斤拷u墨锛堜箤榫燂級杩€??浜斻€佸珐鍥虹粌涔犮€?1?2銆佹嫾闊宠妭娓告垙銆?。
TS80 智能烙铁用户手册说明书
Please read this manual before using this device.This user manual is based on APP1.06.Content s1. Safety Statement2. Overview3. Power Adaptor Selection4. Operation5. Soldering Iron Tip6. Trouble Shooting Guide7.8. Legal Statements Service P1P3P5P6P15P17P19P21Safety Statement 11!1.1 General Safety Use only certified power source/adaptors from your region.(please refer to 3.0 for specifications)Do not operate in humid environment.Do not operate in inflammable/explosive environment.Keep the surface of the product clean and dry.1.2 Warnings When using TS80,Turn the power off when not in use, or left unattended.When power is ON,tip temperatures will between 100℃~400℃ (212℉~752℉), pleasebe careful.Please don’t operate TS80 when it’s wet or operate it with wet hands, which will causean electric shock.1.3 Cautions The handle is constructed with precision, dropping shall be avoided.After continuous use at 350℃ up to 40 minutes, the handle surface temperature willreach 50℃~60℃.For the first time using, TS80 may generate a light smoke due to the heating of heatingelements, which is a normal phenomenon.21.4 Liability StatementAny damage of the product, or losses related to the product damage, ifit’s man-caused, or assumed to be man-caused, the liability will belongto the user.1.5 Working conditionOperating Conditions Non-OperatingConditionsTemperature +0℃~50℃-20℃~+60℃40℃~50℃0%~60%RH 40℃~60℃5%~60%RH0℃~40℃10%~90%RH 0℃~40℃5%~90%RHHigh Temperature Low Temperature Relative HumidityOverview 2①②③④⑤⑥⑦⑧2.1 B uttons and Interface1. Tip heating area2. Heat dispersion protector3. Tip insert end4. Fastener5. Button A6. Button B7. OLED screen8. USB Type-C port34OLEDUSB Type-CUSB Type-CLength:96mmLength:100mm18W100℃~400℃(max )±3%40℃<2ΩScreen Dimensions USB port Power port Heating unit Operation unit Weight 2.2 Specifications36.5g (power adaptor not included)2.3 Operation SpecificationsPower Temperature range Temperature stability Operation temperature under heat Soldering tip resistance to the ground5Power Adaptor Selection3Please select power adapters certified by Qualcomm and marked with QC3.0 (9V 2A).It is required to check if the power adapter is marked to support QC3.0 (9V 2A) output before connecting the power adapter.Note: TS80 will not work normally if the power adapter is not a standard QC3.0 power adapter or does not support a 9V 2A output.TS80 does not support power adapters conforming to PD quick charge.9V 18W 22sWorking Voltage Power The minimum time needed to raise thetemperature from 30to 300℃℃6Operation44.2 Default Settings4.1 Installation 1) Insert soldering tip into the soldering controller;2) Connect TS80 and power source with a USB Type-C cable, turn on the power and follow the instruction.Default temperature unitDefault temperatureSleep mode temperatureAdjustable temperature range℃300℃ (Default )200℃ (Default )100℃~400℃ (Max )Note: If “Sen-Err” appears on TS80 after power is on, it means the soldering tip is not installed securely, please install again.4.3Basic operation4.3.1Screen interfaceAfter power is on, TS80 will show personalized icon and firmware revision number, thenshows standby mode in loops.4.3.2Parameter settingShort press “B” key in standby mode to enter setting mode; Short press “A/B” key in setting mode to select the set item needs to be modified and long press “A” key to enter modification mode; after entering modification mode, press “A/B” key to select the appropriate set value; and wait for 5s to return to setting mode after selecting set value.Long press “B” key to save the modification and return to standby mode after the setting is completed.Note: the functions of A and B keys are interchangeable in left hand mode (LH).78Option picture and corresponding parametersParameter Image Power 18WkTemp 300StbTemp 200SlpTime 180TempStp 10OffVolt 10.0Temp ℃Parameter Name Working Temperature Working temperature ①300200180181013.0℃0-400℃0-400℃60-999s16-24W 1-2510.0-13.0V℃/℉Definition Factory Defaults AdjustableRangeTemperature Display unit Protection Voltage Temperature Step size Sleep Time Power Setting Sleep Temperature Standby temperature when entering mode sleep The time needed to enter mode fromworking mode when there is no operation sleep Operating power The step size for temperature increase or decrease when the temperature is set.Protection voltage when working, if the inputvoltage exceeds the protection voltage, TS80 will stop heating and prompt it.Temperature display unit, in Celsius degree (℃)or Fahrenheit degree (℉)9Parameter Image Parameter Name DefinitionFactory Defaults Adjustable RangeHand RH 8.75V 26℃RH(right hand )RH (right hand )/LH (left hand )②③Restore DFLT Restorefactory defaultsSolder tip calibrationLeft/right hand mode Left/right hand use mode, screen display directions are reverse and key functions are interchangeable in different modes.Calibrate the solder tip currently in useRestore factory defaultsLong press “A” key for direct execution① The power adapter used shall support the power shown on set value. If the set value exceeds the maximum output power of power adapter, TS80 and power adapter may be damaged.② Screen display temperature is not current room temperature and possibly there is a difference between them or the display value is "--℃" prior to calibration. After calibration, the display value may be close to room temperature.③ Insert solder ing tip into TS80 control end and let it stand for 10miutes before solder tipcalibration to ensure TS80 and solder ing tip decrease are cooled to room temperature, and then turn on power for calibration; “Completed” will display after calibration; and “Retry later” will prompt if it fails to meet calibration conditions.Long press “A” key for direct execution4.3.3 Heating operation300℃Short press “A” key in standby mode to enter working mode.300℃If the temperature rises to preset working temperature, you can start soldering, and TS80 will constantly remain in preset working temperature;Note: the number at the top right of the temperature indicates the current working voltage.Long press “B” key to return to standby mode in working mode;10114.3.4 Temperature regulation operationIn working mode, long press “A” key to adjust temperature;300℃The temperature mode is shown in the figure below:Arrows up-heating Arrows down-coolingHorizontal lines - temperaturestabilizn ingLower the temperature: press “A” key;Raise the temperature: press “B” key;250℃350℃250℃350℃ Wait for 5s after setting and then it will return to working mode automatically, the set working temperature will not be saved when power off.100℃400℃Note: When screen displays solid arrow pointing to left or right (◀or▶)i t means the adjustment has already reached its m in/max temperature,settings will not be saved when power off.Remark: Maximum temperature: 400℃.Minimum temperature:100℃.300℃When TS80 reaches your set temperature, it will enter the automatic temperature compensation mode.12134.3.5 Standby modeTS80 will enter sleep mode if it stands for 180s (factory defaults) in working mode and will cool down to temperature(if the temperatureis higher than working temperature, it will keep at preset working temperature) ;sleep sleep and TS80, when moving, will return to working mode autoamtically and will raise the temperature to working temperature (factory setting is 300℃);TS80 will return to standby mode if it stands for 180s (factory defaults) in mode.s leep 200℃300℃4.4 Configuration file1) Connect soldering iron to computer with USB Type-C cable . A virtual disk will appear on computer, and now it enters setting mode;2) Open config.txt file in virtual disk to set parameters.14StbTemp WkTemp SlpTime TempStp OffVolt Temp Hand ZeroP_AdNote: See page to details of parameter definition; Config parameter setting will be updated to TS80 after saved.Temperature Calibration200300180 10100℃~400℃212℉~752℉(Temp =1)100℃~400℃212℉~752℉(Temp =1)60~9999s 1-25100-130 (Unit 0.1V)130000:℃1:℉, 0:RH, 1:LH Automatic adjustment,not modifiableParameter Name Working TemperatureLeft/right Hand mode Temperature Display unit Protection Voltage Temperature Step size Sleep TimeSleep Temperature Parameter Image Factory Defaults Adjustable Range15Soldering Iron Tip55.1 How to replace soldering tip1) Cut off power before replacing the soldering tip;2) Pull out the old soldering tip and then insert the new one;3) Turn on power. If “Sen-Err” appears on TS80 after power is on, it means the soldering tip is not installed securely and therefore shall be installed once again.12°4mm8mm8mmR 0.20TS-D25TS-B025.2 Choosing Soldering Iron TipsNote :Choosing the right tips will help you work more efficiently .5.3 Soldering Tip Maintenance(1) Before switching off, wipe the tip’s soldering side with some solder.(2) Do not leave the tip in high temperature for long time, which may cause it burn out.(3) Do not push too hard while soldering, which will damage the tip.(4) Do not use rough material or files to clean the tip.(5) If the tip surface is oxidized and makes it hard to apply solder on it, you may use600~800grit sandpaper to wipe the tip with Ethanol or Isopropyl alcohol, heatup to 200℃ and apply solder immdeiately to avoid it oxidizing again.(6) Do not use Flux that contains high chlorine or acid, use only resin based flux.16Trouble Shooting Guide6Check 1: If the power supply or cable is brtokenCheck 2: Connect TS80 to computer, see if the computerhas a USB connection or TS80enters DEU modeProblem 2:The temperature status display random numbers Check 1: Means the machine is checking status,which is normalCheck 2: Is the soldering iron installed propely?Check 3: Is the power ca ble in loose or defective contact?Problem 3:Soldering iron restarts automatically Check 1: Is it properly plugged into the power source? Check 2: Is the voltage too low? (need to be set up in the config file)Problem 1: No Display17Problem4: OLED displays“Sen-Err”Check 1:Is the soldering iron installed propely?Check 2:If check 1 passes, then replace the soldering tipProblem 5: The tip doesn’t stick to the solder Check if: 1.Tip temperature is over 400℃2. The soldering side of the tip is not appliedwith solder properlyck of flux during operation4.Rub the tip against dry or high sulfur sponge orfabric5.Tip touched organic material like plastic,siliconeoil or other chemicalsing impure solder or solder that contains lowproportion of tin1819Service 77.2 Changing Boot Up Screen7.1 Standard Service One year of free warranty will be provided, if the damage was not caused by false manipulation by the user. Please contact your seller for warranty details.Tips are consumables products, once it's used, no replacement will be provided.1) Create your own 96*16 pixel image save as BMP in single colorbitmap, file name as “logoin.bmp”;2) Connect TS80 with computer, and enter the virtual disk;3) Copy the bmp file to the root directory of the virtual disk, removethe connection to complete.7.3 Firmware Update1. Visit and download the suitable TS80 firmware to your PC.2. Hold TS80's “A” key, and connect TS80 to your PC with USB Type-C cable, to enterDFU mode. A display of “DFU3.45” will appear on the screen;3. Copy the .hex firmware to the root directory of that disk. When the extension of thefirmware changes from “.hex” to “.rdy”, disconnect USB and the firmware is upgraded.20Legal Statements 8Do not dispose this product with domestic wasteThis device complies with the WEEE Directive (this additional product labelindicates that this electronic product must not be disposed of in household waste). Handling and recycle:Disposal of the product shall be manipulated according to laws and regulations in your area.218.1 Disposal 8.2 Statement of Fulfilling FCC Standard8.3 Statement of Fulfilling CE StandardThis device fulfills part 15 of the FCC regulations Device must fulfill below 2conditions:(1) Device must not generate interference ;(2) Device must be able to resist any interferences on it, including interferences that could cause dangerous manipulation .This product with CE logo on it fulfills related Euro Union laws and regulations .。
富士通笔记本电脑端口复制器用户指南说明书
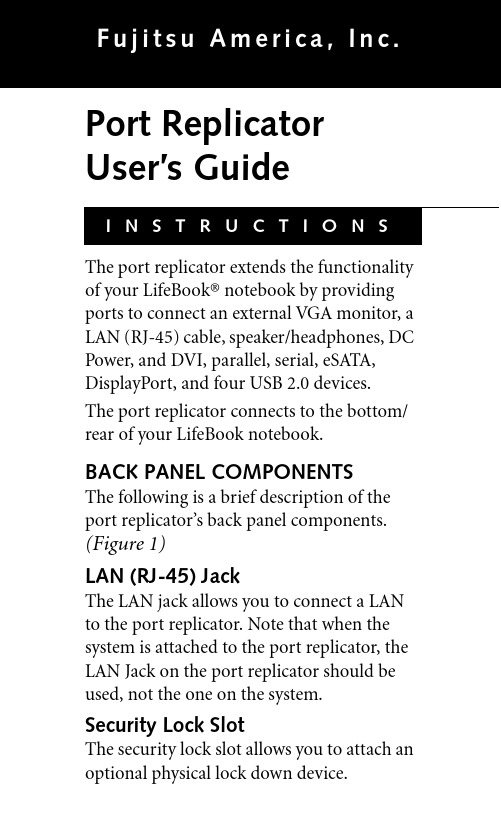
Port Replicator User’s GuideThe port replicator extends the functionality of your LifeBook® notebook by providing ports to connect an external VGA monitor, a LAN (RJ-45) cable, speaker/headphones, DC Power, and DVI, parallel, serial, eSATA, DisplayPort, and four USB 2.0 devices.The port replicator connects to the bottom/ rear of your LifeBook notebook.BACK PANEL COMPONENTSThe following is a brief description of the port replicator’s back panel components. (Figure1)LAN (RJ-45) JackThe LAN jack allows you to connect a LAN to the port replicator. Note that when the system is attached to the port replicator, the LAN Jack on the port replicator should be used, not the one on the system.Security Lock SlotThe security lock slot allows you to attach an optional physical lock down device.Figure 1. Port replicator back panel 23Parallel PortThe parallel port allows you to connect parallel devices.Serial PortThe serial port allows you to connect serial (RS-232C) devices.External Video PortThe external video port allows you to connect an external monitor or display. Note that if a port replicator is attached, you must use the external monitor port on the port replicator.External DVI PortThe external Digital Video Interface (DVI) port allows you to connect an external digital flat-panel monitor or projector, providing a pure digital video signal for digital monitors.DisplayPortThis allows you to attach a DisplayPort cable. DisplayPort cables are primarily used to connect a computer with a monitor or home theater system.AC adapter to power the notebook and charge the internal Lithium ion battery.FRONT PANEL COMPONENTS Following is a description of the port repli-cator’s front panel components. (Figure2) Power On/Off ButtonThe Power On/Off button on the port repli-cator performs the same functions as the system Suspend/Resume button. The Power On/Off button allows you to suspend note-book activity without powering off, resume your notebook from standby mode, and power on your system when it has been shut down from the Windows operating system. Docking PortThe docking port connects the port replicator to your notebook.Security Lock SlotThe security lock slot allows you to attach an optional physical lock down device.4Line Out/Headphone Jack Figure 2. Port replicator front panel56properly on the port replicator.ATTACHING A PORT REPLICATOR The port replicator can be attached on your notebook while the power is on, while in suspend mode, or while the power is off. To attach the port replicator follow these steps:1. Align the port replicator connector on the bottom of the notebook with the connector on top of the port replicator.2. Push the notebook onto the connector to join it with the port replicator securely. CHANGING THE BASE WIDTH This port replicator is designed for specific notebook models with 14” and 15.6”displays. To determine if the port replicator is Do not hold the system by the port replicator. The portreplicator and/or the systemcould be damaged if the port replicator is used as a handle.DETACHING A PORT REPLICATOR The port replicator can be detached from your notebook while the power is on, while in suspend mode, or while the power is off. To detach the port replicator (Figure4):78Figure 4. Detaching the port replicatorFujitsu America, Inc.1250 E. Arques Avenue Sunnyvale, CA 94085 For information, call 1-877-372-3473 or visit our website at /computers For technical support call:1-800-838-5487 Fujitsu, the Fujitsu logo, and LifeBook are regis-tered trademarks of Fujitsu, Ltd. All other trade-marks mentioned herein are the property of their respective owners.© 2010 Fujitsu America, Inc. All rights reserved. B6FY-0051-01EN-00。
80S中文操作手册

操作手册
8 单芯光纤熔接机 0 S
在操作设备前请仔细阅读本操作手册 遵守手册中的所有安全指导和警告 请妥善保管本手册 内容如有变更恕不另行通知 对于从非授权经销商处采购到的商品本公司概不予以负责
版权声明
熔接机内安装的操作软件以及相关文件受版权法,国际条约的相关规定以 及其他知识产权保护法所保护。 复制或部分复制本操作手册而不注明的行为是被禁止的。除非用于个人, 未经本公司的同意禁止侵犯本公司的著作版权。
目录
手动熔接模式...............................................................................................................59 ECF熔接.......................................................................................................................60 熔接设置.......................................................................................................................62 熔接记录.......................................................................................................................63 光纤影像.......................................................................................................................65 熔接记录注释...............................................................................................................66
GDC3000对拷方法

GDC3000对拷方法GDC3000是一种高速数据复制设备,用于在不同存储系统之间进行数据的迁移和复制。
它可以实现数据的对拷,即从一个存储设备向另一个存储设备复制数据,可以在同一数据中心的不同存储系统之间、跨数据中心之间进行数据复制。
第一步是配置设备。
首先需要连接GDC3000设备和源存储设备、目标存储设备。
确保设备之间的连接稳定可靠。
然后,需要在GDC3000设备上安装合适的操作系统、驱动程序和管理软件,以便进行配置和管理。
第三步是启动任务。
在GDC3000设备上,通过启动复制任务来启动数据的对拷过程。
启动任务后,GDC3000设备会自动从源存储设备读取数据,并将数据写入目标存储设备。
对于大容量数据的复制,可以选择分批次复制,以充分利用网络带宽和存储系统的性能。
第四步是监控任务进度。
在对拷过程中,可以通过GDC3000设备提供的管理界面来监控任务的进度。
可以查看复制的速度、传输的数据量以及剩余的时间等信息。
此外,还可以监控复制过程中的错误和异常情况,及时采取措施进行修复。
第五步是结果验证。
在数据对拷完成后,需要验证复制的数据是否完整、一致和可用。
可以通过校验和、数据对比等方法来验证数据的完整性和一致性。
同时,还可以通过在目标存储设备上进行数据访问和测试,验证数据的可用性。
总结起来,GDC3000的对拷方法包括配置设备、创建复制任务、启动任务、监控进度和结果验证。
通过这些步骤,可以实现高速、可靠和可控的数据复制。
在实际应用中,根据具体的需求和环境,还可以进行参数调优、故障恢复和性能优化等工作,以提高数据复制的效率和可靠性。
双排键电子琴EL-900m的磁盘复制拷贝

双排键电子琴EL-900m的磁盘复制拷贝
双排键电子琴EL-900M的磁盘复制操作非常简单,只需
要按照以下步骤进行即可。
首先,将原盘插入磁盘驱动器中,并同时按下数据控制右下角的按键和音乐磁盘录音机录音单元中的LOWER按键。
接着,按下数据控制对应[复制]的按钮,
开始复制操作。
复制操作在进行到50%的时候结束。
最后,
从磁盘驱动器中弹出原盘即可完成磁盘复制功能。
双排键电子琴是一种起源于管风琴的乐器,它有三个键盘,即用手弹奏的上下键盘以及用脚演奏的踏板键盘三段键盘。
右手用上键盘弹奏旋律,左手用下键盘进行伴奏,用踏板键盘控制节奏,这样一个音乐要素的分工。
EL900M金标版双排键电
子琴是YAMAHA EL系列里最高型号,在整体操作及音响效
果都比普通升级版的EL900M双排键电子琴要优秀很多。
它
目前是音乐会演奏、教学、双排键大赛等使用较多的一款。
双排键电子琴的起源可以追溯到1959年,当时日本生产
了第一台立式双排键电子琴。
而我们现在常见并熟悉的双排键电子琴是XXX于1991年之后生产的EL系列。
日本是双排键
电子琴的主产国,而中国主要的双排键电子琴厂家是XXX生产的RS系列。
磁盘复制是指将一张磁盘(原盘)里的内容复制到另一张磁盘(目标盘)里。
EL900M双排键电子琴的磁盘复制操作非常简单,只需要按照上述步骤进行即可。
GDC3000对拷方法

GDC3000对拷方法GDC3000是一种常用的数据传输工具,用于实现大容量数据的快速拷贝。
它可以将数据从一个设备快速而可靠地复制到另一个设备,支持高速率的传输,适用于各种拷贝场景。
下面将详细介绍GDC3000的工作原理和使用方法。
GDC3000的工作原理基于并行传输和数据压缩技术。
它通过多个数据通道同时传输数据,有效提高了数据传输速度。
此外,它还采用了数据压缩技术,可以在传输过程中对数据进行压缩,从而减小传输的数据量,进一步提高传输效率。
1.连接设备:首先,需要将源设备和目标设备通过数据线连接起来。
确保连接的稳定和可靠,以免在传输过程中发生连接问题。
2.配置参数:在正式进行拷贝操作之前,需要对GDC3000进行参数配置。
包括源设备路径、目标设备路径、传输速率等参数设置。
这些参数的配置要根据具体的拷贝需求进行确定。
3.启动拷贝:配置完成后,可以启动拷贝操作。
GDC3000会自动对数据进行压缩和并行传输。
用户可以根据需要选择全量拷贝或增量拷贝。
全量拷贝是指将源设备上的所有数据都拷贝到目标设备上,增量拷贝是指只拷贝源设备上变化的部分数据。
4.监控传输进度:在拷贝操作进行中,可以通过监控界面查看传输进度。
传输进度包括已传输数据量、剩余传输时间等信息。
监控界面还提供了传输日志、错误日志等详细信息,用户可以根据需要进行查看。
5.完成拷贝:拷贝操作完成后,可以进行校验。
校验的目的是确保目标设备上的数据与源设备上完全一致。
可以通过对比源设备和目标设备上的数据,计算校验和进行比对。
如果校验结果一致,则说明拷贝操作成功。
1.高速传输:GDC3000支持高速率的数据传输,可以实现快速的拷贝操作。
并行传输和数据压缩技术的应用,极大地提高了数据传输效率。
2.可靠性强:GDC3000在传输过程中会进行数据校验和错误检测,确保数据的完整性和准确性。
如果发生错误,会及时进行错误提示,方便用户进行处理。
3.灵活性高:GDC3000支持不同设备之间的数据拷贝,可以用于备份数据、迁移数据等多种场景。
SCSI接口知识介绍

SCSI接口的EIDE接口相比还有一个很大的技术优势,那就是SCS I接口中的设备可以同时使用数据总线进行数据传输,而EIDE接口中联接在同一条数据线上的设备只能交替(占用数据线)进行传输;EIDE只能联接四块设备,而SCSI接口可以联接7~15台设备,目前SCSI 硬盘接口有3种,分别是50针、68针、80针。
我们常见到硬盘型号上标有"N"、"W"和"SCA" ,就是表示接口的针数。
N即窄口(Narrow),50针;W即宽口(Wide),68针;SCA即单接头(Single Conner Attach ment),80针,其中80针的SCSI硬盘一般支持热插拔。
传统的IDE硬盘已经成为整个系统中最为明显的瓶颈,为了改善磁盘性能,很多DIY孜孜不倦地努力,然而效果往往难以令人满意。
事实上,高端工作站以及服务器几乎无一例外地使用SC SI硬盘,其好处也是不言而喻的。
在二级市场中,SCSI硬盘并不少见,而且也不乏高档货。
不顾在选购S CSI硬盘时必须具备一些相关的知识,不然肯定找不到方向一、SCSI硬盘的好处硬盘转速是决定传输性能的一个关键因素。
当主流IDE硬盘的转速在5400rpm时,SCSI 硬盘的转速就已经达到7200rpm,而现在IDE硬盘转速提高到7200rpm时,SCSI硬盘的转速早已高达15000rpm了。
高转速意味着硬盘的平均寻道时间短,能够迅速找到需要的磁道和扇区,所以在转速上IDE硬盘已经同SC SI硬盘无法相提并论了。
然而需要注意的是,SCSI硬盘的最大优势并不是转速,而且SCSI接口本身的一些特性。
比较SCSI硬盘和ID E 硬盘的C PU占用率,可以发现SC SI硬盘具有相当的优势。
- 1、下载文档前请自行甄别文档内容的完整性,平台不提供额外的编辑、内容补充、找答案等附加服务。
- 2、"仅部分预览"的文档,不可在线预览部分如存在完整性等问题,可反馈申请退款(可完整预览的文档不适用该条件!)。
- 3、如文档侵犯您的权益,请联系客服反馈,我们会尽快为您处理(人工客服工作时间:9:00-18:30)。
你的时间80%都用错了
哈佛商学院广受好评的时间管理课
用对时间做对事,让碎片时间变成黄金时间,做暗时间的主人,让你的效能翻倍提高!
如果你想成功,第一是要有时间观念,第二是要学会使用时间,第三是不要拖延时间。
第一章别让自己忙在碌碌无为上
分清事情的轻重缓急,不管你有多少工作要做,都要保持清醒和冷静,从容不迫地做好你的时间规划,把事情分为重要,紧急,非重要,普通等级别,然后按部就班,有条不紊地完成。
如果紧急的工作太多,一定要预留时间给重要的工作任务。
记住,珍惜时间,从时间管理开始。
1、很多人的忙碌只换来疲惫,时间管理理论,以轻重为横坐标,以缓急为纵坐标,把事务放在坐标系四类,1、紧急有重要如处理危机、客户投诉、即将到期的任务,应付难缠的客户,准时完成工作;
2、重要但不紧急如建立人际关系、新的机会、参加培训、人员培训、制定防范措施、长期工作规划,问题的发现和预防,向上级提出处理问题的建议;
3、紧急但不重要如电话铃声、不速之客、行政检查、主管部门会议;
4、既不紧急也不重要如客套的闲谈、无聊的信件、个人
的爱好、上网冲浪、看肥皂剧。
周计划和周检讨是最有效、最重要的时间管理手段。
2、不忙碌,朝着目标前行才会有收获,别浪费时间在对成功无益的事情上,重新审视你的生活价值,专心地做好目前最应做好的事情,每天为思考留一些时间,比尔盖茨回答成功的主要经验是“一是勤奋工作,二是刻苦思考。
”爱因斯坦说的好:“要善于思考、思考、再思考,我就是靠这个学习方法成为科学家的”。
无论如何,每天都要抽出一点时间,思考一下自己的前途,思考一下自己选择的路是否正确,思考一下自己到底想要什么样的生活。
第二部分五个核心秘诀,让时间变成效能。
根据自身条件设定目标,人们应当设立通过努力可以达到的目标,目标一旦确定,不要轻易改动,成功秘密在于坚定不移地去追求一个目标。
事前做好计划,事中才能顺利,给实现目标一个明确、合理的“死期”,确定最迟的动工日期,倒推法:列出“死期”之前每个阶段要做的事,实际行动—更小的目标—小目标—大目标。
根据事物来整合资源,提高效率。
谨防“墨菲定律”,时间预算要切合实际,给无法完全掌控的事一些预留时间,理解和运用60/40法则(人生难题解决方案),就是把事情分成两部分,把60%放在重要的
部分,剩下的40%放在另外部分。
第三部分做好分配,事物再多,也不会抓狂。
避免对所有事情“同等对待”,分清轻重缓急,不为小事转移目标,把所有活动分为三个等级ABC,A特别重要的,必须在短期内完成的任务,非常有助于达到目标的,即为最重要的事务,如管理性指导,重要的客户约见,重要的期限临近,能带来领先优势或成功的机会;B比较重要的,C不重要的,处理要看二八原则,日常待办事项分为今天必须做的,今天应该做的,今天可以做的。
第四部分保持自律 ---别让时间白白浪费掉
培养紧急意识,加快工作节奏,用简单易懂的语言来沟通,少用长句子,尽量使用简短的句子,多用肯定句,尽量不用或少用否定句,尽量使用主动语态,不用被动语态,只有简单才是硬道理。
避免无意义的闲聊和空谈,与人交谈,控制好谈话的环境和进程,收住好奇心,别被无关的人或事所干扰,学会对人说不,学会整理东西,避免浪费时间,别让顾虑浪费时间,不要浪费时间去证明自己,扔掉最浪费时间的句型“如果……结果就不是这样”。
第五部分克服拖延 ---提高自控力是关键
所有的急事都是拖延造成的,我们必须在开始每一项
任务之前,先规定好最后的完成期限,果断的做出决定,不言拖延,不要沉迷于幻想中,要去做,别把明挂在嘴上,不要总是为不做找借口,认为耽搁一点时间不要紧,其实很愚蠢,强迫自己去做已经被一拖再拖的事情。
第六章化零为整----向零碎的时间要效益
学习微视,以分钟来衡量时间,时间共享,在同一种时间内做多种事情,学会管理好起床、洗漱、着装这些小事,早餐时间可以用来了解新闻,路上和等待时间,用好了会很有收获,睡眠前时间利用起来足以改变命运,即便在睡眠中也可以思考问题,
第七章 ---职场人士,用对时间做对事
拥有良好的精力,从计划开始,保持紧迫状态,时刻绷紧神经,统观全局,盯面而非点,全是重点等于没重点,紧急和重要哪个优先,动用脑图,有条理的工作,经常敦促自己,没有任何借口,学会专注,一次做好一件事,有些事情可以并行完成,善用每日备忘录。
第八章管理者-----用时间打造高绩效团队
最求效益,赚的更多是硬道理,不能忽视资金的时间价值,以最小投入,获得最大产出,成本管理,让每一分钟都创造价值,深思熟虑,勾画出未来蓝图。
激
励,可以极大地调动员工的积极性,不做最优秀,只做最合适,对唯唯诺诺的员工说不,提高预测力,看清市场走向。
第九章销售人员快速拿到商业订单
进行顾客调查,一切向市场看齐,确认你的目标,营销计划的核心是准确定位,运用ABC法将你的客户分类对待,找一个最有利营销成功的时间,积极回应客户的抱怨与牢骚。
第十章送给学生朋友,好规划带来好成绩
学习同样需要善于规划,为下一周制定详细的学习计划,调好生物钟,找准自己的精力时段,统筹规划作息时间,为次日做好详细安排,学习中也应休息和适当娱乐,这样才科学,准时起床,养成良好习惯,决战早晨,把握一日之际,提前预习功课,提高课堂效率,遵循记忆规律,高效复习,遗忘第二天最快,3、4次之,先快后慢,第二天15分钟复习,3天10分钟复习,4天5分钟复习,最后,记得整理好你的东西和房间。