Xilinx FPGA PCIE Linux驱动程序
如何在Linux系统中安装驱动程序

如何在Linux系统中安装驱动程序Linux系统作为一个开源的操作系统,广泛应用于各种设备和领域。
而安装驱动程序是在Linux系统中使用外部硬件设备的关键步骤之一。
在本文中,我们将学习如何在Linux系统中安装驱动程序的方法和步骤。
1. 检查硬件设备在安装驱动程序之前,首先需要确定硬件设备的型号和制造商。
可以通过查询设备的型号或者查看设备的相关文档来获取这些信息。
这是非常重要的,因为不同的设备可能需要不同的驱动程序来正确地工作。
2. 更新系统在安装驱动程序之前,确保你的Linux系统已经是最新的状态。
可以通过在终端中运行以下命令来更新系统:```sudo apt-get updatesudo apt-get upgrade```更新系统可以确保你拥有最新的软件包和驱动程序,以获得更好的兼容性和性能。
3. 查找合适的驱动程序一般来说,大部分硬件设备的驱动程序都可以在Linux系统的软件仓库中找到。
可以通过使用包管理器(如apt、yum等)来查找并安装合适的驱动程序。
运行以下命令来搜索并安装特定的驱动程序:```sudo apt-cache search 驱动程序名称sudo apt-get install 驱动程序名称```注意替换“驱动程序名称”为具体的驱动程序名称。
安装驱动程序可能需要输入管理员密码和确认安装。
如果你无法在软件仓库中找到合适的驱动程序,可以转向设备的制造商网站或者开源社区来获取。
下载驱动程序后,根据驱动程序提供的文档和说明来安装。
4. 编译和安装驱动程序有些驱动程序可能需要手动编译和安装。
在这种情况下,你需要确保你的系统已经安装了编译工具(如GCC、make等)。
在终端中切换到驱动程序所在的目录,并按照以下步骤进行编译和安装:```./configuremakesudo make install```以上命令将分别进行配置、编译和安装驱动程序。
在进行安装之前,可能需要输入一些配置选项或者确认安装。
基于Xilinx FPGA的PCIE接口实现

4. 3 FPGA设计选用Xilinx公司的ISE软件并采用Verilog硬件描述语言可对该IP核进行行为级描述和逻辑综合,同时可将生成的网表文件设计实现,包括逻辑综合及布局布线。具体设计过程中,需要先加载P IPE Core,这要求ISE为8. 1 以上版本,同时要取得IPCore的使用授权。
在发送过程中,来自P IPE接口的8位数据通过一个8位/10位编码算法进行编码。8 位/10 位编码确保串行数据被直流平衡以避免交流耦合系统中的基带漂移,它同时确保足够的数据转换以避免接收端的时钟恢复。
PX1011A的MAC接口采用独立的时钟,由片内100MHz的基准时钟的锁相环来产生。锁相环有一个相对较高的带宽来实现可选的扩频并减少EM I。8bit 数据接口在250MHz 上运行并进行SSTL2信号发送,这种模式与流行的FPGA I/O接口兼容。
接口上数据采用SSTL2信号发送,传送速率达到250MB / s。每组数据发送端需串行一个25欧姆电阻,数据接收端上拉50欧姆电阻,提高信号的阻抗匹配。TD和RX每组为8位250MB / s信号,为了减少信号间的延时误差,每组信号布线时尽量等长。
4 P IPE Core实现PC IE总线协议4. 1 Xilinx PC I Exp ress P IPE CoreXilinx PCI Exp ress P IPE Core符合PC I Exp ress Base Specification v1. 1 规范的协议和电特性兼容,提供完整的端点解决方案,包括物理链接与处理和配置管理模块。支持同步点对点通信,上行和下行流程控制,与PCI Exp ress处理排序规则完全兼容。有效的链接带宽利用率,误差检测和恢复。支持最大为512字节的有效负载,经过Xilinx专有的测试平台验证的设计,通过PC I - SIG的认证大会( com2p liance workshop) 。
一、如何编写LinuxPCI驱动程序
⼀、如何编写LinuxPCI驱动程序PCI的世界是⼴阔的,充满了(⼤部分令⼈不快的)惊喜。
由于每个CPU体系结构实现不同的芯⽚集,并且PCI设备有不同的需求(“特性”),因此Linux内核中的PCI⽀持并不像⼈们希望的那么简单。
这篇简短的⽂章介绍⽤于PCI设备驱动程序的Linux APIs。
1.1 PCI驱动程序结构PCI驱动程序通过pci_register_driver()在系统中"发现"PCI设备。
事实上,恰恰相反。
当PCI通⽤代码发现⼀个新设备时,具有匹配“描述”的驱动程序将被通知。
详情如下。
pci_register_driver()将设备的⼤部分探测留给PCI层,并⽀持在线插⼊/删除设备[因此在单个驱动程序中⽀持热插拔PCI、CardBus和Express-Card]。
pci_register_driver()调⽤需要传⼊⼀个函数指针表,从⽽指⽰驱动程序的更⾼⼀级结构体。
⼀旦驱动程序知道了⼀个PCI设备并获得了所有权,驱动程序通常需要执⾏以下初始化:启⽤设备请求MMIO / IOP资源设置DMA掩码⼤⼩(⽤于⼀致性DMA和流式DMA)分配和初始化共享控制数据(pci_allocate_coherent())访问设备配置空间(如果需要)注册IRQ处理程序(request_irq())初始化non-PCI(即LAN/SCSI/等芯⽚部分)启⽤DMA /处理引擎当使⽤设备完成时,可能需要卸载模块,驱动程序需要采取以下步骤:禁⽌设备产⽣irq释放IRQ (free_irq())停⽌所有DMA活动释放DMA缓冲区(包括流式DMA和⼀致性DMA)从其他⼦系统注销(例如scsi或netdev)释放MMIO / IOP资源禁⽤该设备下⾯⼏节将介绍这些主题中的⼤部分。
其余部分请查看LDD3或<linux/pci.h>。
如果PCI⼦系统没有配置(没有设置CONFIG_PCI),下⾯描述的⼤多数PCI函数都被定义为内联函数,要么完全空,要么只是返回⼀个适当的错误代码,以避免在驱动程序中出现⼤量ifdefs。
Ubuntu下安装黑金xilinx下载器驱动的方法
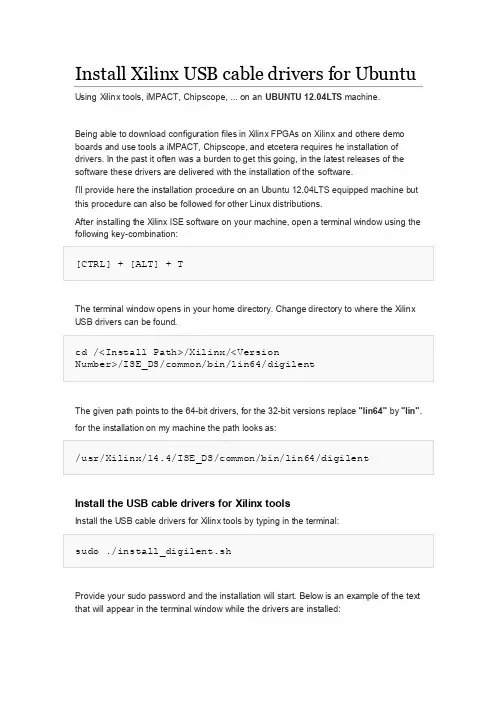
Install Xilinx USB cable drivers for Ubuntu Using Xilinx tools, iMPACT, Chipscope, ... on an UBUNTU 12.04LTS machine.Being able to download configuration files in Xilinx FPGAs on Xilinx and othere demo boards and use tools a iMPACT, Chipscope, and etcetera requires he installation of drivers. In the past it often was a burden to get this going, in the latest releases of the software these drivers are delivered with the installation of the software.I'll provide here the installation procedure on an Ubuntu 12.04LTS equipped machine but this procedure can also be followed for other Linux distributions.After installing the Xilinx ISE software on your machine, open a terminal window using the following key-combination:The terminal window opens in your home directory. Change directory to where the Xilinx USB drivers can be found.The given path points to the 64-bit drivers, for the 32-bit versions replace "lin64" by "lin".for the installation on my machine the path looks as:Install the USB cable drivers for Xilinx toolsInstall the USB cable drivers for Xilinx tools by typing in the terminal:Provide your sudo password and the installation will start. Below is an example of the text that will appear in the terminal window while the drivers are installed:It is possible to specify a directory path here for the installation of the drivers, but normally you can just accept the default given path.The terminal screen will show a whole list of this kind of messages while all .so files are installed or installation is skipped because the libraries are already available.The libraries are installed and the question is asked where to install the binaries of the Xilinx USB cable drivers. Provide a path or accept the default given path by just hitting the enter/return key.Remark:The paths shown in the terminal text examples are those where the drivers are installed on my machine, it is possible that the install paths/locations are different for your machine and/or Linux distribution.The binaries are installed and now the question is asked where to install the data files. Provide a pth or accept the given default by hitting enter/return.Question asked by the installation flow where to install the runtime configuration file. As for may programs the default given path is /etc but hen wanted this can be anywere else by specifying a custom path.Xilinx and Digilent boards use a FTDI USB/RS232 device for communication and downloading of configuration files in the FPGA(s) on teh development / demo boards. The installation program checks if FTDI drivers are already available on the machine and if not installs them. Ubuntu is default equiped with Silabs USB/RS232 drivers, so the FTDI drivers will be installed. It is again possible to specify a location for these drivers. I've let the install tool use the default given location but maybe one wants to install drivers elsewhere, possibly were the Silabs drivers are installed.Voila, installation done and ready to be tested. Connect a development board via a USB cable to your PC and start a tool like iMPACT or Chipscope.Example for iMPACTStart iMPACT via the menu, if you installed the menu system as described in another article on this web page or start iMPACT from the command line.Source the right Xilinx settings file:Where <Install Path> is the directory path where the Xilinx tools are installed, <Version Number> is the version of the Xilinx ISE software installed on your machine, NN = 32 or 64 bit machine and FFF = csh or sh shell used. Then type:The iMPACT GUI will start and when it asks to automatically detect the JTAG chain, respond with yes. WHen the drivers are correctly installed the JTAG chain of components on the used development board will be displayed with icons on the iMPACT canvas.。
xilinx驱动方案

xilinx驱动方案Xilinx是一家全球领先的可编程逻辑器件(FPGA)和深度学习处理器(ACAP)供应商。
作为一家创新型的半导体公司,Xilinx致力于为客户提供高性能、低功耗和高适应性的解决方案。
在这篇文章中,我们将探讨Xilinx的驱动方案以及其在不同领域的应用。
一、什么是Xilinx驱动方案Xilinx驱动方案是基于Xilinx平台的硬件和软件集成开发环境,为开发人员提供丰富的工具和资源,以便设计、构建和部署高性能的应用解决方案。
这些方案主要包括:1. Vivado开发套件:Vivado是一套完整的设计环境,支持FPGA的设计、仿真和综合。
它提供了直观而强大的界面,使设计人员能够快速创建和调试复杂的电路。
2. PetaLinux嵌入式开发套件:PetaLinux是一个基于Linux的嵌入式开发工具,专为基于Xilinx器件的嵌入式系统设计而开发。
它提供了完整的Linux源码、驱动程序和工具链,方便开发人员进行软件开发和系统集成。
3. SDSoC开发环境:SDSoC是一个面向系统设计者的开发环境,可以将C/C++代码转化为高性能的硬件加速器。
它通过自动化的编译和优化过程,使开发人员能够更轻松地使用FPGA来加速应用程序的运行。
4. SDAccel开发环境:SDAccel是一个面向开发者的加速应用程序开发环境,结合了软件编程模型和硬件加速技术。
它支持OpenCL编程模型,使开发人员能够使用高级语言进行开发,并在FPGA上实现高性能计算加速。
二、Xilinx驱动方案的应用Xilinx驱动方案广泛应用于各个领域,下面将介绍其中几个典型的应用案例:1. 通信与网络:Xilinx驱动方案在通信与网络领域中发挥着重要的作用。
例如,在5G通信中,Xilinx的FPGA可以通过高速数据传输和实时处理来提供更高的带宽和低延迟。
此外,Xilinx还提供了各种网络接口协议的IP核,如Ethernet、PCIe等,用于实现高性能的数据传输。
xilinxxdmapcie原理
xilinxxdmapcie原理PCIE是一种高速串行总线标准,用于连接计算机内部的各种硬件设备,如显卡、网卡和存储控制器等。
Xilinx XDMA通过PCIe接口连接到主机系统,利用DMA引擎直接访问系统内存以及外部设备的寄存器。
DMA 是一种不需要CPU参与的数据传输方式,可以大大减少CPU的负载。
Xilinx XDMA PCIE的架构基于FPGA(Field-Programmable Gate Array),可以根据用户的需求进行定制。
XDMA PCIE引擎在FPGA中包含一个或多个DMA通道,每个DMA通道可以进行高速的数据传输。
它们可以同时进行读取和写入操作,并支持多个无关的数据传输流。
DMA通道内部有多个功能模块,包括PCIe接口模块、DMA控制器、存储控制器以及数据转换模块等。
PCIe接口模块用于与主机系统的PCIe接口进行通信,包括配置寄存器的读写操作和中断处理等。
DMA控制器负责控制数据传输的流程,包括启动、停止和暂停等。
存储控制器用于管理数据的缓冲区,可以对应用程序提供高效的数据传输接口。
数据转换模块可选,用于实现数据格式的转换和处理,例如数据压缩和解压缩。
Xilinx XDMA PCIE引擎通过提供一组API和驱动程序,为用户应用程序提供了简化的接口。
用户可以通过这些接口配置和控制DMA通道,进行数据传输操作。
用户应用程序可以通过调用API函数来启动数据传输、获取已完成传输的状态以及处理错误情况。
驱动程序负责管理DMA通道的资源分配和释放,以及中断的处理。
Xilinx XDMA PCIE引擎的特点包括高性能、低延迟和灵活性。
它可以通过并行化和流水线化等技术来实现高效的数据传输。
Xilinx XDMA PCIE支持DMA传输的故障保护和恢复机制,可以处理传输过程中出现的错误。
此外,Xilinx XDMA PCIE还支持AXI(Advanced eXtensible Interface)和AMBA(Advanced Microcontroller Bus Architecture)等接口标准,以方便与其他硬件设备的集成。
linux设备驱动之pci设备的IO和内存
linux设备驱动之pci设备的I/O和内存------------------------------------------Pci设备的I/O和内存是一个比较复杂的问题.如下的总线结构:在上图的总线结构中,ethernet设备和pci-pci bridge的同类型资源空间必须要是pci bus0的一个子集例如,pci bus 0的I/O端口资源是0x00CC~0x01CC. Ethernet设备的I/O范围的是0x00CC~0x0xE0.那么pci-pci bridge的I/O端口范围就必须要在0x0xE0~0x01CC之间. 同样,SCSI和VIDEO同类型资源必须要是pci_bus1的子集.pci bus1上有一个pci桥,对应的资源也就是它所连桥上的资源.即pci_bus->self.也就是说,下层总线的资源是它上层总线资源的子集。
上层总线资源是下层总线资源的父集。
其实,每个PCI设备的资源地始地址都是由操作系统设置的.在x86上,都由bios设置好了.假若没有bios的时候,我们应该怎么去设置设备的资源起始范围呢?可能在pci枚举完成之后:1:从根总线开始,设置根总线的资源范围是从0开始,到0xFFFF或者0xFFFFFFFF的最大范围. 2:对其它的设备,可往其资源寄存器全部写入1,就可以求得该资源项的类型和长度.3:设备从根总线的资源那里分得对应长度的资源.4:如果设备是pci-pci bridge,则递归配置它.可能有人会有这样迷惑,对应于上图,如果pci-pci bridge的资源大小是N.而SCSI和video资源范围超过了N怎么办呢?我们必须要注意一点,总线的区间是可以自已设定的,而设备资源的区间是在设计的时候就已经确定好了.也就是说,我们可以更改pci device区间的起始地址,但我们不能改变它的大小.因此,出现了上面所说的这种情况.可能是由bios在处理PCI的时候出现了BUG.我们需要调整总线的资源区间.其实对于pci_bus的资源范围就是它的过滤窗口.对于过滤窗口的作用,我们在枚举的时候分析的很清楚了.CPU访问PC过程是这样的(只有一个根总线和pci-pci bridge过滤窗口功能打开的情况): 1:cpu向pci发出一个I/O请求.首先经过根总线.它会判断是否在它的资源范围内.如果在它的范围,它就会丢向总线所在的每一个设备.包括pci bridge. 如果没有在根总线的资源范围,则不会处理这个请求.2:如果pci设备判断该地址属于它的资源范围,则处理后发出应答4:pci bridge接收到这个请求,它会判断I/O地址是否在它的资源范围内.如果在它的范围,它会把它丢到它的下层子线.5:下层总线经过经过相同的处理后,就会找到这个PCI设备了一个PCI设备访问其它PCI设备或者其它外设的过程:1:首先这个PCI发出一个请求,这个请求会在总线上广播2:如果要请求的设备是在同级总线,就会产生应答3:请求的设备不是在同层总线,就会进行pci bridge.pci桥判断该请求不在它的范围内(目的地不是它下层的设备),就会将它丢向上层.4:这样辗转之后,就能找到对应的设备了经过这样的分析过来,相信对pci bridge的过滤窗口有更深的理解了.Linux中使用struct resource的结构来表示I/O端口或者是设备内存。
FPGAxilinx开发环境Vivado介绍
FPGAxilinx开发环境Vivado介绍Zynq7000中PS和PL进⾏协同⼯作,其性能架构需要更好的开发⼯具和⼿段。
为提⾼设计效率,简化设计流程,Xilinx推出了以知识产权((Intellectual Property,IP)和系统为中⼼的Vivado设计套件[25-27]。
该套件包括硬件平台设计和开发⼯具Vivado IDE(Vivado Itegrated Development),嵌⼊式开发⼯具Xilinx SDK(Software Development Kit)以及⾼层次综合Vivado HLS(High-Level Synthesis)。
为更好的理解基于Zynq7000的软硬件协同设计流程,⾸先对上述开发⼯具进⾏介绍:(1)Vivado IDE:Vivado IDE将寄存器传输级(Register-Transfer Level,RTL)的电路设计和基于IP核的系统级设计集成在⼀个设计环境中,并且提供了IP集成器和IP封装器等⾼效的设计⼯具,⽤户可以直接调⽤套件提供的IP核,也可以根据⾃⾝需求编写RTL代码,利⽤IP封装器封装后直接例化使⽤。
为⽅便⽤户设计,Vivado IDE⽀持MicroBlaze软处理器的总线接⼝和IP端⼝⾃动连接,编译综合后可直接⽣成PS配置⽂件和PL⽐特流⽂件。
(2)Xilinx SDK:SDK是基于Eclipse平台开发的软件设计⼯具,⽀持Zynq7000系列器件。
SDK⽀持C或C++语⾔,为所有IP核提供驱动程序。
并且SDK内部配备各种软件调试⼯具,⽀持断点设置、单步调试以及内存监控等功能,可以与Vivado IDE内部的集成逻辑分析仪(Integrated Logic Analyzer,ILA)协同调试,提⾼了软硬件协同处理系统的设计效率。
(3)Vivado HLS:Vivado HLS是⼀种算法级的设计⼯具,⽀持C或C++等⾼级编程语⾔。
该⼯具可将实现算法的⾼级编程语⾔转化为RTL 级硬件电路。
linux中pcie设备初始化流程
linux中pcie设备初始化流程PCIe(Peripheral Component Interconnect Express)是一种高速串行总线接口,用于连接计算机主板和外部设备。
在Linux系统中,PCIe设备的初始化是一个重要的过程,它确保设备能够正常工作并与系统进行通信。
本文将介绍Linux中PCIe设备初始化的流程。
1. 设备检测与识别在Linux系统启动时,内核会进行设备检测与识别的过程。
对于PCIe设备,内核会扫描PCIe总线,识别连接在总线上的设备。
这个过程是通过读取PCIe设备的配置空间来完成的。
配置空间是一块特殊的内存区域,包含了设备的各种信息,如设备ID、厂商ID、设备类别等。
2. 分配资源一旦设备被识别,内核会为其分配必要的资源,如内存空间、中断线等。
这些资源的分配是通过解析设备的配置空间来完成的。
内核会根据设备的需求和系统的可用资源进行分配,以确保设备能够正常工作。
3. 驱动加载设备的驱动程序是用来控制和管理设备的软件模块。
在Linux系统中,驱动程序是以内核模块的形式存在的。
一旦设备被识别并分配了资源,内核会加载与之对应的驱动程序。
驱动程序会与设备进行通信,配置设备的寄存器、中断等,并提供相应的接口供用户空间程序使用。
4. 设备初始化设备初始化是指对设备进行一系列的配置和初始化操作,以使其能够正常工作。
设备初始化的具体过程是由设备的驱动程序来完成的。
驱动程序会根据设备的特性和需求,对设备进行相应的配置和初始化。
这包括设置设备的工作模式、参数、中断处理等。
5. 设备注册设备注册是将设备与系统进行关联的过程。
在Linux系统中,设备注册是通过设备模型来完成的。
设备模型是一种用于描述和管理设备的框架,它提供了一套标准的接口和方法,用于设备的注册、管理和访问。
设备注册的过程包括将设备添加到设备模型中,并分配设备号等。
6. 设备启动设备启动是指设备开始正常工作的过程。
在Linux系统中,设备启动是由设备的驱动程序来完成的。
linux系统下安装显卡驱动程序
前言:当用户执行下列操作有不能执行的时候或许是权限不够。
遇到这个问题可以用命令:[ilykty@bogon ~] su root #切换到root用户password : 输入root密码[root@localhost ~] chmod 777 文件名赋予文件最大权限。
linux 安装显卡驱动程序:1、百度输入nvidia or amd 找到官网2、在官网中找到显卡驱动程序(包括显卡型号、操作系统位数)如下图3、点击搜索、进入下载页面。
但是有时候会出现网页。
可能因为31M太大,网页会出现未能响应的情况。
所以在点前一个按钮的时候可以选择右键。
使用迅雷下载连接4、复制下载包到linux 目录下面。
可以用u盘考,推荐使用winSCP 工具。
这个在windows和linux系统直接传送文件还是很好用的。
当然还有好用的远程执行linux 命令的工具——putty(1-4步是在windows系统下完成的)5、linux下切换到命令行页面:init 36、执行安装命令[root@localhost ~] sh NVIDIA-Linux-x86-,系统弹出安装页面如果出现错误报警如:unable to find the development tool 'cc' in your path 需要安装GCC 。
错误原因是我这里没有安装gcc 编译器。
如果没有报错请跳过番外篇1和番外篇2番外篇1:关于gcc编译器gcc 是什么呢?我的理解是一个编译器。
来运行nvidia 编写的显卡驱动程序。
后来我在安装配置tomcat6服务的时候,我发现如果没有安装gcc也不能执行/etc/init.d/tomcat6的文件。
关于怎么安装tomcat6并配置成开机启动的服务我将在下一篇百度文库中介绍。
---------------------------------------------------------------------------------------------在debian系统中有这样的解决方法:一、下载NVIDIA-Linux-x86-二、sh NVIDIA-Linux-x86-1、报错:没安装binutils,apt-get intall binutils2、报错:No precompiled kernel interface was found to match your kernel..apt-get install3、上一步安装后仍然报错,继续往下走:unable to find the development tool 'cc' in your path;please make sure that you have the package 'gcc' installed.If gcc is installed on your system,then please check that 'cc' is in your PATH.apt-get install gcc4、unable to find the development tool 'make' in your path……apt-get install make5、继续:The compiler used to compile the kernel (gcc 4.1) does not exactly match thecurrent compiler (gcc 4.2). The Linux 2.6 kernel module loader rejects kernel modules built with a version of gcc that does not exactly match that of the compiler used to build the running kernel.---------------------------------------------------------------------------------------------------------------------但是我的并不是德班的系统。
- 1、下载文档前请自行甄别文档内容的完整性,平台不提供额外的编辑、内容补充、找答案等附加服务。
- 2、"仅部分预览"的文档,不可在线预览部分如存在完整性等问题,可反馈申请退款(可完整预览的文档不适用该条件!)。
- 3、如文档侵犯您的权益,请联系客服反馈,我们会尽快为您处理(人工客服工作时间:9:00-18:30)。
// (c) Copyright 2009 聳2009 Xilinx, Inc. All rights reserved.//// This file contains confidential and proprietary information// of Xilinx, Inc. and is protected under U.S. and// international copyright and other intellectual property// laws.//// DISCLAIMER// This disclaimer is not a license and does not grant any// rights to the materials distributed herewith. Except as// otherwise provided in a valid license issued to you by// Xilinx, and to the maximum extent permitted by applicable// law: (1) THESE MATERIALS ARE MADE AVAILABLE "AS IS" AND// WITH ALL FAULTS, AND XILINX HEREBY DISCLAIMS ALL WARRANTIES// AND CONDITIONS, EXPRESS, IMPLIED, OR STATUTORY, INCLUDING// BUT NOT LIMITED TO WARRANTIES OF MERCHANTABILITY, NON-// INFRINGEMENT, OR FITNESS FOR ANY PARTICULAR PURPOSE; and// (2) Xilinx shall not be liable (whether in contract or tort,// including negligence, or under any other theory of// liability) for any loss or damage of any kind or nature// related to, arising under or in connection with these// materials, including for any direct, or any indirect,// special, incidental, or consequential loss or damage// (including loss of data, profits, goodwill, or any type of// loss or damage suffered as a result of any action brought// by a third party) even if such damage or loss was// reasonably foreseeable or Xilinx had been advised of the// possibility of the same.//// CRITICAL APPLICATIONS// Xilinx products are not designed or intended to be fail-// safe, or for use in any application requiring fail-safe// performance, such as life-support or safety devices or// systems, Class III medical devices, nuclear facilities,// applications related to the deployment of airbags, or any// other applications that could lead to death, personal// injury, or severe property or environmental damage// (individually and collectively, "Critical// Applications"). Customer assumes the sole risk and// liability of any use of Xilinx products in Critical// Applications, subject only to applicable laws and// regulations governing limitations on product liability.//// THIS COPYRIGHT NOTICE AND DISCLAIMER MUST BE RETAINED AS// PART OF THIS FILE AT ALL TIMES.//-------------------------------------------------------------------------------- //-- Filename: xbmd.c//--//-- Description: XBMD device driver.//--//-- XBMD is an example Red Hat device driver which exercises XBMD design//-- Device driver has been tested on Red Hat Fedora FC9 2.6.15.//--------------------------------------------------------------------------------#include<linux/init.h>#include<linux/module.h>#include<linux/pci.h>#include<linux/interrupt.h>#include<linux/fs.h>//#include <linux/pci-aspm.h>//#include <linux/pci_regs.h>#include<asm/uaccess.h>/* copy_to_user */ #include"xbmd.h"// semaphoresenum {SEM_READ,SEM_WRITE,SEM_WRITEREG,SEM_READREG,SEM_WAITFOR,SEM_DMA,NUM_SEMS};#define SUCCESS 0#define CRIT_ERR -1// Debug - define will output more info#define Verbose 1// Max DMA Buffer Size#define BUF_SIZE (4096 * 1024) enum {INITCARD, // 0INITRST,DISPREGS,RDDCSR,RDDDMACR,RDWDMATLPA, // 5RDWDMATLPS,RDWDMATLPC,RDWDMATLPP,RDRDMATLPP,RDRDMATLPA, // 10RDRDMATLPS,RDRDMATLPC,RDWDMAPERF,RDRDMAPERF,RDRDMASTAT, // 15RDNRDCOMP,RDRCOMPDSIZE,RDDLWSTAT,RDDLTRSSTAT,RDDMISCCONT, // 20RDDMISCONT,RDDLNKC,DFCCTL,DFCPINFO,DFCNPINFO, // 25DFCINFO,RDCFGREG,WRCFGREG,RDBMDREG,WRBMDREG, // 30WRDDMACR,WRWDMATLPS,WRWDMATLPC,WRWDMATLPP,WRRDMATLPS,WRRDMATLPC,WRRDMATLPP,WRDMISCCONT,WRDDLNKC,NUMCOMMANDS};//semaphoresstruct semaphore gSem[NUM_SEMS];MODULE_LICENSE("Dual BSD/GPL");// Defines the Vendor ID. Must be changed if core generated did not set the Vendor ID to the same value#define PCI_VENDOR_ID_XILINX 0x10ee// Defines the Device ID. Must be changed if core generated did not set the Device ID to the same value#define PCI_DEVICE_ID_XILINX_PCIE 0x0007// Defining#define XBMD_REGISTER_SIZE (4*8) // There are eight registers, and each is 4 bytes wide. #define HAVE_REGION 0x01 // I/O Memory region#define HAVE_IRQ 0x02 // Interupt//Status Flags:// 1 = Resouce successfully acquired// 0 = Resource not acquired.#define HAVE_REGION 0x01 // I/O Memory region#define HAVE_IRQ 0x02 // Interupt#define HAVE_KREG 0x04 // Kernel registrationint gDrvrMajor = 241; // Major number not dynamic.unsigned int gStatFlags = 0x00; // Status flags used for cleanup.unsigned long gBaseHdwr; // Base register address (Hardware address) unsigned long gBaseLen; // Base register address Lengthvoid *gBaseVirt = NULL; // Base register address (Virtual address, for I/O). char gDrvrName[]= "xbmd"; // Name of driver in proc.struct pci_dev *gDev = NULL; // PCI device structure.int gIrq; // IRQ assigned by PCI system.char *gBufferUnaligned = NULL; // Pointer to Unaligned DMA buffer.char *gReadBuffer = NULL; // Pointer to dword aligned DMA buffer.char *gWriteBuffer = NULL; // Pointer to dword aligned DMA buffer.dma_addr_t gReadHWAddr;dma_addr_t gWriteHWAddr;unsigned long SA_SHIRQ = 0;unsigned long SA_SAMPLE_RANDOM = 0;int pos;// Struct Used for Writing CFG Register. Holds value and register to be writtentypedef struct cfgwrite {int reg;int value;} cfgwr;// Struct Used for Writing BMD Register. Holds value and register to be writtentypedef struct bmdwrite {int reg;int value;} bmdwr;//-----------------------------------------------------------------------------// Prototypes//-----------------------------------------------------------------------------void XPCIe_IRQHandler (int irq, void *dev_id, struct pt_regs *regs);u32 XPCIe_ReadReg (u32 dw_offset);void XPCIe_WriteReg (u32 dw_offset, u32 val);void XPCIe_InitCard (void);void XPCIe_InitiatorReset (void);u32 XPCIe_ReadCfgReg (u32 byte);u32 XPCIe_WriteCfgReg (u32 byte, u32 value);//---------------------------------------------------------------------------// Name: XPCIe_Open//// Description: Book keeping routine invoked each time the device is opened.//// Arguments: inode :// filp ://// Returns: 0 on success, error code on failure.//// Modification log:// Date Who Description////---------------------------------------------------------------------------int XPCIe_Open(struct inode *inode, struct file *filp){printk(KERN_INFO"%s: Open: module opened\n",gDrvrName);return SUCCESS;}//---------------------------------------------------------------------------// Name: XPCIe_Release//// Description: Book keeping routine invoked each time the device is closed. //// Arguments: inode :// filp ://// Returns: 0 on success, error code on failure.//// Modification log:// Date Who Description////---------------------------------------------------------------------------int XPCIe_Release(struct inode *inode, struct file *filp){printk(KERN_INFO"%s: Release: module released\n",gDrvrName);return(SUCCESS);}//---------------------------------------------------------------------------// Name: XPCIe_Write//// Description: This routine is invoked from user space to write data to// the PCIe device.//// Arguments: filp : file pointer to opened device.// buf : pointer to location in users space, where data is to// be acquired.// count : Amount of data in bytes user wishes to send.//// Returns: SUCCESS = Success// CRIT_ERR = Critical failure//// Modification log:// Date Who Description////---------------------------------------------------------------------------ssize_t XPCIe_Write(struct file *filp, const char *buf, size_t count, loff_t *f_pos){int ret = SUCCESS;memcpy((char *)gWriteBuffer, buf, count);printk(KERN_INFO"%s: XPCIe_Write: %d bytes have been written...\n", gDrvrName, count); memcpy((char *)gReadBuffer, buf, count);printk(KERN_INFO"%s: XPCIe_Write: %d bytes have been written...\n", gDrvrName, count);return (ret);}//---------------------------------------------------------------------------// Name: XPCIe_Read//// Description: This routine is invoked from user space to read data from// the PCIe device. ***NOTE: This routine returns the entire// buffer, (BUF_SIZE), count is ignored!. The user App must// do any needed processing on the buffer.//// Arguments: filp : file pointer to opened device.// buf : pointer to location in users space, where data is to// be placed.// count : Amount of data in bytes user wishes to read.//// Returns: SUCCESS = Success// CRIT_ERR = Critical failure//// Modification log:// Date Who Description//----------------------------------------------------------------------------ssize_t XPCIe_Read(struct file *filp, char *buf, size_t count, loff_t *f_pos){memcpy(buf, (char *)gWriteBuffer, count);printk(KERN_INFO"%s: XPCIe_Read: %d bytes have been read...\n", gDrvrName, count);return (0);}//---------------------------------------------------------------------------// Name: XPCIe_Ioctl//// Description: This routine is invoked from user space to configure the// running driver.//// Arguments: inode :// filp : File pointer to opened device.// cmd : Ioctl command to execute.// arg : Argument to Ioctl command.//// Returns: 0 on success, error code on failure.//// Modification log:// Date Who Description////---------------------------------------------------------------------------int XPCIe_Ioctl(struct inode *inode,struct file *filp,unsigned int cmd,unsigned long arg){u32 regx;int ret = SUCCESS;/*寄存器相关说明在xapp1052.pdf的附录里*/switch (cmd){case INITCARD: // Initailizes XBMD applicationXPCIe_InitCard();break;case INITRST: // Resets XBMD applicationsXPCIe_InitiatorReset();break;case DISPREGS:break;case RDDCSR: // Read: Device Control Status Register regx = XPCIe_ReadReg(0);*((u32 *)arg) = regx;break;case RDDDMACR: // Read: DMA Control Status Registerregx = XPCIe_ReadReg(1);*((u32 *)arg) = regx;break;case RDWDMATLPA: // Read: Write DMA TLP Address Register regx = XPCIe_ReadReg(2);*((u32 *)arg) = regx;break;case RDWDMATLPS: // Read: Write DMA TLP Size Registerregx = XPCIe_ReadReg(3);*((u32 *)arg) = regx;break;case RDWDMATLPC: // Read: Write DMA TLP Count Register regx = XPCIe_ReadReg(4);*((u32 *)arg) = regx;break;case RDWDMATLPP: // Read: Write DMA TLP Pattern Register regx = XPCIe_ReadReg(5);*((u32 *)arg) = regx;break;case RDRDMATLPP: // Read: Read DMA TLP Pattern Register regx = XPCIe_ReadReg(6);*((u32 *)arg) = regx;break;case RDRDMATLPA: // Read: Read DMA TLP Address Register regx = XPCIe_ReadReg(7);*((u32 *)arg) = regx;break;case RDRDMATLPS: // Read: Read DMA TLP Size Registerregx = XPCIe_ReadReg(8);*((u32 *)arg) = regx;break;case RDRDMATLPC: // Read: Read DMA TLP Count Registerregx = XPCIe_ReadReg(9);*((u32 *)arg) = regx;break;case RDWDMAPERF: // Read: Write DMA Performance Register regx = XPCIe_ReadReg(10);*((u32 *)arg) = regx;break;case RDRDMAPERF: // Read: Read DMA Performance Register regx = XPCIe_ReadReg(11);*((u32 *)arg) = regx;break;case RDRDMASTAT: // Read: Read DMA Status Registerregx = XPCIe_ReadReg(12);*((u32 *)arg) = regx;break;case RDNRDCOMP: // Read: Number of Read Completion w/ Data Register regx = XPCIe_ReadReg(13);*((u32 *)arg) = regx;break;case RDRCOMPDSIZE: // Read: Read Completion Size Registerregx = XPCIe_ReadReg(14);*((u32 *)arg) = regx;break;case RDDLWSTAT: // Read: Device Link Width Status Registerregx = XPCIe_ReadReg(15);*((u32 *)arg) = regx;break;case RDDLTRSSTAT: // Read: Device Link Transaction Size Status Register regx = XPCIe_ReadReg(16);*((u32 *)arg) = regx;break;case RDDMISCCONT: // Read: Device Miscellaneous Control Registerregx = XPCIe_ReadReg(17);*((u32 *)arg) = regx;break;case RDDMISCONT: // Read: Device MSI Controlregx = XPCIe_ReadReg(18);*((u32 *)arg) = regx;break;case RDDLNKC: // Read: Device Directed Link Change Registerregx = XPCIe_ReadReg(19);*((u32 *)arg) = regx;break;case DFCCTL: // Read: Device FC Control Registerregx = XPCIe_ReadReg(20);*((u32 *)arg) = regx;break;case DFCPINFO: // Read: Device FC Posted Informationregx = XPCIe_ReadReg(21);*((u32 *)arg) = regx;break;case DFCNPINFO: // Read: Device FC Non Posted Informationregx = XPCIe_ReadReg(22);*((u32 *)arg) = regx;break;case DFCINFO: // Read: Device FC Completion Informationregx = XPCIe_ReadReg(23);*((u32 *)arg) = regx;break;case WRDDMACR: // Write: DMA Control Status RegisterXPCIe_WriteReg(1, arg);break;case WRWDMATLPS: // Write: Write DMA TLP Size RegisterXPCIe_WriteReg(3, arg);break;case WRWDMATLPC: // Write: Write DMA TLP Count RegisterXPCIe_WriteReg(4, arg);break;case WRWDMATLPP: // Write: Write DMA TLP Pattern RegisterXPCIe_WriteReg(5, arg);break;case WRRDMATLPS: // Write: Read DMA TLP Size RegisterXPCIe_WriteReg(8, arg);break;case WRRDMATLPC: // Write: Read DMA TLP Count RegisterXPCIe_WriteReg(9, arg);break;case WRRDMATLPP: // Write: Read DMA TLP Pattern RegisterXPCIe_WriteReg(6, arg);break;case WRDMISCCONT: // Write: Device Miscellaneous Control RegisterXPCIe_WriteReg(18, arg);break;case WRDDLNKC: // Write: Device Directed Link Change RegisterXPCIe_WriteReg(19, arg);break;case RDBMDREG: // Read: Any XBMD Reg. Added generic functionality so all register can be readregx = XPCIe_ReadReg(*(u32 *)arg);*((u32 *)arg) = regx;break;case RDCFGREG: // Read: Any CFG Reg. Added generic functionality so all register can be readregx = XPCIe_ReadCfgReg(*(u32 *)arg);*((u32 *)arg) = regx;break;case WRBMDREG: // Write: Any BMD Reg. Added generic functionality so all register can be readXPCIe_WriteReg((*(bmdwr *)arg).reg,(*(bmdwr *)arg).value);printk(KERN_WARNING"%d: Write Register.\n", (*(bmdwr *)arg).reg);printk(KERN_WARNING"%d: Write Value\n", (*(bmdwr *)arg).value);break;case WRCFGREG: // Write: Any CFG Reg. Added generic functionality so all register can be readregx = XPCIe_WriteCfgReg((*(cfgwr *)arg).reg,(*(cfgwr *)arg).value);printk(KERN_WARNING"%d: Write Register.\n", (*(cfgwr *)arg).reg);printk(KERN_WARNING"%d: Write Value\n", (*(cfgwr *)arg).value);break;default:break;}return ret;}// Aliasing write, read, ioctl, etc...struct file_operations XPCIe_Intf = {read: XPCIe_Read,write: XPCIe_Write,ioctl: XPCIe_Ioctl,open: XPCIe_Open,release: XPCIe_Release,};static int XPCIe_init(void){// Find the Xilinx EP device. The device is found by matching device and vendor ID's which is defined// at the top of this file. Be default, the driver will look for 10EE & 0007. If the core is generated// with other settings, the defines at the top must be changed or the driver will not loadgDev = pci_find_device (PCI_VENDOR_ID_XILINX, PCI_DEVICE_ID_XILINX_PCIE, gDev);if (NULL == gDev){// If a matching device or vendor ID is not found, return failure and update kernel log.// NOTE: In fedora systems, the kernel log is located at: /var/log/messagesprintk(KERN_WARNING"%s: Init: Hardware not found.\n", gDrvrName);return (CRIT_ERR);}// Get Base Address of registers from pci structure. Should come from pci_dev// structure, but that element seems to be missing on the development system.gBaseHdwr = pci_resource_start (gDev, 0);if (gBaseHdwr < 0){printk(KERN_WARNING"%s: Init: Base Address not set.\n", gDrvrName);return (CRIT_ERR);}// Print Base Address to kernel logprintk(KERN_INFO"%s: Init: Base hw val %X\n", gDrvrName, (unsigned int)gBaseHdwr);// Get the Base Address LengthgBaseLen = pci_resource_len (gDev, 0);// Print the Base Address Length to Kernel Logprintk(KERN_INFO"%s: Init: Base hw len %d\n", gDrvrName, (unsigned int)gBaseLen);// Remap the I/O register block so that it can be safely accessed.// I/O register block starts at gBaseHdwr and is 32 bytes long.// It is cast to char because that is the way Linus does it.// Reference "/usr/src/Linux-2.4/Documentation/IO-mapping.txt".gBaseVirt = ioremap(gBaseHdwr, gBaseLen);if (!gBaseVirt){printk(KERN_WARNING"%s: Init: Could not remap memory.\n", gDrvrName);return (CRIT_ERR);}// Print out the aquired virtual base addresssprintk(KERN_INFO"%s: Init: Virt HW address %X\n", gDrvrName, (unsigned int)gBaseVirt);// Get IRQ from pci_dev structure. It may have been remapped by the kernel,// and this value will be the correct one.gIrq = gDev->irq;// 这个中断号是怎么来的,难道是pci_find_device函数分配的?printk(KERN_INFO"%s: Init: Device IRQ: %X\n",gDrvrName, gIrq);//---START: Initialize Hardware// Check the memory region to see if it is in useif (check_mem_region(gBaseHdwr, XBMD_REGISTER_SIZE) < 0){printk(KERN_WARNING"%s: Init: Memory in use.\n", gDrvrName);return (CRIT_ERR);}// Try to gain exclusive control of memory for demo hardware.request_mem_region(gBaseHdwr, XBMD_REGISTER_SIZE, "3GIO_Demo_Drv");// Update flagsgStatFlags = gStatFlags | HAVE_REGION;printk(KERN_INFO"%s: Init: Initialize Hardware Done..\n",gDrvrName);// Request IRQ from OS.// In past architectures, the SHARED and SAMPLE_RANDOM flags were called: SA_SHIRQ andSA_SAMPLE_RANDOM// respectively. In older Fedora core installations, the request arguments may need to be reverted back.// SA_SHIRQ | SA_SAMPLE_RANDOMprintk(KERN_INFO"%s: ISR Setup..\n", gDrvrName);if (request_irq(gIrq, &XPCIe_IRQHandler, IRQF_SHARED | IRQF_SAMPLE_RANDOM, gDrvrName, gDev) < 0){printk(KERN_WARNING"%s: Init: Unable to allocate IRQ",gDrvrName);return (CRIT_ERR);}// Update flags stating IRQ was successfully obtainedgStatFlags = gStatFlags | HAVE_IRQ;// Bus Master Enableif (pci_enable_device(gDev) < 0){printk(KERN_WARNING"%s: Init: Device not enabled.\n", gDrvrName);return (CRIT_ERR);}//--- END: Initialize Hardware//--- START: Allocate Buffers// Allocate the read buffer with size BUF_SIZE and return the starting addressgReadBuffer = pci_alloc_consistent(gDev, BUF_SIZE, &gReadHWAddr);if (NULL == gReadBuffer){printk(KERN_CRIT"%s: Init: Unable to allocate gBuffer.\n",gDrvrName);return (CRIT_ERR);}// Print Read buffer size and address to kernel logprintk(KERN_INFO"%s: Read Buffer Allocation: %X->%X\n", gDrvrName, (unsigned int)gReadBuffer,(unsigned int)gReadHWAddr);// Allocate the write buffer with size BUF_SIZE and return the starting addressgWriteBuffer = pci_alloc_consistent(gDev, BUF_SIZE, &gWriteHWAddr);if (NULL == gWriteBuffer){printk(KERN_CRIT"%s: Init: Unable to allocate gBuffer.\n",gDrvrName);return (CRIT_ERR);}// Print Write buffer size and address to kernel logprintk(KERN_INFO"%s: Write Buffer Allocation: %X->%X\n", gDrvrName, (unsigned int)gWriteBuffer, (unsigned int)gWriteHWAddr);//--- END: Allocate Buffers//--- START: Register Driver// Register with the kernel as a character device.if (register_chrdev(gDrvrMajor, gDrvrName, &XPCIe_Intf) < 0){printk(KERN_WARNING"%s: Init: will not register\n", gDrvrName);return (CRIT_ERR);}printk(KERN_INFO"%s: Init: module registered\n", gDrvrName);gStatFlags = gStatFlags | HAVE_KREG;//--- END: Register Driver// The driver is now successfully loaded. All HW is initialized, IRQ's assigned, and buffers allocatedprintk("%s driver is loaded\n", gDrvrName);// Initializing card registersXPCIe_InitCard();return 0;}//--- XPCIe_InitiatorReset(): Resets the XBMD reference design//--- Arguments: None//--- Return Value: None//--- Detailed Description: Writes a 1 to the DCSR register which resets the XBMD designvoid XPCIe_InitiatorReset(){XPCIe_WriteReg(0, 1); // Write: DCSR (offset 0) with value of 1 (Reset Device) XPCIe_WriteReg(0, 0); // Write: DCSR (offset 0) with value of 0 (Make Active) }//--- XPCIe_InitCard(): Initializes XBMD descriptor registers to default values//--- Arguments: None//--- Return Value: None//--- Detailed Description: 1) Resets device//--- 2) Writes specific values into the XBMD registers inside the EPvoid XPCIe_InitCard(){XPCIe_WriteReg(0, 1); // Write: DCSR (offset 0) with value of 1 (Reset Device) XPCIe_WriteReg(0, 0); // Write: DCSR (offset 0) with value of 0 (Make Active)XPCIe_WriteReg(2, gWriteHWAddr); // Write: Write DMA TLP Address register with starting addressXPCIe_WriteReg(3, 0x20); // Write: Write DMA TLP Size register with default value (32dwords)XPCIe_WriteReg(4, 0x2000); // Write: Write DMA TLP Count register with default value (2000)XPCIe_WriteReg(5, 0x00000000); // Write: Write DMA TLP Pattern register with default value (0x0)XPCIe_WriteReg(6, 0xfeedbeef); // Write: Read DMA Expected Data Pattern with default value (feedbeef)XPCIe_WriteReg(7, gReadHWAddr); // Write: Read DMA TLP Address register with starting address.XPCIe_WriteReg(8, 0x20); // Write: Read DMA TLP Size register with default value (32dwords)XPCIe_WriteReg(9, 0x2000); // Write: Read DMA TLP Count register with default value (2000)}//--- XPCIe_exit(): Performs any cleanup required before releasing the device//--- Arguments: None//--- Return Value: None//--- Detailed Description: Performs all cleanup functions required before releasing device static void XPCIe_exit(void){// Check if we have a memory region and free itif (gStatFlags & HAVE_REGION){(void) release_mem_region(gBaseHdwr, XBMD_REGISTER_SIZE);}// Check if we have an IRQ and free itif (gStatFlags & HAVE_IRQ){(void) free_irq(gIrq, gDev);}// Free Write and Read buffers allocated to useif (NULL != gReadBuffer){(void) kfree(gReadBuffer);}if (NULL != gWriteBuffer){(void) kfree(gWriteBuffer);}// Free memory allocated to our Endpointpci_free_consistent(gDev, BUF_SIZE, gReadBuffer, gReadHWAddr);pci_free_consistent(gDev, BUF_SIZE, gWriteBuffer, gWriteHWAddr);gReadBuffer = NULL;gWriteBuffer = NULL;// Free up memory pointed to by virtual addressif (gBaseVirt != NULL){iounmap(gBaseVirt);}gBaseVirt = NULL;// Unregister Device Driverif (gStatFlags & HAVE_KREG){unregister_chrdev(gDrvrMajor, gDrvrName);}gStatFlags = 0;// Update Kernel log stating driver is unloadedprintk(KERN_ALERT"%s driver is unloaded\n", gDrvrName);}// Driver Entry Pointmodule_init(XPCIe_init);// Driver Exit Pointmodule_exit(XPCIe_exit);void XPCIe_IRQHandler(int irq, void *dev_id, struct pt_regs *regs){u32 i, regx;printk(KERN_WARNING"%s: Interrupt Handler Start ..",gDrvrName);for (i = 0; i < 32; i++){regx = XPCIe_ReadReg(i);printk(KERN_WARNING"%s : REG<%d> : 0x%X\n", gDrvrName, i, regx); }printk(KERN_WARNING"%s Interrupt Handler End ..\n", gDrvrName);}u32 XPCIe_ReadReg (u32 dw_offset){u32 ret = 0;//u32 reg_addr = (u32)(gBaseVirt + (4 * dw_offset));//ret = readl(reg_addr);ret = readl(gBaseVirt + (4 * dw_offset));return ret;}void XPCIe_WriteReg (u32 dw_offset, u32 val){//u32 reg_addr = (u32)(gBaseVirt + (4 * dw_offset));writel(val, (gBaseVirt + (4 * dw_offset)));}ssize_t* XPCIe_ReadMem(char *buf, size_t count){int ret = 0;dma_addr_t dma_addr;//make sure passed in buffer is large enoughif ( count < BUF_SIZE ){printk("%s: XPCIe_Read: passed in buffer too small.\n", gDrvrName);ret = -1;return ret;//goto exit;}down(&gSem[SEM_DMA]);// pci_map_single return the physical address corresponding to// the virtual address passed to it as the 2nd parameter// 获取DMA总线地址,底层调用的是pci_map_singledma_addr = pci_map_single(gDev, gReadBuffer, BUF_SIZE, PCI_DMA_FROMDEVICE);if ( 0 == dma_addr ){printk("%s: XPCIe_Read: Map error.\n",gDrvrName);ret = -1;up(&gSem[SEM_DMA]);return ret;//goto exit; // return 之前要释放互斥量,不能直接return}// Now pass the physical address to the device hardware. This is now// the destination physical address for the DMA and hence the to be// put on Memory Transactions// Do DMA transfer here....// 直接调用read write 函数进行传输?// 宋宝华第页流程图printk("%s: XPCIe_Read: ReadBuf Virt Addr = %x Phy Addr = %x.\n",gDrvrName, (unsigned int)gReadBuffer, (unsigned int)dma_addr);// Unmap the DMA buffer so it is safe for normal access again.pci_unmap_single(gDev, dma_addr, BUF_SIZE, PCI_DMA_FROMDEVICE);up(&gSem[SEM_DMA]);// Now it is safe to copy the data to user space.if ( copy_to_user(buf, gReadBuffer, BUF_SIZE) ){ret = -1;printk("%s: XPCIe_Read: Failed copy to user.\n",gDrvrName);goto exit;}exit:return ret;}ssize_t XPCIe_WriteMem(const char *buf, size_t count){int ret = 0;dma_addr_t dma_addr;if ( (count % 4) != 0 ){printk("%s: XPCIe_Write: Buffer length not dword aligned.\n",gDrvrName); ret = -1;return ret;//goto exit;}// Now it is safe to copy the data from user space.if ( copy_from_user(gWriteBuffer, buf, count) ){ret = -1;printk("%s: XPCIe_Write: Failed copy to user.\n",gDrvrName);return ret;//goto exit;}//set DMA semaphore if in loopbackdown(&gSem[SEM_DMA]);// pci_map_single return the physical address corresponding to// the virtual address passed to it as the 2nd parameterdma_addr = pci_map_single(gDev, gWriteBuffer, BUF_SIZE, PCI_DMA_FROMDEVICE);if ( 0 == dma_addr ){printk("%s: XPCIe_Write: Map error.\n",gDrvrName);ret = -1;up(&gSem[SEM_DMA]);return ret;//goto exit; // return 之前要释放互斥量,不能直接return}// Now pass the physical address to the device hardware. This is now// the source physical address for the DMA and hence the to be// put on Memory Transactions// Do DMA transfer here....// 直接调用read write 函数进行传输?// 宋宝华第页流程图printk("%s: XPCIe_Write: WriteBuf Virt Addr = %x Phy Addr = %x.\n",gDrvrName, (unsigned int)gReadBuffer, (unsigned int)dma_addr);// Unmap the DMA buffer so it is safe for normal access again.pci_unmap_single(gDev, dma_addr, BUF_SIZE, PCI_DMA_FROMDEVICE);up(&gSem[SEM_DMA]);exit:return (ret);}u32 XPCIe_ReadCfgReg (u32 byte){u32 pciReg;if (pci_read_config_dword(gDev, byte, &pciReg) < 0){printk("%s: XPCIe_ReadCfgReg: Reading PCI interface failed.",gDrvrName);return (-1);}return (pciReg);}u32 XPCIe_WriteCfgReg (u32 byte, u32 val){if (pci_write_config_dword(gDev, byte, val) < 0){printk("%s: XPCIe_Read Device Control: Reading PCI interface failed.",gDrvrName);return (-1);}return 1;}。