LED硬灯条产品说明书
LED 灯线条规格说明书

3.0x2.5mm SURFACE MOUNT LED LAMP Features3. The specifications, characteristics and technical data described in the datasheet are subject to change without prior notice.Selection GuideNotes:1. θ1/2 is the angle from optical centerline where the luminous intensity is 1/2 of the optical peak value.2. Luminous intensity/ luminous Flux: +/-15%.Part No.DiceLens TypeIv (mcd) [2] @ 20mA Viewing Angle [1] Code. Min. Max. 2θ1/2 APB3025CGKQWDF-AMTGreen (AlGaInP)Yellow FluorescentF 20 40120° G 40 55 M 80 120 P 200 300Q 300 400 R 400 500White (InGaN)H 55 80 Absolute Maximum Ratings at TA=25°CParameterSymbolValueUnitGreenWhitePower dissipation P d 75 80 mW Operating Temperature Top -40 To+ 100 °C Storage Temperature Tstg°C Junction temperatureT J 120 110 °C DC Forward Current (TA=25°C) I F 30 20 mA Peak Forward Current [1] (TA=25°C) I FM 150 150 mAReverse Voltage (TA=25°C)V R55 VElectrostatic Discharge Threshold (HBM)3000 250 V -40 To+ 110Thermal resistance 1chip on (typ.)(Junction/solder point) 2 chip on (typ.)1 chip on (max.)2 chip on (max.) 220330 256 410220 330 256 410°C/WR th j-s R th j-s R th j-s [2]R th j-s [2] Note:1.1/10 Duty Cycle, 0.1ms Pulse Width.2.Rth(max) is based on statistic values.Electrical / Optical Characteristics at TA=25°C (Green)Parameter SymbolValueUnit Code. Min.Typ.Max.Wavelength at peak emission I F=20mA λpeak 574 nmDominant Wavelength I F=20mA λ dom [1] 3 563 5654 565 5675 567 5696 569 571Spectral bandwidth at 50%ΦREL MAX I F=20mA Δλ20 nm Forward Voltage I F=20mA V F [2] 2.1 2.5 VReverse Current (V R = 5V) I R10 uATemperature coefficient of λpeakI F=20mA, -10°C≤T≤100°CTCλpeak 0.06 nm/°C Temperature coefficient of λdomI F=20mA, -10°C≤T≤100°CTCλdom 0.03 nm/°CTemperature coefficient of V FI F=20mA, -10°C≤T≤100°C TC V-3.6 mV/°CnmNotes:1.The dominant Wavelength (λ d) above is the setup value of the sorting machine. (Tolerance λ d : ±1nm. )2. Forward Voltage: +/-0.1V.Electrical / Optical Characteristics at TA=25°C (White)Parameter Symbol Value Unit Chromaticity coordinate x acc.to CIE1931I F=20mA [Typ.]x [1] 0.31Chromaticity coordinate y acc.to CIE1931I F=20mA [Typ.]y [1] 0.31Forward Voltage I F=20mA [Min.]V F [2]-VForward Voltage I F=20mA [Typ.] 3.3Forward Voltage I F=20mA [Max.] 4.0Temperature coefficient of V FI F=20mA, -10°C≤T≤100°C [Typ.]TC V-2.5 mV/°C Temperature coefficient of xI F=20mA, -10°C≤T≤100°C [Typ.]TC X-0.1 10-3/°CTemperature coefficient of yI F=20mA, -10°C≤T≤100°C [Typ.] TC y-0.2 10-3/°CReverse Current (V R = 5V) [Max.] I R50 uA Notes:1.Measurement tolerance of the chromaticity coordinates is ±0.01.2.Forward Voltage: +/-0.1V.Reliability Test Items And ConditionsThe reliability of products shall be satisfied with items listed below Lot Tolerance Percent Defective (LTPD) : 10%No. Test Item Standards Test Condition Test Times /CyclesNumber ofDamaged1 Continuous operating test - Ta =25°C ,IF = maximum rated current* 1,000 h 0 / 222 High Temp. operating test EIAJ ED-4701/100(101)Ta = 100°C IF = maximum rated current* 1,000 h 0 / 223 Low Temp. operating test - Ta = -40°C, IF = maximum rated current* 1,000 h 0 / 224 High temp. storage test EIAJ ED-4701/100(201)Ta = maximum rated storage temperature 1,000 h 0 / 225 Low temp. storage test EIAJ ED-4701/100(202)Ta = -40°C 1,000 h 0 / 226 High temp. & humidity storage test EIAJ ED-4701/100(103)Ta = 60°C, RH = 90% 1,000 h 0 / 227 High temp. & humidity operating test EIAJ ED-4701/100(102)Ta = 60°C, RH = 90%IF = maximum rated current*1,000 h 0 / 228 Soldering reliability test EIAJ ED-4701/100(301)Moisture soak : 30°C,70% RH, 72hPreheat : 150~180°C(120s max.)Soldering temp : 260°C(10s)3 times 0 / 189 Thermal shock operating test - Ta = -40°C(15min) ~ 100°C(15min)IF = derated current at 100°C1,000 cycles 0 / 2210 Thermal shock test - Ta = -40°C(15min) ~ maximum ratedstorage temperature(15min)1,000 cycles 0 / 2211 Electric Static Discharge (ESD) EIAJ ED-4701/100(304)C = 100pF , R2 = 1.5KΩV=3000V(Green)V=250V(White)Once eachPolarity0 / 2212 Vibration test - a = 196m/s² , f = 100~2KHz ,t = 48min for all xyz axes4 times 0 / 22* : Refer to forward current vs. derating curve diagramItems Symbols Conditions Failure Criterialuminous Intensity lv I F = 20mA Testing Min. Value <Spec.Min.Value x 0.5 Forward Voltage V F I F = 20mA Testing Max. Value ≥Spec.Max.Value x 1.2 Reverse Current I R V R = Maximum Rated Reverse Voltage Testing Max. Value ≥Spec.Max.Value x 2.5High temp. storage test - - Occurrence of notable decoloration, deformation and crackingFailure Criteria。
瑞丰公司RF-BNRI35TS -EE-N-Y型号LED灯条说明书
Date :日期:1-8th Floor, Building #1,10th Industrial Zone, Tian Liao Community, Gong Ming Area, Guang Ming栋一至八楼Web/网址:Features 特征PLCC-2 Package. 垂直型表贴封装 Extremely wide viewing angle. 发光角度大Suitable for all SMT assembly and solder process. 适用于所有的SMT 组装和焊接工艺 Available on tape and reel. 适用于载带及卷轴 Moisture sensitivity level: 3. 防潮等级:3 Package:4000pcs/reel. 包装:4000颗/卷 RoHS compliant. RoHS 认证Description 描述The Blue source color devices are made with InGaN on Substrate Light Emitting Diode蓝光LED 由InGaN 三种元素芯片激发而成Applications 应用Optical indicator.光学指示 Indoor display.室内显示Landscape lighting,lamp belt. 景观照明,灯带等 General use.其他适合的应用Package Dimension外观尺寸:2.8*3.5*0.8mmNOTES:1.All dimensions units are millimeters. (所有尺寸标注单位为毫米)2.All dimensions tolerances are 0.2mm unless otherwise noted. (除特别标注外,所有尺寸允许公差为±0.2毫米)Electrical / Optical Characteristics at Ts=25°C 电性与光学特性Typical Optical Characteristics Curves典型光学特性曲线Fig.1-Forward Voltage Vs. Forward Current Fig.2-Forward Current Vs. Relative Intensity 伏安特性曲线正向电流与相对光强特性曲线备注All the parameters and standardsspecification are based on Refondtest platform.规格书中所有参数和标准都是基于瑞丰的标准测试平台。
LED5050硬灯条规格书

样品承认书SPECIFICATION FOR APPROVAL 客户名Customer品名 Product Name编号 Version number发出日期Deliver date制造确认 Product confirm and sign照明工程部照明品质部审核APPROVED BY APPROVED BY APPROVED BY检查結果□ 合格□不合格INSPECT RESULT ACCEPT REJECT客户确认Customer confirm and sign检查审核承认TESTED BY CHECKED BY APPROVED BY检查結果□ 合格□不合格INSPECT RESULT ACCEPT REJECT说明 REMARK:确认后请回传 , 谢谢 !Please confirm and fax to us ,thank you!产品规格书XL-5050LED硬灯条产品效果展示:产品名称: LED 软灯条产品型号: XL5050-60LED 硬灯条5050 灯珠效果LED 硬灯条5050 灯珠效果一、特点:1、采用高亮度SMD5050 LED灯珠,铝合金外壳,每三个LED为一段。
2、每条的标准长度为1M,每条灯珠数量分别有30PCS/M LED 灯珠,60PCS/M LED灯珠,72PCS/M LED灯珠3、发光颜色:红/ 绿 / 蓝 / 黄 / 白 / 暖白和长彩等多种颜色可供选择4、工作电压:DC12V/DC24V两种5、防水型SMD灯条,表面采用灌胶二、用途:1、 SMD高亮度硬灯条适用于酒店,超薄灯箱,KTV娱乐场所等室内装饰。
2、用于广告招牌等精品装饰领域。
3、度假装饰照明灯,显示及展览。
4、商场专柜,珠宝,首饰台及名贵钟表柜台。
三、产品规格:1 米 30 珠型号规格产品规格书型号颜色XL-5050-30-R 红XL-5050-30-G 绿XL-5050-30-B 蓝XL-5050-30-Y 黄XL-5050-30-W 白XL-5050-30-WW 暖白XL-5050-30-RGB RGB1 米 60 珠型号规格型号颜色XL-5050-60-R 红XL-5050-60-G 绿XL-5050-60-B 蓝XL-5050-60-Y 黄XL-5050-60-W 白XL-5050-60-WW 暖白XL-5050-60- RGB RGB1 米 72 珠型号规格型号颜色XL-5050-72-R 红XL-5050-72-G 绿XL-5050-72-B 蓝XL-5050-72-Y 黄XL-5050-72-W 白XL-5050-72-WW 暖白XL-5050-72- RGB RGB产品名称: LED 软灯条产品型号: XL5050-60 电压数量功率DC12V 30/M 7. 2WDC12V 30/M 7. 2WDC12V 30/M 7. 2WDC12V 30/M 7. 2WDC12V 30/M 7. 2WDC12V 30/M 7. 2WDC12V 30/M 7. 2W电压数量功率DC12V 60/M 14. 4WDC12V 60/M 14. 4WDC12V 60/M 14. 4WDC12V 60/M 14. 4WDC12V 60/M 14. 4WDC12V 60/M 14. 4WDC12V 60/M 14. 4W电压数量功率DC12V 72/M 17. 2WDC12V 72/M 17. 2WDC12V 72/M 17. 2WDC12V 72/M 17. 2WDC12V 72/M 17. 2WDC12V 72/M 17. 2WDC12V 72/M 17. 2W四、参数序号项目 item 单位参数范围 Parameter range1 工作环境温度 working environment ℃-40~502 储存条件 storage condition ℃-50~604 额定电压 limited voltage V DC125 工作电流 current mA 206 功耗 Input power W 7. 2W / 14.4W / 17.2W灯珠类型号:SMD 5050 LED可选颜色:红/绿/蓝/黄/白/暖白/RGB发光角度 : 120 度灯珠数量:30PCS / M60PCS / M72PCS / M外形尺寸 : 1000*10*2mm按整体封存装:裸板V 型槽U 型槽硬灯条套 V 型槽图示硬灯条裸板图示U型槽图示五、注意事项:六、产品应用应用家居装饰应用 KTV 装饰珠宝柜装饰●使用说明 use manual:1. 请先仔细阅读产品规格书 ,确认其使用环境是否符合规格书上的条件上,方可放心使用 . Please read the specificationfirst to make sure the using condition is fit2. 将产品接入电源时 ,请先确保开关处于闭合状态 ..Please shut off the switch before connect the product, then turn on3.本产品保质期为一年 This product warranty for one year。
LA-5050RGB-A LED说明书

LA-5050RGB-A●目录:(Content)◆封面:(Cover)━‥━‥━‥━‥━‥━‥━‥━‥━‥‥━‥━‥PAGE:1OF12◆产品简介(Product introduction)━‥━‥━‥━‥━‥━‥‥━‥━‥PAGE:2OF12◆外形尺寸图及应用领域(Outline Dimensions)━‥━‥━‥━‥━‥━PAGE:3OF12◆产品编码解说及光电参数:Electrical-Optical Characteristics━‥━‥PAGE:4OF12◆色区分BIN及色温坐标:(Intensity Bin Limit)━‥━‥‥━‥━‥━PAGE:5OF12◆光电特性曲线图:(Optical Characteristics)━‥━‥━‥━‥━‥━‥PAGE:7OF12◆信赖度测试项目及标准:(Test items and results of reliability)‥‥‥PAGE:8OF12◆包装规范:(Packing)━‥━‥━━‥━‥━━‥━‥━‥━‥━‥━‥PAGE:9OF12◆产品使用说明及注意事项:(Usage and Handling Instructions)‥‥‥PAGE:10-12OF12●特性:(Features)◆ 5.4长*5.0宽*1.6高:(5.4mm*5.0mm*1.6mm SMT LED Thickness.)◆角度:120度:(View Anglc:120°)◆包装:1000/一盒:(Package:1000PCS/Packet)◆发光颜色:RGB(Emitted Color:RGB)◆混色型:(Mono-color type)◆工作温度:-40~80度:(Operating Temperature:-40~+80℃)◆焊接温度:260度10秒:(S oldering Temperature:260for10sec℃)◆超大功率:(Supper High Power Consumption)◆可做不同的种类:(Various Colors And Types Available.)◆胶水:硅胶:(Resin(Mold):Silicone)◆反向电压5V:(Reverse Voltage:5V)◆储存温度-40~+100度:(Storage Temperature:-40~+100℃)◆脉冲电流60mA注:脉冲宽度0.1mS占空比1/10Pulsed Forward Current60mA(Duty1/10,Pulse Width0.1mS.)LA-5050RGB-ALA-5050RGB-ALA-5050RGB-A●分BIN参数:(Color Coordinate Comparison)·色坐标范围LA-5050RGB-A●典型光学特性曲线:(Typical optical characteristics curves)环境温度与正向电流特性曲线正向电流与相对光强特性曲线Ambient Temperature vs.Forward Current Forward Current VS.Relative Intensity正向电压与正向电流特性曲线环境温度与相对光强特性曲线Forward Voltage VS.Forward Current Ambient Temperature VS.Relative Intensity相对光谱分布特性曲线辐射图特性曲线Relative spectral emission Radiation diagramLA-5050RGB-ALA-5050RGB-A●包装规格✧标签:(Label)卷轴尺寸:(Reel Dimensions)✧载带规格(单位:mm):(Tape Specifications(Units:mm)✧防潮带包装:(Moisture Resistant Packaging)注:标注公差为±0.1mm,单位:mm:(Note:The tolerances unless mentioned is±0.1mm,Unit:mm)LA-5050RGB-A●回流焊接曲线图(IR reflow soldering Profile)✧有铅焊接(Lead solder)✧无铅焊接(Lead Free solder)注意:(NOTES:)1.我们建议的回流焊温度为240℃±5℃,最高的焊接温度要控制在260℃以内。
300W LED 灯条使用说明书

300W Led ProfileUser manualPlease read the instructions carefully before use1.Safety InformationBe careful with your operations. With a dangerous voltage you cansuffer a dangerous electric shock when touching wires!This device has left the factory in perfect condition. In order to maintain this condition and to ensure a safe operation, it is absolutely necessary for the user to follow the safety instructions and warning notes written in this user manual.Damages caused by the disregard of this user manual are not subject towarranty. The dealer will not accept liability for any resulting defects orproblems.If the device has been exposed to temperature changes due to environmental changes, do not switch it on immediately. The arising condensation could damage the device. Leave the device switched off until it has reached room temperature.This device falls under protection-class I. Therefore it is essential that the device be earthed.The electric connection must carry out by qualified person. The device shall only be used with rate voltage and frequency.Make sure that the available voltage is not higher than stated at the end of this manual. Make sure the power cord is never crimped or damaged by sharp edges. If this would be the case, replacement of the cable must be done by an authorized dealer.Always disconnect from the mains, when the device is not in use or before cleaning it. Only handle the power cord by the plug. Never pull out the plug by tugging the power cord.During initial start-up some smoke or smell may arise. This is a normal process and does not necessarily mean that the device is defective, it should decrease gradually.Please don't project the beam onto combustible substances.Fixtures cannot be installed on combustible substances, keep more than 50cm distance with wall for smooth air flow, so there should be no shelter for fans and ventilation for heat radiation.If the external flexible cable or cord of this luminaire is damaged, it shall be exclusively replaced by the manufacturer or his service agent or a similar qualified person in order to avoid a hazard.2.UnpackingThank you for choosing our AL300LP. For your own safety, please read this manual before installing the device. This manual covers the important information on installation and applications. Please install and operate the fixture with following instructions. Meanwhile, please keep this manual well for future needs.The AL300LP is made of a new type of high temperature strength of cast aluminum casing with nice outlook. The fixture is designed and manufactured strictly following CE standards, complying with international standard DMX512 protocol. It's available independently controlled and linkable with each other for operation. And it is applicable for large-scale live performances, theater, studio, nightclubs and discos.The AL300LP adopts 1PCS NICHIA 300W (available for WW) which features high brightness and stability. Please carefully unpack it when you receive the fixture and check whether it is damaged during the transportation. And please check whether the following items are included inside the box: ①②④①AL300LP 1PC②Signal Cable1PC③Power Cable1PC④User Manual1PC③3. Features & SpecificationsVoltage: AC100-240V 50/60HZ Power: 350WLight Source: NICHIA 300W Lifespan: 50000 HoursColor Temperature: 3200K/5600K Color Rendering Index (CRI): Ra≥95 Zoom angle: 12°-36 °Dimming: 16bit linear dimming, four dimming curve selection Control mode: Standard DMX 512/master-slave/auto DMX Channels: 1/3 Channels Body color: Black Shell: Cast aluminumCooling System: Powerful fan IP Grade: IP20SpecificationsVoltage:AC10-240V 50/60HzDimensions: 195(D)*720(W)*415(H)mm Packing size: 332(D)*832(W)*345(H)mm Net Weight: 10.2kg Gross Weight: 12.2kg7201951954154. DMX512 Control ConnectionsConnect the provided XLR cable to the female 3-pin XLR output of your controller and the other side to the male 3-pin XLR input of the moving head. You can chain multipleMoving head together through serial linking. The cable needed should be two core, screened cable with XLR input and output connectors. Please refer to the diagram below. DMX-512 connection with DMX terminatorDigital DISPLAY5-Pin DMX OUTPOWER OUT ENTER Ground3-Pin DMX IN MENU Power Switch3-Pin DMX OUTUPPOWER IN POWER IN5-Pin DMX IN DOWNFUSE 5-Pin DMX IN 3-Pin DMX IN5.Menu OperationsDMX Output3-Pin XLR SocketDMX Input3-Pin XLR Socket1:Ground2:Data(-)3:Data(+)COMMONDMX+DMX-DMX 512 OUT3-PIN XRLDMX 512 IN3-PIN XRL 120ΩPin2Pin3For installations where the DMX cable has to run a longdistance or is in an electrically noisy environment, such as ina discotheque, it is recommended to use a DMX terminator.This helps in preventing corruption of the digital controlsignal by electrical noise. The DMX terminator is simply anXLR plug with a 120 Ωresistor connected between pins 2and 3,which is then plugged into the output XLR socket of thelast fixture in the chain. Please see illustrations below.5.1. Key operationMenu:The first list is the main menu (press MENU toexchange), the second list is submenu (press ENTER toget in or exchange)If the menu include the decimal point, that’s the data,and it can be set by the Key of Up/Down.Key operation:Key of “MENU” (Press it and can save the data)If it’s the main menu, it will exchange to next mainmenu.If it’s the submenu, it will back to main menu.Key of “ENTER” (Press it and can save the data)If it’s the main menu and it have submenu, it will enterthe submenu.If it’s the submenu, it will exchange to the nextsubmenuKey of “UP/DOWN”It’s no function if the menu not include the decimalpoint.If the menu include the decimal point, it can set the dataafter the decimal point. And it need to press “ENTER” tosave the data.5.2.Menu DataMenuStateOperationRemarkMain MenuVice MenuNo vice menuA: advance UP/DOWN adjust ID adress disconnect thecontroller and connect the master light, then it will follow the master light. It will flicker if nosignal. External control mode (standard channel model) ENTER save the IDaddressNo vice menud: dmx UP/DOWN adjust IDaddressExternal control mode (Basic channel model) ENTER Save the ID addresstwo vice menuStAt: static ENTER enter vice menu Static modelC: Color UP/DOWN change value of colorSet the colorENTERsave the data change to the vice menuSt: strobeUP/DOWN change value of strobe strobe and its speedENTER save and exchangetwo vice menu tEMp: temperature ENTER enter the vice menu temperature controlcurrent temperature ENTER change to vice menut: topUP/DOWNchange the data of temperature protectset the protect temperature ENTER save and changeNo vice menudiSP: display ENTER reverse the displayset to show reverse displayNo vice menurESt: reset ENTER enter the interface of key the password is “UP DONW UP DOWN” return Initial State6. DMX Channels3 CH Mode1 CH ModeChannelFunction Value Description 1Dimmer 0-255 Dimmer2Delay time0-10 Default delay of dimmer 11-15No dimmer16-255Choose delay of dimmer(16 is the shortest delay time, increase gradually.... 255 is the longest delay time) 3 Strobe 0-10 No strobe11-255Speed of strobe (255 is fastest)ChannelFunction Value Description 1Dimmer0-255Dimmer7.Operation Instructions·The AL300LP is an LED wash light for on-site decoration purpose.·Don't turn on the fixture if it's been through severe temperature difference like after transportation because it might damage the light due to the environment changes. So make sure to operate the fixture until it is in normal temperature.·This light should be keep away from strong shaking during any transportation or movement. ·Don't pull up the light by only the head, or it might cause damages to the mechanical parts. ·Don't expose the fixture in overheat, moisture or environment with too much dust when installing it. And don't lay any power cables on the floor. Or it might cause electronic shock to the people. ·Make sure the installation place is in good safety condition before installing the fixture.·Make sure to put the safety chain and check whether the screws are screwed properly when installing the fixture.·Make sure the lens are in good condition. It's recommended to replace the units if there are any damages or severe scratch.·Make sure the fixture is operated by qualified personnel who knows the fixture before using. ·Keep the original packages if any second shipment is needed.·Don't try to change the fixtures without any instruction by the manufacturer or the appointed repairing agencies.·It is not in warranty range if there are any malfunctions from not following the user manual to operate or any illegal operation, like shock short circuit, electronic shock, lamp broke, etc.8.InstallationsFor added protection mount the fixtures in areas outside walking paths, seating areas, or in areas were the fixture might be reached by unauthorized personnel.Before mounting the fixture to any surface, make sure that the installation area can hold a minimum point load of 10 times the device's weight.Fixture installation must always be secured with a secondary safety attachment, such as an appropriate safety cable.Never stand directly below the device when mounting, removing, or servicing the fixture.From a ceiling, or set on a flat level surface (see illustration below). Be sure this fixture is kept at least 0.5m (1.5 ft) away from any flammable materials (decoration etc.).Please ensure that the led profile spotlight is hung using the appropriate "C" clamp or half cheeseboro. A safety chain or cable should also be used as a secondary point of holding the fixture in case the clamp comes loose. Never hang the fixture without a safety chain or cable.There is an eye-bolt on the back of the fixture to which the safety chain or cable can threaded through and then hung from the secondary point. Make sure the Gel frame (Gel holder) is clipped into position correctly and cannot come loose.If you are not qualified or have any doubts about hanging the led profile spotlight then do NOT hang it.Do not clamp the safety cable to the U bracket or clamp. That is not a secondary safety point.A secondary safety point is any point that will adequately hold the led profile spotlight if the "C" clamp or half cheesboro fails.Then the safety cable would be the backup and stop the fixture from falling to the ground. So do NOT fix the safety cable to the same place that the "C"clamp is attachedSatety Clamp Safety CableTruss installing Floor Projection9. Photographic ChartSpectrogram CRILumen of 15 degree Lumen of 38 degree10.Cleaning and maintenanceNow ignoring maintenance and cleaning is very good way of creating problems "down the road" and many companies and installations do just that. However the net result is, no matter what the fixture, premature failure!Changing the oil in a car, most people do on a regular basis.So with the fixtures, regular maintenance it an excellent practice, if you want the fixtures to last.So what is the maintenance for the fixture?Clean the fans!Turn off the led profile spotlight.Using a small vacuum cleaner, suck the dust and “fur balls” out.Do not use a can of co². That will just blast the dust and dirt everywhere!The fans keep the LED cool and keep the electronics cool too.Without the fan working efficiently and dust free, the fixtures will fail and that will be a lot more costly than having someonevacuum the fixtures on a regular basis.How often should the fans be cleaned? It depends on where the fixtures are; in a very dusty atmosphere once a week. Socheck the fans on a regular basis, they may not need cleaned every week but a quick “visual inspection” should be done.The front lens should be cleaned so the light output is maintained.The shutter blades sometimes require cleaning as well.With the led profile spotlight turned off, use only a moist lint-free cloth. Never use alcohol or solvents to clean the fixture.Never spray anything onto the fixture at the front or in any place on the fixture.。
LED 硬灯条规格书

Led Strip P198-5050SeriesModel Number Color V oltate(V)LEDQ’ty/pc)Lumen(LM/pc)Angle(°)Max Current(ma/pc)MaxPower(W/pc)KS.P.P198.WN412.001 3000-3500DC12V 24 200-300 120 480 5.76 KS.P.P198.PN412.001 5000-7000 DC12V 24 200-300 120 480 5.76 412.001 >9000 DC12V 24 200-300 120 480 5.76 KS.P.P198.RN412.001 620-630 DC12V 24 80-100 120 480 5.76 KS.P.P198.GN412.001 520-530 DC12V 24 200-230 120 480 5.76 KS.P.P198.BN412.001 465-470 DC12V 24 50-80 120 480 5.76 KS.P.P198.YN412.001 589-594 DC12V 24 80-100 120 480 5.76●Application※Walkway lighting※Architectural decorative lighting※Stairway lighting & decorating※DIY lights for home use※Path and contour marking※Decorative lights for holiday,event,show,Echibitio n.●AdvantagesEasy connection and installation※long life span,standard warranty 2 years※No need the constant-current power feed※Low power consumption※Best choice for holiday season,show and exhibition 's decoratingGlue only on top: □Pu glue and AL □Epoxy and AL ■PC and ALIP65●Dimension &Circuit drawings510(20.07")20(0.79")17(0.47")11.5(0.45")00ontplntpower ●Linking operationEBCDA上排为+下排为RGB印字为-白条为+FGI●Attentions when operating :1.Effective power for switch power is only 85% of power’s label,so LED product’s load power shoul be at least more than 15% when user choose feeding power.2. Make sure the right and stable anode and cathode when installingcables,and also attention to the driving voltage in case to damagecomponents and fire accident when circuit pass through voltage.2.Forbidden to connect cables when power on,putting power in coolplace,so that it ensures appropriate working temperature.4.Make sure strip’s gra de of waterproof.To install suitable conditions in accordance with practical IP.5.This product is allowed to connect only 10PCS (0.5M/PCS )in seires wound. 2V differential voltage for the beginning and the end.6.This user manual is only applicable for our product.●Packing information120g/pcs,50PCS/carton, Dimension per Packing Size+-+-+-+-+-+-+-+-+-+-。
福尔米托 LED 顶光灯条系列说明书
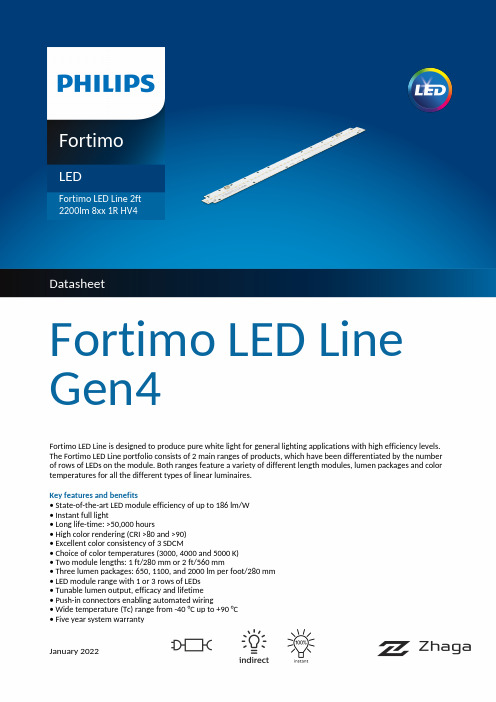
Fortimo LED Line Gen4Fortimo LED Line is designed to produce pure white light for general lighting applications with high efficiency levels.The Fortimo LED Line portfolio consists of 2 main ranges of products, which have been differentiated by the number of rows of LEDs on the module. Both ranges feature a variety of different length modules, lumen packages and color temperatures for all the different types of linear luminaires.Key features and benefits• State-of-the-art LED module efficiency of up to 186 lm/W • Instant full light• Long life-time: >50,000 hours• High color rendering (CRI >80 and >90)• Excellent color consistency of 3 SDCM• Choice of color temperatures (3000, 4000 and 5000 K)• Two module lengths: 1 ft/280 mm or 2 ft/560 mm• Three lumen packages: 650, 1100, and 2000 lm per foot/280 mm • LED module range with 1 or 3 rows of LEDs • Tunable lumen output, efficacy and lifetime • Push-in connectors enabling automated wiring• Wide temperature (Tc) range from -40 °C up to +90 °C • Five year system warrantyJanuary 2022Ordering dataCommercial product name EOC12NC Box quantity Fortimo LED Line 2ft 2200lm 830 1R HV48718696 686423 009290 015 42606180Fortimo LED Line 2ft 2200lm 840 1R HV48718696 686447 009290 015 42706180Fortimo LED Line 2ft 2200lm 850 1R HV48718696 686461 009290 015 42806180Drive currentsParameter Nominal*Life**Max***Unit Fortimo LED Line 2ft 2200lm 8xx 1R HV4 204300380mAModule temperaturesParameter Nominal*Life**Max***Unit T c (case temperature at T c point)458080°C* Nominal value at which typical performance is specified** Value at which life time is specified*** Maximum value for safe operation, do not operate above this valueOptical characteristics - table per color (CCT)Fortimo LED Line 2ft 2200lm 830 1R HV4Parameter Min Typ Max Unit Luminous flux190620282214lm Efficacy157lm/W Correlated color temperature (CCT)3000K Color coordinates (CIEx, CIEy)(0.430, 0.398)-Color consistency3SDCM CRI80R90Photobiological safety RG1 unlimitedMeasurement precision ± 5% for the flux data and ± 6% for the efficacy data. Measurement precision for color coordinates ± 0.005. Measurement precision for CRI ± 1.5.Operation point830lm lm/WTc 25 °C169616580% I-nom 163mA Tc-nom 45 °C1655162Tc-max 80 °C1574156Tc 25 °C2091160I-nom 204mA Tc-nom 45 °C2028157Tc-max 80 °C1937151Tc 25 °C3687142I-max 380mA Tc-nom 45 °C3591140Tc-max 80 °C3398134Fortimo LED Line 2ft 2200lm 840 1R HV4Parameter Min Typ Max Unit Luminous flux198020902300lm Efficacy162lm/W Correlated color temperature (CCT)4000K Color coordinates (CIEx, CIEy)(0.381, 0.378)-Color consistency3SDCM CRI80R90Photobiological safety RG1 unlimitedMeasurement precision ± 5% for the flux data and ± 6% for the efficacy data. Measurement precision for color coordinates ± 0.005. Measurement precision for CRI ± 1.5.Operation point840lm lm/WTc 25 °C174717080% I-nom 163mA Tc-nom 45 °C1705167Tc-max 80 °C1622161Tc 25 °C2154165I-nom 204mA Tc-nom 45 °C2090162Tc-max 80 °C1996156Tc 25 °C3800147I-max 380mA Tc-nom 45 °C3701144Tc-max 80 °C3502138Fortimo LED Line 2ft 2200lm 850 1R HV4Parameter Min Typ Max Unit Luminous flux199820902322lm Efficacy162lm/W Correlated color temperature (CCT)5000K Color coordinates (CIEx, CIEy)(0.342, 0.350)-Color consistency3SDCM CRI80R90Photobiological safety RG1 unlimitedMeasurement precision ± 5% for the flux data and ± 6% for the efficacy data. Measurement precision for color coordinates ± 0.005. Measurement precision for CRI ± 1.5.Operation point850lm lm/WTc 25 °C174717080% I-nom 163mA Tc-nom 45 °C1705167Tc-max 80 °C1622161Tc 25 °C2154165I-nom 204mA Tc-nom 45 °C2090162Tc-max 80 °C1996156Tc 25 °C3800147I-max 380mA Tc-nom 45 °C3701144Tc-max 80 °C3502138Beam shapeThe Philips LED module generates a Lambertian beam shape, which is a pragmatic starting point for OEMs wishing to design secondaryoptics.Electrical characteristicsParameter Min Typ Max UnitForward voltage61.063.464.2VPower consumption12.412.913.1W = kWh/1000h Number of modules in series per chain4Number of modules per chain1Number of modules in parallel3Measurement precision for Vf +/- 3%. Measurement precision for power +/- 3.3%Specifications stated at Tc-nom and I-nomTuning informationFlux and efficacy versus current (at Tc nominal)I [mA]Flux [%]Efficacy [%]30014293252122972041001001638110310252108Flux and efficacy versus temperature at Tc (at I nominal)Tc [°C]Flux [%]Efficacy [%]80959645100100251031020105104Lumen maintenanceOperation point Lumen maintenance L70L80L90x 1000 hours B50B20B10B50B20B10B50B20B10 80% I-nom 163 mA Tc 25°C>70>70>70>70>70>70353535Tc-nom 45°C>70>70>70656060303030Tc-life 80°C707065454040202020I-nom 204 mA Tc 25°C>70>70>70>707070353030Tc-nom 45°C>70>70>70605555252525Tc-life 80°C656565404040202020I-life 300 mA Tc 25°C>70>70>70656560303030Tc-nom 45°C>70>70>70555050252525Tc-life 80°C606055353535151515 LifetimeParameter Value UnitM70F50 nominal>70000hoursM70F50 life61000hoursLifetime L70B50 = 60 0000 hours at I-life and Tc-life. >70 000 hours claim is based on extrapolating raw LM80-data to lower temperatures and currents by using statistical techniques.Performance WindowWiringSpecification item Value Unit ConditionInput wire cross-section0.33...0.5mm2stranded wire20...22AWG stranded wireInput wire strip length7.5...8.5mmInput wire cross-section0.33...0.75mm2solid, fused, stranded18...22AWG solid, fused, strandedInput wire strip length7.5...8.5mmMechanical characteristicsParameter Min Typ Max Unit Length560.2560.7561.2mm Width39.54040.5mm Height excl. connector 4.19 4.29 4.39mm Height incl. connector 5.6 5.86mm Product mass96gramAbsolute ratingsParameter Min Max UnitCurrent through the LED module (I-max)380mACase temperature (Tc-max)80°CPower at rated Vf-max and I-max26.6WESD (direct contact)8kVESD (air)15kVWorking voltage420V dcVoltage strength1840V acAmbient temperature-40°CApplication informationCertificates and StandardsIEC/TR 62778IEC 62384IEC 62031:2008/A1:2012/A2:2014Relevant clauses of EN 62471:2008 (With IEC/TR 62471-2: 2009 and IEC/TR 62778: 2014) ENEC+CEENECZhaga Compliant**L56W4ApplicationIP rating No IP-rating Overheating protection No protection Luminaire class IEC Class I and IEC Class II Dimming YesSwitching cycles in accordance with EU 1194/2012: >15000© 2022 Signify Holding, IBRS 10461, 5600VB, NL. All rights reserved. The information provided herein is subject to change, without notice. Signify does not give any representation or warranty as to the accuracy or completeness of the information included herein and shall not be liable for any action in reliance thereon. The information presented in this document is not intended as any commercial offer and does not form part of any quotation or contract, unless otherwise agreed by Signify.Philips and the Philips Shield Emblem are registered trademarks of Koninklijke Philips N.V. All other trademarks are owned by Signify Holding or their respective owners.UK importer address: 3 Guildford Business Park, GU2 8XG12/01//oem。
Enttec ALEPH2 ET Mk2 5色高功率LED灯条说明书

ALEPH2 ET Mk25C O L O U R H I GH P O W E R L E D L I G H T B A R300mm/600mm/1200mmBack PanelPlease make sure the Power pass-through current does not exceed 10 AmpsF eatures•Strong aluminium chassis with small profile•DMX512 Controllable and RDM Configurable•Can use up to 12 DMX channels, depending on configuration•Snapshots: 64 fully user recordable slots, 50 different pre-loaded stand-alone colours •16-bit or Smart 8-bit LED dimming •Strobe Mode with controllable frequency from DMX •Fan-less smart heat management•Easy addressing and configuration interface •180° Adjustable mounting bracket•Changeable diffuser using holder accessory (sold separately)CleaningIt is important to clean the ALEPH2 ET Mk2 to maintain a long service life. Make sure the unit is unplugged before you attempt any cleaning.•Surface dust should be removed with an air compressor, please make sure you do not blowcompressed air directly inside the unit.•Optics can be cleaned with a glass cleaner or IPA with a soft cloth•Make sure the unit is dry and there is no cleaning fluid residue before powering the unit aftercleaning.Safety•Do not expose the ALEPH2ET Mk2to rain or moisture, doing this will void your warranty.•Do not spill water or other liquids into or onto your unit.•Do not look directly into the LEDs, doing so may damage your eyes.•Check that the local power outlet matches the required voltage (120 240V AC)→•Make all the connections before you plug in the main power.•Do not remove the cover under any condition.There are no user serviceable parts inside.•Never operate this unit when its cover is removed.•Never plug this unit in to a dimmer rack.•Always be sure to mount this unit in an area that will allow proper ventilation. Allow at least 20 cmbetween this device and a wall.•Make sure ventilation holes are clean and unobstructed.•Do not attempt to operate this unit, if it becomes damaged.•Always mount this unit in a safe and stable manner.•Power-supply cords should be routed carefully.•The unit should be situated away from heat sources Control PanelAfter powering up, the current firmware version is displayed, followed by the DMX Start Address.The unit can be configured by using the 4 buttons under the display as follows.The following is the menu setting structure:BACK→SET -If pressed while address is being displayed:It activates the back-light and goes to Main Menu-If pressed while setting a menu:It takes you to the previous level without changing anything← -Scrolls down when navigating the menu-Decreases the value displayed when setting a parameter-Hold the key for a few seconds to fast scroll down-Scrolls up when navigating the menu-Increases the value displayed when setting a parameter-Hold the key for a few seconds to fast scroll up-Confirms the displayed value-Activates the displayed function or-Opens the next menuMain MenuDMX Address MenuThe DMX start address is the most important parameter to be defined when setting up your lights. By default the fitting will be set to 001.The addressing will depend on the current selected personality. For example if the light is set to RGBAW mode (5 channels), the DMX address range will be 001 –508.Personality MenuThe ALEPH2 ET Mk2 has six different personalities or operational modes, which can either be selected remotely from any standard RDM controller tool or locally using the control panel. The light behaves differently in each mode, since the DMX channel distribution changes according to the desired working personality. Set the desired personality before patching your lights in any lighting desk or control system.1 – 8BIT RGBAW MODE (5 Channel)This basic mode will turn the ET into a 5 channel light,allowing to drive each available colour as an independent dimmer. Each DMX channel uses 8 bits resolution where 000 is OFF, 255 is Full intensity, as described in the following chart.2 – 8BIT RGBW MODE (4 Channel)As some lighting control systems do not support RGBAW lights, we have implemented a RGBW mode so the fitting can be used with any controller. Each DMX channel uses 8bits resolution where 000 is OFF, 255 is Full intensity, as described in the following chart.3 – 8BIT (6CHANNEL) MODEThis basic mode will allow you to drive each colour using 8 bits resolution, setting the values from one of the 6DMX channels where 000 is OFF, 255 is Full intensity, as described in the following chart.Example 1: to turn all the channels to full intensity, set all the channels to 255 value:Example 2: to turn only the red group colour to full intensity,set the first channel to 255 value:The smart dimming in this personality follows an “s” curve resulting in a smooth LED output all along the 8 bits range.4 - 16BIT (12 CHANNEL) MODEThis mode will allow you to drive each colour using 16 bits resolution; setting the values from one of the 12 DMX channels from 000 to 255 where the first channel of each group will be (HIGH) and the following channel the (LOW)one, as described in the following chart.This personality gives the user full control on the output dimming, so any colour combination can be generated.5 - EXTENDED (9 CHANNEL) MODEThis extended mode offers a wide variety of output effects,turning the ALEPH2 ET Mk2 into a very versatile unit, using 9DMX channels, as described in the following chart.COLOUR GROUP INTENSITY (CH1-CH5) operate as described in the RGBAW personality plus they can be modified or affected by the strobe function or master dimmer channel, as described further in this section.Although these 6 channels have no effect when the true CCT mode is activated (9th channel > 010)STROBE DURATION(CH6)this channel works in conjunction with the strobe frequency from CH7. It will only take any effect if the channel 7th > 10.It defines the duration of the ON state and linearly increases the time from 2.5 milliseconds when 000 to 650 milliseconds when 255.NOTE: Strobe duration time must be lower than Strobe frequency for flashing. If duration time is equal or greater than frequency, the light will be continuously ON. STROBE FREQUENCY (CH7) will turn the ALEPH2 ET Mk2 bar into a versatile multi-colour strobe with user adjustable frequency. The strobe feature can be activated by setting the channel to a value between 011 and 255. In the same range, the strobe frequency can be adjusted by varying the channel value, with 011 the lowest frequency (about 0.3 flashes per second) and 255 the highest one (25 flashes per second).The strobe channel can be used in conjunction with all the other channels,so you can change the current output colour or the master intensity whilst strobing at the selected frequency, all at the same time.MASTER DIMMER(CH8)drives the general intensity, multiplying with all other current output channels, with 000 the lowest intensity 0% (light will be OFF, regardless of other channel values)and255the highest,allowing100% whatever other channels are demanding.TRUE CCT MODE (CH9)will turn the ALEPH2 ET Mk2 bar into a true colour temperature adjustable fitting, simulating a tungsten light behaviour.The white colour feature can be activated by setting the channel to a value greater than 010. CH9=011 will produce the warmest white and 255 the coolest one. Values between 000-010 will stop the true CCT feature.The true CCT mode channel can be used in conjunction with strobe and master dimmer features,so you can strobe and/or dim the current white output set by this channel. The ALEPH2ET Mk2has been laboratory calibrated to closely follow the black body Locus curve.With8bits resolution allowing the light to travel from TRUE warm to cool whites (12000K to 1800K) keeping a high CRI for natural colours.6 – 8BIT 1CHANNEL MODEThis mode turns the Aleph 2 ET Mk2 into a single colour, single channel dimmer.The output colour is not any specific kind of white and this mode is not tuned up to produce balanced output. It is onlymeant to produce as much light as possible using only one control channel.This mode is often used to control custom built A2 lights where only white LEDs are populated instead of coloured LEDs.Presets MenuThe Aleph2 ET Mk2 has 64 available slots where the user can record custom colours from DMX. These can later be activated from the menu. Presets turn the ET into a stand-alone fitting,where64different colours can easily be triggered on-site, without the need of DMX.It is also possible to record user personalised presets on any of the 64 memory slots, overwriting the default ones. RECORDING CUSTOM PRESETS:To record your own colours, please scroll to the desired slot (from 01 to 64), feed the desired data through the DMX port until you are happy with the look. Then pressIMPORTANT NOTES:When the light is powered on,it will automatically take preset 01 as the default power on value, if the Lamp On Mode setting is ON. This feature is handy for the user to set up the desired colour combination for the fitting to start every time it is powered up.Note that the strobe feature is not a supported preset.Any incoming DMX data will override the presets, so ensure that there is no DMX data coming in before navigating this menu intending to playback the different colours. Running the Factory Defaults RDM command will restore all the presets to the original values and user recorded presets will not be recoverable.Lamp On Mode MenuThis setting instructs the ET about what to do after a power up sequence.If DMX or OFF settings are chosen, the ET will stay off and will wait for DMX instructions.When Lamp On Mode = ON the ET will power up and then output whatever drop has been recorded in slot 01 of the presets. Please notice that any incoming DMX will override this preset, as DMX takes the highest precedence. PWM Frequency MenuThe PWM driving frequency can be adjusted. This might have an impact on the way some cameras respond to the light emitted by the A2 ET Mk2.Backlight MenuThe NORMAL setting will turn the display green back light on after any key operation.It will turn it off after a15 seconds of in-activity. The ON setting will keep the back light always on. The OFF setting will keep the back light always off, regardless of any operation.Factory Defaults MenuRunning the Factory default sequence will reset all the user configurable parameters,including DMX address,presets, Personality, Lamp On mode, Etc.Temperature MenuThis menu shows the current fixture temperature in degrees Celsius.LED and CPU operating temperatures can be monitored from the control panel as well as RDM.Test MenuUsing this menu you can test every group of LEDS in the ET fitting. The LEDs will turn on at full power, so avoid looking at the light directly when performing the test. Firmware VersionIndicates the current firmware version installed in the fitting. Please check ENTTEC website for latest firmware version.Firmware UpdateUpdating the firmware of the ALEPH2 ET Mk2 requires an ENTTEC USB Pro or a Pro Mk2 usb interface plugged in to a PC USB port. Connect the USB PRO to the ET through a standard 5 pin DMX cable.Please download and install the RDM Controller App from website, connect the widget to the unit, power it up and run the application.To make sure the process has been successful, please the firmware version has changed by looking at the “Software Version ID” RDM field or navigate to the Firmware Version menu using the control panel.RDM CapabilitiesThe ALEPH2 ET Mk2 supports RDM features and any RDM Controller can be used to configure it using RDM. The “ENTTEC RDM Controller” free App can be downloaded from ENTTEC website and be used in combination with a DMX USB PRO or a PRO MK2 widget.The supported RDM parameters are:Read only fields•Device Info•Software Version ID•Supported Parameters•Parameters Description•DMX Personality Description•Sensor Value (temperature x 2)•Sensor Definition•Boot Software Version•Manufacturing Label•Device Label•Status MessagesUser configurable fields•Identify Device•DMX Start Address•PID_8001: Master faders•DMX Personality•Factory Defaults•Lamp On Mode•Reset Device•Capture Preset•Preset PlaybackPlease note that DMX Personality,DMX Start Address, Factory Defaults, Lamp On Mode and Presets fields can also be configured from the menu interface at the back of the light.SpecificationsDue to continuous improvements and innovations of all ENTTEC products, specifications and features are subject to change without notice.Colour Gamut Ordering InformationDimensionsSales enquiries: ****************Support enquiries: ******************。
- 1、下载文档前请自行甄别文档内容的完整性,平台不提供额外的编辑、内容补充、找答案等附加服务。
- 2、"仅部分预览"的文档,不可在线预览部分如存在完整性等问题,可反馈申请退款(可完整预览的文档不适用该条件!)。
- 3、如文档侵犯您的权益,请联系客服反馈,我们会尽快为您处理(人工客服工作时间:9:00-18:30)。
LED硬灯条产品说明书
一、产品说明
颜色:黄,白,暖白光
工作电压: DC 24V
灯珠分类:SMD5050(贴片5050灯珠)
1、规格:
5050每米40灯DC 24V 1M≤8 W;
5050每米60灯DC 24V 1M≤12W ;
5050每米72灯DC 12V 1M≤14.4 W;
光源色温不同,光色也不同
色温在3300K以下,光色偏红给以温暖的感觉;有稳重的气氛,温暖的感觉.,通称暖色温。
色温在 3000--6000K 为中间,人在此色调下无特别明显的视觉心理效果,有爽快的感觉;故称为“中性”色温
色温超过 6000K ,光色偏蓝,给人以清冷的感觉,通称冷色温
2、工艺类别
NK---裸板(室内用)
铝---滴胶(半防水,灯脚滴硅胶,工艺稍复杂)
铝---全滴胶(防水,室外用,工艺稍复杂,适合室外复杂环境工作)
产品特性
1、采用散热性能好的铝基板或玻纤板作为载体,印制电路板,散热性能好,导电性强。
2、外壳为铝合金材料,散热性能好。
如果安装在室外,可根据客户要求把铝合金外壳氧化成跟楼体相同的颜色,不会因为安装灯具而影响楼体的美观。
3、采用防紫外线,抗老化的胶水全部密封,防水性能达到IP65。
4、一般应用于广告装饰、城市亮化、楼宇亮化、酒柜、珠宝展柜、天花暗槽等室内外照明以及装饰照明。
长度可按要求定做。
3、使用及注意:
本产品为恒流低压12V,请接12V低压或购置变压开关电源;
本品常规使用时,建议并联;当串联使用时,连接长度请勿超过电源最大功率的80%,以免电源超负载工作导致电源烧毁。
二、使用说明:
1、接线说明:红、黄、蓝、绿、白单色防水软光条:产品引出两根电源线,一根是红色,一根是黑色,导线线径是22AWG,长度是150MM。
红色线接电源正级,黑色线接电源负极。
如果使用控制器控制,红色线接控制器输出的正级,黑色接控制器输出的负极。
2、安装说明:
方案一:将灯条放到需要安装的位置上,取出螺丝,在灯条的两端堵头上上紧螺丝,固定好灯条,如左下图所示;
方案二:卡件安装。
取出卡件,将卡件安装在平面上,用自攻螺丝锁紧,将灯带放到卡件中间,向下用力把硬灯条压进卡件,如右上图所示。
3、安装注意事项:
1)、按照接线图正确的接线;
2)、注意产品的工作参数不能超过了极限参数表里所规定;
3)、产品安装时要将螺丝打紧,否则产品易脱落;
4)、产品在安装和使用过程中不允许用锐器去触碰产品,以免划伤灯具,影响美观。