Hp服务器安装Solaris 10 详细安装图解
新手入门:Solaris 10系统安装图解
新手入门:Solaris 10系统安装图解我们简要介绍了Solaris 10操作系统的特性,本篇向大家介绍在VMware Workstation 5环境下如何安装Solaris 10(X86)操作系统。
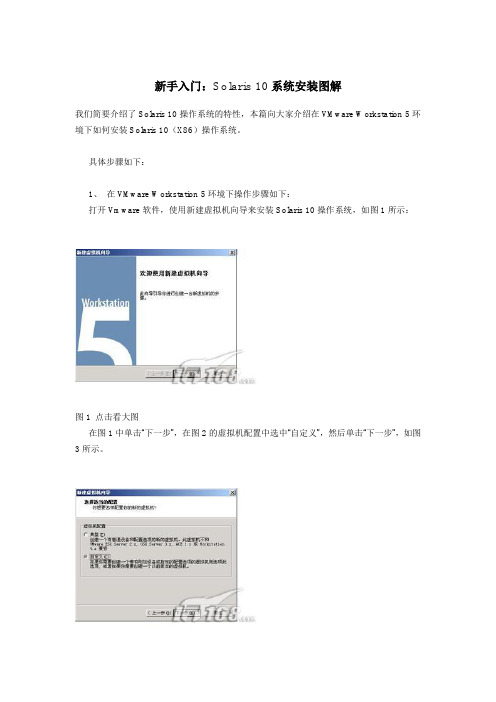
具体步骤如下:1、在VMware Workstation 5环境下操作步骤如下:打开Vmware软件,使用新建虚拟机向导来安装Solaris 10操作系统,如图1所示:图1 点击看大图在图1中单击“下一步”,在图2的虚拟机配置中选中“自定义”,然后单击“下一步”,如图3所示。
图2 点击看大图图3 点击看大图在图3虚拟机格式中选择“新的—Workstation 5 (W)”,然后单击“下一步”,如图4所示。
图4 点击看大图在图4的客户机操作系统选中“Sun Solaris(S)”,在“版本(V)”选择“Solaris 10(experimental)”,然后单击“下一步”,如图5所示,“虚拟机名称”采用默认值,“位置”修改,使用“浏览”为“E:\solaris10\”;然后单击“下一步”,进入图6中,“虚拟机内存”一般采用系统的默认值(至少要96MB,否则的话不能使用图形界面安装),笔者在这里使用“272 MB”内存,接近最大的推荐内存284MB(如果PC机的物理内存比较大,比如说1GB,建议使用最大的284MB 内存)。
图5 点击看大图图6 点击看大图在图6中,单击“下一步”,进入图7,在“网络连接”中选中“使用桥接网络”,接下来在“I/O 适配器类型”采用默认值,如图8所示;然后单击“下一步”,进入图9中,在“磁盘”选中“创建一个新的虚拟磁盘”;接下来在“虚拟机磁盘类型”也采用默认值,如图10所示。
图7 点击看大图图8 点击看大图图9 点击看大图图10 点击看大图在图10中单击“下一步”,进入图11,在这里“磁盘大小(GB)”笔者选择12.0(缺省的是4.0),也就是Solaris10的最小磁盘空间;在指定的“磁盘文件”采用采用默认的文件名,如图12所示,然后点击“完成”按钮,出现如图13的Solaris 10的虚拟机。
Solaris10安装步骤
SUN服务器Solaris10安装步骤1.接入显示器,鼠标和键盘2.接入串口线至SER MGT口,打开SecureCRT软件,点击左上角文件—快速链接,协议:Serial、端口:COM4、波特率:96003. 插入电源线,等待开机硬件扫描4. 主机名-login:root ,password:changeme(密码不显示)5. 加电命令:start空格/SYS/ 回车,输入Y(yes)。
(可以直接按电源键)6. 登录系统控制台:start空格/SP/console 回车,输入Y(yes)。
7.等待至显示器亮,按Ctrl+Break,等待服务器进入OK监控状态。
8.显卡输出:ok setenv空格input-device空格keyboard鼠标输出:ok setenv空格output-device空格screen9.要使这些更改生效,键入:ok reset-all10. OK模式下:A: 做Raid,boot空格cdrom空格-s,进入单命令用户模式操作,具体做Raid步骤,按机型去官网下载管理文档操作。
(若是DVD光驱则输入:boot空格dvd空格-s)。
做完raid后,命令label标签一下。
否则装系统会提示找不到硬盘。
B: 进入OK模式后,将Solaris10系统盘插入光驱,并在OK提示符下输入以下命令:OK boot空格cdrom1.等待系统出现如下提示:Select a Language0. English1. French2. German3. Italian4. Japanese5. Korean6. Simplified Chinese7. Spanish8. Swedish9. Traditional ChinesePlease make a choice (0 - 9), or press h or ? for help:安装语言选择0.English,输入0后按F-2;2.出现如下提示:Select a Locale0. English (C - 7-bit ASCII)1. Albania (ISO8859-2)2. Australia (ISO8859-1)3. Belgium-Flemish (ISO8859-1)4. Belgium-Flemish (ISO8859-15 - Euro)5. Bosnia (ISO8859-2)6. Brazil (ISO8859-1)7. Brazil (UTF-8)8. Bulgaria (ISO8859-5)9. Canada-English (ISO8859-1)10. Catalan, Spain (ISO8859-1)11. Catalan, Spain (ISO8859-15 - Euro)12. Croatia (ISO8859-2)13. Czech Republic (ISO8859-2)14. Denmark (ISO8859-1)15. Denmark (ISO8859-15 - Euro)16. Egypt (ISO8859-6)17. Egypt (UTF-8)18. Estonia (ISO8859-15)Press Return to show more choices.Please make a choice (0 - 59), or press h or ? for help:本地语言选择0. English (C - 7-bit ASCII),输入0后按F-2;3.在终端上安装Solaris10,这时会出现如下提示:What type of terminal are you using?1) ANSI Standard CRT2) DEC VT523) DEC VT1004) Heathkit 195) Lear Siegler ADM316) PC Console7) Sun Command Tool8) Sun Workstation9) Televideo 91010) Televideo 92511) Wyse Model 5012) X Terminal Emulator (xterms)13) CDE Terminal Emulator (dtterm)14) OtherType the number of your choice and press Return:终端类型选择3)DEC VT100,输入3后按F-2;4.出现如下提示:q The Solaris Installation Program qqqqqqqqqqqqqqqqqqqqqqqqqqqqqqqqqqqqqqqqqqqqqThe Solaris installation program is divided into a series of short sectionswhere you'll be prompted to provide information for the installation. Atthe end of each section, you'll be able to change the selections you'vemade before continuing.About navigation...- The mouse cannot be used- If your keyboard does not have function keys, or they do notrespond, press F; the legend at the bottom of the screenwill change to show the F keys to use for navigation. qqqqqqqqqqqqqqqqqqqqqqqqqqqqqqqqqqqqqqqqqqqqqqqqqqqqqqqqqqqqqqqqqqqqqqqqqqq qqqqqF2_Continue F6_HelpSolaris的安装分为好几部分,每一部分后面都需要进行确认,如果发现有错,可以更改先前输入的信息,按F-2继续安装;5.出现如下提示:q Identify This System qqqqqqqqqqqqqqqqqqqqqqqqqqqqqqqqqqqqqqqqqqqqqqqqqqqqqqqqqOn the next screens, you must identify this system as networked ornon-networked, and set the default time zone and date/time.If this system is networked, the software will try to find the informationit needs to identify your system; you will be prompted to supply anyinformation it cannot find.> To begin identifying this system, press F2. qqqqqqqqqqqqqqqqqqqqqqqqqqqqqqqqqqqqqqqqqqqqqqqqqqqqqqqqqqqqqqqqqqqqqqqq qqqqqqqqF2_Continue F6_Help开始定义系统的名字、网络、及掩码,时区及时间,按F-2继续安装;- Network Connectivity ---------------------------------------------------------Specify Yes if the system is connected to the network by one of the Solarisor vendor network/communication Ethernet cards that are supported on theSolaris CD. See your hardware documentation for the current list ofsupported cards.Specify No if the system is connected to a network/communication card thatis not supported on the Solaris CD, and follow the instructions listed underHelp.Networked---------[X] Yes[ ] No--------------------------------------------------------------------------------F-2_Continue F-6_Help提示系统是否连接了网络,选YES,按F-2继续安装;- Configure Multiple Network Interfaces ----------------------------------------Multiple network interfaces have been detected on this system. Specify allof the network interfaces you want to configure.Note: You must choose at least one interface to configure.Network interfaces------------------[X] bge0[ ] bge1[ ] bge2[ ] bge3--------------------------------------------------------------------------------F-2_Continue F-6_Help选择主网卡接口,选bge0,按F-2继续安装;DHCP for bge0----------------------------------------------------------------Specify whether or not this network interface should use DHCP to configure itself. Choose Yes if DHCP is to be used, or No if the network interface is to be configured manually.NOTE: DHCP support will not be enabled, if selected, until after the system reboots.Use DHCP for bge0-----------------[ ] Yes[X] No--------------------------------------------------------------------------------F-2_Continue F-6_Help提示是否需要使用DHCP来配置主机的IP地址,选NO,按F-2继续安装;Host Name for bge0 -----------------------------------------------------------Enter the host name which identifies this system on the network. The namemust be unique within your domain; creating a duplicate host name will causeproblems on the network after you install Solaris.A host name must have at least one character; it can contain letters,digits, and minus signs (-).Host name for bge0 SUN_M5000--------------------------------------------------------------------------------F-2_Continue F-6_Help输入主机名:SUN_M5000,按F-2继续安装;IP Address for bge0 ----------------------------------------------------------Enter the Internet Protocol (IP) address for this network interface. Itmust be unique and follow your site's address conventions, or asystem/network failure could result.IP addresses contain four sets of numbers separated by periods (for example129.200.9.1).IP address for bge0 XXX.XXX.XXX.XXX--------------------------------------------------------------------------------F-2_Continue F-6_Help输入主机IP地址,XXX.XXX.XXX.XXX,按F-2继续安装;- Subnet for bge0--------------------------------------------------------------On this screen you must specify whether this system is part of a subnet. Ifyou specify incorrectly, the system will have problems communicating on thenetwork after you reboot.> To make a selection, use the arrow keys to highlight the option andpress Return to mark it [X].System part of a subnet-----------------------[X] Yes[ ] No--------------------------------------------------------------------------------F-2_Continue F-6_Help提示主机的网络是否采用子网掩码的方法,选YES,按F-2继续安装;- Netmask for bge0 -------------------------------------------------------------On this screen you must specify the netmask of your subnet. A defaultnetmask is shown; do not accept the default unless you are sure it iscorrect for your subnet. A netmask must contain four sets of numbers separated by periods (for example 255.255.255.0).Netmask for bge0 255.255.255.0--------------------------------------------------------------------------------F-2_Continue F-6_Help提示输入子网掩码,输入255.255.255.0,按F-2继续安装;- IPv6 for bge0 ----------------------------------------------------------------Specify whether or not you want to enable IPv6, the next generation Internet Protocol, on this network interface. Enabling IPv6 will have no effect ifthis machine is not on a network that provides IPv6 service. IPv4 servicewill not be affected if IPv6 is enabled.> To make a selection, use the arrow keys to highlight the option andpress Return to mark it [X].Enable IPv6 for bge0--------------------[ ] Yes[X] No--------------------------------------------------------------------------------F-2_Continue F-6_Help不使用IPv6技术,选NO,按F-2继续安装;- Set the Default Route for bge0 -----------------------------------------------To specify the default route, you can let the software try to detect oneupon reboot, you can specify the IP address of the router, or you can choose None. Choose None if you do not have a router on your subnet.> To make a selection, use the arrow keys to select your choice and press Return to mark it [X].Default Route for bge0--------------------------[ ] Detect one upon reboot[X] Specify one[ ] None----------------------------------------------------------------------F-2_Continue F-6_Help提示设置缺省网关,选择Specify one,按F-2继续安装;- Default Route IP Address for bge0 ----------------------------------Enter the IP address of the default route. This entry will be placed in the/etc/defaultrouter file and will be the default route after you reboot (example 129.146.89.225).Router IP Address for bge0 XXX.XXX.XXX.XXX----------------------------------------------------------------------F-2_Continue F-6_Help提示输入主机的缺省网关,输入XXX.XXX.XXX.XXX,按F-2继续安装;- Confirm Information for bge0 -------------------------------------------------> Confirm the following information. If it is correct, press F2;to change any information, press F4.Networked: YesUse DHCP: NoHost name: SUN_M5000IP address: XXX.XXX.XXX.XXXSystem part of a subnet: YesNetmask: 255.255.255.0Enable IPv6: NoDefault Route: Specify oneRouter IP Address: XXX.XXX.XXX.XXX----------------------------------------------------------------------F-2_Continue F-4_Change F-6_Help提示确认上面输入的信息,如果上面的输入信息有错,可以按F-4后重新输入,如果正确,按F-2继续安装;- Configure Security Policy: ---------------------------------------------------Specify Yes if the system will use the Kerberos security mechanism.Specify No if this system will use standard UNIX security.Configure Kerberos Security---------------------------[ ] Yes[X] No----------------------------------------------------------------------F-2_Continue F-6_Help提示配置安全策略,选NO,按F-2继续安装;- Confirm Information ----------------------------------------------------------> Confirm the following information. If it is correct, press F2;to change any information, press F4.Configure Kerberos Security: No---------------------------------------------------------------------F-2_Continue F-4_Change F-6_Help确认刚才输入的信息,如果刚才输入的信息有错,按F-2重新输入;如果正确,按F-2继续安装;- Name Service -------------------------------------------------------On this screen you must provide name service information. Select the nameservice that will be used by this system, or None if your system will eithernot use a name service at all, or if it will use a name service not listedhere.> To make a selection, use the arrow keys to highlight the optionand press Return to mark it [X].Name service------------[ ] NIS+[ ] NIS[ ] DNS[ ] LDAP[X] None----------------------------------------------------------------------F-2_Continue F-6_Help配置名字服务,选择None(不采用任何名字服务),按F-2继续安装;- Confirm Information ------------------------------------------------> Confirm the following information. If it is correct, press F2;to change any information, press F4.Name service: None----------------------------------------------------------------------F-2_Continue F-4_Change F-6_Help确认刚才输入的信息,如果刚才输入的信息有错,按F-4重新输入;如果正确,按F-2继续安装;- Time Zone ----------------------------------------------------------On this screen you must specify your default time zone. You can specify atime zone in three ways: select one of the continents or oceans from thelist, select other - offset from GMT, or other - specify time zone file.> To make a selection, use the arrow keys to highlight the option andpress Return to mark it [X].Continents and Oceans----------------------------------- [ ] Africa| [ ] Americas| [ ] Antarctica| [ ] Arctic Ocean| [X] Asia| [ ] Atlantic Ocean| [ ] Australia| [] Europev [ ] Indian Ocean----------------------------------------------------------------------F-2_Continue F-6_Help设置时区,选择Asia,按F-2继续安装;- Country or Region --------------------------------------------------> To make a selection, use the arrow keys to highlight the option andpress Return to mark it [X].Countries and Regions-------------------------^ [ ] France| [ ] Germany| [ ] Gibraltar| [ ] Greece| [ ] Hungary| [ ] Ireland| [ ] Italy| [ ] Latvia| [ ] Liechtenstein| [ ] Lithuania| [ ] Luxembourg| [ ] Macedoniav [X] China----------------------------------------------------------------------F-2_Continue F-6_Help选择国家或地区,选择China,按F-2继续安装;- Date and Time -----------------------------------------------------> Accept the default date and time or enternew values.Date and time: 2010—XX--XX 10:48Year (4 digits) : 2010Month (1-12) : XXDay (1-31) : XXHour (0-23) : 10Minute (0-59) : 48----------------------------------------------------------------------F-2_Continue F-6_Help设置时间,按照当地时间,按F-2继续安装;Root Password ------------------------------------------------------Please enter the root password for this system.The root password may contain alphanumeric and special characters. For security, the password will not be displayed on the screen as you type it.> If you do not want a root password, leave both entries blank.Root password: *****Root password: *****----------------------------------------------------------------------F-2_Continue F-6_Help设置root用户密码,设置为root,按F-2继续安装;- Identify This System -----------------------------------------------On the next screens, you must identify this system as networked ornon-networked, and set the default time zone and date/time.If this system is networked, the software will try to find the informationit needs to identify your system; you will be prompted to supply any information it cannot find.> To begin identifying this system, press F2.----------------------------------------------------------------------F-2_Continue F-6_Help系统鉴别系统信息,直接按F-2继续安装;- Solaris Interactive Installation -----------------------------------On the following screens, you can accept the defaults or you can customize how Solaris software will be installed by:- Selecting the type of Solaris software to install- Selecting disks to hold software you've selected- Selecting unbundled products to be installed with Solaris- Specifying how file systems are laid out on the disksAfter completing these tasks, a summary of your selections (called a profile) will be displayed.There are two ways to install your Solaris software:- "Standard" installs your system from a standard Solaris Distribution.Selecting "Standard" allows you to choose between initial installand upgrade, if your system is upgradable.- "Flash" installs your system from one or more Flash Archives---------------------------------------------------------------------F2_Standard F4_Flash F5_Exit F6_Help- Eject a CD/DVD Automatically? --------------------------------------During the installation of Solaris software, you may be using one or moreCDs/DVDs. You can choose to have the system eject each CD/DVD automatically after it is installed or you can choose to manually eject each CD/DVD.[ ] Automatically eject CD/DVD[X] Manually eject CD/DVD----------------------------------------------------------------------F2_Continue F3_Go Back F5_Exit- Reboot After Installation? -----------------------------------------After Solaris software is installed, the system must be rebooted. You can choose to have the system automatically reboot, or you can choose to manually reboot the system if you want to run scripts or do other customizations before the reboot. You can manually reboot a system by using the reboot(1M) command.[X] Auto Reboot[ ] Manual Reboot----------------------------------------------------------------------F2_Continue F3_Go Back F5_Exit- Solaris Interactive Installation ---------------------------------------------This system is upgradable, so there are two ways to install the Solaris software.The Upgrade option updates the Solaris software to the new release, savingas many modifications to the previous version of Solaris software as possible. Back up the system before using the Upgrade option.The Initial option overwrites the system disks with the new version ofSolaris software. This option allows you to preserve any existing file systems. Back up any modifications made to the previous version of Solaris software before starting the Initial option.After you select an option and complete the tasks that follow, a summary of your actions will be displayed.----------------------------------------------------------------------F2_Upgrade F3_Go Back F4_Initial F5_Exit F6_Help- Initializing -------------------------------------------------------The system is being initialized.Loading install media, please wait...- License ------------------------------------------------------------- Sun Microsystems, Inc. ("Sun")| SOFTWARE LICENSE AGREEMENT|| READ THE TERMS OF THIS AGREEMENT ("AGREEMENT") CAREFULLY BEFORE | OPENING SOFTWARE MEDIA PACKAGE. BY OPENING SOFTWARE MEDIA| PACKAGE, YOU AGREE TO THE TERMS OF THIS AGREEMENT. IF YOU ARE| ACCESSING SOFTWARE ELECTRONICALLY, INDICATE YOUR ACCEPTANCE OF | THESE TERMS BY SELECTING THE "ACCEPT"(OR EQUIVALENT) BUTTON AT| THE END OF THIS AGREEMENT. IF YOU DO NOT AGREE TO ALL OF THE| TERMS, PROMPTLY RETURN THE UNUSED SOFTWARE TO YOUR PLACE OF| PURCHASE FOR A REFUND OR, IF SOFTWARE IS ACCESSED ELECTRONICALLY, | SELECT THE "DECLINE" (OR EQUIVALENT) BUTTON AT THE END OF THIS| AGREEMENT. IF YOU HAVE SEPARATELY AGREED TO LICENSE TERMS| ("MASTER TERMS") FOR YOUR LICENSE TO THIS SOFTWARE, THEN SECTIONS | 1-6 OF THIS AGREEMENT ("SUPPLEMENTAL LICENSE TERMS") SHALL| SUPPLEMENT AND SUPERSEDE THE MASTER TERMS IN RELATION TO THIS | SOFTWARE.|v 1. Definitions.----------------------------------------------------------------------F-2_Accept License F5_Exit-- Select Geographic Regions -----------------------------------------Select the geographic regions for which support should be installed.> [ ] Australasia> [ ] Asia> [ ] Eastern Europe> [ ] Northern Europe> [ ] Northern Africa> [ ] Middle EastV [/] Southern Europe[ ] Catalan, Spain (ISO8859-1)[ ] Cyprus (Greek) (UTF-8)[ ] Greece (ISO8859-7)[X] Italian[X] Italy (ISO8859-1)[ ] Malta (English) (UTF-8)[ ] Malta (UTF-8)[ ] Portugal (ISO8859-1)[ ] Spain (ISO8859-1)Press Return to hide components-------------------------------------------------------------------------------- F-2_Continue F3_Go Back F5_Exit F6_Help- Select System Locale ---------------------------------------------------------Select the initial locale to be used after the system has been installed.[ ] POSIX C ( C )Western Europe[ ] Great Britain (ISO8859-1) ( en_GB.ISO8859-1 )[ ] Great Britain (ISO8859-15 - Euro) ( en_GB.ISO8859-15 )[X] Great Britain (UTF-8) ( en_GB.UTF-8 )----------------------------------------------------------------------F-2_Continue F3_Go Back F5_Exit F6_Help- Select Products ----------------------------------------------------Select the products you would like to install.V [X] Solaris 10 Extra Value Software................. 69.92 MB[X] Sun Validation Test Suite 6.3................... 69.92 MBProduct is selected. Press Return to deselect----------------------------------------------------------------------F-2_Continue F3_Go Back F-4_Product Info F5_Exit F6_Help- Additional Products ------------------------------------------------To scan for additional products, select the location you wish to scan. Products found at the selected location that are in a Web Start Ready install form will be added to the Products list.Web Start Ready product scan location:[X] None[ ] CD/DVD[ ] Network File System----------------------------------------------------------------------F-2_Continue F3_Go Back F5_Exit- Select Software ----------------------------------------------------Select the Solaris software to install on the system.NOTE: After selecting a software group, you can add or remove software bycustomizing it. However, this requires understanding of softwaredependencies and how Solaris software is packaged.[X] Entire Distribution plus OEM support ....... 5617.00 MB[ ] Entire Distribution ........................ 5573.00 MB[ ] Developer System Support ................... 5460.00 MB[ ] End User System Support .................... 4444.00 MB[ ] Core System Support ........................ 971.00 MB[ ] Reduced Networking Core System Support ..... 920.00 MB---------------------------------------------------------------------F-2_Continue F3_Go Back F4_Customize F5_Exit F6_Help- Select Disks -------------------------------------------------------On this screen you must select the disks for installing Solaris software.Start by looking at the Suggested Minimum field; this value is theapproximate space needed to install the software you've selected. Keepselecting disks until the Total Selected value exceeds the Suggested Minimum value.NOTE: ** denotes current boot diskDisk Device Available Space====================================================================== [X] c1t0d0 69994 MB (F4 to edit)[ ] c1t1d0 69994 MBTotal Selected: 69994 MBSuggested Minimum: 4372 MB----------------------------------------------------------------------F-2_Continue F3_Go Back F4_Edit F5_Exit F6_Help- Preserve Data? -----------------------------------------------------Do you want to preserve existing data? At least one of the disks you'veselected for installing Solaris software has file systems or unnamed slicesthat you may want to save.----------------------------------------------------------------------F-2_Continue F3_Go Back F4_Preserve F5_Exit F6_Help- Automatically Layout File Systems? ---------------------------------Do you want to use auto-layout to automatically layout file systems?Manually laying out file systems requires advanced system administrationskills.----------------------------------------------------------------------F2_Auto Layout F3_Go Back F4_Manual Layout F5_Exit F6_Help- File System and Disk Layout ----------------------------------------The summary below is your current file system and disk layout, based on the information you've supplied.NOTE: If you choose to customize, you should understand file systems, theirintended purpose on the disk, and how changing them may affect the operationof the system.File sys/Mnt point Disk/Slice Size====================================================================== overlap c1t0d0s2 69994 MB----------------------------------------------------------------------F-2_Continue F3_Go Back F4_Customize F5_Exit F6_Help- Customize Disk: c1t0d0 ---------------------------------------------Boot Disk: c1t0d0Entry: Recommended: MB Minimum: MB====================================================================== Slice Mount Point Size (MB)0 01 02 overlap 699943 04 05 06 07 0====================================================================== Capacity: 69994 MBAllocated: 0 MBFree: 69994 MB--------------------------------------------------------------------------------F-2_OK F-4_Options F5_Cancel F6_Help- Customize Disk: c1t0d0 -------------------------------------------------------Boot Disk: c1t0d0Entry: swap Recommended: 0 MB Minimum: 0 MB====================================================================== Slice Mount Point Size (MB)0 / 143391 swap 81932 overlap 699943 /opt 266274 05 06 /export/home 204817 0====================================================================== Capacity: 69994 MBAllocated: 69640 MBRounding Error: 2 MBFree: 352 MB----------------------------------------------------------------------F-2_OK F-4_Options F5_Cancel F6_Help- File System and Disk Layout ----------------------------------------The summary below is your current file system and disk layout, based on the information you've supplied.NOTE: If you choose to customize, you should understand file systems, theirintended purpose on the disk, and how changing them may affect the operationof the system.File sys/Mnt point Disk/Slice Size====================================================================== / c1t0d0s0 14339 MBswap c1t0d0s1 8193 MBoverlap c1t0d0s2 69994 MB/opt c1t0d0s3 26627 MB/export/home c1t0d0s6 20481 MB----------------------------------------------------------------------F-2_Continue F3_Go Back F4_Customize F5_Exit F6_Help- Mount Remote File Systems? -----------------------------------------Do you want to mount software from a remote file server? This may benecessary if you had to remove software because of disk space problems.----------------------------------------------------------------------F-2_Continue F3_Go Back F4_Remote Mounts F5_Exit F6_Help- Profile ------------------------------------------------------------The information shown below is your profile for installing Solaris software.It reflects the choices you've made on previous screens.====================================================================== - Installation Option: Initial| Boot Device: c1t0d0| Client Services: None|| Locales: Great Britain (ISO8859-1)| System Locale: Great Britain (UTF-8) ( en_GB.UTF-8|| Software: Solaris 10, Entire Distribution plus OEM su|| File System and Disk Layout: / c1t0d0s0 14339 MB| swap c1t0d0s1 8193 MB| /opt c1t0d0s3 26627 MB| /export/home c1t0d0s6 20481 MBv----------------------------------------------------------------------F-2_Begin Installation F4_Change F5_Exit F6_Help- Warning ------------------------------------------------------------The following disk configuration condition(s) have beendetected. Errors must be fixed to ensure a successfulinstallation. Warnings can be ignored without causing theinstallation to fail.WARNING: Unused disk space (c1t0d0)WARNING: CHANGING DEFAULT BOOT DEVICEYou have either explicitly changed the default boot device, oraccepted the default to "Reconfigure EEPROM". In either case,the system's EEPROM will be changed so it will always bootSolaris from the device that you've specified. If this is notwhat you had in mind, go back to the disk selection screens andchange the "Reconfigure EEPROM" setting.----------------------------------------------------------------------F-2_OK F5_Cancel。
380g6 solaris安装系统加载阵列卡驱动
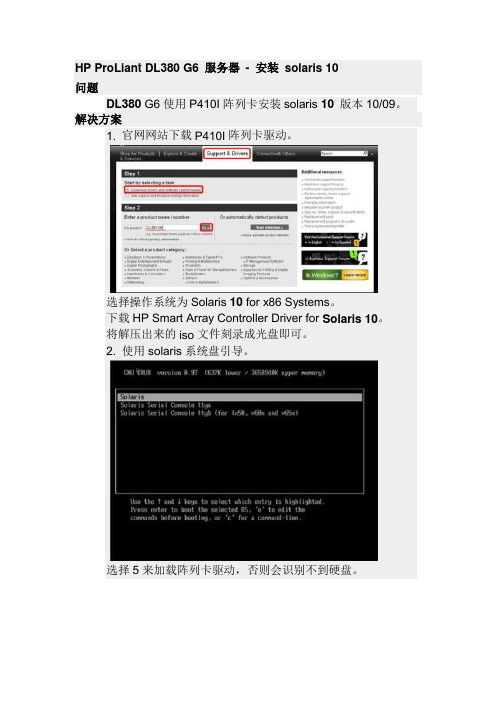
HP ProLiant DL380 G6 服务器- 安装solaris 10问题DL380 G6使用P410I阵列卡安装solaris 10版本10/09。
解决方案1. 官网网站下载P410I阵列卡驱动。
选择操作系统为Solaris 10 for x86 Systems。
下载HP Smart Array Controller Driver for Solaris10。
将解压出来的iso文件刻录成光盘即可。
2. 使用solaris系统盘引导。
选择5来加载阵列卡驱动,否则会识别不到硬盘。
驱动加载方式选择光驱,需要将刻录好的驱动光盘放入光驱后按1。
屏幕会提示安装完成,此时需要将系统盘重新放入光驱点击e。
选择1来安装系统。
此时只需等待光盘自动加载。
选择键盘类型,F2继续。
按回车继续。
使用图形界面安装此时需要按回车。
选择语言。
下一步继续。
选择网络连接方式。
输入主机名。
域名设置。
划分时区标准。
选择国家或地区。
设置时间和日期。
设置超级用户密码。
确认信息,点击确认继续,需要更改选择返回。
点击下一步开始安装。
安装选项。
会有重要提示,需要手动拿出系统光盘避免重复安装。
指定安装操作系统的介质。
安装过程只需等待。
同意协议下一步继续。
选择安装类型。
搜集磁盘空间需求后准备安装。
确定没有问题点击立即安装,安装过程需要耐心等待。
安装完成后服务器会自动重启。
选择solaris 10进入,输入用户名及密码。
solaris10 操作系统安装(sparc)(详细)

北京神州泰岳软件股份有限公司网络管理事业部基础技能-solaris安装(sparc)北京神州泰岳软件股份有限公司2019年8月20日文档属性目录1场景说明 (4)2串口线物理连接 (5)3连接console (8)3.1USB串口驱动程序安装 (8)3.2通过SecureCRT连接Console(方式一) (8)3.3通过Windows的超级终端(方式二) (9)4安装操作系统 (13)1 场景说明本文档截图使用的是sun v210 服务器,具体进入ok模式的方法请参考各型号服务器的说明,本服务器有两块72G硬盘,安装时在第一块硬盘c0t0d0上创建分区,系统安装要求下(此处配置与虚拟机配置稍有不同):现有设备列表:2 串口线物理连接UNIX服务器一般随机没有安装显卡,需要通过串口线连接至服务器的console控制台,sun 服务器随机会附带以个DB9的串口和一根直连网线,用于连接服务器附图1. 随机附带的DB9串口接头(9针)除了使用sun自带的串口头外在大部分服务器上也可使用Cisco设备附带的串口线附图2. Cisco设备串口线可以直接使用上述的串口线(如cisco串口线)的连接至台式PC机后面的9针串口(com1),对于项目现场实施人员使用的是笔记本电脑(无串口),因此还需要准备一根DB9串口转usb接口的线,这种线在电子市场即可买到。
附图3. USB转DB9线附图4. 串口线连接方式附图5. V210服务器背板示意图3 连接console3.1 USB串口驱动程序安装注意:确保已按第二章将SUN小型机与笔记本电脑正确进行了物理连接;DB9转USB串口线会一般会附带驱动程序,笔记本电脑需要安装驱动程序,本次培训中使用公司统一购买的串口线,驱动程序下载路径为:FTP: /07产品培训资料/NMBU基础技能_Unix初级(Solaris)/tools//usbdirver.rar3.2 通过SecureCRT连接Console(方式一)◆打开设备管理器,找到COM设备所对应的端口附图6.◆打开SecuCRT新建连接连接类型选择serial,端口为com4 ,速率为9600附图7.单击“Connect”,进入系统控制台,回车有字符显示。
Solaris 10安装过程
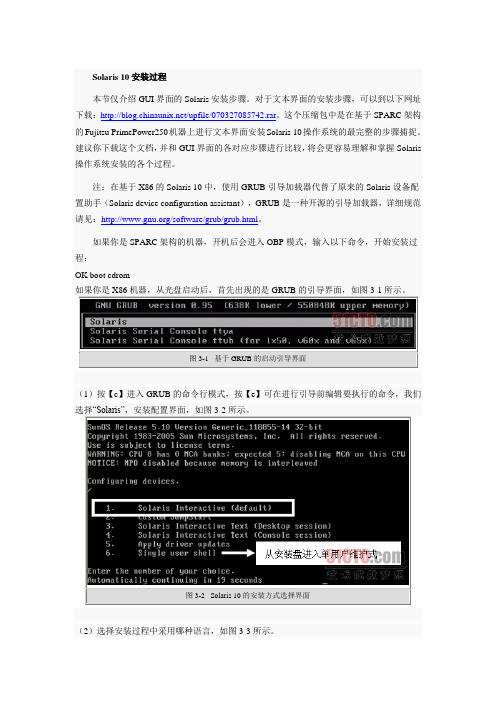
图3-6选择安装源文件的位置
(6)继续按照默认设置,然后选择自定义安装,并单击【下一认设置,然后选定要安装的Solaris软件组(配置簇)的类型,如图3-8所示。
图3-2 Solaris 10的安装方式选择界面
(2)选择安装过程中采用哪种语言,如图3-3所示。
图3-3选择安装过程以哪种语言显示
(3)配置系统标识信息如图3-4所示。最完整的文本界面的安装步骤可到此下载:/upfile/070327085742.rar。
注:在基于X86的Solaris 10中,使用GRUB引导加载器代替了原来的Solaris设备配置助手(Solaris device configuration assistant),GRUB是一种开源的引导加载器,详细规范请见:/software/grub/grub.html。
如果你是SPARC架构的机器,开机后会进入OBP模式,输入以下命令,开始安装过程:
OK boot cdrom
如果你是X86机器,从光盘启动后,首先出现的是GRUB的引导界面,如图3-1所示。
图3-1基于GRUB的启动引导界面
(1)按【c】进入GRUB的命令行模式,按【e】可在进行引导前编辑要执行的命令,我们选择“Solaris”,安装配置界面,如图3-2所示。
图3-8选择要安装的软件集配置簇
(8)继续按照默认设置,然后指定磁盘分区,如图3-9所示。
图3-9进行磁盘分区
(9)单击【修改】按钮,进行自定义分区,Solaris 10默认只分3个区:/、swap、/export/home,如图3-10所示。
图3-10自定义磁盘分区
提示:如果你的机器拥有两块本地硬盘,而且考虑把两块硬盘做成镜像的话,你需要预留空间(建议为128MB),用来存放状态数据库。通常保留第7个分区不使用,即上图显示的最后一行片7(slice7)的文件系统为空,大小为128MB。详见后文《RAID和Solaris卷管理软件》
【详细】SUN Solaris 10虚拟机安装手册

1.新建虚拟机,选择镜像文件,设置基本的信息后,进入系统初始化界面1.表示执行GUI安装,使用图形用户界面安装(下面使用此种安装方式)2.表示执行自动的自定义JumpStart 安装3.表示执行文本安装程序进行安装,会改写缺省的GUI 安装程序并运行文本安装程序。
4.表示执行文本安装程序在控制台会话中进行安装2.选择1后,系统检测安装组件3.选择安装语言:6(简体中文),按Enter4.显示将要安装的项目,点击’下一步’5.选择网络连接’联网的’,点击’下一步’6.选择是否用于DHCP,选择’否’,点击’下一步’7.设置主机名,任意输入,这里输入:solaris,点击’下一步’8.设置IP,输入:172.18.4.*.点击’下一步’[IP设置可以任意选择可用的IP即可]9.设置网络掩码’255.255.255.0’,点击’下一步’[默认为255.255.255.0]10.设置IPV6,选择’否’,点击’下一步’11.设置缺省路由,选择’无’,点击’下一步’[依情况而定,可以指定路由器]12.设置Kerberos,选择‘否’,点击‘下一步’13.设置服务,选择‘无’,点击‘下一步’【可以设置相应的服务】14.设置时区,选择‘地域性的洲、国家、地区’,点击‘下一步’15.选择‘亚洲---中国’,点击‘下一步’16.设置日期和时间,默认自动获取,点击‘下一步’17.设置超级用户的密码,输入密码并确认后点击‘下一步’18.确认安装信息,点击‘确认’19.开始安装系统,点击‘下一步’20.设置安装选项,均选择‘是’,在通知窗口点击‘确定’21.选择系统的介质,选择‘CD/DVD’22.接受许可证并点击‘下一步’23.选择安装类型,选择‘缺省安装’,点击‘下一步’24.立即安装25.正在安装系统,等待安装100%。
solaris10安装

Solaris 10 系统安装安装步骤如下:1.已经运行的系统或者重新安装的系统里面键入stop +a,中断操作系统的运行(stop键为SUN键盘专有的键,两个键同时按住)进入ok状态。
2.键入boot cdrom插入Unix第一张安装盘,自动重起,开始安装系统;直到出现Detecting locale会有很长的一段时间在检测网络等设备3.出现选择语言的界面,为整个系统选择语言,此步选择6,即简体中文。
Please make a choice (0-9),or press h or ? for help 6 cr出现solaris 安装控制台4、在下一步时,选择网络连续:选:非联网的。
否则将导致smc服务不能工作5、在下一步时,要求输入主机名:scada10805版本会有一步是否使用系统自动派分的DFSv4域,选择是,再下一步6、时区选择:选择中国,下一步,日期和时间默认后下一步。
7、输入超级用户root的口令。
11118、正在启用远程服务选项,选择:是;务必选“是”否则FTP网络服务不可用9、确认之后,solaris开始安装。
这之后两步按默认的来。
开始初始化安装。
10、选择安装程序的安装方式:升级或者初始(即重新安装)并确认继续安装11、选择安装类型为自定义12、选择语言环境,中文的全选,英文的北美13、选择系统语言环境为中文(ZH)。
附加产品选择无14、选择solaris软件组,为缺省的整个群组以及OEM下面会提示是否保留已有数据,选择否15、磁盘的分配、可以根据实际情况,分配,主要注意:第一项:/―――2000,/为根目录,要求不小于200MB;第二项:swap―――交换区,2000或4000,两倍内存 (例如:1G内存配置为2000,2G内存配置为4000);/export/home―――56981或54979 (剩余的空间,与第二项相关),此项是一般用户的家目录。
对大硬盘可以根据实际来。
Solaris10安装
Solaris10安装要开始折腾Solaris了从后台组的同事那⾥弄来了⼀个2G多的solaris10的ISO安装⽂件。
开始在⾃⼰的电脑上虚拟机上安装solaris。
把虚拟机设置好后,随便就安装了,安装过程基本就是回车按F2了。
⽹上也有安装教程,搜⼀下就出来了。
这⾥从⽹上Copy⼀下过来Show⼀下得了。
找了⼏个⽹址,下⾯这个有截图(本⼈安装后才发现这⽹址):顺便把安装的html也Copy过来。
先将虚拟机的光驱指向到Solaris10的iso镜像⽂件,内存⼤约1个G左右,硬盘40个G。
出现这个画⾯的时候直接敲回车,或者在1分钟后默认选择第⼀个选项。
这⾥选择安装模式,按1选择默认安装,或者在30秒后默认选择第⼀个选项。
选择以后会⾃动加载安装⽂件。
这⾥选择键盘的布局,默认就是我们使⽤的美国英⽂键盘。
这⾥按回车键以后会启动Solaris10的对话控制台安装界⾯,如果不按任何键,30秒后会默认进⼊控制台(⽆窗⼝)模式。
把⿏标箭头移动到这个窗⼝⾥,按回车键继续。
这⾥选择界⾯语⾔。
我选的是0 English,⼤家也可以选择6 Simplified Chinese 。
这是安装的欢迎界⾯,并显⽰有很多设置需要被确认。
这⾥选择Solaris是否联⽹,这不是废话么?不联⽹怎么做服务器?是否启⽤Solaris的DHCP,就像我们使⽤路由器时在windows中设置⾃动获取IP⼀样。
选择不启⽤。
这⾥输⼊主机名。
这⾥输⼊Solaris的IP地址。
这⾥输⼊Solaris的⼦⽹掩码,⼀般都是24位掩码。
这⾥提⽰是否启⽤IPV6,⽬前IPV6并没有普及,所以我们选择不启⽤。
这⾥提⽰是否启⽤Solaris的Kerberos协议,主要⽤于计算机⽹络的⾝份鉴别,为了⽅便我们就不启⽤它了。
这⾥提⽰是否选择名称服务。
这⾥提⽰NFS共享的设置,选择系统⾃动获取这⾥是时区的选项。
选择 Asia(亚洲)。
选择China(中国)接受默认的时间,或者输⼊新的数值。
- 1、下载文档前请自行甄别文档内容的完整性,平台不提供额外的编辑、内容补充、找答案等附加服务。
- 2、"仅部分预览"的文档,不可在线预览部分如存在完整性等问题,可反馈申请退款(可完整预览的文档不适用该条件!)。
- 3、如文档侵犯您的权益,请联系客服反馈,我们会尽快为您处理(人工客服工作时间:9:00-18:30)。
Solaris 10 安装
服务器自检时出现”Press any key to view Option ROM messages”,按任意键。
Smart Array Controller自检完成后,出现相关提示信息。
按“F8”可以进入ROM Configuration for Array 。
若前一步未按任意键,则不能进行raid配置ROM Configuration。
根据服务器的硬盘配置情况创建Logical Drive 。
如果有三块以上磁盘,就做Raid 5。
Raid5作用可以简单描述为:组成Raid 的N 个磁盘中,如果有单个磁盘损坏,不会影响数据的完整性;损坏的磁盘被替换后,可以完全重建数据。
Raid 完成后,从光盘驱动服务器,进入安装界面,选择Solaris ,开始安装:
进入安装选择界面,选择5加载驱动程序:
然后将驱动光盘放入光驱并选择1,从光盘加载:
加载完成后选e,继续安装:
选择1 开始安装Solaris系统:
键盘配置,F2下一步:
点击文本框,回车,进入图形安装,如不做选择默认为文本安装:
系统语言选择,0. English 回车
系统信息配置,下一步:
网络配置,选择Networked,下一步
DHCP配置,No,下一步
Host Name,不要随意配置,申请License时要用到,下一步
IP配置,下一步
配置子网掩码,下一步
是否启用IPv6,No,下一步
如何配置网关,Specify one(制定一个),下一步
配置网关,下一步
网络认证协议配置,No,下一步
Name Service,不启用None,下一步
NFS网络文件服务域名,Use the NFSv4 domain derived by the system,下一步
时区选择,Geographic Continent/ Country/Region,下一步
选择Asia→China,下一步
设置时间,下一步
设置Root密码,下一步
远程服务配置,No,不打开,下一步
配置确认,Confirm
进入,安装配置,下一步
安装完成后自动重启,自动弹出光盘,下一步
选择安装介质,CD/DVD,下一步
扯淡的服务协议,如果可以就选择不同意吧
安装模式选择,Custim Install(自定义安装),下一步
语言选择,North America→English (United States)(en_US),下一步这里很重要如果出错会影响后期北向的安装使用
系统使用场合选项,English (United States,ISO8859-1)(en_US.ISO8859-1),下一步
选择附加产品,None,下一步
软件集选择,Entire Group(完整安装),下一步
系统安装磁盘选择,一般为默认,选择全部硬盘,下一步
指定fdisk的硬盘,一般为默认,下一步
指定fdisk的磁盘大小,默认,下一步
点Modify...,开始进行磁盘分区
Slice 0:目录为“/”,容量为总容量的40%;
Slice 1:swap交换分区,容量为内存容量的2倍,并为内容扩容预留。
建议设为内存容
量的4倍;
Slice 3:目录为“/opt”,容量为总容量的20%;
Slice 4:目录为“/var”,容量为剩余容量;
Slice 5~7:目录为空,容量为空;
按照以上规则配置完成后,OK
确认无误,下一步
确认配置无误,Install Now,开始安装
等待安装
按Continue 继续安装
重启后取出光盘
进入Solaris,第一次进入系统会比较慢,耐心等待
进入系统后首先要打开ftp和telnet服务,命令如下:
bash-3.00# svcadm enable telnet 启动telnet远程登录服务。
bash-3.00# svcadm enable ftp 启动ftp文件传输协议服务。
备份完成后修改/etc/default/login 文件,打开telnet服务
修改/etc/ftpd/ftpusers 文件,允许root账户ftp。