1LG0说明书
LG洗衣机说明书

一块 2 3 4 *5. : ’00#)*!##"7 9
一个 2 3 4 *5. : ,;*###%7 9
另行销售的零部件可以到当地的 1- 电子维修中心或维修站购买。
/0/
!"# $ %&#
’(%()*’+",-
定稿日期: %##,. (
操作开关功能介绍
额外功能 0 975: ;1<4;* 2
强力洗: 可增加洗涤力度, 提高洗涤效果。 超洁洗: 可延长洗涤时间, 提高洗涤效果。 超洁漂: 可追加 ! 次漂洗, 提高漂洗效果。 柔脱水: 用间脱脱水降低衣物的起皱程度。 羊毛程序时, 仅有柔脱水功能。 快速程序时, 无此功能。 预约的功能时, 也可同时选择此功能。 标准、 夜间程序时可同时选择此功能。
!"# $ %&#
特点
压缩洗涤及旋瀑王水流漂洗
洗涤时, 内桶回转产生离心力使水流穿透衣物进行 % 次压缩洗涤。 漂洗时, 旋瀑式水流从内桶与桶盖之间流到内桶, 打散衣物, 降低缠绕, 提高漂洗 效果, 从而使漂洗更加干净彻底。
!# 段水位选择
!# 段水位是洗涤时可选择 !# 个不同档次水位进行洗涤,即使洗 少量衣物也有合适的水位。 水位从 ! 到 !# 逐渐增高。
显 示 0 3451678 2
显示 洗衣过 程或预约 中剩余 的时 间。 当有错误发生时,显示窗口将有错 “ ” 误信息提示。如 表示折盖未 关。 0 参见 1!+ 故障的诊断 2
可依据下表说明选择所需功能:
区 分 强力洗 超洁洗 超洁漂 柔脱水
接通电源 按 ! 次按键 按 % 次按键 按 ’ 次按键 按 , 次按键 按 = 次按键 按 & 次按键 按 + 次按键 按 ( 次按键 按 " 次按键 按 !# 次按键
重组人促红素注射液说明书(6000IU,原研)

【 物过量 】 药 可能会 导致红细胞压积 过高 ,引 起各种致命 的心 血管系统并发症 。
BFuJ
集落形成的作用 。 【 床试验 】 临 一般 临床试验及双盲 临床试验 对 127例 肾性贫 血 患者 (透 析前 的肾性贫 血 患者
111例 ,正 在施行 CAPD的 肾性贫 血 患者 16例 ),每 周
Rccombinant Humall Eγ (CHO Cell)
在 给 药 初 期 ,通 常 对 成 人 每 周 一 次 皮 下 注 射
汉语拼音
:
Epocth dfa(基 因重组 )6,000国 际单位 。贫 血得到 改 善后 ,对 成 人 通 常每 两 周 皮 下 注 射 一 次 ,每 次 6,0OO~12,000国 际单位 ,作 为维持量 。 对 小儿通 常每周皮下注射 一 次 ,每 次 100国 际
重组 人促 红 素注射液
(CHO细 胞 )说 明书
【 规 格 】
请仔细 阅读说 明书并在 医师指导下使用
【 品名 称 】 药 通用名称 :重 组人促红素注射液 (CHo细 胞 ) ° 商 品名称 :利 血宝 ESPo° 英文名称
:
600OIU/0.5m1/支
ห้องสมุดไป่ตู้
【 法用量 】 用
tllrop⒍ eth I句 e∝ ion
(2) 作用机理
【 药物相 互作用 , 尚不 明确 。
评估本剂对各种成 红细胞祖细胞的集落形成刺激作 用 ,结 果证实本剂对后期成 红细胞祖细胞 (CFU E) 在高浓度下 ,本 剂亦 有 明显的刺激集落形成作用 。 盯刺激早期成 红细胞祖细胞 (BFU E)的 集落形成 。 Ⅱ 另外 ,刈 肾性贫血患者本剂也有促进CFuE、
LG电视LCD维修手册说明书
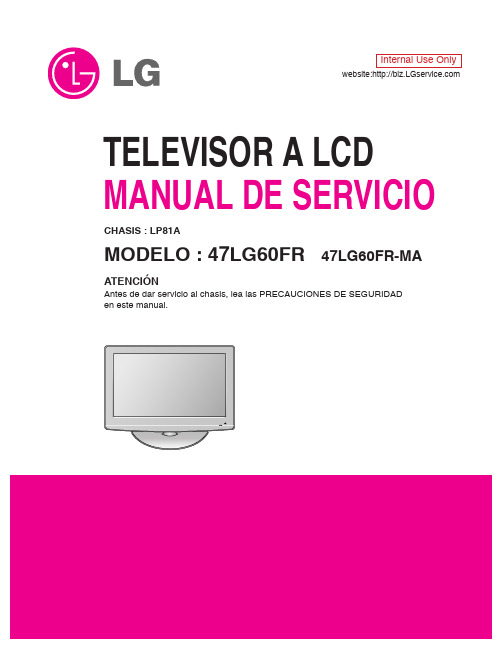
TELEVISOR A LCD MANUAL DE SERVICIOATENCIÓNAntes de dar servicio al chasis, lea las PRECAUCIONES DE SEGURIDADCHASIS : LP81AMODELO : 47LG60FR 47LG60FR-MAwebsite:Internal Use OnlyCONTENIDOCONTENIDO (2)PRECAUCIONES DE SEGURIDAD (3)ESPECIFICACIONES (4)INSTRUCCIÓN DE AJUSTE (11)SOLUCIÓN DE PROBLEMAS (15)DIAGRAMA EN BLOQUE (20)VISTA EN DESPIECE (21)PAGINA DE SVC........................................................................................ESPECIFICACIONESNOTA: las especificaciones que reflejan mejoras en los productos están sujetos a cambios sin previo aviso.4. General Specification(TV)No ItemSpecificationMeasurementResultRemark1.Display Screen Device37" wide Color Display Module Resolution:1366X768(HD)42" wide Color Display Module Resolution:1366X768(HD)/1920*1080(FHD)47" wide Color Display Module Resolution:1366X768(HD)/1920*1080(FHD)52" wide Color Display ModuleResolution:1920X1080(FHD)2. Aspect Ratio 16:93.LCD Module37" TFT WXGA LCD 37" HD MAKER :LPL 42" TFT WXGA LCD 42" HD MAKER :AUO, LPL 47" TFT WXGA LCD 47" HD MAKER :LPL 42" TFT WUXGA LCD 42" FHD MAKER : LPL 47" TFT WUXGA LCD 47" FHD MAKER : LPL 52" TFT WUXGA LCD52" FHD MAKER : SHARP 4. Operating Environment1) Temp. : 0 ~ 40 deg LGE SPEC2) Humidity : 0 ~ 85%5. Storage Environment 1) Temp. : -20 ~ 60 deg2) Humidity : 0 ~ 85 %6.Input VoltageAC100 ~ 240V, 50/60Hz1. Application Range.This spec sheet is applied to the 37"/42"/47"/52" LCD TV used LP81A chassis.2. SpecificationEach part is tested as below without special appointment 2.1 Temperature : 25±5°C(77±9°F), CST : 40±5°C 2.2 Relative Humidity : 65±10%2.3 Power Voltage : Standard input voltage (100~240V@ 50/60Hz)• Standard Voltage of each products is marked by models 2.4 Specification and performance of each parts are followed each drawing and specification by part number in accordance with BOM .2.5 The receiver must be operated for about 20 minutes prior to the adjustment.3. Test method3.1 Performance : LGE TV test method followed.3.2 Demanded other specificationSafety : UL, CSA, IEC specification 3.3 EMC : FCC, ICES, IEC specification5. Chrominance & Luminance Specification6. SET Optical Feature6.1. General feature- Measurement Condition: Full white/ Vivid => Measure the black luminance after 30 seconds.- C/R is excepted for PC modeNo Parameter SymbolValueUnit Remark Min Typ1 37 inch(HD)Contrast Ratio Dynamic CR9000:112000:1LPL Surface Luminance, LWH (AV/Component/HDMI)360450Cd/m2white LWH (PC)250Cd/m22 42 inch(HD)Contrast Ratio Dynamic CR9000:112000:1AUO Surface Luminance, LWH (AV/Component/HDMI)360450Cd/m2white LWH(PC)250Cd/m23 42 inch(HD)Contrast Ratio Dynamic CR9000:112000:1LPL Surface Luminance, LWH (AV/Component/HDMI)360450Cd/m2white LWH(PC)250Cd/m24 47 inch(HD)Contrast Ratio Dynamic CR9000:112000:1LPL Surface Luminance, LWH(AV/Component/HDMI)360450Cd/m2white LWH(PC)250Cd/m25 42 inch(FHD)Contrast Ratio Dynamic CR9000:112000:1LPL TBD15000 : 1For 50/60/70 Tool Surface Luminance, LWH(AV/Component/HDMI)360450Cd/m2white LWH(PC)250Cd/m2647 inch(FHD)Contrast Ratio Dynamic CR9000:112000:1LPL TBD15000 : 1For 50/60/70 Tool Surface Luminance, LWH(AV/Component/HDMI)360450Cd/m2white LWH(PC)250Cd/m2752 inch(FHD)Contrast Ratio Dynamic CR9000:112000:1Sharp TBD15000 : 1For 50/60/70 Tool Surface Luminance, LWH(AV/Component/HDMI)320400Cd/m2white LWH(PC)250Cd/m27. Component Video Input (Y, P B, P R)No.SpecificationRemark Resolution H-freq(kHz)V-freq(Hz)Pixekclock1. 720*48015.7359.9413.500SDTV, DVD 480I(525I)2. 720*48015.7560.0013.514SDTV, DVD 480I(525I)3. 720*57615.62550.0013.500SDTV, DVD 576I(625I) 50Hz4. 720*48031.4759.9427.000SDTV480P5. 720*48031.5060.0027.027SDTV480P6. 720*57631.2550.0027.000SDTV 576P 50Hz7. 1280*72044.9659.9474.176HDTV720P8. 1280*72045.0060.0074.250HDTV720P9. 1280*72037.5050.0074.25HDTV 720P 50Hz10. 1920*108028.12550.0074.250HDTV 1080I 50Hz,11. 1920*108033.7259.9474.176HDTV 1080I12. 1920*108033.7560.0074.25HDTV 1080I13. 1920*108056.2550148.5HDTV 1080P141920*108067.43259.94148.350HDTV 1080P151920*108067.560.00148.5HDTV 1080P8. RGB Input (Analog PC)No. Resolution H-freq(kHz) V-freq(Hz) Pixel clock(MHz)Proposed Remark1.640*35031.46870.8025.17EGA2720*40031.46970.0828.32DOS3.640*48031.46959.9425.17VESA(VGA)4800*60037.87960.3140VESA(SVGA)51024*76848.3636065VESA(XGA)61280*76847.77659.8779.5VESA(WXGA)71360*76847.7259.79984.75VESA(WXGA)81366*76847.76084.62VESA(WXGA)91280*102463.66859.895109.00SXGA Only FHD 101400*105065.31759.978121.75SXGA Only FHD 111600*120074.53759.869161.00UXGA Only FHD 121920*108066.58759.934138.50WUXGA (Reduced Blanking)Only FHD9. HDMI Input (PC-Spec. out but display correctly at only HDMI/DVI IN 1 via DVI to HDMI cable)No. Resolution H-freq(kHz) V-freq(Hz) Pixel clock(MHz)Proposed Remark1.720x40031.46870.0828.322.640x48031.46959.9425.17VESA(VGA)3.800x60037.87960.3140.00VESA(SVGA)41024x76848.36360.0065.00VESA(XGA)51280x76847.77659.8779.5VESA(WXGA)61360x76847.7259.79984.62VESA(WXGA)71366x76847.76084.62VESA(WXGA)81280x102463.59560.0108.875SXGA Only FHD 91400x105065.16060.0122.50SXGA Only FHD 101600x120074.07760.0130.375UXGA Only FHD 111920x108066.64759.988138.625WUXGA Only FHD10. HDMI input ( DTV )No. Resolution H-freq(kHz) V-freq(Hz) Pixel clock(MHz)Proposed Remark 1720*48031.4759.9427SDTV 480P Support(not spec) 2720*48031.56027.027SDTV 480P support(not spec) 3720*57631.255027SDTV 576P support(not spec) 41280*72044.9659.9474.176HDTV 720P51280*720456074.25HDTV 720P61280*72037.55074.25HDTV 720P71920*108028.1255074.25HDTV 1080I81920*108033.7259.9474.176HDTV 1080I91920*108033.756074.25HDTV 1080I101920*108056.2550148.5HDTV 1080P111920*108067.43259.94148.350HDTV 1080P121920*108067.560.00148.5HDTV 1080P131920*1080272474.25HDTV 1080P141920*108033.753074.25HDTV 1080PINSTRUCCIÓN DE AJUSTE1. Application RangeThese instructions are applied to all of the LCD TV, LP81AChassis.2. Notice2.1 Because this is not a hot chassis, it is not necessary touse an isolation transformer. However, the use ofisolation transformer will help protect test instrument.2.2 Adjustment must be done in the correct order.2.3 The adjustment must be performed in the circumstance of25±5°C of temperature and 65±10% of relative humidity ifthere is no specific designation.2.4 The input voltage of the receiver must keep 100~220V,50/60Hz.2.5 Before adjustment, execute Heat-Run for 15 minutes atRF no signal.3. Adjustment items3.1 PCB assembly adjustment itemsDownload the MSTAR main software (IC801, Mstar ISP Utility)3.2 SET assembly adjustment itemsDDC Data input.Adjustment of White Balance.Factoring Option Data input 4. PCB assembly adjustment method(Using MSTAR Download program)4.1 S/W program download4.1.1 Preliminary steps(1) Download method 1 (PCB Assy)- HD- FHD(2) Connect the download jig to D-sub jack4.1.2 Download steps(1) Execute ‘ISP Tool’ program in PC, then a main window will be opened(2) Click the connect button and confirm "Dialog Box".(3) Click the Config button and Change speedE2PROM Device setting : over the 350Khz(4) Read and write bin fileClick "(1)Read" tab, and then load download file(XXXX.bin) by clicking "Read".(5).Click "Auto(2)" tab and set as below (6).click "Run(3)".(7).After downloading, check "OK(4)" message.# USB DOWNLOAD1. Put the USB Stick to the USB socket2. Automatically detecting update file in USB StickDouble click3. Select "Start" Button and press "ok" buttonUpdating is staring.4. Finishing the version updating, you have to put out USB stickand "AC Power" off5. After putting "AC Power" on and check updated version onyour TV4.2 ADC ProcessO Required Equipments- Remote controller for adjustment- MSPG-925F Pattern Generator4.2.1 Method of Auto RGB Color Balance- Convert to RGB PC in Input-source- Input the PC 1024x768 @ 60Hz 1/2 Black & White Pattern(MSPG-925F model:60, pattern:54) into RGB- Adjust by commanding AUTO_COLOR_ADJUST(0xF1) 0x00 0x02 instruction.4.2.1.1 Confirmation- We confirm whether "0xF3 (offset), 0xF4 (gain)" address of EEPROM "0xBC" is "0xAA" or not.- If "0xF3", "0xF4" address of EEPROM "0xBC" isn’t "0xAA", we adjust once more- We can confirm the ADC values from "0x06~0x0B" addresses in a page "0xBC"*Manual ADC process using Service Remocon. After enter Service Mode by pushing "ADJ" key, execute "Auto-RGB" by pushing "_" key at "Auto-RGB".4.2.2 Component input ADC4.2.2.1 Component Gain/Offset Adjustment7- Convert to Component in Input-source- Input the Component ( Which has 720p@60Hz YPbPr signal : 100% Color Bar (MSPG-925F Model : 217 / Pattern: 65 ) into Component.- Adjust by commanding AUTO_COLOR_ADJUST (0xF1) 0x00 0x02 instruction4.2.2.2 Confirmation- We confirm whether "0xF3 (offset), 0xF4 (gain)" address of EEPROM "0xBC" is "0xAA" or not.- If "0xF3", "0xF4" address of EEPROM "0xBC" isn’t "0xAA", we adjust once more- We can confirm the ADC values from "0x06~0x0B" addresses in a page "0xBC"*Manual ADC process using Service Remocon. After enter Service Mode by pushing "ADJ" key, execute "Auto-RGB" by pushing "_" key at "Auto-RGB".5. Adjusting the White Balance5.1 Purpose and Principle for adjustment of thecolor temperature-Purpose : Adjust the color temperature to reduce the deviation of the module color temperature.- Principle : To adjust the white balance without the saturation,(Fix the one of R/G/B gain to C0 and decrease the others.)5.2 Adjustment mode : Two modes of Cool and Warm (Medium data is automatically calibrated by the Cool data)O Required Equipments- Remote controller for adjustment- Color Analyzer : CA100+ or CA-210 or same product LCD TV( ch : 9 ),- Auto W/B adjustment instrument(only for Auto adjustment)5.3 Connecting diagram of equipment formeasuring (For Automatic Adjustment)(1) Enter the adjustment mode of DDC- Set command delay time : 50ms- Enter the DDC adjustment mode at the same time heat-- Maintain the DDC adjustment mode with same condition of Heat-run-> Maintain after AC off/on in status of Heat-run pattern display)(2) Release the DDC adjustment mode- Release the adjust mode after AC off/on or std-by off/on in status of finishing the Hear-run mode- Release the Adjust mode when receiving the aging off command(F3 00 00) from adjustment equipment- Need to transmit the aging off command to TV set after finishing the adjustment.- Check DDC adjust mode release by exit key and release DDC adjust mode (3) Enter the adjust mode of white balance- Enter the white balance adjustment mode with aging command(F3, 00, FF)* Luminance min value is 200cd/ß≥in the cool mode( For LCD)6. Adjustment of White Balance• Adjustment mode : Two modes (Cool and Warm)(Medium data is automatically calibrated by the Cool data)• Color analyzer(CA100+, CA210) should be used in the calibrated ch by CS-1000(LCD : CH9, PDP : CH10)• Operate the zero-calibration of the CA100+ or CA-210, then stick sensor to the module when adjusting.• For manual adjustment, it is also possible by the following sequence.1) Select white pattern of heat-run by pressing "POWER ON"key on remote control for adjustment then operate heat run longer than 15 minutes.(If not executed this step, the condition for W/B may be different.)2) Push "Exit" key.3) Change to the AV mode by remote control.(Push front-AV or Input key)4) Input external pattern(85% white pattern)5) Push the ADJ key two times (entering White Balance mode)6) Stick the sensor to the center of the screen and select each items (Red/Green/Blue Gain and Offset) using /(CH +/-) key on R/C..7) Adjust R/ G/ B Gain using /(VOL+/-) key on R/C.8) Adjust two modes (Cool and Warm)(Fix the one of R/G/B and change the others)9) When adjustment is completed, Exit adjustment mode using EXIT key on R/C.SOLUCIÓN DE PROBLEMAS 1. No power1) Symptom1) It is not discharged minutely from the module.2) Light does n ot c ome into the front LED.2) Check process2. No Raster1) Symptom1) No OSD and image occur at screen..2) It maintains the condition where the front LED is green 2) Check process3. Unusual display from RF mode.1) Check process4. Unusual display from rear AV mode.5. Unusual display from Side AV mode.6. Unusual display from Side S-Video mode.7. Unusual display from componen t 1 mode.10. No Sound10-1Symptom1) LED is green.2) Screen display but sound is not output.10-2 Check processDIAGRAMA DE BLOQUEA V 1i nS i d e A V i n (A V 2 n )C om p i nC o m p i nR G i n (D /L )C V B S I N Y /P b /P r I NR /G /B /H S /V S I NC V B S I NL I N E O U T L I N E I N A M P _M U T E R S -232CR x /T x M X 3232R (T u n e r )P C A u d i o i nD I S P L A Y M O D U L EE D I D N V ME D I D N V MH D M I 1H D M I 2H D M I 3U S B T M D S 351P A G H D M I M U XZ o r a n V A D D I S -966X D M P E G D e c o d e r D D R M E M D D R M E M S E R I A L F L A S H M s t a r R o m e o L G E 6891C DT W 9910S u b D e c o d e rN T P 3000A D i g i t a l A u d i o A M PM A I N N V MM C 74H C 4066A u d i o S WL M 324X 4 A M P S E R I A L F L A S HB D 2041P r o t e c t I CE D I D N V M D D C /H D P /C E C T M D S (H D M I i n )D D C /H P D /CE CT M D S (H D M I i n )T M D S (H D M I i n )U S B (A V I /O , D a t a I /O )+5V C V B SO U T656 I NS W _R E S E T P A R T _I 2C P A R T _I 2C S W _R E S E T I 2S O U T L V D S M P E G R X /T XM P E G R E S E T I 2S I N656 I NT M D S (H D M I i n )D D C /H P D /C E CD D C /H P D /CE C [C E C n o t t h r o u g h H D M I M U X , d i r e c t J A C K t o M A I N I C ]D D CD D CD D CU A R T _R x /T xA U D I O _S W L I N E I NL I N E I N L I N E I N Y /P b /P r I NL I N E I NY /C I NL I N E I N E D I D N V MR O M _I 2CD S U B _D D Cx 0.55x 0.55x 0.55x 0.55S _V I D E O _D E TL I N E _M U T EL I N E O U T x 4x 0.55L I N E I NC V B S I NS I F I N T U N E R _I 2C P A R T _I 2C H D M I _S E L(O p t i n )(O p t i n )(O p t i o n )S p k O u t 1W (M o n o )S W _R E S E T T P A 3107D A u d i o A m pCopyright LG Electronics. Inc. All right reserved.Only for training and service purposesC 2008LGE Internal Use Only- 21-VISTA EN DESPIECE300521200800802803550804801122560121510120500121810540840530570830900400THE SYMBOL MARK OF THIS SCHEMETIC DIAGRAM INCORPORATES SPECIAL FEATURES IMPORTANT FOR PROTECTION FROM X-RADIATION.FILRE AND ELECTRICAL SHOCK HAZARDS, WHEN SERVICING IF IS ESSENTIAL THAT ONLY MANUFATURES SPECFIED PARTS BE USED FORTHE CRITICAL COMPONENTS IN THE SYMBOL MARK OF THE SCHEMETIC.INPUT1 : COMP1/2,RS232C,PCTHE SYMBOL MARK OF THIS SCHEMETIC DIAGRAM INCORPORATES SPECIAL FEATURES IMPORTANT FOR PROTECTION FROM X-RADIATION.FILRE AND ELECTRICAL SHOCK HAZARDS, WHEN SERVICING IF IS ESSENTIAL THAT ONLY MANUFATURES SPECFIED PARTS BE USED FORTHE CRITICAL COMPONENTS IN THE SYMBOL MARK OF THE SCHEMETIC.INPUT2 : CVBS,SIDE AVTHE SYMBOL MARK OF THIS SCHEMETIC DIAGRAM INCORPORATES SPECIAL FEATURES IMPORTANT FOR PROTECTION FROM X-RADIATION.FILRE AND ELECTRICAL SHOCK HAZARDS, WHEN SERVICING IF IS ESSENTIAL THAT ONLY MANUFATURES SPECFIED PARTS BE USED FORTHE CRITICAL COMPONENTS IN THE SYMBOL MARK OF THE SCHEMETIC.H D M I _S H D M I _SHD_ATNPANEL WAFERTHE SYMBOL MARK OF THIS SCHEMETIC DIAGRAM INCORPORATES SPECIAL FEATURES IMPORTANT FOR PROTECTION FROM X-RADIATION.FILRE AND ELECTRICAL SHOCK HAZARDS, WHEN SERVICING IF IS ESSENTIAL THAT ONLY MANUFATURES SPECFIED PARTS BE USED FORTHE CRITICAL COMPONENTS IN THE SYMBOL MARK OF THE SCHEMETIC.TUNERTHE SYMBOL MARK OF THIS SCHEMETIC DIAGRAM INCORPORATES SPECIAL FEATURES IMPORTANT FOR PROTECTION FROM X-RADIATION.FILRE AND ELECTRICAL SHOCK HAZARDS, WHEN SERVICING IF IS ESSENTIAL THAT ONLY MANUFATURES SPECFIED PARTS BE USED FORTHE CRITICAL COMPONENTS IN THE SYMBOL MARK OF THE SCHEMETIC.Audio S/W : COMP1 or SIDE L/RTHE SYMBOL MARK OF THIS SCHEMETIC DIAGRAM INCORPORATES SPECIAL FEATURES IMPORTANT FOR PROTECTION FROM X-RADIATION.FILRE AND ELECTRICAL SHOCK HAZARDS, WHEN SERVICING IF IS ESSENTIAL THAT ONLY MANUFATURES SPECFIED PARTS BE USED FORTHE CRITICAL COMPONENTS IN THE SYMBOL MARK OF THE SCHEMETIC.00USB/MPEG DECTHE SYMBOL MARK OF THIS SCHEMETIC DIAGRAM INCORPORATES SPECIAL FEATURES IMPORTANT FOR PROTECTION FROM X-RADIATION.FILRE AND ELECTRICAL SHOCK HAZARDS, WHEN SERVICING IF IS ESSENTIAL THAT ONLY MANUFATURES SPECFIED PARTS BE USED FORTHE CRITICAL COMPONENTS IN THE SYMBOL MARK OF THE SCHEMETIC.DDRSUB - HYNIX : EAN31729202MAIN - QIMONDA : EAN41788501THE SYMBOL MARK OF THIS SCHEMETIC DIAGRAM INCORPORATES SPECIAL FEATURES IMPORTANT FOR PROTECTION FROM X-RADIATION.FILRE AND ELECTRICAL SHOCK HAZARDS, WHEN SERVICING IF IS ESSENTIAL THAT ONLY MANUFATURES SPECFIED PARTS BE USED FORTHE CRITICAL COMPONENTS IN THE SYMBOL MARK OF THE SCHEMETIC.TW9910THE SYMBOL MARK OF THIS SCHEMETIC DIAGRAM INCORPORATES SPECIAL FEATURES IMPORTANT FOR PROTECTION FROM X-RADIATION.FILRE AND ELECTRICAL SHOCK HAZARDS, WHEN SERVICING IF IS ESSENTIAL THAT ONLY MANUFATURES SPECFIED PARTS BE USED FORTHE CRITICAL COMPONENTS IN THE SYMBOL MARK OF THE SCHEMETIC.Apr., 2008 P/NO : MFL41394424Printed in Korea。
LG 洗衣机程序概述(英文)说明书

/ Overview of programmes
snoitcursnigtarepodnitalsniehtroftehsyrametnlpSu
Program/type of laundry/information
W Wool: Hand or machine-washable wool or rich-wool textiles. Especially gentle wash program to prevent shrinkage, longer program pauses (textiles rest in wash liquor).
- - - -, 0 - 1200 rpm
Note: Wash large items separately. Use a detergent designed for delicates and follow the instructions on the item's care label. Use detergent sparingly.
ments) to remove fabric-softener residue.
2 kg; ' - 40 °C
- - - , 0 - 800 rpm
Speed Eco GF, Reduced Ironing, Rinse Plus
h Dark Wash: Dark textiles made of cotton and dark easy-care textiles. 3.5 kg; ' - 40 °C
Speed Eco GF, Rinse Plus
LG MASTER-K120S SERIES可编程逻辑控制器 说明书

K7M-DR60U K7M-DRT60U
60点
6
产电
备注
I/O继电器 辅助继电器 保持继电器 连接继电器 专用继电器 时间继电器
计数器 步进继电器 数据区域
说明
项目
基本功能
位置 位置 内置功能 控制
原点返回 点动
脉冲捕捉 外部中断 输入滤波 重量(g)
规格
K7M-DR20U
K7M-DR30U
K7M-DR40U
● 通讯模块
G7L-CUEB:RS-232C 1CH (CH0) G7L-CUEC:RS-422/485 1CH (CH0) G7L-DBEA :DeviceNet 从站(CH0) G7L-PBEA:Profibus-DP 从站(CH0) G7L-FUEA:Fieldbus 连接 (Fnet, CH0) G7L-RUEA :Fieldbus 连接 (Rnet, CH0)
·40点(I:24, O:16) ·20点(I:12, O:8)
·60点(I:36, O:24) ·30点(I:18, O:12)
● 运算速度
0.1µs/步
(经济型:0.4µs/步)
● 程序容量
10k步(经济型:2k步)
● 掉电保持
专用的基本功能 功能强大的的内置功能
各种扩展模块
最优的性价比
PID 控制(8 环)
RS-232C 4(Rx), 7(Tx), 5(SG)
Loader (KGLWIN) HMI
多种
“ ” 扩展模块
扩展模块
● 数字输入/输出模块 ● 特殊模块
输入
A/D
G7E-DC08A:DC输入8点
D/A
输出 G7E-TR10A:TR输出10点 G7E-RY08A:继电器输出8点
LoRaWAN LG-01 网关-BACnet 使用手册说明书

LoRaWAN LG-01网关-BACnet使用手册文档更新说明日期版本更新内容2019-10-09 V1.0 首次发布目录概述 (2)1.LoRaWan设备网络拓扑图 (3)2.设备简介 (4)2.1 LG-01 LoRaWAN Gateway(网关) (4)2.2 TH-01 LoRaWAN TempHum Sensor(温湿度) (6)2.3 MT13L LoRaWAN Thermostat(温控器) (7)2.4 MxLORA-N04 LoRaWAN Remote IO(远程IO) (8)3.软件设定 (13)3.1 LG-01 IP设定 (13)3.2 LG-01 BACnet设定 (14)3.3 LG-01 BACnet Object列表 (15)概述本文档主要描述LoRaWan节点(如温湿度,远程IO,温控器),LoRaWAN协议的末端节点可以将采集现场信息汇集至LG-01网关,再通过LG-01网关发布基于楼控常用的Bacnet IP协议,对远端的LoRaWan节点进行监测和控制,解决了传统楼控设计方案无法同时兼顾距离、抗干扰和功耗的问题。
同时具备无需布线、安装简单、维护时间间隔长、成本低等优势。
1.LoRaWan设备网络拓扑图远距离数据无线传输网络拓扑图2.设备简介2.1 LG-01 LoRaWAN Gateway(网关)基于LoRaWAN标准协议,开发由LoRa末端、LG-01网关组成的LoRaWAN无线方案,网关可定制发布基于楼控常用的协议(BACnet IP,Modbus IP,MQTT,UDP)。
设备供电采用DC19V 1.5A供电,也可以使用POE48V电源插入主板以太网口供电,数据和供电通过网线并行传输。
网关接口1LoRa天线GPS天线WIFI天线4G天线网关接口2电源输入以太网口USB输入2.2 TH-01 LoRaWAN TempHum Sensor(温湿度)LS-TH01温湿度传感器为楼控市场提供了高性价比的LoRaWAN终端节点解决方案。
LG-4、LG-4K、LG-4M、LG-4L、LG-4P使用说明书

尊敬的用户:感谢您对英伦汽车的信任,选择了具有优良安全性、舒适性、动力性和经济性的英伦汽车,我们期待着以优质的产品和服务为您的工作和生活带来乐趣。
首次使用前请阅读并遵守本手册的内容,将帮助您更好的了解、使用英伦汽车,使您的新车在今后使用中技术状况良好,始终保持最佳性能。
您对您的车辆了解的越多,就越能享受到驾驶该车辆的安全性和趣味性。
若您在使用过程中发现一些问题,请就近与本公司授权的英伦品牌服务站联系,服务站将在保养、维修方面向您提供优质的服务,请您务必按本手册中的保养规定按期完成保养工作。
本手册提供了所有车型的相关信息,由于车型配置不同,本手册的说明与您所购车辆的实际配置可能会有差别,请以实际接收的车辆为准。
本手册属于整车的一个组成部分,出售或出借本车时,请将本手册转交给新车主。
本手册中的所有资料均为出版时的最新资料,今后如有改动,恕不另行通知。
祝您快乐人生,吉利相伴!浙江吉利控股集团汽车销售公司 2013年08月版权所有。
如未经吉利控股集团汽车销售公司书面同意,不得转载或复印本手册的任何内容。
安全和车辆损坏警告本使用说明书中,具有安全警告和车辆损坏警告,必须小心根据警告的内容来避免受伤或损坏的可能性。
不得擅自进行车辆改装,否则将会影响车辆的性能、安全和使用期限,甚至可能触犯政府法规,因改装引起的直接或间接车辆问题均不在保修范围之内。
本书中警示类型的表示和使用方法等说明如下:《车辆使用说明书》与《保修保养手册》是本公司与用户之间就有关产品的正确使用、质量保证责任、售后服务等方面的约定,请务必在使用本公司产品前认真阅读。
若您的汽车或零部件因为过度使用、不正确使用、不按规定的里程/时间间隔进行保养或擅自进行车辆改装而导致故障,您将丧失相应的索赔权利和保修权利。
本使用说明书中的93号无铅汽油适用于除北京地区以外区域,北京地区根据环保要求使用92号无铅汽油。
本 手 册 中 的 重 要 说 明安全符号当看到上图所示的安全标记时,则表示“禁止……”;“禁止这样做”或者“禁止让这种情况发生”。
LG 智能冰箱说明书

目录产品介绍产品特点 (2)各部件名称 (4)安全注意事项 (5)搬运和放置 (6)电器联接 (6)产品标准 (7)警告和废弃冰箱处理 (7)使用使用前的准备 (8)控制面板功能介绍 (8)开机及温度调节 0冷藏室......................................................................维他保鲜室 (3)冷冻室 (4)功能的使用与设置 (6)非故障现象及特殊现象的分析与排除非故障现象 (2)特殊现象的分析及排除 (22)清洁与维护除霜 (9)清洁 (9)节能要点 (9)其它事项 (20)冰箱小常识冰箱小常识(I) (23)冰箱小常识(II) (24)2产品特点产品介绍LCD 温度显示LCD 液晶显示屏分别显示冷藏室、维他保鲜室和冷冻室的设定温度及功能状态。
外观鲜明,一目了然,操作方便。
高效节能采用高效节能压缩机、三循环制冷系统及加厚发泡层,制冷效率更高、更节能。
三温三控及变温保鲜室,变温冷冻室冷藏室、保鲜室和冷冻室均由电脑系统控制。
保鲜室和冷冻室可自由变温,可对需要短期储存的肉类食品进行浅冷冻,食品保鲜时间更长久,又不致使食品冻得太硬,烹饪前无需解冻,方便实用。
智能精确温控,保鲜更长久运用微电脑系统,对冷藏室、维他保鲜室和冷冻室的温度分别设定、控制和显示,温度控制更精确,保鲜更长久。
智能速冷,快速便捷独有的智能速冷功能,令冷藏室温度迅速降至2℃,保鲜效果更好,冰镇饮料更轻松。
智能速冻,强力保鲜独有的智能速冻功能,使食品在最短时间内冻至- 8℃以下,保鲜更科学。
维他保鲜独立的制冷系统、冷气循环系统及保湿装置,可使室内温度控制在接近0℃。
在此环境下,微生物(细菌、酵母、霉菌)的生长和繁殖得到了更有效抑制,食品的保鲜时间是常规保鲜的两到三倍。
智能风扇冷藏室和保鲜室风扇的开启具有智能功能,电脑控制系统可根据不同的环温和制冷系统的需要自动控制风扇的运行。
- 1、下载文档前请自行甄别文档内容的完整性,平台不提供额外的编辑、内容补充、找答案等附加服务。
- 2、"仅部分预览"的文档,不可在线预览部分如存在完整性等问题,可反馈申请退款(可完整预览的文档不适用该条件!)。
- 3、如文档侵犯您的权益,请联系客服反馈,我们会尽快为您处理(人工客服工作时间:9:00-18:30)。
1LGO系列(IP55)三相异步电动机1LGO Series(IP55)three phase asynchronousmotor技术说明SPECIFICATION西门子电机(中国)有限公司Siemens Standard Motors Ltd.1 说明1.1 应用范围标准电机使用规范:标准电机具有IP55 防护等级(见铭牌标注),适用于灰尘及潮湿的工作环境。
如果电机安装或储存于户外,有必要增加相应的防护装置,以避免受长期强烈的阳光暴晒、雨水的侵蚀、以及冰雪和灰尘对电机造成的影响。
如果有必要,请咨询制造工厂或相关的技术部门。
电机适用于热带地区,参考标准:冷却环境温度40℃,相对湿度60%。
环境温度-20℃ (40)海拔高度≤1000m如果使用环境条件和以上不一样,电动机铭牌必须作相应的标示。
本系列电机符合GB18613-2006《中小型三相异步电动机能效限定值及能效等级》标准,能效等级为3级,具体规格的能耗指标参见铭牌。
1.2结构及运行模式电机结构型式:1LG0电机为自冷却(带风扇)型式电机。
在使用时必须确保电机具有足够的冷却风量,该要求可以通过独立驱动风扇或风机来达到,在安装风扇时必须确保风机的风向必须与电机正常冷却的风向一致。
标准电机底脚和机座是浇铸一体的。
.2 运输及储存1滚动轴承:当电机从入库一直到开始调试的时间超过4年,电机所装配的“滚动轴承”必须加以更换。
过长的储存时间将会对电机的使用寿命造成一定的影响。
加工表面(法兰表面,轴端表面等)必须做防腐蚀处理,如必要,对绝缘电阻进行测量,详见3.5。
3 调试3.1 安装电机安装完毕后必须将吊环拧紧或拆除。
电机轴朝下安装,建议在风罩端增加相应的防护措施以防止异物通过风扇罩进入。
电机轴朝上安装,一定要安装由设备运营商提供的防护盖,以防止液体顺轴进入电机。
低噪音运行:联轴器和联动件(联轴器,滑轮、风扇)的严格对齐和良好的平衡是电机低噪音低振动运行的必要条件。
如有必要,整个电机和联动件应整体校动平衡。
3.2 接线盒1LG0电机出线盒顶部部分可以作4×90度方向旋转。
3.3 动平衡,联动部件安装及拆卸联动机件(联轴器,皮带轮,齿轮联动装置等)应该使用相应的专业工具(如图1)。
标准电机转子动平衡方式为半键平衡。
在安装联动件时必须特别注意!动平衡方式在电机铭牌上有标注(H表示半键平衡,F表示全键平衡,N 表示不带键平衡)。
如联动装置是半键平衡的话,导向键探出的可见部分一定要去除(见图2)。
2如果电机在不安装联动装置的情况下启动,必须确保联接键不至于甩出造成危险。
电动机接线盒内接线板上有6个接线柱对应电机内绕组引出线。
接电源线对应相序,具体标记如表1。
表1相序 ABC 头 U1V1W1尾 U2V2W2按电动机铭牌规定接法,接成△或Y 。
如电机存在A11、A12、A60、A61、A72、K45选项中的一个或几个,其引线端标识见下图。
3注意: 当出线盒进线电缆口由密封浇铸外壳构成时,密封口必须用适当的方式打开(如图 3)。
特别注意在打开电缆口的同时避免对接线盒内的接线板,电缆线连接等造成破坏!适配器一定要旋进,确保和PTC温度传感器连接!接线盒一定要密封,以防尘防水。
系统电压和频率必须和铭牌所列数据一致,电压和频率波动范围分别为±5%和±2%,无需降低输出功率。
接线盒连接和排列必须和接线盒内所提供的接线图一致。
接地线必须与具有当使用导线夹时,须将导线布置成使线夹两侧保持水平。
即当使用线夹时,单根导线尾端必须弯成U型或者套上电缆接线头(如图4)。
这同样适用于绿-黄接地保护和外部接地线(如图5)。
接线盒接线板接线时旋转拧紧力矩请参考图6。
防冷凝加热器在电机运行的情况下不可使用。
3.5 检查绝缘电阻在初次启动电机前或者经过长时间(6个月)停机后,必须对电机绕组的绝缘电阻进行测量。
绕组绝缘电阻测量完成后的短时间内,接线端子还可能带有一定的危险高电压,请勿直接触摸。
绝缘电阻:最小绝缘电阻:新电机或绕组维修后的电机对地电阻为10兆欧.临界电阻:临界电阻的计算方法为额定电压乘以系数0.5,如额定电压690V电机临界电阻可计算如下临界电阻= 0.69 kV * 0.5 Mohms/kV =0.345Mohms测量方法:最小绝缘电阻的测量:绕组对地电阻的测量可以通过对绕组施加500V 直流电压来测量,绕组温度需保证在25℃±15℃。
临界电阻的测量:临界电阻的测量必须在电机运行温度的情况下对绕组施加500V直流电压。
检查:当电机在长时间停机或储存后,最小电阻值小于10兆欧时,可能是由4于环境潮湿引起的,此时需要将绕组进行烘干处理。
电机经过长时间运行后,最小电阻值可能降低至临界电阻。
只要测量值不再低于临界电阻值,电机可以继续使用,否则应立刻停止运行。
必须找出导致该结果的原因,并对绕组或绕组部分进行修复、清理及烘干。
3.6 调试当变频器驱动电机时,干扰程度大小取决于变频器的类型(种类,干扰控制措施及制造商)。
制造商提供的变频器使用说明书中有关电磁兼容部分的内容必须时刻注意。
如果推荐使用屏蔽式电缆线的话,当屏蔽层和电机接线盒的大面积可传导性连接金属部分接触时,屏蔽层将会产生理想屏蔽的效果。
变频器会导致电机传感器(如PTC温度传感器)产生谐波电压。
如果使用变频器驱动电机,转速超过电机额定转速时,必须注意电机的机械极限转速(参见电机安全转速IEC60034-1)。
抗干扰:如电机带有内置传感器(如:PTC温度传感器),用户应选择适当的传感器信号线(最好是屏蔽线)以及测量装置。
调试前必须严格遵守本说明(安全调试说明)及各相关说明书中所列的各项数据及建议!4 维护安全防范5注意:电机配有排水孔时,排水孔须经常打开,排出电机内部积水,排水孔出口应在电机的最低处!装配新轴承,润滑脂类型:正常运行条件下,轴承应水平安装。
密封轴承在使用寿命期内不必更换润滑酯。
预加润滑油酯(不带加排油装置)的开启式轴承,机座号180-280的电机运行5000小时应定期更换润滑酯。
定期加润滑油酯(带加排油装置)的开启式轴承,机座号315的2极电机运行3000小时、4-6极电机运行5000小时需加润滑酯,机座号355的2极电机运行2000小时、4-6极电机运行4000小时需加润滑酯。
应保证电动机在运行过程中良好的润滑。
运行中发现轴承过热或润滑脂变质时应及时更换润滑脂。
更换润滑脂时,应清除旧的润滑脂,并用汽油洗净轴承盖的油槽,然后将润滑脂填充轴承内外圈之间空腔1/2(对2级)或2/3(对4.6级)。
当轴承寿命终了时,电动机运行的振动及噪声将明显增大,检查轴承的径向游隙如达到下表数值时即应更换轴承。
轴承内径 (mm) 20-30 35-50 55-80 85-120 极限磨损游隙 (mm) 0.10 0.15 0.20 0.306更换新轴承的规格型号应与旧轴承相符。
注意:使用时不允许超过电机的最大悬臂力(见产品样本)!除考虑总运行时间外,由于润滑脂的老化失效,滚动轴承必须每3年进行更新。
在特殊条件下使用的电机,(如:立式安装、强振动、负载波动剧烈、频繁逆向操作等),轴承的更换相对于上述正常运行情况应更加频繁。
电机标准润滑脂类型:UNIREX N3 (Esso),合成润滑脂符合DIN 51825-K3N 规定。
特殊润滑脂在电机铭牌上都有标示或在单独的润滑脂铭牌有标示。
拆下电机的必要部分,用专业的工具将滚动轴承拉出,(如图1)。
清洁轴颈!均匀加热滚动轴承80-100℃后压入,避免对轴承的重击(如用锤子等物敲打),所有旧的密封件(如轴封等)也应该更新。
如果轴封为非弹性轴封,更换时也应使用相同类型的轴封。
端盖螺栓的旋紧力矩大小参考相关列表再润滑装置:电机配有再润滑装置时,请注意铭牌上所标示的润滑说明!轴承的再润滑应在电机的运行过程中进行!71 Description4.1 Field of ApplicationPrescribed use of standard motors:The standard motors are provided with degree of protection IP55 (see rating plate) and can be used in a dusty and damp environment. A suitable superstructure or an additional cover is recommended if the motors are deployed or stored outdoors to avoid the long-term effects of intense, direct sunshine, rain, snow, ice and dust. If necessary, please consult the manufacturer or concerned technical department. The motors are tropic proof. Guide value: 60% relative humidity at a coolant temperature of 40℃.Ambient temperature -20℃ (40)Site altitude ≤1000mIf the ambient conditions deviate, this must be shown1on the ratings plate; these data then apply.1LG0 series motor accord with GB18613-2006《Limited values of energy efficiency and class of energy conservation of small and medium three-phase asynchronous motors》, Energy efficiency of the motors are class 3, energy cost data see rating plate.4.2 Construction and mode of operation.Motor types:1LG0 motors are self-ventilated by fan mounted on and driven by rotor. The customers must ensure that there is sufficient cooling in operation, either through a separately driven fan or, with fan drives, through the driven fan. When the fan is mounted, make sure that the fan hub does notobstruct the flow of air over the cooling ribs.In the case of the base motors the feet are cast on the motor housing.5 Transportation and Storagereplaced if the period from the time the motor is delivered up until it is commissioned exceeds 4 years. The service life of the motor unit is considerably reduced the longer it is stored.Finished surfaces (flange surfaces, ends of shafts, etc.)2should be treated with an anti-corrosion agent.If necessary, the insulation resistance of the winding must be measured, see Section 3.5.6 Commissioning6.1 InstallationLifting eyes that are screwed in place must be tightened or removed after the motor has been installed.If the motor is installed vertically with the shaft end facing downwards, a protective shield is recommended for the ventilator hood in order to prevent the ingress of foreign bodies.If the shaft end is facing upwards, a cover must be installed provided by the equipment operator to prevent the ingress of liquids along the shaft.Quiet running: Exact alignment of the coupling and a well-balanced transmission element (coupling, pulleys, fans, etc.) are essential for quiet vibration-free running. If necessary, the whole motor and transmission element should be balanced.6.2 Terminal boxTerminal box is mounted in basic design on top of the motor, and can be turned by 4×90 to allow cable entry from each direction.6.3 Balancing, transmission elementsA suitable device should always be used for fitting and removing the transmission elements (couplings, pulleys,3pinions, etc.) (Fig.1).As standard, the rotors are dynamically balanced with the half feather key.When fitting the transmission element, keep the type of balance in mind!The balance status is indicated on the ratings plate (H=Half, F=Full-key balancing, N=Balancing without feather key).If the transmission elements are balanced with a half feather key, the visible, protruding part of the feather keyelement attached, the feather key should be secured to prevent it being thrown out to cause risks.There are six wiring terminals on the connection panel in the motor connection box corresponding to winding outgoing line in the motor. The specific notes of connecting power line to the phase-sequence are in Table 1.Table 1Phase-sequence A B C4Head U1 V1 W1 end U2 V2 W2 According to connection requirement referred on motor rating plate, the following pictures show the connection “△” or “Y”.If the motors with the option A11、A12、A60、A61、A72 or K45, the indication of terminal block are shown in the following table.NOTE: If the openings for cables and wiring in the terminal box are sealed with a “cast skin” (knockout),The seal end must be opened in the appropriate manner (see Fig 3).Care must be taken not to damage the terminal box, the terminal board, the cable connections, etc. inside the terminal box !5An adapter must be screwed in for PTC thermistor connections!The terminal box must be sealed so that it is dust and water-tight.The system voltage and the frequency must agree with the data given on the rating plate. Voltage or frequency deviations are of ±5% and ±2% respectively from the rated voltage and frequency values are permitted without the need to derate the output frequency. The connection and arrangement of the terminal links must agree with the diagram provided in the terminal box.Wherever terminal clips are used , arrange the conductors so that the clips are virtually level on both sides. This method of connection means that the ends of single conductor must be bent in the shape of a U or be fitted with a cable lug (see Fig.4). This also applies to the green-yellow protective earthing conductor and the outer earthing conductor (see Fig.5)Please refer to Fig. 6 for the tightening torques for the screwed electrical connections-terminal board connections.The anti-condensation heater must not be switched on during operation.6.5 Insulation resistance inspectionThe insulation resistance of the windings must be measured prior to initial startup of the motor, or after long periods of storage or standstill (approx.6 months).6While the measurement is being taken and immediatelyafterwards, some of the terminals carry dangerous voltages and must not be touched.Insulation resistance:The minimum insulation resistance of new, cleaned or repaired windings with respect to ground is 10 Mohms.The critical insulation resistance Rcrit is calculated first by multiplying the rated voltage UN, e.g. 0.69 kVAC, with the constant factor (0.5 Mohms/kV):Rcrit= 0.69 kV * 0.5 Mohms/kV =0.345Mohms MeasurementThe measurement of the minimum insulation resistance: the windings to ground is measured with 500V DC. The winding temperature should then be kept 25℃±15℃.The measurement of the critical insulation resistance: it should be measured with 500V DC with the winding at operating temperature.CheckingIf the minimum insulation resistance of a new, cleaned or repaired motor, which has been stored or at standstill for a prolonged period of time, is less than 10 Mohms, this may be due to humidity. The windings must then be dried.After long periods of operation, the minimum insulation resistance may drop to the critical insulation resistance. As long as the measured value does not fall below the calculated value of the critical insulation resistance, the motor may continue in operation. If it does, the motor must7be stopped immediately.The cause must be determined, and the windings or winding sections repaired, cleaned or dried as necessary.6.6 Commissioningemittedto a greater or lesser degree, depending on the converter version concerned (type, interference suppression measures, manufacturer). The instructions of the converter manufacturer regarding electromagnetic compatibility must be heeded at all times.If the use of a shielded motor cable is recommended, the shield will have the greatest effect if it is conductively connected over a large area on the metal terminal box of the motor (with a screwed metal conduit thread). Noise voltages may occur on the sensor leads of motors with integrated sensors (e.g. PTC thermistors) as a result of the converter.If the motor is operated on a converter at speeds that exceed the rated speed, the mechanical critical speeds (safe operating speed IEC 60034-1) must be observed.Noise immunity: If the motor has an integrated sensor (e.g. a PTC thermistor), the owner is responsible for8ensuring adequate noise immunity by choosing a suitable sensor signal lead (possibly with shielding, Connected like the motor supply lead) and evaluator.The data and recommendations specified in all the instructions supplied (“Information on safety and commissioning”), and in all other related instructions, must always be observed prior to commissioning!7 Maintenance9NOTE: Where motors are fitted with condensed water openings, they should be open always to let any accumulated water drain away.Condensed water openings should always be at the lowest point of the motor!Fitting new bearings, type of greaseUnder normal operating conditions, with horizontally mounted motors and the following coolant temperatures and motor speeds, the bearings should be changed at the intervals [h] specified in the catalogue.The sealed bearings have no need to change grease within lifespan.The motors with pre-lubricated open bearings but without regreasing device should be re-lubricated at regular intervals. Motors with frame size 180-280 should be re-lubricated periodically with operation of 5000 hours.The motors with open bearings and regreasing device also should be re-lubricated at regular intervals. Motors with frame size 315, 2-pole should be re-lubricated periodically with operation of 3000 hours, and 4/6-pole should be re-lubricated periodically with operation of 5000 hours; the motors with frame size 355, 2-pole should be re-lubricated periodically with operation of 2000 hours operation, and 4/6-pole should be re-lubricated periodically with operation of 4000hours.The good lubrication of motors should be guaranteed in operation. Changing greasing should be done once the bearings are overheated or that grease goes bad.When changing grease, the old grease should be erased, and the gas groove of the bearing cover should be cleaned with gasoline. Then, filling the grease by ½ (for 2-pole) or ¾ (for 4/6-pole) gap between the inner and outer circle of the bearing with grease.10When the bearing’s lifespan nearly comes to the end,the vibration and noise of the motor increase greatly. Oncethe vertical space meets the figure below when checking,the bearing should be changed.(mm) 20-30 35-50 55-80 85-120 Bearingsemi-diaMaximum abrasion0.10 0.15 0.20 0.30space(mm)The size of changed bearing should agree with the old replaced bearing.NOTE: Maximum radial force (see Catalogue) must notbe exceeded!Irrespective of the number of operating hours, the rolling-contact bearing should be renewed every 3years because of grease ageing. In the case of motors operating under special conditions, such as a vertical motor position, heavy vibration, sudden load changes, frequent reversing operation, etc., the bearing should be changed at considerably more frequent intervals than the operating hours stated above.Type of grease for standard machines: UNIREX N3 (Esso); synthetic greases must conform to DIN 51825-K3N.Special greases should be indicated on the rating plateor on a separate plate.Dismantle the motor to the extent necessary. Pull offthe rolling-contact bearing with a suitable device (see Fig.1). Clean the journal!Heat the rolling-contact bearing evenly to about80-100℃ and press on. Heavy blows (such as with a hammer, ect.) should be avoided. Any worn sealing elements (such as the shaft sealing ring, etc.) should also11be renewed.If springless radial shaft sealing rings are used, the replacement sealing rings must also be of the springless type.Tightening torques for the screws at the end shields ( see table ).Regreasing deviceIn the case of motors with a regreasing device, please take note of the information given on the rating plate or the lubrication instruction plate!The bearings should be re-lubricated while the motor is running!12。