丰达FAX-3829传真机说明书
传真机指南说明书
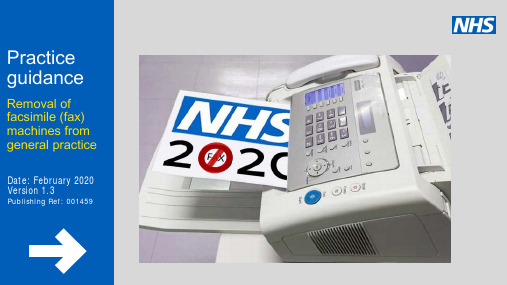
Removal of facsimile (fax) machines from general practiceThis guide has been developed to allow you to easily navigate to the information you need, whether it is contained in the guide itself or linked to a website. All buttons and images can be clicked on.Using this guide NavigationQuick links at the bottom left of each pageNavigation buttons at the bottom of each page.The home button takes you to the introduction page.Examples of other linkswithin this guideContents1) Introduction2) GP Contract3) Guidance4) Implementation Process5) Evaluation and Benefits6) Final ChecklistTestimonial: Advantages of not having a faxThe transition was made easy as our fax machine stopped working however the advantages of not having the fax machine; were evident within a few weeks.Initially departments would phone up to say that they couldn’t send a fax though, we then asked the senders to email requests instead. Although some were reluctant to do so, we believe it forced the users into changing their mindset, as no other alternative was offered.Emailing is by far, a better way of sending patient identifiable data, it is less timeconsuming than people think, and of course it saves paper.Alison Peat, Acting Practice Manager, South East LondonThe GP contract states that GP Practices will no longer use facsimile (fax) machines for either NHS or patient communications by April 2020.This best practice guidance documentprovides staff the direction, considerations and implementation plans for stopping the use of fax machines from GP Practices for NHS or patient communications, in support of the GP contract digital commitment.The recently published NHS Long Term Plan (LTP) and GMS contract have highlighted that technology will play a central role within the delivery of care. This guidance is anopportunity to move away from non secure communications via fax, NHSE/I is providing access to NHS mail for social care providers and supporting services.Introduction2020 Contractual arrangementsNHS England and GPC England have agreed an ambitious programme of work to be delivered over the next five years. There have been agreed measures that will become contractual requirements in April 2020 or April 2021 subject to available IT infrastructure.NHS England and GPC England expect practices, where feasible, to be making progress in2019/20 towards meeting those requirements. The use of alternatives to facsimile (fax) machines for NHS and patient communications is listed in the GMS contract 5 year framework and the associated guidance that supports the Long-Term Plan. The commitment states:-•By April 2020, practices will no longer use facsimile (fax) machines for either NHS or patient communications.Fax machines will be removed across the NHS in a bid to improve patient safety and cybersecurity. The outdated technology will be phased out by 31 March 2020 under plans announced by Secretary of State Matt Hancock in 2018.NHS organisations will be required to use modern communication methods instead, such as secure email.GP contract Background and requirementThis guide discusses the considerations andprovides guidance on the issues surrounding removal of the faxmachine in GP practices.GuidanceKey ConsiderationsThe following pages contain guidance and process steps that will help you to successfully remove the fax machine from your practice by April 2020.The key considerations are:ConsiderationInformation to consider and planningResources Ensure you allocate enough resources to deliver the planProject time for admin tasks should not be underestimated and considered fullyPlanning A plan/checklist will help you to allocate tasks, timescales and monitor progress effectivelyStaff buy inInvolve all staff in developing the new process -they will be the key to making this a successCommunications A robust communications plan will ensure all stakeholders are aware of whatthe new process will be and when it will happenFall back use of faxes was considered, it became obvious that GP practices should have business continuity plans in place, but they are not expected to rely on faxes.processOverview:Six steps to1Form a project teamsuccessfulimplementation2Who are you in contact with by fax?3New ways of working4Communications5Remove fax number and add email6Update patient facing informationForm project team and agree responsibilitiesExample project team processStep One: Setting up your project teamPractice ManagerOverall project managementAdmin Staff and Team Manager (includes medical secretaries and support staff)Project support to look at different ways of working and any business changeReception Team and Manager Project support to look at different ways of working and any business changeGP named Clinical LeadClinical support and guidance for the project IT, Quality, Governance Manager Guidance and support to ensure best practice for any IT infrastructure needs, data security and governance for sharing dataSocial care and supporting services staff -e.g. Care Home Manager, Senior Care staff, Lead Nurse, Pharmacists, Social Care admin teams etc.Project support to look at different ways ofworking and any business change with regards to different ways of approaching communication.Populate a list of all users that send and receive information from GP practice via faxMonitor sent and received faxes for a minimum of four weeks and record on a usage log. Once you have a comprehensive list, contact all key stakeholder listed about the changes to the fax machines. Explain how you will work through the process with them to identify risks and changes in working practice that may be required.Identify and agree an alternative secure route to communicate with these stakeholders. You may wish to retain this log for a short period in case any concerns are raised. Please destroy the document once the stakeholder engagement work is complete. See below an example list from a GP practice:process Step Two:Stakeholder list Who are you in contact with by fax?Who communicates with your practice using faxFor what reasonSend or receiveContact details Frequency CommentsNext Door Care Home Visit requestsReceivenextdoor@ca DailyProfessionals email has been shared, this is not a secureencrypted account, PID cannot be included in message. Encourage uptake of NHS mail.Down the road pharmacyMedicati onrequestReceiveDowntheroad @DailyProfessionals email has beenshared. This is a secure encrypted account.Best practice for managing NHS Mail clinical enquiries and requests:An automated response should be set to inform the professional/s that their email has been received.NHS mail accounts already set up and in use need to be reviewed and a decision made regarding email address inbox management.A different email address should be considered for patients. It can be an easy transition if you take some precautionary steps, for example, ensure the administration team are informed and have the skills, where required, to manage extra incoming emails to the practice email inbox.processStep Three: New ways of workingSuggested text:Thank you for your email. We will get back to you for all Non-Urgent emails within 48 hours during working hours Mon-Fri 9.00am-6.30pm.For advice or guidance on any health conditions please visit: https:///conditions/NHS 111 service should be used if you urgently need medical help or advice and it is not life-threatening https:///using-the-nhs/nhs-services/urgent-and-emergency-care/nhs-111/Call 999 for any emergency or anything life threatening.Guidance for sending secureemail Example of fax letterUsing your stakeholder list, send a communication to all stakeholders explaining: •the removal date of the fax machine•the agreed process in place to manage emails instead of faxes before the fax is switched ‘off’•your new contact information•their responsibility with regards to GDPR and encryption when sending and receiving patient identifiable information using anything other than NHS mail.process Step Four:communicationsGP practice staff to be informed of fax switch off date during practice team meetingsHow to password protect documentsThese documents may help when implementing your change process:Communications letter to be sentout to Care HomesIn order to successfully implement this project, please also consider these actions:1.Remove the old fax number from all of the following:•Letter headers including any pre-printed materials •Correspondence documents •Website•Social media2.Replace with your email address of choice3.Review all templates within the GP system and change to support the new contactinformation.processStep Five: remove fax number and add emailThe GP contract also mentions the need for a patient facing email address where patients can contact the practice directly.6.1 Practices are encouraged to have a patient-facing email account. NHS England and GPC England will publish guidance on how to deal with emails from patients, including how frequently inboxes should be monitored.Steps to take when setting up your practice’s patient facing email address:•Consider which email address is to be patient facing –ensure the one you choose is easy to be identified as patient facing•Who will manage the inbox from the practice side •Add the new contact information to the practice website•Remember to delete and file incoming emails as there is a limited mail box size for the mail accounts •Remove the fax number.Setting up a patient facing emailprocessStep Six: update patient facing informationAn automated response should be sent to inform the patients that their email has been received.Best practice for managing sent NHS Mail patient enquiries and requests:processStep Six: update patient facing informationSuggested text:Thank you for your emailWe will get back to you for all Non-Urgent emails within 48 hours during working hours Mon-Fri 9.00am-6.30pm.For advice or guidance on any health conditions please visit: https:///conditions/NHS 111 service should be used if you urgently need medical help or advice and it is not life-threateninghttps:///using-the-nhs/hs-services/urgent-and-emergency-care/nhs-111/Call 999 for any emergency or anything life threatening.This page looks at possible time and cost savings within the practice across the admin, reception and GP teams by removing the fax machine.Click here to see benefits calculator which gives an estimated cost saving for your practice following the removal of the fax machine(s).BenefitsCost savings and evidencePractices, pharmacies and care homes who no longer use fax machines have reported the following benefits: •Reduction in material and running costs •Reduction in time spent walking to the fax machine and around the building •Reduction in errors and queries as the communications are clearer•Reduction in missing requests thanks to a safer and more secure data transfer•Better audit trail•Improved data security and clinical safety as having NHS mail allowscommunications with the practice via secure email•Improved turnaround time for queries due to secure email communications improving patient care.Quick reference checklist Final ChecklistKey Considerations: Ensure resources are in place to cover the task, do not underestimate. Plan the project robustly, staff buy in will be key to success.Good communications with key stakeholders is also vital to ensure the move from fax communications to more secure data sharing via email is successful. Form project team: include Practice Manager, Admin, Reception, GP leadership support, IT/Compliance Officer, Social Care Providers and Supporting Staff.Identify stakeholders: monitor and log faxes sent and received from all key stakeholders. Contact all stakeholders recorded on the log and explain the upcoming changes, the process, any risks and new ways of working going forward.New ways of working: Review any NHS mail accounts already set up. Select a shared email address for professionals and one for patients and agree a management process with relevant staff.Communications: Contact all stakeholders on the log and outline the date the fax machine will be removed, new contact information including the responsibilities with governance. Example letters are available in the full guidance click here.Admin: Remove fax number and add email on all letterheads, correspondence documents, website, social media. Review templates in GP system to align with new contact info. Remove all fax machines and manage any issues.This guide discusses the considerations and provides guidance on the how to implement the removal of fax machines from your GP practice.If you would like to read about a practice that have removed their fax machines please click here for the case study.here If you require further information please contact us at Digital Primary Care Team: *************.ukFurther informationContact us How to get in touch。
fax用户使用手册

內部郵件至外部傳真機 八(發送 發送) 發送
發送郵件
Presentation 實現WinFax
11
桌面至傳真機 一(發送)
連接服務器共享Fax
查看本機連接
Presentation 實現WinFax
12
桌面至傳真機 二(發送)
2
1
3
Presentation 實現WinFax 13
85687999 嘟嘟嘟 分機 (“P”表示暫停鍵) (“嘟嘟嘟”表示聽到3聲“嘟嘟嘟”響聲)
文件 傳真機1 傳真機 DDN
NOAH卡
內部
圖片文件 電腦
服务器
硬盘
SMTP
其他Site 其他
傳真機2 傳真機
圖片文件
公司同仁
Presentation 實現WinFax 25
內部掃描至本人郵件 內部 至 人郵件 內部) 人郵件(內部
撥號規則: 撥號規則 8501
8511 8553 8560
例如: 例如:85011773
+ 傳真號碼
文件
文件 傳真機1 傳真機
8563
PSTN
傳真機 服務器 傳真機2 傳真機 WKS同仁 同仁 其它Site同仁 同仁 其它
Presentation 實現WinFax
20
內部郵件至其他Site傳真機 一(發送 發送) 發送
外部傳真機至內部郵件 內部郵件至外部傳真機 掃描到內部郵件再發送至外部郵件 收到的不明地址傳真件統一置於Public Folder 傳真機不再提供列印服務
所有傳送,接收的內容伺服器全部記錄 所有傳送 接收的內容伺服器全部記錄
Presentation 實現WinFax
传真指南说明书

Fax guide(傳真指南)傳真功能可讓您掃描物件,並將掃描文件傳真給一位或多位收件人。
若要從印表機傳送傳真,您可以輸入傳真號碼、使用快捷鍵號碼,或使用通訊錄來完成此項作業。
請注意:若要在傳真號碼中置入一秒鐘的撥號暫停,請按下在 Fax to(傳真目的地:)方框中,撥號暫停會以逗點呈現。
如果需要先撥外線,請使用這項功能。
使用印表機控制面板傳送傳真1將原始文件載入自動送件器中(面朝上,短邊先進入自動送件器)或放在掃描器玻璃上(面朝下)。
請注意:請不要將明信片、相片、小東西、專用透明投影膠片、相紙或細薄材質(如雜誌剪報)載入自動送件器。
將這些物品放置在掃描器玻璃上。
2若要將文件載入「自動送件器」,請調整紙張導引夾。
3在主畫面上,觸控Fax(傳真)。
4利用觸控式螢幕或鍵台,輸入傳真號碼或快捷鍵。
若要新增收件人,請觸控Next Number(下一個號碼),然後輸入收件人的電話號碼或快捷鍵號號碼,或者搜尋通訊錄。
請注意:若要在傳真號碼中置入撥號暫停,請按下 Fax to(傳真目的地:)框中,撥號暫停會以逗點呈現。
如果需要先撥外線,請使用這項功能。
5觸控Fax It(將它傳真)。
使用傳真快捷鍵傳真快捷鍵就像電話或傳真機上的快捷鍵號碼。
您可以在建立永久傳真目的地時,指定快捷鍵號碼。
永久傳真目的地或快捷鍵號碼建立在「內嵌式 Web 伺服器」上 Settings(設定)下的 Manage Shortcuts(管理快捷鍵)鏈結中。
快捷鍵號碼 (1–99999) 可以包含單一收件人或多個收件人。
建立一組含有快捷鍵號碼的傳真快捷鍵,即可快速而輕易地將群組發送資訊傳真給整個群組。
1將原始文件載入自動送件器中(面朝上,短邊先進入自動送件器)或放在掃描器玻璃上(面朝下)。
請注意:請不要將明信片、相片、小東西、專用透明投影膠片、相紙或細薄材質(如雜誌剪報)放入自動送件器。
將這些物品放置在掃描器玻璃上。
2若要將文件載入「自動送件器」,請調整紙張導引夾。
传真机的使用方法和技巧
传真机的使用方法和技巧传真机其实是影像扫描器、调制解调器及电脑打印机的一种合体,扫瞄仪把文件的内容转化成数码影像,调制解调器则把影像资料透过电话线传送,在另一端的打印机则把影像变成原文件的复印本。
传真机工作原理传真机虽然是近20年才开始广泛使用的通讯工具,但是它的发明构思却形成在150年前。
据有关资料显示,早在1843年5月27日,传真机的原理就得到了专利保护,它比电话专利整整早了30年。
传真机的工作原理其实相对简单,首先将需要传真的文件通过光电扫描技术将图像、文字转化为采用霍夫曼编码方式的数字信号,经V.27、V.29方式调制后转成音频信号,然后通过传统电话线进行传送。
接收方的传真机接到信号后,会将信号复原然后打印出来,这样,接收方就会收到一份原发送文件的复印件。
总结一下就是发送时:扫描图像-->生成数据信号-->对数字信息压缩-->调制成模拟信号-->送入电话网传输接收时:接收来自电话网的模拟信号-->解调成数字信号-->解压数字信号成初始的图像信号-->打印。
不同类型的传真机在接收到信号后的打印方式是不同的,他们的工作原理的区别也基本上在这些方面。
现在市场上主要有两种传真机即:热敏纸传真机和喷墨/激光传真机。
热敏纸传真机是通过热敏打印头将打印介质上的热敏材料熔化变色,生成所需的文字和图形。
热转印从热敏技术发展而来,它通过加热转印色带,使涂敷于色带上的墨转印到纸上形成图像。
最常见的传真机中应用了热敏打印方式。
激光式普通纸传真机是利用碳粉附着在纸上而成像的一种传真机,其工作原理主要是利用机体内控制激光束的一个硒鼓,凭借控制激光束的开启和关闭,从而在硒鼓产生带电荷的图象区,此时传真机内部的碳粉会受到电荷的吸引而附着在纸上,形成文字或图像图形。
喷墨式传真机的工作原理与点矩阵式列印相似,是由步进马达带动喷墨头左右移动,把从喷墨头中喷出的墨水依序喷布在普通纸上完成打印的工作。
传真机不能收发的几种清零方法

存储器中错误信息进行清零,开机前打开记录纸舱盖,用手同时按住
“TAL和“POLI”,接通电源,然后松下 “TALI和 “POL键LCD上显示
“MEMORYCLER1ED青除存储器〉,几秒钟后LCD显示字符,即清除了存 储器中的错误信息。
xx传真机
xx传真机扫描曝光度调整
按功能键 —9*8#7—启动/复印X2次—SW-A,=0000^启动/开始X1次—SW- C1=001—功能—启始—停止X2次
补充一点:
部分机型(SFX-211H、SFX-P100)0等,进入调整后,机器显示 “??SCAN TEST??”前面会多出一个AGC灰度调整参数,可用 保留”免提”键进行调 整,按 复印”结束。自动灰度调整如果你碰巧手中有一张三洋公司的No.503测
如果机器的扫描器是CIS(比如夏普等),则会显示 “shadingmOd(消隐/补偿模式)
10.G3 MODE
11.TEL DATA SEND
12.TEL DATA RECEIVE
xx系列显示黑块
处理方法:
这现象一般都是由于主板ROM引起,你只需要将ROM拿下,然后将主板 上的
电容C5短路放电后再将其装上(注意:
如果机器的扫描器用的是CIS(比如夏普等),则会显示ቤተ መጻሕፍቲ ባይዱ“SHADINGMO”E(消隐/补偿模式) 。此功能非常有用,具体将会在以后 “传真机扫描头之补偿大 全”中做详细介绍
10.G3 MO
DE11.TEL DATA SEN
D12.TEL DATA RECEIVE
五xx篇
其实只要进入了维修方式之后,CIS的补偿步骤大同小异。进入维修方式之 后,
xx(SHARP)
夏普(SHARP传真机分为FO和UX两大系列,但是维修方式的进入几乎 完全相同,并且内部的菜单也相似。
传真流程步骤及使用方法
传真流程步骤及使用方法传真是近二十多年发展最快的非话电信业务。
传真是往来收发件往来的中药电信业务之一。
以下是店铺为大家整理的关于传真流程,给大家作为参考,欢迎阅读!传真流程1、用电话线连接好传真机,测试可以打电话。
2、准备好的传真内容资料,纸张尺寸不能大于传真的支持尺寸。
3、把待发送的传真资料翻面放到传真机的吸纸口上,平衡适当的插进去,直到感觉纸张已放实。
4、输入对方的传真机电话号码,电流声反馈拨通之后,按压发送按钮,启动传真,稍后传真机就启动复制发送传真,直到发送完成再挂断电话。
此时对方就可以收到传真了。
传真机的使用方法1.首先是把要传真的内容放入传真机,当然在这儿之前要先把盖子打开的。
2.一般传真机都会提示怎样放置文件,我们用的传真机是将文字面向下的(一般传真机都是这样的)。
3.根据提示将要传真的内容放好就可以了,要传的内容是向下的哦!4.然后就是拨号了,这里有两种方式,一般传真的时候号码没有单独记下来,可以先拨号5.然后按监听键,这样就相当于按了电话的免提键,传真机会有外音,或者如果不需要外音直接将话机提起就可以(其实也是可以先拨号再放要传文件的,但是要把握好速度,不要等电话接通了信号已经给了,内容还没放好,这样就糟咯,一般建议是先放传真内容哦!总之只要保证在电话接通前把文件放好就没问题了。
)6.有的传真机是自动的,拨通之后就会直接给传真信号,听到刺耳的“滴”的声音就是有信号了,一般这个信号是连续的,“滴--------”此时按下“传真/开始”按钮,传真就会自动传送了,就不用管咯!7.还有一种就是电话传真一起的,拨打的号码是有人先接听的,电话接听后告诉人家你要发传真,请她给你个传真信号就可以了,要注意也是要等到听到传真信号想起“滴--------”的声音,才可以按下“传真/开始”按钮开始传送另一种拨号方式就是直接提机拨号,也就是跟我们平时打电话一样,把听筒拿起来拨号,然后等传真信号8.拨通之后,听到“滴-----”的信号声,此时按下“传真/开始”按钮9.挂了听筒,传真就会自动传送了,就不用管咯!10.等传真机将传真内容吐出来传真就发送完毕了,这样就OK 了!~11.最后要把我们的传真机盖子盖好哦,以防进灰尘等其他东西,影响使用寿命。
传真机说明书

目录(简介) 2安装和最初的准备工作附件---------------------------------------- 1—1 连接安装---------------------------------- 1—2 操作位置---------------------------------- 1—3 按键和指示器---------------------------- 1—5 注意事项---------------------------------- 1—7 袖珍盒带的安装------------------------- 1—8 记录纸的安装----------------------------- 1—9 材料输送盘和接收盘的安装----------- 1—11 选择器的安装----------------------------- 1—13 打开电源开关----------------------------- 1—14 录制外出口信----------------------------- 1—15 核实你的外出口信----------------------- 1—16 建议口信----------------------------------- 1—16 使用程序性能----------------------- ------1—17 编制程序------------------------------ -----1—18 记时系统装置(日期选择)------- ----1—19 标识语程序和传真电话号码鉴别器----------1—21 编制你的标识语程序---------------------1—22 符号代号表(目录)---------------------1—23 编制电话号码程序------------------------1—24 自动拨号电话号码编制程序------------1—25 姓名地址卡目录---------------------------1—25 一次接触拨号电话号码程序------------1—26 快速拨号电话号编制程序---------------1—27 秘密电话号码编制程序------------------1—28 电话号码的清除---------------------------1—29基础说明传送材料前------------------------------- -2—1 可传送的材料------------------------------2—1 自动材料输送盘---------------------------2—1 分析对比------------------------------------2—2 手工操作传送------------------------------2—3 对话过程中,传送材料------------------2—4 传送材料------------------------------------2—4 加入额外记录纸--------------------------2—4 自动传送-----------------------------------2—5 使用自动拨号传送材料-----------------2—5 使用重拨号传送材料--------------------2—6 接收材料和有声口信--------------------2—7 手工操作接收-----------------------------2—7 自动接收----------------------------------2—7 向你的机传送入材料-------------------2—9 在同一呼叫中留下口信或传送入材料------2—9 手近代传送材料-------------------------2—10 声音接触器(开关)-------------------2—11 声音接触器的安装----------------------2—11 从声音接触器接收到的要求----------2—11 复制品的制作----------------------------2—12 中断复印----------------------------------2—12回答装置当作回答装置的操作-------------------2—13 有声口信和材料接收的装配----------2—14 在你贮存口信后录音-------------------2—15 进来呼叫的监听-------------------------2—15 录制备忘口信-----------------------------2—16 两线对话的录音-------------------------2—17 进行和回答声音呼叫-------------------2—18 进行呼叫-----------------------------------2—18 重拨号--------------------------------------2—18 使用自动拨号器进行声音呼叫--------2—19进一步说明自动接收计时器--------------------------3—1呼叫对方-----------------------------------3—3呼叫对方通行语装置--------------------3—3为被呼叫回收材料作准备---------------3—4呼叫其它机--------------------------------3—5通讯网络-----------------------------------3—6编制通讯网通行代号程序--------------3—7打开传送通行代号检查器装置开关-----3—8打开接收通行代号检查器装置开关-----3—9使用保密铃声呼叫--------------------------3—10编制保密铃声身份号码程序--------------3—10使用秘密铃声代号呼叫-------------------3—11从一个遥控电话中,作为回答装置的操作---------------------3—12费用节省器-----------------------------------3—12遥控性能的概述----------------------------3—12编制遥控操作中遥控电话回答装置身份号码程序----------------------------3—13播放口信--------------------------------------3—14播放新录制口信----------------------------3—14倒带和进带----------------------------------3—15标识语口信的录音-------------------------3—15重新装置磁带、录制后来口信----3—16室内监听器----------------------------------3—16重录外出口信-------------------------------3—17跃过外出口信、录制接收进来口信----3—17其它装置-------------------------------------3—18声音按键-------------------------------------3—18闪光按键-------------------------------------3—18拨号联合装置-------------------------------3—18暂停按键-------------------------------------3—19打印材料和目录活动性能材料(日讠志材料)------------4—1 日讠志材料自动打印装置-----------------4—2日讠志材料的打印--------------------------4—3单独传送打印材料------------------------4—4传送材料装置------------------------------4—4贮存电话号码目录------------------------4—5打印电话号码目录------------------------4—5失误(错误)代号目录------------------4—6字体代号目录------------------------------4—7系统编制程序性能可编制程序性能的用法-----------------5—1传真电话标识语标题--------------------5—1传真电话传送速度-----------------------5—1传真电话接收速度-----------------------5—2声音侦听器--------------------------------------5—2 录音时间-----------------------------------------5—3 呼叫台控制方法--------------------------------5—3 电话回答装置(传真电话)铃声计数器--5—4 传真电话铃声计数器--------------------------5—4 重新装置可编制程序性能的使用-----------5—5 打印系统装置目录-----------------------------5—6 服务性能-----------------------------------------5—7 服务材料目录的打印--------------------------5—7 编制服务性能程序-----------------------------5—7故障检修和维修错误代码------------------------------------------6—1 故障检修指南------------------------------------6—2 维修------------------------------------------------6—5 规格------------------------------------------------6—7系统编制程序性能P5—1一、可编制程序性能的用法:1、传真电话标识语标题:ON:你的标识语和电话号码可打印在你机发出的传真材料的最顶一行。
传真机使用方法

发送传真可以在多种配置下发送传真。
其中包括:1 发送书面传真(使用前面板或计算机)。
2 发送带计算机产生的封面的书面传真(使用计算机)。
3 发送带或不带封面的文件(使用计算机)。
4 以单页传真形式发送计算机产生的封面(使用计算机)。
有关使用计算机发送传真的信息,请参阅“hp 照片及图像帮助”。
在默认情况下, hp officejet 仅在发送或接收传真出现问题时才打印报告。
在每次事务处理之后,都会在前面板显示屏中短暂地显示一条确认消息,表明某项目是否已成功发送。
若需要打印已成功发送传真的确认信息,请参阅第 21 页的“打印报告”,了解有关报告选项的信息。
如果尚未设置日期和时间,请先进行设置。
请参阅第 27 页的“设置日期和时间”。
从 hp officejet 发送传真1 将原件放在自动进纸器上。
有关详细信息,请参阅第 7 页的“加载原件”。
2 用键盘输入传真号码或按“快速拨号”直到出现所需的快速拨号项目。
有关快速拨号的详细信息,请参阅“hp 照片及图像帮助”中的“设置快速拨号”。
3 按“开始/ 黑白”或“开始/ 彩色”。
发送传真前,更改设置并使用快速拨号1 将原件放在自动进纸器上。
有关详细信息,请参阅第 7 页的“加载原件”。
2 用键盘输入传真号码或按“快速拨号”直到出现所需的快速拨号项目。
有关快速拨号的详细信息,请参阅“hp 照片及图像帮助”中的“设置快速拨号”。
3 按“输入”。
学校4 按“传真” 滚动浏览传真选项。
6 当出现所需的设置时,按“输入”应用该设置。
7 按“开始/ 黑白”或“开始/ 彩色”。
发送彩色传真可与其他彩色传真机相互收发彩色传真。
若从前面板发送传真,并且 hp officejet 确定收件人使用的是黑白传真设备,它将发送黑白传真。
若从软件发送传真,并且 hp officejet 确定收件人使用的是黑白传真设备,hp officejet 将提示您以黑白方式发送传真。
对于彩色传真,建议只使用彩色原件。