IBM System p5最新产品介绍(new)
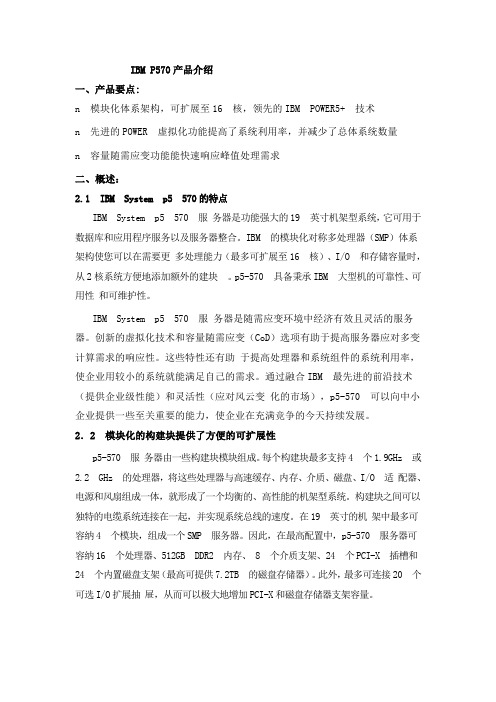
IBM P570产品介绍

IBM P570产品介绍一、产品要点:n 模块化体系架构,可扩展至16 核,领先的IBM POWER5+ 技术n 先进的POWER 虚拟化功能提高了系统利用率,并减少了总体系统数量n 容量随需应变功能能快速响应峰值处理需求二、概述:2.1 IBM System p5 570的特点IBM System p5 570 服务器是功能强大的19 英寸机架型系统,它可用于数据库和应用程序服务以及服务器整合。
IBM 的模块化对称多处理器(SMP)体系架构使您可以在需要更多处理能力(最多可扩展至16 核)、I/O 和存储容量时,从2核系统方便地添加额外的建块。
p5-570 具备秉承IBM 大型机的可靠性、可用性和可维护性。
IBM System p5 570 服务器是随需应变环境中经济有效且灵活的服务器。
创新的虚拟化技术和容量随需应变(CoD)选项有助于提高服务器应对多变计算需求的响应性。
这些特性还有助于提高处理器和系统组件的系统利用率,使企业用较小的系统就能满足自己的需求。
通过融合IBM 最先进的前沿技术(提供企业级性能)和灵活性(应对风云变化的市场),p5-570 可以向中小企业提供一些至关重要的能力,使企业在充满竞争的今天持续发展。
2.2 模块化的构建块提供了方便的可扩展性p5-570 服务器由一些构建块模块组成。
每个构建块最多支持4 个1.9GHz 或2.2 GHz 的处理器,将这些处理器与高速缓存、内存、介质、磁盘、I/O 适配器、电源和风扇组成一体,就形成了一个均衡的、高性能的机架型系统。
构建块之间可以独特的电缆系统连接在一起,并实现系统总线的速度。
在19 英寸的机架中最多可容纳4 个模块,组成一个SMP 服务器。
因此,在最高配置中,p5-570 服务器可容纳16 个处理器、512GB DDR2 内存、 8 个介质支架、24 个PCI-X 插槽和24 个内置磁盘支架(最高可提供7.2TB 的磁盘存储器)。
IBM System p5 185 (7037-A50) 快速入门指南说明书

Quick start guide for IBM System p5185(7037-A50)IBMSystemsRack-mounted devices are not to be used as a shelf or workspace.Do not placeany object on top of rack-mounted devices.CAUTION:The weight of this part or unit is between18 and 32 kg (39.7 and70.5 lb).It takes two persons to safely lift this part or unit.(C009)The exclamation mark surrounded by a gray triangle denotes caution.ACAUTION notice indicates the presence of a hazard that has the potential ofcausing moderate or minor personal injury.Before doing a step that containsa caution icon,read and understand the caution statement thataccompanies it.1Before you beginUse safe practices when lifting.This Quick start guide contains an abbreviated set of setup instructions designed to help you quickly unpack and set up a standard ers unfamiliar with this IBM hardware should use the fully detailed setup instructions that you can find in the IBM Systems Hardware Information Center.For details about how to access the information center,see task 8.Finish your system setup2.1 2.2InventoryComplete an inventory of the external parts.If you have incorrect,missing,or damaged parts,contact any of the following resources:Locate the kitting report (inventory list) in the bag that contains the information center CD (SK3T-8159).Make sure you received all of the parts that you ordered. Y our order information should be located in an envelope adhered to the outside of your system box.Y ou can also obtain order information from your marketing representative or IBM Business Partner.If you are not installing your server into a rack,skip to task 7.Cable the serverY our IBM resellerIBM Rochester manufacturing automated information line at1-800-300-8751(United States only)Directory of worldwide contacts at /planetwide.Select your location to view the service and support contact information.2If you are installing your server into a rack,you will need the following parts:3.13.23.3If you are installing your server into a new rack,ensure that you have completed the unpacking instructions that were provided with the rack.If your server is already installed in a rack,skip to task 7.Cable the server 3.4Prepare the rack for installation AB3Place the rack in the location of the e the wrench that was provided with your rack to level the rack by raising or lowering the front and back leveling feet .Install the stabilizer bracket on the front of the rack.A B4.14.2Locate the rack-mounting template,the rack-mounting hardware kit,and the sliderail assemblies that were included with your server.If the rack has a trim kit installed,remove the trim kit to provide access to the EIAunits.Use the rack-mounting template to determine where in the rack to place the server.Remove any filler panels necessary to allow adequate access to the location whereyou will install your server.If you do not have enough space around your rack to open the front and back doors completely,remove the doors before starting this task to allow adequate access.Install the slide rail assemblies44.3Follow the rack-mounting template and use theself-adhesive placement dots to mark the locationon the rack where you will place the server.From the back of the rack,use the tab on the back of the slide rails to align theslide rail to the back of the rack.A1.Note:Install units into the lower part of the rack first.Place larger and heavier units in the lower part of the rack.4.4Install the slide rail assemblies .Using the cage-nut-insertion tool or a flat-blade screwdriver,install cage nuts (forsquare rack-rail mounts) or clip nuts (for round rack-rail mounts) into the marked locations on the left and right rack rails.4.54.6 2.If necessary ,screwdriver to loosen the two adjustment screws on the back of the slide rail toexpand or contract the slide rail.Y ou might need to extend the slide rails to access the adjustment screws .B B Tip:3.Locate the cable-managementarm hinge bracket .Using twoM6 screws,secure the cable-the left slide rail (when you arefacing the front of the rack) andinto the rack.C Using two M6 screws,of the rack.Moving to the front of the rack,use two M6 screws to securethe right slide rail to the front of the rack.Use two M6 screws to secure the left slide rail to the front ofthe rack.Tighten the screws that you used to adjust the length of theslide rail in substep 2.Note:e the hinge pin to attach the cable-management arm to the cable-management hinge bracket .Ensure that the lever is in the horizontal position inside the rack cabinet to prevent the A B C Note:D Install the cable-management arm566.3Using at least two people,rails.6.1Attach the four blue rack-support wheels to the side of the server.A 6.2server chassis.Install the server onto the slide rail assembly Before installing the server onto the slide rail assembly,ensure that the leveling feet are extended and that the stabilizer bracket is correctly installed to prevent the rack from falling forward.6.4Tip:6.5Attach M4 screws side of the server to secure theserver to the slide rails.three B 6.6wheels.Ensure that all six screws aresecurely attached through theslide rail and into the serverbefore removing the rack-support wheels.If the screws have not been inserted,theserver might fall when therack-support wheels areremoved.6.7Remove the six M4 screws from the side of the server chassis.These will be used to attach the server to the side rails.Actual size part 93H4729Using two M3.5 screws,install the cable bracket restraint on the back leftside of the server.D -6.8the server into the rack.6.9Tip:6.11Slide the in and out of the racktwo or three times.This action alignsthe with the slide rails.Theshould glide on the slide rails.server server server 6.12Using a screwdriver,tighten the frontslide rail-retaining screws that securethe slide rails to the rack's front flangeon each side of the rack.6.136.13Attention:If any binding is detected,repeat steps 6.9 through 6.12.For additional stability needed whentransporting the rack,retaining screw bracket,second optional screw rail from sliding.G H Slide the server about halfway out ofthe rack.Push the server back into the rack.Using a screwdriver,tighten the rail-retaining screws that secure theslide rails to the rack's rear flangeon each side of the rack.CAUTION:After the slide rails areinstalled,do not extend them past theirsafety release latches.The safetyrelease latches stop the slide rails fromoverextending and separating.Thisaction prevents the server from beingaccidentally pulled out too far anddropped.6.107.1 7.27.6 7.7CAUTION:This product is equipped with a 3-wire (two conductor and a ground) power cable and e this power cable with a properly grounded electrical outlet to avoid electrical shock.(C018)Note:Tip:Connect the server's power supply to a power source.Connect a TTY terminal or terminal emulator to a serial port,or connect a display monitor to an optional graphics adapter in one of the PCI slots.Some display monitors are shipped with a CD that contains video driversfor Microsoft Windows.Y ou do not need those drivers for this model.Some graphics adapters require a DV1-1to VGA converter.If you are using one of these graphics adapters,attach the supplied converter (04N7533) to yourmonitor cable before connecting to the graphics adapter.Connect a keyboard and mouse to the USB ports.If you want to connect the server with your network,connect a network cable toone of the Ethernet ports.ABECDIf you are using any optional adapters,connect the cables to the appropriateadapter connectors in the PCI slots of your server.Route the cables through the cable-management arm and secure the cableswith the straps provided.Y ou have completed the basic setup of your server.Go to task 8EFinish your system setup.Cable the server77.37.57.4A B C D EFinish your server setupUsing a Web browser,go to the information center at/systems/infocenter/hardware.Answer the questions in the interactive interview,and follow the procedures in the resulting checklist.From the navigation bar,click Systems Hardware information System p information Initial server setup Create a customized initial server setup checklist.>>>Y ou have completed the basic tasks to set up your server.access the .Follow these steps to create a customized checklist that helps configure your server install software,apply fixes,and establish connections with your service provider:Y ou can now IBM Systems Hardware Information Center ,If you cannot access the online version of the information center,it is also provided on a CD (SK3T -8159) with your server.8.18.28.38International Business Machines Corporation 2006,2007 Printed in USASeptember 2007All Rights ReservedMail comments to:IBM CorporationAttention Department DDR3605 Highway 52 NorthRochester,MN U.S.A.55901-7829Fax comments to:1-800-937-3430 (U.S.or Canada)1-507-253-5192 (outside the U.S.or Canada)Internet URL: /systems/infocenter/hardware References in this publication to IBM products orservices do not imply that IBM intends to makethem available in every country or region.IBM,the IBM logo,and System p5 are trademarks of International Business Machines Corporation in the United States,other countries,or both.Microsoft and Windows are trademarks of Microsoft Corporation in the United States,other countries or both.Other company,product,and service names maybe trademarks or service marks of others.29R1716SA41-5169-04。
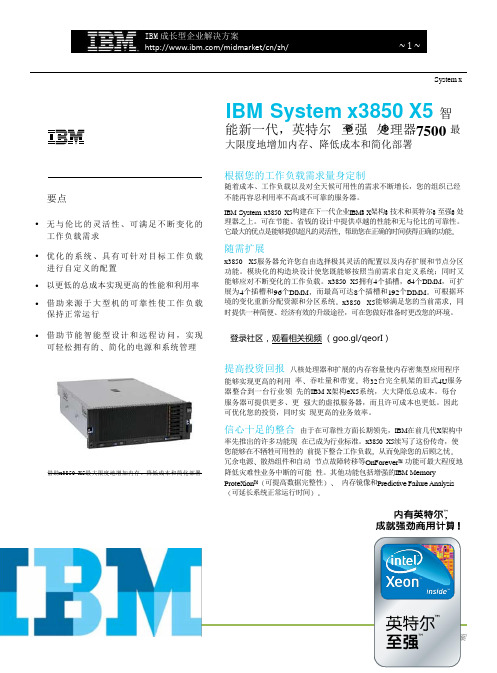
x3850 X5产品手册

IBM成长型企业解决方案System xIBM System x3850 X5 智能新一代,英特尔至强处理器7500 最大限度地增加内存、降低成本和简化部署要点●无与伦比的灵活性、可满足不断变化的工作负载需求●优化的系统、具有可针对目标工作负载进行自定义的配置●以更低的总成本实现更高的性能和利用率●借助来源于大型机的可靠性使工作负载保持正常运行●借助节能智能型设计和远程访问,实现可轻松拥有的、简化的电源和系统管理借助x3850 X5最大限度地增加内存、降低成本和简化部署根据您的工作负载需求量身定制随着成本、工作负载以及对全天候可用性的需求不断增长,您的组织已经不能再容忍利用率不高或不可靠的服务器。
IBM System x3850 X5构建在下一代企业I B M®X架构®技术和英特尔®至强®处理器之上。
可在节能、省钱的设计中提供卓越的性能和无与伦比的可靠性。
它最大的优点是能够提供超凡的灵活性,帮助您在正确的时间获得正确的功能。
随需扩展x3850 X5服务器允许您自由选择极其灵活的配置以及内存扩展和节点分区功能。
模块化的构造块设计使您既能够按照当前需求自定义系统;同时又能够应对不断变化的工作负载。
x3850 X5拥有4个插槽,64个D I MM,可扩展为4个插槽和96个D I MM,而最高可达8个插槽和192个D I MM。
可根据环境的变化重新分配资源和分区系统。
x3850 X5能够满足您的当前需求,同时提供一种简便、经济有效的升级途径,可在您做好准备时更改您的环境。
登录社区,观看相关视频(goo.gl/qeorI)提高投资回报八核处理器和扩展的内存容量使内存密集型应用程序能够实现更高的利用率、吞吐量和带宽。
将32台完全机架的旧式4U服务器整合到一台行业领先的I B M X架构e X5系统,大大降低总成本。
每台服务器可提供更多、更强大的虚拟服务器,而且许可成本也更低。
IBM p5服务器逻辑分区(LPAR)

IBM p5服务器逻辑分区(LPAR)简介: 学习有关如何对 IBM System p5 服务器分区的基础知识。
如果您的企业与我们的相似,也许您会对拥有许多未得到充分利用却消耗了数据中心宝贵地板空间的服务器感到沮丧——这些服务器仅专用于单个应用程序,而该应用程序仅使用了昂贵的 CPU 和内存资源的很小一部分。
将所有那些服务器合并到少量硬件上以更充分地利用资源,同时仍然为每个应用程序维护单独的操作系统环境,那不是很好吗?使用基于 IBM POWER5 的服务器,您完全可以实现这点。
什么是逻辑分区?逻辑分区 (LPAR) 是划分单个系统的 CPU、内存和其他资源以创建多个单独服务器的能力。
每个 LPAR 拥有自己的 CPU、内存和 I/O 设备分配。
此类分区是在固件级别而不是在物理资源级别进行的。
因此,使用 IBM System p5 服务器,您能够使用Micro-Partitioning™ 来创建 LPAR——每个 LPAR 分配的物理 CPU 少于一个。
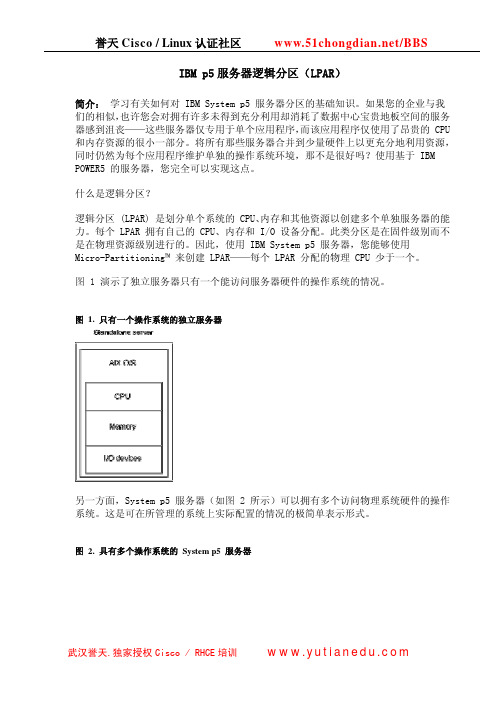
图 1 演示了独立服务器只有一个能访问服务器硬件的操作系统的情况。
图 1. 只有一个操作系统的独立服务器另一方面,System p5 服务器(如图 2 所示)可以拥有多个访问物理系统硬件的操作系统。
这是可在所管理的系统上实际配置的情况的极简单表示形式。
图 2. 具有多个操作系统的 System p5 服务器每个 LPAR 包含自己的操作系统,该操作系统可以是 AIX®、Linux® 或 i5/OS®。
在一个 p5 系统上,您只能有一个 Linux 或 i5/OS 分区。
回页首特殊种类的 LPAR:虚拟 I/O 服务器还存在一种特殊分区,称为“虚拟 I/O 服务器”(Virtual I/O Server,VIO Server)。
VIO Server 提供了在多个 LPAR 之间共享 I/O 资源的能力。
您在 VIO Server 上定义虚拟以太网和磁盘设备,然后使它们对系统上的其他 LPAR 可用。
SYSTEM P5 介绍及与ESERER P5区别

• • • •
System p5+家族 中端/高端
• System p5 560Q 平台提供了一个或两个强 大的构建块系统(可从 4 核扩展至 16 核 ) • IBM System p5-575 具备超高密度封装; 没有一种基于 IBM POWER5 处理器的系统 能够达到由将近 200 个 CPU 安装在一个系 统机架 • System p5 570 服务器是随需应变环境中经 济有效且灵活的服务器。创新的虚拟化技术和 容量随需应变(CoD)选项有助于提高服务器 应对多变计算需求的响应性 p5-570 具备秉承 IBM 大型机的可靠性、可用性和可维护性。
System P5的特性(一)
• SYSTEM 系列主要特性就是显著降低RISC服务器进入门槛的 System p5 185等产品,这些产品将成为x86架构市场用户的 新选择又包括创造多项记录的中端产品,最大限度满足用户对产 品不同定位的需求。截至本次发布,System p5产品所取得的 世界记录已经达到70余项,其动力主要来自以全新2.2GHz POWER5+处理器为代表的POWER处理器,和显著提高计算密 度的QCM(4内核处理器模块)处理器封装技术,后者可使产品 在紧凑空间中成倍增加了计算能力。此外,通过首次引入 PowerPC处理器等技术,进一步降低入门级RISC服务器价格。 • 全新成本控制型System p5产品包括:System p5 185、 System p5 510Q、System p5 520Q、System p5 560Q、System p5 575、IBM BladeCenter JS21和IBM IntelliStation POWER 185; • 全能型System p5产品包括:System p5 510、System p5 520、System p5 550、System p5 570。
IBM System x3550 M3 说明书

請速上網或撥0800-016-888行銷推廣處亦可洽詢 IBM 經銷業務人員System x 伺服器保固昇等與維護服務 線上訂購與諮詢/tw/ma/svrweb.htmlSystem x 伺服器售後服務網址:/support/tw/zh臺灣銀行採購部 (案號:LP5-990026)得標項次:第四組伺服器x3550 M3 項次 13, 14第13項次 129,531元 (Microsoft Windows 2008 作業系統)第14項次108,209元 (Linux 作業系統)IBM System x3550 M3採用精簡設計、提供最佳運算效能特點IBM Systems and Technology Group System x數據表■ 獲致出色效能功耗比,提升成本效益■ 彈性設計,簡化管理和可維護性■ 彈性架構,維持可用性並降低風險蘊含創新技術的精簡套件IBM System x3550 M3 奠基於最新的 Intel ® Xeon ® 處理器技術,並配備極致出色的處理能力與優異的能源管理及冷卻功能。
與前幾代產品相比,x3550 M3 擁有雙倍效能,並採用整合低電壓元件的彈性省電設計,可協助您以較低每瓦特成本來處理需求嚴苛的工作負荷。
簡化管理及可維護性x3550 M3 提供彈性的可擴充設計,可輕鬆升級為 4 到 8個硬碟機。
完善的系統管理工具 (如進階診斷和單點控制資源能力),便於進行部署、整合、服務及管理。
降低風險和維持可用性x3550 M3 已整合新型 6 Gbps RAID 介面卡並提升兩倍的 I/O 效能、提供彈性架構、非常適合關鍵任務型應用程式及虛擬化環境。
進階記憶體支援和更大的磁碟容量、可讓您運用高速處理能力、而不會影響執行時間。
優良的 x3550 M3 配置是 IBM Express Advantage TM Portfolio 產品組合的一部分、專門為了滿足中型企業的需求而設計。
IBM产品物理指标简介
空闲:N/A
工作:N/A
电压
315 ~ 512 V AC , 50/60 Hz(三相)
功率(Watts)
N/A
电源负载(kVA)
2107-9215.5千伏安
2107-9227千伏安
2107-92E6千伏安
2107-9A27千伏安
2107-9AE6千伏安
浪涌电流
(Inrush current)
工作:5.9 ~ 6.2 Bels
噪音(声压)
Sound Pressure
空闲:N/A
工作:N/A
空闲:N/A
工作:N/A
电压/电流
90 ~ 136V AC @ 2A
198 ~ 257 V AC @ 1A
50/60 Hz
90 ~ 127V AC @ 3.9A
198-257 V AC @ 1.65A
50/60 Hz
1.75A
电源负载(VA)
320 VA (max.)
550 VA (max.)
热输出(Btu/hr)
256 ~ 1,058
1,878 (max.)
最大海拔高度
2134 m
2133 m
二、IBM存储产品物理指标:
IBM TotalStorage DS8300 (机柜式)
机型(Model)
DS8300
尺寸(mm,宽x深x高)
198 ~ 257 V AC @ 1~2A
50/60 Hz
90 ~ 127V AC @ 3.9A
198-257 V AC @ 1.65A
50/60 Hz
功率(Watts)
203
60 ~ 390 Watts
IBM 小型机
POWER5 eServer p5 服务器升级之路 IBM Systems and Technology Group
▪ 在外界看来IBM就是大型机,大型机就是IBM。IBM总是把其最先进
的技术首先应用于大型机。
▪ 大型机不是以处理能力见长,它所强调的是RAS和IO。
10
© 2004 IBM Corporation
IBM Systems and Technology Group
I5 Series (AS/400和i系列 )
17
© 2004 IBM Corporation
IBM Systems and Technology Group
LPAR 的优点:
▪ 服务器集中 ; ▪ 隔离生产环境和测试环境; ▪ 提高硬件的使用率; ▪ 隔离不同的应用环境; ▪ 提高硬件资源分配的灵活性
18
© 2004 IBM Corporation
IBM Systems and Technology Group
IBM小型机的优势:
▪ DDR ECC Chipkill内存 ▪ 在线微码升级 ▪ 首次失败数据捕获 ▪ 服务处理器 ▪ 处理器动态分配 ▪ 冗余电源 风扇 ▪ 内部LED诊断 ▪ 热插拔PCI –X 电源 风扇 硬盘 ▪ PCI-X 总线和二级三级缓存 内存重新分配
▪ p系列服务器上,如果升级CPU则必须更换整个CPU板,其优点是
CPU主频和系统总线带宽同时得到提升,保证更高主频的CPU带来更 高的服务器性能。
15
© 2004 IBM Corporation
IBM Systems and Technology Group
IBM 发明的自诊断技术FFDC(First Failure Data Capture)能够做到早发现故障(例如在p690上就设 计有5600多个观察点),并能自动隔离失效部件。 目前在p系列服务器上能做到自动隔离失效的 CPU、 L2/L3缓冲器、PCI总线、PCI卡和LPAR(逻辑分 区)等,使系统能够继续运行。
IBM磁带产品详细参数
数据传输速率
使用全高型和半高型LTO Ultrium 4技术,本机数据传输速率可达120MBps
使用全高型LTO Ultrium 3技术,本机数据传输速率可达80MBps
使用半高型LTO Ultrium 3技术,本机数据传输速率可达60MBps
机架安装
17.6英寸(447.5毫米)x 3.44英寸(87.6毫米)x 29.13英寸(740毫米)
重量
33磅(15公斤)
工作环境
温度
54到95华氏度,12到35摄氏度
相对湿度
20%-80%相对湿度(非冷凝)
功率
100 V交流电压时为1.3 amps;240 V交流电压时为0.7 amps
连接和系统支持
热插拔组件
电源、磁带驱动器
RAID支持
无
系统管理
支持SMI-S
支持的操作系统
OS/400®、V5R2、V5R3或更高版本
AIX 5L™ V5.1、V5.2、V5.3或更高版本
Sun Solaris 8和9
Microsoft® Windows® 2000
Microsoft Windows 2003
HP-UX 11.0、HP-UX 11.11和HP-UX 11.2311
TS3100提供LVD Ultra160、4 Gbps光纤通道和3 Gbps SAS(仅用于LTO4)接口,可连接到IBM System p、IBM System i、IBM System x、RS/6000 SP™、AS/400和IBM Netfinity®系统以及非IBM服务器、工作站和个人计算机上
p5虚拟化解决方案建议书
IBM System p5解决方案系列——高级虚拟化解决方案1.前言 (2)2.方案介绍 (2)2.1.目标客户 (2)2.2.系统结构与配置 (3)2.3.优势分析 (4)2.3.1.p5 560Q优势 (4)2.3.2.高级虚拟化技术优势 (5)3.建议配置 (5)3.1.配置清单 (6)3.2.示意图 (6)3.3.说明 (7)1. 前言随着企业业务的不断发展,企业的I/T 环境也在不断进行演变。
经过多年的积累,在很多大型企业的IT 机房中逐渐形成了大量的服务器系统,运行企业的各种业务应用,其中有很多运行在Linux 和UNIX 系统平台上,属于企业的核心业务应用,包括数据库系统和核心的应用程序。
这种IT 模式决定了管理员必须要同时管理大量的服务器系统,有时达到几十台甚至上百台。
如此大量的服务器系统,给企业的IT部门经理带来了许多的困扰:1. 成本问题。
业务经理要上新的业务,需要新的服务器。
但部门经费却没有增长甚至还在不断缩减。
越来越多的服务器,管理员们都在超负荷工作,急需增加新的管理员。
随着服务器的增多,机房的电力、散热、空调、空间等问题也越来越头痛。
2. 管理问题。
如此复杂的IT架构,众多的系统平台和大量的业务让管理员们力不从心。
资源利用率低下,大量的机器的利用率都不超过20%,有的甚至只有5%。
无法为负载大的应用服务器动态增加CPU和内存。
3. 故障/容灾问题。
始终无法保证达到您所制定的故障或者灾难恢复时间的目标。
由于成本原因,不得不将部分应用排除在灾难恢复范围内。
4. 高可用性问题。
当服务器或核心业务升级时,您的业务和服务器不得不停机,无法保证24小时运行。
部分服务器的宕机时间达不到99.999%的5个9的要求。
2. 方案介绍为了解决以上问题,IBM推出了IBM System p5高级虚拟化解决方案,此方案能够在一台p5服务器上运行多套操作系统和业务系统,最大化为客户节省成本。
此方案再配合IBM的Partition Load Manager(PLM)软件,可实现无需监管的动态资源调控。
- 1、下载文档前请自行甄别文档内容的完整性,平台不提供额外的编辑、内容补充、找答案等附加服务。
- 2、"仅部分预览"的文档,不可在线预览部分如存在完整性等问题,可反馈申请退款(可完整预览的文档不适用该条件!)。
- 3、如文档侵犯您的权益,请联系客服反馈,我们会尽快为您处理(人工客服工作时间:9:00-18:30)。
IBM
2500
POWER Cell Nanotubes
Patents Awarded
2000
Canon
HP
Matsushita Samsung
Micron
Intel Hitachi Toshiba Fujitsu
1500
1000
500
0
9
© 2006 IBM Corporation
20 05 Q 3
20 04 Q 4
3
© 2006 IBM Corporation
IBM Systems
IBM System p5
IBM System p5重点更新产品 重点更新产品
4
© 2006 IBM Corporation
IBM Systems
IBM System p5
The IBM ~ p5 family of systems
11
© 2006 IBM Corporation
IBM Systems
IBM System p5
IBM POWER5 及 POWER6 的芯片发展
2001 2002-3 2004 2005 2006
Power4
Copper + SOI
0.18 λm
1-1.3GHz 1-1.3GHz
Power4+
Power5
Reduced size/power More LPARs (32) 4GB Switch
64-way Sub-processor Partitioning Enhanced Distributed Switch Enhanced Core Parallelism Improved FP Performance Faster memory environment Infiniband Virtualization
IBM POWER5/POWER5+产品介绍 产品介绍
2
© 2006 IBM Corporation
IBM Systems
IBM System p5
中国UNIX服务器市场
(数据来源:IDC报告)
•IBM在2005年第二季度市场份额达到49.9%,基本达到“半壁江山”的目标。 •IBM自 1998年以来,已经连续8年占据市场份额第一名。 •CA数量稳定增长
From consumer electronics to supercomputers
A common architecture . . . the most scalable technology
Servers
POWER2
POWER3™
POWER4+™ POWER5
POWER5+
POWER4™
Clients/ Blades
*Source for ~ p5 systems benchmarks: /eserver/benchmarks
5
** US List Price as of April 12, 2005. Prices are subject to change without notice and reseller prices may vary. © 2006 IBM Corporation /servers/ca/en/eserver/pseries/hardware/entry/510express_browse.html
减少功耗 改善内存控制器 支持4核心处理器封装[QCM] [QCM], 支持4核心处理器封装[QCM],并扩展 16路服务器 至16路服务器
第一个 核心处理器封装技术 通过SMT技术,每个处理器模块能够实现 通过SMT技术, SMT技术
4
8个处理线程
每个QCM处理器模块集成了76MB高速缓存 每个QCM处理器模块集成了76MB高速缓存 QCM处理器模块集成了76MB IBM成熟的多内核技术和多芯片封装技术 IBM成熟的多内核技术和多芯片封装技术 的进一步扩展
>>> GHz Core
Shared L2 Distributed Switch Shared L2
Distributed Switch Shared L2
Mem Ctl
Distributed Switch
2001 POWER4 第一个“双内核”处理器 优秀的动态逻辑分区能力
© 2006 IBM Corporation
Best Performance
1.9 GHz POWER5+ 处理器, 处理器,DCM封装 封装
Best Performance
1.65 GHz POWER5+ 处理器, 处理器,DCM封装 封装
Best Performance
1.5 GHz POWER5+ 处理器, 处理器,QCM封装 封装
Best Price/Performance
POWER5™ 0.09 microns (Planned*)
1998 Power3 第一个采用“铜芯片” 技术的处理器
0.13 microns
1.2 to 1.9 GHz Core 1.2 to 1.9 GHz Core
0.13 microns
1.5 to 1.9 GHz Core
>>> GHz Core
PowerPC 603e
PowerPC 750
PowerPC 750CXe
PowerPC 750GX
PowerPC 970FX
PowerPC 970MP
Consumer/ Industrial
PowerPC 401
PowerPC 405
Cell PowerPC 440
Source: /chips/power/aboutpower/
IBM Systems
IBM System p5
POWER的辉煌历史
1970s John Cocke 博士发明了 RISC架构芯片
POWER4™
0.18 microns
1.0 to 1.3 GHz Core
1990 Power1 火星探路者的中央处理器
1993 Power2 Deep Blue在“人机大战” 中战胜世界冠军
Distributed Switch
2004 POWER5 第一个支持“并发多线程”的处理器 更为强大的虚拟化功能 微分区、虚拟I/O、分区资源管理器
IBM Systems
10
Mem Ctl
1-1.3 GHz Core
1.4-2.0 GHz CoreShared L2
IBM System p5
IBM Power Architecture™
Autonomic Computing Enhancements
12
© 2006 IBM Corporation
IBM Systems
IBM System p5
POWER5+ 芯片技术追求极至 The best gets even better! +
更快的主频, 更快的主频,更高集成度
0.09微米技术,面积比POWER5小 0.09微米技术,面积比POWER5小37% 微米技术 POWER5
IBM System p5
IBM System p5 新产品介绍
2006年5月
© 2006 IBM Corporation
IBM Systems
IBM System p5
主要内容
UNIX 市场现状 IBM POWER5/POWER5+重点更新产品 重点更新产品
IBM POWER5/POWER5+技术 技术
四核模块QCM 四核模块
13
© 2006 IBM Corporation
IBM Systems
IBM System p5
Modifications to IBM POWER4 to create POWER5/5+
POWER4
P P
L2
POWER5
P P
L2 L3
L3 Ctl
P P
L2
P P
L2
L3 Ctl
IBM Systems
IBM System p5
2006年2月IBM System p5/p5+更新重点
IBM POWER5+™ 处理器
2.2 / 1.9 / 1.65 / 1.5 GHz POWER5+处理器
基于POWER5+处理 处理 基于 器的系统
IBM System p5 510/510Q IBM System p5 520/520Q IBM System p5 550/550Q IBM System p5 560Q IBM System p5 570 IBM System p5 575
1.5GHz POWER5
p5-520 Express
Up to 2-way
1.5GHz POWER5
p5-550 Express
Up to 4-way
1.5GHz POWER5
p5-570 Express
Up to 8-way
1.5GHz POWER5
1- to - 64 way, starting at less than $4,000 US list price**!
7
© 2006 IBM Corporation
IBM Systems
IBM System p5
Processors
8
© 2006 IBM Corporation
IBM Systems
IBM System p5
IBM’s 2005 Patent Total: 13 yrs of Leadership
