SWAT操作手册
SWAT校准指南

C HAPTER33SWAT:C ALIBRATIONSWAT校准模型运行的校准分成以下几步:1.水量平衡和河流流量2.泥沙3.营养物Water Balance And Stream Flow—水量平衡和径流在校准之前,必须对流域内的实际情况有所了解。
理论上,必须具有河流实测数据或是流域出口实测数据。
首先对年平均值做校准,年校准之后,可以延伸至月、日记录,进行校准微调。
年平均观测和模拟值汇总为下表的格式:Total Water Yield总水量Baseflow基流Surface Flow地表径流实测200 mm 80 mm 120 mmSWAT 300 mm 20 mm 280 mm如果在流域出口处校准,对应的SWAT值的表在.std文件中。
在文件的末尾,在标题为Ave Annual Basin Values的表中列出了这些值。
如果对流域内某个测站进行校准,总水量可以从河段.rch文件的FLOW_OUT字段计算得到。
基流和地表径流值必须从HRU输出文件(.sbs)或子流域输出文件(.bsb)得到。
为估计基流和径流的贡献,必须对GWQ,SURQ 和WYLD的年平均值做平均计算,以求得目标流域面积加权平均值。
地表径流和基流必须转化为对总水量(WYLD)的百分比,这些百分比然后乘以河道输出文件中的总水量。
不能直接用GWQ和SURQ的值,是因为河道内的降水,蒸发,输移损失等会改变从HRU或子流域输出文件的WYLD字段预测的净水量。
这里有几种把观测径流量分割为基流和地表径流,并计算其百分率的方法。
如果有每日径流数据,可以使用基流分割程序来完成这项分析过程。
I. Basic Water Balance & Total Flow Calibration—基本水量平衡和总径流校准校准地表径流:Step 1:调整CN2(.mgt),直到地表径流符合要求。
附录A中有很多表包含了多种多样土地覆盖类型的CN值。
waters T 操作手册

日常操作步骤:准备UPLC 设置样品表 运行样品 定量 打印报告 注:如果一个星期内不运行样品请不要关质谱仪,使其保持真空。
建立新方法和project 的操作步骤:准备UPLC 建立新的project 用标准品调谐 编辑质谱方法 编辑UPLC 方法 设置样品表 运行样品 定量 打印报告 1. 开机1.1. 打开电脑,打开质谱电源和UPLC 各电源,各部件通过自检后,点击进入工作站。
1.2. 选择Instrument > MS Tune 进入调谐页面。
1.3. 从调谐页面选择Vacuum> pump ,打开真空泵,开始抽真空。
机械泵和分子涡轮泵开始工作。
1.4. 质谱上的真空灯开始闪烁,当系统达到真空状态,灯变为绿色,不再闪烁。
如果达到实验状态大约要抽真空12小时 1.5. 气源压力设置氮气:90 – 120 psi 氩气:7 psi2. 准备UPLC 系统2.1. 准备流动相 用0.22um 的膜过滤缓冲液,所有的缓冲液和超纯水都要新配制,超纯水和缓冲液使用不得超过二天。
2.2. 所有样品都要用流动相初始梯度比例的溶剂来溶解,并用0.22um 的膜过滤。
2.3. 初始化UPLC 泵 在Masslynx 主页面上选择 将 出现下面的画面。
MassLynx V4.0.lnk2.4.点击 进入UPLC控制台,见下图。
2.5.湿灌注UPLC泵 选择CONTROL>Prime A/B solvent2.6.选择A1/B1或A2/B2 输入时间1min,如果更换了流动相则输入3min,按star.2.7.初始化UPLC自动进样器 在UPLC控制台上选择Sample Manager2.8.选择Control >> Prime syringes2.9.灌注进样器和洗针系统。
选择Sample syringe and wash syringes2.10.参数 Number of cycles 平时选1,但在更换洗针溶液时选5。
SWAT上机说明

SWAT模型上机实例一、打开SWAT打开ArcView,File Extensions,勾选AVSWATX Extendable,点击OK进入SWAT界面。
(注:系统语言需要设置成英语,通过控制面板里的区域和语言选项设置。
)二、建立SWAT 工程文件1、点击New Project新建一个工程文件,出现如下界面的时候,可先在右边方框选择路径,在左边方框输入工程文件名称,完成路径选择和名称输入点击ok。
此时,程序会在对应路径下建立一个sabine.avsx文件。
2、此时,程序弹出如下提示栏,需要用户输入数据源路径,点击ok采用默认路径。
默认情况下,程序将在与sabine.avsx文件相同目录下建立一个sabine文件夹,将用来存放该project的生成数据。
三、Watershed Delineation1、导入dema, 点击①,选择Load DEM grid from disk,点击OK;b, 在右边路径选择为:C:\AVSWATX\AvSwatDB\Example3,此时选择左边的dem,或者直接输入dem,点击OK;c, 有警示栏提示需将DEM数据投影,点击OK即可。
2、DEM投影a, 点击②,依次点击projection、OK、Yes;b, 选择Predefined Projection,Alber Equal_Area(Conterminous U.S.),点击OK。
回到Dem Properties提示栏时,再次点击OK回到Delineation。
3、载入MASKa, 勾选③Focusing watershed area option前面的方框,在弹出界面中选择Load mask grid from disk,点击OK。
b, 在右边的路径选择中,将路径选择到C:\AVSWATX\AvSwatDB\Example3,然后在左边选择amask,点击OK。
4、载入数字化的河网信息如果有数字化的流域信息,则可通过④载入河流河段信息,这个例子中我们不做输入。
SWAT使用手册(中文翻译)
Soil and Water Assessment Tool User’s Manual Version 2000S.L.Neitsch, J.G.Arnold, J.R.Kiniry, R.Srinivasan, J.R.Williams, 2002Chapter 1 overview1.1 流域结构W ATERSHED CONFIGURATION✧子流域-无数量限制的HRUs(每个子流域至少有1个)-一个水塘(可选)-一块湿地(可选)✧支流/干流段(每个子流域一个)✧干流河网滞留水(围坝拦截部分)(可选)✧点源(可选)1.1.1子流域(subbasins)子流域是流域划分的第一级水平,其在流域内拥有地理位置并且在空间上与其他子流域相连接。
1.1.2 水文响应单元(HRU)HRUs是子流域内拥有特定土地利用/管理/土壤属性的部分,其为离散于整个子流域内同一土地利用/管理/土壤属性的集合,且假定不同HRU相互之间没有干扰。
HRUs的优势在于其能提高子流域内负荷预测的精度。
一般情况下,一个子流域每会有1-10个HRUs。
为了能在一个数据集内组合更多的多样化信息,一般要求生成多个具有合适数量HRUs的子流域而不是少量拥有大量HRUs的子流域。
1.1.3主河道(Reach/Main Channels)水流路线、沉积物和其他经过河段的物质在theoretical documentation section7中有描述。
1.1.4 支流(Tributary Channels)辅助性水流渠道用来区分子流域内产生的地表径流输入的渠系化水流。
附属水道的输入用来计算子流域内径流产生到汇集的时间以及径流汇集到主河道的输移损失。
辅助性水道输入定义了子流域内最长达水流路经。
对某些子流域而言,主河道可能是最长的水流路经,如果这样,辅助性水流渠道的长度就和主河道一样。
在其他子流域内,辅助性河道的长度和主河道是不同的。
1.1.5池塘、湿地和水库(Ponds/Wetlands/Reservoirs)两类水体(池塘/湿地)在每个子流域内都会有定义。
SAMBA—SWAT的设置和使用
1. swat介绍SWAT:The Samba WEB Administration ToolSWAT是Samba的图形化管理工具。
我们可以通过浏览器利用swat工具来设置samba。
在swat中每一个samba参数都有相应的帮助文件或解释文件,很适合初学者。
SWAT工具嵌套在xinetd超级守护进程中,要通过启用xinetd进程来启用swat。
因此要先安装xinetd工具包,然后安装swat工具包。
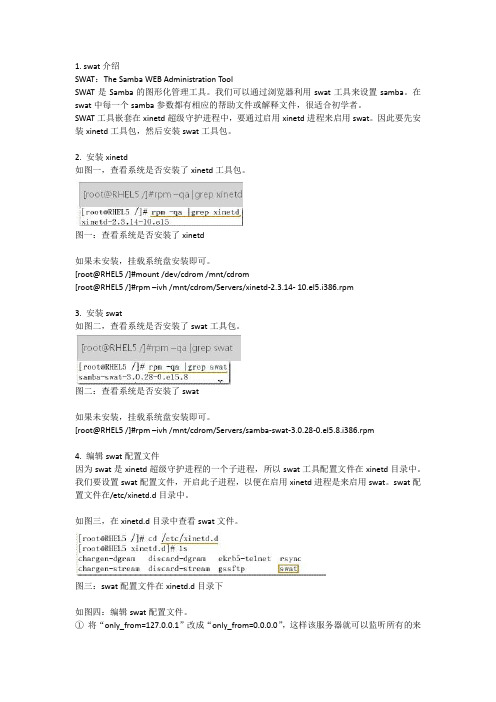
2. 安装xinetd如图一,查看系统是否安装了xinetd工具包。
图一:查看系统是否安装了xinetd如果未安装,挂载系统盘安装即可。
[root@RHEL5 /]#mount /dev/cdrom /mnt/cdrom[root@RHEL5 /]#rpm –ivh /mnt/cdrom/Servers/xinetd-2.3.14- 10.el5.i386.rpm3. 安装swat如图二,查看系统是否安装了swat工具包。
图二:查看系统是否安装了swat如果未安装,挂载系统盘安装即可。
[root@RHEL5 /]#rpm –ivh /mnt/cdrom/Servers/samba-swat-3.0.28-0.el5.8.i386.rpm4. 编辑swat配置文件因为swat是xinetd超级守护进程的一个子进程,所以swat工具配置文件在xinetd目录中。
我们要设置swat配置文件,开启此子进程,以便在启用xinetd进程是来启用swat。
swat配置文件在/etc/xinetd.d目录中。
如图三,在xinetd.d目录中查看swat文件。
图三:swat配置文件在xinetd.d目录下如图四:编辑swat配置文件。
①将“only_from=127.0.0.1”改成“only_from=0.0.0.0”,这样该服务器就可以监听所有的来访IP。
②将“disable=yes”改成“disable=no”,这样swat子进程就可以随xinetd超级守护进程一起启动了。
ArcSWAT中文手册
ARCSWAT2.1 INTERFACE FOR SWAT2005
用户使用向导
M. WINCHELL,R.SRINIVASAN,M.DILUZIO,J.ARNOLD
JULY,2008
翻译制作:94527257
翻译初稿完成时间:2009 年 3 月 14 日
BLACKLAND RESEARCH CENTERTEXAS AGRICULTURAL EXPERIMENT STATION720 EAST BLACKLAND ROAD -TEMPLE, TEXAS 76502
6.1.1 启动............................................................................................................................. 29 6.1.2 Land Use 数据 ............................................................................................................ 30 6.1.3 Soil 数据 ..................................................................................................................... 34 6.1.4 Slope分类..................................................................................................................... 37 6.1.5 Landuse, Soil, And Slope的覆盖................................................................................. 39 6.2 HRU定义............................................................................................................................ 40 第七章 输入气象数据 ................................................................................................................... 44
SWAT操作说明
SWAT(Soil and Water Assessment TooL)操作说明(ArcView界面)http:/./swatR.SrinivasanBlackland Research and Extension CenterTexas Agricultural Experiment StationTexas A&M University翻译:高歌 许红梅(国家气候中心)2007年11月主要内容1.简介2.目的3.扩展部分4.流域划分及土地利用、土壤类型定义5.应用SWAT6.结果的后处理及显示简介土壤和水评估工具(SWAT)是一个具有物理基础可进行连续事件模拟的水文模式,用于预报土地管理措施对水、沉积物的影响以及农用化学物的大量使用、复杂流域的土壤变化、土地利用和管理条件的长期影响。
模拟时,一个流域被划分为一定数量均匀的子流域(即水文响应单元 HRUs),子流域内的土壤和土地利用具有一致的特征。
每个子流域的输入信息包括:天气;子流域内统一的陆面覆盖、土壤以及管理措施;池塘或水库,地下水以及主要的河道及子流域支流。
径流的运载,沉淀物、营养物和杀虫剂在子流域主要河道的运载情况也可以模拟,主要考虑了一些影响水文的物理过程。
更为细致的SWAT功能的描述,请参考SWAT User’s Manual, Version 99.2 (/swat/swatdoc.html#new)。
目的操作说明介绍软件安装及熟悉基本操作。
建立项目A VSWATX , ArcView3.x的扩展版。
建立一个ArcView项目,该项目包括连接处理好的资料以及兼容所有GIS常用的功能。
项目还包括一个常用的ArcView 图形用户界面(GUI),有菜单、按钮和工具。
1.启动ArcView3.x, 从File菜单中选取extension, 浏览A VSWATX并选择可选框,出现A VSWATX界面(图1)。
2.按下New Project旁边的按钮,弹出对话框,从下拉菜单选择资料目录,然后填写创建项目的名称,如:SWATDEMO. 文件名最长可以有8个字符,不给出文件的扩展名。
SWAT操作步骤

SWAT操作步骤:1New project/对话框Project Directory2Watershed Delineator:(1)A utomatic Watered Delineation——Load from disk——DEM ——点Mask前要Load from disk——amask(2)S tream Definition: DEM-based 点黄色汇流方向的栅格图形——出现建议采取的汇流面积(3)S tream network: 点击图形(4)W atershed Outlets Selection and Definition:首先选取任一流域的一个出口断面的节点(方法是画一个框区域,在所出现的图上点一个节点)——点Delineate Watershed描绘分水岭(5)C alculation of Subbasin Parameters: 点击右侧的图形3HRU Analysis:(1)注意最后都要reclassify(land use date;from disk——land use——value——Luc.dbf/soil.dbf)(2)定义HRU: Dominant HRU——Create HRU4Write Input Table: Custom database(自定义数据库)——Write all (1)Weather Generator Date(2)Custom Database——wgnstation.dbf(3)Rainfall Data——pcp.fork.dbf(4)Temperature Date——tmpfork.dbf5SWAT Simulation;setup SWAT/Run——Run SWAT6最后结果:(注意存储位置)(1)Output.std 流域均值的情况(2)Output.rch 每条河段的入流和出流。
- 1、下载文档前请自行甄别文档内容的完整性,平台不提供额外的编辑、内容补充、找答案等附加服务。
- 2、"仅部分预览"的文档,不可在线预览部分如存在完整性等问题,可反馈申请退款(可完整预览的文档不适用该条件!)。
- 3、如文档侵犯您的权益,请联系客服反馈,我们会尽快为您处理(人工客服工作时间:9:00-18:30)。
BASINS Extension - Model - SWATby M. Di Luzio, R. Srinivasan and J.G. ArnoldPurposeThe SWAT ArcView extension for BASINS is a graphical user interface for SWAT (Soil and Water Assessment Tool)model (Arnold et al., 1998). SWAT model is a river basin, or watershed, scale model developed to predict the impact of land management practices on water,sediment(沉积物),and agricultural chemical yields in large,complex watersheds with varying soils,land use,and management conditions over long periods of time.The model is physically based and computationally efficient, uses readily available inputs and enables users to study long-term impacts. For a detailed description of SWAT, see Soil and Water Assessment Tool User's Manual, Version 2000 (Neitsch et al., 2000), published by the Agricultural Research Service and the Texas Agricultural Experiment Station, Temple Texas.The SWAT model can be applied to support various watershed and water quality modeling studies.Examples of such studies include the following:•National and regional scale water resource assessment considering both current and projected management conditions. 在当今和未来的管理条件下,对全国和区域尺度上的水资源评估,•Bosque(丛林)River TMDL in Erath County, Texas. The project determined sediment, nitrogen and phosphorus loadings to Lake Waco from various sources including dairy waste application areas,waste treatment plants,urban areas,conventional row crops and rangeland(牧场,牧地).Numerous land management practices were simulated and analyzed (Saleh et al., 2000)•Poteau River TMDL in Oklahoma/Arkansas.This project assess determined sediment, nitrogen and phosphorus loadings to Wister Lake and dissolved oxygen(溶解氧),temperature,algae(水藻,海藻),and CBOD(碳生化需氧量)in the river.Management scenarios regarding poultry(家禽)waste were analyzed (Srinivasan et al., 2000).•DDT in the Yakima River basin,Washington.SWAT was used to simulate past and future sediment contamination by DDT in the Yakima river basin.•The EPA office of pesticide registration(农药注册局)is evaluating SWAT for use in landscape/watershed scale evaluation for pesticide registration.•SWAT is being used extensively in the U.S.and Europe to assess the impact of global climate on water supply and quality (Rosenberg et al, 1999).The SWAT ArcView extension for BASINS is a consistent evolution(一致的评估)of AVSWAT,an ArcView extension developed for an earlier version of SWAT (Di Luzio et al.,1998).The BASINS SWAT interface extension requires the designation of land use(土地利用说明),soil,weather,groundwater,water use,management,soil chemistry,pond, and stream water quality data,as well as the simulation period,to ensure a successful simulation.ApplicationSWAT model can be used to simulate a single watershed or a system of multiple hydrologically connected watersheds.Each watershed is divided first in subbasins and then in hydrologic response units (HRUs)based on the land use and soil distributions. In BASINS the watershed boundaries(流域边界)can be defined through the BASINS Delineation extensions(BASINS流域划分)(see BASINS User's Manual, Sec. 8),while the HRU distribution can be defined exclusively using the Landuse and Soil Overlay and HRU distribution extension (see BASINS User's Manual, Sec. 9.1).For this reason, although the BASINS SWAT has been developed using Dialog Designer extension(ver. 3.1 or later)the installation requires Spatial Analyst (ver. 1.1 or later) and ArcView extensions installed on your PC.ProceduresKey Procedures•Load or select the SWAT extension (if not done) checking the relative box in the BASINS Extension Manager ('Models' category)•Delineate the watershed (see BASINS User's Manual, Sec. 8) and define the HRUs (see BASINS User's Manual, Sec. 9.1)•(Optional) Edit SWAT databases•Define the weather data•Apply the default input files writer•(Optional) Edit the default input files•Set up (requires specification of simulation period, PET calculation method, etc.) and run SWAT•(Optional) Apply a calibration tool•(Optional) Analyze, plot and graph SWAT output using GenScnBefore you Get StartedFirst, verify that the SWAT extension is active in your BASINS project by typing Ctrl+B from the BASINS View(or selecting the BASINS Extension choice in the File menu) and selecting the Models item from the Extension Categories dropdown list. The SWAT entry in the Basins Extensions list should be visible and selected (Screen 1).Screen 1If the SWAT entry is not selected (checked), click on it to select it.The extension brings to the project a new View object with the designed graphical user interface (GUI) for SWAT model. The working view is SWAT View (Screen 2) and is actually introduced to the project when the user defines the HRUs distribution in the watershed with the SWAT option active (see BASINS User's Manual, Sec. 9.1).Screen 2Moreover the extension brings to BASINS View the following items:1.Under the Utilities menu, the item SWAT Databases (Screen 3).Screen 3By selecting this item the user can access and edit several SWAT model data bases (see Sec. 11.1.1) that can be used within each BASINS project.2.Under the Models menu, the SWAT item (Screen 4)Screen 4By selecting this item the user can pass from BASINS View to SWAT View, the graphical user interface (GUI) for the SWAT model.3. A new item is added to the BASINS View pop-up menu(视图弹出菜单). Right clickon the map display of the BASINS View to activate the pop-up menu (Screen 5)Screen 5By selecting this item the user can pass from BASINS View to SWAT View, the graphical user interface (GUI) for the SWAT model.ReferencesArnold, J.G., Srinivasan, R., Muttiah, R.S., and Williams, J.R. 1998. Large area hydrologic modeling and assessment part I: model development. J. American Water Resources Association 34(1):73-89.Di Luzio, M., Srinivasan R. and Arnold J.G, 1998. Watershed oriented non-point pollution assessment tool. In: Computers in Agriculture - 7th international conference. October 26-30th 1998, Orlando, FL. ASAE. 233-241.Neitsch, S. , Arnold J.G. and Williams J.R., 2000. Soil and Water Assessment Tool User抯 Manual, Version 2000.Rosenberg, N.J., Epstein, D.L., Wang, D., Vail, L., Srinivasan, R., and Arnold, J.G. 1999. Possible impacts of global warming on the hydrology of the Ogallala aquifer region. J. of Climate 42:677-692.Saleh, A., Arnold, J.G., Gassman, P.W., Hauck, L.W., Rosenthal, W.D., Williams, J.R., and McFarland, A.M.S. 2000. Application of SWAT for the upper north Bosque watershed. Transactions of the ASAE 43(5):1077-1087.Srinivasan, R., Arnold, J.G., Ramanarayanan, T.S., and Bednarz, S.T. 2000. Modeling Wister lake watershed with the soil and water assessment tool (SWAT) J. American Water Resources Association (in review).1.0 SWAT Database EditorsPurposeThe SWAT model uses five databases to store required information about plant growth and urban land uses, tillage, fertilizer components and pesticide properties (See Soil and Water Assessment Tool User's Manual, Version 2000).The BASINS SWAT extension brings to the user, friendly dialog based editors (SWAT Database Editors) to access and edit these and two additional databases to store custom soils and custom weather station parameters.ApplicationThe SWAT Database Editors are available once BASINS SWAT extension is loaded.The user can start the editing session from two locations in the BASINS project:1.From BASINS View,select the SWAT Databases item from the Utilities menu (seeScreen 1.1);Screen 1.12.From SWAT View,select the Databases item from the Edit Input menu (see Screen1.2).Screen 1.2A dialog pops up showing the list of the SWAT Database Editors (Screen 1.3).Screen 1.3Seven database items are listed: User Soils, User Weather Stations, Land Cover/Plant Growth, Fertilizer, Pesticide, Tillage, Urban:.er Soils: this database is used to store SWAT custom soil data. Dataare entered in this database when the used soil maps are not linked to the STATSGO soil database included with BASINS.er Weather Stations: this database is used to store SWAT statistical weather parameters for stations that are not in the US database included with BASINS.nd Cover/Plant Growth: this database contains SWAT plant growth parameters. Although you are given the option of modifying existing land cover/plant parameters or adding additional plant species to thedatabase, it should be noted that changes to the plant database should be based on experimental data. The typical user will not need to make changes to this database.IV.Fertilizer: this database is used to store SWAT fertilizer parameters.Both inorganic and organic (manure) fertilizer data are stored in this database. You are given the option of modifying existing and/or adding new fertilizer parameters. The typical user will not need to make changes to this database.V.Pesticide: this database is used to store SWAT pesticide parameters. You are given the option of modifying existing and/or adding new pesticide parameters. The typical user will not need to make changes to thisdatabase.VI.Tillage: this database is used to store SWAT tillage parameters. You are given the option of modifying existing and/or adding new tillageparameters. The typical user will not need to make changes to thisdatabase.VII.Urban: this database is used to store SWAT urban land type parameters.You are given the option of modifying existing and/or adding new urbanland type parameters. The typical user will not need to make changes tothis database.Double click on the database item to start editing.Key Procedures•(Optional) Edit the User Soils database•(Optional) Edit the User Weather Stations database•(Optional) Edit the Land Cover/Plant Growth database•(Optional) Edit the Fertilizer database•(Optional) Edit the Pesticide database•(Optional) Edit the Tillage database•(Optional) Edit the Urban database1.1 User Soils Database EditorThe User Soils Database Editor is used to update the database storing the SWAT custom soil data: data are entered in this database when using soil maps that are not linked to STATSGO soil database included in BASINS. Detailed definitions of the variables listed under each command can be found in the Soil and Water Assessment Tool User's Manual, Version 2000see the section covering the Soil Input File (Chapter 36, Par.36.1).From the Edit SWAT Database dialog, double click the User Soils item (Screen 1.1.1).Screen 1.1.1The User Soils dialog is displayed to start the editing session (Screen 1.1.2).Screen 1.1.2A list of soils in the custom database is shown on the left side of the dialog. The user has three options to proceed: edit an existing soil data set, add a new soil data set, or delete a soil data set:1.To edit an existing soil data set, click the name of the soil to be edited onthe soil list. The data for the soil will be loaded and displayed (Screen 1.1.3).Screen 1.1.3 Note: If the cursor is placed on top of any text box or button, a short help description (yellow label) appears; for parameters the range of variation is shown. A complete description of the variables is provided in the Soiland Water Assessment Tool User's Manual, Version 2000 , see the section covering the Soil Input File (Chapter 36, Par. 36.1)The data are separated in two groups: the first group of parameters are applicable to the entire soil profile and are displayed in the box titled 'By Soil'; the second group of parameters pertain to a particular soil layer and are displayed in the box titled 'By Layer'.The layer number is displayed at the bottom of the 'By Layer' box between the Up and Down buttons.The different layers in the soil profile can be accessed through these buttons. Activate the parameter text box clicking on it. Type in and/or edit the text value. You can pass to the next parameter text box pressing the TAB key. If the value of the parameter is out of range a message box like the one on screen1.1.4, pops up.Screen 1.1.4Click OK: the parameter is reset to the original value or to the closest range limit.Once all editing changes have been made, click Exit.If changes have been made, a dialog may pop up (Screen 1.1.5).Screen 1.1.5This dialog reports parameters that exceed the suggested ranges. Click OK.A dialog pops up (Screen 1.1.6).Screen 1.1.6Click No to return to editing and correct the values. Click Yes to continue, a new dialog pops up (Screen 1.1.7).Screen 1.1.7Click Yes to save the changes. Click No to proceed without saving.2.To add a new soil data set to the database, the user has 3 options: enteringparameters on a default form, loading data from a formatted SWAT Soil input file, or copying data from an existing soil data set in the database.a.To add a new soil using a default form, click the Add New button inthe User Soils dialog.A modified dialog with default values for the soil profile will pop up(Screen 1.1.8). The default values are the minimum in the respectiveallowed range.Screen 1.1.8Click the Cancel button to exit the session.To complete the session enter the name of the new soil and edit theother parameters. Once finished, click the Save button to store thenew soil data set.This returns you to the original User Soils dialog. The list of soils in the database will now include the name of the just added soil.b.To load soil data from a formatted SWAT input file, click the Load(.Sol) button.A message pops up (Screen 1.1.9) warning you to use a correctlyformatted .sol file (see SWAT user Manual).Screen 1.1.9To quit the load operation, click No. To proceed with loading click Yes.A browser will be displayed (Screen 1.1.10).Screen 1.1.10Select the soil input file (.sol) to be loaded and click OK (or double click the selection). The soil data will fill the fields in the User Soils dialog. Click the Save button to store the new data set or click Cancel to exit the adding session.c.To add a new soil by modifying an existing soil data set, select thename of the soil to be copied from the User Soils dialog (left sidelist). Once the soil data is displayed, click the Add New (Modify)button.A modified dialog box will appear with all the data fields filled (copiedfrom the previous selected soil data) except the soil name (Screen1.1.11).Screen 1.1.11Enter a new soil name and modify the other data fields. Click Save tostore the modified soil data.3.To delete a soil data set, select the name of the soil to be deleted fromthe User Soils dialog (left side). Once the soil data are displayed, clickthe Delete button.A prompt box will appear asking you to verify the deletion (Screen 1.1.12).Screen 1.1.12Click Yes to continue with the deletion. Click No to quit without deleting. To exit the editing session of the User Soils database click Exit from the User Soils dialog.1.2 User Weather Stations Database EditorThe User Weather Stations Database Editor is used to update the database of SWAT custom weather generator parameters: data are entered in this database for weather stations that are not in the US database included in BASINS. Detailed definitions of the variables listed under each command can be found in the Soil and Water Assessment Tool User's Manual, Version 2000see the section covering the 'Weather Input File' (Chapter 34, Par. 34.1).From the SWAT Database Editors dialog, double click the User Weather Stations item (Screen 1.2.1).Screen 1.2.1The User Weather Stations dialog is displayed to start the editing session (Screen 1.2.2).Screen 1.2.2A list of stations in the custom database is shown on the left side of the dialog. The user has three options: edit an existing station data set, add a new station data set, or delete a station data set.1.To edit an existing station data set, click the name of the station on thestations list. The data for the station will be loaded and displayed (Screen1.2.3).Screen 1.2.3Note:If the cursor is placed on top of any text box or button, a short help description (yellow label) appears; for parameters the range of variation is shown. A complete description of the parameters is provided in the Soil and Water Assessment Tool User's Manual, Version 2000, see the section covering the Weather Input File (Chapter 34, Par. 34.1).The data are separated into two groups: the first group consists of single parameters (see top right of the dialog) while variables summarized by month are listed in the box labeled 'Monthly parameters.' The data fields for the monthly parameters can be accessed by clicking the buttons to the left of the variable names (Screen 1.2.4).Screen 1.2.4Activate the parameter box by clicking on it. Enter and/or edit the text value. You can move to the next parameter by pressing the TAB key. If the current value of the parameter is out of range a message box like the one on screen 1.2.5 pops up.Screen 1.2.5Click OK: the parameter is reset to the original value or to the closest range limit.Once all editing changes have been made, click Exit.If changes have been made, a prompt dialog may pop up (Screen 1.2.6).Screen 1.2.6A dialog pops up (Screen 1.2.7).Screen 1.2.7Click No to return to editing and correct the values. Click Yes to continue,a new dialog pops up (Screen 1.2.8).Screen 1.2.8Click Yes to save the changes. Click No to proceed without saving.2.To add a new station data set to the database, the user has 3 options: enterthe parameters in a default form, load the data from a formatted SWAT Soil inputfile, or copy the data from an existing soil data set in the database.a.To add a new station using a default form, click the Add New buttonin the User Weather Stations dialog.A modified dialog with default values for the soil profile will pop up(Screen 1.2.9). The values are the minimum in the respective allowedrange.Screen 1.2.9Click the Cancel button to exit the session.To complete the adding session type the name of the new station and editthe other parameters.Once finished, click the Save button to store the new station dataset.This returns you to the original User Weather Stations dialog. The listof stations in the database will now include the name of the just addedstation.b.To load stations data from a formatted SWAT input file, click the Load (.Wgn)button.A message pops up (Screen 1.2.10) warning you to use a correctlyformatted .wgn file (see SWAT User's Manual).Screen 1.2.10To quit the load operation, click No. To proceed with the loading clickYes, a browser will be displayed (Screen 1.2.11).Screen 1.2.11Select the station input file (.wgn) to be loaded and click OK(or doubleclick the selection). The station data will fill the fields in the UserWeather Stations dialog. Click the Save button to store the new data setor click Cancel to exit the session.c.To add a new station by modifying an existing station data set, selectthe name of the station to be copied from the User Weather Stations dialogbox (left side list).Once the station data are displayed, click the Add New (Modify)button.A modified dialog box will appear with all the data fields filled (copiedfrom the previous selected station data) except the station name (Screen1.2.12).Screen 1.2.12Enter a new station name and modify the other data fields. Click Saveto store the modified station data.3.To delete a station data set, select the name of the station to be deleted from the User Weather Stations dialog (left side).Once the station data are displayed, click the Delete button.A prompt box will appear asking you to verify the request (Screen 1.2.13).Screen 1.2.13Click No to quit the deletion Click Yes to continue with the deletion.To exit the editing session of the User Weather database click Exit from the User Weather Stations dialog.1.3 Land Cover/Plant Growth Database EditorThe Land Cover/Plant Growth Database Editor is used to update the database of SWAT parameters: new data sets can be entered when using land use map classes with no link to the current Land Cover/Plant Growth Database or when the current parameters need to be updated. The detailed definition of the parameters can be found in the Soil and Water Assessment Tool User's Manual, Version 2000, see the section covering the Land Cover/Plant Growth Database File (Chapter 42, Par. 42.1).From the SWAT Database Editors dialog, double click the Land Cover/Plant Growth item (Screen 1.3.1).Screen 1.3.1When this editor is selected, the Land Cover/Plant Growth database dialog is displayed to start the editing session (Screen 1.3.2),Screen 1.3.2A list of Land Cover/Plant (LCP) data sets in the custom database is shown on the left side. The user has three options: edit an existing LCP data set, add a new LCP data set, or delete a LCP data set:1.To edit an existing LCP data set, click the name of the LCP to be edited onthe LCP list. The data for the LCP will be loaded and displayed (Screen 1.3.3).Screen 1.3.3Note:If the cursor is placed on top of any text box or button, a short help description (yellow label) appears; for parameters the range of variation is shown. A complete description of the parameters is provided in the Soil and Water Assessment Tool User's Manual, Version 2000, see the section covering the Land Cover/Plant Growth Database (Chapter 42, Par.42.1).Activate the parameter text box by clicking on it. Enter or edit the text value. You can move to the next parameter text box by pressing the TAB key. If the current value of the parameter is out of range a message box like the one on screen 1.3.4, pops up.Screen 1.3.4Click OK: the parameter is reset to the original value or to the closest range limit.Once all editing changes have been made, click Exit.If changes have been made, a prompt dialog pops up (Screen 1.3.5).Screen 1.3.5Click Yes to save the changes. Click No to proceed without saving.2.To add a LCP data set to the database, the user has 2 options: enteringparameters in a default data set or copying data from an existing LCP data set in the database.a.To add a new LCP data set using a default form, click the Add Newbutton in the Land Cover/Plant Growth database dialog.A modified dialog with default values for the LCP data will pop up (Screen1.3.6). The values are the minimum in the respective allowed range.Screen 1.3.6Click the Cancel button to exit the adding session.To complete the session type the name of the new LCP and the other parameters.Once the finished, click the Save button to store the new LCP data set.This returns you to the original Land Cover/Plant Growth Database dialog.The list of LCPs in the database will now include the name of the just added LCP.b.To add a new LCP by modifying an existing LCP data set, select the nameof the LCP to be copied from the list in the dialog (left side list).Once the LCP data are displayed, click the Add New (Modify) button.A dialog box will appear with all the deletion request (copied from theprevious selected LCP data) except the LCP name (Screen 1.3.7).Screen 1.3.7Enter a new LCP name and modify the other data fields. Click Save to storethe modified LCP data.3. To delete a LCP data set, select the name of the LCP to be deleted from the Land Cover/Plant Growth Database dialog (left side).Once the LCP data are displayed, click the Delete button. A prompt box will appear asking you to verify deletion request (Screen 1.3.8)Screen 1.3.8Click Yes to continue with the deletion. Click No to quit the deletion. Note: Only the new Land Cover/Plant Growth data sets entered by the User canbe removed from the database. The user can not remove the data sets thatare included with BASINS but can modify the parameters and/or restorethe default values (see below).The default growth parameters for the land cover types provided with theinterface are stored and can be recovered at any time. This operation may be performed only for land covers provided with the interface. This operation eliminates all changes made to the growth parameters by the user.a.Click the name of the default land cover/plant to be recovered.b.Click the Default button at the bottom of the dialog box.c. A prompt box will appear (Screen 1.3.9), allowing you to continueor abort the recovery process. To continue click Yes. To abort click No.Screen 1.3.9To exit the editing session of the Land Cover/Plant Growth database click Exitfrom the Land Cover/Plant Growth database dialog.Notes:1. A entry dialog pops up (Screen 1.3.10) when exiting the session or clickingthe CN-OVN button in editing.Screen 1.3.10This dialog allows you to enter the values for the SCS Curve Number and the overland Manning's number.Click the SCS Runoff Curve Table button to open a reference table (Screen1.3.11).Screen 1.3.11Click OK, the Curve Number values are reported to the entry dialog.In the same way, click the Factor 'n' Table button to open a reference table (Screen 1.3.12).Screen 1.3.12Click OK, the Manning's number value is reported to the entry dialog.Click OK to save the current values in the main dialog.2.Check the "Crop Is Fertilized" box if the current "Land Cover/Plant Growth"entry is about a crop used to be fertilized.1.4 Fertilizer Database EditorThe Fertilizer Editor is used to update the database storing the respective SWAT parameters: new data sets can be entered when using agricultural management practices involving fertilizers not included in the current Fertilizer database or when the current parameters need to be updated. The detailed definitions of the parameters can be found in the Soil and Water Assessment Tool User's Manual, Version 2000, see Chapter 42, Par. 42.4.From the SWAT Database Editors dialog, double click the Fertilizer item (Screen 1.4.1).Screen 1.4.1When this editor is selected the Fertilizer database dialog is displayed to start the editing session (Screen 1.4.2).Screen 1.4.2A list of fertilizers is shown on the left side. The user has three options: edit an existing fertilizer data set, add a new fertilizer data set, or delete a fertilizer data set:1.To edit an existing fertilizer data set, click the name of the fertilizer tobe edited. The data for the fertilizer will be loaded and displayed (Screen1.4.3).Screen 1.4.3Note:If the cursor is placed on top of any text box or button, a short help description (yellow label) appears; for parameters the range of variation is shown. A complete description of the parameters is provided in the Soil and Water Assessment Tool User's Manual, Version 2000, see the section covering the Fertilizer Database File (Chapter 42, Par. 42.4).Activate the parameter box by clicking on it. Enter or edit the text value. You can pass to the next parameter by pressing the TAB key. If the current value of the parameter box is out of range a message box like the one on screen 1.4.4, pops up.Screen 1.4.4Click OK: the parameter reset back to the original value or to the closest range limit.Once all editing changes have been made, click Exit.If changes have been made, a prompt dialog pops up (Screen 1.4.5).。