Python3中urllib详细使用方法_光环大数据Python培训
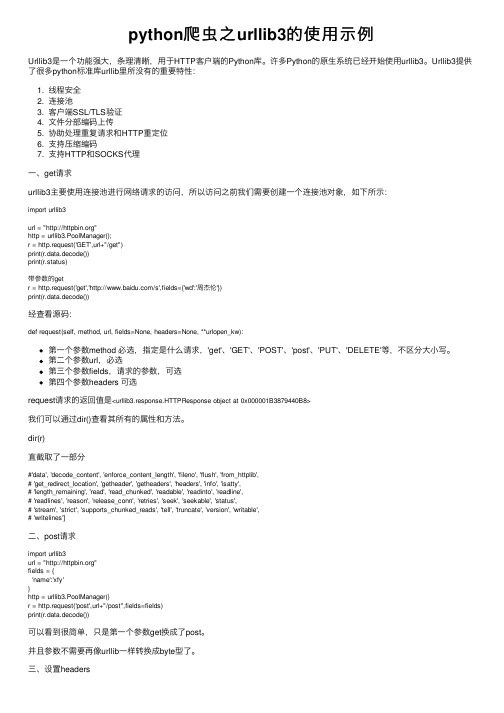
python爬虫之urllib3的使用示例

python爬⾍之urllib3的使⽤⽰例Urllib3是⼀个功能强⼤,条理清晰,⽤于HTTP客户端的Python库。
许多Python的原⽣系统已经开始使⽤urllib3。
Urllib3提供了很多python标准库urllib⾥所没有的重要特性:1. 线程安全2. 连接池3. 客户端SSL/TLS验证4. ⽂件分部编码上传5. 协助处理重复请求和HTTP重定位6. ⽀持压缩编码7. ⽀持HTTP和SOCKS代理⼀、get请求urllib3主要使⽤连接池进⾏⽹络请求的访问,所以访问之前我们需要创建⼀个连接池对象,如下所⽰:import urllib3url = ""http = urllib3.PoolManager();r = http.request('GET',url+"/get")print(r.data.decode())print(r.status)带参数的getr = http.request('get','/s',fields={'wd':'周杰伦'})print(r.data.decode())经查看源码:def request(self, method, url, fields=None, headers=None, **urlopen_kw):第⼀个参数method 必选,指定是什么请求,'get'、'GET'、'POST'、'post'、'PUT'、'DELETE'等,不区分⼤⼩写。
第⼆个参数url,必选第三个参数fields,请求的参数,可选第四个参数headers 可选request请求的返回值是<urllib3.response.HTTPResponse object at 0x000001B3879440B8>我们可以通过dir()查看其所有的属性和⽅法。
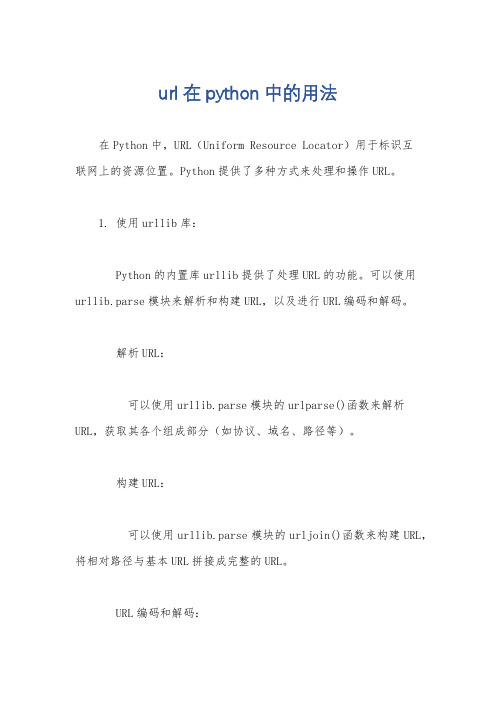
url在python中的用法

url在python中的用法在Python中,URL(Uniform Resource Locator)用于标识互联网上的资源位置。
Python提供了多种方式来处理和操作URL。
1. 使用urllib库:Python的内置库urllib提供了处理URL的功能。
可以使用urllib.parse模块来解析和构建URL,以及进行URL编码和解码。
解析URL:可以使用urllib.parse模块的urlparse()函数来解析URL,获取其各个组成部分(如协议、域名、路径等)。
构建URL:可以使用urllib.parse模块的urljoin()函数来构建URL,将相对路径与基本URL拼接成完整的URL。
URL编码和解码:可以使用urllib.parse模块的quote()函数进行URL编码,将特殊字符转换为%xx的形式;使用unquote()函数进行URL解码,将%xx形式的字符还原为特殊字符。
发送HTTP请求:可以使用urllib.request模块发送HTTP请求,获取URL对应的内容。
2. 使用requests库:requests是一个功能强大的第三方库,用于发送HTTP请求。
它提供了更简洁和方便的API,可以轻松处理URL相关的操作。
发送GET请求:使用requests.get()函数发送GET请求,获取URL对应的内容。
发送POST请求:使用requests.post()函数发送POST请求,向URL提交数据。
处理URL参数:可以使用requests库的params参数来传递URL参数,或使用params参数传递一个字典来构建URL参数。
处理URL路径:可以使用requests库的url参数来指定URL路径。
处理请求头:可以使用requests库的headers参数来设置请求头信息。
处理响应:请求返回的响应可以通过requests库提供的方法来获取响应头、响应内容等信息。
3. 使用其他第三方库:除了上述两个库,还有其他第三方库也提供了处理URL的功能,如httplib2、treq等。
Python3中使用urllib的方法详解(header,代理,超时,认证,异常处理)

Python3中使⽤urllib的⽅法详解(header,代理,超时,认证,异常处理)我们可以利⽤urllib来抓取远程的数据进⾏保存哦,以下是python3 抓取⽹页资源的多种⽅法,有需要的可以参考借鉴。
1、最简单import urllib.requestresponse = urllib.request.urlopen('/')html = response.read()2、使⽤ Requestimport urllib.requestreq = urllib.request.Request('/')response = urllib.request.urlopen(req)the_page = response.read()3、发送数据#! /usr/bin/env python3import urllib.parseimport urllib.requesturl = 'http://localhost/login.php'user_agent = 'Mozilla/4.0 (compatible; MSIE 5.5; Windows NT)'values = {'act' : 'login','login[email]' : 'yzhang@','login[password]' : '123456'}data = urllib.parse.urlencode(values)req = urllib.request.Request(url, data)req.add_header('Referer', '/')response = urllib.request.urlopen(req)the_page = response.read()print(the_page.decode("utf8"))4、发送数据和header#! /usr/bin/env python3import urllib.parseimport urllib.requesturl = 'http://localhost/login.php'user_agent = 'Mozilla/4.0 (compatible; MSIE 5.5; Windows NT)'values = {'act' : 'login','login[email]' : 'yzhang@','login[password]' : '123456'}headers = { 'User-Agent' : user_agent }data = urllib.parse.urlencode(values)req = urllib.request.Request(url, data, headers)response = urllib.request.urlopen(req)the_page = response.read()print(the_page.decode("utf8"))5、http 错误#! /usr/bin/env python3import urllib.requestreq = urllib.request.Request('https:// ')try:urllib.request.urlopen(req)except urllib.error.HTTPError as e:print(e.code)print(e.read().decode("utf8"))6、异常处理1#! /usr/bin/env python3from urllib.request import Request, urlopenfrom urllib.error import URLError, HTTPErrorreq = Request("https:// /")try:response = urlopen(req)except HTTPError as e:print('The server couldn't fulfill the request.')print('Error code: ', e.code)except URLError as e:print('We failed to reach a server.')print('Reason: ', e.reason)else:print("good!")print(response.read().decode("utf8"))7、异常处理2#! /usr/bin/env python3from urllib.request import Request, urlopenfrom urllib.error import URLErrorreq = Request("https:// /")try:response = urlopen(req)except URLError as e:if hasattr(e, 'reason'):print('We failed to reach a server.')print('Reason: ', e.reason)elif hasattr(e, 'code'):print('The server couldn't fulfill the request.')print('Error code: ', e.code)else:print("good!")print(response.read().decode("utf8"))8、HTTP 认证#! /usr/bin/env python3import urllib.request# create a password managerpassword_mgr = urllib.request.HTTPPasswordMgrWithDefaultRealm() # Add the username and password.# If we knew the realm, we could use it instead of None.top_level_url = "https:// /"password_mgr.add_password(None, top_level_url, 'rekfan', 'xxxxxx') handler = urllib.request.HTTPBasicAuthHandler(password_mgr)# create "opener" (OpenerDirector instance)opener = urllib.request.build_opener(handler)# use the opener to fetch a URLa_url = "https:// /"x = opener.open(a_url)print(x.read())# Install the opener.# Now all calls to urllib.request.urlopen use our opener.urllib.request.install_opener(opener)a = urllib.request.urlopen(a_url).read().decode('utf8')print(a)9、使⽤代理#! /usr/bin/env python3import urllib.requestproxy_support = urllib.request.ProxyHandler({'sock5': 'localhost:1080'}) opener = urllib.request.build_opener(proxy_support)urllib.request.install_opener(opener)a = urllib.request.urlopen("https:// ").read().decode("utf8") print(a)10、超时#! /usr/bin/env python3import socketimport urllib.request# timeout in secondstimeout = 2socket.setdefaulttimeout(timeout)# this call to urllib.request.urlopen now uses the default timeout# we have set in the socket modulereq = urllib.request.Request('https:// /')a = urllib.request.urlopen(req).read()print(a)总结以上就是这篇⽂章的全部内容,希望本⽂的内容对⼤家学习或使⽤python能有所帮助,如果有疑问⼤家可以留⾔交流。
光环大数据培训用三个案例透析大数据思维的核心

光环大数据培训用三个案例透析大数据思维的核心光环大数据培训机构了解到,逻辑推理能力是人类特有的本领,给出原因,我们能够通过逻辑推理得到结果。
在过去,我们一直非常强调因果关系,一方面是因为我们常常是先有原因,再有结果,另一方面是因为如果我们找不出原因,常常会觉得结果不是非常可信。
而大数据时代,大数据思维要求我们从探求因果联系到探索强相关关系。
以下三个案例分别来自药品研发、司法判决与广告投放,从三个不同的角度了解大数据思维的核心。
大数据与药品研发:寻找特效药的方法比如在过去,现代医学里新药的研制,就是典型的利用因果关系解决问题的例子。
青霉素的发明过程就非常具有代表性。
首先,在19世纪中期,奥匈帝国的塞麦尔维斯(Ignaz Philipp Semmelweis,1818—1865)a、法国的巴斯德等人发现微生物细菌会导致很多疾病,因此人们很容易想到杀死细菌就能治好疾病,这就是因果关系。
不过,后来弗莱明等人发现,把消毒剂涂抹在伤员伤口上并不管用,因此就要寻找能够从人体内杀菌的物质。
最终在1928年弗莱明发现了青霉素,但是他不知道青霉素杀菌的原理。
而牛津大学的科学家钱恩和亚伯拉罕搞清楚了青霉素中的一种物质—青霉烷—能够破坏细菌的细胞壁,才算搞清楚青霉素有效性的原因,到这时青霉素治疗疾病的因果关系才算完全找到,这时已经是1943年,离赛麦尔维斯发现细菌致病已经过去近一个世纪。
两年之后,女科学家多萝西·霍奇金(Dorothy Hodgkin)搞清楚了青霉烷的分子结构,并因此获得了诺贝尔奖,这样到了1957年终于可以人工合成青霉素。
当然,搞清楚青霉烷的分子结构,有利于人类通过改进它来发明新的抗生素,亚伯拉罕就因此而发明了头孢类抗生素。
在整个青霉素和其他抗生素的发明过程中,人类就是不断地分析原因,然后寻找答案(结果)。
当然,通过这种因果关系找到的答案非常让人信服。
其他新药的研制过程和青霉素很类似,科学家们通常需要分析疾病产生的原因,寻找能够消除这些原因的物质,然后合成新药。
urllib、urllib2、urllib3、request的详细区别

urllib、urllib2、urllib3、request的详细区别1、在python2.x版本中有 urllib库和 urllib2库;在python3.x版本中把 urllib库和urllib2 合成为⼀个 urllib库;urllib3库是在python3.x版本中新增的第三⽅扩展库。
2、urllib2 是python2.x的http访问库,是python内置标准库;urllib库同样是python的内置标准库;3、requests 是第三⽅http访问库,需要安装。
requests 友好度⾼⼀些,推荐使⽤ requests。
4、urllib3 是⼀个基于python3.x版本的功能强⼤,友好的HTTP访问库。
越来越多的python应⽤开始采⽤ urllib3库。
它提供了很多python标准库中没有的重要功能。
5、在python3.x版本中,urllib2 模块已经不在单独存在(也就是说当在程序中import urllib2 时,系统提⽰你没这个模块,会报错),urllib2被合并到了urllib中,叫做urllib.request 和 urllib.error 。
6、urllib库是⼀个⽤来处理⽹络请求的python标准库,它包含4个模块。
①urllib.request---请求模块,⽤于发起⽹络请求②urllib.parse---解析模块,⽤于解析URL:详见:③urllib.error---异常处理模块,⽤于处理request引起的异常④urllib.robotparser robots.tx---⽤于解析robots.txt⽂件⼩结:urllib、urllib2、urllib3库均能通过⽹络访问互联⽹上的资源⽂件,它们通过使⽤统⼀资源定位符(URL)并结合re模块完成很多意想不到的操作。
① urllib:Python2和Python3内置的⽹络请求库,Python3的 urllib库实际是Python2版本中 urllib2库和 urllib库的合并② urllib2:它只存在于Python2版本的内置库中,功能与urllib基本类似,主要上为 urllib库的增强③ urllib3:Python2和Python3均可以使⽤,但不是标准库,需要使⽤pip安装使⽤,urllib3提供了线程安全池和⽂件post等。
Python3直接爬取图片URL并保存示例

Python3直接爬取图⽚URL并保存⽰例有时候我们会需要从⽹络上爬取⼀些图⽚,来满⾜我们形形⾊⾊直⾄不可描述的需求。
⼀个典型的简单爬⾍项⽬步骤包括两步:获取⽹页地址和提取保存数据。
这⾥是⼀个简单的从图⽚url收集图⽚的例⼦,可以成为⼀个⼩⼩的开始。
获取地址这些图⽚的URL可能是连续变化的,如从001递增到099,这种情况可以在程序中将共同的前⾯部分截取,再在最后递增并字符串化后循环即可。
抑或是它们的URL都保存在某个⽂件中,这时可以读取到列表中:def getUrls(path):urls = []with open(path,'r') as f:for line in f:urls.append(line.strip('\n'))return(urls)保存图⽚在python3中,urllib提供了⼀系列⽤于操作URL的功能,其中的request模块可以⾮常⽅便地抓取URL内容,也就是发送⼀个GET请求到指定的页⾯,然后返回HTTP的响应。
具体细节请看注释:def requestImg(url, name, num_retries=3):img_src = url# print(img_src)header = {'User-Agent': 'Mozilla/5.0 (Windows NT 6.1; WOW64) \AppleWebKit/537.36 (KHTML, like Gecko) \Chrome/35.0.1916.114 Safari/537.36','Cookie': 'AspxAutoDetectCookieSupport=1'}# Request类可以使⽤给定的header访问URLreq = urllib.request.Request(url=img_src, headers=header)try:response = urllib.request.urlopen(req) # 得到访问的⽹址filename = name + '.jpg'with open(filename, "wb") as f:content = response.read() # 获得图⽚f.write(content) # 保存图⽚response.close()except HTTPError as e: # HTTP响应异常处理print(e.reason)except URLError as e: # ⼀定要放到HTTPError之后,因为它包含了前者print(e.reason)except IncompleteRead or RemoteDisconnected as e:if num_retries == 0: # 重连机制returnelse:requestImg(url, name, num_retries-1)其他捕获异常以下是批量爬取⽹页时可能需要捕获的异常,同时可以看出,urllib2库对应urllib库,⽽httplib库对应http.client:Python2Pyhton3urllib2.HTTPError urllib.error.HTTPErrorurllib2.URLError urllib.error.URLError (HTTPError被包含其中)httplib.IncompleteRead http.client.IncompleteRead httplib.RemoteDisconnected http.client.RemoteDisconnected重连机制在函数参数中设置⼀个参数num_retries并对其进⾏初始化,即默认参数。
urllib3 用法

urllib3 用法urllib3 用法1. 概述urllib3是一个功能强大的Python HTTP库,它提供了多种高级特性,包括连接池、请求重试、SSL验证等。
在Python /及更高版本中,urllib3已经作为Python标准库的一部分。
2. 安装使用pip命令可以轻松安装urllib3,命令如下:pip install urllib33. 导入库在使用urllib3之前,需要先导入库。
导入urllib3的方式如下:import urllib34. 创建连接池urllib3的一个主要特性是连接池。
连接池可以复用HTTP连接,提高请求的性能。
通过以下代码可以创建一个连接池:http = ()5. 发送GET请求使用连接池创建一个GET请求非常简单。
通过调用连接池的request()方法,并指定请求的方法(GET/POST/PUT/DELETE)、URL和其他选项,即可发送请求并获取响应。
示例代码如下:response = ('GET', 'print()print()6. 发送POST请求发送POST请求也非常简单。
除了请求方法('POST')和URL之外,还需要指定请求的body数据。
下面是一个发送POST请求的示例:data = {'key1': 'value1', 'key2': 'value2'}response = ('POST', ' fields=data)print()print()7. 请求重试urllib3提供了请求重试的功能,可以在请求失败时自动重试一定次数。
通过设置retries参数,可以指定重试次数。
下面的示例演示了如何使用请求重试:retry = (total=3, backoff_factor=)http = (retries=retry)response = ('GET', '8. SSL验证urllib3默认会验证SSL证书,确保连接的安全性。
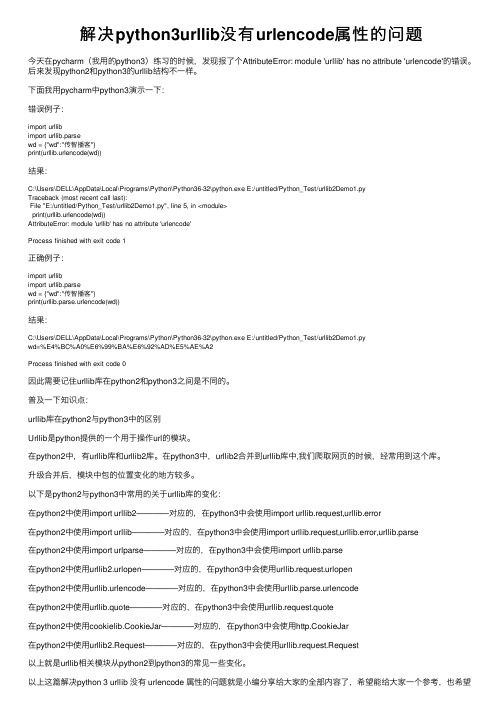
解决python3urllib没有urlencode属性的问题

解决python3urllib没有urlencode属性的问题今天在pycharm(我⽤的python3)练习的时候,发现报了个AttributeError: module 'urllib' has no attribute 'urlencode'的错误。
后来发现python2和python3的urllib结构不⼀样。
下⾯我⽤pycharm中python3演⽰⼀下:错误例⼦:import urllibimport urllib.parsewd = {"wd":"传智播客"}print(urllib.urlencode(wd))结果:C:\Users\DELL\AppData\Local\Programs\Python\Python36-32\python.exe E:/untitled/Python_Test/urllib2Demo1.pyTraceback (most recent call last):File "E:/untitled/Python_Test/urllib2Demo1.py", line 5, in <module>print(urllib.urlencode(wd))AttributeError: module 'urllib' has no attribute 'urlencode'Process finished with exit code 1正确例⼦:import urllibimport urllib.parsewd = {"wd":"传智播客"}print(urllib.parse.urlencode(wd))结果:C:\Users\DELL\AppData\Local\Programs\Python\Python36-32\python.exe E:/untitled/Python_Test/urllib2Demo1.pywd=%E4%BC%A0%E6%99%BA%E6%92%AD%E5%AE%A2Process finished with exit code 0因此需要记住urllib库在python2和python3之间是不同的。
- 1、下载文档前请自行甄别文档内容的完整性,平台不提供额外的编辑、内容补充、找答案等附加服务。
- 2、"仅部分预览"的文档,不可在线预览部分如存在完整性等问题,可反馈申请退款(可完整预览的文档不适用该条件!)。
- 3、如文档侵犯您的权益,请联系客服反馈,我们会尽快为您处理(人工客服工作时间:9:00-18:30)。
Python3中urllib详细使用方法_光环大数据Python培训python3 抓取网页资源的 N 种方法1、最简单import urllib.requestresponse = urllib.request.urlopen(‘/’)html = response.read()2、使用 Requestimport urllib.requestreq = urllib.request.Request(‘/’)response = urllib.request.urlopen(req)the_page = response.read()3、发送数据#! /usr/bin/env python3import urllib.parseimport urllib.requesturl = ‘http://localhost/login.php’user_agent = ‘Mozilla/4.0 (compatible; MSIE 5.5; Windows NT)’values = {‘act’ : ‘login’,‘login[email]’ : ‘yzhang@’,‘login[password]’ : ‘123456’}data = urllib.parse.urlencode(values)req = urllib.request.Request(url, data)req.add_header(‘Referer’, ‘/’)response = urllib.request.urlopen(req)the_page = response.read()print(the_page.decode(“utf8”))4、发送数据和header#! /usr/bin/env python3import urllib.parseimport urllib.requesturl = ‘http://localhost/login.php’user_agent = ‘Mozilla/4.0 (compatible; MSIE 5.5; Windows NT)’values = {‘act’ : ‘login’,‘login[email]’ : ‘yzhang@’,‘login[password]’ : ‘123456’}headers = { ‘User-Agent’ : user_agent }data = urllib.parse.urlencode(values)req = urllib.request.Request(url, data, headers)response = urllib.request.urlopen(req)the_page = response.read()print(the_page.decode(“utf8”))5、http 错误#! /usr/bin/env python3import urllib.requestreq = urlli b.request.Request(‘ ‘) try:urllib.request.urlopen(req)except urllib.error.HTTPError as e:print(e.code)print(e.read().decode(“utf8”))6、异常处理1#! /usr/bin/env python3from urllib.request import Request, urlopenfrom urllib.error import URLError, HTTPErrorreq = Request(“ /”)try:response = urlopen(req)except HTTPError as e:print(‘The server couldn’t fulfill the request.’) print(‘Error code: ‘, e.code)except URLError as e:print(‘We failed to reach a server.’)print(‘Reason: ‘, e.reason)else:print(“good!”)print(response.read().decode(“utf8”))7、异常处理2#! /usr/bin/env python3from urllib.request import Request, urlopenfrom urllib.error import URLErrorreq = Request(“ /”)try:response = urlopen(req)except URLError as e:if hasattr(e, ‘reason’):print(‘We failed to reach a server.’)print(‘Reason: ‘, e.reason)elif hasattr(e, ‘code’):print(‘The server couldn’t fulfill the request.’)print(‘Error code: ‘, e.code)else:print(“good!”)print(response.read().decode(“utf8”))8、HTTP 认证#! /usr/bin/env python3import urllib.request# create a password managerpassword_mgr = urllib.request.HTTPPasswordMgrWithDefaultRealm()# Add the username and password.# If we knew the realm, we could use it instead of None.top_level_url = “https:// /”password_mgr.add_password(None, top_level_url, ‘rekfan’, ‘xxxxxx’)handler = urllib.request.HTTPBasicAuthHandler(password_mgr)# create “opener” (OpenerDirector insta nce)opener = urllib.request.build_opener(handler)# use the opener to fetch a URLa_url = “https:// /”x = opener.open(a_url)print(x.read())# Install the opener.# Now all calls to urllib.request.urlopen use our opener.urllib.request.install_opener(opener)a = urllib.request.urlopen(a_url).read().decode(‘utf8’)print(a)9、使用代理#! /usr/bin/env python3import urllib.requestproxy_support = urllib.request.ProxyHandler({‘sock5’: ‘localhost:1080’})opener = urllib.request.build_opener(proxy_support)urllib.request.install_opener(opener)a = urllib.request.urlopen(“ “).read().decode(“utf8”)print(a)10、超时#! /usr/bin/env python3import socketimport urllib.request# timeout in secondstimeout = 2socket.setdefaulttimeout(timeout)# this call to urllib.request.urlopen now uses the default timeout # we have set in the socket modulereq = urllib.request.Request(‘ /’)a = urllib.request.urlopen(req).read()print(a)为什么大家选择光环大数据!大数据培训、人工智能培训、Python培训、大数据培训机构、大数据培训班、数据分析培训、大数据可视化培训,就选光环大数据!光环大数据,聘请大数据领域具有多年经验的讲师,提高教学的整体质量与教学水准。
讲师团及时掌握时代的技术,将时新的技能融入教学中,让学生所学知识顺应时代所需。
通过深入浅出、通俗易懂的教学方式,指导学生较快的掌握技能知识,帮助莘莘学子实现就业梦想。
光环大数据启动了推进人工智能人才发展的“AI智客计划”。
光环大数据专注国内大数据和人工智能培训,将在人工智能和大数据领域深度合作。
未来三年,光环大数据将联合国内百所大学,通过“AI智客计划”,共同推动人工智能产业人才生态建设,培养和认证5-10万名AI大数据领域的人才。
参加“AI智客计划”,享2000元助学金!【报名方式、详情咨询】光环大数据网站报名:手机报名链接:http:// /mobile/。
