datastudio中文手册
S3C2410中文手册第1章_产品综述
UART................................................................................................................................................ 4 DMA控制器 .....................................................................................................................................5 A/D转换和触摸屏接口 ...................................................................................................................5 LCD控制器STN LCD显示特性 ......................................................................................................5 TFT彩色显示屏 ............................................................................................................................... 5 看门狗定时器.................................................................................................................................. 5 IIC总线接口 ....................................................................................................................................6 IIS总线接口 .....................................................................................................................................6 USB主设备 ......................................................................................................................................6 SD主机接口 ..................................................................................................................................... 6 SPI接口 ............................................................................................................................................ 6 工作电压.......................................................................................................................................... 7 操作频率.......................................................................................................................................... 7 封装.................................................................................................................................................. 7 1.2 内部结构图....................................................................................................................................8 表 1-1 272-FBGA 引脚分配及顺序..........................................................................................9 表 1-2 272-FBGA封装的引脚分配..........................................................................................12 信号描述........................................................................................................................................ 21 表 1-3 S3C2410A信号描述.........................................................................................................21 表 1-4 S3C2410A 专用寄存器...................................................................................................25
Dataload 4.2.0汉化版应用手册(ERP部份)
Data load 4.2.0汉化版应用手册(ERP部份)在数据录入实施过程当中,静态数据录入会占用大量的时间,如何压缩静态数据的录入时间,如何让实施的项目尽快提交,达到快速实施、快速结束的目的。
一、Data load工具介绍Data load导入工具的导入原理类似于软件档案的录入界面,Excel格式同时打开,两边做不断的复制、粘贴。
它可以将重复的键盘、鼠标操作按预定命令编成一模板,通过此软件向第二方软件发出敲击键盘或点击鼠标的指令,从而达到本来需要手动的操作让计算机自动完成的目的。
Data load软件就是一款键盘鼠标工具软件。
Data load工具可以进行数据的导入,其有几大优点:1、安全性:由于静态档案是从软件的界面进行导入的,所以在导入的过程就完成了一定的数据校验,比在档案在数据库中导入更安全,不我是谁2、我是谁3、我是谁4、我是谁易出问题5、灵活性:由于该工具设置简单,基本上在做档案导入时,我是谁6、我是谁7、我是谁8、我是谁不论档案之间差别有多大,都能很快设置好,有的导入设置几分钟就可以。
9、可交付性:由于该档案非常易用,在做实施过程中,完全可以教会上游岗位,由上游岗位来完成,这样减轻了我们的工作压力,从而我们可以做更多有效率的工作。
二、Data load 4.2.0的安装Data load 4.2.0汉化版是一款免安安装的绿色软件,只要将压缩包解压至硬盘某一根目录下即可使用,创建快捷方式至桌面以方便使用。
三、 Data load 功能界面推荐:先在Excel中编辑好模板再复制过来。
执行导入命令编辑列名,可以自由设定(双击)四、ERP常用键介绍Enter—确定/打开/完成Tab —进格F11 —查询Ctrl+F11 —执行查询F4 —取消/退出↓—向下(换行)→—改变选定项目Ctrl+S —保存Alt + F—激活ERP界面“文件”菜单Alt + E —激活ERP界面“编辑”菜单Alt + V —激活ERP界面“查看”菜单Alt + L —激活ERP界面“文件夹”菜单Alt + T —激活ERP界面“工具”菜单五、Data load对应ERP的常用键的命令Enter—ENT Tab —TABF11 —*QE Ctrl+F11 —*QR↓—*DN →—*RTCtrl+S —*SA VE六、其它非常用键介绍命令名称设置格式命令效果DELETELE \{DELETE 10} 键盘DEL效果BACKSPACE \{BACKSPACE} 键盘BKSP效果*ML() *ML(坐标) 左键单击*MR() *MR(坐标) 右键单击*DL() *DL(坐标) 左键双击*DR() *DR(坐标) 右键双击*SL *SLn 停留n秒七、Data load命令的设置规则、命令名称编辑以及命令新增方法Data load提供自由开放的命令编辑,按相关命令设置规则就可以随意更改和新增命令。
DataDomian630配置手册--威创

DataDomain630实施文档版权说明本文件中出现的任何文字叙述、文档格式、插图、照片、方法、过程等内容,除另有特别注明,版权均属美国EMC公司所有,受到有关产权及版权法保护。
任何个人、机构未经美国EMC公司的书面授权许可,不得复制、引用或传播本文件的任何片断,无论通过电子形式或非电子形式。
目录1DATADOMIAN设备初始化 (1)1.1硬件初始化 (1)1.2OS初始化配置 (1)2DATADOMAIN OS升级 (4)3创建VTL虚拟带库 (6)4在光纤交换机上配置ZONE (12)5设置VTL访问控制 (13)6NBU备份测试 (23)1 DataDomian设备初始化1.1 硬件初始化DataDomain630硬件初始化步骤包括如下内容:1.DataDomain630上架;2.确保DataDomain630通电3小时后再进行配置(NVRAM需要充电3小时);3.如果NVRAM充电没有3小时的后,系统将会自动关闭所有的功能(文件系统将会处于disable的状态);4.DataDomain630连接可以采用RJ232进行连接,或者是直接连接显示器和键盘进行;1.2 OS初始化配置连接DataDomain630后,按照如下的步骤进行OS的初始化:1.使用RJ232或者是直接接显示器和键盘,并登入DD630;默认为的登录用户名是sysadmin;初始密码是DataDomain机器的SN(可以在背面进行查看)2.登录进行系统后运行config setup进行配置。
注意:红色字体部分是需要进行输入和添加的部分sysadmin@DD630_mindray# config setupLicenses ConfigurationConfigure Licenses at this time (yes|no) [no]: no配置网络:Network ConfigurationConfigure Network at this time (yes|no) [no]: yesHostnameEnter the hostname for this system (fully-qualified domain name)[DD630_mindray.localdomain]: DD630.localdomainDomainnameEnter your DNS domainname[localdomain]:Ethernet port eth0aEnable Ethernet port eth0a (yes|no|?) [yes]: yesUse DHCP on Ethernet port eth0a (yes|no|?) [no]: noEnter the IP address for eth0a[10.10.10.1]: 10.1.3.102Enter the netmask for eth0a[255.0.0.0]: 255.255.255.0Ethernet port eth0bEnable Ethernet port eth1 (yes|no|?) [no]: noDefault GatewayEnter the default gateway IP address: 10.1.3.254DNS ServersEnter the DNS Server list (zero, one, two or three IP addresses): 直接回车Pending Network SettingsHostname DD630.localdomainDomain name localdomainDefault Gateway 10.1.3.254DNS Server List DNS Server ListPort Enabled Cable DHCP IP Address Netmask---- ------- ----- ---- ----------- -------------eth0a yes no no 10.1.3.102 255.255.255.0eth0b no no n/a n/a n/a---- ------- ----- ---- ----------- -------------*** No connection on configured Ethernet portDo you want to save these settings (Save|Cancel|Retry): Save(保存网络配置)Filesystem ConfigurationConfigure Filesystem at this time (yes|no) [no]: yesGlobal compression typeWill this restorer replicate to/from restorers with the old global compression type "1"? (yes|no|?) [no]: yesChange the global compression type of this filesytem for new data to "1"? (yes|no) [yes]: yesLocal compression typeWhat local compression type will this filesystem use?(none|lz|gz|gzfast) [lz]: 建议使用lz模式进行压缩Marker typeWhat marker type will this filesystem use?(none|nw1|cv1|tsm1|tsm2|eti1|hpdp1|besr1|ssrt1|ism1|auto) [auto]: 直接回车Pending Filesystem SettingsGlobal Compression Type 1Local Compression Type lzMarker type autoDo you want to save these settings (Save|Cancel|Retry): Save System ConfigurationConfigure System at this time (yes|no) [no]: yesAdmin HostEnter a hostname for administrative access to the restorer[bakserver.localdomain]: DD630.localdomainAdmin EmailEnter an email address or group alias that will receive emailfrom the restorer. The address is also used as the 'From'address in all email sent by the restorer.: china@System LocationEnter a physical location, to better identify this system.[unspecified]: 直接回车Mail ServerEnter the hostname of a mail (SMTP) server to relay email alerts.[mail]: 直接回车TimezoneEnter your timezone name.[Asia/Shanghai]: 直接回车Configure NTPEnable Network Time Service? (yes|no) [yes]: noPending System SettingsAdmin host DD630.localdomainAdmin email china@System location unspecifiedSMTP server mailTimezone Asia/ShanghaiDo you want to save these settings (Save|Cancel|Retry): Save CIFS ConfigurationConfigure CIFS at this time (yes|no) [no]:NFS ConfigurationConfigure NFS at this time (yes|no) [no]:Configuration complete.配置完成。
研华 ADAM-5510KW系列PC基于软逻辑控制器用户手册说明书

ADAM-5510KW系列PC-based 软逻辑控制器用户手册ADAM-5510KW系列PC-based 软逻辑控制器用户手册版权声明此文档的版权为研华公司所有。
研华公司保留改进本手册所描述产品时不预先通知的权力。
在取得研华公司书面同意前,任何个人或机构都不得以任何形式对本手册中任何部分进行复制、复印、翻译和传播。
本手册中的信息是准确和可靠的。
但是,研华公司不承担任何顾客在使用中的,或涉及到第三方权力的责任。
商标申明ADAM是研华公司的商标IBM 和 PC 是国际商用机器公司的商标MULTIPROG是KW-Software公司的商标第一版2004年10月目录第 1 章系统概述-------------------------------------------1-11.1绪论--------------------------------------------------1-2 1.2特征--------------------------------------------------1-2 1.2.1 支持IEC 61131-3标准的开发环境---------------------1-3 1.2.2 交叉语言编程----------------------------------------1-4 1.2.3丰富的编程和存储空间--------------------------------1-4 1.2.4实时多任务引擎--------------------------------------1-5 1.2.5预先定义功能库--------------------------------------1-5 1.2.6强大的调试 / 诊断 / 仿真/强制工具-------------------1-5 1.2.7使用标准联接-MODBUS标准接口------------------------1-6 1.2.8在线编辑和部份下载----------------------------------1-6 1.2.9 RS-232/485 通信能力---------------------------------1-6 1.2.10用于编程的内建SRAM和闪盘--------------------------1-7 1.2.11内建实时时钟和看门狗-----------------------------------1-7 1.2.12为整体解决方案提供整套I/O模块-------------------------1-8 1.2.13内建的以太网端口(仅ADAM-5510EKW/TP)--------------------1-9 1.3 ADAM-5510KW系列控制器规格-----------------------------1-9 1.3.1系统----------------------------------------------------1-9 1.3.2ADAM-5510KW的RS-232 通讯口 (COM1)--------------------1-10 1.3.3ADAM-5510EKW 和ADAM-5510EKW/TP的 RS-232/485 通讯口(COM1)-------------------------------------------------------------------------------1-10 1.3.4 RS-485 通讯口 (COM2) (对于 SCADA/HMI 软件)---------------1-10 1.3.5 RS-232/485 通讯口 (COM4) (对于远程 I/O 模块)--------------- 1-10 1.3.6 隔离--------------------------------------------------------------------------- 1-11 1.3.7 电源--------------------------------------------------------------------------- 1-11 1.3.8 机械--------------------------------------------------------------------------- 1-11 1.3.9 环境--------------------------------------------------------------------------- 1-11 1.3.10 软件规格------------------------------------------------------------------- 1-11 1.3.11 尺寸---------------------------------------------------------------- 1-11 1.3.12 LED 状态----------------------------------------------------------------- 1-121.4 限制------------------------------------------------------------------------------ 1-14 1.4.1 性能 / 速度------------------------------------------------------------------ 1-14 1.4.2远程 I/O 数量---------------------------------------------------------------. 1-14 1.4.3 存储空间--------------------------------------------------------------------...1-14 1.4.4 TCP/IP 连接----------------------------------------------------------------. 1-15 1.4.5 固件升级注意事项--------------------------------------------------------- 1-15第2章安装指南--------------------------------------------2-12.1系统需求---------------------------------------------..2-2 2.1.1主机安装需求------------------------------------------2-2 2.1.2 ADAM-5510KW 系列的需求------------------------------.. 2-2 2.1.3 I/O 模块的需求------------------------------------------------ 2-2 2.2硬件安装------------------------------------------------2-4 2.2.1 选择 I/O 模块------------------------------------------------------. 2-4 2.2.2选择电源模块---------------------------------------.2-8 2.2.3 安装主单元和模块------------------------------------------ 2-10 2.2.4 I/O 扩展槽和 I/O 通道数量------------------------------.. 2-11 2.2.5 装配--------------------------------------------------------------------- 2-12 2.2.6跳线设置和D I P开关设置---------------------------2-14 2.2.6.1 COM2 口 RS-485 控制模式设定------------------------.. 2-15 2.2.6.2 看门狗设定------------------------------------------------. 2-16 2.2.6.3 电池备份设定------------------------------------------------.. 2-16 2.2.6.4 RS-232/485 选择跳线设定---------------------------.. 2-17 2.2.6.5 DIP 开关设定------------------------------------------------------ 2-18 2.2.7 COM 针脚定义------------------------------------------.. 2-21 2.3系统配线及连接------------------------------.2-22 2.3.1 电源配线------------------------------------------------------. 2-22 2.3.2 I/O 模块配线--------------------------------------------------------- 2-23 2.3.3通讯口连接---------------------------------.2-23 2.3.3.1 MULTIPRO 编程电缆定义------------------------------------ 2-23 2.3.3.2 Modbus/RTU 从站连接电缆定义-----------------------------------.. 2-26 2.3.3.3 多节点连接主站/从站配线------------------------------ 2-28 2.3.3.4 远程I/O 配线------------------------------------------------------. 2-29 2.3.3.5编程端口维护电缆定义---------------------...2-30 2.3.4以太网连接------------------------------------------.2-31第3章快速入门-----------------------------------3-13.1I/O模块配置------------------------------------------.3-4 3.2 软件安装--------------------------------------------------- 3-8 3.3创建一个工程并测试系统------------------------3-21 第4章 Multiprog 通过以太网编程 ------------------------------ 4-14.1 配置 IP 地址------------------------------------------------ 4-2 4.2 Multiprog通过以太网编程---------------------------------------- 4-6第5章M o d b u s功能-------------------------------------5-15.1绪论------------------------------------------------------------. 5-2 5.2 Modbus/RTU 主站功能------------------------------------ 5-2 5.2.1 演示怎样通过Modbus/RTU 主站功能使用COM4连接ADAM-4015T 的例程---------------------------------------------------------------5-3 5.2.2演示怎样通过Modbus/RTU 主站功能使用COM4连接ADAM-4056S 的例程------------------------------------------------------------- 5-8 5.3 Modbus/RTU 从站功能------------------------------------ 5-11 5.3.1本地I/O点的M o d b u s地址映射---------------------.5-11 5.3.2 Modbus 地址映射---------------------------------------------.. 5-12 5.4 Modbus/TCP 服务端功能---------------------------------.. 5-17 5.5 Modbus/TCP 客户端功能------------------------------------ 5-17第 6 章ADAM-5000 功能块------------------------------------------------ 6-16.1A I功能块例程---------------------------------..6-4 6.2A O功能块例程---------------------------------6-7 6.3D I/D O功能块例程------------------------------6-10 6.4移动功能块“I N T t o M B42X X X”例程---6-14 6.5M M A,S C A L E_B I A S和S C A L E功能块例程---------------------------------------------------------------.. 6-19 6.6C A L E N D A R功能块例程---------------------6-21 附录A数据格式及I/O量程----------------------A-1附录B参考书目----------------------------------B-11 系统概述1.1 概述PC-based 软逻辑控制系统ADAM-5510KW 系列控制器是 PC-based 软逻辑控制器符合IEC-61131-3 标准的编程语言会使熟悉梯形图,功能块, 顺序功能表, 指令表和结构化文本的用户感到适应。
艾特软件定义数据中心智能基础设施的中文版本说明书
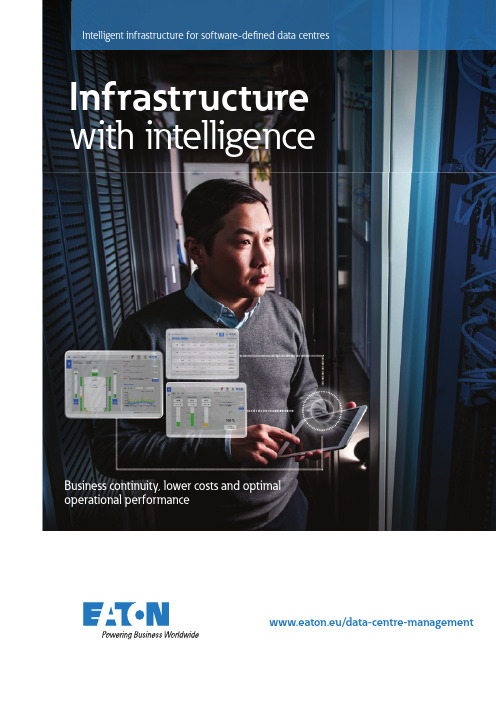
www.eaton.eu/data-centre-managementModern businesses need a better response to ever-changing market dynamics and competitive pressures. Scalable, flexible software-defined IT infrastructures are rising up the agenda in the endeavor to improve business continuity, increase data centre agility, resilience and operational efficiency, and deliver more efficient ways of managing assets.IT managers are looking for new tools that will carry their management capabilities up the technology stack and beyond the data centre walls so that they have complete intelligence and control of how the data centre is serving the needs of the business.Effective and timely data centre monitoring and management has never been a straightforward proposition. Technologies age rapidly, workloads grow exponentially, and the business needs of organisations change unpredictably. Every data centremanager knows that the realities of theirrole demand constant and concentratedthought in order to optimise data centreperformance and anticipate a constantsuccession of challenges. Challengessuch as a mix of hardware and softwarefrom multiple vendors, the frequent lackof co-ordination between Facilities and ITmanagement, and the tendency for datacentres to evolve as a collection of siloes.Such challenges and the risks they bringare becoming more pressing in the eraof software-defined and cloud-orientedoperations. So too are the changes andchallenges inherent within data workloadsthemselves, which require correspondingresponses from the physical infrastructureif tasks are to be completed successfully.Now more than ever, there is an urgentneed for a clear, holistic, single view ofthe whole infrastructure across theoperational, physical and virtual/cloudlayers of IT applications.The IntelligentInfrastructure Solution By bringing together an innovative mix of hardware andsoftware, Eaton offers intelligent integrated solutions helping data centre and IT professionals ensure that their data room´s physical infrastructure is reliable, operational performance optimal and continuity of the business is well secured.Eaton offers you a 3 layer solution architecture helping close a gap between the physical infrastructure and IT and ensure the integrated approach to the data centre monitoring and management.MANAGEMENT &MONITORINGOPTIMISATIONINTELLIGENTINTEGRATION INSOFTWARE DEFINEDDATA CENTRESCONTROLVIRTUALISED COMPONENTSExposing the infrastructure state to uppervirtualisation and cloud orchestrationlayers:• Single plane of glass approach• Automated disaster preventionOPERATIONALCOMPONENTSIT-centricmonitoring:• Power• Space• Environmentalmonitoring PHYSICALCOMPONENTSPower andcapacity devices:• UPS• PDUs• IT racksThe modern data centre challengeEaton´s integrated 3layer solution for ITrooms and data centreshelps close the gapbetween the physicalinfrastructure and IT.Eaton´s integrated infrastructure solutionsfor software-defined data centresEaton ePDUs: intelligent power distribution andmonitoring in IT racks1. Physical componentsA physical infrastructure must be robust and reliable enough to ensure high uptime of IT applications and data integrity without compromising efficiency.Power protectionEach IT appliance requires power. The demand for power in IT applications accelerates following the deployment of modern technologies such as virtual servers and converged and hyperconverged infrastructures. Virtualisation’s impact on power demand is two-fold. First, everyphysical server needs more power. Virtualised machines (VMs) run at 70% to 80% capacity, compared to just 10 – 15% for an unvirtualised machine. This significantly increases power density per enclosure. Secondly, virtualisation allows applications to move from one server to another at a moment’s notice, instantly shifting the power demands within existing infrastructures and highlighting the need for flexibility.IT teams must allow for the fact that in modern IT environments, demand for computing capacity, and therefore power, is dynamic with workloads, applications and storage moving within and among data centres as business needs dictate. To reach peak operating efficiency while avoiding the risk of power outages, developing a sophisticated power protection strategy and integrating it with the ICT infrastructure is essential.With these needs in mind, Eaton offers a range of Energy Star qualified high efficiency UPSs which suit different IT applications and installations and are compatible with virtualisation environments.Power distributionWhile UPS protects your IT application from power outages, power distribution ensures that the power from the UPS is distributed between the IT appliances you have in your rack. Modern power distribution units can also help optimise ITefficiency, lower costs and improve business continuity. The next generation of Eaton’s advanced rack PDUs (ePDU G3) incorporates monitoring and management capabilities. So, in addition to distributing power from the UPS to your IT appliances safely and efficiently, modern distribution units will let you monitor and measure power consumption in an IT rack, remotely shut down power during an outage, and help initiate disaster recovery policies.IT equipment organisationRacks and enclosures are among the first pieces of equipment deployed in a data centre or server room and you should make sure you house your IT appliances properly and efficiently. Appropriate cable management and storage accessories are important for keeping racks neat and well organised, and aircontainment configurations ensure optimised cooling in your data centre. Ensure you have the optimal housing solution for your IT appliances with Eaton’s comprehensive range of IT racks and airflow containment configurations suitable for different applications to lower costs and improve the safetyof your work environment.Eaton IPM Infrastructure - main product functionalityPower Chain monitoring IT Asset Management Holistic reportingEnvironmental monitoring2. Operational componentsEaton ePDUs mounted to the back of the rack monitor power usage to +/- 1% accuracy for sub-billing and cost allocation while environmental sensors are attached to the front of each rack to monitor air intake temperature as well as temperature and humidity levels within the site. Paired withEaton´s Intelligent Power Manager Infrastructure solution consisting of IPM Infrastructure software and Intelligent Power Controller appliance, they revolutionise the overall management of data centres.The IPM Infrastructure solution can easily integrate into the current data centreinfrastructure and allows you to understand and monitor power, space and environmental capacity within the context of your IT infrastructure in order to plan change, anticipate challenges, and make intelligent decisions that ensure business continuity and optimise the IT equipment life span.IPM Infrastructure has an intuitive user interface, with drill down navigation capability and capacity management tools making it simple for IT administrators to understandthe impacts on and interaction between their power infrastructure and their ICT applications.The solution builds upon an open source software project called 42ITy ( ). The open innovation process of allowing community members to make use of, and contribute to Eaton work, helps Eatongive you a system that can communicate withequipment from many vendors.3. Virtualisation componentsEaton Intelligent Power Manager (IPM) software is a separate software solution that can be deployed alongside IPM Infrastructure, complementing its IT -centric visibility andmonitoring capabilities. It enables tight power integration into the leading virtual machine management systems, including VMware® vCentre™, Microsoft SCVMM™, Citrix XenCentre™ and RedHat KVM. This means that status data for all UPS and PDU power devices in the virtual network can be viewed and managed together with network, physical server and storage information – all from a single pane of glass.This helps to ensure business continuity as you can make decisions informed by both power and IT equipment status. Reactions can be faster and automated disaster recovery policies become more effective.During utility failures or environmental events, affected ITdevices, both virtual and physical, can be shut down gracefully and automatically, saving work in progress and preserving dataintegrity. Alternatively, virtual machines can be migrated to other locations or failover sites to keep business moving. The Intelligent Power Manager solution has an intelligent load shedding feature which can suspend non-critical virtual machines, increasing system uptime while extending battery runtime and minimising the generator load.IPM’s other features include power capping on demand, which helps keep critical workloads running longer during a power outage by limiting the server power consumption. This can yield gains of up to 200 per cent runtime with the same number of UPS battery modules, when paired with policy based load shedding.In addition, Intelligent Power Manager exposes power chain and environmental health information to cloud orchestrators and management systems such as OpenStack and VMware’s vRealise Operations platform. Intelligent Power Manager integrates with OpenStack via a REST API and an OpenStack Nova scheduler filter, enabling OpenStack to ensure power optimised virtual machine (VM placement). Similarly, Intelligent Power Manager provides real-time visibility of power chain and environmental status to vRealise Operations via it’s REST API so that powerchain and environmental status are factored into overall system health and risk analysis.This integration between the physical infrastructure and thevirtualisation layers enables automation of disaster prevention and recovery policies to remove the potential for manual error when your team is acting under the time pressure of a power event.In SummaryVirtualisation, cloud computing, and related technology trendsmean that now more than ever the data centre is a focal point for the effectiveness of organisations across almost every industry sector. Increasingly, if the data centre fails, the business fails.Eaton’s intelligent infrastructure solutions are built for this world, transforming the physical data centre infrastructure from a siloed black box into a dynamic source of intelligence so that IT and data centre managers can see their data centre within the context of the organisation it serves and perform their role more effectively.VSPEX L ABSVALIDATEDVM VM VM VM Failed Server Operating Server Operating ServerVM VMEaton has the broadest industry alliance partner network in the industry. We work closely with leading IT vendors to pre-validate our solutions and create reference designs that shorten deployment times and reduce uncertainty.IPM helps maintain business continuity during power failures by triggering an automatic migration of virtual machines to unaffected parts of the network or to an off-site backup facility, co-location data centre or cloud computing infrastructure.Changes to the products, to the information contained in thisdocument, and to prices are reserved; so are errors and omissions. Only order confirmations and technical documentation by Eaton is binding. Photos and pictures also do not warrant a specific layout or functionality. Their use in whatever form is subject to prior approval by Eaton. The same applies to Trademarks (especially Eaton, Moeller, and Cutler-Hammer). The Terms and Conditions of Eaton apply, as referenced on Eaton Internet pages and Eaton order confirmations.Follow us on social media to get the latest product and support information.Eaton Electric Ltd 270 Bath RoadSlough SL1 4DX, UK /UK© 2018 EatonAll Rights ReservedPublication No. BR152023EN / CSSC - 980Article No. Intelligent infrastructure for software-defined data centres brochure Rev A - UK version February 2018Eaton is a registered trademark.All other trademarks are property of their respective owners.。
DataService-操作手册范本
DataServices培训总结-操作手册目录一、DS简介 (2)二、DS数据加载方式 (2)三、DS进行数据抽取模型开发的基本过程 (3)四、DS创建数据源系统和目标系统的数据存储 (3)1、Oracle数据库作为数据源系统 (3)2、ECC作为数据源系统 (4)3、HANA数据库作为目标系统 (5)五、全量加载过程 (5)1、创建Project和Job (5)2、导入源表的元数据到资源库 (6)3、创建Data Flow (6)4、设置源表和目标表 (7)5、手工执行Job (7)六、基于表比较的增量加载 (8)1、在Job下定义工作流 (8)2、在工作流中定义数据流 (8)3、加入Table_Comparison控件 (9)4、设置Table_Comparison控件 (9)七、基于时间戳的增量加载 (10)1、在Job下定义工作流 (10)2、定义Script控件 (10)3、定义处理新增数据的数据流和处理更新数据的数据流 (11)八、DS中常用控件介绍 (13)1、Key_Generation (13)2、Case (13)3、Merge (14)4、Validation (15)5、设置过滤器和断点 (15)九、定义Job定期执行 (16)1、登录Data Services Management Console (16)2、定义Batch Job Schedules (17)十、其他注意事项 (18)一、DS简介SAP BusinessObjects Data Services是通过SAP HANA认证的ETL工具。
采用数据批量处理的方式,定期执行后台作业,将数据从多个业务系统中抽取出来,并进行必要的处理(转换,合并,过滤,清洗),然后再加载到HANA数据库中。
DS的组件之间的关系:◆Management Consol:管理控制台是网页版DS管理工具,可以进行一些系统配置和定义Job执行◆Designer:Designer是一个具有易于使用的图形用户界面的开发工具。
ld中文手册完全版%28带目录%29
ld中文使用手册完全版(译)-1、概述 (4)2、命令行选项 (5)2.1、连接器提供大量的命令行选项 (5)2.2、连接脚本 (5)2.3、对于名称是单个字符的选项 (5)2.4、对于名称是多个字符的选项,选项前可以有一个或两个破折号; (5)2.5、多字符选项的参数 (5)2.5、如果连接器通过,被编译器驱动来间接引用(比如GCC), (6)2.5.1、被GNU连接器接受的常用命令行开关的一个列表 (6)`-aKEYWORD' (6)`-AARCHITECTURE'`--architecture=ARCHITECTURE' (6)`-b INPUT-formAT'`--format=INPUT-formAT' (6)`-cMRI-COMMANDFILE' (6)`-d'`-dc'`-dp' (6)`-e ENTRY'`--entry=ENTRY' (6)`-E'`--export-dynamic' (6)`-EB'连接big-endian对象. 会影响缺省输出格式 (7)`-EL'连接little-endian对象. 会影响缺省输出格式 (7)`-g'忽略. 为了跟其它工具兼容而提供 (7)`-i'执行一个增量连接(跟'-r'等同) (7)`-init NAME' (7)`-lARCHIVE'`--library=ARCHIVE' (7)`-M'`--print-map'打印一个连接位图到标准输出 (7)`-n'`--nmagic', (7)`-N'`--omagic' (7)`--no-omagic' (7)`-o OUTPUT'`--output=OUTPUT' (7)`-O LEVEL' (7)`-q'`--emit-relocs' (7)`-r'`--relocateable' (7)`-R FILENAME'`--just-symbols=FILENAME' (8)`-s'`--strip-all',忽略输出文件中所有的符号信息 (8)`-S'`--strip-debug'忽略输出文件中所有的调试符号信息(但不是所有符号). (8)`-t'`--trace',打印ld处理的所有输入文件的名字 (8)`-T SCRIPTFILE'`--script=SCRIPTFILE' (8)`-u SYMBOL'`--undefined=SYMBOL' (8)`-Ur' (8)`--unique[=SECTION]' (8)`-v'`--version' `-V' (8)`-x'`--discard-all'删除所有的本地符号. (8)`-X'`--discard-locals' (8)`-y SYMBOL'`--trace-symbol=SYMBOL' (8)`-z KEYWORD' (8)`-( ARCHIVES -)'`--start-group ARCHIVES --end-group' (9)`--accept-unknown-input-arch' (9)`-assert KEYWORD'这个选项被忽略,只是用来跟SunOS保持兼容 (9)`-Bdynamic'`-dy'`-call_shared'连接动态链接库 (9)`-Bgroup' (9)'--no-undefined' (9)`-Bstatic'`-dn' `-non_shared' `-static' (9)`-Bsymbolic' (9)`--check-sections'`--no-check-sections' (10)`--cref' (10)`--no-define-common' (10)`--defsym SYMBOL=EXPRESSION' (10)`--demangle[=style]' `--no-demangle' (10)`--dynamic-linker FILE' (10)`--embedded-relocs' (10)`--fatal-warnings'把所有的警告视为错误 (10)`--force-exe-suffix'确保输出文件有一个.exe后缀 (10)`--no-gc-sections'`--gc-sections' (11)`--help'在标准输出上打印一个命令行选项概要,然后退出. (11)`--target-help' (11)`-Map MAPFILE' (11)`--no-keep-memory' (11)`--no-undefined'`-z defs' (11)`--allow-multiple-definition'`-z muldefs' (11)`--allow-shlib-undefined' `--no-allow-shlib-undefined' (11)`--no-undefined-version' (11)`--no-warn-mismatch' (11)`--no-whole-archive' (11)`--noinhibit-exec' (11)`-nostdlib' (12)`--oformat OUTPUT-formAT' (12)`-qmagic'这个选项被忽略,只是为了跟Linux保持兼容 (12)`-Qy'这个选项被忽略,只是为了跟SVR4保持兼容. (12)`--relax' (12)`--retain-symbols-file FILENAME' (12)'--retain-symbols-file' (12)`-rpath DIR' (12)`-rpath-link DIR' (12)`-shared'`-Bshareable' (13)`--sort-common' (13)`--split-by-file [SIZE]' (13)`--split-by-reloc [COUNT]' (13)`--traditional-format' (13)'--trafitinal-format'开关告诉ld 不要把相同的入口合并起来 (13)`--section-start SECTIONNAME=ORG' (13)`-Tbss ORG'`-Tdata ORG' `-Ttext ORG' (14)`--dll-verbose'`--verbose' (14)`--version-script=VERSION-SCRIPTFILE' (14)`--warn-common' (14)`--warn-constructors' (14)`--warn-multiple-gp' (15)`--warn-once' (15)`--warn-section-align' (15)`--whole-archive' (15)`--wrap SYMBOL' (15)`--enable-new-dtags'`--disable-new-dtags' (15)i386 PE平台的特定选项 (15)`--add-stdcall-alias' (16)`--base-file FILE' (16)`--enable-stdcall-fixup'`--disable-stdcall-fixup' (16)`--export-all-symbols' (16)3、环境变量 (16)`GNUTARGET' (16)`LDEMULATION' (16)4、连接脚本 (17)4.1、基本的连接脚本的概念 (17)4.1.1、三种节 (17)4.1.2、每一个loadable或allocatable的输出节有两个地址 (17)4.1.3、每一个目标文件还有一个关于符号的列表, 被称为'符号表' (17)4.2、连接脚本的格式 (18)4.3、简单的连接脚本示例 (18)4.4、简单的连接脚本命令 (19)4.4.1、设置入口点. (19)4.4.2、处理文件的命令. (19)`INCLUDE FILENAME' (19)`INPUT(FILE, FILE, ...)'`INPUT(FILE FILE ...)' (19)`GROUP(FILE, FILE, ...)'`GROUP(FILE FILE ...)' (19)`OUTPUT(FILENAME)' (19)`SEARCH_DIR(PATH)' (19)`STARTUP(FILENAME)' (20)4.5、处理目标文件格式的命令 (20)`OUTPUT_formAT(BFDNAME)'`OUTPUT_formAT(DEFAULT, BIG, LITTLE)' (20)`TARGET(BFDNAME)' (20)4.6、其它的连接脚本命令 (20)`EXTERN(SYMBOL SYMBOL ...)'. (20)`FORCE_COMMON_ALLOCATION' (20)`INHIBIT_COMMON_ALLOCATION' (20)`NOC ROSSREFS(SEC TION SEC TION ...)' . (20)`OUTPUT_ARC H(BFDARCH)' (21)4.6、为符号赋值 (21)4.7、SEC TIONS命令 (22)4.7.1、输出节描述 (22)4.7.2、输出节名 (23)4.7.3、输出节描述 (23)4.7.4、输入节描述 (23)4.7.4.1、输入节通配符 (24)4.7.4.2、输入节中的普通符号. (25)4.7.4.3、输入节和垃圾收集 (25)4.7.5、输出节数据 (26)4.7.5.1、输出节关键字 (27)4.7.5.2、输出节的丢弃。
PASCO PS-2000数据采集器 使用指南

数据采集器使用指南数据采集器操作手册PS-20003 〜5 号显示在液晶显示器的右上角闪烁。
快速参考主要显示模式(该设定与传感器的不同而异)按即可将显示模式变换到序列中的下一个显示或退出任何一个子选单。
重复按即可逐个通过各主要显示模式。
范例:与数据采集器连接的温度传感器的显示1. 传感器数值―显示特定传感器的测量、名称及单位变换2. 日期和时间―计时与追踪测量值3. 电池寿命―显示碱性电池的剩余寿命4. 取样方法―提供三个取样选项( 取样率、手动取样、智能取样)5. 数据内存―表明已用和可用内存容量6. 数据回顾―用于检阅已储存的数据组7. 校准―用于校准已连接的传感器,每种传感器各有其独特的显示012-07784C© 著作权所有,2001 年PASCO scientific保留一切权利。
中国总代理:科艺仪器有限公司A & P INSTRUMENT CO., LTD.目录设备 (7)设定插入电池 (8)安装DataStudio (9)连接数据采集器至计算机上 (10)连接数据采集器至USB集线器上 (10)基本功能数据采集器按钮 (10)开启和关闭数据采集器 (11)设定日期和时间......................................................................... .11 用数据采集器进行测量. (12)插入传感器 (12)用DataStudio获取已储存的数据 (12)显示主显示模式 (13)变更显示模式 (14)测量选项和取样变更传感器测量 (14)变更传感器单位 (14)取样测量选项 (15)变更取样方法 (15)取样率测量方法 (15)- 使用取样率方法进行测量 (16)- 变更取样率的理由 (16)- 变更取样率或单位 (16)手动取样测量方法 (17)目录(续)测量与取样(续)- 用手动取样进行测量 (17)- 在手动取样过程中切换传感器 (17)智能取样方法 (18)- 用智能取样进行测量 (18)- 智能取样程度 (18)- 变更智能取样程度 (18)-DataStudio内的智能取样数据 (18)数据组回放与删除回放数据组 (19)变更数据组回放的单位 (19)数据组编号 (20)删除数据组 (20)校准 (21)重新设定与清除传感器内存 (21)数据提取与DATASTUDIO数据采集器与DataStudio的运用 (22)提取已储存的数据至DataStudio内 (22)合并来自多个数据采集器的数据组 (23)电池寿命与内存尽量延长电池寿命 (23)最大化数据内存 (24)技术问题与支持故障排除 (24)技术支持 (25)保修 (26)设备PS-2000 数据采集器附带下列配置:a) USB连接线 (1)b) AA电池 (2)c) DataStudio简化版(Lite)光盘 (1)d) 拉锁封口的乙烯袋,用于保护数据采集器免受化学品或水的损伤。
- 1、下载文档前请自行甄别文档内容的完整性,平台不提供额外的编辑、内容补充、找答案等附加服务。
- 2、"仅部分预览"的文档,不可在线预览部分如存在完整性等问题,可反馈申请退款(可完整预览的文档不适用该条件!)。
- 3、如文档侵犯您的权益,请联系客服反馈,我们会尽快为您处理(人工客服工作时间:9:00-18:30)。
統計工具 統計可用此按鈕開啟和關閉。按下Σ符號旁邊的 下拉清單箭頭就會顯示可用統計資料的清單。
使用這個選項來 建立新的實驗。
使用這個選項來開啟現 有活動。
在表格中手工輸 入數據。
建立實驗 輸入數據
開啟活動 圖表方程式
輸入數學運算式 ( 例如:y = x2 )
5
DataStudio 入門手冊
手冊編號:012-08107
PASPORT 實驗設定
在 PASPORT 介面 ( 例如 USB 連結、Xplorer) 上連接想要使用的感應器。DataStudio 會自動偵 測到此感應器並建立合適的顯示。
顯示數據
摘要面板
摘要面板列出了目前可用的測量、在實驗中已收集的任何數據及其顯 示。
如要顯示數據,感應器或數據必須與某顯示關聯。從摘要面板的 底部,將欲用的顯示類型拖曳到頂部區域內的感應器上,就可為該感 應器或目標數據組建立一個顯示。
通過將感應器或數據過程從數據摘要欄拖曳到開啟的顯示上, 多個顯示可顯示多種數據類型。取決於感應器或實驗條件,一些顯示 類型比其他類型更為有用。
表格 即時數值。
儀錶 儀錶顯示使用圖形儀錶顯示數據的圖片表達。
棒形圖 棒形圖顯示繪出了作為總數而合併成 「棒形條」的數據點。棒形條的面積與特定數據範圍的 頻率或所觀測到的特定測量之次數成正比。
FFT FFT ( 快速傅利葉轉換 ) 顯示了數據的頻譜分解。較高的取樣頻率會得到更精細的數據頻譜定 義。與其他顯示類型不同,此顯示不儲存數據;而只是顯示數據的 「時間切片」快照。
10
手冊編號:012-08107
DataStudio 入門手冊
為數據建立顯示
您可於任何時間從實驗中建立或移除顯示,即便是在數據收集過程中亦不例外。
DataStudio 中的可用顯示類型 以下為可用顯示的類型及其描述:
圖表 圖表顯示繪製了感應器數據相對於時間的曲線。 如要用一個數據類型相對於類型繪圖,請將該數據由數據摘要 ( 在摘要面板內 ) 拖曳到圖表的 時間座標軸 (x 座標軸 ) 上。此新數據類型就會取代時間,從而生成 XY 曲線 ( 例如力量相對 於位置 )。 按一下並拖曳座標軸上的數字將會直接變更此圖表的比例。按一下並拖曳座標軸線本身將會 在此顯示視窗中移動該座標軸。
保留或停止按鈕 倘若實驗被配置為手動取樣 ( 請參閱 「設定實驗選項」),啟動按鈕將會轉變為保留或停止按 鈕。在數據收集過程中按下保留按鈕就會儲存一個數據點。按一下保留按鈕右邊的紅色方塊 即會停止數據收集。
顯示與分析工具
DataStudio 提供了一套完整的功能組合,設計為協助顯示和分析數據。各種顯示可在數據收集 開始前、過程中、結束後隨時建立。
手冊編號:012-08107
設定實驗選項
選項 使用選項按鈕設定取樣選項。按一下實驗設定視窗中的選項按鈕即可開啟取樣選項。
手動取樣標籤 此選項用於需要選取特定數據點 ( 而非收集連續數據 ) 的實驗。這些數據點可被與某非由感應 器測量的參數相關聯。該關聯的參數可手工鍵入。 按一下 「僅在得到指令時保留數據」核取方塊就會啟動手動取樣模式。倘若保留的數據將會 有關聯的手工輸入數據,也請核取 「當保留數據時輸入鍵盤數值」核取方塊。倘若 「數值輸 入提示」核取方塊被核取,當數據被 「保留」時,DataStudio 將提示使用者手工輸入該關聯 數據。其餘選項用於描述此手工輸入的數據。您可以描述和命名此數據、指定單位及數值準 確度。
介面 取決於電腦的類型,以下為建議採用的介面:
SCSI 或序列埠電腦 具有 USB 埠的電腦
科學工作室介面 PASPORT USB 連結、Xplorer 或 750 USB 介面
DataStudio 要求
為了使用 DataStudio,您需要至少滿足以下要求:
Macintosh - 系統 7.5 或更高版本,可用記憶體:8 Mb ( 最好為 16 Mb),序列、SCSI 或 USB 連 接埠,光碟機,20 MB 可用硬碟空間。
9
DataStudio 入門手冊
手冊編號:012-08107
使用 DataStudio 配置實驗─ 所有介面
DataStudio 具有多個用於協助配置實驗的工具。利用摘要面板和關聯的功能有助於進一步定義 實驗參數。多個顯示可用於提供將數據形象化的有力方法。本節討論了如何建立數據顯示並 描述了各顯示的功能。
6
手冊編號:012-08107
DataStudio 入門手冊
如果您要增加未與此介面連接的感應器,請按一下實驗設定視窗中的增加感應器按鈕;一個 新的視窗就會出現,其中列出所有感應器;您可由此選取合適的感應器。
7
DataStudio 入門手冊
手冊編號:012-08107
首次啟動 DataStudio ─ 科學工作室
DataStudio 入門手冊
感應器面板
感應器面板列出了所有可能的感應器。請捲動此清單,找到實驗要用的感應器。如要選取特 定感應器,請連按兩下感應器面板內的相應圖示。此軟體會自動選擇正確的可用連接埠。
現在請將實際感應器連接到對應的通道上。
一旦選取了感應器,實驗設定視窗內就會出現一個圖示,其箭頭表明了每個感應器的正確通 道。連按兩下此視窗內的感應器圖示就會開啟感應器內容視窗,由此可設定測量、校正及取 樣頻率。可用的測量會在摘要面板內顯示。
全屏顯示 圖表、FFT、棒形圖、儀錶等顯示可利用全屏顯示工具自動調整大小。整個顯示將自動調整顯 示範圍,從而令數據能夠填滿整個顯示視窗。
拉近、拉遠、範圍選取 圖表和棒形圖顯示比例工具可改變顯示視窗的檢視內容,從而縮小、擴展、或聚焦於數據的 選定部份。如要使用範圍選取工具,按一下該工具,然後通過按下滑鼠鍵並拖曳在您想仔細 檢視的數據區域畫一個方框;此圖表就會被拉近到您選取的區域。全屏顯示按鈕會將此數據 還原為可最佳檢視所有數據點的比例。
可用的測量將會在摘要面板內顯示。在某些情形下,按一下設定按鈕即可取得更多的測量或 單位。
設定感應器的取樣頻率。
按一下校正按鈕以校 正感應器。
選取測量單位。 實驗設定視窗顯示了已與電腦連接的感應器。這個視窗也顯示每個感應器的取樣頻率和可用 的數據類型。 需要校正的感應器會有一個校正按鈕,用於啟動校正功能表。
測量變更─ Delta 工具 Delta 工具是智能工具的一項功能,用於在圖表顯示上測量兩數據 點之間的 X 和 Y 座標值變化。 如要使用 Delta 工具: 拖曳智能工具的十字標線到一個數據點上。 讓滑鼠指標圍繞十字標線之小方框的一個邊緣上盤旋,直至此指標 轉變為三角形和手掌。 單按並拖曳至第二個數據點,一個虛線方框就會出現,其兩個角落 為選定的兩個數據點。在此虛線方框的邊上,您會看到這兩個點之 座標值的差。 如要改變此方框的大小,請按下其包含箭頭的角落並將它拖曳到新 的數據點處。單按並拖曳任何虛線也將改變此方框的大小 ( 僅限在一個方向上的移動 )。
如果使用 PASPort 感應器,您可在任何時候連接此設備。如需關於正確連接的細節,請參閱 介面的手冊或感應器的 Quick Start Card ( 快速入門卡 )。 一旦連接 PASPORT 感應器,PASPORTAL 視窗應會自動啟動:
這些是預先設計的電子 活頁簿。如要使用,您 只需將想用的實驗反 白,然後按一下開啟選 定活頁簿。
輸入數學運算式 ( 例如:y = x2 )
科學工作室實驗設定
按一下設定按鈕以啟動實驗設定視窗。您將使用此視窗來選取感應器和設定實驗條件。 如果軟體沒有立即辨識出所用介面,請按一下變更按鈕,然後從請選擇數據源視窗中的清單 裡選擇您的介面。實驗設定視窗於是就會顯示該選取的介面。
8
手冊編號:012-08107
說明手冊
手冊編號:012-08107
DataStudio 入門手冊
手冊編號:012-08107
手冊編號:012-08107
DataStudio 入門手冊
引言
DataStudio 是甚麼?
DataStudio 是一種數據獲取、顯示及分析程式。此軟體與 PASCO 介面和感應器配合使用,以 收集和分析數據。DataStudio 可用於建立和完成各年級之常識、生物學、化學、物理學實驗。
按一下這裏即可啟 動 DataStudio 及自 行建立實驗。
4
手冊編號:012-08107
DataStudio 入門手冊
倘若 PASPORTAL 視窗沒有啟動,請連按兩下電腦桌面上的 DataStudio 圖示,啟動 DataStudio 軟體。 在 DataStudio 開啟時,電腦上會出現 「歡迎使用 DataStudio」導引螢幕,其中有四個選項: 從啟動螢幕中選取建立實驗。 如果 DataStudio 已在執行中,從檔案功能表中選取 「新增活動」。
智能工具 智能工具會啟動一組十字標線,用於顯示指定數據點的座標數據對。當您接近某數據點時, 智能工具會被 「吸引」到該數據點上。所顯示的座標會出現在圍繞該十字標線之小方框的右 上緣括弧中。智能工具也可用於顯示兩個數據點之間的差距。
14
手冊編號:012-08107
DataStudio 入門手冊
移動智能工具 如要改變智能工具之十字標線的位置,請令滑鼠游標在智能工具的中心上盤旋,直至其指標 轉變為兩個交叉雙箭頭和一個手掌。拖曳智能工具的十字標線至希望的位置。如要將此十字 標線的移動限制為沿某座標軸,請讓滑鼠游標在與您想要沿著移動之座標軸垂直的虛線,上 盤旋,直至其指標轉變為一個手掌;然後將十字標線拖曳到新的位置。
連按兩下電腦桌面上的 DataStudio 圖示將會啟動 DataStudio 軟體。 在 DataStudio 開啟時,電腦上會出現 「歡迎使用 DataStudio」導引螢幕,其中有四個選項:
使用這個選項來 建立新的實驗。