活学活用wxPython
python学习教程(十)之wxpython
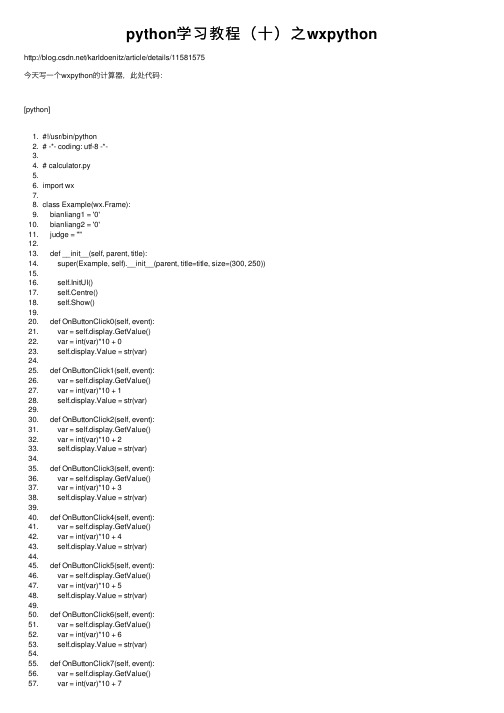
python学习教程(⼗)之wxpython /karldoenitz/article/details/11581575今天写⼀个wxpython的计算器,此处代码:[python]1. #!/usr/bin/python2. # -*- coding: utf-8 -*-3.4. # calculator.py5.6. import wx7.8. class Example(wx.Frame):9. bianliang1 = '0'10. bianliang2 = '0'11. judge = ""12.13. def __init__(self, parent, title):14. super(Example, self).__init__(parent, title=title, size=(300, 250))15.16. self.InitUI()17. self.Centre()18. self.Show()19.20. def OnButtonClick0(self, event):21. var = self.display.GetValue()22. var = int(var)*10 + 023. self.display.Value = str(var)24.25. def OnButtonClick1(self, event):26. var = self.display.GetValue()27. var = int(var)*10 + 128. self.display.Value = str(var)29.30. def OnButtonClick2(self, event):31. var = self.display.GetValue()32. var = int(var)*10 + 233. self.display.Value = str(var)34.35. def OnButtonClick3(self, event):36. var = self.display.GetValue()37. var = int(var)*10 + 338. self.display.Value = str(var)39.40. def OnButtonClick4(self, event):41. var = self.display.GetValue()42. var = int(var)*10 + 443. self.display.Value = str(var)44.45. def OnButtonClick5(self, event):46. var = self.display.GetValue()47. var = int(var)*10 + 548. self.display.Value = str(var)49.50. def OnButtonClick6(self, event):51. var = self.display.GetValue()52. var = int(var)*10 + 653. self.display.Value = str(var)54.55. def OnButtonClick7(self, event):56. var = self.display.GetValue()57. var = int(var)*10 + 758. self.display.Value = str(var)59.60. def OnButtonClick8(self, event):61. var = self.display.GetValue()62. var = int(var)*10 + 863. self.display.Value = str(var)64.65. def OnButtonClick9(self, event):66. var = self.display.GetValue()67. var = int(var)*10 + 968. self.display.Value = str(var)69.70. def OnButtonCls(self, event):71. self.display.Value = '0'72.73. def OnButtonBck(self, event):74. var = self.display.GetValue()75. var = int(var)/1076. self.display.Value = str(var)77.78. def OnButtonClickClose(self, event):79. wx.Exit()80.81. def OnButtonClickJia(self, event):82. self.bianliang1 = self.display.GetValue()83. self.display.Value = '0'84. self.judge="+"85.86. def OnButtonClickJian(self, event):87. self.bianliang1 = self.display.GetValue()88. self.display.Value = '0'89. self.judge="-"90.91. def OnButtonClickChe(self, event):92. self.bianliang1 = self.display.GetValue()93. self.display.Value = '0'94. self.judge="*"95.96. def OnButtonClickChu(self, event):97. self.bianliang1 = self.display.GetValue()98. self.display.Value = '0'99. self.judge="/"100.101. def OnButtonClickEqu(self, event):102. bianliang2 = self.display.GetValue()103. if self.judge == '+':104. self.display.Value = str(int(self.bianliang1)+int(bianliang2))105. elif self.judge == '-':106. self.display.Value = str(int(self.bianliang1)-int(bianliang2))107. elif self.judge == '*':108. self.display.Value = str(int(self.bianliang1)*int(bianliang2))109. elif self.judge == '/':110. self.display.Value = str(int(self.bianliang1)/int(bianliang2))111.112. def InitUI(self):113.114. menubar = wx.MenuBar()115. fileMenu = wx.Menu()116. menubar.Append(fileMenu, '&File')117. self.SetMenuBar(menubar)118.119. vbox = wx.BoxSizer(wx.VERTICAL)120. self.display = wx.TextCtrl(self, style=wx.TE_RIGHT,value='0')121. vbox.Add(self.display, flag=wx.EXPAND|wx.TOP|wx.BOTTOM, border=4) 122. gs = wx.GridSizer(4, 4, 5, 5)123.124. buttonCls = wx.Button(self, label='Cls')125. buttonBck = wx.Button(self, label='Bck')126. buttonClose = wx.Button(self, label='Close')127. button7 = wx.Button(self, label='7')128. button8 = wx.Button(self, label='8')129. button9 = wx.Button(self, label='9')130. buttonChu = wx.Button(self, label='/')131. button4 = wx.Button(self, label='4')132. button5 = wx.Button(self, label='5')133. button6 = wx.Button(self, label='6')134. buttonChen = wx.Button(self, label='*')135. button1 = wx.Button(self, label='1')136. button2 = wx.Button(self, label='2')137. button3 = wx.Button(self, label='3')138. buttonJian = wx.Button(self, label='-')139. button0 = wx.Button(self, label='0')140. buttonDot = wx.Button(self, label='.')141. buttonEqu = wx.Button(self, label='=')142. buttonPlus = wx.Button(self, label='+')143.144. gs.AddMany([145. (buttonCls, 0, wx.EXPAND),146. (buttonBck, 0, wx.EXPAND),147. (wx.StaticText(self), wx.EXPAND),148. (buttonClose, 0, wx.EXPAND),149. (button7, 0, wx.EXPAND),150. (button8, 0, wx.EXPAND),151. (button9, 0, wx.EXPAND),152. (buttonChu, 0, wx.EXPAND),153. (button4, 0, wx.EXPAND),154. (button5, 0, wx.EXPAND),155. (button6, 0, wx.EXPAND),156. (buttonChen, 0, wx.EXPAND),157. (button1, 0, wx.EXPAND),158. (button2, 0, wx.EXPAND),159. (button3, 0, wx.EXPAND),160. (buttonJian, 0, wx.EXPAND),161. (button0, 0, wx.EXPAND),162. (buttonDot, 0, wx.EXPAND),163. (buttonEqu, 0, wx.EXPAND),164. (buttonPlus, 0, wx.EXPAND)165. ])166.167. buttonCls.Bind(wx.EVT_BUTTON,self.OnButtonCls)168. buttonBck.Bind(wx.EVT_BUTTON,self.OnButtonBck)169. buttonClose.Bind(wx.EVT_BUTTON,self.OnButtonClickClose) 170. button0.Bind(wx.EVT_BUTTON,self.OnButtonClick0)171. button1.Bind(wx.EVT_BUTTON,self.OnButtonClick1)172. button2.Bind(wx.EVT_BUTTON,self.OnButtonClick2)173. button3.Bind(wx.EVT_BUTTON,self.OnButtonClick3)174. button4.Bind(wx.EVT_BUTTON,self.OnButtonClick4)175. button5.Bind(wx.EVT_BUTTON,self.OnButtonClick5)176. button6.Bind(wx.EVT_BUTTON,self.OnButtonClick6)177. button7.Bind(wx.EVT_BUTTON,self.OnButtonClick7)178. button8.Bind(wx.EVT_BUTTON,self.OnButtonClick8)179. button9.Bind(wx.EVT_BUTTON,self.OnButtonClick9)180. buttonEqu.Bind(wx.EVT_BUTTON,self.OnButtonClickEqu) 181. buttonPlus.Bind(wx.EVT_BUTTON,self.OnButtonClickJia) 182. buttonJian.Bind(wx.EVT_BUTTON,self.OnButtonClickJian) 183. buttonChen.Bind(wx.EVT_BUTTON,self.OnButtonClickChe) 184. buttonChu.Bind(wx.EVT_BUTTON,self.OnButtonClickChu) 185.186. vbox.Add(gs, proportion=1, flag=wx.EXPAND)187. self.SetSizer(vbox)188.189.190.191. if __name__ == '__main__':192.193. app = wx.App()194. Example(None, title='Calculator') 195. app.MainLoop()196.。
Python微信小程序开发

Python微信小程序开发Python是一种高级编程语言,它具有简单易学、功能丰富、开发效率高等优点。
随着智能手机的普及,移动应用程序开发变得越来越重要。
微信小程序作为一种在微信平台上运行的轻量级应用程序,已经成为许多开发者的首选。
本文将介绍如何使用Python进行微信小程序开发。
一、微信小程序简介微信小程序是一种在微信内被打开的应用程序,它具有轻量级、跨平台、开发便捷等特点。
微信小程序可以在微信内直接使用,无需下载安装,也无需占用手机内存空间。
目前,微信小程序已经成为许多企业、个人开发者进行业务推广、营销活动的重要渠道。
二、Python在微信小程序开发中的应用Python作为一种高级编程语言,具有简单易学、语法清晰等特点。
在微信小程序开发中,使用Python可以提高开发效率,简化开发过程。
1. Python开发工具Python提供了许多开发工具,可以帮助开发者更轻松地进行微信小程序开发。
其中,微信官方提供了一个名为“WePY”的开源框架,它基于Vue.js,并且使用类似于Vue.js的语法。
开发者可以通过使用“WePY”框架来开发微信小程序,并且可以在开发过程中利用Python的强大功能。
2. Python与微信小程序的交互Python可以与微信小程序进行数据交互,实现数据的传输和处理。
开发者可以使用Python的网络编程库,例如“request”库来发送HTTP请求,并且可以使用“json”库来解析和处理API接口返回的JSON数据。
通过使用Python的强大功能,开发者可以更灵活地处理数据,实现个性化的功能。
三、Python微信小程序开发实例以一个简单的天气查询小程序为例,介绍Python在微信小程序开发中的具体应用。
1. 小程序功能需求该天气查询小程序需要实现以下功能:- 用户输入城市名称,获取该城市的实时天气情况;- 显示该城市的温度、湿度等天气指标;- 提供未来三天的天气预报。
2. 小程序开发过程使用“WePY”框架进行开发,具体步骤如下:- 创建一个“WePY”项目,初始化项目目录结构;- 在“WePY”页面中,添加用户输入城市名称的输入框和查询按钮;- 定义一个函数,当用户点击查询按钮时,触发该函数并获取用户输入的城市名称;- 使用Python的网络编程库发送HTTP请求,调用天气API接口,并传入用户输入的城市名称;- 使用Python的“json”库解析API返回的JSON数据,获取天气指标;- 在页面中显示天气指标,并提供未来三天的天气预报。
Python中的微信小程序开发指南

Python中的微信小程序开发指南微信小程序是一种可以在微信平台上运行的轻量级应用程序,它可以提供丰富的功能和用户交互体验。
本文将为您介绍如何使用Python 语言进行微信小程序的开发,为读者提供一份简明扼要的Python微信小程序开发指南。
一、了解微信小程序的基础知识在开始微信小程序的开发之前,我们首先需要了解微信小程序的基础知识。
微信小程序分为前端和后端两部分,前端使用WXML (WeiXin Markup Language)和WXSS(WeiXin Style Sheets)进行界面和样式的描述,后端使用Python编写业务逻辑和接口。
二、安装和配置开发环境在使用Python进行微信小程序开发之前,我们需要安装Python开发环境。
您可以从Python官方网站下载并安装Python的最新版本,然后使用pip命令安装依赖的库和工具。
三、创建微信小程序项目在开始开发微信小程序之前,我们需要创建一个微信小程序项目。
使用微信开发者工具创建一个新的小程序项目,并选择Python作为后端语言。
四、编写前端界面微信小程序的前端界面使用WXML和WXSS进行开发。
WXML类似于HTML,用于描述界面的结构,而WXSS则用于描述界面的样式。
您可以使用微信开发者工具提供的代码编辑器编写和修改前端界面的代码。
五、编写后端接口微信小程序的后端接口使用Python编写。
您可以使用Python的Flask框架或者Django框架来搭建后端接口。
根据您的需求,选择合适的框架进行开发,并编写相应的接口逻辑。
六、前后端交互微信小程序的前端和后端需要进行数据的交互和通信。
您可以使用微信小程序提供的API进行前后端交互,发送HTTP请求和接收响应。
七、调试和测试在完成微信小程序的开发之后,您可以使用微信开发者工具进行调试和测试。
微信开发者工具提供了模拟器和调试工具,可以帮助您检测和修复代码中的错误。
八、发布和上线当您完成微信小程序的开发和测试之后,您可以将其发布和上线。
wxpython总结(1)
参数4:pos 窗体的位置坐标。默认值为(-1,-1),则窗体的位置由系统决定。 参数5:size 窗体的大小。默认值为(-1,-1),则窗体的大小由系统决定。 参数6:style 窗体样式。默认值为 DEFAULT_FRAME_STYLE 默认样式 DEFAULT_FRAME_STYLE 是下面这些值的复合:
2.基本用法—菜单点击回应
• self.Bind(): 点击事件,将菜单和函数绑定 • self.Bind(wx.EVT_MENU, self.response_open, open) • def response_open(self, event): • print 'open a new file‘
2.基本用法—添加菜单
• • • • • • • • • • • • wx.MuneBar():创建一个菜单栏 wx.Menu():创建菜单 wx.Menu.Append():添加子菜单 wx.MuneBar. Append():添加菜单 self.SetMenuBar( wx.MuneBar()):在程序类中创建菜单栏 添加菜单示例: class MainFrame(wx.Frame): def __init__(self,parent,id): wx.Frame.__init__(self, parent, id, u'添加菜单', size=(800,500), style=wx.DEFAULT_FRAME_STYLE ^ (wx.RESIZE_BORDER | wx.MINIMIZE_BOX | wx.MAXIMIZE_BOX)) self.setmenu()
style = wx.TE_MULTILINE | wx.HSCROLL)#输出文本
2.基本用法—wx.Button、wx. CtrlText
Python技术与微信开发结合方法

Python技术与微信开发结合方法随着移动互联网的迅速发展,微信成为人们日常生活中最常用的社交软件之一。
而Python作为一门简洁、高效、易学的编程语言,也成为开发人员的首选。
本文将探讨如何将Python技术与微信开发相结合,为读者提供一些方法和技巧。
一、微信公众号开发微信公众号是指由个人、企业或组织在微信平台上创建的公众号账号,通过这个账号可以向用户提供信息推送、交互式服务等功能。
Python可以用来开发微信公众号的后台程序,实现自动回复、数据统计等功能。
开发者可以使用开源的Python库(如wechatpy、itchat等)来简化开发流程。
二、微信小程序开发微信小程序是一种无需下载即可使用的应用,使用微信作为平台,依托微信的用户基础和社交关系,可以实现快速推广和使用。
Python可以用来开发微信小程序的服务器端程序,处理用户的请求和响应,并与数据库进行交互。
开发者可以使用Django、Flask等Python框架来搭建后台服务器。
三、图像识别与微信图像识别是指通过计算机技术对图像进行分析和处理,从中提取出有用的信息。
Python具有丰富的图像处理和机器学习库,可以用来实现微信中的图像识别功能。
例如,可以使用Python的OpenCV库来实现人脸识别、物体识别等功能,并将识别结果发送到微信。
四、数据分析与微信Python在数据分析领域有着广泛的应用,可以处理和分析大量的数据。
通过结合Python的数据分析库(如pandas、numpy等)和微信开发技术,可以实现将数据分析结果以图表的形式发送到微信。
这对于数据驱动的决策和实时数据监控非常有帮助。
五、机器人技术与微信Python拥有成熟的机器学习和自然语言处理库,可以被应用在聊天机器人的开发中。
开发者可以使用Python的机器学习库(如scikit-learn、NLTK等)来训练模型,并结合微信公众号或小程序的开发技术,实现智能问答、语音识别等功能。
python编写微信小程序

Python编写微信小程序随着智能手机普及的日益增加,微信小程序成为了一种非常流行的应用形式。
微信小程序可以在微信中直接运行,无需下载和安装,为用户提供了更加便捷的服务体验。
为了更好地满足用户需求,许多开发者选择使用Python语言编写微信小程序。
1. 为什么选择PythonPython是一种简单易学、功能强大的编程语言,拥有丰富的库和工具支持,可快速完成开发任务。
在编写微信小程序时,Python可以提高开发效率,减少代码量,更容易维护和扩展。
2. 开发环境搭建在开始编写微信小程序之前,需要搭建Python开发环境。
首先确保已安装Python解释器,推荐使用最新版本。
然后安装相关的Python第三方库,如requests、flask等,以便进行网络请求和服务端开发。
3. 微信小程序的结构微信小程序通常包括前端页面和后端服务两部分。
前端页面负责展示和交互,可以使用类似HTML、CSS、JavaScript等技术进行开发;后端服务则负责处理逻辑、数据交互等,可以使用Python编写后端接口和逻辑。
4. 前端页面开发在前端页面开发中,可以使用类似于Vue.js、React等前端框架进行开发,也可以直接使用微信小程序提供的框架进行开发。
Python也可以通过Python-to-JavaScript转译工具来编写前端页面逻辑。
5. 后端服务开发在后端服务开发中,可以使用Python编写RESTful API接口,通过HTTP请求和响应来实现与前端页面的交互。
利用Python的强大库和框架,可以快速构建出高效可靠的后端服务。
6. 数据存储和管理在微信小程序中,通常需要对数据进行存储和管理。
可以使用数据库管理系统如MySQL、MongoDB等来存储数据,也可以使用Python的ORM框架来简化数据操作,提高效率。
7. 部署和测试完成微信小程序的开发后,需要进行部署和测试。
可以选择合适的云服务提供商或自建服务器来部署后端服务,同时进行前后端整合测试和性能测试,确保微信小程序的稳定性和用户体验。
wxPython基础教程说明书
iAbout the T utorialwxPython is a blend of wxWidgets and Python programming library. This introductory tutorial provides the basics of GUI programming and helps you create desktop GUI applications.AudienceThis tutorial is designed for software programmers who are keen on learning how to develop GUI applications for the desktop.PrerequisitesYou should have a basic understanding of computer programming terminologies. A basic understanding of Python and any of the programming languages is a plus. Disclaimer & CopyrightCopyright 2015 by Tutorials Point (I) Pvt. Ltd.All the content and graphics published in this e-book are the property of Tutorials Point (I) Pvt. Ltd. The user of this e-book is prohibited to reuse, retain, copy, distribute or republish any contents or a part of contents of this e-book in any manner without written consent of the publisher.We strive to update the contents of our website and tutorials as timely and as precisely as possible, however, the contents may contain inaccuracies or errors. Tutorials Point (I) Pvt. Ltd. provides no guarantee regarding the accuracy, timeliness or completeness of our website or its contents including this tutorial. If you discover any errors on our website or inthistutorial,******************************************.iiT able of ContentsAbout the Tutorial (i)Audience (i)Prerequisites (i)Disclaimer & Copyright (i)Table of Contents .................................................................................................................................... i i1.WXPYTHON – INTRODUCTION (1)2.WXPYTHON –ENVIRONMENT (2)Windows (2)Linux (2)MacOS (2)3.WXPYTHON – HELLO WORLD (3)4.WXPYTHON – FRAME CLASS (5)Window Style Constants (5)wx.Frame Class Member Functions (6)wx.Frame event binders (6)5.WXPYTHON – PANEL CLASS (7)6.WXPYTHON – GUI BUILDER TOOLS (8)7.WXPYTHON – MAJOR CLASSES (12)8.WXPYTHON – EVENT HANDLING (15)9.WXPYTHON – LAYOUT MANAGEMENT (20)10.WXPYTHON – BOXSIZER (21)iii12.WXPYTHON – FLEXIGRIDSIZER (29)13.WXPYTHON – GRIDBAGSIZER (32)14.WXPYTHON – STATICBOXSIZER (35)15.WXPYTHON – BUTTONS (38)16.WXPYTHON – STATICTEXT CLASS (43)17.WXPYTHON – TEXTCTRL CLASS (47)18.WXPYTHON –RADIOBUTTON & RADIOBOX (51)19.WXPYTHON – CHECKBOX CLASS (55)20.WXPYTHON –COMBOBOX & CHOICE CLASS (57)21.WXPYTHON – GAUGE CLASS (61)22.WXPYTHON – SLIDER CLASS (64)23.WXPYTHON – MENU ITEM, MENU & MENUBAR (67)24.WXPYTHON – TOOLBAR CLASS (72)25.WXPYTHON – DIALOG CLASS (76)MessageDialog (77)wx.TextEntryDialog (79)wx.FileDialog Class (82)wx.FontDialog Class (86)26.WXPYTHON – NOTEBOOK CLASS (89)iv28.WXPYTHON – MULTIPLE DOCUMENT INTERFACE (96)29.WXPYTHON – SPLITTERWINDOW CLASS (98)30.WXPYTHON – DRAWING API (101)wx.Colour Class (101)wx.Pen Class (102)wx.Brush Class (102)31.WXPYTHON – HTMLWINDOW CLASS (105)32.WXPYTHON – LISTBOX & LISTCTRL CLASS (107)33.WXPYTHON – DRAG AND DROP (113)wxPython is a Python wrapper for wxWidgets (which is written in C++), a popular cross-platform GUI toolkit. Developed by Robin Dunn along with Harri Pasanen, wxPython is implemented as a Python extension module.Just like wxWidgets, wxPython is also a free software. It can be downloaded from the official website . Binaries and source code for many operating system platforms are available for download on this site.Principal modules in wxPython API include a core module. It consists of wxObject class, which is the base for all classes in the API. Control module contains all the widgets used in GUI application development. For example, wx.Button, wx.StaticText (analogous to a label), wx.TextCtrl (editable text control), etc.wxPython API has GDI (Graphics Device Interface) module. It is a set of classes used for drawing on widgets. Classes like font, color, brush, etc. are a part of it. All the container window classes are defined in Windows module.Official website of wxPython also hosts Project Phoenix – a new implementation of wxPython for Python 3.*. It focuses on improving speed, maintainability, and extensibility. The project began in 2012 and is still in beta stage.5WindowsPrebuilt binaries for Windows OS (both 32 bit and 64 bit) are available on /download.php page. Latest versions of installers available are: wxPython3.0-win32-3.0.2.0-py27.exe for 32-bit Python 2.7wxPython3.0-win64-3.0.2.0-py27.exe for 64-bit Python 2.7wxPython demo, samples and wxWidgets documentation is also available for download on the same page.wxPython3.0-win32-docs-demos.exeLinuxwxPython binaries for many Linux distros can be found in their respective repositories. Corresponding package managers will have to be used to download and install. For instance on Debian Linux, following command should be able to install wxPython.MacOSPrebuilt binaries for MacOS in the form of disk images are available on the download page of the official website.67A simple GUI application displaying Hello World message is built using the following steps:∙Import wx module. ∙Define an object of Application class. ∙Create a top level window as object of wx.Frame class. Caption and size parameters are given in constructor. ∙Although other controls can be added in Frame object, their layout cannot be managed. Hence, put a Panel object into the Frame. ∙Add a StaticText object to display ‘Hello World’ at a desired position inside the window. ∙Activate the frame window by show() method. ∙Enter the main event loop of Application object.The above code produces the following output:wxPython8wxFrame object is the most commonly employed top level window. It is derived from wxWindow class. A frame is a window whose size and position can be changed by the user. It has a title bar and control buttons. If required, other components like menu bar, toolbar and status bar can be enabled. A wxFrame window can contain any frame that is not a dialog or another frame.wxPython9wx.Frame Class has a default constructor with no arguments. It also has an overloaded constructor with the following parameters:Window Style Constants4.10wx.DEFAULT_FRAME_STYLE is defined as:wx.MINIMIZE_BOX | wx.MAXIMIZE_BOX | wx.RESIZE_BORDER | wx.SYSTEM_MENU | wx.CAPTION | wx.CLOSE_BOX | wx.CLIP_CHILDRENExamplewx.Frame Class Member Functions11wx.Frame event bindersWidgets such as button, text box, etc. are placed on a panel window. wx.Panel class is usually put inside a wxFrame object. This class is also inherited from wxWindow class.Although controls can be manually placed on panel by specifying the position in screen coordinates, it is recommended to use a suitable layout scheme, called sizer in wxPython, to have better control over the placement and address the resizing issue.In wxPanel constructor, the parent parameter is the wx.Frame object in which the panel is to be placed. Default value of id parameter is wx.ID_ANY, whereas the default style parameter is wxTAB_TRAVERSAL.wxPython API has the following sizers, using which controls are added into a panel object:Sizer object is applied as the layout manager of the panel using SetSizer() method of wxPanel class.Panel object in turn is added to the top level frame.12Creating a good looking GUI by manual coding can be tedious. A visual GUI designer tool is always handy. Many GUI development IDEs targeted at wxPython are available. Following are some of them:∙wxFormBuilder∙wxDesigner∙wxGlade∙BoaConstructor∙gui2pywxFormBuilder is an open source, cross-platform WYSIWYG GUI builder that can translate the wxWidget GUI design into C++, Python, PHP or XML format. A brief introduction to usage of wxFormBuilder is given here.First of all the latest version of wxFormBuilder needs to be downloaded and installed from /projects/wxformbuilder/. On opening the application, a new project with blank grey area at the center appears.Give a suitable name to the project and choose Python as code generation language. This is done in the Object properties window as shown in the following image:1314Then from ‘Forms’ tab of components palette, choose Frame. Add a vertical wxBoxSizer from ‘Layouts’ tab.15Add necessary controls in the Box with suitable captions. Here, a StaticText (label), two TextCtrl objects (text boxes) and a wxButton object are added. The frame looks like the following image:Enable Expand and Stretch on these three controls. In the object properties for wxButton object, assign a function findsquare() to OnButtonClick event.16Save the project and press F8 to generate Python code for developed GUI. Let the generated file be named as Demo.pyIn the executable Python script, import demo.py and define FindSquare() function. Declare Application object and start a main event loop. Following is the executable code:17The above code produces the following output:wxPython18Original wxWidgets (written in C++) is a huge class library. GUI classes from this library are ported to Python with wxPython module, which tries to mirror the original wxWidgets library as close as possible. So, wx.Frame class in wxPython acts much in the same way as wxFrame class in its C++ version.wxObject is the base for most of the classes. An object of wxApp (wx.App in wxPython) represents the application itself. After generating the GUI, application enters in an event loop by MainLoop() method. Following diagrams depict the class hierarchy of most commonly used GUI classes included in wxPython.7.wxPython192021wxPythonUnlike a console mode application, which is executed in a sequential manner, a GUI based application i s event driven. Functions or methods are executed in response to user’s actions like clicking a button, selecting an item from collection or mouse click, etc., called events. Data pertaining to an event which takes place during the application’s runtime is stored as object of a subclass derived from wx.Event . A display control (such as Button) is the source of event of a particular type and produces an object of Event class associated to it. For instance, click of a button emits a mandEvent. This event data is dispatched to event handler method in the program. wxPython has many predefined event binders. An Event binder encapsulates relationship between a specific widget (control), its associated event type and the event handler method.For example, to call OnClick() method of the program on a button’s click event, the following statement is required:Bind() method is inherited by all display objects from wx.EvtHandler class. EVT_.BUTTON here is the binder, which associates button click event to OnClick() method.ExampleIn the following example, the MoveEvent, caused by dragging the top level window – a wx.Frame object in this case – is connected to OnMove() method using wx.EVT_MOVE binder. The code displays a window. If it is moved using mouse, its instantaneous coordinates are displayed on the console. 8.23The above code produces the following output:current window position x= 562 y= 309 current window position x= 562 y= 309 current window position x= 326 y= 304 current window position x= 384 y= 240 current window position x= 173 y= 408 current window position x= 226 y= 30 current window position x= 481 y= 8024Some of the subclasses inherited from wx.Event are listed in the following table:Events in wxPython are of two types. Basic events and Command events. A basic event stays local to the window in which it originates. Most of the wxWidgets generate command events. A command event can be propagated to window or windows, which are above the source window in class hierarchy.ExampleFollowing is a simple example of event propagation. The complete code is:2526In the above code, there are two classes. MyPanel, a wx.Panel subclass and Example, a wx.Frame subclass which is the top level window for the program. A button is placed in the panel.This Button object is bound to an event handler btnclk() which propagates it to parent class (MyPanel in this case). Button click generates a CommandEvent which can be propagated to its parent by Skip() method.MyPanel class object also binds the received event to another handler OnButtonClicked(). This function in turn transmits to its parent, the Example class. The above code produces the following output:Button received click event. Propagated to Panel class.Panel received click event. Propagated to Frame class.Click event received by frame class.27End of ebook previewIf you liked what you saw…Buy it from our store @ https://。
python图形开发GUI库wxpython使用方法详解

python图形开发GUI库wxpython使⽤⽅法详解⼀、python gui(图形化)模块介绍: Tkinter :是python最简单的图形化模块,总共只有14种组建 Pyqt :是python最复杂也是使⽤最⼴泛的图形化 Wx :是python当中居中的⼀个图形化,学习结构很清晰 Pywin :是python windows 下的模块,摄像头控制(opencv),常⽤于外挂制作⼆、wx模块的安装:C:\Users\Administrator> pip install wxpython三、图形化介绍四、wx主要组件介绍1、frame(窗⼝)参数:parent = None #⽗元素,假如为None,代表顶级窗⼝id = None #组件的标识,唯⼀,假如id为-1代表系统分配idtitle = None #窗⼝组件的名称pos = None #组件的位置,就是组件左上⾓点距离⽗组件或者桌⾯左和上的距离size = None #组件的尺⼨,宽⾼style = None #组件的样式name = None #组件的名称,也是⽤来标识组件的,但是⽤于传值2、TextCtrl(⽂本框)参数:parent = None #⽗元素,假如为None,代表顶级窗⼝id = None #组件的标识,唯⼀,假如id为-1代表系统分配idvalue = None #⽂本框当中的内容GetValue #获取⽂本框的值SetValue #设置⽂本框的值pos = None #组件的位置,就是组件左上⾓点距离⽗组件或者桌⾯左和上的距离size = None #组件的尺⼨,宽⾼style = None #组件的样式validator = None #验证name = None #组件的名称,也是⽤来标识组件的,但是⽤于传值3、Button(按钮)参数:parent = None #⽗元素,假如为None,代表顶级窗⼝id = None #组件的标识,唯⼀,假如id为-1代表系统分配idlable = None #按钮的标签pos = None #组件的位置,就是组件左上⾓点距离⽗组件或者桌⾯左和上的距离size = None #组件的尺⼨,宽⾼style = None #组件的样式validator = None #验证name = None #组件的名称,也是⽤来标识组件的,但是⽤于传值其它组件的参数类似4、创建窗⼝基础代码基本创建窗⼝代码说明:import wx #引⼊wx模块app = wx.App() #实例化⼀个主循环<br>frame = wx.Frame(None) #实例化⼀个窗⼝<br>frame.Show()#调⽤窗⼝展⽰功能<br>app.MainLoop()#启动主循环效果如下图:五、Gui编写简单实例实现如下⼀个GUI界⾯,在上⾯⽂本框中输⼊⽂本⽂件地址,点击“打开”按钮后将⽂本⽂件内容显⽰在下⾯的⽂本框中。
- 1、下载文档前请自行甄别文档内容的完整性,平台不提供额外的编辑、内容补充、找答案等附加服务。
- 2、"仅部分预览"的文档,不可在线预览部分如存在完整性等问题,可反馈申请退款(可完整预览的文档不适用该条件!)。
- 3、如文档侵犯您的权益,请联系客服反馈,我们会尽快为您处理(人工客服工作时间:9:00-18:30)。
活学活用wxPython
活学活用wxPython
项目说明本书英文版版权由原作者所有,前言及本书内容介绍两章由CliffPeng(Hairui)翻译,其他章节由ZZJ翻译完成,经CliffPeng整理成wiki。
中文译文为译者学习笔记性质,但非经译者允许请勿转载及摘录用作商业盈利目的。
经网友介绍,在找到了由zzj翻译的稿件,经征得同意,转载于此,作为日后学习提高的基础。
内容索引章节名
翻译者
翻译进度
审校者
审校进度备注前言CliffPeng 100% CliffPeng 33%
致谢
0%
关于本书CliffPeng
100% CliffPeng 33%
第一部分0%
第一章欢迎使用wxPython
ZZJ
100%
CliffPeng
33%
第二章给wxPython程序一个坚实的基础ZZJ
100%
CliffPeng
33%
第三章在事件驱动环境中开发ZZJ
100%
CliffPeng
33%
第四章用PyCrust使得wxPython更易处理ZZJ
100%
CliffPeng
33%
第五章绘制蓝图
ZZJ
100%
CliffPeng
33%
第六章使用wxPython基本构件ZZJ
100%
CliffPeng
33%
第二部分基础wxPython ZZJ
100%
CliffPeng
33%
第七章使用基础控件
ZZJ
100%
CliffPeng
33%
第八章将构件放入窗体中ZZJ
100%
CliffPeng
33%
第九章通过对话框让用户选择ZZJ
100%
CliffPeng
33%
第十章创建和使用wxPython菜单
ZZJ
100%
CliffPeng
33%
第十一章使用sizer放置构件ZZJ
100%
CliffPeng
33%
第十二章操作基本图像ZZJ
100%
CliffPeng
33%
第三部分高级wxPython
ZZJ
100%
CliffPeng
33%
第十三章建造列表控件并管理列表项ZZJ
100%
CliffPeng
33%
第十四章网格控件ZZJ
100%
CliffPeng
33%
第十五章树形控件
ZZJ
100%
CliffPeng
33%
第十六章在应用程序中加入HTML ZZJ
100%
CliffPeng
33%
第十七章wxPython的打印构架ZZJ
100%
CliffPeng
33%
第十八章使用wxPython的其他功能ZZJ
100%
CliffPeng
33%。