浪潮存储系统AS3000用户手册V1.0
浪潮全产品手册.pdf说明书

浪潮全产品手册浪潮服务器关键应用主机高性能人工智能英信服务器统一存储天梭M13天梭TS860G3天梭TS860M5TL1000/2000DPS-M1BCP FS5900FS6500/6600FS6800FS9510/9520 NF5180M5NF5280M5NF5270M5NF8480M5大数据云海Insight 云海大数据一体机NF5486M5NF5466M5I9000SR整机柜InCloudRack融合架构整机柜AS5600G2/AS5800G2AS2200G2/AS2600G2AS5300G2/AS5500G2AS5600AS18000NP5570M5ON5263M5OB5161M4OB5162M5存储光纤交换机备份软件业务连续性保护软件磁带库DP1000-M1备份一体机目录NF8260M5i24NF5280M5AGX-2GX4NF5280M5-VNF5468M5SR-AI整机柜F10A FPGAAS1300G2/1500G2/1600G2AS13000HF5000软件定义存储HF系列全闪AS2600G2-F/AS5300G2-F/AS5500G2-F/AS5600G2-F/AS5800G2-F安全可信服务器SSR主机安全增强系统安全应用交付系统运维安全管控系统数据库安全审计系统AIStation天眼AI应用程序特征分析系统深度学习框架CAFFE-MPIi48云操作系统K-DB数据库超融合架构一体机InCloud OpenStack云操作系统I8020刀片服务器 NF5288M5(AGX-2)NF5280M5i24i48TS860M5ClusterEngine集群管理平台基因一体机GeneEngine M2F10A FPGA天眼高性能应用特征监控分析系统K-DB K-RAC集群云海OS·服务器虚拟化系统 V5数据中心管理平台InCloud Manager01关键应用主机天梭M13支持高达48TB内存容量的千核级新一代关键应用主机,拥有单日处理数十亿笔交易的强大计算能力,为客户核心业务量身打造。
MaxAttach NAS 3000 Quick Start Card 用户手册说明书
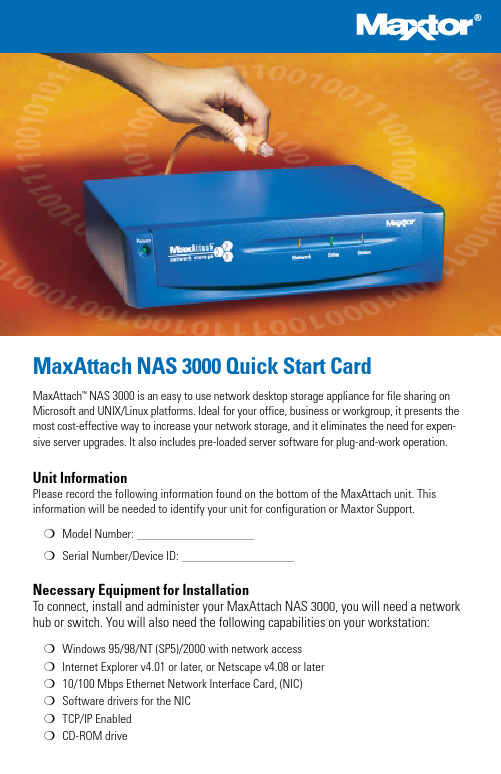
MaxAttach NAS 3000 Quick Start CardMaxAttach™NAS 3000 is an easy to use network desktop storage appliance for file sharing on Microsoft and UNIX/Linux platforms. Ideal for your office, business or workgroup, it presents the most cost-effective way to increase your network storage, and it eliminates the need for expen-sive server upgrades. It also includes pre-loaded server software for plug-and-work operation. Unit InformationPlease record the following information found on the bottom of the MaxAttach unit. This information will be needed to identify your unit for configuration or Maxtor Support.❍Model Number:❍Serial Number/Device ID:Necessary Equipment for InstallationTo connect, install and administer your MaxAttach NAS 3000, you will need a network hub or switch. You will also need the following capabilities on your workstation:❍Windows 95/98/NT (SP5)/2000 with network access❍Internet Explorer v4.01 or later, or Netscape v4.08 or later❍10/100 Mbps Ethernet Network Interface Card, (NIC)❍Software drivers for the NIC❍TCP/IP Enabled❍CD-ROM drive1Connect MaxAttach To Your Network1.To connect the MaxAttach unit to the network, insert the cable that came withthe unit into the network connection on the back of MaxAttach. Insert the otherend into a 10/100 BASE-T Ethernet connection on your network hub or switch.Use the power adapter and cord to connect the MaxAttach to a power source.2.Power on MaxAttach by pressing the On/Off button in the back of the unit. Onthe front panel of the box, the power light will flash for several minutes duringthe power-up cycle. When the power light stops flashing and the networklight is on, your MaxAttach is ready to configure.2Install the MaxNeighborhood Software1.Insert the self-launching CD in the CD-ROM drive and follow the on-screeninstallation instructions.2. A welcome screen will appear with options to install MaxNeighborhood or toRegister Online. Click the Install MaxNeighborhood button.3.When the installation is complete, you will be given the option to launch.To launch, click FINISH. A MaxNeighborhood window will appear with a“SEARCHING, Please Wait….” message – indicating that the computeris searching for MaxAttach units. When the search is complete, the gridwindow will display the MaxAttach unit(s) on your network.3Launch the Configuration Wizard1.Highlight and double-click on the name of your MaxAttach unit in theMaxNeighborhood window.2.The Configuration Wizard will help you set the clock, assign an administratorpassword and assign a unit name and workgroup. The system will restartwith the updated settings.3.You’re Done! For more details on configuration, installation and troubleshooting, please refer to the MaxAttach NAS 3000 Installation Guide. Technical support is available at 1-800-4MAXTOR and at © 2000 Maxtor Corporation. All rights reserved. Maxtor is a registered trademark of Maxtor Corporation. MaxAttach and MaxNeighborhood are trademarks of Maxtor Corporation. Other product, company names and logos are trademarks or registered trademarks of their respective owners. Specifications subject to change without notice. Printed in the U.S.A. 06/00 1464B。
浪潮存储DCS02系统产品安装指导书V1.1版(本指导书适用于AS500G,AS500E存储安装)
涉密第1页/共41页IT service management | 2013 INSPUR ™Copyright and Confidentiality StatementAny information contained in this document, whether it is related to Inspur or its partners, including but not limited to functional description, policies, processes, decisions, employee information, agent and customer information, and all financial data, shall be kept in strict confidence.Copyright© Inspur Group Limited 2014文档信息文档修改记录版权及保密性声明本文档中包含的所有信息,无论涉及到浪潮还是其合作伙伴(包括但不限于功能描述、政策、流程、决定、雇员信息、代理及客户信息以及所有的财务信息),都必须绝对保密。
本文件中出现的任何文字叙述、文档格式、插图、照片、方法、过程等内容,除另有特别注明,版权均属浪潮信息所有,受到有关产权及版权法保护。
任何单位和个人未经浪潮信息的书面授权许可,不得复制或引用本文件的任何片断,无论通过电子形式或非电子形式。
浪潮集团版权所有© 2013目录1.产品介绍 (5)1.1.产品参数 (5)2.调试过程 (5)2.1.硬件安装 (5)2.1.1.硬盘安装 (5)2.1.2.连接扩展柜 (6)2.2.系统授权码申请及注册 (7)2.2.1.获取机器码 (7)2.2.2.授权码注册 (8)重要说明 (8)2.3.存储配置 (8)2.3.1.磁盘信息 (9)2.3.2.卷组管理 (11)2.3.3.逻辑卷管理 (12)3.映射主机 (14)3.1.FC-SAN (14)3.1.1.FC主机组管理 (14)3.1.2.增加FC主机 (15)3.2.IP-SAN (18)3.2.1.主机组信息 (18)3.2.2.新建主机组 (19)3.2.3.增加主机 (19)3.2.4.映射磁盘 (19)4.IP-SAN环境ISCSI启动器的安装与配置 (20)4.1.WINDOWS系统ISCSI启动器安装与配置 (20)4.2.Linux 上启动器的安装和使用 (26)5.多路径软件的安装 (28)5.1.Windows多路径功能 (28)5.1.1.Windows 2003 MPIO安装设置 (28)5.1.2.Windows 2008 MPIO 安装设置 (28)5.1.3.Linux多路径安装配置 (36)6.其他 (40)1.产品介绍1.1. 产品参数2.调试过程2.1. 硬件安装2.1.1.硬盘安装将硬盘从硬盘包装袋中取出,按从右到左的顺序逐一安装硬盘,硬盘安装到位后,应扣紧卡扣,使硬盘面板齐平,如下图2.1.2.连接扩展柜AS500G/AS500E的扩展柜为AS500GJ或者AS500EJ扩展柜示意图如下:连接一个扩展柜方法连接多个扩展柜方法2.2. 系统授权码申请及注册2.2.1.获取机器码通过控制器的IP地址登陆每个控制器,获取两个控制器的机器码2.2.2.授权码注册将两个控制器的系统机器码、购买的功能选择等信息发送给浪潮客户服务部为您产生产品授权码,并发送邮件或致电给您。
浪潮集团 AS2000浪潮存储系统说明书

浪潮集团有限公司
尊敬的浪潮存储系统用户:
衷心感谢您选用了浪潮存储系统!
本手册介绍了浪潮存储系统的技术特性与系统的安装、设置和使用,有助于 您更详细地了解和便捷地使用本款存储系统。
请将我方产品的包装物交废品收购站回收利用,以利于污染预防,造福人类。 浪潮集团有限公司拥有本手册的版权。 未经浪潮集团有限公司许可,任何单位和个人不得以任何形式复制本用户手 册。浪潮集团有限公司保留随时修改本手册的权利。 本手册中的内容如有变动恕不另行通知。我们建议您在使用浪潮存储系统之 前仔细阅读本手册,以避免您在操作中出现失误。 手册中难免存在细节上的不足,希望您能够包涵,并及时给我们批评指正。 如果您对本手册有疑问或建议,请向浪潮集团有限公司垂询。
目录
声 明...........................................................................................................................................3 安全细则...........................................................................................................................................4 第一章 安装准备工作.....................................................................................................................8
AS3000基本配置操作表
redundant link #1 IP: 192.168.171.2 MASK:255.255.255.0 redundant link #2 IP: 192.168.172.2 MASK:255.255.255.0
西门子推荐设置, 一个系统内每对 AS3000都使用同样 的设置
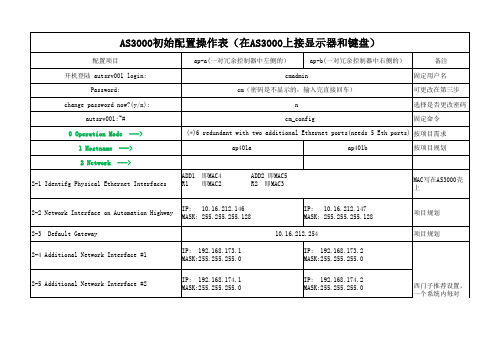
AS3000初始配置操作表(在AS3000上接显示器和键盘)
配置项目 开机登陆 autsrv001 login: Password: change password now?(y/n): autsrv001:~# 0 Operation Mode 1 Hostname 2 Network ---> ap-a(一对冗余控制器中左侧的) cmadmin cm(密码是不显示的,输入完直接回车) n cm_config ap-b(一对冗余控制器中右侧的) 备注 固定用户名 可更改在第三步 选择是否更改密码 固定命令
项目规划
项目规划
项目规划
11 Expert Configuration <Exit>
--->
Do you really want to store the configuration?< Yes > < Yes >
autsrv001:~#ຫໍສະໝຸດ reboot 按Enter键
10.16.210.200 (空格) 10.16.210.201 ---> base-name:winsrv40 IP on the Application Highway: 10.16.212.10 IP on the Automation Highway: 10.16.212.130 the hostname for the remote CM ap401b IP address of the remote CM 10.16.212.147 Remote Redundant Interface #1 192.168.171.2 Remote Redundant Interface #2 192.168.172.2
浪潮云服务器操作手册

目录第一章系统概述 ................................................................................................................................... - 1 -1.1 系统简介 .................................................................................................................................. - 1 -1.2 系统功能图 .............................................................................................................................. - 2 -1.3 基本操作说明........................................................................................................................... - 2 -第二章访问系统 ................................................................................................................................... - 3 -2.1 安装和设置 .............................................................................................................................. - 3 -2.2 启动过程 .................................................................................................................................. - 3 -2.3 停止和挂起工作....................................................................................................................... - 4 -第三章功能说明 ................................................................................................................................... - 5 -3.1 控制板 ...................................................................................................................................... - 5 -3.2 云主机操作 .............................................................................................................................. - 6 -3.2.1 创建云主机 ................................................................................................................... - 7 -3.2.2 云主机启动 ................................................................................................................. - 12 -3.2.3 获取密码 ..................................................................................................................... - 12 -3.2.4 云主机镜像 ................................................................................................................. - 13 -3.2.5 云主机重启 ................................................................................................................. - 16 -3.2.6 云主机关机 ................................................................................................................. - 17 -3.2.7 删除云主机 ................................................................................................................. - 17 -3.2.8 查看控制台 ................................................................................................................. - 18 -3.3 查找 ........................................................................................................................................ - 18 -3.3.1 筛选过滤 ..................................................................................................................... - 18 -3.3.2 搜索查找 ..................................................................................................................... - 19 -3.4 存储 ........................................................................................................................................ - 21 -3.5 模板 ........................................................................................................................................ - 30 -3.6 事件 ........................................................................................................................................ - 38 -3.7 业务资源调配......................................................................................................................... - 40 -3.7.1 增加带宽 ..................................................................................................................... - 40 -3.7.2 减少带宽 ..................................................................................................................... - 41 -3.7.3 增加内存和CPU .......................................................................................................... - 42 -3.7.4 减少内存和CPU .......................................................................................................... - 43 -3.8 迁移性 .................................................................................................................................... - 44 -3.8.1 云主机导入 ................................................................................................................. - 44 -3.8.2 云主机导出 ................................................................................................................. - 45 -第一章系统概述1.1系统简介浪潮云服务管理系统是一个开源软件平台的计算资源池,以建立公有、私有和混合IaaS层云。
浪潮存储操作文档

存储操作手册
1、安装浪潮存储客户端软件或Web登录密码为:root123)登录。
2、打开“Inspur Infinity Storage System Software”软件,默认用户名:
Management Host, 默认密码:root123(已修改)
3、登录后选择快速设置,进行搜索设备,左侧栏目后搜索到AS520E存储设备。
在系统设置里面可以修改名称
4、点击系统设置,修改登录密码。
5、点击系统信息,查看存储状态
6、点击通道,查看存储所有硬盘状态。
7、点击创建磁盘,选择硬盘,做存储RAID大小;本次做RAID 5+全局热备方案。
8、做完RAID后查看RAID在线信息。
9、点击创建分区,选择创建大小,其他分区类同。
10、扩展分区,点击任务栏扩展分区进行磁盘扩展。
11、创建后查看是否在正常状态。
12、点击任务栏“主机LUN映射”,进行磁盘挂载到主机。
选择自定义LUN映射配置,选择服务器HBA卡连接光纤跳线到存储端口,也就是插槽通道。
13、添加分组查找服务器WWN号
点击分配组加入到组里面创建。
14、选择通道,点击映射
在分区状态栏查看磁盘是否已经映射,存储磁盘已经挂载完成。
浪潮存储系统AS系列存储管理手册(V3.0)
选择任意一个硬盘,回车选择 scan scsi drive.
回车选择要扫描的磁盘通道。回车就可以看到这个通道未被占用的 ID。
7
浪潮存储 身边的存储专家
Hale Waihona Puke AS 存储系统用上下方向键选择要扫描的 ID号,回车选择Y E S 确认操作。就会弹出一个信息框,显 示结果。
创建 log ic Drive
有两种方式可以创建 log ic Drive. 第一种可以选择主菜单的Q uick installation.(单机扩容用户可以选择这样的方式配置, 双机或网络应用,不推荐使用。)
选择 Y E S 后,回车。选择要设定的 R AID 级别。系统默认会用所有的硬盘来组建一个 log ic Drive,如果指派了 Spare,系统会用最小磁盘通道中 ID 号最小的硬盘来充当。
1
浪潮存储 身边的存储专家
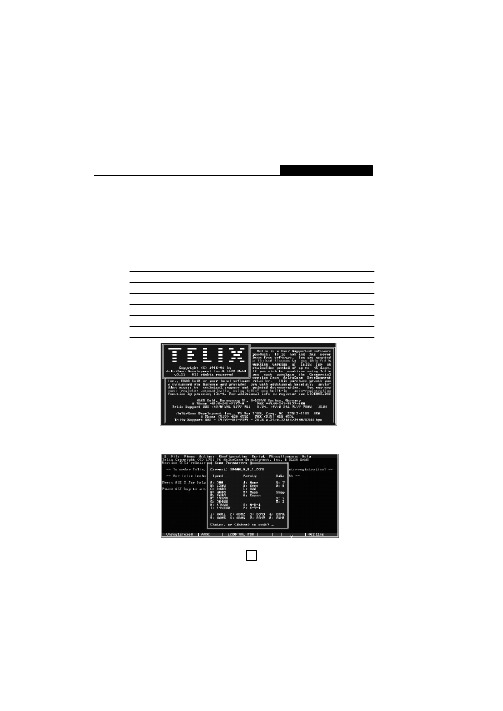
③进入终端程序界面,按回车键,选择显示的格式。
AS 存储系统
④回车,控制界面显示在屏幕上。
菜单栏 :系统设置及管理菜单,此区域可进行操作或浏览。 菜单栏操作控制键:
方向键:↑ 方向键:↓ Enter E sc
按键向上翻菜单 按键向下翻菜单 选择确认键,选择、进入子菜单或执行一个操作 退出键,返回上级菜单或放弃操作
选择了 R AID 级别,回车开始创建 log ic Drive,并把这个 log ic Drive作为一个分区 映射到第一主机通道的 L U N 0.
10
第 三 章 创 建 阵 列
注 意
假如客户需要浪潮在出厂之前配置相应 R AID 级别的阵列,浪潮采用 Q uick instal- lation方式,客户可以根据自己的需要进行L U N 号的映射配置。具体操作可查考view and edit h ost L uns设置。