DOP-B07S411触摸屏说明书
DOP-B07S411触摸屏说明书

C
(5) Specifications
MODEL LCD MODULE Display Type Resolution Backlight Display Size Operation System MCU NOR Flash ROM SDRAM Backup Memory Buzzer USB COM1 DOP-B07S411 DOP-B07S411K 7" TFT LCD (65535 colors) 800 x 480 pixels LED Back Light (less than 20,000 hours half-life at 25 C) (Note 1) 154.08 x 85.92mm Delta Real Time OS 32-bit RISC Micro-controller Flash ROM 128 MB (OS System: 30MB / Backup: 16MB / User Application: 82MB) 64Mbytes 32Kbytes Multi-Tone Frequency(2K ~ 4K Hz)/85dB 1 USB Slave Ver 2.0 1 USB Host Ver 1.1 RS-232(supports hardware flow control) RS-232 / RS-485 RS-422 / RS-485 N/A Built-in Natural air circulation CE IP65 DC +24V(-10% ~ +15%)(please use isolated power supply) AC500V for 1 minute (between charging (DC24V terminal) and FG terminals) 4.0W 3V lithium battery CR2032 × 1 It depends on the temperature used and the conditions of usage, o about 3 years or more at 25 C. 0 C ~ 50 C -20 C ~ +60 C 10% ~ 90% RH [0 ~ 40 C], 10% ~ 55% RH [41 ~ 50 C] Pollution Degree 2 IEC 61131-2 Compliant 5Hz≦f<9Hz = Continuous: 1.75mm / Occasional: 3.5mm 9Hz≦f≦150Hz = Continuous: 0.5g / Occasional: 1.0g X, Y, Z directions for 10 times 215 x 161 x 50 196.9 x 142.9 Approx. 820g Approx. 840g
台达DOP B S 触摸屏和CT MEV 驱动器MODBUS通讯应用
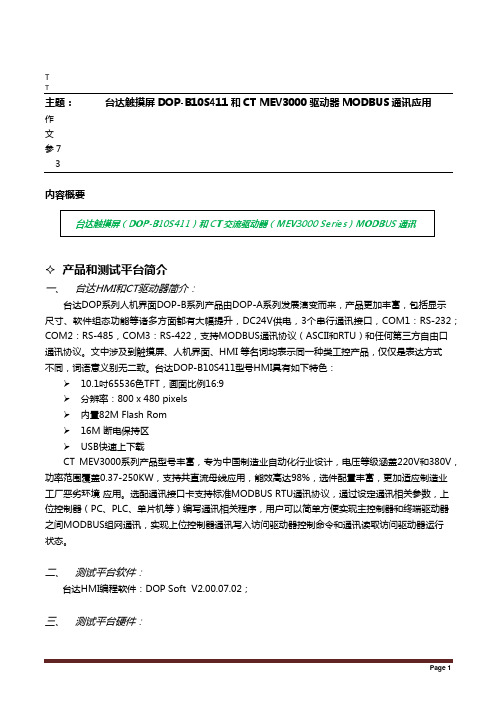
TT主题:台达触摸屏DOP-B10S411和CT MEV3000驱动器MODBUS通讯应用作文参73内容概要台达触摸屏(DOP-B10S411)和CT交流驱动器(MEV3000 Series)MODBUS通讯✧产品和测试平台简介一、台达HMI和CT驱动器简介:台达DOP系列人机界面DOP-B系列产品由DOP-A系列发展演变而来,产品更加丰富,包括显示尺寸、软件组态功能等诸多方面都有大幅提升,DC24V供电,3个串行通讯接口,COM1:RS-232;COM2:RS-485,COM3:RS-422,支持MODBUS通讯协议(ASCII和RTU)和任何第三方自由口通讯协议。
文中涉及到触摸屏、人机界面、HMI 等名词均表示同一种类工控产品,仅仅是表达方式不同,词语意义别无二致。
台达DOP-B10S411型号HMI具有如下特色:➢10.1吋65536色TFT,画面比例16:9➢分辨率:800 x 480 pixels➢内置82M Flash Rom➢16M 断电保持区➢USB快速上下载CT MEV3000系列产品型号丰富,专为中国制造业自动化行业设计,电压等级涵盖220V和380V,功率范围覆盖0.37-250KW,支持共直流母线应用,能效高达98%,选件配置丰富,更加适应制造业工厂恶劣环境应用。
选配通讯接口卡支持标准MODBUS RTU通讯协议,通过设定通讯相关参数,上位控制器(PC、PLC、单片机等)编写通讯相关程序,用户可以简单方便实现主控制器和终端驱动器之间MODBUS组网通讯,实现上位控制器通讯写入访问驱动器控制命令和通讯读取访问驱动器运行状态。
二、测试平台软件:台达HMI编程软件:DOP Soft V2.00.07.02;三、测试平台硬件:T四、DOP和MEV3000通讯连线制作方法:MEV3000参数设置和通讯地址说明一、MEV3000驱动器通讯访问参数地址编码规则:TTMEV驱动器作为MODBUS RTU从机设备,定义了两种寻址方式,即标准和非标准寄存器方式,还涉及到16bit或者32Bits数据访问方式。
控制器触摸屏操作说明书

控制器触摸屏操作说明书操作说明书说明书编号:XXXXX-XXXXX版本号:V1.01. 引言本操作说明书旨在提供有关控制器触摸屏操作的详细说明。
请仔细阅读本手册,并按照指示正确操作,以确保设备的正常运行和安全性能。
如有任何疑问或困惑,请及时咨询相关专业人员。
2. 操作安全须知在使用控制器触摸屏之前,请务必遵守以下注意事项:2.1 请将手指干燥清洁,并确保触摸屏表面干净无污垢。
2.2 请勿使用锐利物体或过硬物体敲击触摸屏。
2.3 在触摸屏上绘画或书写时,请使用特制的触摸笔。
2.4 避免使用过大的力量按压触摸屏,以免损坏触摸屏。
2.5 请勿将化学性溶剂直接接触触摸屏表面,以免腐蚀触摸屏。
3. 控制器触摸屏操作方法控制器触摸屏的操作方法如下:3.1 打开控制器:首先确认电源已连接并处于正常工作状态。
然后按下触摸屏上的开关按钮,待控制器系统启动完成后即可进入操作界面。
3.2 导航功能:触摸屏上方配备有导航栏,用于切换不同的操作功能。
通过轻触导航栏中的图标,即可进入相应的功能模块。
3.3 菜单操作:在每个功能模块中,触摸屏下方将显示相关菜单选项。
通过轻触相应的菜单选项,即可进一步打开或选择所需操作内容。
3.4 参数设置:在特定功能模块中,系统会提供参数设置选项,用户可根据具体需求调整相应参数。
轻触参数设置区域,并按照提示进行参数调整。
3.5 保存和退出:完成所有操作后,请务必保存修改内容。
在退出系统前,可点击屏幕右上角的退出按钮,选择“确认退出”以正常关机。
4. 常见问题解决4.1 触摸屏无法正常操作若出现触摸屏无法响应操作的情况,请检查以下几点:- 请确保触摸屏没有受到外部物体撞击或其他损坏。
- 检查触摸屏是否被污垢或水分覆盖,若有,请清洁并晾干触摸屏。
- 请重启控制器系统并重新尝试操作。
4.2 触摸屏显示异常或反应迟缓若出现触摸屏显示异常或反应迟缓的情况,请尝试以下方法:- 检查电源供应是否稳定,若电压过低或不稳定,请重新连接稳定的电源。
波士恰7英寸触摸屏LCD说明书

Supports various systems7inch HDMI LCD (B) (with bicolor case)Working with Raspberry PiFor the Windows OS on PC, the resolution of the LCD is automatically identified. Hence, you do not need to make the relative settings. When working with Raspberry Pi, you should set the resolution of the LCD by yourself, or else the LCD screen will not work. For more detail information, please read the following section.Turn on the "backlight" switch then connect the LCD to your Pi (HDMI Port of LCD -> HDMI Port of Pi; USB Port of LCD -> USB Port of Pi; 5V~2A power supply). Download the Raspbian image from Raspberry Pi web site (https:///downloads/). Write the image to a TF card and append the following lines to the config.txt file which is located in the root of your TF card:max_usb_current=1hdmi_group=2hdmi_mode=87hdmi_cvt 800 480 60 6 0 0 0hdmi_drive=1You must make sure that there are no spaces on either side of the equal sign.Save and connect the TF card to your Pi then power up.(Touch input working well means that the LED firmware is Rev2.1. If the LCD firmware is 1.1, see#About LCD revision)Note: Resolution of Ubuntu Mate OS or Windows 10 IoT Core OS can also be set properly by editing config.txt.RotationDisplay RotatingTo rotating the display, you can append this statement to the config filedisplay_rotate=1 #1: 90; 2: 180; 3: 270Reboot the Raspberry Pisudo rebootTouch rotatingWith the operation above. The screen could rotate in display. However, the touch works improperly. To rotate the touch as display, you could do as below:1. install libinputsudo apt-get install xserver-xorg-input-libinput2. create an xorg.conf.d foldersudo mkdir /etc/X11/xorg.conf.d3. copy file 40-libinput-conf to the folder which we createdsudo cp /usr/share/X11/xorg.conf.d/40-libinput.conf /etc/X11/xorg.conf.d/4. Append a statement to touchscreen part of the file as below:sudo nano /etc/X11/xorg.conf.d/40-libinput.conf5. save and reboot your Pisudo rebootAfter completing these steps. The LCD could rotate 90 degree both display and touch.Note:90 degree: Option "CalibrationMatrix" "0 1 0 -1 0 1 0 0 1"180 degree: Option "CalibrationMatrix" "-1 0 1 0 -1 1 0 0 1"270 degree: Option "CalibrationMatrix" "0 -1 1 1 0 0 0 0 1"About LCD revisionAn LCD with Rev 2.1 firmware does not require any drivers, that is, touch function works properly without installing any software. So we did not provide any drivers and images for Rev 2.1 LCDs. The following drivers are only available for the LCD with Rev 1.1 firmware. But if you install the driver for the Rev 2.1 one, it will lead touch function not to work.Rev2.1 New FeaturesStandard HID protocol, easy to be integrated into your system.For the Raspberry Pi, supports Raspbian, Ubuntu Mate, single touch, and driver free.When work as a computer monitor, supports Windows 10/8.1/8/7, five-points touch, and driver free.Rev1.1 and beforeFor the Raspberry Pi, comes with Raspbian driver (works with your Raspbian directly), andUbuntu imageWhen work as a computer monitor, touch function is unavailableHow to distinguishSee the backside of your LCD. The Revision number "Rev2.1" printed means that the LCDfirmware is Rev 2.1.However, "Rev1.1" printed on the backside doesn't mean that the LCD firmware must be Rev 1.1.Generally speaking, a LCD shipped after January 1, 2016 may be a Rev 2.1 one, although it was printed "Rev1.1".Note: The only difference between Rev 1.1 and Rev 2.1 is the firmware, but hardware solutions, placement and routing are all the same. (PCB printings might be different due to different production batches.)You can verify the firmware by these steps:1. Using Raspberry Pi: Connect the LCD to your Pi (HDMI Port of LCD -> HDMI Port of Pi; USB Port of LCD -> USB Port of Pi; 5V~2A power supply). Download the image, e.g. Raspbian 2015-11-21 jessie or Raspbian 2015-05-05 wheezy, from Raspberry Pi web site (https:///downloads/). Write the image to a TF card and add the following code to the end of /boot/config.txt:max_usb_current=1hdmi_group=2hdmi_mode=87hdmi_cvt 800 480 60 6 0 0 0hdmi_drive=1You must make sure that there are no spaces on either side of the equal sign.Save and connect the TF card to your Pi then power up. If touch works, that means the firmware revision is Rev 2.1.2. Without Raspberry Pi: A PC (Windows 10/8.1/8/7) is required which cannot connect with other display device. Connect the LCD to your PC (USB Port of LCD -> USB Port of PC; HDMI Port of LCD -> HDMI Port of PC. Please first connect the USB Ports then connect the HDMI Port). If a new touch drive is recognized by Windows, that means the firmware revision is Rev 2.1. In this case, after the driver successfully installed, you can use the LCD as a human interface device.If the touch function doesn't work properly after these steps, the firmware revision is often Rev1.1, which can also work by other methods, see Rev 1.1 Manual.Detailed informationDepending on the firmware, please view the instructions of different revision:[Expand] [Expand]7inch HDMI LCD (B) (Firmware Rev 2.1) User Manual7inch HDMI LCD (B) (Firmware Rev 1.1) User Manual(Not support Raspberry Pi 3 Model B)(/wiki/7inch_HDMI_LCD_(B)_(Firmware_Rev_1.1)_User_Manual)How to install 7inch Bicolor caseResourcesAn LCD with Rev 2.1 firmware does not require any drivers, that is, touch function works properly without installing any software. So we did not provide any drivers for Rev 2.1 LCDs.7inch HDMI LCD (B) image - used for the LCD with firmware Rev2.17inch HDMI LCD (B) image - used for the LCD with firmware Rev1.1Drivers (only support Rev1.1 LCD)Out of date, Not available for any Raspbian OS later than 27-May-2016.RPI2B_B_B+_USB_TOUCH_CAP_7.0_RASPBIAN.tar.gz(https:///file/d/0B5ceUb50sIDnOFhsZ3IteGVGXzA/view?usp=sharing) (For Raspberry Pi 2 Model B)RPIB_B+_USB_TOUCH_CAP_7.0_RASPBIAN_20150605.tar.gz(https:///file/d/0B5ceUb50sIDnbndweF9PMGQ3UHc/view?usp=sharing) (For Raspberry Pi B+/A+/B)3D Drawings7inch HDMI LCD B/C DrawingsLCD Panel Dimension7inch HDMI LCD (B) panel dimension (/w/upload/3/34/7inch-hdmi-lcd-b-panel-dimension.pdf)Anti-PiracySince the first-generation Raspberry Pi released, Waveshare has been working on designing,developing, and producing various fantastic touch LCDs for the Pi. Unfortunately, there are quite a few pirated/knock-off products in the market. They're usually some poor copies of our early hardware revisions, and comes with none support service.To avoid becoming a victim of pirated products, please pay attention to the following features when purchasing:。
台达DOP-B系列程序的上载下载图文操作说明

台达DOP-B系列程序的上载下载操作说明1、传输时要先进入SYS界面,在屏幕的空白处长按3秒以上,弹出如下图:确定点系统设置-MISC 改为USBCOMMMODE:1进入上载下载标准模式选择COM1到这个界面就可以上载下载程序了。
2、通讯电缆的制作和连接:电缆有2种,一种是USB方口打印机线,实际连接HMI时发现屏的屏的驱动很难装上去,就用9孔串口线,两头都是孔,接HMI的COM1口。
3、软件用DOPSoft 1.01.10确定输入密码,默认12345678完成上载。
如果未通讯上就会出现如下图:班前教育记录日期:工程名称施工单位教育性质班前安全教育安全员(班组长) 安全教育内容1、施工人员必须严格执行“安全生产,预防为主”的基本方针。
还应执行项目部关于安全生产的各项规章制度。
2、施工工人必须佩戴合格的安全帽,并系好帽扣,防止安全帽脱落失去防护作用。
3、高空作业人员必须佩戴合格的安全带,作业时,应高挂低用,高空或构件上行走时,安全带必须与钢丝缆绳或稳定牢固的构件连接,更不得在无安全措施和设施的情况下冒险作业或行走。
登高作业时,必须从安全爬梯上下,禁止从钢柱上攀登和滑下。
不得在无安全保障的作业面施工作业。
4、施工人员应学会自我保护,做到不伤害他人,不被他人伤害,保证自己安全,不伤害自己。
5、施工人员不得酒后上班,不得宿醉上班。
6、上下交叉作业时,尽量避开统一垂直方向作业,上下应保持安全距离或设置安全防护层,并安排专人进行监护。
7、施工作业时,工人间应相互配合、相互呼应、相互提醒、协调一致。
当前工序安全性注意事项:1、严禁违章2、防高处坠落3、防物体打击伤害参加人员签名:。
台达屏的说明书
5.2 系统设置(System Setting)画面介绍......................................................... 5-5
5.3 上/下载(Upload/Download)画面介绍
....................................................... 5-7
A.12 新增图标输入元件
........................................................................................ A-15
A.13 新增
U盘上下载传输模式
............................................................................ A-16
第四章
Screen Editor使用范例说明
.........................................................4-1
4.1 16位配方使用范例....................................................................................... 4-1
A.6 新增
U盘报警选项
....................................................................................... A-6
A.7 新增
HMI内部系统参数................................................................................ A-8
飞利浦107s71_93彩色显示器电子用户手册说明书

electronic user's manualSafety & Troubleshooting安全与故障排除信息安全注意事项与维护 •故障排除 •监管信息 •其他有关信息返回页首安全注意事项与维护连接与使用计算机显示器前请阅读并遵循以下说明:z 如果在一段时期内不会使用显示器,将显示器电源插头拔下。
z 切勿尝试拆除背板,否则可能遭受电击。
仅限合格维护人员拆除背板。
z请勿将物体放置在显示器顶部,物体可能跌入通风口,或遮蔽通风口,影响显示器电子装置正常冷却。
z为避免电击风险或永久性损坏机器,切勿将显示器暴露在雨中或使之接触高湿度。
z切勿使用酒精或氨基液体清洁显示器。
必要时用稍微粘湿的布清洁。
清洁前将显示器电源插头拔下。
z 放置此显示器时, 请确认电源线和插座是容易接上的。
z当使用显示器时,请务必安装旋转底座以确保安全如果遵循本手册说明操作,但显示器不正常运转,请与维护人员接洽。
警告:不遵循本文规定执行控制、调整或程序有可能导致电击、电及/或机械危险。
关于本电子用户手册关于本指南 •您可能需要的其它文件 •符号说明关于本指南本电子用户指南适用于任何飞利浦彩色显示器用户。
它描述了该显示器特征、设定、操作和其它信息,该资料与印刷版本完全相同。
指南中包含以下章节:● 安全与故障排除信息提供排除常见故障的提示和方法以及您可能需要的其它有关信息。
● “关于本电子用户手册”简要介绍了手册内容、符号说明以及您可能需要参考的其它文件。
● 产品信息简要介绍了本显示器的特征及其技术规格。
● 安装显示器阐述了首次设定过程,简要介绍了显示器使用方法。
● 屏幕显示提供了调整显示器设定值的信息。
● 客户服务与保修列举了世界各地飞利浦消费者信息中心、服务台电话号码以及有关产品保修信息。
● 术语表对技术用语作了更详细的解释。
● 下载选项允许您在硬盘中保存一份完整的手册。
● 常问问题 。
返回页首您可能需要的其它文件除本电子用户指南外,您可能还需要参考以下文件:● 飞利浦彩色显示器快速入门指南总结了显示器设定步骤。
台达触摸屏入门的链接和基本按键设置方法

台达触摸屏入门的链接和基本按键设置方法
台达触摸屏链接
一、入门及已有程序的时候操作:
1.需要新建一个文档
2.选对我们使用的触摸屏的型号B07S411k:
3.选对我们的PLC
4.注意我们建立触摸屏的密码,一般初始都是12345678.上载程序到PC时要用。
5.完成后出现的界面
6.你要上载东西的时候,要设置“环境”。
按“选项”-“环境设置“
7.依照你链接的线的情况,选择USB,乙太网络,或是用PC通讯口(RS232或RS485时候用),现阶段是用USB就选USB,USB要装驱动程序,没驱动时候,我解决方法是去他们官网找USB驱动程序,或者你们自己百度一下:
8.设置好后,比如触摸屏有程序的话我们叫“上载”
9.密码就是开发者的密码,一般是刚刚的12345678.如果别人不给你看,好吧,淘宝或者百度找破解密码的程序。
点“是”随便储存一个文件名。
10.上载完成,你会得到你要的界面:
二、接下来是我们要新建一个界面操作是怎样呢?参考下面入门操作:
1、创建一个交替型按钮控件
2、控件属性对话框,此对话框内容和属性表视窗内容一样,两者都可以更改属性
3、输入对话框
4属性对话框
5、换画面按钮
6、换画面属性对话框
还有部分基本介绍,在自己参照现有的程序,去熟悉去练习。
FROM—POINT Wu。
- 1、下载文档前请自行甄别文档内容的完整性,平台不提供额外的编辑、内容补充、找答案等附加服务。
- 2、"仅部分预览"的文档,不可在线预览部分如存在完整性等问题,可反馈申请退款(可完整预览的文档不适用该条件!)。
- 3、如文档侵犯您的权益,请联系客服反馈,我们会尽快为您处理(人工客服工作时间:9:00-18:30)。
PIN1
RXD TXD GND RTS CTS
COM2 COM3
NOTE
Function Key
1. The definition of the operation LED indicator (Blue) can be determined by the users freely.
User defined key x 4 + System key x 4
A B User-defined Function Keys / System Keys A User-defined Function Keys: F1, F2, F3, F4 System Keys: , , , SYS : Power LED Indicator Lights in green when HMI works normally. : Operation LED Indicator (Blue)
DOP-B07S411 / DOP-B07S411K COM2 Port
MODE1
COM Port PIN
Perpetual CalendБайду номын сангаасr (RTC)
MODE2 COM2 COM3
MODE3 COM2 COM3
DOP-B07S411 / DOP-B07S411K (Rear View)
Cooling Method Safety Approval
215(8.46")
154.1 x 87.6mm
B
(2) Pin Definition of Serial Communication
DOP-B07S411 / DOP-B07S411K COM1 Port
COM Port PIN 1 2 3 4 5 6 7 8 9 MODE1 RS-232 C
The operation LED indicator blinks in blue when either the communication is carried out or the data is accessing (please refer to the “Note1” below for explanation). : Alarm LED Indicator (Red) The alarm LED indicator blinks in red when one of the alarms is on. D Touch Screen / Display Serial COM Port
(4) Dimensions
A B
NOTE
1) The half-life of backlight is defined as original luminance being reduced by 50% when the maximum driving o current is supplied to HMI. The life of LED backlight shown here is an estimated value under 25 C normal temperature and humidity conditions. 2) The value of the power consumption indicates the electrical power consumed by HMI only without connecting to any peripheral devices. In order to ensure the normal operation, it is recommended to use a power supply which the capacity is 1.5 ~2 times the value of the power consumption. 3) The content of this instruction sheet may be revised without prior notice. Please consult our distributors or download the most updated version at /industrialautomation/.
o o o o o o o
142.3 (5.6")
161(6.34")
B07S411/B07S411K Instrunction Sheet
142.9
DOP-B07
High Color‧Wide Screen‧ User-Friendly HMI Products
D
Note: T=1.6mm(0.063")~6mm(0.24") 51.2(2.02") T
DOP-B07S411K (Front View)
DOP-B07S411 / DOP-B07S411K
196.9
+0.04" +1.0 0 (7.75" -0
)
+1.0 (5.63"+0.04" ) -0 0
(1) Preface
Thank you for purchasing DELTA’s DOP-B series. This instruction sheet will be helpful in the installation, wiring and inspection of Delta HMI. Before using the product, please read this instruction sheet to ensure correct use. You should thoroughly understand all safety precautions before proceeding with the installation, wiring and operation. Place this instruction sheet in a safe location for future reference. Please observe the following precautions: Install the product in a clean and dry location free from corrosive and inflammable gases or liquids. Ensure that all wiring instructions and recommendations are followed. Ensure that HMI is correctly connected to a ground. The grounding method must comply with the electrical standard of the country (Please refer to NFPA 70: National Electrical Code, 2005 Ed.). Do not disassemble HMI, modify or remove wiring when power is applied to HMI. Do not touch the power supply during operation. Otherwise, it may cause electric shock. If you have any questions during operation, please contact our local distributors or Delta sales representatives. The content of this instruction sheet may be revised without prior notice. Please consult our distributors or download the most updated version at /industrialautomation.
(Note1)
C
(5) Specifications
MODEL LCD MODULE Display Type Resolution Backlight Display Size Operation System MCU NOR Flash ROM SDRAM Backup Memory Buzzer USB COM1 DOP-B07S411 DOP-B07S411K 7" TFT LCD (65535 colors) 800 x 480 pixels LED Back Light (less than 20,000 hours half-life at 25 C) (Note 1) 154.08 x 85.92mm Delta Real Time OS 32-bit RISC Micro-controller Flash ROM 128 MB (OS System: 30MB / Backup: 16MB / User Application: 82MB) 64Mbytes 32Kbytes Multi-Tone Frequency(2K ~ 4K Hz)/85dB 1 USB Slave Ver 2.0 1 USB Host Ver 1.1 RS-232(supports hardware flow control) RS-232 / RS-485 RS-422 / RS-485 N/A Built-in Natural air circulation CE IP65 DC +24V(-10% ~ +15%)(please use isolated power supply) AC500V for 1 minute (between charging (DC24V terminal) and FG terminals) 4.0W 3V lithium battery CR2032 × 1 It depends on the temperature used and the conditions of usage, o about 3 years or more at 25 C. 0 C ~ 50 C -20 C ~ +60 C 10% ~ 90% RH [0 ~ 40 C], 10% ~ 55% RH [41 ~ 50 C] Pollution Degree 2 IEC 61131-2 Compliant 5Hz≦f<9Hz = Continuous: 1.75mm / Occasional: 3.5mm 9Hz≦f≦150Hz = Continuous: 0.5g / Occasional: 1.0g X, Y, Z directions for 10 times 215 x 161 x 50 196.9 x 142.9 Approx. 820g Approx. 840g