WEFP系统说明书
上海依相乘用车电控系统使用维护说明书20131023

前言感谢您选择使用上海依相动力系统有限公司的产品,并感谢您阅读《上海依相智享电控系统使用说明书》!本说明书主要介绍了发动机电控系统部件的技术参数、使用说明和维护保养。
正确使用和保养电控系统对行车安全和延长系统的使用寿命极为重要,驾驶维护人员应仔细阅读本说明书,按要求正确使用和保养燃气电控系统。
随着产品的不断改进提高和用户不断提出的新要求,本说明书中的有关内容将会有不同程度的变更,上海依相保留在不预先通知的情况下进行修改的权力,具体配置情况应以当时产品技术文件为依据。
本说明书编写难免有一些遗漏和不足,敬请及时提出修改建议,使之渐臻完善。
谢谢!上海依相动力系统有限公司 2013年12月目录1. 依相CNG电控系统流程图2. 依相LNG电控系统流程图3. 电控系统特点及主要功能 (1)4. 电控系统主要电器部件 (3)4.1 电子控制单元ECU (3)4.2 线束 (4)4.3 电子油门踏板 (4)4.4 电子节气门 (5)4.5 曲轴位置传感器 (6)4.6 相位传感器 (6)4.7 歧管温度压力传感器/增压压力传感器 (7)4.8 燃气温度压力传感器 (7)4.9 冷却液温度传感器 (8)4.10 宽域氧传感器 (9)4.11 排温传感器 (12)4.12 废气旁通控制阀 (13)4.13 点火线圈 (13)4.14 高压线 (14)4.15 火花塞 (15)5. 电控系统主要燃气部件 (16)5.1 CNG高压过滤器 (16)5.2 CNG高压电磁阀 (16)5.3 CNG减压器 (18)5.4低压过滤热交换器 (19)5.5 LNG中压电磁阀 (20)第一章智享1.6系统介绍1.依相CNG智享电控系统流程图2.依相 LPG 智享电控系统图3.智享电控系统原理及主要功能3.1电控系统原理Ver1.6智享系统是一种燃气多点顺序喷射供气系统。
系统工作时,燃气ECU以原车喷油信号为基础信号,同时在发动机冷却水温度、燃气温度、燃气压力、真空压力等相关参数的校正,确定最终的喷气时间,由燃气喷轨向对应的发动机气缸供气。
EFP使用说明简化版

WEFP电气火灾监控系统——操作使用说明施耐德万高(天津)电气设备有限公司 质量及客户支持部1 2 3 4 5 6产品简介 WEFPT-F分离式探测器设置 WEFPT-Z组合式探测器设置 WEFPJ监控单元快速设置 WEFPS监控主机操作使用说明 常见注意事项2度质量及客户支持部一、产品简介监控主机监控单元监控探测器度质量及客户支持部3二、WEFPT-F分离式探测器设置1、地址设置波特率位拨码开关共8位,其中: 1~6位为地址位,7~8位为波特率位; 1~6位根据拨码地址表进行设置; 7、8位位波特率(9600):8为“ON”,7为“OFF”。
度质量及客户支持部4二、WEFPT-F分离式探测器设置2、地址拨码表度质量及客户支持部5三、WEFPT-组合式探测器设置1.按键说明上翻键 下翻键 前进键 回车键度质量及客户支持部6三、WEFPT-组合式探测器设置2.系统设置1.按“菜单”键,进入系统 设置界面; 2.通过“上翻键”或“下翻 键”将光标移到“系统设置 ”,按一下“回车键”进入 系统设置界面。
度质量及客户支持部7三、WEFPT-组合式探测器设置3.输入密码1.默认密码“0000” 2.按一下“回车键”进入下 一级菜单。
度质量及客户支持部8三、WEFPT-组合式探测器设置3.设置漏电报警值1.进入系统设置界面第一项 为“漏电报警值”设置; 2.按一下“回车键”进入设 置状态; 3.通过“前进键”调整数位 ; 4.通过“上翻键”或“下翻 建”调整数值; 5.设置完后按“回车键”保 存。
度质量及客户支持部9三、WEFPT-组合式探测器设置4.设置探测器地址1.进入系统设置界面后,通 过“上翻键”或“下翻建” 调整到通讯设置界面; 2.按一下“回车键”进入设 置状态; 3.通过“前进键”调整数位 ; 4.通过“上翻键”或“下翻 建”调整数值; 5.设置完后按“回车键”保 存。
注:波特率出产时已设置好,不 需再设置!度质量及客户支持部10三、WEFPT-组合式探测器设置5.返回主界面1.设置完成后,按“ 复位”按钮复位2.设备显示初始化3.返回主界面度质量及客户支持部11四、WEFPJ监控单元设置1.按键说明度质量及客户支持部12四、WEFPJ监控单元设置2.系统设置度质量及客户支持部13三、WEFPJ监控单元设置3.输入密码度质量及客户支持部14四、WEFPJ监控单元设置4.探测器设置度质量及客户支持部15四、WEFPJ监控单元设置5.设置参数1.进入“探测器设置界面”后 ,光标默认在“探测器”上;1.按一下“回车”键,光标移 到“编号”栏; 2.通过“上翻键”或“下翻建 ”选择需设置的探测器编号;1.按“前进键”将光标移到“ 使用状态”栏,再通过“上翻 键”或“下翻建”设置使用状 态; 2.设置完成后,按“回车键” 保存。
微 Focus 服务管理自动化 X(SMAX)软件版本 1.0 文件手册说明书

Software release date: July 2019Document release date: July 2019Facility Management: Visitor RegistrationVersion 1.0ContentsLegal Notices (3)Introduction (4)Visitor Registration (4)Service Catalog Offering: Register a visitor (5)People, Groups, and Roles (5)Custom Actions (5)Notifications (6)Installation and Configuration Instructions (7)Micro Focus Trademark Information (14)Company Details (14)Legal NoticesWarrantyThe only warranties for products and services of Micro Focus and its affiliates and licensors (“Micro Focus”) are set forth in the express warranty statements accompanying such products and services. Nothing herein should be construed as constituting an additional warranty. Micro Focus shall not be liable for technical or editorial errors or omissions contained herein.The information contained herein is subject to change without notice.Restricted Rights LegendConfidential computer software. Except as specifically indicated otherwise, a valid license from Micro Focus is required for possession, use or copying. Consistent with FAR 12.211 and 12.212, Commercial Computer Software, Computer Software Documentation, and Technical Data for Commercial Items are licensed to the U.S. Government under vendor's standard commercial licenseCopyright Notices© 1993-2019 Micro Focus or one of its affiliatesIntroductionThis package provides support for managing Visitor registration, a common requirement for Facility management in the enterprise.The applications consist of the following components:∙ A visitor registration entity process used to record and track a visitor’s details including the time they are onsite, who will be their host, pass allocated, vehicle registration details and any parking required ∙Allow an employee to create a visitor registration record utilizing a Visitor Request Catalog Offering that is exposed for self-service access through the SMAX Portal.Visitor RegistrationThe Visitor registration process is designed to allow recording of planned visits to a company location. These could be originated from employee reporting via the self-service portal, or contacting the reception in advance, or even to record a visitor that has not been registered in advance and a host has agreed to see them.The following process is defined by default for visitor registration processing, and this can be further configured or changed as needed to match customer specific practices.The work within the process is as follows:▪Phase: New - When a Visitor registration is first created and being filled out, the record resides in this phase. As long as the Visitor name has been populated, the record will automatically move to the next phase.▪Phase: Planned– This phase is used for any visitor registration records prior to the visitor arriving on site. During this phase the details of the record can be updated as information is made available (forexample if parking is required, what site they will be visiting and expected Arrival time). If the visit has been cancelled, the record can be manually moved to the End phase.▪Phase: On site– This phased is used to record that a visitor is onsite at the given location and cannot be set manually. For the transition to this phase to occur, the Arrival time, Host and Pass No. fields should be populated. If the check box for “Is a parking space required?” has been ticked, the Car Registration & Parking space No. fields are also mandatory.▪Phase: End– The final phase is for when the registration is closed, and the visitor is no longer on site or the registration was cancelled.Service Catalog Offering: Register a visitorTo enable self-service submission of visitor registration records, you may define a Catalog Offering that triggers the creation of a visitor registration record as part of its fulfillment. Such offering is not included in the marketplace package and must be defined manually.See the configuration section for details.People, Groups, and RolesFor proper implementation of the visitor registration package, you will manage people, and roles related to the facility management operations in the company.Define your own roles to provide the Facility management teams that manage access to sites such as receptionists or security guards with the needed rights to view and modify visitor registration records.Custom Actions2 custom actions have been defined by default within the Visitor registration record:▪The visitor registration record has a custom action to Call Host using the SIP protocol used by many desktop VOIP applications such as Skype for Business.▪The visitor registration record has a custom action to Send Email to Host to notify them that their visitor has arrived on site.You will see these actions within the corresponding application record detail pages:See the configuration section for instructions on setting up Custom Actions.NotificationsFor the Send email to Host button, a custom action is used to send a notification.Installation and Configuration InstructionsNOTE: When loading packages published on the Market Place or other public sources we strongly advise to load the package into a development or sandbox environment first. Do not load a package from public sources directly into your production environment.Manual Configuration to be done before importing the Security packageTo ensure the package can be deployed successfully when cross entity links are part of the package, ensure the flag “Enable custom entity link to support OOTB entities”is activated in the Application Settings.Simulate the loadWe strongly recommend to simulate the load prior loading the package. To simulate the load perform the following steps:∙From the main menu, select Administration > Utilities > Packages > Options.∙Click SIMULATE, and browse to the package bundle –FacilityMgmt_VisitorReg_v1.0.pkb- file created above and click Open.∙The simulation automatically starts. Wait for the simulation to complete without error.The package can be loaded successfully when the status is set to “Completed”. Warning messages should be documented.Load the packageOnce the simulation succeeded, use the SMAX Import tool to load the package. To load a package perform the following steps:∙From the main menu, select Administration > Utilities > Packages > Options.∙Click IMPORT, and browse to the package bundle –FacilityMgmt_VisitorReg_v1.0.pkb- file to import it. A window opens and displays the progress and statistics of the package import process.∙The data is imported into the tenant.∙Log off and login again∙Verify the imported configuration changes in the target tenant.Manual Configuration to be done after importing the Visitor Registration packageManual Configuration Steps: Visitor Request offering1.You should define the new Offering using the Catalog Management application, selecting anappropriate category and service for its inclusion. As an example, the following screen shows the Visitor Request offering created under a Facilities service within the Facility Management category.2.Add the following user options to the offering:er Option 1: VisitorName_cii.Display Name: Name of Visitoriii.Type: Stringiv.Required: Checkeder Option 2: Company_cii.Display Name: Companyiii.Type: Stringiv.Required: Checkeder Option 3: ParkingReqd_cii.Display Name: Parking Required?iii.Type: Booleaner Option 4: CarReg_cii.Display Name: Car Registrationiii.Type: Stringer Option 5: ArrivalTime_cii.Display Name: Arrival Date/Timeiii.Type: Stringiv.Required: Checked3.Under the Fulfillment Plan, create 2 automatic tasks in serial as shown below.a.Task 1: Create Visitor Registration RecordWithin the task, add a Create record business rule, set it to create a Visitor Registration record, and pass the following parameters:i.Visitor Name: ${erOptions.Visitorname_c}pany: ${pany_c}iii.Expected Arrival: ${erOptions.ArrivalTime_c}iv.Parking Required?: ${erOptions.ParkingReqd_c}v.Car Registration: ${erOptions.CarReg_c}b.Task 2: Close RequestWithin the task, add a Set Multiple Fields business rule, and pass the following parameters:i. Completion Code: Select Fulfilled offlineii. Solution: Your visitor registration request has been successfully submitted4. Within the Rules section add a new rendering Rule as shown below:Condition: ${erOptions.Parkingreqd_c != true}Hide the Car Registration User option5.Within the Default values tab, provide a proper default Service desk group, such as a Facilities groupyou may define in your company. This will ensure that the request goes automatically to the Fulfilment phase and executes the task plan, eliminating the need for manual processing the offering request tickets. All handling can then be done within the visitor registration process.Manual Configuration Steps: People, Groups, and RolesDefine your own roles to provide Facilities staff with the needed rights to view and modify visitor registration records.Manual Configuration Steps: Custom ActionsWhile the custom actions are already defined within the marketplace package, you may need to make adjustments as follows:The Call Host action requires the use of the SIP protocol to do VOIP within your organization. Please refer to the documentation of your VOIP application to make sure that the correct value is being passed from the host person record.For example Skype for Business requires the email address of the Host, however many other applications typically want the telephone number. If you do not have a SIP compatible VOIP solution, it is recommended you disable this Custom Action to avoid confusion to users.Example for a customer action using the telephone number.Manual Configuration Steps: Public ViewsIt is recommended that you create some standard views of the visitor registration records to help the facility management teams manage the records. We recommend creating the following public views for visitor registration records1.Expected Today: use Filter on Expected Arrival field2.Expected Tomorrow: use Filter on Expected Arrival field3.All: no filterMicro Focus Trademark InformationMICRO FOCUS and the Micro Focus logo, among others, are trademarks or registered trademarks of Micro Focus (IP) Limited or its subsidiaries in the United Kingdom, United States and other countries. All other marks are the property of their respective owners.Company DetailsCompany name: Micro Focus International plcPlace of registration: England and WalesRegistered number: 5134647Registered address: The Lawn, 22-30 Old Bath Road, Berkshire, RG14 1Q。
WEW屏显试验机测控系统使用说明

WEW屏显万能测控系统使用说明书临沂市沂南县检验检测中心二零一五年七月目录第一章简介 (1)1.1 简介 (1)1.2 主要功能 (1)1.3 软硬件要求 (2)1.4适用范围 (2)第二章安装与卸载 (3)2.1 软件安装 (3)2.2 启动程序 (3)2.3 退出 (3)2.4 卸载 (3)第三章操作使用指南 (4)3.1 主窗口 (4)3.2 主菜单 (4)3.2.1 系统 (4)3.2.2 设置 (6)3.2.3 标定 (10)3.2.4 工具 (12)3.2.5 帮助 (12)3.2.6 退出 (12)3.3面板 (12)3.3.1 数字显示面板 (12)3.3.2 曲线显示面板 (14)3.3.3 数据处理面板 (15)3.3.4 试验板 (17)3.4 功能详解 (17)3.4.1 新建记录 (17)3.4.2 打开记录 (20)3.4.3 报表打印 (20)3.4.4 Excel报表编辑器 (22)3.4.5 内嵌报表编辑器 (25)3.4.6 整理数据库 (28)3.4.7 试验标准生成器 (29)第四章试验过程 (34)附录:微机屏显液压式万能试验机数据采集卡 (35)第一章简介1.1 简介该测控软件用于微机屏显液压式万能试验机对各种材料进行拉伸、压缩、弯曲等各种试验。
该软件可用于WinXP、Win7等多种操作系统,可根据《GB/T228.1-2010金属材料室温拉伸试验方法》、《GB/T7314-2005金属材料室温压缩试验方法》、《GB/T232-2010金属材料弯曲试验方法》标准进行自动数据分析,也可以人机交互,进行手动分析。
该测控软件自主研发,可以根据用户反馈信息不断进行完善、升级。
1.2 主要功能该测控软件用于微机屏显液压式万能试验机进行各种金属及非金属的试验,按照相应标准完成实时测量与显示、数据处理、结果输出等各种功能。
主要功能、特点描述总结如下:(1)实时测量与显示试验力及峰值、位移、变形等各信号;(2)实现了力-变形,力-位移等多种试验曲线的实时屏幕显示,可随时切换观察,曲线的放大与缩小非常方便;(3)具备试验参数的计算机存储、设定等功能,调零、标定等操作都从软件上进行,各参数可方便的进行存储;(4)采用人机交互方式分析数据。
微电销系统使用手册.doc

微电销系统使用手册版本:20140320目录第1章导读11.1文档介绍11.2文档约定1第2章系统入门22.1基本概念22.2微电销系统界面说明22.2.1登录界面22.2.2微电销系统界面32.2.3顶部主菜单区42.2.4左侧菜单区42.2.5主操作区52.2.6外呼排行榜52.2.7右下角提醒弹窗6第3章控制面板73.1用户管理73.1.1添加用户73.1.2编辑用户83.1.3删除用户83.1.4修改密码83.1.5用户续费93.2用户的角色、权限、部门设置103.2.1角色、权限和部门的作用和关系10 3.2.2设置角色权限113.3修改字段133.3.1修改字段下拉框的值133.3.2修改字段的显示隐藏143.3.3增加字段153.3.4修改字段的顺序163.4回收站163.5创建/修改数据分类17第4章客户管理194.1客户管理194.1.1录入客户资料194.1.2批量导入客户资料194.1.3查看客户资料详细内容21 4.1.4按数据分类查看客户224.1.5查找客户244.1.6按用户角色查看客户244.1.7批量操作客户254.1.8查看客户统计264.2联系记录管理284.2.1录入联系记录284.3客户分配294.4客户共享30第5章客户任务设置315.1客户任务管理315.1.1批量导入客户资料315.1.2批量导入客户资料315.2客户任务执行345.2.1批量领取客户资料345.2.2日常任务列表345.2.3日常任务处理35第6章外呼控制台376.1什么情况下会用到外呼控制台37 6.2外呼控制台功能37第7章通话详单397.1查看通话详单397.2查看通话详单报表40第8章客户池418.1客户池42第1章导读1.1文档介绍手册核心内容是介绍微电销电脑客户端的操作与运用。
本手册结合了具体的操作流程与详实的讲解过程,帮助微电销用户快速学习使用微电销系统。
手册对微电销系统的每个功能都有对应的目录,用户可以很方便地找到所需要内容。
维电网络安全套件多设备版(麦凯夫应用)引导设置指南说明书

Verizon Internet Security Suite Multi-Device Powered by McAfeeInstallation Guide for Multi Devices for Residential UsersContentsIntroduction 3System requirements 4Installing Verizon Internet Security Suite Multi-Device 6 Downloading your software 6 Sign in to Security Dashboard 6Choose your device 7Download your software on this computer 7Download your software on another computer 8Download your software on a smartphone 8Download your software on a tablet 8 Troubleshooting your installation 10IntroductionNow that you’ve installed Verizon Internet Security Suite Multi-DevicePowered by McAfee software on your computer, you should protectyour other devices. This guide helps you download and install VerizonInternet Security Suite Multi-Device Powered by McAfee on anothercomputer, tablet or smartphone.Verizon Internet Security Suite Multi-Device software for your computeris a proactive, always-updating, security bundle that helps protect youridentity and your computer from viruses, spyware, email and IM scams,and hackers and online predators.You can also install Verizon Internet Security Suite Multi-Device softwareon your tablet or smartphone. Then, you can lock and locate your deviceif it’s lost. And if you think it’s s tolen, you can even wipe its data toprotect your private information.Your product subscription allows you to install SafeKey passwordmanager on all your devices. SafeKey securely stores your usernamesand passwords for your favorite sites, and logs in for you—with just oneclick.System requirementsYour devices must meet these minimum system requirements to runVerizon Internet Security Suite Multi-Device Powered by McAfee.Windows computers▪IBM-compatible personal computer, 1 GHz processor or higher▪One of these Windows operating systems:- Microsoft Windows XP (32-bit) with Service Pack 3 (SP3) or later- Windows Vista (32 or 64-bit) with Service Pack 1 (SP1) or later- Windows 7 (32 or 64-bit) with Service Pack 1 (SP1) or later- Windows 8 (32 or 64 bit)- Windows 8.1 (32 or 64 bit)▪500 MB hard disk space▪512 MB RAM for Windows XP, or 2 GB RAM for all other Windowsoperating systems▪1024 x 768 resolution or higher▪Microsoft Internet Explorer 7.0 or later, or Mozilla Firefox 4.0 orlater, or Google Chrome 10.0 or later▪Internet connectionMac computers▪Apple Macintosh computer with Intel Core processor (werecommend a Core 2 Duo processor)▪Mac OS X 10.7 (Lion), or 10.8 (Mountain Lion), or 10.9 (Mavericks)▪300 MB hard disk space▪ 2 GB RAM▪1024 x 768 resolution or higher▪Mozilla Firefox 12 or later, or Apple Safari 5.0 or later (required forSiteAdvisor browser plug-in)▪Internet connectionSmartphones▪Google Android 2.3 and 4.0 ▪iOS 5 or laterTablets▪Google Android 2.3 and 4.0 ▪iOS 5 or laterInstalling Verizon Internet Security Suite Multi-DeviceYou can install your Verizon Internet Security Suite Multi-DevicePowered by McAfee software on another computer, tablet orsmartphone in a few simple steps. Before you begin, make sure that yourdevice meets the minimum system requirements and is connected to theInternet.Downloading your softwareYou can download your Verizon Internet Security Suite Multi-DevicePowered by McAfee software when you sign in to your Verizon account.From the Security Dashboard you can download your software onanother computer, tablet or smartphone, monitor and manage thesecurity status of all your devices, and lock, locate or wipe data on yoursmartphone or tablet.Sign in to Security Dashboard1 Go to the Verizon website () and sign in to MyVerizon.2 From the left menu, select My Services, and then select InternetSecurity Suite.3 In the Broadband Essentials & Extras Management pane, clickManage.4 Click Security Dashboard.Choose your device1 On your Security Dashboard, click the + tab.2 Select the device you want to protect.Download your software on this computer1 To protect this computer, click Download.2 Choose your software, and then click Download.3 Accept the McAfee License Agreement, and then click Download.Download your software on another computer1 To protect another computer, click Send Link.2 Choose your software, and then click Next.3 Enter your email, and click Send.Download your software on a smartphone1 To protect a smartphone, click Send Link.2 Select the smartphone you want to protect.3 Choose your software, and then click Next.4 Enter your country and phone number.5 Choose if you want to receive the download link in a text or an email.If you choose email, enter your email.6 Click Send Text or Send Email.Download your software on a tablet1 To protect a tablet, click Send Link.2 Select the tablet you want to protect.3 Choose your software, and then click Next.4 Enter your country and nickname your tablet.5 Enter your email.6 Click Send Email.Troubleshooting your installationHere are the most common problems that you might encounter duringyour software installation, and solutions to fix them.▪If your device does not meet the minimum system requirements,upgrade your device.▪If you’re cannot download your software, make sure your device isconnected to the Internet, and then try again.▪If your software installation cannot continue, contact VerizonSupport ().▪If your software order is denied, you might live in a country that wedon't export to in accordance with the United States law. If so, youwill not be able to activate and use this software properly. For moreinformation, please contact Verizon Support().。
威谱功能说明
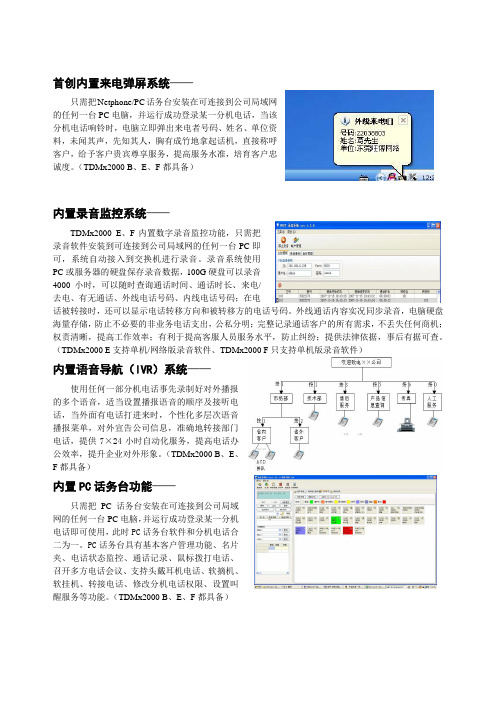
首创内置来电弹屏系统——只需把Netphone/PC话务台安装在可连接到公司局域网的任何一台PC电脑,并运行成功登录某一分机电话,当该分机电话响铃时,电脑立即弹出来电者号码、姓名、单位资料,未闻其声,先知其人,胸有成竹地拿起话机,直接称呼客户,给予客户贵宾尊享服务,提高服务水准,培育客户忠诚度。
(TDMx2000 B、E、F都具备)内置录音监控系统——TDMx2000 E、F内置数字录音监控功能,只需把录音软件安装到可连接到公司局域网的任何一台PC即可,系统自动接入到交换机进行录音。
录音系统使用PC或服务器的硬盘保存录音数据,100G硬盘可以录音4000小时,可以随时查询通话时间、通话时长、来电/去电、有无通话、外线电话号码、内线电话号码;在电话被转接时,还可以显示电话转移方向和被转移方的电话号码。
外线通话内容实况同步录音,电脑硬盘海量存储,防止不必要的非业务电话支出,公私分明;完整记录通话客户的所有需求,不丢失任何商机;权责清晰,提高工作效率;有利于提高客服人员服务水平,防止纠纷;提供法律依据,事后有据可查。
(TDMx2000 E支持单机/网络版录音软件、TDMx2000 F只支持单机版录音软件)内置语音导航(IVR)系统——使用任何一部分机电话事先录制好对外播报的多个语音,适当设置播报语音的顺序及接听电话,当外面有电话打进来时,个性化多层次语音播报菜单,对外宣告公司信息,准确地转接部门电话,提供7×24小时自动化服务,提高电话办公效率,提升企业对外形象。
(TDMx2000 B、E、F都具备)内置PC话务台功能——只需把PC话务台安装在可连接到公司局域网的任何一台PC电脑,并运行成功登录某一分机电话即可使用,此时PC话务台软件和分机电话合二为一。
PC话务台具有基本客户管理功能、名片夹、电话状态监控、通话记录、鼠标拨打电话、召开多方电话会议、支持头戴耳机电话、软摘机、软挂机、转接电话、修改分机电话权限、设置叫醒服务等功能。
WEFP培训XXXX合集

WEFP系统集成-(多主机联网)
客户支持部-售后 服务中心(ASS)
1.进入“WEFP”电气火灾监控系统。 2.进入“系统设置”选项卡,点击 “网络设置”按钮,进入网络设置。
Байду номын сангаас
WEFP系统集成-(多主机联网)
客户支持部-售后 服务中心(ASS)
WEFP系统集成-(故障排查)
常见的通讯故障:
说明二: 485总线可以带满载设备通讯
理论上的标称往往实际上是达不到的,通讯距离越长,波特率越高,线径越细,线材质量越差,转换器品质 越差, 防雷保护越强这些都会大大降低真实负载数量。
说明三: 485总线是一种最简单 、最稳定 、最成熟的工业总线结构.
这种说法其实是错误的, 485总线是一种用于设备联网的经济型的传统的工业总线方式,通讯质量是需 要根据施工经验进行测试和调试的,485总线虽然简单,但必须严格安装施工规范进行布线。
WEFP系统集成-(配置回路板)
客户支持部-售后 服务中心(ASS)
强制:必须选中 全部开启:全部回路开启 开启:可选择某一个点单独开启 回路开启:可选择某一个回路单独开启
WEFP系统集成-(布局图绘制)
客户支持部-售后 服务中心(ASS)
以J2-3设备为例: 1:探测器设备所在的监控单元编号 2:探测器设备在监控单元下的地址 3:探测器设备在整个回路系统图中
其实只是485总线结构理论上 在理想环境的前提下才有可能使得传输距离达到1200米,一般是指通讯线 材优质达标,波特率9600,只有一台485设备才能使得通讯距离达到1200米,而且能通讯并不代表每次通讯都 正常,所以通常485总线实际的稳定的通讯距离远远达不到1200米,负载485设备多,线材阻抗不合乎标准,线 径过细,转换器品质不良,设备防雷保护,波特率的加高等等因素都会降低通讯距离。
- 1、下载文档前请自行甄别文档内容的完整性,平台不提供额外的编辑、内容补充、找答案等附加服务。
- 2、"仅部分预览"的文档,不可在线预览部分如存在完整性等问题,可反馈申请退款(可完整预览的文档不适用该条件!)。
- 3、如文档侵犯您的权益,请联系客服反馈,我们会尽快为您处理(人工客服工作时间:9:00-18:30)。
, WEFPS
WEFPJ
WEFPS WEFPJ
T1-16
WEFPS WEFP WEFP WEFPS WEFPS WEFP WEFPS WEFPS
WEFP A B WEFPS ,
2-4 WEFPS
RS485 B WEFPJ WEFPT A B RVSP 2*1.5mm2 A
WEFPT-F A
on DIP
A
1 2 3 4 5 6 7 8
B WEFPJ , ,
B ,
24V
AB
T5 T4 T3 T2
AB
T1
24V
WEFPS WEFPT-F
DC18V~DC26V, AC:250V5A
2-5
DC:30V 5A
X X
WEFPT-F
A
B
RVSP 2*1.5mm2 WEFPT-F
WEFPT-F 24V
2-6
WEFPT-Z
DC18V~
DC26V
AB AB
T1
24V
1 2 3 4 5 6 7 8
T5
T4
T3
T2
2. WEFPJ WEFPS
4-2
1. ~AC242V 2.
AC220V AC:250V 5A DC:30V 5A WEFPT-Z
AC187V
1 2 3 4 5 6 7 8 220V A B A B
WEFPT-Z 0000
9600
4-12 WEFPJ
4-13
WEFPJ
RS485
4-14
24 A
23 B
22 +
21 -
20 A
19 B
18 +
17 -
16 A
15 B
14 +
13 -
1. WEFPT-F WEFPS
1
WEFPT-Z FG AC187V~AC242V,
WEFPJ AC220V WEFPS AC:250V 5A DC: WEFPS
3-1WEFPT-Z
WEFPT-Z , WEFPT-Z 1.25 30 RS485 RS485
WEFPT-Z Ta Tb Tc Tn
a) 3-2 WEFPT-Z b)
WEFPT-Z
3-3 WEFPT-Z
Ta Tb Tc Tn
3-4 WEFPT-Z
3-5 WEFPT-Z
Ia Ib Ic
3-6 WEFPT-Z
, WEFPS
,
WEFPS Windows XP Compact Flash
R
Windows CE
R
1024 WEFPT , WEFPS , WEFPS
1024 WEFPJ
, USB 2.0
RJ45 WEFPS GB14287.1-2005
,
TCP/IP
1
GB14048.1-2006
1-4 WEFPS
WEFPJ AC:250V 5A DC:30V 5A 24V
AC187V~ AC242V 2.
A B A B
23 22
21
20
WEFPT-Z 3. WEFPJ
WEFPT-F
1 2
3 4 5 6 7 8
9 10 11 12
13
14
4-9
0000 29
4-10 WEFPJ
RS485
,
9600
4-11 WEFPJ
WEFPJ
WEFPT-F DC24V
AC220V 50HZ
WEFPT-Z
WEFPT-F -2005 14287.3 2005
1-2 WEFPT-Z
WEFPT-Z 2 3
GB14287.2 GB
WEFPJ WEFPT RS485 WEFPT , 8
1-3 WEFPJ
WEFPT , RS485 16 WEFPT
3.
0086-22-83712900
4-17 WEFPS-Q
4-18 Windows CE
4. 5.
000
500mA
4-19
4-20
4-21
4-2
4-2
1. 2. 3. Bit7-Bit0 4. 01 01
1 Ia 02 Ib 03 Ta 02 Tb 03 Ic Bit11-Bit0: Tc 04 Tn 1 30 05 Tw 06 T1-T5 Ta-Tw 1.25
18 +
17 -
16 A
15 B
14 +
13 -
12 A
11 B
10 +
9 4
8
7 3
6
5 2
4
3
2
1 1
X
1
2
3
4
5
6
7
8
9
10
11
12
13
14
15
16
17
18
19
72
73
74
75
X
AC:250V 5A DC:30V5 A
WEFPT-F WEFPJ WEFPT-F
WEFPS
90% WEFPT-F RS485 90%
CAN
RS485
4800 9600
9600
3-39 WEFPJ
4800
9600
19200
9600
3-40 WEFPJ
3-41
3-43 ,
3.4.7.4
3-42 WEFPS
, 3-44
USB 000 111 3.4.7.4
3-43
3-44
3-45
a.
b. 3-46
X
3-47
3-48 WEFPJ WEFPT
WEFP
Schneider Wingoal (Tianjin) Electric Equipment Co., Ltd.
WEFP
WEFP WEFP WEFP EMC WEFP
WEFPT
WEFPJ WEFPS
1.2.1 WEFPT-F WEFPT-F RS485 WEFPS
a. 1-1 WEFPT-F b.
1 2 3 4 5 6 7 8 220V A B A B
WEFPT-F 24V 5 100mA AC187V~AC242V AC:250V 5A DC:30V 5A
6
DC24V WEFPT-Z
9
10
2-7
11 12 13 14
15 16
WEFPT-Z
WEFPT-Z
A B A B
WEFPJ 13 14 24V
, J1 J4 T4-1 2, 16
WEFPJ
T2-1
T3-1
1 WEFPT
WEFPT
T2-2 T3-16
T3-2
T4-2
T4பைடு நூலகம்16
c) WEFPT WEFPJ WEFPS WEFPJ 1-64 , 1, 2-49 1-16
2-3
WEFPS WEFPT WEFPJ WEFPT 1-16 2-3 WEFPT T1 WEFPT WEFPJ T2 T49 T1-1 J1 WEFPT
,
Modbus-RTU
3-15 WEFPT-Z
1~64
4800
9600
19200
3-16 WEFPT-Z
3-17 WEFPT-Z
3-18 WEFPT-Z
3-19 WEFPJ
a) 3-20 WEFPJ
b)
WEFPJ WEFPJ
3-21
3-22
3-23
WEFPJ
3-24
3-25
WEFPJ
3-26
3-27
9
10
4-3
11 12 13 14
15 16
9600 28
WEFP-Z WEFPJ
4-4 WEFPT-Z
WEFPS
, 0mA ~1000mA
4-5 WEFPT-Z
20mA ~1000mA 500mA
4-6 WEFPT-Z
,
1 ~200
4-7 WEFPT-Z
4-8 WEFPT-Z
1.
A B A B
AC220V WEFPT-
X
WEFPS
3-48
X
X
3-49
X
3-50
3-51
X
3-52
3-53
3-55 WEFPS N/A
3-55
3.4.2
X
3-56
X
3-58
WEFP B B WEFPS
RS485 WEFPT A B RVSP 2*1.5mm2 A WEFPJ
A
3.4.6
4-1 WEFP
1.
on DIP
DC24V AC:250V 5A DC:30V 5A WEFPT-F
3-7 WEFPT-Z
WEFPT-Z
3-8 WEFPT-Z
0000
,
20mA~1000mA
3-9 WEFPT-Z
,
0S ~30S
3-10 WEFPT-Z
,
3-11 WEFPT-Z
0mA ~1000 mA
,
1 ~200
3-12 WEFPT-Z
WEFPT-Z ,
3-13 WEFPT-Z
3-14 WEFPT-Z
17
3-28 WEFPJ
3-29
3-30
3-31
3-32
3-33
3-34
WEFPS WEFPJ WEFPJ WEFPJ
3-35
WEFPS
3-36
20~1000 0~30 0~1000 1~200 1~200