潮影光电投影仪说明书
投影机使用说明书

投影机使用说明书一、主要安全注意事项1、请插紧电源插头,否则可能导致起火。
2、请勿将多台电子设备的电源插头连接到一个墙壁插座上,否则,可能会因为墙壁插座过热引起火灾。
3、请勿使用破损的电源线或电源插头或松动的电源插座,否则可能导致触电或起火。
4、切勿过度弯折或缠绕电源线并避免在电源线上放臵重物,否则,可能会因为电源线破损,导致触电或引起火灾。
5、请勿用湿手插拔电源插头,否则可能导致触电。
6、在清洁之前,请先拔下电源插头,否则有触电或引起火灾的危险。
7、在产品出现问题时,必须拔下电源插头,彻底切断电源。
仅使用产品上的电源按钮不能彻底切断电源。
8、请勿通过插拔电源插座的方式来打开或关闭投影机。
(这样会减少灯泡寿命)。
二、安装和连接1、安装投影仪,使投影仪射出的光柱与投影屏幕成直角。
•调整投影仪的位臵,使镜头指向屏幕的中心位臵。
如果屏幕未垂直安装,屏幕上的画面可能不会呈长方形。
•请勿在光线明亮的地方安装投影屏幕。
如果周围环境太亮,则投射到屏幕上的画面将会被冲淡而显示不清楚。
•在明亮的环境中使用投影仪时,请用窗帘挡住光线。
•您可以相对于屏幕将投影仪安装到以下位臵:<桌面正投> / <吊装正投> / <桌面背投> / <吊装背投>.在屏幕前方安装投影仪将投影仪安装到屏幕前方时,可以使用菜单调整画面以使其正常显示,这取决于放臵投影仪的位臵:(1).对于前部落地,请按:菜单 > 设臵 > 安装 > 桌面正投(2).对于前部悬挂,请按:菜单 > 设臵 > 安装 > 吊装正投2、缩放和调焦(在投影机侧面)(1).缩放旋钮,可以转动缩放旋钮,以便在缩放范围内调整图像大小。
(2). 聚焦环,转动聚焦环调整屏幕画面的焦距。
四、更换和清洁过滤器更换投影仪过滤器的注意事项:•过滤器位于投影仪底面。
•关闭投影仪电源,在投影仪充分散热冷却后拔下电源线。
投影仪使用手册
投影仪使用手册投影仪使用手册1、引言感谢您选择使用本投影仪。
本手册将提供详细的使用说明和操作指南,帮助您正确高效地使用投影仪。
2、快速入门2.1 投影仪组件介绍在开始使用投影仪之前,请先了解各个组件的名称和位置,确保正确安装和连接。
2.2 连接电源和信号源将投影仪连接到电源和相关信号源,以获得图像显示。
2.3 开机和关机详细说明如何开启和关闭投影仪,包括使用遥控器和投影仪本体的操作方法。
3、系统设置3.1 显示设置介绍如何调整图像的亮度、对比度、色彩等参数,以获得最佳的投影效果。
3.2 声音设置说明如何调整投影仪的音量、音调等参数,以获得适合的音频效果。
3.3 其他设置介绍其他系统设置选项,如语言、时间等,以满足不同用户的需求。
4、图像调整4.1 投影距离和画面大小调整解释如何根据实际情况调整投影距离和画面大小,以确保投影效果符合预期。
4.2 图像位置调整教授如何调整图像的水平和垂直位置,使其完全居中和对称。
4.3 形状和校正调整介绍如何调整图像的形状和倾斜度,以获得清晰和正常的显示效果。
5、外部设备连接5.1 计算机连接详细说明如何将投影仪连接到计算机,以便进行投影演示和展示。
5.2 DVD和蓝光播放器连接指导如何将投影仪连接到DVD和蓝光播放器,以观看高清影片。
5.3 游戏机和其他设备连接提供其他设备连接投影仪的操作指南,如游戏机、摄像机等。
6、故障排除常见问题和解决方法的列表,帮助用户在遇到问题时快速找到解决方案。
7、维护和保养提供投影仪的维护和保养建议,包括清洁、更换灯泡等。
8、安全须知列出用户在操作投影仪时需要注意的安全事项和警示信息。
9、附件本文档涉及的附件,请查看附件文件。
10、法律名词及注释10.1 法律名词1定义和解释法律名词1的含义和相关要点。
10.2 法律名词2定义和解释法律名词2的含义和相关要点。
:::。
投影仪产品说明书
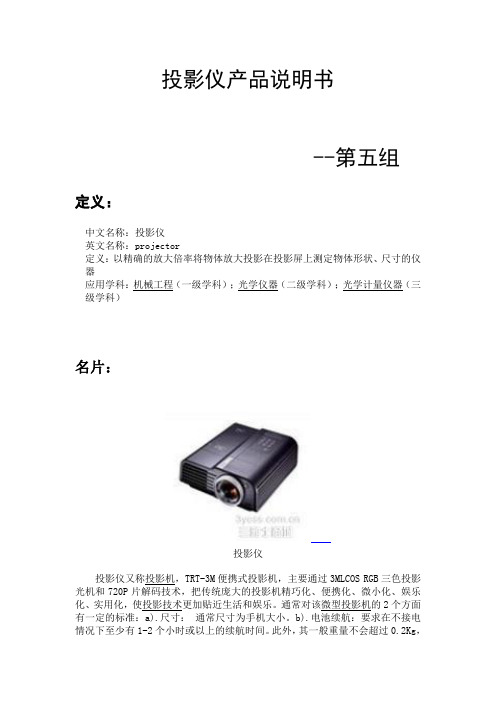
投影仪产品说明书--第五组定义:中文名称:投影仪英文名称:projector定义:以精确的放大倍率将物体放大投影在投影屏上测定物体形状、尺寸的仪器应用学科:机械工程(一级学科);光学仪器(二级学科);光学计量仪器(三级学科)名片:投影仪投影仪又称投影机,TRT-3M便携式投影机,主要通过3MLCOS RGB三色投影光机和720P片解码技术,把传统庞大的投影机精巧化、便携化、微小化、娱乐化、实用化,使投影技术更加贴近生活和娱乐。
通常对该微型投影机的2个方面有一定的标准:a).尺寸:通常尺寸为手机大小。
b).电池续航:要求在不接电情况下至少有1-2个小时或以上的续航时间。
此外,其一般重量不会超过0.2Kg,有些甚至还不需要风扇散热或超小静音风扇散热。
可以随身携带,有时我们也会称之为微型投影机或口袋投影机。
功能:LCOS是一种新型的反射式microLCD投影技术。
与穿透式LCD和DLP相比,LCOS 具有利用光效率高、体积小、开口率高、制造技术较成熟等特点,它可以很容易的实现高分辨率和充分的色彩表现。
由于LCOS尺寸一般为0.7英寸,所以相关的光学仪器尺寸也大大缩小,使LCOS-PTV的总成本大幅下降。
HTPS-LCD目前仅有索尼(SONY)及爱普生(EPSON)拥有专利权,而DLP则是德州仪器的独家专利,LCOS 则无专利权的问题。
虽然LCOS看起来简单,但要产品化还要有一个过程,并不是像想象的那样容易形成一个产业。
LCOS技术一经推出便在全世界范围内造成极大影响,但由于制造工艺等方面原因,目前基于LCOS技术的产品还没有形成大规模量产,只有少数厂家开发出了应用于投影机的LCOS芯片和应用LCOS技术的投影机及背投电视机。
LCOS 技术在以后大屏幕显示应用领域具有很大优势,它没有晶元模式,且具有开放的架构和低成本的潜力。
近几年来,在LCD业界出现了许多新技术,其中较热门的技术是LCOS。
LCOS 最大的优点是解析度可以很高,在携带型资讯设备的应用上,此优点是其他技术无法与之看齐的。
投影机使用说明书
投影机使用说明书一、简介投影机是一种可以将图像或视频投射到屏幕或墙壁上的设备。
它广泛应用于教育、商务演示、家庭影院等领域,为用户提供高质量的视觉体验。
本使用说明书将为您提供详细的投影机使用指导,帮助您正确地设置和操作投影机。
二、产品规格在开始使用投影机之前,让我们先了解一下产品规格:1. 投影技术:液晶/ DLP/ LCoS2. 亮度:根据型号而定,通常在2000流明到6000流明之间3. 分辨率:根据型号而定,通常为1920x1080像素或更高4. 投影比例:根据型号而定,通常为16:9或4:35. 投影尺寸:根据投影距离和投影比例计算6. 对比度:根据型号而定,通常为1000:1或更高7. 音频输出:根据型号而定,通常为3.5mm音频接口或扬声器内置8. 输入接口:根据型号而定,通常包括HDMI、VGA、USB等9. 电源:根据型号而定,通常为AC 100-240V,50/60Hz10. 尺寸和重量:根据型号而定请确保在使用投影机之前,您已经阅读并理解了产品规格,并根据您的需求选择了适合的型号。
三、操作指南1. 设置投影机将投影机放置在平稳的台面或架子上,确保其与屏幕或墙壁保持适当的距离。
根据您的需求,调整投影机的角度和高度,以获得最佳的投影效果。
2. 连接电源和信号源将投影机的电源线连接到电源插座,并打开投影机的电源开关。
接下来,将信号源(如电脑、DVD播放器等)与投影机连接。
通常情况下,您可以使用HDMI、VGA或USB线缆进行连接。
确保连接稳定并插入正确的接口。
3. 调整投影画面通过投影机的菜单或遥控器上的按钮,调整图像的亮度、对比度、色彩和焦距。
您还可以根据投影距离和投影比例来调整图像的大小。
4. 播放内容一切准备就绪后,您可以打开信号源设备,并播放您想要投影的内容。
投影机会将内容投影到屏幕或墙壁上,您可以根据需要进行播放控制。
5. 关闭投影机使用完毕后,首先停止信号源设备的播放。
然后,关闭投影机的电源开关,待其完全关闭之后,再拔掉电源插头。
微型 LED 投影仪 使用手册说明书

微型LED投影仪使用手册由于持续改进,实际产品可能与本手册略有不同,请参考实际产品。
✧安全通知◆使用投影机前请仔细阅读使用说明书。
◆请使用投影机上指示的电源或随附的电源线。
◆请勿直视投影机的镜头,以免烫伤眼睛。
◆请勿自行拆卸投影机,否则公司将不提供免费保修服务。
◆请勿将投影机放在可能堵塞通风口的物体(如碎布和毯子)上。
◆无防水功能,请保持投影仪远离雨水或湿气,不能放置花瓶杯等液体物品。
◆如果长时间不使用投影仪,请关闭电源并切断电源。
◆如果需要运输这台投影仪,请使用最初的泡沫或其他防震材料保护投影仪。
发现投影机有问题,请联系商家,请勿自行维修。
目录第一章节产品介绍第二章节投影机的操作第三章节信号源/菜单操作第四章节电脑输入调节第五章节安卓功能使用第一章节产品介绍序号定义描述1开/关机开机/关机2上下左右多功能上下左右3ok功能确认4返回功能返回5菜单菜单显示6信号源信号源显示7调焦环调节清晰度8梯形校正±15度调节画面梯形失真9电脑电脑输入或其它VGA输出设备10-11高清连接HDMI输入或其它HDMI输出设备12复合视频输入接口三合一转接线接入复合视频信号13 3.5mm耳机接口耳机接口或有源音箱接口14USB接口连接U盘或移动硬盘/鼠标15SD卡SD卡卡槽16IR遥控头遥控接收信号遥控器◆第二章节投影机的操作1.启动/关闭●将投影机连接到电源适配器的直流侧,然后打开适配器电源,机身电源指示灯将亮起,投影机将进入待机状态。
●启动:按下机身或遥控器上的《开/关机键》身电源指示灯闪烁,投影机将启动,即进入工作状态;2.图像聚焦3.梯形校正第三章节信号源/菜单操作1.在此界面可以调节图像、亮度、对比度、声音、时间、语言...........等等。
第四章节电脑输入调节确认你的电脑和高清连接电脑正常后,进入电脑/高清信号模式,即可进行如下操作。
1.连接电脑,采用电脑/高清接口连,2.部分电脑还需要转换,按住FN 键的同时按【F1-F12之间】常见的组合键如下:东芝、夏普、宏基(FN+F5)\IBM 、日立、明基(FN+F7)\HP 惠普、NEC(FN+F4)\联想、方正、三星、松下(FN+F3)\苹果、戴尔(FN+F8)\华硕(FN+F9)1通过遥控器操作:按遥控器上的“SOURCE ”调出输入源选择菜单(如左图所示),重复按“SOURCE ”选择所需的信号输入通道,然后按[←]/[→]确认2通过机身键操作:按机器上的“SOURCE ”调出输入源选择菜单,按“[↑]/[↓]”选择所需的信号输入通道,然后按“OK 确认1.通过遥控器操作,按遥控器上的“MENU ”调出主菜单,按“[←]/[→]“进入图片菜单”[↑]/[↓]“选择要调整的项目,然后按”OK “进行设置。
投影仪器使用说明
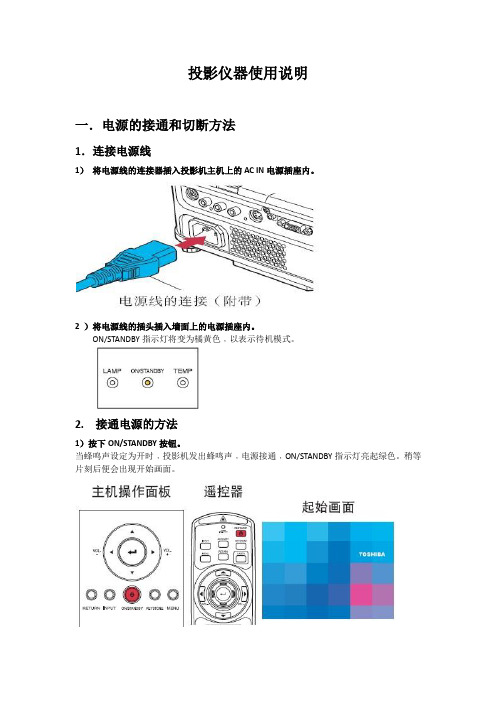
投影仪器使用说明一.电源的接通和切断方法1.连接电源线1)将电源线的连接器插入投影机主机上的AC IN电源插座内。
2 )将电源线的插头插入墙面上的电源插座内。
ON/STANDBY指示灯将变为橘黄色﹐以表示待机模式。
2. 接通电源的方法1)按下ON/STANDBY按钮。
当蜂鸣声设定为开时﹐投影机发出蜂鸣声﹐电源接通﹐ON/STANDBY指示灯亮起绿色。
稍等片刻后便会出现开始画面。
3. 卸下镜头盖要接通电源时﹐请务必先卸下镜头盖。
否则﹐镜头盖套在上面有可能因受热而变形。
注意事项:•当灯泡点亮时﹐请勿窥视镜头。
灯泡的强烈光线可能会使您的眼睛受伤或造成视力下降。
•不要堵住吸气口和排气口﹐否则会因机内发热而引起火灾等。
•不要将手和脸靠近排气口附近﹐也不要在其附近堆放物体和其它设备﹐否则会烫伤手脸或造成设备的变形﹑变色﹐引起故障。
4. 电源的切断方法1)按下ON/STANDBY按钮。
画面上显示电源切断的确认提示。
不久该提示即会消失。
(提示一旦消失﹐该项操作即无效。
)2)再按一次ON/STANDBY按钮。
蜂鸣声设定设定为[开]时﹐投影机发出蜂鸣声﹐画面消失﹐但内部冷却风扇继续运转。
然后投影机进入待机模式。
在冷却期间﹐ON/STANDBY 指示灯闪烁。
指示灯闪烁时﹐不能重新接通电源。
此时即使拔下电源线也没事。
注意事项:如果要在冷却结束前接通电源﹐请在重新插上电源插头之前让灯泡有时间冷却(约5分钟)。
如果灯泡过热﹐可能会点不亮。
二.投影机连接笔记本电脑的方法在笔记本上,配备了一个专门用于切换投影机的F功能按键,当需要切换笔记本信号到投影机上时,可以同时按住Fn以及F功能按键就可以切换信号。
F功能键会因为品牌的不同而又差别。
下面提供几个主流品牌的笔记本电脑,将这些快捷按键整理如下,方便大家查询。
三星Samsung:Fn+F4惠普HP:Fn+F4东芝:Fn+F5宏基Acer:Fn+F5联想ThinkPad:Fn+F7索尼Sony:Fn+F7华硕Asus:Fn+F8戴尔Dell:Fn+F8富士通Fujitsu:Fn+F10三.常见问题及解决方法1. 投影仪RGB端口无输入信号投影仪在切换到RGB输出时,提示RGB端口无信号输入。
投影仪操作指导书

1 目的
保障投影仪计量精度时刻达到国际标准,能保证各产品的顺利检测工作。
2 使用范围
适用于品质部人员操作过程。
3 操作要求
3.1 使用前应仔细检查各部份位置是否正确,接地线是否良好(易产生感应电)。
3.2 选择好物镜和照明方式,打开电源、照明开关。
3.3 测量物件前应先将被测物件清洁干净,再将被测物件放置于工作台上,升降工作台使被测物件在投影屏上呈清晰图象。
3.4 将工件调整到与工作台移动方向平行,用投影屏上的十字线对准工件被测尺寸一端,将X或Y置零,然后将十字线对准工件另一端,此时显示屏上的X或Y值即为被测物件的长度实际值。
3.5 角度测量:将工作放置于工作台的适当位置,转动投影屏使其投影屏上的十字线之一与被测物件角的一边重合,将投影屏上的角度显示置零,然后转动投影屏使其与另一边重合,此时显示屏上的显示值为此工件的角度值。
3.6 若发现投影仪有故障(无电源、有电源无照明、升降工作台调不到聚焦等)应产即关闭电源,找专业维修人员维修、调试。
3.7 仪器操作时,不可用力过猛,用后必须把仪器裸露屏面擦净,涂上防锈油,以防生锈。
3.8 投影仪为高度精密仪器,绝不可自行拆卸,非专业培训人员不得使用。
投影仪使用指南说明书

Quick SetupBefore using the projector, make sure you read the safety instructions in the online User’s Guide .Choose a locationKeep the projector level and place it at a height so its lens is even with the top or bottom of the screen and is centered horizontally. If this isn’t possible, use the lens shift feature or the keystone correction button on the projector to reposition the image (see “Adjust the image”).In order to view 3D images correctly, RF 3D glasses must be worn within 32 feet (10 m) of the projector. Use the image below to determine the viewing distancefor 3D projection (the shading represents the 3D viewing area):See the online User’s Guide for more information on where to place your projector.Connect video devicesFor additional connection types, see the online User’s Guide .Connect multiple video devices and use the Source buttons on the remote control or thebutton on the projector to switch between them.Note: When connecting a source that requires HDCP 2.2, you must use the HDMI1 port.Turn on your equipment1 Turn on your video source.2Plug in the projector.3Press the power button on the projector or the On button on the remote control. The shutter opens and thepower light flashes blue, then stays on.Note: To shut down the projector, press the power button on the projector or the Standby button on the remote control, then press the button again to confirm, if necessary. Wait for cooldown to complete before unplugging the projector.4Use the arrow buttons on the remote control to highlight any of the options on the Home screen that appears, then press Enter to select it. You can display a QR code, switch between projection sources, and quickly access various adjustment options from this screen.5The default language of the menu system is English. To select another language, press the Menu button on the projector or remote control. Select Extended and press Enter . Select Language and press Enter . Select your language and press Enter . Press the Menu button to exit the menu system.Using the remote controlInstall the batteries as shown (two AA batteries).Turn off projector displayNavigate projector menusTurn projector off For more information on using the remote control, see the online User’s Guide.Adjust the image1 P ress the Patternbutton on the remote control to display a test pattern.2 T o raise the image or correct a tilted image, adjust the front feet asshown below.3 P ress the4 P ress the56 I f your image looks like or , you can use the buttons on theprojector to correct this.Note: Using the keystone adjustment can affect the size and effectiveresolution of your image. If possible, change the position of yourprojector to eliminate the keystone effect and use the lens shift optionto position the image as necessary.7 Press Esc to exit.Viewing 3D imagesTo view 3D content, you must first connect a 3D-compatible video device toone of the HDMI ports on your projector. You also need a pair of Epson® (partnumber V12H548006) or Epson-compatible RF 3D active shutter glasses.1 Turn on and begin playback on the 3D-compatible video device.Note: Make sure you set the video device to play content in 3D mode.2 Slide the power switch on your 3D glasses to the On position.Note: If the glasses don’t automatically display 3D content, you may needto pair them with the projector. Move the glasses within 10 feet (3 m) of theprojector, then press and hold the Pairing button on the 3D glasses for atpress EnterMediumTroubleshootingIf you see a blank screen or the No signal message after turning on your video device or computer, check the following:•Make sure the power light on the projector is blue and not flashing.•P ress the button on the projector or one of the Source buttons on the remote control to switch to the correct image source, if necessary.•I f you’re using a Windows® laptop, press the function key on your keyboard that lets you display on an external monitor. It may be labeled CRT/LCD or have an icon such as. You may have to hold down the Fn key while pressing it (such as Fn + F7). Wait a moment for the display to appear.•I f you’re using a Mac laptop, open System Preferences and select Displays. Click the Arrangement tab and select the Mirror Displayscheckbox.If 3D images aren’t displaying properly, check the following:•P ress the Menu button, then select Signal > 3D Setup > 3D Display and make sure that the 3D option is selected.•M ake sure that you are within the 3D viewing range. See “Choose a location” on the front of this sheet or the online User’s Guide for more information.•C heck that your 3D glasses have not entered standby mode. Slide the power switch on the 3D glasses to the Off position, then back to the On position.•C heck that your video device and media are both 3D-compatible. Refer to the documentation that came with your video device for moreinformation.Where to get helpManualsFor more information about using the projector, click the icons on your desktop to access the online manuals (requires an Internet connection). If you don’t see icon links to the manuals, you can install them from the projector CD or go to the Epson website, as described below.Telephone support servicesTo use the Epson® PrivateLine® Support service, call (800) 637-7661. This service is available for the duration of your warranty period. You may also speak with a support specialist by calling (562) 276-4394 (US) or (905) 709-3839 (Canada). Support hours are 6 am to 8 pm, Pacific Time, Monday through Friday, and7 am to 4 pm, Pacific Time, Saturday. Days and hours of support are subjectto change without notice. Toll or long distance charges may apply. Internet supportVisit /support (U.S.) or www.epson.ca/support (Canada) for solutions to common problems. You can download utilities and documentation, get FAQs and troubleshooting advice, or e-mail Epson. RegistrationRegister today to get product updates and exclusive offers. You can use the CD included with your projector or register online at /webreg.Optional accessoriesFor a list of optional accessories, see the online User’s Guide.You can purchase RF 3D glasses (part number V12H548006) or other accessories from an Epson authorized reseller. To find the nearest reseller, call 800-GO-EPSON (800-463-7766). Or you can purchase online at (U.S. sales) or www.epson.ca (Canadian sales).NoticesBluetooth Safety and SpecificationsContains Bluetooth module model: DBUB-E207This document provides safety instructions and describes the specifications. Read this document carefully before use to ensure your safety and product performance.U.S.Contains FCC ID: BKMAE-E207This device complies with Part 15 of the FCC Rules. Operation is subject to the following two conditions: (1) This device may not cause harmful interference, and (2) this device must accept any interference received, including interference that may cause undesired operation.This equipment has been tested and found to comply with the limits for a Class B digital device, pursuant to Part 15 of the FCC Rules. These limits are designed to provide reasonable protection against harmful interference in a residential installation. This equipment generates, uses and can radiate radio frequency energy and, if not installed and used in accordance with the instructions, may cause harmful interference to radio communications. However, there is no guarantee that interference will not occur ina particular installation. If this equipment does cause harmful interference to radioor television reception, which can be determined by turning the equipment off and on, the user is encouraged to try to correct the interference by one of the following measures:•Reorient or relocate the receiving antenna.•Increase the separation between the equipment and receiver.•C onnect the equipment into an outlet on a circuit different from that to which the receiver is connected.•Consult the dealer or an experienced radio/TV technician for help.This transmitter must not be co-located or operating in conjunction with any other antenna or transmitter.Radiation Exposure Statement:This equipment complies with FCC radiation exposure limits set forth for an uncontrolled environment. This equipment should be installed and operated with minimum distance 7.9 inches (20 cm) between the radiator and your body.CanadaContains IC: 1052D-E207This Class B digital apparatus complies with RSS-102 of the IC radio frequency (RF) Exposure rules.This device complies with Industry Canada license-exempt RSS standards. Operationis subject to the following two conditions: (1) This device may not cause harmful interference, and (2) this device must accept any interference received, including interference that may cause undesired operation.This transmitter must not be co-located or operating in conjunction with any other antenna or transmitter.CAN ICES-3(B) / NMB-3(B)Radiation Exposure Statement:This equipment complies with IC RSS-102 radiation exposure limits set forth for an uncontrolled environment. This equipment should be installed and operated with minimum distance 20 cm (7.9 inches) between the radiator and your body. Declaration of ConformityAccording to 47CFR, Part 2 and 15, Class B Personal Computers and Peripherals; and/or CPU Boards and Power Supplies used with Class B Personal Computers.We: Epson America, Inc.Located at: 3840 Kilroy Airport WayMS: 3-13Long Beach, CA 90806Telephone: (562) 981-3840Declare under sole responsibility that the product identified herein, complies with47CFR Part 2 and 15 of the FCC rules as a Class B digital device. Each product marketed, is identical to the representative unit tested and found to be compliant with the standards. Records maintained continue to reflect the equipment being producedcan be expected to be within the variation accepted, due to quantity production and testing on a statistical basis as required by 47CFR 2.909. Operation is subject to the following two conditions: (1) this device may not cause harmful interference, and (2) this device must accept any interference received, including interference that may cause undesired operation.Trade Name: EpsonType of Product: LCD ProjectorModel: H715A/H710AMarketing Name: PowerLite Pro Cinema 4040/6040UBEpson America, Inc. Limited WarrantyThree-Year Projector Limited Warranty and 90-Day Lamp Limited WarrantyWhat Is Covered: Epson America, Inc. (“Epson”) warrants to the original retail purchaserof the Epson projector product enclosed with this limited warranty statement that theproduct, if purchased new and operated in the United States, Canada, or Puerto Rico willbe free from defects in workmanship and materials for a period of three (3) years fromthe date of original purchase. This limited warranty applies only to the projector and notto the projector lamp, which carries a limited warranty period of ninety (90) days fromthe date of original purchase. For warranty service, you must provide proof of the date oforiginal purchase.What Epson Will Do To Correct Problems: If your product requires service duringthe limited warranty period, please call Epson at the number on the bottom of thisstatement and be prepared to provide the model, serial number, and date of originalpurchase. Epson will, at its option, repair or replace the defective unit, without chargefor parts or labor. If Epson authorizes an exchange for the defective unit, Epson willship a replacement product to you, freight prepaid, so long as you use an address inthe United States, Canada, or Puerto Rico. You are responsible for securely packagingthe defective unit and returning it to Epson within five (5) working days of receipt ofthe replacement. Epson requires a debit or a credit card number to secure the cost ofthe replacement product in the event that you fail to return the defective one. If Epsonauthorizes repair instead of exchange, Epson will direct you to send your product toEpson or its authorized service center, where the product will be repaired and sent backto you. You are responsible for packing the product and for all costs to and from theEpson authorized service center. When warranty service involves the exchange of theproduct or of a part, the item replaced becomes Epson property. The exchanged productor part may be new or refurbished to the Epson standard of quality, and at Epson’soption, the replacement may be another model of like kind and quality. Epson’s liabilityfor replacement of the covered product will not exceed the original retail selling price ofthe covered product. Exchange or replacement products or parts assume the remainingwarranty period of the product covered by this limited warranty. If Epson replaces thelamp as part of the warranty service, the replacement lamp carries the limited 90-daywarranty stated above.What This Warranty Does Not Cover: This warranty covers only normal use in the UnitedStates, Canada or Puerto Rico. Excessive continual use is not considered normal use. Thiswarranty does not cover consumables such as filters. This warranty is not transferable.Epson is not responsible for warranty service should the Epson label or logo or therating label or serial number be removed. Epson is not responsible for warranty serviceshould the product fail to be properly maintained or fail to function properly as a resultof misuse, abuse, improper installation, neglect, improper shipping, damage caused bydisasters such as fire, flood, and lightning, improper electrical current, software problems,the use of non-Epson lamps, add-in cards or cables, interaction with non-Epson products,or service other than by Epson or an Epson Authorized Servicer. Postage, insurance, orshipping costs incurred in presenting your Epson product for carry-in warranty service areyour responsibility. If a claimed defect cannot be identified or reproduced in service, youwill be held responsible for costs incurred.DISCLAIMER OF WARRANTIES: THE WARRANTY AND REMEDY PROVIDED ABOVE AREEXCLUSIVE AND IN LIEU OF ALL OTHER EXPRESSED OR IMPLIED WARRANTIES INCLUDING,BUT NOT LIMITED TO, THE IMPLIED WARRANTIES OF MERCHANTABILITY, FITNESS FORA PARTICULAR PURPOSE AND NON-INFRINGEMENT. UNLESS STATED HEREIN, ANYSTATEMENTS OR REPRESENTATION MADE BY ANY OTHER PERSON OR FIRM ARE VOID.Remedies: Your exclusive remedy and Epson’s entire liability for a material breach ofthis Agreement will be limited to a refund of the price paid for the Epson productscovered by this Agreement. Any action for breach of warranty must be brought within3 months of the expiration date of the warranty. Epson is not liable for performancedelays or for nonperformance due to causes beyond its reasonable control. Except asprovided in this written warranty, neither Epson nor its affiliates shall be liable for anyloss, inconvenience, or damage, including direct, special, incidental or consequentialdamages, including lost profits, cost of substitute equipment, downtime, claims of thirdparties, including customers, or injury to property, resulting from the use or inability touse the Epson products, whether resulting from a breach of warranty or any other legaltheory. Some jurisdictions do not allow limits on warranties or remedies for breach incertain transactions. In such jurisdictions, the limits in this paragraph and the precedingparagraph may not apply.In Canada, warranties include both warranties and conditions.Arbitration, Governing Laws: Any disputes arising out of this Agreement will be settledby arbitration to be conducted before a single arbitrator in Los Angeles, California,in accordance with the commercial Arbitration Rules of the American ArbitrationAssociation, and judgment upon the award rendered by the arbitrator may be enteredin any court having jurisdiction thereof. This Agreement shall be construed in accordancewith the laws of the State of California, except this arbitration clause which shall beconstrued in accordance with the Federal Arbitration Act.To find the Epson Authorized Reseller nearest you, please visit our website at:.To find the Epson Customer Care Center nearest you, please visit/support.To contact the Epson Connection SM , please call (800) 637-7661 or (562) 276-4394 in theU.S. and (905) 709-3839 in Canada or write to Epson America, Inc., P.O. Box 93012, LongBeach, CA 90809-3012.EPSON and PowerLite are registered trademarks, and EPSON Exceed Your Vision is a registered logomark ofSeiko Epson Corporation. Epson Connection is a service mark and PrivateLine is a registered trademark of EpsonAmerica, Inc.Mac is a trademark of Apple Inc., registered in the US and other countries.General Notice: Other product names used herein are for identification purposes only and may be trademarksof their respective owners. Epson disclaims any and all rights in those marks.This information is subject to change without notice.© 2016 Epson America, Inc., 5/16Printed in XXXXXX CPD-51729。
- 1、下载文档前请自行甄别文档内容的完整性,平台不提供额外的编辑、内容补充、找答案等附加服务。
- 2、"仅部分预览"的文档,不可在线预览部分如存在完整性等问题,可反馈申请退款(可完整预览的文档不适用该条件!)。
- 3、如文档侵犯您的权益,请联系客服反馈,我们会尽快为您处理(人工客服工作时间:9:00-18:30)。
潮影光电投影仪说明书
摘要:
一、引言
二、潮影光电投影仪产品概述
1.产品型号及特点
2.适用场景
三、投影仪主要功能与操作
1.开关机及基本操作
2.图像调节与设置
3.连接外部设备
四、投影仪维护与保养
1.清洁与保养
2.常见问题及解决方法
五、附录
1.技术参数
2.配件清单
3.保修政策
正文:
【引言】
潮影光电投影仪是一款高性能、多功能的家庭及商务投影设备,为用户带来清晰、震撼的视觉体验。
本文将详细介绍潮影光电投影仪的使用方法、功能
特点以及维护保养等方面的信息。
【潮影光电投影仪产品概述】
潮影光电投影仪的产品型号为PJ-XXX,采用先进的投影技术,具有高亮度、高清晰度、高色彩还原度等特点。
适用于家庭影院、商务演示、教育培训等多种场景。
【投影仪主要功能与操作】
1.开关机及基本操作
潮影光电投影仪的开关机操作简单,只需按下电源按钮即可。
在使用过程中,用户可通过遥控器或机身按键对投影仪进行基本操作,如音量调节、画面切换等。
2.图像调节与设置
投影仪支持自动对焦和手动对焦功能,用户可根据需要选择合适的对焦方式。
此外,还可通过遥控器或机身按键调节画面亮度、对比度、色彩等参数,以获得最佳的视觉效果。
3.连接外部设备
潮影光电投影仪支持多种接口,如HDMI、VGA、USB 等,可方便地连接电脑、手机、平板等外部设备。
在连接过程中,请确保设备与投影仪的接口匹配,并正确设置相关参数。
【投影仪维护与保养】
1.清洁与保养
在使用过程中,应定期清洁投影仪的镜头和内部风扇,防止灰尘积累影响投影效果。
清洁时,请使用专用的镜头纸和气吹,避免使用湿布和水清洗。
2.常见问题及解决方法
若出现投影画面模糊、颜色失真等问题,请检查投影仪的镜头、聚焦环、接口等部件是否正常。
如无法解决,请参考说明书或联系售后服务。
【附录】
1.技术参数
潮影光电投影仪的技术参数包括:亮度、分辨率、对比度、投影比等。
具体参数请参考产品说明书或官方网站。
2.配件清单
投影仪配件包括:遥控器、电源适配器、HDMI 线、VGA 线、说明书等。
请在使用过程中妥善保管配件,以免遗失。
3.保修政策
潮影光电投影仪享受国家规定的三包服务,具体保修政策和范围请参考产品说明书或官方网站。