加速度传感器i4迷你型iBeacon加速度传感器
ibeacon方案

iBeacon方案简介iBeacon是一种基于蓝牙低功耗技术的室内定位方案。
它利用设备之间的无线信号进行定位和导航,为用户提供室内定位服务。
本文档将详细介绍iBeacon的原理、优势以及如何在应用程序中实现iBeacon方案。
iBeacon原理iBeacon方案由三个主要组件组成:Beacon设备、移动设备和应用程序。
Beacon设备是一个小型的硬件设备,通常由电池供电。
它发送一个带有特定标识符的无线信号,这个标识符可以被附近的移动设备捕获和解读。
移动设备上运行的应用程序可以根据接收到的信号来确定自己在室内的位置。
当用户的移动设备接收到Beacon设备发出的信号时,应用程序将触发相应的操作。
比如,当用户进入某个商店的区域时,应用程序可以发送一条欢迎消息或者优惠券给用户。
这种个性化的体验可以提高用户的满意度和购买意愿。
iBeacon优势iBeacon方案具有以下几个优势:1.低功耗:iBeacon采用蓝牙低功耗技术,Beacon设备可以连续工作数月甚至数年而不需要更换电池。
这使得iBeacon非常适合长时间使用的场景,比如零售商店或者博物馆。
2.精准定位:iBeacon方案可以实现室内定位的精度在1米以内,极大地提高了定位的准确性。
这对于某些需要精确定位的场景非常重要,比如导航、推送信息等。
3.简易部署:iBeacon方案的部署非常简单。
只需要将Beacon设备放置在室内适当的位置即可。
同时,Beacon设备之间的距离可以根据需求灵活调整,从而实现更细粒度的定位。
4.开放性:iBeacon是一种开放性的技术,几乎可以在任何移动设备上运行。
这意味着开发者可以轻松地集成iBeacon技术到他们的应用程序中,为用户提供更好的体验。
实现iBeacon方案要在应用程序中实现iBeacon方案,需要以下几个步骤:1.获取Beacon设备:首先,需要获取一些Beacon设备。
市面上有很多Beacon设备的供应商,可以根据实际需求选择合适的设备。
LC10A 超低功耗,I2C 接口 高精度心率检测传感器 使用说明书
焊接注意事项:由于 LC10A 为透明封装,高温状态持续请勿超过 10S,以免损坏外 观或直接导致芯片失效;
成都维客昕微电子有限公司
[3]
7 结构设计推荐
LC10A 说明书
为了更好地发挥出芯片性能,我们推荐了芯片硬件结构方案,包括 LED 的布局、玻璃丝 印尺寸、挡板尺寸以及 IC 与玻璃间隙,具体结构如下所示。
发生壳料内部窜光。 *注:以上结构、硬件、光路若不使用推荐方案,维客不保证性能;不支持使用双色模和 IML 工艺。
成都维客昕微电子有限公司
[6]
LC10A 说明书
8 LED 性能参数及辅料说明
LC10A 心率芯片对 Green、IR 的光效及压降要求如下表所示,可根据下表 LED 参数 自行选择 LED 供应商;
VDDIO 2
3
4
5
PD
LC10A
10
9
8
C1 C2
7 VCP 10u 10u
6 VDD C3100n
INT SCL SDA VDD VDDIO
主板
图 2 LC10A 推荐应用电路
推荐应用电路设计注意事项: a、建议心率模块使用单独 LDO 供电; b、如 MCU 通信、中断、复位 IO 采用 1.8V 电压,则 VDDIO 需要单独接 1.8V 电源;如
Polar WearLink 传感器 Nike+ 用户手册说明书
POLAR WEARLINK+ TRANSMITTER NIKE+ User ManualPolar WearLink®Transmitter Nike+ This user manual contains instructions for the Polar WearLink transmitter Nike+.The heart rate sensor is compatible with Nike+iPod, Nike+SportBand and Polar training computers using GymLink technology,such as FT80,FT60,RS300X,and CS400.For detailed list of compatible products.The latest version of this user manual can be downloaded.Please follow the pictures on the front cover.Heart Rate Sensor Parts1.The plastic electrode areas on the reverseside of the strap detect heart rate.PictureA1.2.The connector sends the heart rate signalto the receiving device.Picture A2.WearLink heart rate sensors enable training in a group without interference from other heart rate sensors.Wear the Heart Rate Sensor1.Moisten the electrode areas of the strap.Picture B1.2.Attach the connector to the strap.PictureB2.3.Adjust the strap length to fit tightly butcomfortably.4.Tie the strap around your chest,just belowthe chest muscles,and attach the hook tothe other end of the strap.Picture B3.5.Check that the moist electrode areas arefirmly against your skin and that the Polarlogo of the connector is in a central andupright position.Picture B4.Detach the connector from the strap and rinsethe strap under running water after every use.See detailed washing instructions in the Caring for Your Heart Rate Sensor section.Linking the Heart Rate Sensor with Nike+ iPodNike+iPod-compatible heart rate sensors are sold separately from the Nike+iPod Sport Kit and the Nike+iPod sensor.Nike+iPod compatible heart rate sensors can be used with iPod nano(5th generation or newer).Before using the heart rate sensor for the first time,you must link it to your iPod nano receiver:•iPod nano(5th generation or newer): Connect your Nike+iPod receiver to youriPod nano,choose Nike+iPod>Settings> Heart Rate Monitor>Link,and follow theon-screen instructions.Unlinking the heart rate sensor:•iPod nano:Choose Nike+iPod>Settings> Heart Rate Monitor>Unlink,and follow the on-screen instructions.Linking the Heart Rate Sensor with Nike+ SportBandNike+SportBand-compatible heart rate sensors are sold separately from the Nike SportBand. Before using the heart rate sensor for the first time,you must link it to your Nike+SportBand:1.Wear the heart rate sensor.Make sure thereare no other shoe sensors or heart ratesensors nearby.2.Press and hold the TOGGLE button on theNike SportBand for3seconds.A blinkingLink message appears on the SportBanddisplay,followed by OK.For more information on the Nike+SportBand, see the complete manual available atnikeplus/downloads.Caring for Your Heart Rate SensorThe heart rate sensor is a high-tech instrument that should be handled with care.Follow the caring instructions to ensure reliable measurement and to maximize the life span of the heart rate sensor.The following instructions will help you fulfill guarantee obligations. Connector:Detach the connector from the strap after every use and dry the connector with a soft towel.Clean the connector with a mild soap and water solution when needed.Never use alcohol or any abrasive material(eg.steel wool or cleaning chemicals).Strap:Rinse the strap under running water after every use and hang to dry.Clean the strap gently with a mild soap and water solution when needed.Do not use moisturizing soaps,because they can leave residue on the strap.Do not soak,iron,dry clean or bleach the strap.Do not stretch the strap or bend the electrode areas sharply.Dry and store the strap and the connector separately,to maximize the heart rate sensor battery lifetime.Keep the heart rate sensor in a cool and dry place.Do not store the heart rate sensor wet in non-breathing material,such as a sports bag,to prevent snap oxidation.Do not expose the heart rate sensor to direct sunlight for extended periods.Check the label on your strap to see if it ismachine washable.Never put the strap or theconnector in a dryer!ServiceDuring the warranty period,service the product at an authorized Polar Service Center only.The warranty does not cover damage caused by unauthorized service.See Limited International Polar Guarantee.BatteriesTo change the battery yourself,follow the instructions below,and see the markings on the connector and picture C on the front cover of this user manual.ing a coin,open the battery cover byturning it counterclockwise to OPEN.2.Insert the battery(CR2025)inside thecover with the positive(+)side against thecover.Make sure the sealing ring is in thegroove to ensure water resistance.3.Press the cover back into the connector.e the coin to turn the cover clockwise toCLOSE.When changing the battery,make sure the sealing ring is not damaged,in which case you should replace it with a new one to ensure the water resistance of the connector.Battery kits with sealing rings are available at Polar retailers and authorized Polar Service Centers.In the USA and Canada,sealing rings are available at authorized Polar Service Centers only.Keep batteries away from children.Ifswallowed,contact a doctor immediately.Batteries should be disposed of in compliancewith local regulations.For allergy information,see the listed materials in Technical Specifications.Avoid skinreactions by wearing the heart rate sensor over a shirt,moistened under the electrodes.The combined impact of moisture and intense abrasion may cause a black color to come off the heart rate sensor’s surface,possibly staining light-colored clothes.If you use perfume or insect repellent on your skin,you must ensure that it does not come into contact with the heart rate sensor.Using Your Heart Rate Sensor in a Water Environment Polar WearLink transmitter Nike+may be used when swimming,but interference may occur for the following reasons:•Sea-and pool water are very conductive,and electrodes may short-circuit,preventing ECG signals from being detected by the heart rate sensor.•Jumping or sharp muscle movement may shift the heart rate sensor so the ECG signals cannot be detected.•The ECG signal strength is individual and depends on tissue composition.Technical SpecificationsBattery type:CR 2025Battery sealing ring:O-ring 20.0x 1.0Material FPM WearLink Nike+battery life:600h Operating temperature:14°F to 122°F/-10°C to +50C Connector material Polyamide Strap material 38%Polyamide,29%Polyurethane,20%Elastane,13%Polyester•This guarantee does not affect theconsumer’s statutory rights under applicable national or state laws in force,or theconsumer’s rights against the dealer arisingfrom their sales/purchase contract.•This limited Polar international guarantee is issued by Polar Electro Inc.for consumerswho have purchased this product in the USA or Canada.This limited Polar internationalguarantee is issued by Polar Electro Oy forconsumers who have purchased this product in other countries.•Polar Electro Oy/Polar Electro Inc.guarantees the original consumer/purchaser of this device that the product will be freefrom defects in material or workmanship for two(2)years from the date of purchase.•The receipt of the original purchase is your proof of purchase!•The guarantee does not cover the battery, normal wear and tear,damage due tomisuse,abuse,accidents or non-compliance with the precautions;improper maintenance, commercial use,cracked,broken orscratched cases/displays,armband,elasticstrap and Polar apparel.•The guarantee does not cover any damage/s, losses,costs or expenses,direct,indirect or incidental,consequential or special,arising out of,or related to the product.•Items purchased second hand are not covered by the two(2)year warranty,unless otherwise stipulated by local law.•During the guarantee period,the product will be either repaired or replaced at any of theauthorized Polar Service Centers regardlessof the country of purchase.Guarantee with respect to any product will be limited to countries where the product has been initially marketed.。
ibeacon定位原理

ibeacon定位原理一、iBeacon概述iBeacon是苹果公司于2013年推出的一种基于蓝牙4.0低功耗技术的定位方案,可以在室内和半室内环境下实现高精度的定位。
iBeacon 主要由信标设备和移动终端设备两部分组成,信标设备可以发射蓝牙信号,移动终端设备可以接收并处理这些信号,从而实现室内定位。
二、iBeacon技术原理1. BLE技术iBeacon使用的是BLE(Bluetooth Low Energy)技术,也称为蓝牙4.0低功耗技术。
BLE技术采用了GFSK调制方式,采用2.4GHz频段进行通信。
BLE在传输数据时使用了频率跳变和自适应功率控制等多种优化方式,使得其具有低功耗、短距离、高速率等特点。
2. iBeacon协议iBeacon协议是苹果公司定义的一种基于BLE技术的通信协议。
该协议规定了蓝牙信号广播包的格式和内容。
其中包括UUID、Major、Minor三个参数,分别用来标识一个特定的iBeacon设备。
3. 三角测量原理iBeacon通过信号强度指示(RSSI)来实现定位。
移动终端设备接收到iBeacon设备发出的蓝牙信号后,可以计算出信号的强度值。
根据三角测量原理,当移动终端设备接收到至少三个iBeacon设备的信号时,就可以通过计算这些信号的强度值和位置信息,确定移动终端设备所处的位置。
4. 信号过滤算法为了提高定位精度和减少误差,iBeacon还采用了一些信号过滤算法。
其中最常用的是加权平均算法和卡尔曼滤波算法。
加权平均算法将多次测量得到的RSSI值进行加权平均处理,从而减小因为环境干扰等原因导致的误差。
卡尔曼滤波算法则是一种基于状态估计的滤波方法,能够根据历史数据和模型预测未来数据,并对测量数据进行修正。
三、iBeacon定位应用1. 室内导航iBeacon技术可以在室内环境下实现高精度的定位,并且具有低功耗、易部署等优点,因此被广泛应用于室内导航场景。
用户在室内打开导航APP后,可以通过iBeacon设备发出的信号,得到自己所处的位置和前往目的地的路径,从而实现室内导航。
Endevco 2222C 微型铂矿加速度传感器说明书

The Endevco ® model 2222C is the world’s most popular miniature piezoelectric accelerometer for vibration measurement on mini-structures and small objects.Its light weight (0.5 gm without the low-noise replaceable cable) effectively minimizes mass loading. Theaccelerometer is a self-generating device that requires no external power source for operation.The model 2222C features Endevco’s Piezite ® type P-8 crystal element operating in the radial shear mode. This sensor exhibits excellent output sensitivity stability over time. Signal ground is isolated from the mounting surface of the unit by a hard anodized surface. A specially designed low noise coaxial cable is supplied for error-free operation. Unit and cable removal tools are included in the package to ensure proper removal in the field.Endevco signal conditioner models 133, 2775B, 2771, 6634C or Oasis 2000 (4990A-X with cards 428 and/or 433) computer- controlled system are recommended for use with this high impedance accelerometer.•NEW! 2222C-R available as replacement sensor•Industry standard •Light weight (0.5 gm)•Adhesive mounting •Ground isolated•Small structure vibration measurement-20-15-10-505101520FREQUENCY IN HERTZ-30-10103050TEMPERATURE o F (o C)(-73)(10)(93)(177)STANDARD TOLERANCE INCHES (MILLIMETERS).XX = +/- .02 (.X = +/- .5).XXX = +/- .010 (.XX = +/- .25)FeaturesDescriptionModel 2222CPiezoelectric accelerometerSpecificationsThe following performance specifications conform to ISA-RP-37.2 (1964) and are typical values, referenced at +75˚F (+24˚C), 4 mA and 100 Hz, unless otherwise noted. Calibration data, traceable to National Institute of Standards and Technology (NIST), is suppliedUnitspC/g 1.4pC/g 1.0See typical amplitude response kHz 32kHz 25Hz 1 to 8000Hz 1 to 10 000Dynamic characteristicsCharge sensitivity Typical MinimumFrequency responseResonance frequency (typical) MinimumAmplitude response [1]±10% ±1 dB (ref)Temperature response See typical curve -67°F (-55°C) max/min % -15 / 0+350°F (+177°C) max/min % +15 / 0Transverse sensitivity % ≤5Amplitude linearity %1Per 200g, 0 to 2000 gAcceleration applied in the direction of the arrow on the unit produces positive output Electrical characteristicsOutput polarityResistance (with 3093M10-12 cable)GΩ ≥10at +350°F (+177°C) (with 3093M10-12 cable) GΩ ≥0.5MΩ ≥1 at 100 Vdc pF470Signal return isolated from mounting surface-100˚F to +350˚F (-73˚C to +177˚C)Sealed by silicone compound g pk 1000g pk10 000equiv. g pk/μ strain 0.04equiv. g pk/°F (/°C)0.05 (0.09)See outline drawing gm (oz) 0.5 (0.018)gm (oz)3.7 (0.13)Aluminum, hard anodized 3093-12 cable assembly Adhesive% 20 Hz to 10 000 HzpC/g %pFModel 2222CPiezoelectric accelerometerAccessoriesIsolation Capacitance GroundingEnvironmental characteristicsTemperature range Humidity [2]Sinusoidal vibration limit [3] Shock limit [4]Base strain sensitivityThermal transient sensitivityPhysical characteristicsDimensions Weight (sensor)Weight (cable-12’’ long) Case material Connector Mounting [5]CalibrationSupplied:Charge frequency response Charge sensitivityMaximum transverse sensitivity CapacitanceNotes:1. Low-end response of the transducer is a function of its associated electronics.2. Removing cable exposes accelerometer interior to environment. See Piezoelectric Instruction Manual before replacing cable assembly.3. When exposed to high g and large displacement, the cable must be tied down as close to the accelerometer as possible to prevent cable whip and subsequent cable failure.4. Short duration shock pulses, such as those generated by metal-to-metal impacts, may excite transducer resonance and cause linearity errors. See TP290 for more details.5. Adhesives such as petro-wax, hot-melt glue, and cyanoacrylate epoxy (super glue) may be used to mount the accelerometer temporarily to the test structure. To remove an epoxy-mounted accelerometer, first soften the epoxy with an appropriate solvent and then twist the unit off with the supplied removal wrench. Damage to sensors caused by inappropriate removal procedures are not covered by Endevco’s warranty.6. Maintain high levels of precision and accuracy using Endevco’s factory calibrationservices. Call Endevco’s inside sales force at 800-982-6732 for recommended intervals, pricing and turn-around time for these services as well as for quotations on ourstandard products.Continued product improvement necessitates that Endevco reserve the right to modify these specifications without notice. Endevco maintains a program of constant surveillance over all products to ensure a high level of reliability. This program includes attention to reliability factors during product design, the support of stringent Quality Control requirements, and compulsory corrective action procedures. These measures, together with conservative specifications have made the name Endevco synonymous with reliability.©Endevco (San Juan Capistrano), Inc. All Rights Reserved 30700 Rancho Viejo Road, San Juan Capistrano, CA 92675 USA (800)982-6732•(949)493-8181fax(949)661-7231••Email:************************100812。
TBOX规格书
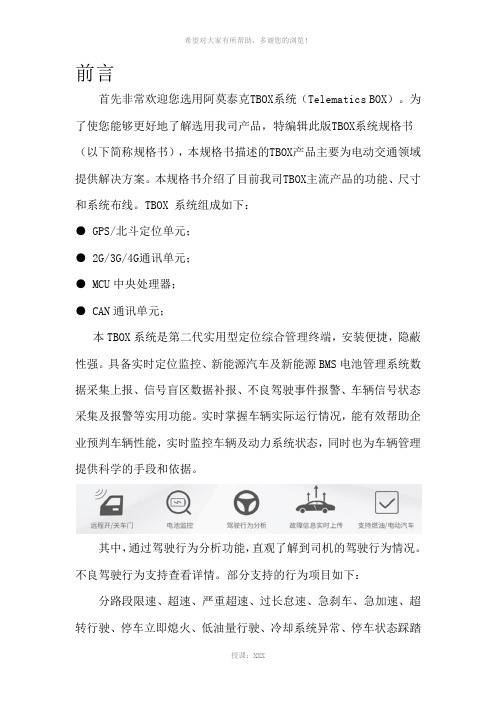
前言首先非常欢迎您选用阿莫泰克TBOX系统(Telematics BOX)。
为了使您能够更好地了解选用我司产品,特编辑此版TBOX系统规格书(以下简称规格书),本规格书描述的TBOX产品主要为电动交通领域提供解决方案。
本规格书介绍了目前我司TBOX主流产品的功能、尺寸和系统布线。
TBOX 系统组成如下:● GPS/北斗定位单元;● 2G/3G/4G通讯单元;● MCU中央处理器;● CAN通讯单元;本TBOX系统是第二代实用型定位综合管理终端,安装便捷,隐蔽性强。
具备实时定位监控、新能源汽车及新能源BMS电池管理系统数据采集上报、信号盲区数据补报、不良驾驶事件报警、车辆信号状态采集及报警等实用功能。
实时掌握车辆实际运行情况,能有效帮助企业预判车辆性能,实时监控车辆及动力系统状态,同时也为车辆管理提供科学的手段和依据。
其中,通过驾驶行为分析功能,直观了解到司机的驾驶行为情况。
不良驾驶行为支持查看详情。
部分支持的行为项目如下:分路段限速、超速、严重超速、过长怠速、急刹车、急加速、超转行驶、停车立即熄火、低油量行驶、冷却系统异常、停车状态踩踏油门、长时间刹车、长时间踩离合、粘离合、发动机异常熄火、机油油温异常、猛踩油门、燃油温度过高、空档滑行、冷车启动、电瓶电压高、电瓶电压低、充电电压低、充电电压高……TBOX内部内置了BLE4.0蓝牙模块,蓝牙BLE技术可以全面取代目前汽车上普遍采用的PKE遥控总成,通过多个蓝牙模块的配合,可精确判断智能手机距离车辆的位置,在车内还是车外。
技术优势1,iBeacon功能,可以实现距离感知,iBeacon是苹果在2013年WWDC上推出一项基于蓝牙 4.0(Bluetooth LE | BLE | Bluetooth Smart)的精准微定位技术,当你的手持设备靠近一个Beacon基站时,设备就能够感应到Beacon信号,范围可以从几毫米到50米。
德国大陆公司,美国通用汽车公司类似方案的研究发现,(详见附件美国通用汽车公司BLE专利文稿)他们所采用的BLE方案都是通过RSSI值判断距离的方法来判定手机是在车内或者车外,由于不同品牌手机之间蓝牙信号强度的差异,因此,该方案无一例外的都要进行人工标定,其应用场景为,当用户第一次使用该功能,或者用户更换手机的时候,需要在距离车辆上的BLE天线的固定位置,例如坐在驾驶座上用手机APP点击标定按键或通过操作车内相应的设置功能进行标定,之后车辆的BLE传感器以此信号强度为基准,测算出手机与传感器之间的距离,这在用户感受上不会太好,如果用户频繁更换手机,如果用户没有及时重新标定手机信号强度,会造成距离判断误差很大,甚至会造成手机误锁进车内的风险。
bea雷达传感器eaglesix说明书

bea雷达传感器eaglesix说明书摘要:1.雷达传感器简介2. Eaglesix 雷达传感器的特点3.雷达传感器的主要应用领域4.操作与维护指南5.安全注意事项正文:一、雷达传感器简介雷达传感器是一种利用无线电波进行距离测量、目标检测和跟踪的设备。
在我国,雷达传感器技术已广泛应用于军事、气象、航空、交通等领域。
其中,Eaglesix 雷达传感器以其出色的性能和可靠性,赢得了市场的认可。
二、Eaglesix 雷达传感器的特点1.高灵敏度:Eaglesix 雷达传感器具有较高的灵敏度,能够检测到较远距离的目标。
2.抗干扰能力强:Eaglesix 雷达传感器采用先进的抗干扰技术,能够在复杂环境中稳定工作。
3.精确度高:Eaglesix 雷达传感器具有较高的测量精度,可实现精确的目标定位。
4.自动跟踪:Eaglesix 雷达传感器具备自动跟踪功能,可实时跟踪目标的运动轨迹。
5.易于集成:Eaglesix 雷达传感器具有良好的兼容性和集成性,可方便地与其他设备配合使用。
三、雷达传感器的主要应用领域1.军事领域:雷达传感器可用于战场监测、无人机导航、导弹制导等。
2.气象领域:雷达传感器可用于探测降水、风速、风向等气象信息。
3.航空领域:雷达传感器可用于飞机导航、飞行安全、空中交通管制等。
4.交通领域:雷达传感器可用于智能交通系统、车流量监测、违章监测等。
四、操作与维护指南1.操作注意事项:操作雷达传感器时,应确保设备平稳、可靠地工作,避免强烈震动和阳光直射。
2.维护保养:定期对雷达传感器进行清洁、检查和保养,确保设备处于良好状态。
3.故障处理:遇到故障时,应立即停机检查,找出原因并进行修复。
五、安全注意事项1.防止触电:操作雷达传感器时,应确保设备接地良好,避免触电事故。
2.防止辐射:在雷达传感器工作范围内,应尽量避免长时间暴露于辐射环境。
3.安全防护:根据实际应用场景,为雷达传感器配置相应的安全防护措施。
Nitecore Intellicharge i4说明书
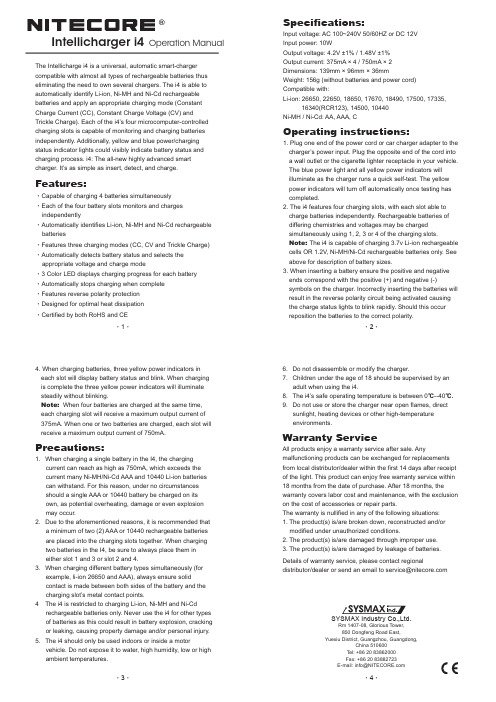
SYSMAX Industry Co.,Ltd.Rm 1407-08, Glorious Tower,850 Dongfeng Road East,Yuexiu District, Guangzhou, Guangdong,China 510600Tel: +86 20 83862000Fax: +86 20 83882723E-mail:*****************Operation ManualThe Intellicharge i4 is a universal, automatic smart-charger compatible with almost all types of rechargeable batteries thus eliminating the need to own several chargers. The i4 is able to automatically identify Li-ion, Ni-MH and Ni-Cd rechargeable batteries and apply an appropriate charging mode (Constant Charge Current (CC), Constant Charge Voltage (CV) andTrickle Charge). Each of the i4’s four microcomputer-controlled charging slots is capable of monitoring and charging batteries independently. Additionally, yellow and blue power/charging status indicator lights could visibly indicate battery status and charging process. i4: The all-new highly advanced smart charger. It’s as simple as insert, detect, and charge.Features:·Capable of charging 4 batteries simultaneously ·Each of the four battery slots monitors and charges independently·Automatically identifies Li-ion, Ni-MH and Ni-Cd rechargeable batteries ·Features three charging modes (CC, CV and Trickle Charge)·Automatically detects battery status and selects the appropriate voltage and charge mode ·3 Color LED displays charging progress for each battery ·Automatically stops charging when complete ·Features reverse polarity protection ·Designed for optimal heat dissipation ·Certified by both RoHS and CESpecifications:Input voltage: AC 100~240V 50/60HZ or DC 12V Input power: 10WOutput voltage: 4.2V ±1% / 1.48V ±1%Output current: 375mA × 4 / 750mA × 2 Dimensions: 139mm × 96mm × 36mmWeight: 156g (without batteries and power cord)Compatible with:Li-ion: 26650, 22650, 18650, 17670, 18490, 17500, 17335,16340(RCR123), 14500, 10440Ni-MH / Ni-Cd: AA, AAA, COperating instructions:1. Plug one end of the power cord or car charger adapter to the charger’s power input. Plug the opposite end of the cord into a wall outlet or the cigarette lighter receptacle in your vehicle. The blue power light and all yellow power indicators will illuminate as the charger runs a quick self-test. The yellow power indicators will turn off automatically once testing has completed.2. The i4 features four charging slots, with each slot able to charge batteries independently. Rechargeable batteries of differing chemistries and voltages may be charged simultaneously using 1, 2, 3 or 4 of the charging slots. Note: The i4 is capable of charging3.7v Li-ion rechargeable cells OR 1.2V, Ni-MH/Ni-Cd rechargeable batteries only. See above for description of battery sizes.3. When inserting a battery ensure the positive and negative ends correspond with the positive (+) and negative (-)symbols on the charger. Incorrectly inserting the batteries will result in the reverse polarity circuit being activated causing the charge status lights to blink rapidly. Should this occur reposition the batteries to the correct polarity.4. When charging batteries, three yellow power indicators in each slot will display battery status and blink. When charging is complete the three yellow power indicators will illuminate steadily without blinking.Note: When four batteries are charged at the same time, each charging slot will receive a maximum output current of 375mA. When one or two batteries are charged, each slot will receive a maximum output current of 750mA.Precautions:1. When charging a single battery in the I4, the chargingcurrent can reach as high as 750mA, which exceeds the current many Ni-MH/Ni-Cd AAA and 10440 Li-ion batteries can withstand. For this reason, under no circumstances should a single AAA or 10440 battery be charged on its own, as potential overheating, damage or even explosion may occur.2. Due to the aforementioned reasons, it is recommended thata minimum of two (2) AAA or 10440 rechargeable batteries are placed into the charging slots together. When charging two batteries in the I4, be sure to always place them in either slot 1 and 3 or slot 2 and 4.3. When charging different battery types simultaneously (forexample, li-ion 26650 and AAA), always ensure solidcontact is made between both sides of the battery and the charging slot’s metal contact points.4 The i4 is restricted to charging Li-ion, Ni-MH and Ni-Cdrechargeable batteries only. Never use the i4 for other types of batteries as this could result in battery explosion, cracking or leaking, causing property damage and/or personal injury.5. The i4 should only be used indoors or inside a motorvehicle. Do not expose it to water, high humidity, low or high ambient temperatures.6. Do not disassemble or modify the charger.7. Children under the age of 18 should be supervised by anadult when using the i4.8. The i4’s safe operating temperature is between 0℃--40℃. 9. Do not use or store the charger near open flames, directsunlight, heating devices or other high-temperature environments.Warranty ServiceAll products enjoy a warranty service after sale. Anymalfunctioning products can be exchanged for replacements from local distributor/dealer within the first 14 days after receipt of the light. This product can enjoy free warranty service within 18 months from the date of purchase. After 18 months, thewarranty covers labor cost and maintenance, with the exclusion on the cost of accessories or repair parts.The warranty is nullified in any of the following situations:1. The product(s) is/are broken down, reconstructed and/or modified under unauthorized conditions.2. The product(s) is/are damaged through improper use.3. The product(s) is/are damaged by leakage of batteries.Details of warranty service, please contact regionaldistributor/*****************************************·1··3··4··2·Intellicharger i4®。
- 1、下载文档前请自行甄别文档内容的完整性,平台不提供额外的编辑、内容补充、找答案等附加服务。
- 2、"仅部分预览"的文档,不可在线预览部分如存在完整性等问题,可反馈申请退款(可完整预览的文档不适用该条件!)。
- 3、如文档侵犯您的权益,请联系客服反馈,我们会尽快为您处理(人工客服工作时间:9:00-18:30)。
产品规格书
PRODUCT SPECIFICATION
深圳云里物里科技股份有限公司
Version 2.2发布时间
2017-08-04
MODEL NO/DESCRIPTION
产品名称:迷你型加速度传感器iBeacon
产品型号:i4
目录
1.产品简介 (3)
2.产品特点 (4)
3.运用范围 (4)
4.产品物理特性 (4)
5.技术参数 (5)
6.电气特性 (5)
7.LIS2DHTR传感器性能参数 (5)
8.默认参数 (6)
9.支持设备 (6)
10.操作说明 (7)
11.认证信息 (7)
12.包装信息 (7)
13.质量保障 (8)
i4迷你型加速度传感器iBeacon为信号白,能够配合各种装修风格;本产品的极限距离可达80米,能够降低部署成本;采用CR2477电池(1000mAH),支持微信摇一摇接入。
中间可丝印或滴胶logo。
立面侧面
内部结构
外形小巧
采用CR2477电池(1000mAH)
支持微信摇一摇接入
增加超低功耗、高性能、3轴线性加速度传感器(LIS2DHTR)
内置温度传感器
传感器可选择的G值范围:±2g、±4g、±8g、±16g
加速度传感器的输出数据频率:1Hz-5.3kHz
传感器具有“睡眠唤醒”与“重返睡眠”功能
并有两个独立的可编程中断入口可用于监测自由跌落以及姿态检测
3.运用范围
传感器ibeacon可配合手机APP显示方向、运动激活、运动记步、移动监测、摇摆控制等;线下顾客广告、优惠券推送,精准营销;商场、机场等大型公众场合室内定位;旅游景点、博物馆等线上讲解;展会、论坛、办公室签到;网址:基于位置的实时消息推送,如现场资料、会议流程分享等;演唱会、大型赛事等观众互动。
4.产品物理特性
型号I4
外壳材质PC
外壳颜色信号白
外型尺寸Ø37x16.5mm
产品重量21g(含电池)
使用电源CR2477
供电电压 3.0VDC
安装方式双面胶粘贴
5.技术参数
通讯方式BLE4.0
广播功率-30~4dBm,默认0dBm
广播频率100ms~10s,默认500ms
传输距离空旷极限传输距离80米
安全性支持密码连接及不可连接模式,防恶意连接功能支持设备iOS7.0及以上,Android4.3及以上
6.电气特性
静态电流≤3uA
峰值电流11mA
平均电流46uA(0dBm/500ms)
电池型号CR2477
电池容量1000mAH
使用寿命17个月(0dBm/500ms)
7.LIS2DHTR传感器性能参数
工作电压 1.71V-3.6V
最小功耗2uA
数字输出接口I2C/SPI
测量轴3轴(X,Y,Z)
唤醒功能有
加速度范围±2g、±4g、±8g、±16g
带宽1Hz~5.3kHz
传感器工作温度-40℃~+85℃
传感器封装SMD,2.0*2.0*1.0mm,14-pin,LGA
8.默认参数
参数名称默认值
UUID设备ID FDA50693-A4E2-4FB1-AFCF-C6EB07647825 Major主类10001
Minor次类19641
Measured power功率校验-59dBm
Transmission Power发射功率0dBm
Change Password修改密码(minew123)可以为字母和数字
Broadcasting Interval 广播周期期500ms
Serial ID设备序列号0-99999随机产生
iBeacon Name设备名称1-12个字符,MiniBeacon_
Connection Mode连接模式Yes(可连接模式)No(不可连接模式)
Soft Reboot软件复位minew123(与密码一致)
Battery Service电池电量电池图标显示,实时检测,满格为100%的电量9.支持设备
固件完全符合Apple公司iBeacon技术要求,支持机型包括:
支持设备系统支持设备型号
iOS7.0及以上iPhone4S,iPhone5/5C/5S,iPhone6/6Plus/6S/6SPlus,
iPhone7/7Plus,iPad mini/mini2/4/Air/Pro
Android4.3及以上Samsung S4/S5/S6/S7,Note3/4/5…
小米M3/4/5…
华为P7/8/9,荣耀6/7/8
具备蓝牙4.0及Android4.3以上机型均可支持
10.操作说明
开机:打开产品后盖,按住按键不放,5秒后,蓝色LED一直亮5秒则开机成功。
关机:在开机状态下,按住按键不放,5秒后,蓝色LED闪烁五次则关机成功。
修改参数:详细的修改参数说明,请参照:MiniBeacon_Instructions_2.0cn.pdf 11.认证信息
FCC ID编号:2UAB6-MS54V3CE证书编号:BCTC-LH161112146C
苹果MFi认证编号:iBC-14-00582
12.包装信息
包装信息精品内盒内盒工业内盒(含电池)外箱(含电池)
包装
图片
数量1个20个20个200个
净重21.0g0.42kg0.42kg 4.2kg
毛重32.0g0.65kg0.65kg 5.8kg
尺寸6x6x2cm30.5x11x7.5cm30.5x11x7.5cm32x23.5x40cm
13.质量保障
工厂通过了ISO9001质量体系认证。
每一个产品都经过严格测试(发射功率测试、灵敏度测试、功耗测试,稳定性测试、老化测试等)。
声明:本规格书仅供参考,如有更改,恕不另行通知。
创新微科技对本说明书的内容有最终解释权。