安博士单机版使用手册
APC4.0安装手册

AhnLab Policy Center 4.0产品安装手册导读Copyright (C) AhnLab, Inc. 2002-2010. All rights reserved.AhnLab Policy Center 4.0产品安装手册的内容和程序受著作权法和计算机程序保护法的保护。
此产品安装手册中所提及的产品名称为各公司的注册商标。
AhnLab Policy Center 4.0产品安装手册只介绍关于产品安装和初始设置的内容。
更详细的内容AhnLab Policy Center 4.0管理员手册。
2010年08月01日发行第一版免责条款制造商、进口商及代理店对包括伤害在内的偶发性损伤或因不当使用和操作产品所造成的其他损伤不负任何责任。
此产品导入指南是以当前产品为标准撰写的。
安博士公司正在不断添加和完善新的功能,今后也将持续开发新的技术。
在没有对产品购买人或购买企业事先提示的情况下,产品的全部功能可能有所变更,与此产品导入指南的内容有所偏差。
标记规则参考注意手册的构成AhnLab Policy Center 4.0的手册分为产品使用指南和管理员手册。
产品安装手册:在产品安装手册中说明引进AhnLab Policy Center 4.0后,作为基本的Ah nLab Policy Center 4.0安装、初试安装助手使用方法、域设置、转发服务器使用方法、域结构设置、环境设置等。
1AhnLab Policy Center 4.0产品导入指南2 管理员手册:管理员手册除了产品安装内容之外,为便于在使用AhnLab Policy Center 4.0的过程中参考,根据菜单结构说明AhnLab Policy Center 4.0的功能。
产品注册安装AhnLab Policy Center 4.0的用户必须进行产品注册。
在没有进行产品注册的状态下,将无法升级最新的引擎并无法享用其他丰富的客户服务支持。
需要在北京安博士信息安全技术有限公司的主页上进行用户登记,或填写本软件产品随附的用户登记卡并将之寄给本研究所。
安博尔T401说明书

安博尔T401说明书
产品可能会因使用不当或疏忽而受损。
有些产品损坏情形十分严重,应加以检查,并视需要拿到授权维修点进行修理后才能重新使用。
如同任何电子装置一般,在开启产品的电源时应特别注意。
在极少数情况下,您可能会注意到从机器传出气味或看到冒烟或火花。
或者您可能会听到爆声、爆裂声或嘶嘶声。
这些状况可能仅表示内接式电子组件有安全和控制上的问题。
或者,它们可能表示潜在的安全问题。
然而,请勿冒险或尝试自己诊断状况。
请经常检查您的电脑及其组件是否有损坏、磨损或危险的迹象。
如果您对组件的状况有任何疑虑,请勿使用产品。
请与客户支持中心或产品制造厂商联络,以获得有关如何检查产品的说明,并在必要时将产品送修。
如果需要服务与支持中心的电话号码,请参阅第67页
的全球电话清单。
虽然以下所列的状况极少发生,但如果您遇到其中任何一种状况,或对产品有任何安全上的考量,请停止使用产品并切断电源及电信线路,然后向客户支持中心寻求进一步的协助。
FC300操作说明书

" 如何开始 .................................................................. 11 " 附件包 (≤ 7.5 kW) ............................................................. 12 " 机械安装 .................................................................. 14 " 电气安装 .................................................................. 16 " 拆除外接电缆的挡板 ........................................................ 16 " 主电源连接和接地 .......................................................... 17 " 电动机连接 ................................................................ 19 " 保险丝 .................................................................... 21 " 访问控制端子 .............................................................. 23 " 电气安装,控制端子 ........................................................ 23 " 连接示例 .................................................................. 24 " 启动/停止 ................................................................. 24 " 脉冲启动/停止 ............................................................. 25 " 加速/减速 ................................................................. 25 " 电位器参考值 .............................................................. 25 " 电气安装,控制电缆 ........................................................ 26 " 开关 S201、S202 和 S801 ........................................................ 27 " 最终设置与测试 ............................................................ 28 " 其他连接 .................................................................. 30 " 继电器选件 MCB 105 ............................................................ 30 " 机械制动控制 .............................................................. 33 " 电动机热保护 .............................................................. 33
博士安全系统SE2系列产品使用指南与搭建说明书

FCC NoticeThis device complies with Part 15 of the FCC Rules and with RSS-210 of Industry and Science Canada. Operation is subject to the following two conditions:•This device may not cause harmful interference, and•This device must accept any interference received, including interference that may cause undesiredoperation.FCC ID: ESV-0117-1Canada: 1249 102 6431.2Using the SE2 TransmitterThis feature is enabled on this transmitter. This feature is not enabled on this transmitter.1.2.1Standard OperationTransmitting a Manual AlarmT o send an alarm, press and hold the Alarm button for 1 second. The transmitter sends an alarm signal to the central console. With some SE2 models, you can also visually confirm the signal if done in sight of a receiver (receiver lights the red LED). After a manual alarm is initiated, the auto tracking feature begins. Thetransmitter sends a signal to the central console every 7 sec., updating your location. T o reset the transmitter after a manual alarm is initiated, perform a test as described in T esting the Transmitter .T esting the TransmitterT o test your transmitter, stand in sight of a siren/strobe or a receiver. While holding down the T est button, press the Alarm button until you hear an audible tone. A test transmission is sent to the central console. Also, thestrobe on an outdoor siren/strobe or the green LED on a receiver illuminates.If you do not receive confirmation of a successful test transmission (such as the strobe on a siren/strobe or the green LED on a receiver not illuminating), try the test again. If there is still no confirmation, take the transmitter to the security department.1.0Part I - User Guide(For Distribution to All SE Users)1.1IntroductionThe SE2 Series T ransmitters are personal transmitters designed to work with the Security Escort system. When initiated, a signal identifying you and your location is sent to the Security Escort monitoring station. The SE2can also be tested within sight of a receiver or siren/strobe by the user.1 - Test button2 - Alarm button3 - Lanyard1 - Must use2 - Optional3 - Side view of clip4 - Clip5 - Back of transm itter1.2.2Optional FeaturesMan-Down Alarm FeatureWith the man-down feature enabled, the transmitter alarms whenever the transmitter (you) is in a prone position (60° from upright). The transmitter emits an audible tone upon sensing the prone position, and initiates the auto tracking feature. T o reset thetransmitter after a man-down alarm is initiated, return the transmitter to the upright position and perform a test as described in Section 1.2.1 Standard Operation .Lanyard Snatch Alarm FeatureWith the lanyard snatch alarm feature enabled, thetransmitter sends an alarm signal to the central console and initiates the auto tracking feature when the lanyard pin is pulled out of the unit. T o reset the transmitter after a lanyard snatch alarm is initiated, reinsert the lanyard pin and perform a test as described in Section 1.2.1 Standard Operation .1.2.3Wearing the T ransmitterThe transmitter comes with a clip which can be worn over a pocket or belt, or be secured to a belt. Secure the clip to the transmitter (screws provided) at the two top positions to use it as a clip.T o use the clip securely on a belt, attach it at the third location at the bottom. Use the screw already securing the battery door.The clip is designed to wear on a security type utility belt. If worn on a thin belt, be aware that such a loose fitting can cause the transmitter to activate theman-down alarm (if enabled) when there is too much loose movement.2.0Part II - Setup Instructions(For Security Department Use Only)2.1Models and FeaturesThe various SE2 models and their features are identified in T able 2.1 - Retaining screw2 - Pry here2.2Removing the CoverThe Man-Down, Supervision T racking, and Lanyard Snatch features are controlled by the jumpers located next to the battery compartment.T o remove the cover:1.Remove the belt clip (if used).2.Remove the retaining screw on the back of theenclosure (see Figure 3).ing a flat-head screwdriver, pry the lower part ofthe front cover away from the rest of the enclosure.1 - Off2 - On2.3Enabling/Disabling FeaturesFigure 4 shows the location of the specific jumper for each feature. Note that the lanyard-snatch jumper and lanyard switch are only included on the SE2M,SE2S-SN, and SE2U-SN models.1 - Lanyard switch2 - Man-down jumper3 - Supervision jumper4 - Lanyard jumper5 - Battery com partm ent2.3.1Supervision FeatureT o enable the supervision tracking feature, place its jumper in the ON position, as indicated in Figure 5. Do this by moving the jumper to cover both pins using a small pair of pliers. With supervision tracking enabled,the transmitter sends a silent transmission to the central console approximately every 90 seconds. This enables the central console to monitor the battery andtransmitter condition, as well as track the transmitter’s location within the protected area.2.3.2Man-Down and Lanyard Snatch FeaturesT o enable the man-down and lanyard snatch features,place the desired feature jumper in the ON position as shown in Figure 5. Use a small pair of pliers to move the jumper so it covers both pins.See Section 1.2.2 Optional Features for descriptions of these features.2.3.3BatteryThe transmitter uses a CR2, 3 V lithium battery. The central console indicates when the battery is low and needs replacement.See Figure 4 for battery polarity. The battery life depends on usage and enabled features.Notes:。
AVENTICS 压力开关Series PM1 用户操作手册说明书

Pressure Switches, Series PM1- Operating pressure -0,9 ... 0 -0,9 ... 3 0,2 ... 16 bar- Mechanical- Spring-loaded bellow, adjustable- Electr. connection Plug EN 175301-803, form A- Compressed air connection Internal thread G 1/4 Flange with O-ring Ø 5x1,5Type MechanicalFunction change-over contact (mechanical)Mounting orientation AnyWorking pressure min./max.See table belowAmbient temperature min./max.-20 ... 80 °CMedium temperature min./max.-10 ... 80 °CMedium Compressed air, Hydraulic oilMeasurement Relative pressureSwitching element microswitch (input/output)Protection against overpressure80 barMax. switching frequency1,5 HzShock resistance max.15 gVibration resistance10 g (60 - 500 Hz)Repeatability (% of full scale value)± 1 %Switching point adjustableHysteresis max. switching pressure differenceDC operating voltage min./max.12 ... 30 V DCOperational voltage AC min./max.12 ... 250 V ACMounting types via through holesProtection class IP65Electr. connection Plug EN 175301-803, form AWeight0,16 kg1) Min. switching pressure range 0.2 bar falling/0.5 bar rising1) Valve plug connector2) Adjustment screw, self-holding1) Valve plug connector2) Adjustment screw, self-holding3) cylinder screw M5x30 (included in scope of delivery)4) O-ring Ø5x1,5 (included)A) p1 (-), min.B) p1 (-), max.p1 (+) = upper switching pressure with increasing pressure p1 (-) = lower switching pressure with decreasing pressureA) p1 (-), min.B) p1 (-), max.p1 (+) = upper switching pressure with increasing pressure p1 (-) = lower switching pressure with decreasing pressure Δ p1 = max. operating pressure difference or hysteresis Example:p1 (+) = 8 bar > p1(-) = 7.6 barΔ p1 = 0.4 barreference cycle: 30/min., reference temperature: + 30 °C1) AC2) DCreference cycle: 30/min., reference temperature: + 30 °C1) AC2) DC3) cos ≈ 0,7°4) L/R ≈ 10 msAllocation+UB break contact NO (make contact)GNDYour local contact:/contactus/EmersonAutomationSolutions/company/Emerson-Automation-SolutionsAn example configuration is depicted on the title page. The delivered product may thus vary from that in the illustration. Subject to change. This Document, as well as the data, specifications and other information set forth in it, are the exclusive property of AVENTICS GmbH. It may not be reproduced or given to third parties without its consent. Only use the AVENTICS products shown in industrial applications. Read the product documentation completely and carefully before using the product. Observe the applicable regulations and laws of the respective country. When integrating the product into applications, note the system manufacturer's specifications for safe use of the product. The data specified only serve to describe the product. No statements concerning a certain condition or suitability for a certain application can be derived from our information.The information given does not release the user from the obligation of own judgement and verification. It must be remembered that the products aresubject to a natural process of wear and aging.of the Emerson family of companies. All other marks are the property of their respective owners. © 2020 Emerson Electric Co.All rights reserved.2020-12。
工作文档SPPA-T3000用户手册(组态手册3)
sSPPA-T3000,用户手册用户组态手册(共4册,第3分册)目,录1,,模板编辑器.................... 错误!未指定书签。
1.1,,启动模板编辑器 ...... 错误!未指定书签。
1.1.1,,退出模板编辑器.. 错误!未指定书签。
1.2,,常规布置................. 错误!未指定书签。
1.2.1,,工具栏.................. 错误!未指定书签。
1.2.1.1,,标准............... 错误!未指定书签。
1.2.1.2,,链接............... 错误!未指定书签。
1.2.1.3,,排列............... 错误!未指定书签。
1.2.1.4,,图形布局....... 错误!未指定书签。
1.2.1.5,,交互式绘图工具错误!未指定书签。
1.2.2,,模板的上下文菜单错误!未指定书签。
1.2.3,,单一、持久模式.. 错误!未指定书签。
1.2.4,,选项...................... 错误!未指定书签。
1.2.5,,窗口...................... 错误!未指定书签。
1.2.6,,保存视图.............. 错误!未指定书签。
1.3,,模板功能................. 错误!未指定书签。
1.3.1,,保存模板.............. 错误!未指定书签。
1.3.2,,以新的名字保存模板错误!未指定书签。
1.3.3,,打开库.................. 错误!未指定书签。
1.3.4,,编辑模板.............. 错误!未指定书签。
1.3.5,,创建新的模板...... 错误!未指定书签。
1.3.6,,删除模板.............. 错误!未指定书签。
1.3.7,,删除模板库节点.. 错误!未指定书签。
1.3.8,,将模板移动到另一个库节点错误!未指定书签。
布士安全系统产品参考手册说明书
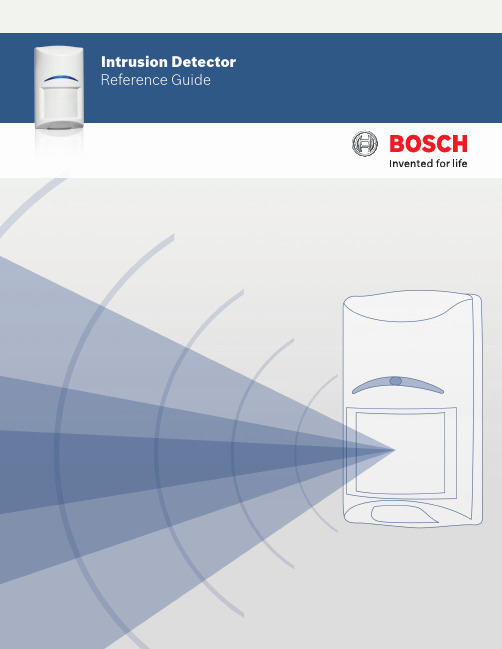
Intrusion DetectorReference Guide2 | Bosch Security SystemsTable of ContentsIntroduction3Blue Line Series6Commercial Series8Professional Series10Classic Line12RADION wireless18Specialty Sensors20Detector Reference Guide | 3Security you can rely onWhether you are securing a home, retail store, bank, museum, commercial business or government facility, you need dependability from your systems. With decades of experience and an unwavering dedication to high-quality and high-performing products, Bosch detectors provide best-in-class false alarm immunity and catch performance while minimizing installation time and complexity. Millions of residential and commercial users rely on Bosch for superior intrusion detection.Bosch is recognized throughout the security industry as a global leader in intrusion detection expertise. We have earned this reputation by consistently providing products that meet your needs with a focus on performance, reliability, durability, and ease of installation.Bosch detectors fulfill the requirements of standards allover the world. In the state-of-the-art Bosch laboratory, we verify that our detectors pass the most stringent requirements of each certification standard. Bosch also designs its own, even more demanding, tests to ensure the detectors are virtually immune to environmental disturbances. As a result, false alarm protection and catch performance exceed the requirements of any single country. With Bosch detectors, there is no hiding place for intruders and zero tolerance for false alarms.4| Bosch Security SystemsWall-to-Wall coverageExcellent catch performanceFirst Step Processing intelligently analyzes motionfor an almost instant response to intruders. Thedetectors automatically adjust to their environment bycompensating for temperature fluctuations, so you areguaranteed optimal performance regardless of changesin room conditions.For more challenging applications, models with SensorData Fusion technology employ a sophisticated softwarealgorithm to analyze signals from multiple sensors,including microwave, temperature, and white light levels,to make the most intelligent alarm decisions in thesecurity industry.No more false alarmsBosch detectors feature Microwave Noise AdaptiveProcessing to easily differentiate humans from falsealarm sources, such as a ceiling fan or hanging sign.For increased reliability, dual sensors process the PIR andmicrowave Doppler radar signals independently and mustagree there is an alarm before the relay activates. Thesealed optical chamber also prevents drafts and insectsfrom affecting the detector. Bosch pet and small animalimmunity provides optimal sensitivity for any application.Minimize time on the ladderBosch detectors include a number of uniquedesign features to help you get the job done fasterand more reliably.▶ A self-locking, two-piece enclosure means no more lostscrews and an easy snap-to-lock installation▶ Integrated biaxial bubble level eliminates the guessworkto ensure proper alignment, requiring one lessinstallation tool▶ The removable, gap-free, liftgate-style terminal stripr educes mounting time to mere seconds and preventsincorrect wiring to eliminate future service calls▶ Optics and electronics are assembled into the frontenclosure and sealed with a protective cover to preventdamage during installation▶ A flexible mounting height makes positioning thedetector easy, and you get no-gap coverage withoutany optical or electronic on-site adjustmentsDetector Reference Guide | 5Ideal for any applicationIntelligent intrusion detection is a delicate balance between responding to real security breaches and ignoring sources of costly false alarms. Bosch offers a choice of detector models that set the standard for reliability and rapid detection.Our intrusion detectors suit the requirements of virtually any application — from residential to large commercial to high security. They stand up to multiple challenges, including strong drafts, moving objects, and the presence of pets.Our complete line includes:▶ Passive Infrared (PIR) and TriTech®(Combination PIR and microwave Dopper radar) – Long-range – 360° ceiling mount – Pet friendly®▶ Request-to-exit PIR ▶ Glass break ▶ Seismic and shock ▶ Photoelectric beam▶ Wireless communication6| Bosch Security SystemsBlue Line Gen2 Series Detection is PowerPIRStandardPet Friendly®Quad PIR* Difficult environments include rooms with potential false alarm sources, such as: air conditioning vents, strong drafts of cold or warm air, slow moving objects such as curtains, plants, or signs hanging from the ceiling, a fan that could be running when the system is activated, under floor heating, room temperatures exceeding 86℉ (30℃), a detector that could be exposed to bright white light (car headlights, floodlights, direct sunlight, etc.)** For UL installations the operating range is 32℉ to 120℉ (0℃ to 49℃), indoor useDetector Reference Guide | 7 TriTech® (PIR + MW)Standard Pet Friendly®8| Bosch Security SystemsCommercial SeriesDetection delivered. Reliability assured.TriTech (PIR + MW)StandardAnti-maskas curtains, plants, or signs hanging from the ceiling, a fan that could be running when the system is activated, under floor heating, room temperatures exceeding 86℉ (30℃), a detector that could be exposed to bright white light (car headlights, floodlights, direct sunlight, etc.)** For UL installations the operating range is 32℉ to 120℉ (0℃ to 49℃), indoor useDetector Reference Guide | 910| Bosch Security SystemsProfessional SeriesIntelligent Motion DetectionPIRTriTech® (PIR + MW)StandardAnti-maskStandard* Difficult environments include rooms with potential false alarm sources, such as: air conditioning vents, strong drafts of cold or warm air, slow moving objects such as curtains, plants, or signs hanging from the ceiling, a fan that could be running when the system is activated, under floor heating, room temperatures exceeding 86℉ (30℃), a detector that could be exposed to bright white light (car headlights, floodlights, direct sunlight, etc.)** For UL installations the operating range is 32℉ to 120℉ (0℃ to 49℃), indoor useTriTech® (PIR + MW)Anti-mask CurtainAnti-mask CurtainClassic Line Long Range PIRLong-range* Difficult environments include rooms with potential false alarm sources, such as: air conditioning vents, strong drafts of cold or warm air, slow moving objects such as curtains, plants, or signs hanging from the ceiling, a fan that could be running when the system is activated, under floor heating, room temperatures exceeding 86℉ (30℃), a detector that could be exposed to bright white light (car headlights, floodlights, direct sunlight, etc.)** For UL installations the operating range is 32℉ to 120℉ (0℃ to 49℃), indoor useTriTech® (PIR + MW)Long-range OutdoorClassic Line Ceiling Mount PIRCurtain Wide angleLow-profile Panoramicas curtains, plants, or signs hanging from the ceiling, a fan that could be running when the system is activated, under floor heating, room temperatures exceeding 86℉ (30℃), a detector that could be exposed to bright white light (car headlights, floodlights, direct sunlight, etc.)** For UL installations the operating range is 32℉ to 120℉ (0℃ to 49℃), indoor usePIR TriTech®(PIR + MW)PIR TriTech® (PIR + MW)PanoramicHigh-Performance PanoramicPIRRecessedas curtains, plants, or signs hanging from the ceiling, a fan that could be running when the system is activated, under floor heating, room temperatures exceeding 86℉ (30℃), a detector that could be exposed to bright white light (car headlights, floodlights, direct sunlight, etc.)** For UL installations the operating range is 32℉ to 120℉ (0℃ to 49℃), indoor useRADION wireless†Superior Range and Reliability PIR TriTech® (PIR + MW) Pet Friendly® Standard Pet Friendly® Curtain Pet Friendly®Standard† Wireless peripherals require a compatible receiver. B810 RADION receiver is compatible with SDI2 bus panels (B Series and G Series); RFRC-OPT is compatible with Option bus panels; RFRC-STR is compatible with Streamline bus panels.* Difficult environments include rooms with potential false alarm sources, such as: air conditioning vents, strong drafts of cold or warm air, slow moving objects such as curtains, plants, or signs hanging from the ceiling, a fan that could be running when the system is activated, under floor heating, room temperatures exceeding 86℉ (30℃), a detector that could be exposed to bright white light (car headlights, floodlights, direct sunlight, etc.)** For UL installations the operating range is 32℉ to 120℉ (0℃ to 49℃), indoor useGlass break Door/Window Contacts OtherAcoustic Surface Mount RecessedMount Universal Transmitter SmokePortable Other Keyfob Panic Button Bill TrapPremises Wireless (ZigBee) RADION ZB PIR TriTech® (PIR+MW) StandardStandard* Difficult environments include rooms with potential false alarm sources, such as: air conditioning vents, strong drafts of cold or warm air, slow moving objects such as curtains, plants, or signs hanging from the ceiling, a fan that could be running when the system is activated, under floor heating, room temperatures exceeding 86°F (30°C), a detector that could be exposed to bright white light (car headlights, floodlights, direct sunlight, etc.)** For UL installations the operating range is 32° to 120°F (0° to 49°C), indoor use.*** Power source has capacity for an additional battery increasing the battery life from 6 to 10 years (RFPR-ZB) or from 3 to 6 years (RFDL-ZB).**** All models feature a two-piece design, self-locking enclosure, interchangeable mounting base and integrated bubble level.Specialty Request-to-exit PIRStandardHigh-performance* Difficult environments include rooms with potential false alarm sources, such as: air conditioning vents, strong drafts of cold or warm air, slow moving objects such as curtains, plants, or signs hanging from the ceiling, a fan that could be running when the system is activated, under floor heating, room temperatures exceeding 86℉ (30℃), a detector that could be exposed to bright white light (car headlights, floodlights, direct sunlight, etc.)** For UL installations the operating range is 32℉ to 120℉ (0℃ to 49℃), indoor useSpecialty Glass Break AcousticStandardComboMagneticContactSpecialty Photoelectric Beam Dual BeamShort RangeMedium Range* Difficult environments include rooms with potential false alarm sources, such as: air conditioning vents, strong drafts of cold or warm air, slow moving objects such as curtains, plants, or signs hanging from the ceiling, a fan that could be running when the system is activated, under floor heating, room temperatures exceeding 86℉ (30℃), a detector that could be exposed to bright white light (car headlights, floodlights, direct sunlight, etc.)** For UL installations the operating range is 32℉ to 120℉ (0℃ to 49℃), indoor useSpecialty Photoelectric Beam Quad BeamMedium RangeLong Range* QS — single channel QF — four channelSpecialty Seismic/ShockSeismic Shock StandardHigh-performanceStandard* Difficult environments include rooms with potential false alarm sources, such as: air conditioning vents, strong drafts of cold or warm air, slow moving objects such as curtains, plants, or signs hanging from the ceiling, a fan that could be running when the system is activated, under floor heating, room temperatures exceeding 86℉ (30℃), a detector that could be exposed to bright white light (car headlights, floodlights, direct sunlight, etc.)** For UL installations the operating range is 32℉ to 120℉ (0℃ to 49℃), indoor useN e wAccessoriesNotesDetector Reference Guide | 31 NotesA Tradition of Quality and Innovation For 125 years, the Bosch name has stood for quality and reliability. Bosch is the global supplier of choice for innovative technology backed by the highest standards for service and support. Bosch Security Systems proudlyoffers a wide range of security, safety, communications and sound solutions that are relied upon every day in applications around the world, from government facilities and public venues to businesses, schools and homes. Bosch Security Systems, Inc.130 Perinton ParkwayFairport, NY 14450 USAPhone: 800.289.0096Fax: 585.223.9180For more information please visit © Bosch Security Systems, 2016 Modifications reservedPrinted in United States | 10/16BINBR_DETECT-REF_v20161028。
Compassx流动头操作指南说明书

Fluid HeadOPERATOR’S MANUAL1090 Compass x2Fluid Head 1092 Compass x6 Fluid Head 1093 Compass x8Fluid Head 1096 Compass x10 Fluid Head1098 Compass x18 Fluid HeadThank you for purchasing the Compass x Fluid Head. The Compass x Fluid Head has been designed to suit a wide range of cameras, lenses and accessories as demanded by professional users.The robust design and construction of the Compass x Fluid Head offers maximum stability and durability and includes a precision drag plate system in the pan and tilt assembly to deliver true fluid drag performance over the entire temperature and payload range.The fluid drag and the counterbalance system were designed to provide excellent control and repeatability and offer progressive equal increments of drag and torque through the unique radial ring design.The Compass x Fluid Head will give best performance whenused on a wide range of Miller tripods, including SOLO, T oggle, Sprinter II and HD T ripods (depending on bowl size). This will ensure maximum system stability to suit any professional set-up. The Compass x Fluid Head will suit most industry standard75mm and 100mm tripods as well, please refer to manufactures’ manual for mounting details.Safety InstructionsPlease use this manual to familiarise yourself with the operation of the Compass x Fluid Head and observe these instructionsto prevent any damage to your equipment. Ensure that all equipment is operating correctly and free from defects and damage, also please ensure that the tripod is steady, secure and that the bowl is approximately horizontal when attaching the camera. The operator is responsible for the safe operation of this piece of equipment.• Do not exceed the maximum payload capacity of the Fluid Head.• Do not leave the camera unattended on the Fluid Head.• Do not release the SLIDE LOCK LEVER whilst the camera is at an angle.• Do not adjust the tripod whilst the camera is attached to the Fluid Head.• Ensure PAN HANDLE CLAMP and CLAMP NUT is securely tightened.• Apply TILT LOCK when adding/removing equipment from the camera or when attaching/removing the camera from the Fluid Head.• Hold camera securely whilst changing Counterbalance, Pan Drag or Tilt Drag settings.• Hold the camera securely whilst releasing the SAFETY RELEASE LEVER.• H old camera securely whilst adjusting the CLAMP NUT to level the Fluid Head.2. M ounting Y our Camera2.1 Remove the CAMERA PLATE by lifting the SAFETYRELEASE LEVER on the PLATFORM (SLIDE LOCK LEVER must be unwound (clockwise)) (Fig. 3a).2.2 Attach the CAMERA PLATE to the camera 1 such that the Centre of Gravity (C of G)2 mark on the camera is approximately in the middle of the camera plate.2.3 Tighten PAN/TILT LOCKS, mount the CAMERA PLATEto the PLATFORM non-locking side first. The side load lock mechanism will capture camera plate (distinct click sound will be made when CAMERA PLATE is retained). CAMERA PLATE will be able to slide freely (60mm) until SLIDE LOCK LEVER is tightened.2.4 Untighten TILT LOCK, slide the CAMERA PLATE suchthat the camera’s C of G is directly above the centre axis of the Fluid Head (fig. 3b), camera should be balanced (if not slide camera backward or forward). Once balanced tighten the SLIDE LOCK LEVER (anti-clockwise)3 and tighten TILT LOCK.If this cannot be achieved then reposition the CAMERA PLATE on the Camera – step 2.2.NOTES:1Refer to the camera’s owners manual for correct method of attachment to the CAMERA PLATE. Remove the 1⁄4” screw or 3/8” screw as required.2The camera’s C of G can be estimated by placing the camera on to a round rod and then shifting it backwards or forwards until a balance point – C of G - is achieved. It is recommended to identify this point on the camera as it will be useful in step 2.2.3Ensure SLIDE LOCK LEVER is tightened at all times when you are not finding C of G or mounting/dismounting camera.3. C ounterbalance ControlThe counterbalance system was designed to neutralise theeffect of the camera weight when it is tilted. The Compass xFluid Head offers a 16 position counterbalance system whichis operated with the CB SELECTOR RING and the CB PLUSSELECTOR (Fig. 4). With the Compass x systems it is also Array possible to disengage counterbalance (position zero),NOTE:Be careful when disengaging counterbalance as you coulddamage your equipment with an unwanted tilt drop.The CB SELECTOR RING and the CB PLUS SELECTOR mustbe operated when the BASE PLATE is in a horizontal position.After changing the counterbalance setting it may benecessary to tilt the camera back and forth to ensure that theCB spring has engaged.3.1 For safety it is generally better to start at a highercounterbalance position (e.g. position 14) and work yourway to the correct setting, this is to reduce any chance ofunwanted tilt drops (Fig. 4).3.2 Hold the camera and release the TILT LOCK, then gentlytilt the camera from the horizontal position forwardthen backward and observe its response. If the camera‘springs back’ to the horizontal position then a lowercounterbalance setting is required, use the CB SELECTORRING to cycle through all even number positions (eightpositions including zero).3.3 Finer adjustments can be made by engaging the CB PLUSSELECTOR (upward direction).3.4 Correct counterbalance setting has been achieved whenthe camera does not spring back or drop when panhandle is released.Fig. 44. P an/Tilt Drag ControlThe Compass x Fluid Head offers selectable positions offluid drag in the Pan and Tilt (including zero positions). The settings are equally stepped from lighter drag in position 1 up to heavier drag in position 3 on CX2 and CX6 models and position 5 on CX8, CX10 and CX18 models, the drag plates are completely disengaged in position zero.• D o not pan or tilt the Fluid Head whilst adjusting PAN orTILT DRAG CONTROL or whilst the PAN and TILT DRAGCONTROL is between settings.• The drag setting can be changed at any tilt or pan angle.5. P an/Tilt Lock ControlThe Compass x Fluid Head offers high capacity caliper disc brake system to hold the Fluid Head in a fixed pan and/or tilt position. Camera position will not change when applying or releasing the Pan-tilt locks.• D o not pan or tilt the Fluid Head whilst the PAN or the TILT LOCK is partially applied.6.IlluminationCompass x Fluid Head offers illumination of the BUBBLE TheLEVEL when the low ambient light conditions exist.Illumination can be achieved by pressing the LED BUTTON once. The light will switch off after 10 seconds.The Compass x Fluid Head offers high quality surface coatings, Array dust and moisture seals. Miller recommends keeping the Fluid Head clean at all times by using soft brushes and lint free cloth to wipe over the surfaces.• Do not immerse the Fluid Head in any liquid.• Do not use stiff brushes, abrasives, harsh detergents and solvents.Battery ReplacementT he Compass x Fluid Head uses a single 11A type - 6 Volt bat-tery for Illumination. Miller recommends the following batteries to provide long life performance – GP11A, Duracell MN11 or Vinnic L1016.1. Using a Phillips Head #1 screw driver, remove theRETAINING SCREW and the BATTERY COVER.2. Using a small flat screw driver remove the battery.3. Align the new battery as shown on the back of theBATTERY DOOR and place into the BATTERY HOUSING,then push down the battery into place. A small flat screw driver may be used to push down the battery into theBATTERY HOUSING.4. Align the BATTERY DOOR into the body then tighten thescrew lightly.11The Compass x Fluid Head can be stored for extended periods; Miller recommends storage in a Miller case and the following:• Clean the external surfaces.• Keep in a dry place away from direct sunlight.•Loosen off PAN & TILT LOCK.Spare Parts and AccessoriesService, Sales and SupportMiller Authorised Service Agents must carry out all service and repair work. Failure to observe this requirement may void warranty .It is advisable to notify Miller or a Miller Authorised Service Agent if a change of performance is observed as a result of dropping or rough usage. For information regarding sales and service of Miller products or for your nearest Miller representative please contact us via our website or at the following:MILLER CAMERA SUPPORT EQUIPMENT 30 Hotham ParadeArtarmon, Sydney, NSW 2064 Australia P +61 2 9439 6377 F +61 2 9438 2819 ****************.auMILLER Camera Support (LLC) USA 216 Little Falls Road (Unit 15 & 16), Cedar Grove, New Jersey 07009 USA P +1 (973) 857 8300 F +1 (973) 857 8188 **********************MILLER FLUID HEADS (EUROPE) LTD.12A, Shepperton Business Park Govett Avenue, Shepperton Middlesex, TW17 8BA United KingdomP +44 (0) 1932 222 888 F +44 (0) 1932 222 211******************************ITEM ITEM NO.BatteryP3798Camera screw 3/8”P0037Camera screw 1/4”P0036Serrated washerPN12501Pan handle - fixed with clamp 679Pan handle - telescopic with clamp696Accessory mounting adaptor 1/4” and 3/8” 1217Accessory mounting bracket 1218Sliding Plate Assembly (Euro)*1210X Sliding Plate Assembly (Mini Euro)*1206X1/4” screw and pin carriage493*1206 & 1210 are not compatible with CompassX, use 1206X & 1210X only.WarrantyPlease refer to warranty card for complete details. MILLER CAMERA SUPPORT EQUIPMENT 30 Hotham ParadeArtarmon, SydneyNSW 2064 AustraliaTel: +61 2 9439 6377Fax: +61 2 9438 2819Email: sales@.auD12728-2。
- 1、下载文档前请自行甄别文档内容的完整性,平台不提供额外的编辑、内容补充、找答案等附加服务。
- 2、"仅部分预览"的文档,不可在线预览部分如存在完整性等问题,可反馈申请退款(可完整预览的文档不适用该条件!)。
- 3、如文档侵犯您的权益,请联系客服反馈,我们会尽快为您处理(人工客服工作时间:9:00-18:30)。
一. V3 VirusBlock 2005的安装
1.1 系统要求
• 安装V3 VirusBlock 2005产品对计算机配置的要求如下, 安装本产品之前请用户确认计算机的配置情况
系统配置 OS 推荐配置 Windows 98/ME/NT 4.0 Workstation Service Pack 6/2000 Professional/XP Pentium III以上 256MB 200MB 以上 1024 * 768 24倍速以上 最低配置 Windows 98 以上
CPU Memory HDD Resolution CD-ROM
Pentium 133MHz 以上 32MB 80MB 以上 800 * 600 4倍速以上
1.2 安装
• 把V3 VirusBlock 2005产品的安装光盘放入光驱里 此时会出现〈正在准备安装…〉的魔法师窗口
•
如果没有出现V3 VirusBlock 2005 InstallShield的魔法
• 运行智能升级 :安装结束后会弹出<升级向导 >窗口,在 窗口上点击“开始”按钮后产品将自动升级最新的病毒引 擎 • 在<升级向导 >窗口里点击“开始”按钮
点击开始以后会出现正在升级的界面,等待升级完成即可.
•
V3 VirusBlock 2005产品安装及智能升级结束后会弹 出<环境设置魔法师>窗口
• 2.安装完成后会在桌面自动生成一个名字为V3Net for Windows Server 6.0的图标,如下图
• 3.打开光盘内的SmartUpdate文件夹,在Disk1文件夹 内双击Setup.exe文件出现如下界面进行安装
• 4.点击安装进行下一步,开始出现安装过程的界面
5.点击完成结束安装
•
选择要删除的项目后点击下一步>按钮
二.V3 VirusBlock 2005的设置
• 双击打开桌面的V3 VirusBlock 2005图标,弹出下面的界面
• 点击工具栏上的设置出现以下界面,如果没有特殊需求可直接在 右侧选择保护级别
• 需要自定义的用户要点击系统扫描/监控,在右侧选择要扫描和 监控的选项
• 根据自己的需要来具体设置每个选项,首先设置系统扫描
• 其他的选项也依照上面的方法来依次做设置
六. V3 for Windows Server的使用
事件日志查询
扫描日志查询
病毒隔离区查询
安全警告列表查询
七. 手动升级最新病毒库
• 当软件无法正常自动升级的时候,需要去安博士网站下载最新病 毒库手动升级. 注:必须先用注册的用户名登陆才可下载 • 1.首先登陆安博士网站注册用户名和密码 • 2.然后用注册好的用户名和密码登陆,再注册产品序列号 • 3.全注册好以后重新登陆,点击下载中心下载最新病毒库 • 4.下载下图所示文件完成以后,双击下载的文件,开始手动升级
师窗口时采用以下的方法进行安装
• •
1. 点击“状态栏”→开始→运行 在弹出的“运行”窗口里输入产品的光盘盘符及产品的安 装文件名称后点击“确认”按钮 (例 :‘D:\install.exe’)
•
2.打开光盘,直接双击光盘内的install.exe进行安装
• 结束安装准备后会出现V3 VirusBlock 2005 InstallShield的魔法师窗口,点击“下一步”按钮后继续 执行下一步的安装步骤
6.卸载
• 在状态栏的 开始>程序>AhnLab>V3Net for Windows Server 6.0>V3Net for Windows Server 6.0和Smart Update Utility > Smart Update Utility删除 选项 • 在控制面板里双击程序添加/删除后,在程 序目录里选择V3Net for Windows Server 6.0和Smart Update Utility 点击添加/删除选项
安博士单机版使用手册
江西智通科技发展有限二. 三. 四. 五. 六. 七. V3 VirusBlock 2005的安装 V3 VirusBlock 2005的设置 V3 VirusBlock 2005的使用 V3 for Windows Server的安装 V3 for Windows Server的设置 V3 for Windows Server的使用 手动升级最新病毒库
<简易设置>的级别设定
• 保护级别 – 高 :完全切断病毒的入侵 (适 合对病毒的安全要求最高的用户) • 保护级别 – 一般 :切断大部分病毒的入侵 (适合对病毒的安全要求较高的一般用户) • 保护级别 – 低 : 切断普通病毒的入侵 (适 合对病毒的安全要求一般的用户) • 保护级别 – 用户自定义 : 用户可以按照 自己的需求设置病毒的扫描和治疗环境
五.V3 for Windows Server的设置
• 双击打开桌面的V3Net for Windows Server 6.0图标,弹出下 面的界面
• 点击工具栏上的设置出现以下界面,如果没有特殊需求可直接在 右侧选择保护级别
• 需要自定义的用户要点击系统扫描/监控,在右侧选择要扫描和 监控的选项
1.3 卸载
• 在状态栏的 开始>程序>AhnLab->V3 VirusBlock 2005>V3 VirusBlock 2005删除 选项 • 在控制面板里双击程序添加/删除后,在程 序目录里选择V3 VirusBlock 2005点 击添加/删除选项
•
此时会弹出V3 VirusBlock 2005安装魔法师窗口,在 窗口里显示删除安装过的文件的过程
• 根据自己的需要来具体设置每个选项,首先设置系统扫描
• 其他的选项也依照上面的方法来依次做设置
三. V3 VirusBlock 2005的使用
时间日志
扫描日志
病毒隔离区查询
安全警告列表查询
四. V3 for Windows Server的安装
• 1.首先打开光盘内的V3Net_Windows6.0文件夹,双击 Setup.exe文件出现如下界面进行安装
•
出现<许可证协议 >窗口。 阅读V3 VirusBlock 2005的用户授权协议后,如果同意协议内容点击 “是”按钮后继续执行下一步的安装步骤
•
出现<客户信息>窗口,在窗口里输入用户名称、公司 名称及产品序列号后点击“下一步”按钮后继续执行下 一步的安装步骤
• 出现<选择目的地位置> 窗口,V3 VirusBlock 2005 产品的默认路径(C:\Program Files\Ahnlab),也可以 选择其它安装路径,点击“浏览”按钮设置其它路径后 点击“下一步”按钮后继续执行下一步的安装步骤
•
出现<开始复制文件 >窗口,确认产品的安装文 件夹、名称及安装路径后点击“下一步”按钮后 继续执行下一步的安装步骤
• 出现<安装状态>窗口,此窗口显示产品的安装情况
• 完成V3 VirusBlock 2005安装后出现<InstallShield魔法师 窗口关闭>的窗口,在窗口里选择将要执行的程序后点击“完 成”按钮结束本产品的安装