安装与操作说明书
Holman产品安装和操作手册说明书

These symbols are intended to alert theuser to the presence of important operatingand maintenance instructions in the manualaccompanying the appliance.NOTICEUsing any part other than genuine Holman factory supplied parts relieves the manufacturer of all liability.Holman reserves the right to change specifications and product design without notice. Such revisions do not entitle the buyer to corresponding changes, improvements, additions or replacements for previously purchased equipment.Due to periodic changes in designs, methods, procedures, policies and regulations, the specifications contained in this sheet are subject to change without notice. While Holman Manufacturing exercises good faith efforts to provide information that is accurate, we are not responsible for errors or omissions in information provided or conclusions reached as a result of using the specifications. By using the information provided, the user assumes all risks in connection with such use.GENERAL SAFETY INFORMATIONThis equipment is designed and sold for commercial use only by personnel trained and experienced in its operation and is not sold for consumer use in and around the home nor for use directly by the general public in food service locations.Before using your new equipment, read and understand all the instructions & labels associated with the unit prior to putting it into operation. Make sure all people associated with its use understand the units operation & safety before they use the unit.All shipping containers should be checked for freight damage both visible and concealed. This unit has been tested and carefully packaged to insure delivery of your unit in perfect condition. If equipment is received in damaged condition, either apparent or concealed, a claim must be made with the delivering carrier. Concealed damage or loss - if damage or loss is not apparent until after equipment is unpacked, a request for inspection of concealed damage must be made with carrier within 15 days. Be certain to retain all contents plus external and internal packaging materials for inspection. The carrier will make an inspection and will supply necessary claim forms.GENERAL INSTALLATION INFORMATIONThe unit was shipped fully assembled and ready to plug into a standard outlet specified for its voltage and amp draw. If improper electrical supply is determined, contact a qualified electrician prior to using the unit. Removal and replacement of the power cord and plug will void the warranty. For assistance, contact your local authorized service agent for service or required maintenance. Level unit using the adjustable feet under the unit (approximately 1/2" adjustment).Before using the unit for the first time, wipe down the exterior with a damp cloth.Allow enough space around the toaster for adequate ventilation. Do not operate the unit without the crumb tray properly positioned. Overheating and poor toasting may occur. Read all labels on the unit and follow their instructions.MAINTENANCE AND REPAIRSContact the factory, a service representative or a local service company for service or required maintenance. Go to /scripts/manuals.aspx to find a service agent near you. Replacement cord sets must be purchased from Star Manufacturing International, Inc. or our authorized agents. Should you need any assistance regarding the operation or maintenance of any Holman equipment; write, phone, fax or e-mail our service department. In all correspondence mention the model number and the serial number of your unit, along with the voltage.Business Hours: 8 am to 4:30 p.m. Central Standard Time Telephone:(877) 242-0270Fax:(314) 781-2714E-mail:***********************************************************Website: Mailing Address: Star International Holdings Inc., Company10 Sunnen DriveSt. Louis, MO 63143U.S.A.MODELIRCS2-SBKConveyor ToastersElectronic ControlsIL27072M-Z17824, Rev. A 12/19/2013 CAUTIONELECTRICAL CONNECTIONBefore making any electrical connection to this unit, check that the power supply is adequate for the voltage, amperage and requirements stated on the rating plate. A wiring diagram is included in the Installation & Operations manual, which can be downloaded at /scripts/manuals.aspx .Disconnect the unit from the power source before installing or removing any parts.Be absolutely sure that the ground connection for the receptacle is properly wired. Do not connect equipment to power without proper ground connections. Improper grounding may result in personal injury or fatality.DO NOT CUT OR REMOVE THIS PLUG OR GROUNDING PRONG FROM THE PLUG.CONNECT/PLUG UNIT INTO DEDICATED A.C. LINE ONLY SPECIFIED ON THE DATAPLATE OF THE UNIT.CERTAIN SURFACES ARE EXTREMELY HOT DURING OPERATION AND CARE SHOULDBE TAKEN WHILE USING THIS UNIT.DO NOT IMMERSE OR LET THE UNIT STANDIN WATER.DO NOT HOSE DOWN THE UNIT OR THE TABLE/COUNTER IF THE UNIT IS ON THETABLE/COUNTER.KEEP AWAY FROM RUNNING WATER.INSTALLATION REQUIREMENTS1. Space: 16”x24”x18” (width x depth x height) inSpecialty Board of Breakfast Toaster Cart2. Electricity: 208/240 Volts, 30 Amps, NEMA L6-30RRecepticaleNOTE: Ensure to clean the toaster properly before using it for the first time. Refer to the Cleaning Procedure document for cleaning instructions.CAUTION WARNINGThe Holman IRCS conveyor toaster comes with pre-programmed factory default settings for CROISSANT, MUFFIN .Factory default settings are as follow:POWER SAVER SWITCHThere are three Power Saver modes:ON: Unit is in pre-programmed power saving setting.OFF: Power Saver mode is turned off.AUTO ON: Power Saver turns on when there has been no activityfor a programmed length of time.The operator may adjust the level of power reduction for the saver mode. (Note: conveyor may move slowly when in saver mode.)Two buttons (+) and (-) are used when increasing or decreasing the value of each programmable setting.A red LED light located at the lower portion of the control panel label will indicate if the value for top heat, bottom heat or conveyor speed is being adjusted.NEMA L6-30RWARNING WARNING WARNINGWARNINGCERTAIN SURFACES ARE EXTREMELY HOTDURING OPERATION AND CARE SHOULD BE TAKEN WHILE USING THIS UNIT.START UPWhen the toaster has been plugged into a suitable outlet and power supply, the word OFF will be displayed on the L.E.D. read out.A. Press the ON/OFF button once to turn on the toaster. The toaster will now enter into pre-heat and “PREHT” will be displayed (the elements will begin to glow but the conveyor and fan motor will not turn on).B. After one minute, the fan motor will turn on and the conveyor will begin turning at the previously saved setting (for initial start up, the drive motor will operate at the factory default setting).C. After 24 minutes, the display will show the last used programselection i.e. (for initial startup, CROIS, MUFFIN, will be the last program selected).DAILY OPERATIONCheck the power cord to insure that it is plugged into a proper outlet.Press the ON/OFF button once to turn the toaster on. Press the button a second time to turn the toaster off.NOTE: When the toaster is turned off, the fan and conveyor motors will continue to run for five minutes. The words COOL and DOWN will be alternately displayed during that time. After five minutes, the word OFF will be displayed until the ON/OFF button is pressed again.Once the toaster has been pre-heated, the menu buttons can be pressed to change to CROIS, MUFFIN, T3, T4.Menu buttons T5 & T6 are cheese melting features, when these buttons are pressed, the conveyor will stop and the display will count down. When finished, the conveyor will reverse for 10 seconds.OPERATING HINTS AND SAFETYIMPORTANT: If “HIGH TEMP” shows on the display1. Turn off the toaster and allow it to fully cool down.2. Inspect the fan inlet on the bottom of the toasterand remove anyting blocking the cooling fan inlet.3. Press the red high temperaure limit reset button onthe back of the toaster. (Note: There is one reset on each side). (Note: the toaster must be fully cool in order for the limit switch to reset).4. Turn on the toaster and check for proper operation.5. If cleaning the cooling fan inlet does not correctthe problem, contact the factory or an authorized service agency for required maintenance.Disconnect power to the unit with the ON/OFF button at the end of each day of operation.Do not leave the unit in operation without an attendant.Do not leave the unit at high temperature when not in use or during idle periods. This will cause food particles and grease film to carbonize.The cooling fan will continue to run until the toaster has completely cooled. If the toaster MUST be moved after using, allow the cooling fan to turn OFF before unplugging.CAUTION PROGRAMMING A. CONVEYOR SPEED (temporary setting)The conveyor speed is programmable with a range from 1 to 99 with1 being the slowest and 99 being the fastest. Each menu item can have independent conveyor speed settings.B. PROGRAMMING VALUES FOR MENU ITEMSTo make a program change to the top & bottom elements, or conveyor speed, you must first be in the menu item you want changed. Example: to change the programmed conveyor speed for croissants, the display must read CROIS . To change the programmed conveyorspeed for MUFFIN, the display must read MUFFIN and so on foreach menu item.1) Select the menu item you want to change i.e. CROIS, MUFFIN, T3, T4. 2) Press and hold both ( + ) AND ( - ) buttons for 3 seconds untilthe display goes blank, release the buttons and the display will show three characters for the menu item elected and the last two characters for the current value setting, i.e. CROIS, MUFFIN, T3, T4. The red L.E.D. light for upper front element at the bottom of the label will flash.3) Press the ( + ) or ( - ) buttons to increase or decrease thesetting for the upper element.4) Press the button for the menu button again and the red L.E.D.for the up lower element will flash.5) Press the ( + ) or ( - ) buttons to increase or decrease thesetting for the lower element. 6) Press the button for the menu button again and the red L.E.D.for the conveyor speed will flash.7) Press the ( + ) or ( - ) buttons to increase or decrease thesetting for the conveyor speed.8) Button T5 & T6 are cheese melting functions program. Theseare the same as above, but set a cheese melting time in seconds instead of conveyor speed.9) To skip one feature setting with out making any changes,press the menu item button one time and the red L.E.D. light for the next item will now flash.10) To change the POWER SAVER values press the SAVERbutton or to save your new setting(s), and exit the program mode press the menu button.11) The last two characters in the display will show MN forminutes.12) The first three characters will be numerical to represent thetime setting.13) When set to “OFF” the Saver button will be disabled duringoperation. The PowerSaver can be set to “OFF” or using the ( + ) or ( - ) set the time from 15 to 480 minutes.14) Press the SAVER button to change the power reduction usingthe ( + ) or ( - ) buttons to increase or decrease the setting.15) Press the POWER SAVER button to save changes and toexit.CLEANINGPreventive maintenance for your Holman toaster consists of the following recommended cleaning procedures. To keep your toaster in its top operating condition, these steps should be performed on a daily or weekly basis as required.SuppliesKAY® QSR Oven CleanerKAY® QSR Heavy Duty Multi-Purpose Sink Detergent (dispensed use solution)KAY® Sink Sanitizer (use solution prepared at the sink)No Scratch Pad Red ClothDaily Procedure:1. Turn toaster off, conveyor will continue to run until cooleddown (approx. 5-10 minutes)2. Immediately spray the oven cleaner onto the No ScratchPad and scrub the conveyor chain while it is still warm and moving.NOTE: DO NOT SPRAY directly onto the conveyor belt or into the cooking chamber. Overspray onto the heating elements can damage or shorten the life of the elements.3. Wash the No Scratch pad at the 3 compartment sink and thensoak with Multi-Purpose Sink Detergent. Ring the pad out so that it is only damp and continue to scrub the conveyor belt while it’s still moving. 4.Rinse the No Scratch pad at the 3 compartment sink to remove all detergent and then soak with clean warm water. Ring the pad out so that it is only damp and continue to scrub the conveyor belt while it still moving.5. Wipe the conveyor belt with a clean red cloth dampened withsanitizer solution while it is still moving. Allow to air dry.6. Rinse the No Scratch pad at the 3 compartment sink and thensoak with clean warm water. Ring the pad out so that it is only damp and wipe exterior areas of the toaster.7. Remove interior crumb tray and bottom catch tray and taketo the three compartment sink. Spray the pieces with oven cleaner and allow to sit on the drain board for a minimum of five minutes.8. Wash, Rinse and Sanitize removable pieces and allow to airdry before sliding the trays back into the unit.9. Unit is now ready to turn ON for warm up and use.DO NOT IMMERSE THE UNIT IN WATER OR LETTHE UNIT STAND IN WATER.DO NOT USE A NON-STICK SPRAY ON THE CONVEYOR BELT, IT WILL CAUSE A STICKYBUILD-UP AND INCREASE STICKING.DO NOT HOSE DOWN THE UNIT OR THETABLE/COUNTER IF THE UNIT IS ON THETABLE/COUNTER.KEEP AWAY FROM RUNNING WATER.WARNING WARNINGWARNING CAUTION STAR INTERNATIONAL HOLDINGS INC. COMPANY Star - Holman - Lang - Wells - Bloomfield - Toastmaster10 Sunnen Drive, St. Louis, MO 63143 U.S.A.(314) OPERATION PROCEDURESUsed to toast croissants and english muffinsTo Turn unit ON1. Ensure toaster is plugged in2. Press ON/OFF burron on each control panel.Screen will display “PREHT” for 25 minutes. DO NOT toast any product while the screen displays “PREHT”3. Select ‘CROIS” on the control panel and“MUFIN” on the other.4. Toast product in corresponding belt. Eg.croissants must only be toasted on the “CROIS” belt.To Turn unit OFF1. Ensure there is no product in the toastingchamber2. Press ON/OFF button on each control panel.Screen will shuffle “COOL” and “DOWN” for 10 minutes.NOTE: belts will continue to move for the duration of the cool-down time. Use this time to clean the toaster.ROUTINELY CHECKEntering Programming ModeNOTE: Ensure the toaster is ONNOTE: Changes to the same product must be repeated for each belt.1. Select product2. Press and hold up and down arrows at the sametime. You will enter programming mode.3. Use the up and down arrows to select thedesired top heat.4. Press product button on control5. Use the up and down arrows to select desiredbottom heat.6. Press product button on control7. Usse the top and down arrows to select desiredconveyor speed8. Press product button on control 2-3 times untilyou exit programming mode.NOTE: Changes in belt speed will be madeimmediately. Changes in top/bottom heat will take time to adjust depending on the specifics of the changeIRCS-2-SB2M-Z17508120V 240V 240V 120VO T 2 L 2 M 2 F 2 O T 1 H B 2 H T 2HB1 HT1L1 F1 M1120V 240V 240V 120VOT2 L2 M2 F2 OT1 HB2 HT2H B 1 H T 1L 1 F 1 M 1CFIFWHTBLKGND 15A15A10108914151611WHTRED BLK11814912133512121312344588991114141516OTOTFSRRCMRRCMMCMCFS FAN SWITCH (TSTAT)OT OVER TEMP (TSTAT)IF IMPINGEMENT FAN CF COOLING FANM MOTOR CAPACITOR CM CONVEYOR MOTOR RR REVERSING RELAYBLK REDWHT2M -Z 17824: S p l i t C o n v e y o r T o a s t e r , I R C S 2-S B KSK2709Rev. a 12/19/13MODEL: IRCS2-SBK:Split Electronic Conveyor ToasterDecember 19, 2013, Rev ASTAR INTERNATIONAL HOLDINGS INC. COMPANY Star - Holman - Lang - Wells - Bloomfield - Toastmaster10 Sunnen Drive, St. Louis, MO 63143 U.S.A.(314) 678-6303。
安居宝操作安装说明书

安居宝操作安装说明书安居宝管理软件操作系统安装及使用说明书第一部分:操作系统安装安居宝智能小区管理系统网络版包括电子巡更系统、多表抄集、停车场系统、综合系统,包括门禁系统、住宅监控、边界报警三个子系统,~系统结构为C/S(客户机/服务器一般数据都放在服务器上~工作站只结构的网络版系统),是安装管理软件~这样有利保护数据。
下面介绍两种常见的操作系统安装模式:1、客户机\服务器模式 2、单一PC使用模式一、客户机\服务器模式安装方法,此方法适用于大型网络系统,:1、服务器安装,客户机\服务器模式,服务器要求运行在Windows 2000 Server以上的网络操作系统版本~而且服务名建议设置为Server~客户机要求是Windows98/2000都行。
网络协议采用TCP/IP ~如果网络中有两台以上的PC~建议一台作专门的服务器用或服务器与工作站并用~用于运行数据库~Windows 2000Server安装完后~建议为该服务器配置域。
第一次启动后出现:,图1,第 , 页 / 共 11 页图1也可以通过打开《实用工具》中的《服务器配置》来完成此项~如果不配置~可以把下面的方框中的勾去掉。
,1, 服务器装完后为客户分配用户名~打开《开始》-> 《程序》->《管理工具》,《Active Directory用户和计算机》菜单上后出现窗口如下,图2,:图2如上选择《新建》-><Users>后,图3,第 , 页 / 共 11 页图3JuBao,就是你工作站登录时的用户名~其它其中的,An都是标识~然后点<下一步>为它设置登录密码即可完成。
2、客户机安装:工作站可以装Windows98或以上的操作系统都行~配置一下网络~在登录时~输入在服务器中建的用户登录名<User>,并输入密码即可登录到服务器域中。
二、如果只有一台PC进行管理~建议操作系统装Windows 2000Profession 版即可。
Wilo-SiFire Easy 安装及操作说明说明书
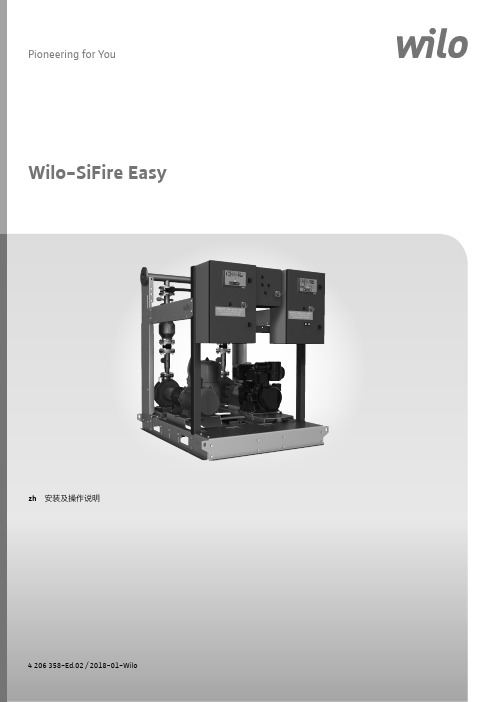
Wilo-SiFire EasyPioneering for You4 206 358-Ed.02 / 2018-01-Wilozh 安装及操作说明Fig. 5:)中文2WILO SE 01/2018说明文字1A 自自来水总管道B 蓄水罐 500 升C 溢流D 排水E 标准供货范围1稳压泵2止回阀3测试喷放4压力开关5压力表6薄膜压力罐31闸阀2局部喷洒器接口3主泵电路双压力开关4止回阀5柴油机泵弹性阻尼套筒6隔膜式再循环电路接口7排放侧主泵扩散锥8带间隔环的水泵/电机联轴器9主泵电动机/柴油机10联轴器护罩11主泵控制开关12管道补压泵控制开关13出口管14流量计选项设置接口15(柴油机泵)燃油箱16主泵引水电路接口17主泵18稳压泵19燃油泄漏罐20燃油箱通风阀21燃油液位计22燃油箱沉积物清洗排水口23燃油泄漏罐沉积物清洗排水口24加油口盖25电机回流管接口26电机燃油供应接口27燃油液位计45C =水箱容量7A 自自来水总管道B 蓄水罐 500 升C 溢流D排水81燃油液位指示器2加液孔盖3电机回流管管件4油箱沉积物清除排水口5电机燃油开/关阀6电机燃油供应管件接头7油箱通风阀(应排出室外)8连接到电动水泵控制开关设备的电动浮子A 消声器B 排气热保护C 冷凝排水D膨胀接头3中文A消声器B排气热保护C冷凝排水D膨胀接头1011中文1概述信息 (7)2安全 (7)2.1本操作说明中使用的危险信号 (7)2.2工作人员资格鉴定 (7)2.3违反安全说明时出现的危险情况 (7)2.4工作中的安全意识 (7)2.5用户安全说明 (8)2.6有关安装和维护工作的安全指示 (8)2.7自行改装与生产备件 (8)2.8不允许的操作方式 (8)3运输和临时存放 (8)3.1运输和存放期间的残余风险 (8)4规定用途 (8)5产品数据 (9)5.1型号代码 (9)5.2供货范围 (9)5.3附件 (9)6产品说明及功能 (10)6.1概述信息 (10)6.2产品说明 (10)6.2.1升压设备 (10)6.2.2控制开关 (10)6.3产品功能 (10)7安装及电气连接 (11)7.1安装 (11)7.2安全建议 (11)7.3控制和环境 (12)7.4电气连接 (12)7.4.1概述 (12)7.4.2液压连接 (12)7.4.3设备防护 (12)7.4.4装置的正吸入压头 (12)7.4.5装置的抽吸高度 (13)7.4.6用于柴油发动机燃烧和冷却的二次空气 (13)8试运行 (13)8.1一般准备和检查 (13)8.2装置低于水位 (13)8.3装置低于水位(抽吸作业) (14)8.4功能控制 (14)8.4.1主电泵试运行 (14)8.4.2主柴油机泵试运行 (14)8.4.3管道补压泵试运行 (14)8.4.4装置充水 (15)8.4.5自动运转测试 (15)9维护 (15)9.1一般维护要求 (16)9.2水泵自动启动测试 (16)9.3柴油机泵自动启动测试 (16)9.4定期测试 (16)9.5设备管理期间的残余风险 (17)中文10控制开关 EC-Fire(电动、柴油、管道补压) (18)10.1电泵控制开关 - DOL (18)10.2电泵控制开关 – 星形/三角形描述 (19)10.3电泵 HMI (20)10.4电泵控制开关 – 远程报警 (21)10.5电泵控制开关 – 功能 (21)10.6柴油机泵控制开关 (22)10.7柴油泵 HMI(描述) (23)10.8柴油机泵控制开关 – 远程报警 (24)10.9柴油机泵控制开关 - 功能 (25)10.10管道补压泵控制开关 (26)10.11管道补压泵控制开关 – 远程报警 (26)10.12管道补压泵控制开关 - 功能 (26)11故障、原因和排除方法 (27)12停止运行和拆除 (30)13备件 (30)中文中文1概述信息关于本文档操作说明的原件以英语撰写。
Miele嵌入式烤箱操作和安装说明说明书
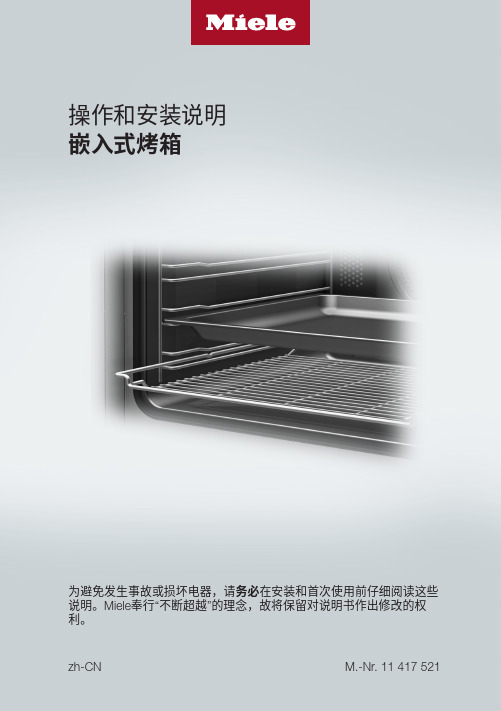
操作和安装说明嵌入式烤箱为避免发生事故或损坏电器,请务必在安装和首次使用前仔细阅读这些说明。
Miele奉行“不断超越”的理念,故将保留对说明书作出修改的权利。
zh-CN M.-Nr. 11 417 521内容警告和安全说明 (6)环境保护 (12)电器使用说明书 (13)控制鍵 (14)On/Off(开启/关闭)感应控制键 (15)显示屏 (15)感应控制键 (15)符号 (17)使用电器 (18)选择菜单选项 (18)更改列表中的设置 (18)使用分段条更改设置 (18)选择功能或操作模式 (18)输入数字 (19)输入字母 (19)激活 MobileStart (19)特点 (20)铭牌 (20)随机内容 (20)可选配件,可订购 (20)安全性特点 (25)经 PerfectClean 清洁表面处理过的表面 (25)高温热解配件 (25)首次使用前 (26)Miele@home (26)基本设置 (27)首次加热烤箱并冲洗蒸汽释放系统 (28)设置 (30)设置概述 (30)打开“设置”菜单 (32)语言 (32)时间 (32)日期 (32)照明 (32)显示屏 (32)音量 (33)单位 (33)Booster (33)2内容快速冷却阶段 (33)保温 (34)建议温度 (34)热解建议 (34)通风冷却运行 (34)安全性 (34)Miele@home (35)远程控制 (35)激活 MobileStart (35)远程更新 (36)软件版本 (36)演示程序 (36)出厂设置 (36)分钟提示器 (37)主菜单和子菜单 (38)节能提示 (40)操作 (42)更改烹饪程序的数值和设置 (42)更改温度和核心温度 (42)设置烹饪持续时间 (43)更改设置的烹饪持续时间 (43)删除设置的烹饪持续时间 (43)取消烹饪程序 (44)预热烤箱内腔 (44)Booster (44)预热 (45)快速冷却阶段 (45)保温 (45)Crisp function (46)加湿烹调 (47)使用加湿烹调启动烹饪程序 (47)蒸发剩余水分 (49)自动程序 (51)类别 (51)使用自动程序 (51)便利提示 (51)其他应用 (52)解冻 (52)3内容烘干 (53)预热餐具 (54)保温 (54)低温烹饪 (55)冷冻食物/即食食品 (56)用户偏好程序 (57)烘焙 (59)烘焙提示 (59)烹饪图表上的注释 (59)功能注释 (59)烘烤 (61)烘烤提示 (61)烹饪图表上的注释 (61)功能注释 (62)食物烘烤探针 (63)烧烤 (65)烧烤提示 (65)烹饪图表上的注释 (65)功能注释 (66)清洁与保养 (67)不适用的清洁剂 (67)去除正常污渍 (67)去除顽固污渍(不包括 FlexiClip 灵动滑轨) (68)高温热解清洁烤箱内腔 (69)除垢 (71)机门拆卸 (74)拆卸机门 (75)安装机门 (78)拆下带 FlexiClip 灵动滑轨的侧滑轨 (78)调低顶部加热/烧烤元件 (79)故障排除指南 (80)服务 (84)若发生故障,请联系我们 (84)保修 (84)4内容安装 (85)安装尺寸 (85)安装在高柜或基座中 (85)侧视图 (86)接线和通风 (87)安装烤箱 (88)电气连接 (89)烤箱 (89)电气连接 (89)烹饪图表 (90)面糊 (90)揉搓混合物 (91)发酵面团 (92)夸克面团 (93)海绵蛋糕混合物 (93)泡芙面团、千层酥皮、蛋白酥饼 (94)开胃菜 (95)牛肉 (96)小牛肉 (97)猪肉 (98)羊肉,野味 (99)家禽,鱼类 (100)产品标准 (101)有害物质 (102)5警告和安全说明正确使用此烤箱适用于家庭和其他类似环境。
车载无线终端快速 安装与使用指南说明书

车载无线终端快速安装与使用指南(V1.0)前言衷心感谢您选择使用本产品!本产品是一款拥有北斗、GPS双模定位技术的智能车载定位终端,为了更好地使用本产品,我们建议您仔细阅读本使用指南。
目录1.安装与开机 (3)2.APP使用方法 (8)3.设备激活方法 (10)4.保修卡 (13)安装与开机1.使用说明产品的正确使用步骤如下:安装>开机>激活上线2.安装SIM卡关机状态下将SIM卡按照标识方向插入卡槽。
3.安装固定主机主机建议由指定经销商或专业安装人员进行安装固定,并注意以下事项:(1)为避免窃贼破坏,主机安装应尽量隐蔽。
(2)避免与发射源放在一起,比如车载通讯设备等。
(3)避开高温、高湿的环境。
(4)使用螺丝固定或扎带固定在合适的位置。
(5)因内置的GPS天线具有方向性,主机安装时务必保证正面(有指示灯的面)朝上。
(6)安装位置必须避开金属物体,还要避开人体的遮挡,比如座垫下方。
4.安装电源线(1)本产品支持电压范围为:12V-72V;红色线为电源正极,黑色线为电源负极,黄色线为ACC 线。
(2)电源线务必接在常电上。
(3)电源负极请选择单独接地,勿与其他地线共接。
(4)ACC线接在电门锁开关输出端(打开钥匙时,电门锁输出电压与电瓶电压基本相同;关闭钥匙时,电门锁无电压输出)。
5.开机设备接通车辆电源后,将会开启蓝色指示灯,表示已开机。
开机后,设备会依次搜索GSM信号(LED快速闪烁)和GPS信号(LED慢速闪烁),设备就绪后LED 灯会常亮。
设备长时间静止时会进入休眠状态,此时LED关闭。
APP使用方法1.下载和安装APP客户端我们为用户提供了专用手机APP,用手机扫描下面的二维码即可下载。
详细操作说明可以在帮助中获取。
(扫此二维码下载APP)2.注册和登录APP客户端支持两种登录方式:(1)使用设备号和设备密码登录;注意:登录前需要先联系经销商或管理员激活设备。
(2)使用手机号和手机登录密码登录。
宝洁丽 D-220V 安装说明与使用手册说明书

说明书尺寸:210*297mm;材质:120g双胶纸; 用胶装2目录最高形态之完美45 6789162124252630313233343637技术图纸和电源、进水连接建议零件标识遥控器控制座圈和盖开启/关闭(仅适用于宝洁丽 D7)相匹配的陶瓷产品列表安全措施/安装前侧面控制面板设置自动开启/关闭设置 (仅适用于宝洁丽D7)技术规格电源插头:正常操作状态/漏电保护清洗操作设定移动和按摩清洗模式 烘干设定/除臭设定材料清单安装遥控器概述臀部清洗/下身清洗操作座圈加热设置3目录384041444546474951525354用户 1 和 2 模式时间设定 清洗T 型阀过滤网用户 1 和 2 设定喷嘴自动清洗模式清洗进水软管过滤器夜光灯设定拆除宝洁丽故障检修ECO 节能环保省电模式清洗清洗喷嘴头最高形态之完美传承260年的丰富经验,凝聚高品质的创新与坚持,宝洁丽带给您——完美的设计,上乘的品质,尖端的科技以及人性化的操控。
设计能力高超娴熟的焊接工艺,无一丝缝隙或可视接缝——宝洁丽呈现出最和谐的设计一体性。
按下按钮即获舒适时尚智能的红外线遥控可进行便捷操作,也可定制各种功能。
按下按钮,操作20多种便捷功能:•电子座圈盖自动开启和关闭。
•舒适的集成夜光灯即使在完全漆黑的夜晚也可帮助确定方向。
•个别功能可按照用户需求定制。
•水量和水温可调。
宝洁丽有两款可供选择,即宝洁丽D5和D7,可与德国唯宝D形萨泊威和欧A产品相匹配。
组装前,敬请认真阅读这些说明。
4Subway 5600 10 xxSubway 6600 10 xxSubway 6603 10 xxSubway 6607 10 xxSunberry 5630 B0 xxSubway 6630 10 xxSunberry 5631 10 xx Omniaarchitectura 5674 10 xxOmniaarchitectura 5675 10 xxOmniaarchitectura 5676 10 xxOmniaarchitectura 5677 10 xxOmniaarchitectura 5683 10 xxOmniaarchitectura 5684 10 xxHommage 6662 10 015Villeroy & Boch 相匹配的陶瓷产品列表材料清单6技术规格颜色 臀部清洗下身清洗移动清洗按摩清洗瞬时水加热水压控制水温控制喷嘴位置调节 除臭烘干烘干温度控制座圈加热控制座圈和盖缓降控制座圈使用感应器人体传感器有源人体传感器 遥控器遥控主动和关闭座圈及盖用户设置模式 夜光灯 抗菌座圈抗菌喷嘴喷嘴自动清洗模式使用前、后喷嘴自动清洗模式节能设置智能节能模式(开/关) 待机模式清洗名称viClean D7viClean D5白色5档设定5档设定5档设定白色5档设定5档设定5档设定5档设定5档设定5档设定5档设定空气清新和烘干遥控器清洁卫生感应器节能环保坐圈电压最大额定功率环境温度供水压力供水温度热水 水温加热最大功率加热座圈 表面温度加热器最大功率烘干 烘干温度 最高风速烘干最大功率空气净化器 方法风量电源线长度 尺寸净重220V AC,50Hz1650W0~40°C (32~104°F)0.07 ~0.75 MPa (10~100psi)3~35°C (37~95°F)30~40°C (86~104°F)1600W29~37°C (84~98°F)50W30~46°C (86~114.8°F)4.2m/s (133/4 ft/s)300W 活性炭吸收0.1m 3/min (3.5 ft 3/min)1 m (39“)382x522x145mm (15“x 201/2“x 53/4“)5.1kg (111/4 lbs) 4.8kg (101/4 lbs)7200 m m(77/8")100 m m(315/16")(97/8")250 m m522mm (201/2")290mm (117/16")391mm (157/16")361mm (143/16")55mm (23/16")358mm (141/8")230mm (91/16")130mm (51/8")203mm (8")516.5mm (205/16")531.5mm (2015/16")382mm (15")145mm (53/4")M 68技术图纸和电源、进水连接建议安全措施220 VAC / 50 Hz安装1. 切勿将产品安装在湿度超过90%RH(相对湿度)的房间。
3271 型和 3277 型 气动执行机构 安装和操作手册
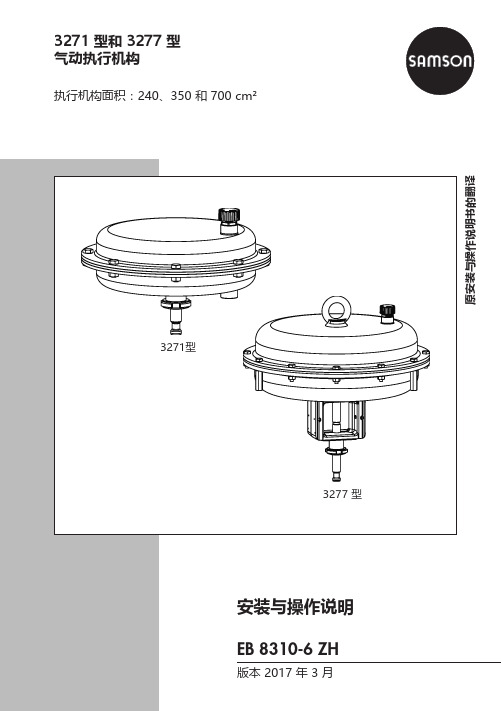
3271 型和 3277 型气动执行机构执行机构面积:240、350 和 700 cm²2 EB 8310-6 ZH安装与操作说明的注解安装与操作说明书就如何安全地安装和操作设备给出说明,用于操作SAMSON的相关设备。
Î为安全且恰当地使用安装与操作说明书,请认真阅读并将其留存备用。
Î如有任何疑问,欢迎致电SAMSON售后服务部门(***************************)。
设备的安装与操作说明将随货发送。
请登陆网站www.samson.de > Product documentation获取文件的最新版本,您可在[Find:]区域内输入文件号或型号查找文件。
标志词释义伤害的危险情况。
伤害的危险情况。
目录1 安全说明和措施 (5)1.1 关于可能发生的严重人身伤害的相关说明 (7)1.2 有关可能发生的人身伤害的说明 (8)1.3 有关可能的财产损失的说明 (9)2 设备上的标记 (10)2.1 执行机构铭牌 (10)3 结构和工作原理 (11)3.1 3271型 (11)3.2 3277 型 (12)3.3 操作方向 (13)3.4 信号压力路线 (13)3.4.1 3271型 (13)3.4.2 3277 型 (13)3.5 故障-安全功能 (13)3.5.1 操作方向为“执行机构推杆伸出”(FA) 的型号 (14)3.5.2 操作方向为“执行机构推杆收回”(FE) 的型号 (14)3.6 类型 (14)3.7 技术数据 (15)4 准备措施 (19)4.1 拆箱 (19)4.2 运输和吊举 (19)4.2.1 运输 (20)4.2.2 提举 (20)4.3 存放 (22)4.4 准备安装 (23)5 安装和启动 (24)5.1 将执行机构安装到阀门上 (24)5.2 预压弹簧 (27)5.2.1 张紧弹簧 (27)5.2.2 增大执行机构止推力 (27)5.2.3 改动行程范围 (28)EB 8310-6 ZH 3目录6 操作 (30)6.1 节流应用 (30)6.2 开/关应用 (30)6.3 操作方向反向 (31)6.3.1 从推杆伸出到推杆收回,操作方向反向 (31)6.3.2 从推杆收回到推杆伸出,操作方向反向 (33)6.4 带手轮类型 (35)6.4.1 手动伸出执行机构推杆 (35)6.4.2 手动收回执行机构推杆 (35)6.5 调节行程限位 (36)6.5.1 底部行程限位(最小行程) (36)6.5.2 顶部行程限位(最大行程) (36)7 维修 (38)7.1 更换膜片 (39)7.2 更换执行机构推杆密封件 (42)7.3 退货装运准备 (44)7.4 订购备件和工作耗材 (45)8 故障 (46)9 停用和拆卸 (48)9.1 停止运行 (48)9.2 从阀门拆下执行机构 (48)9.3 释放执行机构中的弹簧压缩 (48)9.4 处置 (48)10 附录 (50)10.1 售后服务 (50)10.2 备件 (51)4 EB 8310-6 ZH安全说明和措施1 安全说明和措施预期用途SAMSON 3271和3277型执行机构专门应用于单座直通阀上。
ABB ACH531-01 变频器安装和操作指南说明书
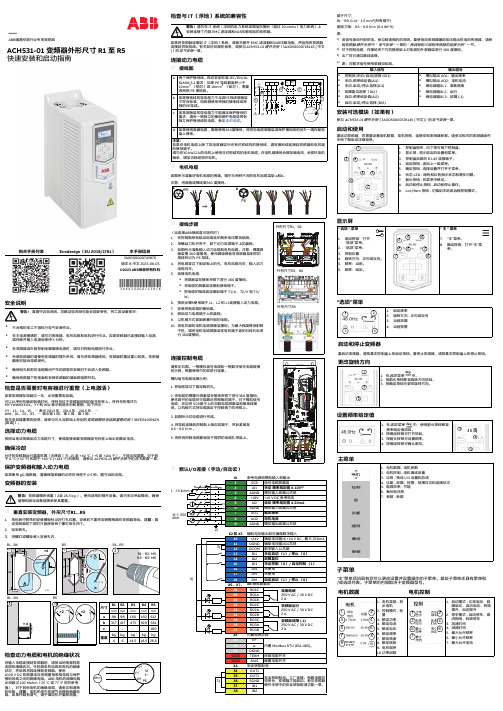
安全说明连接到供电网络。
有关如何处理的信息,请参见ACH531-01 硬件手册(3AXD50000728145 [ 中文])的电气安装一章。
连接动力电缆⏹接线图⏹电机电缆如图所示准备好电机电缆的两端。
图中为两种不同的电机电缆类型 a和b。
⏹接线步骤(当选择ABB接线盒可选件时)1.在控制板旁粘贴当地语言的残余电压警告贴纸。
2.用螺丝刀松开夹子,卸下动力电缆端子上的盖板。
3.如图所示准备输入动力电缆和电机电缆。
注意:裸露屏蔽层需 360 度接地。
使用黄绿颜色将用屏蔽层制作的尾线标记为 PE 导线。
4.将电缆穿过下固定板上的孔,电机电缆向右,输入动力电缆向左。
5.连接电机电缆:•将屏蔽层在接地夹钳下进行 360 度接地。
•将电缆的屏蔽层连接到接地端子。
•把电缆的相导线连接到端子 T1/U、T2/V 和 T3/W。
6.按照步骤5使用端子 L1、L2 和 L3连接输入动力电缆。
7.安装控制电缆的接地架。
8.装回动力电缆端子上的盖板。
9.以机械方式紧固装置外部的电缆。
10.将电机端的电机电缆屏蔽层接地。
为最大程度降低射频干扰,请将电机电缆屏蔽层在电机端子盒的引线孔处进行 360度接地。
端子尺寸:R1…R9: 0.14…1.5 mm 2(所有端子)紧固力矩:0.5…0.6 N·m (0.4 lbf·ft)注:1)该信号源由外部供电。
参见制造商的的说明。
要使用由变频器辅助电压输出供电的传感器,请参阅变频器硬件手册 中“电气安装”一章的“两线制和三线制传感器的连接示例”一节。
2)对于控制电缆,在接地夹下方的接地架上对电缆的外屏蔽层进行 360 度接地。
3)出厂时已通过跳线连接。
4)注:对数字信号使用屏蔽双绞线。
安装可选模块(如果有)参见 ACH531-01 硬件手册(3AXD50000728145 [ 中文])的电气安装一章。
启动和使用要启动变频器,您需要设置电机数据、电机控制、连接宏和变频器参数。
- 1、下载文档前请自行甄别文档内容的完整性,平台不提供额外的编辑、内容补充、找答案等附加服务。
- 2、"仅部分预览"的文档,不可在线预览部分如存在完整性等问题,可反馈申请退款(可完整预览的文档不适用该条件!)。
- 3、如文档侵犯您的权益,请联系客服反馈,我们会尽快为您处理(人工客服工作时间:9:00-18:30)。
规格
型号
电压 频率 净重 消耗功率 风量 噪音 备注
(V) (Hz) (kg)
(W)
(m3/h) (dB-A)
2.3 VFA15AXP-V 220~ 50 0.9
包装附件列表
随换气扇包装箱有以下附件,开箱后请清点是否齐全,若不 齐全,请与经销商联系。
名称
图样
数量
安装胶钉
4
安装螺钉 4
(Ø 3.5×25)
使用安装说明
书 (含保修证)
1
胶条
1
安装与操作
注意事项:安装前务必确认电源已关断。 本产品可直接或通过连接管排气至室外。
图A 图B
产品外形尺寸 1. 墙式安装 1.1 于墙上开出 160 毫米直径的圆孔; 1.2 螺丝锁附孔距:196 毫米×196 毫米; 1.3 标示出适当的螺丝孔位置钻洞后,放入胶钉; 1.4 松开风扇本体上侧边的螺丝,取下面板; 1.5 把风扇本体安置于墙上后,使用附件包中的螺丝锁固。
点开距不少于 3 毫米的全极断开装置(另购)。 10. 必须预防气体由气体管道或生火器具管道倒流入屋内。 11. 此产品为 Y 型连接,为了避免危险,如果电源线损坏,
必须由制造商、代理商或合格的技师更换。 12. 仅供使用于一般的排气,请勿使用排放有危险或是爆炸
性的气体。 13. 请勿使用于烹调区域上方。 (如图 A) 14. 请勿安装于有蒸气的场所。 15. 牢固地安装以避免异音。 16. 设置适当的吸入孔。 17. 设置一检查孔。 18. 请勿采用如图 B 所示的配管方式。 19. 请勿把换气扇直接安装在天花板上。
墙式安装示意图
2. 窗玻璃安装 2.1 于窗玻璃上开出 160 毫米直径的圆孔; 2.2 将胶条安放于玻璃孔上; 2.3 松开风扇本体上侧边的螺丝,取下面板; 2.4 使用玻璃胶来填满胶条与换气扇间的间隙。
3.2 如使用下边出线,需使用钳子或刀将面板下方的出线口 去掉。
窗玻璃安装示意图 3. 电气配线 配线请遵守当地电气与安全规范。(电气设备安装必须
安装与操作说明书
换气扇 机型:VFA15AXP-V
请阅读并保存此手册
注意事项
1. 安装或是维护时需将电源关闭。 2. 换气扇不可装设于温度超过 40℃以上的场所。 3. 安装孔直径尺寸至少为 160 毫米。 4. 换气扇的安装高度请高于 2.3 米,以降低人员受伤的风
险。 5. 安装工作必须由合格人员施行。 6. 本产品使用于住宅。 7. 安装于浴室等场所,请加装合格漏电断路器。 8. 不可将开关设置于浴室内可及之处。 9. 安装时,必须在本机与固定供电线路之间安装一个其触
示灯为绿色;高速运转时,LED 指示灯为橘色。
维修保养
警告:
清洁维护前请先将电源关闭。每年应该进行维修保养。 注意事项: 1. 切勿使用汽油、苯、稀释剂或者其它诸如此类的化学品
擦拭换气扇。 2. 切勿让水进入电机。 3. 切勿把塑料部品浸入高于 60指深入外盖内以免受伤。 2. 机体请勿喷到水,会造成电机故障。 3. 发生异常时(烧焦味等)须停止运转功能,将电源关闭。
由合格的技师来安装)。 不可将开关设置于浴室内可及之处。 3.1 依照接线图连接电源线,从机体后方或是从下边把电源
线引出机体外;
接线图
后方出线图示
下边出线图示
面板出线口图示
4. 测试运转及面板安装 4.1 电源开启后,检查是否有异常的震动与噪声; 4.2 合上面板后锁紧下边螺丝; 4.3 请使用电源开关循环操作换气扇,低速运转时,LED 指
3.7
100
24 低风量
160 35 高风量
* 噪音量测在半无响室中进行,量测点于进气口的正面,左 侧,右侧各 1 米处取平均值。 * 特性规格是未装上逆止风门配件时之规格。 * 规格若有变动,将不另行通知。