Nutch 1.5.1入门指南
NUT核磁处理软件实用指南

单击鼠标左键出现红色光标线, 移动到积分的起点,单击左键, 此时出现绿色光标线,移动到积 分的终点,单击左键,即完成对 某一峰的积分工作。重复操作即 可对每个峰进行积分工作。
NUTs 基本操作
积分
主要命令 “ID” 按 “Ctrl+I” 显示积分值
单击鼠标左键,出现 红色光标线,将光标 移动到已积分好的峰 上:
NUTs 特殊操作
多重图谱的显示 IS
NUTs 特殊操作
多重谱图的显示 主要命令:“IS”, “DD”, “BU” DD:双图谱显示,并对其对比和进行加、减操作 先将需要插入的图谱进行一些基本操作(如FT、SR、 PE)之后,键入或选择命令“AL”,打开另一个需要对比 的图谱,适当处理后,键入命令“DD”,即可调出上一图 谱。用“AM”编译前一谱图。
NUTs 特殊操作
插入注释用图片或文字
图例“MO” 主要用于图 片的插入
NUTs 特殊操作
插入注释用图片或文字
键入或选择命令“NO”,用 鼠标左键点击任意位置或键 入命令“A” ,出现对话框, 输入所需的信息。 在此命令状态下,选定某一 文本,按鼠标右键可对其再 编译,或删除。 键入“C”,取消所有插入 键入“P”,显示实验参数
峰值编译
主要命令 “PP”, “DP”
键入“DP”命令后,将光标放在所要编译 的峰上,点击鼠标右键,出现编译对话框。 Label at Page Top: 决定 峰值的显示是否在谱图 的最上面。如果取消对 其的选择可以将峰值放 在任何想要放的位置。 Show Info field only:显 示用户想要显示的数据 或文字
AS命令下可以对两个谱图进行加、减等操作。
优点:双谱图显示,可进行加减操作,应用广泛 缺点:无法实现多谱图显示
P57英语臀部肌肉注射模拟器产品说明书
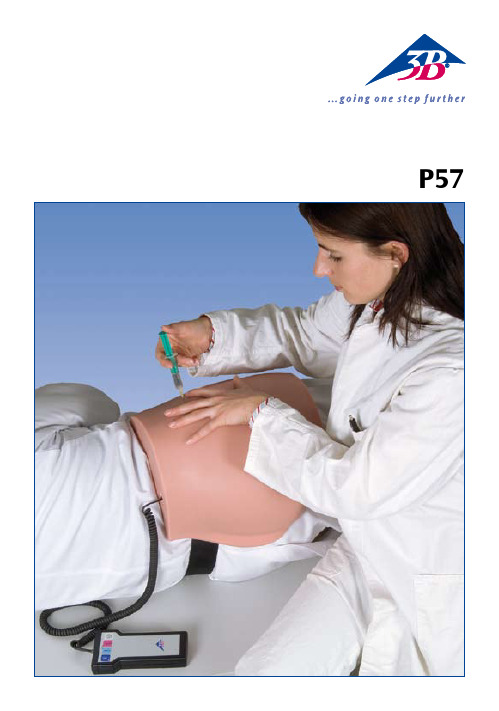
P57®EnglishIntramuscular Injection Simulator-ButtockThank you for choosing a 3B Scientific® product. Please read the user manual carefully before using the unit to ensure a flawless operation and to enable you to work in a satisfactory way with this product. Table of contents:1. Quick Instructions3 1.1 Turning the unit on 3 1.2 T button / C button 3 1.3 Matrix of the result indicator 41.4 Turning the unit off 42. Getting started and operation 4 2.1 Accessories 4 2.2 Some preliminary remarks 4 2.3 Power supply 4 2.4 Inserting and removing thebatteries 4 3. Working with the P57 6 3.1 Operation 6 3.1.1 Layout of the display 6 3.1.2 Turning the unit on and off 6 3.1.3 Training mode (T button) 6 3.1.4 Control mode (C button) 63.2 Administering an intramuscular(i.m.) injection into thebuttock musculature 7 3.2.1 A dministering ventroglutealinjections using the ‘A. vonHochstetter’ method 73.2.2 Disinfection of the skin 74. Operation and storage7 4.1 Tabletop operation 7 4.2 Storage 75. General safety precautions 86. Frequently asked questions (FAQ’s) 8 6.1 The battery indicator is flashing.After turning the unit on again,the indicator is off. But whydoes it then light up again? 8 6.2 Why can’t the injectionsimulator be turned on againafter prolonged storage? 8 6.3 Which types of batteries arerecommended for the injectionsimulator? 8 6.4 Can I also operate the injectionsimulator with rechargeablebatteries? 87. Transport and packaging 88. Maintenance 8 8.1 Care instructions 8 8.2 Exchanging the silicone skin 8 8.3 Warranty 11 8.4 Request for replacement parts 112EnglishIntramuscular Injection Simulator-Buttock1.1 Turning the unit ONBefore using the unit for the first time please insert the supplied batteries (2x AA), (see p. 4/ 2.4).In the training mode (T button), you will immediately receive feedback as follows whileadministering the injection: • p ositive feedback (result indicator (LED green) when you have performed the injection into the muscle correctly,• n egative feedback (result indicator (LED red) + acoustic signal) when you hit the bone.In the control mode (C button) you will receive no feedback while performing an injection into the muscle. The result will be saved and you have to press the C button again to check whether you have carried out the intramuscular injection correctly or incorrectly. You will receive• positive feedback (result indicator (LED green)) when you have performed the intramuscular injection correctly,•n egative feedback (result indicator (LED red)) when you have performed the injection incorrectly. When you hit the bone while injecting, you will immediately receive negative feedback (resultindicator (LED red) + acoustic signal).12345671. Quick InstructionsStatus light (red LED) for battery Start buttonT button (training mode)Status indicator (yellow LED) for C button C button (control mode)Result indicator (red and green LED)3®English1.3 Matrix of the result indicatorResult indicator (training mode)Result indicator (control mode)Correct injection/site green greenIncorrect injection/site no signal redNot deep enough no signal red Injection into the bone red red1.4Turning the unit OFFThe unit automatically switches off when it has not been used for a period of two minutes, or can be manually turned off by simultaneously pressing the T button and the C button.2 Getting started and operation2.1 Accessories•P57 Injection simulator (buttock), (foam) muscle and silicone skin preassembled•Disposable 5 ml syringe•Injection cannula for intramuscular injections• 2 AA batteries•Control unit•Connecting cable (control unit / simulator)2.2 Some preliminary remarks• Place the supplied batteries into the P57 Injection Simulator before first usage. (see 2.4 Inserting the batteries)• Please use only the (rechargeable or non-rechargeable) batteries for the P57 Injection Simulatorrecommended on page 8 (section 6.3).• When inserting the batteries, please ensure correct polarity! Incorrectly inserted batteries may damage the unit!• The skin of the 3B Scientific injectable buttock is made of an elastic material (silicone). Afterprolonged usage and repeated punctures in the same area it may become necessary to substitute the s kin with a replacement skin. Injections into the simulator should only be performed usingcannula gauges (20 and 21 gauge /0.8, 4 cm long, syringe).2.3 Power supplyThe P57 Injection Simulator is supplied with two 1.5 V, type AA/LR6 alkaline manganese batteries. These enable an operating time of up to 20 hours. This period may vary depending on the type of batteries used.2.4. Inserting and replacing the batteriesRemove the cap of the battery compartment at the back of the control unit by sliding it downwards. Then insert the supplied AA batteries, ensuring correct polarity (see p. 5, figs. 1 and 2). Intramuscular Injection Simulator-Buttock4English Intramuscular Injection Simulator-Buttock fig. 1fig. 2fig. 35English3 Working with the P573.1 Operation3.1.1 Layout of the displayStatus light (red LED) for battery Start buttonT button (training mode)Status indicator (yellow LED) for T button Status indicator (red LED) for C button C button (control mode)Result indicator (red and green LED)3.1.2 Turning the unit ON and OFF Turning ON• • ••• This is to prevent any leaking batteries from causing damage to the unit.• • • Now administer the injection.• You will receive immediate feedback as follows while performing the injection- positive feedback (result indicator (LED green)) when you have performed the intramuscular injection correctly,- negative feedback (result indicator (LED red) + acoustic signal) when you hit the bone.• • • 1234567Intramuscular Injection Simulator-Buttock6®English• Now administer the injection.• The information whether the site and depth of the injection have been selected correctly is now temporarily saved by the unit, but not yet displayed.• After completing the injection, press the C button once more to indicate the result. The yellow status indicator next to the C button will flash during this process. You will receive- positive feedback (result indicator (LED green)) when you have performed the injection into the muscle correctly (correct site and correct depth),- negative feedback (result indicator (LED red)) when you have performed the injection incorrectly (at wrong sites and/or not deep enough).• When hitting a bone during the injection you will receive immediate negative feedback (result indicator (LED red) + acoustic signal).•3.2 Administering an intramuscular (i.m.) injection into the buttock musculature3.2.1 Administering ventrogluteal injections using the ‘A. von Hochstetter’ methodA relatively safe method for intramuscular injections in the buttock region is the ‘A. von Hochstetter’ method. The injection is administered into the gluteus medius muscle, or into the gluteus minimus muscle located underneath.The injection can be administered with the patient either in the supine or lateral position. Anatomical landmarks are (1) the greater trochanter, (2) the anterior iliac spine, and (3) the iliac crest. These are eas-ily palpable bony landmarks.To locate the injection site, spread the index and middle fingers apart as far as possible. Palpate the anterior iliac spine with the tip of the index or middle finger located ventrally (depending on the side of the body). Palpate the iliac crest with the other (abducted) finger. Then rotate this finger approx. 2 cm downward, while the other finger remains on the anterior iliac spine. As a result of the rotation, the ball of the hand should rest on the great trochanter. The lower part of the triangle now formed by the index and middle fingers is the injection site.Disinfect the injection site and insert the needle perpendicularly, i.e. at a 90° angle to the body surface. Before injecting, aspirate by pulling back on the plunger of the syringe to avoid inadvertent vessel punc-turing. Now start injecting, making sure that the needle is protected against any change of position. When finished, remove the needle and compress the injection site with a sterile pad.3.2.2 Disinfection of the skinPlease use only normal tap water to disinfect the skin, since ordinary disinfectants may damage the materials of the model.4. Operation & storage4.1 Tabletop operationPosition the injection simulator on a level and non-slippery surface.4.2 Storage• The injection simulator is best stored at a dry place at room temperature.• Do not expose the injection simulator to direct sunlight, since heat over 45°C may cause the material to deform or become brittle.• When the injection simulator is not used for a prolonged period of time, it is recommended to remove the batteries.Intramuscular Injection Simulator-Buttock7®English5. General safety precautions• Keep out of the reach of children!• Do not recharge batteries (LR6) under any circumstances! Risk of Explosion!• Empty batteries must be disposed of in accordance with the national requirements!• E nvironment: components must be disposed of in accordance with the relevant national environment regulations concerning the decommissioning and final disposal of the unit.• Recharge batteries only with a suitable charging set.• D o not use any powerful chemicals to clean the unit, since these may cause damage to the materials of the model.6. Frequently asked questions (FAQs)6.1 The battery indicator is flashing. After turning the unit on again, the indicator is off. But why does it then light up again?This may happen when batteries of different capacities are used. In this case, please replace the batteries with new ones. Tip: As a rule, only use batteries of the same type, the same capacity, the same age and the same manufacturer. Mark “matching” batteries accordingly.6.2 Why can’t the injection simulator be turned on again after prolonged storage?Rechargeable batteries are subject to self-discharge, even while the unit is turned off. Self-discharge is approximately 20% per month. Even disposable batteries run down slightly while the injection simulator is turned off. Tip: Remove the batteries from the battery compartment when not using the unit for a prolonged period of time. This is to prevent that any leaking batteries cause damage to the unit. Afterthe injection simulator has not been used for a prolonged period of time, only insert freshly recharged batteries or new batteries into the unit.6.3 Which types of batteries are recommended for the injection simulator?We recommend the use of alkaline manganese batteries (type AA batteries or LR6). Zinc carbon batteries should not be used.6.4 Can I also operate the injection simulator with rechargeable batteries?Yes, you can use Ni-MH (nickel metal hydride) or Ni-Cd (nickel cadmium) rechargeable batteries.You will achieve a substantially longer operation time with Ni-MH batteries than with Ni-Cd batteries. Tip: Use batteries of the same type, age and manufacturer only.7. Transport and packagingPlease check the shipping and product packaging for any damage. In case of transport damage, please contact your dealer. Please keep the original packaging. This special packaging is the best protection for your valuable product during transport.8. Maintenance8.1 Care instructionsThe silicone skin of the injection simulator can be cleaned with a mild soap solution. Please do not use any detergents containing solvents, as these will damage the silicone skin.8.2. Exchanging the silicone skinLift the silicone skin up on one side of the injection simulator and then pull it up on the left and the right until it is completely detached from the frame (see p. 9/figs. 4 + 5).Attention: Please make sure that the (foam) muscle is not detached from the underlying bone during this process. The silicone skin can now be easily removed and exchanged with a replacement skin (see p. 10/figs. 6 ). The old silicone skin can be disposed of with normal household waste. Intramuscular Injection Simulator-Buttock8Intramuscular Injection Simulator-ButtockEnglishfig. 59Intramuscular Injection Simulator-ButtockEnglish Array fig. 610®English 8.3 WarrantyThe warranty period for the injection simulator is 36 months from the invoice date and shall include engineering, material and manufacturing defects and the electronic functions of the unit, provided that the unit has been subjected to normal usage and appropriate maintenance. The warranty shall not cover parts subject to wear, such as silicone skin, foam core, injection cannula, disposable syringe and batteries.Within the scope of the warranty claim, 3B Scientific shall not be obliged to pay compensation for damage caused in the context of or as a consequence of non-authorized persons carrying out or attemptingrepairs, modifications or changes, or when the product or any part of it has been damaged by an accident, unintended usage or misuse.8.4 Request for replacement parts• Silicone skin (XP302)In case of a complaint, please indicate the serial number located at the center of the bottom of the base housing under the felt cover of the injection simulator.Intramuscular Injection Simulator-Buttock11P 57-04/07-1。
1-Torque1.5中文教程
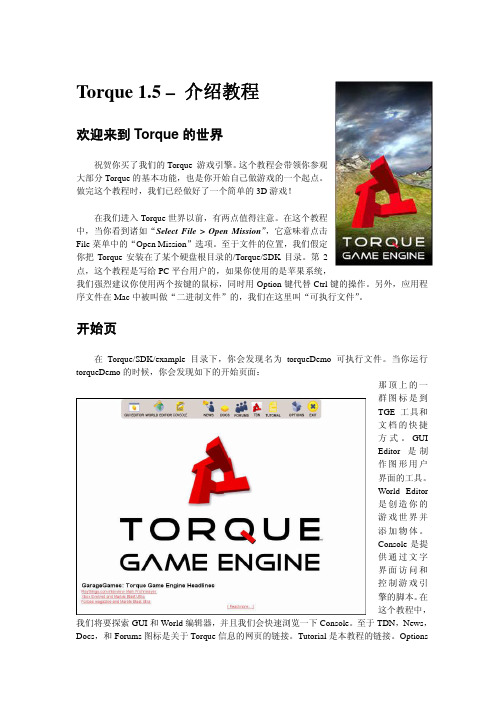
Torque 1.5 – 介绍教程欢迎来到Torque的世界祝贺你买了我们的Torque 游戏引擎。
这个教程会带领你参观大部分Torque的基本功能,也是你开始自己做游戏的一个起点。
做完这个教程时,我们已经做好了一个简单的3D游戏!在我们进入Torque世界以前,有两点值得注意。
在这个教程中,当你看到诸如“Select File > Open Mission”,它意味着点击File菜单中的“Open Mission”选项。
至于文件的位置,我们假定你把Torque安装在了某个硬盘根目录的/Torque/SDK目录。
第2点,这个教程是写给PC平台用户的,如果你使用的是苹果系统,我们强烈建议你使用两个按键的鼠标,同时用Option键代替Ctrl键的操作。
另外,应用程序文件在Mac中被叫做“二进制文件”的,我们在这里叫“可执行文件”。
开始页在Torque/SDK/example目录下,你会发现名为torqueDemo可执行文件。
当你运行torqueDemo的时候,你会发现如下的开始页面:那顶上的一群图标是到TGE工具和文档的快捷方式。
GUIEditor是制作图形用户界面的工具。
World Editor是创造你的游戏世界并添加物体。
Console是提供通过文字界面访问和控制游戏引擎的脚本。
在这个教程中,我们将要探索GUI和World编辑器,并且我们会快速浏览一下Console。
至于TDN,News,Docs,和Forums图标是关于Torque信息的网页的链接。
Tutorial是本教程的链接。
Options让你能设置普通的图形和声音选项,比如屏幕分辨率或音量等。
最后,Exit 就像你想象中的那样,退出这个引擎。
我们在这个教程中不会深入介绍Torque 的Consol (控制台),只是让你知道它能做什么,点击这个图标,在Consol 窗口你可以看到引擎启动后的一些进程记录。
你不仅仅可以用它来得到文字反馈,你也能直接在文字输入框中输入命令,举个例子,输入“quit();”,当然,这个命令退出了TGE 。
Nutch 的配置文件
Nutch 的配置Nutch的配置文件主要有三类:1.Hadoop的配置文件,Hadoop-default.xml和Hadoop-site.xml。
2.Nutch的配置文件,Nutch-default.xml和Nutch-site.xml。
3.Nutch的插件的配置文件,这些插件的配置文件在加载插件的时候由插件自行加载,如filter的配置文件。
配置文件的加载顺序决定了配置文件的优先级,先加载的配置文件优先级低,后加载的配置文件优先级高,优先级低的配置会被优先级高的配置覆盖。
因此,了解Nutch配置文件加载的顺序对学习使用Nutch是非常必要的。
下面我们通过对Nutch源代码的分析来看看Nutch加载配置文件的过程。
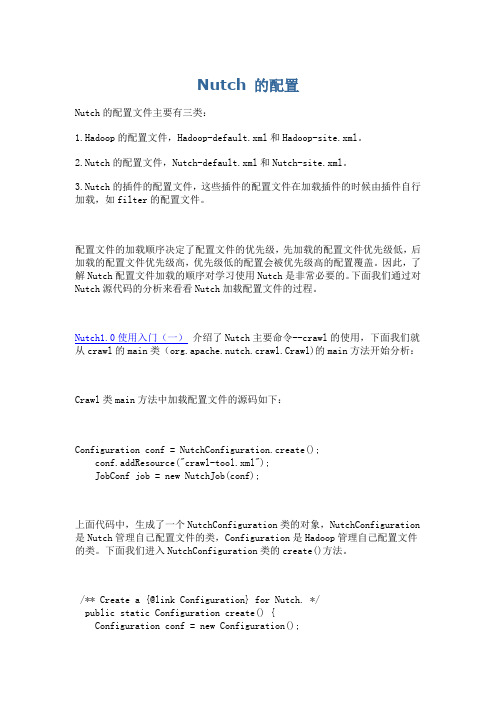
Nutch1.0使用入门(一)介绍了Nutch主要命令--crawl的使用,下面我们就从crawl的main类(org.apache.nutch.crawl.Crawl)的main方法开始分析:Crawl类main方法中加载配置文件的源码如下:Configuration conf = NutchConfiguration.create();conf.addResource("crawl-tool.xml");JobConf job = new NutchJob(conf);上面代码中,生成了一个NutchConfiguration类的对象,NutchConfiguration 是Nutch管理自己配置文件的类,Configuration是Hadoop管理自己配置文件的类。
下面我们进入NutchConfiguration类的create()方法。
/** Create a {@link Configuration} for Nutch. */public static Configuration create() {Configuration conf = new Configuration();addNutchResources(conf);return conf;}create()方法中,先生成了一个Configuration类的对象。
nuttcp 使用方法
nuttcp 使用方法一、什么是 nuttcp?nuttcp 是一款用于测试网络带宽的工具,它通过在客户端和服务器之间传输数据来测量网络的性能和吞吐量。
nuttcp 支持多种操作系统,包括 Linux、Windows 和 macOS。
它是一个命令行工具,使用简单且功能强大。
二、安装 nuttcp1. 在 Linux 上安装 nuttcp在大多数 Linux 发行版中,nuttcp 可以通过包管理器进行安装。
例如,在Ubuntu 上,可以使用以下命令安装 nuttcp:sudo apt-get install nuttcp2. 在 Windows 上安装 nuttcp在 Windows 上,可以从 nuttcp 的官方网站()下载预编译的二进制文件。
解压缩下载的文件后,将 nuttcp.exe 添加到系统的 PATH 环境变量中,这样就可以在命令提示符中直接运行 nuttcp。
3. 在 macOS 上安装 nuttcp在 macOS 上,可以使用 Homebrew 包管理器来安装 nuttcp。
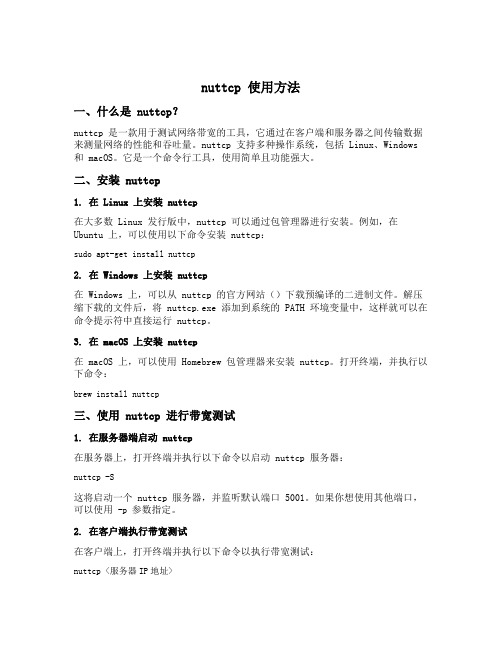
打开终端,并执行以下命令:brew install nuttcp三、使用 nuttcp 进行带宽测试1. 在服务器端启动 nuttcp在服务器上,打开终端并执行以下命令以启动 nuttcp 服务器:nuttcp -S这将启动一个 nuttcp 服务器,并监听默认端口 5001。
如果你想使用其他端口,可以使用-p参数指定。
2. 在客户端执行带宽测试在客户端上,打开终端并执行以下命令以执行带宽测试:nuttcp <服务器IP地址>替换<服务器IP地址>为实际的服务器 IP 地址。
默认情况下,nuttcp 将使用默认端口 5001 进行测试。
如果服务器使用了其他端口,可以使用-p参数指定。
3. 查看测试结果带宽测试完成后,nuttcp 将显示测试的结果。
其中包括平均传输速度、传输的数据量、传输时间等信息。
Nutch相关框架安装使用最佳指南
Nutch相关框架安装使用最佳指南一、nutch1.2二、nutch1.5.1三、nutch2.0四、配置SSH五、安装Hadoop Cluster(伪分布式运行模式)并运行Nutch六、安装Hadoop Cluster(分布式运行模式)并运行Nutch七、配置Ganglia监控Hadoop集群和HBase集群八、Hadoop配置Snappy压缩九、Hadoop配置Lzo压缩十、配置zookeeper集群以运行hbase十一、配置Hbase集群以运行nutch-2.1(Region Servers会因为内存的问题宕机)十二、配置Accumulo集群以运行nutch-2.1(gora存在BUG)十三、配置Cassandra 集群以运行nutch-2.1(Cassandra 采用去中心化结构)十四、配置MySQL 单机服务器以运行nutch-2.1十五、nutch2.1 使用DataFileAvroStore作为数据源十六、nutch2.1 使用AvroStore作为数据源十七、配置SOLR十八、Nagios监控十九、配置Splunk二十、配置Pig二十一、配置Hive二十二、配置Hadoop2.x集群一、nutch1.2步骤和二大同小异,在步骤5、配置构建路径中需要多两个操作:在左部Package Explorer 的nutch1.2文件夹上单击右键> Build Path > Configure Build Path... >选中Source选项> Default output folder:修改nutch1.2/bin为nutch1.2/_bin,在左部Package Explorer的nutch1.2文件夹下的bin文件夹上单击右键> Team >还原二中黄色背景部分是版本号的差异,红色部分是1.2版本没有的,绿色部分是不一样的地方,如下:1、Add JARs... > nutch1.2 > lib ,选中所有的.jar文件> OK2、crawl-urlfilter.txt3、将crawl -urlfilter.txt.template改名为crawl -urlfilter.txt4、修改crawl-urlfilter.txt,将# accept hosts in +^http://([a-z0-9]*\.)*/# skip everything else-.5、cd /home/ysc/workspace/nutch1.2nutch1.2是一个完整的搜索引擎,nutch1.5.1只是一个爬虫。
nutch介绍
搜索过程 Nutch提供了一个Fascade的NutchBean类供我 们使用,一段典型的代码如下
nutch的目标 nutch致力于让每个人能很容易, 同时花费很少 就可以配置世界一流的Web搜索引擎. 为了完成这 一宏伟的目标, nutch必须能够做到: • 每个月取几十亿网页 • 为这些网页维护一个索引 • 对索引文件进行每秒上千次的搜索 • 提供高质量的搜索结果 • 以最小的成本运作 这将是一个巨大的挑战。
Crawler工作流程 1. 创建一个新的WebDb (admin db -create). 2. 将抓取起始URLs写入WebDB中 (inject). 3. 根据WebDB生成fetchlist并写入相应的 segment(generate). 4. 根据fetchlist中的URL抓取网页 (fetch). 5. 根据抓取网页更新WebDb (updatedb).
爬虫,Crawler Index是Crawler抓取的所有网页的索引,它 是通过对所有单个segment中的索引进行合并处 理所得的。Nutch利用Lucene技术进行索引,所 以Lucene中对索引进行操作的接口对Nutch中的 index同样有效。但是需要注意的是,Lucene中 的segment和Nutch中的不同,Lucene中的 segment是索引index的一部分,但是Nutch中的 segment只是WebDB中各个部分网页的内容和索 引,最后通过其生成的index跟这些segment已经 毫无关系了。
爬虫,Crawler Crawler的重点在两个方面,Crawler的工作流 程和涉及的数据文件的格式和含义。数据文件主要 包括三类,分别是web database,一系列的 segment加上index,三者的物理文件分别存储在 爬行结果目录下的db目录下webdb子文件夹内, segments文件夹和index文件夹。那么三者分别 存储的信息是什么目录: 1.crawdb,linkdb 是web link目录,存放url 及url的互联关 系,作为爬行与重新爬行的依据,页面默认30天过期。 2.segments 是主目录,存放抓回来的网页。页面内容有 bytes[]的raw content 和 parsed text的形式。nutch 以广度优先的原则来爬行,因此每爬完一轮会生成一个 segment目录。 3.index 是lucene的索引目录,是indexs里所有index合并 后的完整索引,注意索引文件只对页面内容进行索引,没 有进行存储,因此查询时要去访问segments目录才能获 得页面内容。
NUTS软件的使用说明
NUTS软件的使用说明核磁共振数据的处理主要包括以下几步:1.FT变换(将FID数据转换成通常的频率域图谱)2.谱峰调相位3.谱图基线校正4.化学位移定标5.谱图积分6.作图下面就这些步骤中最基本的内容作简单介绍,详细的说明请查阅该程序的ONLINE HELP.1,谱图转换启动NUTS软件,打开文件夹,在你的PC机上找到核磁数据目录,从该目录或它的子目录中找到名为fid的文件,打开该文件时会出现一对话框:Want to try an Auto Detect Import? 选择“是”,屏幕上出现FID信号,键入FT,将FID信号转变为谱图。
2.调相位(AP)键入ZO或双击左键选择左侧一段(一般是谱图的最左侧)后键入1,再选择右侧一段(一般是谱图的最右侧)后键入2,回车,键入PE,揿住鼠标左键将左侧基线调平,再单击右键,然后揿住右键将右侧基线调平,回车。
也可以通过键入PH,或用光标点击PH图标,按住mouse左键,左右移动mouse,可调谱的零级相位,同样方式,右键可调谱的一级相位,相位调好后回车,退出调相位功能。
3.基线校正键入BC,BF,自动基线校正;对于高版本可以直接键入FBLP自动基线校正。
4.定标按住mouse左键,出一红色“十”光标,将光标移至要定标的TMS或溶剂峰处,使竖线与峰重叠,同时打“O”,出一对话框,输入TMS或溶剂峰的化学位移数值,然后点击OK即可,比如在CDCl3作溶剂时键入O在对话框中键入7.26然后点击OK即可。
5.积分键入AI或用光标点击“AI”图标,对谱图做自动分段积分,如要调积分线相位,则键入“ID”,再键入“B”,类似于调谱图相位,按住mouse左键或右键,左右移动mouse可分别调积分线的零级或一级相位,完成后回车,退出ID功能。
如对某一处分段积分不满意,要重新分段,可按一下mouse左键,屏幕上出现一红色竖线,将此线移至不满意的积分线处,打“D”,原来的积分线消失,再按一下左键,将红线移至要积分的峰的左侧,按一下左键,再移至峰的右侧,再按一下左键,就完成了对这组峰的积分,全部完成后回车,退出积分功能。
NUT操作手册
NUT操作⼿册第⼀章加⼯⼀个零件零件图纸:使⽤⼑具:1、外圆车⼑2、螺纹⼑3、切槽⼑如果要加⼯这个零件,但⼜不熟悉NUT系列数控系统的操作,该怎么办呢?第⼀步:熟悉机床主界⾯和操作⾯板(见第⼆章:系统简介)第⼆步:机床上电与回零(见第三章:开机与回零)第三步:熟悉机床操作(见第四章:机床运⾏)第五步:对⼑(见第五章:对⼑)第六步:编写加⼯程序(见第六章:程序编写)第七步:模拟仿真,检查程序是否正确(见第七章:模拟仿真)第⼋步:调⽤程序,开始⾃动加⼯。
第⼆章系统简介1.1 界⾯介绍图1 系统主界⾯1区:左上⾓LOGO显⽰区2区:右上⾓系统时间和系统状态显⽰区3区:坐标显⽰区4区:速度显⽰区5区:G代码状态显⽰区6区:⼑具和⼯件测量区7区:程序⾃动运⾏显⽰区8区:⼑具运⾏路径的图形显⽰区9区:⽣产管理显⽰区10区:MDA操作区11区:功能按钮显⽰区12区:信息和报警信息显⽰区1.2 操作⾯板介绍图1.3 操作⾯板表1.2 ⾯板按钮列表1.3 系统状态介绍飞阳NUT系统的操作状态分为:空闲和运⾏两个状态。
第三章开机与回零2.1 开机1、机床上电,系统⾃动启动;2、系统启动结束后,释放急停按钮;3、按操作⾯板上的(上电按钮),系统上电;4、按操作⾯板上的(复位按钮),系统报“复位完成”信息,则系统进⼊⼯作状态。
2.2 回零机床正常启动后,需要回零后才能执⾏程序的⾃动加⼯。
当系统处于空闲状态下,回零操作可以通过以下两种⽅式实现:1、单轴回零2、全部回零2.2.1 单轴回零1、开机后系统处于空闲状态;2、点击主界⾯上的回零按钮,则操作⾯板上的(循环启动)按钮灯长亮;3、按下(循环启动)按钮后,相应的轴开始回零;4、回零完成后,主界⾯对应轴的回零按钮消失。
2.2.2 全部回零1、开机后系统处于空闲状态;2、按下操作⾯板上的(回零)按钮,该按钮灯长亮,同时(循环启动)按钮灯长亮;3、按下(循环启动)按钮后,所有轴开始回零;4、回零完成后,主界⾯上的回零按钮消失。
nutch应用-安装与使用
nutch应用-安装与使用Nutch 使用之锋芒初试“工欲善其事,必先利其器。
”经过前文的“细解”,我们已经完成了Nutch在Windows中的安装。
接下来就让我们通过锋芒初试,来亲自体验一下Nutch的强大功能吧!Nutch的爬虫抓取网页有两种方式,一种方式是Intranet Crawling,针对的是企业内部网或少量网站,使用的是crawl命令;另一种方式是Whole-web crawling,针对的是整个互联网,使用inject、generate、fetch和updatedb等更底层的命令。
本文将以使用Nutch为笔者在CSDN处的个人专栏(/zjzcl)文章内容建立搜索功能为例,来讲述Intranet Crawling的基本使用方法(假设用户电脑系统已安装好JDK、Tomcat和Resin,并做过相应的环境配置)。
1、设置Nutch的环境变量在Windows系统的环境变量设置中,增加NUTCH_JAVA_HOME变量,并将其值设为JDK的安装目录。
比如笔者电脑中JDK安装于D:\j2sdk1.4.2_09,因此将NUTCH_JAVA_HOME的值设为D:\j2sdk1.4.2_09。
2、Nutch抓取网站页面前的准备工作(1)在Nutch的安装目录中建立一个名为url.txt的文本文件,文件中写入要抓取网站的顶级网址,即要抓取的起始页。
笔者在此文件中写入如下内容:/zjzcl(2)编辑conf/crawl-urlfilter.txt文件,修改部分:# accept hosts in +^/zjzcl3、运行Crawl命令抓取网站内容双击电脑桌面上的Cygwin图标,在命令行窗口中输入:cd /cygdrive/i/nutch-0.7.1不明白此命令含义的读者请参见前《细解》一文,然后再输入:bin/nutch crawl url.txt -dir crawled -depth 3 -threads 4 >& crawl.log等待大约2分多钟后,程序运行结束。
- 1、下载文档前请自行甄别文档内容的完整性,平台不提供额外的编辑、内容补充、找答案等附加服务。
- 2、"仅部分预览"的文档,不可在线预览部分如存在完整性等问题,可反馈申请退款(可完整预览的文档不适用该条件!)。
- 3、如文档侵犯您的权益,请联系客服反馈,我们会尽快为您处理(人工客服工作时间:9:00-18:30)。
Nutch 1.5.1入门指南
一、简介
Nutch是一个Java实现的web爬虫,爬取的结果存储到database(指定文件路径下的一系列文件及目录)供Solr或Lucene索引和检索。
2012年7月发布的最新版本有两个:主流的v1.5.1和支持大范围爬取、大数据存储的v2.0。
Grub (search engine)是开源的分布式搜索爬虫平台(distributed search crawler platform)。
创建于2000年,2003年被LookSmart收购,后来被中止,2007年再次启动。
官网。
注意与GNU GRUB的不同,GNU GRUB是计算机启动的引导加载程序(boot loader)。
Larbin是法国人用C++实现的web爬虫,最近已经不更新了。
二、使用Nutch
1.解压缩Nutch二进制分发包,目录如下:
●bin目录,只包含一个可执行文件nutch
●conf目录,nutch命令执行的配置参数
●docs目录,JavaDoc帮助
●lib目录,相关Jar类库
●plugins目录,相关插件库
记{Nutch解压缩目录}/nutch为NUTCH_HOME
2.设置环境变量JAVA_HOME
略
3.修改配置文件conf/nutch-site.xml
4.设置要爬取的网址URL
创建myURLs目录(为了执行方便,最好为$NUTCH_HOME/myURLs)
在myURLs目录创建文件seed.txt,编辑该文件,一行一个要爬取的网址url。
5.执行命令nutch命令
bin/nutch crawl myURLs -dir crawlDir -depth 3 -topN 5
说明:
crawl是nutch命令的参数,表示进行爬取操作;
myURLs指定要爬取的URLs;
crawlDir指定爬取结果的存放目录;
depth指定爬取的网址的深度,即从指定URL逐层进入的链接的深度;
topN指定在每个深度爬取的页面数量上限
6.爬取结果分析
经过若干时间,nutch命令执行完毕,crawlDir目录下将出现如下3个子目录:
●crawldb,其中是Nutch已知的全部URL(包括已经爬取的和未爬取的,爬取的时间)。
●linkdb,其中是到每个URL的已知链接列表,包括源URL和链接的锚名字。
●segments,其中是segment的集合。
一个segment是URLs的集合,这些URLs作为一个
单位(unit)被爬取。
⏹crawl_generate,命名爬取的URLs集合
⏹crawl_fetch,包含每个URL的爬取状态
⏹content,包含从每个URL爬取的原始内容
⏹parse_text,包含每个URL的解析之后的文本
⏹parse_data,包含从每个URL解析出来的外部链接(outlinks)和元数据(metadata)
⏹crawl_parse,包含外部链接URLs,用以更新crawldb
三、Nutch与Solr结合使用
1.安装设置Solr
●下载Solr并解压缩(记{Solr解压缩目录}为SOLR_HOME)
●进入$SOLR_HOME/example
●执行java –jar start.jar
打开浏览器,访问http://localhost:8983/solr/admin/,如果正常即表示启动成功
2.集成Nutch与Solr
Nutch擅长网页抓取,Solr擅长索引和搜索。
通过如下命令可以在Nutch爬取的同时进行Solr索引:
bin/nutch crawl myURLs -solr http://localhost:8983/solr/ -depth 3 -topN 5
Nutch完成爬取之后,使用Solr索引:
●复制$NUTCH_HOME/conf/schema.xml到$SOLR_HOME/example/solr/conf
●进入$SOLR_HOME/example
●重新执行java –jar start.jar
●执行如下Nutch命令,将Nutch爬取的数据发送给Solr进行索引
bin/nutch solrindex http://127.0.0.1:8983/solr/ crawlDir/crawldb -linkdb crawlDir/linkdb crawlDir/segments/*
Solr建立索引之后,就可以打开浏览器,访问http://localhost:8983/solr/admin/进行各种关键词检索了。