第一次配置juniper-SSG140
Juniperssg-140防火墙冗余配置步骤分析

Juniper ssg 140防火墙HA配置步骤一、设置步骤1、将两台防火墙的第六个端口连接在一起,我们设置将原有防火墙设置为主防火墙,新增加的防火墙为备份的防火墙,备份的防火墙只连接第六个端口,其他的端口将在防火墙配置完毕后才连接上。
2、使用终端线缆连接到防火墙的Console口,超级终端参数设置为9600-8-无-1-无。
二、命令行配置方式蓝色字体为在超级终端上输入的命令1、主防火墙配置ns204>unset interface e6 ip将端口6的IP地址删除,ns204>set interface e6 zone ha将端口6和HA区域绑定一起配置NSRPns204->ns204-> get nsrp查看NSRP配置信息nsrp version: 2.0cluster info:cluster id not set: nsrp is inactive 默认的情况下NSRP没有激活VSD group info:init hold time: 5heartbeat lost threshold: 3heartbeat interval: 1000(ms)group priority preempt holddown inelig master PB other memberstotal number of vsd groups: 0Total iteration=3808,time=2721060,max=880,min=286,average=714RTO mirror info:run time object sync:disabledping session sync: enabledcoldstart sync donensrp link info:no nsrp link has been defined yetNSRP encryption: disabled--- more ---NSRP authentication: disabledNSRP monitor interface: nonenumber of gratuitous arps: 4 (default)track ip: disabledns204-> set nsrp cluster id 1 设置cluster组号ns204(M)-> set nsrp vsd id 0 设置VSD的组号,这条命令可以不用输入,因为防火墙的默认的虚拟安全数据库(VSD)的值是0。
Juniper SSG系列 VPN配置详细设置图形界面

Juniper SSG系列VPN配置详细设置图形界面本次配置使用的是SSG140和SSG20来做站点到站点的基于路由的VPN(两端地址都为静态IP地址)。
下图是拓扑图:我们是在公司内部做配置,所以把外网口直接连接,我们在实验中用ip1。
1。
1.2来代替图中的2.2.2。
2,这样确保路由没有问题,模拟下图的环境首先我们说一下配置的思路:配置基于路由的站点到站点VPN:1。
为绑定到安全区段和通道接口的物理接口分配IP 地址。
2。
配置VPN 通道,在Untrust 区段内指定其外向接口,将其绑定到通道接口,并配置其代理ID。
3. 在Trust 和Untrust 区段的通讯簿中输入本地及远程端点的IP 地址.4. 输入通向trust—vr 中外部路由器的缺省路由、通过通道接口通向目标的路由以及通向目标的Null 路由。
为Null 路由分配较高的度量(远离零),以便其成为通向目标的下一个可选路由。
接着,如果通道接口的状态变为“中断”,且引用该接口的路由变为非活动,则安全设备会使用Null 路由(即实质上丢弃了发送给它的任何信息流),而不使用缺省路由(即转发未加密的信息流)。
5. 为每个站点间通过的VPN 流量设置策略。
以下配置为SSG140防火墙初始化防火墙Juniper 防火墙出厂时可通过缺省设置的IP 地址使用Telnet 或者Web 方式管理.缺省IP 地址为:192.168.1.1/255。
255.255。
0。
可以直接通过WEB来进行配置,但容易发生错误,建议使用设备自带的配置线连接计算机的COM口采用超级终端来行配置。
1、我们先配置接口eth0/0绑定到trust安全区段,并设置IP为192。
168.1。
3/24,通过console 口来配置:(先配置SSG140,登录的用户名和密码为默认密码:均为netscreen)SSG140-> unset interface ethernet0/0 ipSSG140—〉 set interface ethernet0/0 zone trustSSG140—〉 set interface ethernet0/0 ip 192。
juniper SSG140 l2tp vpn
L2TP隧道(L2TP Tunnel)是指在第二层隧道协议(L2TP)端点之间的逻辑链接:LAC(L2TP接入聚合器)和LNS(L2TP网络服务器)。
当LNS是服务器时,LAC 是隧道的发起人,它等待新的隧道。
一旦一个隧道被确立,在这个点之间的新通信将是双向的。
为了对网络有用,高层协议例如点对点协议(PPP)然后通过L2TP 隧道。
今天刚好在学Juniper防火墙的时候,刚好学到L2TP VPN的配置,那么今天我们来看看使用Juniper防火墙来做L2TP VPN。
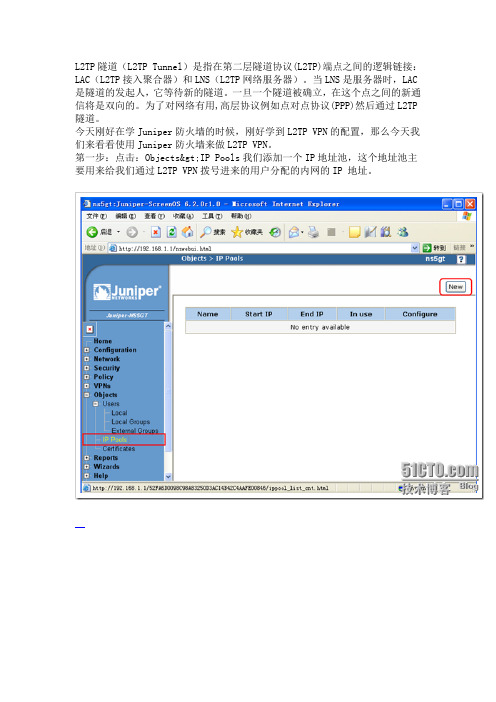
第一步:点击:Objects>IP Pools我们添加一个IP地址池,这个地址池主要用来给我们通过L2TP VPN拨号进来的用户分配的内网的IP 地址。
如上图:IP Pool Name就是给我们地址池起上一个名字,以便我们以后好调用。
Start IP:我们地址池起始的IP地址End IP:我们地址池结束的IP地址输入好以后点击OK就行了。
当我们建立好之后,它自动会返回到我们一个地址池汇总的地方,在这里我们可以看见我们刚才建立的那一个地址池。
当我们地址池建立以后进入“Objects>Users>Local”里面去建立我们的用户。
如下图点击右上角的“New”来新建我们的用户。
如下图:User Name:输入用户名Status: EnableUser Password:输入密码Confirm Password:输入确认密码将L2TP User选中,因为我们这个用户将用来给通过L2TP拨号进来的用户登录使用的。
按照上面图的步骤,我们再建立一个cisco用户名。
当我们建立好之后,就会看见如下图显示两个用户名。
当我们建立好用户以后,我们还要建立一个用户组,将我们的用户加入该组里面。
在Group Name后面输入我们的组名,我这里输入的是“aa”,而在我们“Available Members”这里面显示的是我们刚才建立好的用户名,但是下图应该还有一个cisco用户才对。
Juniper-SSG-140
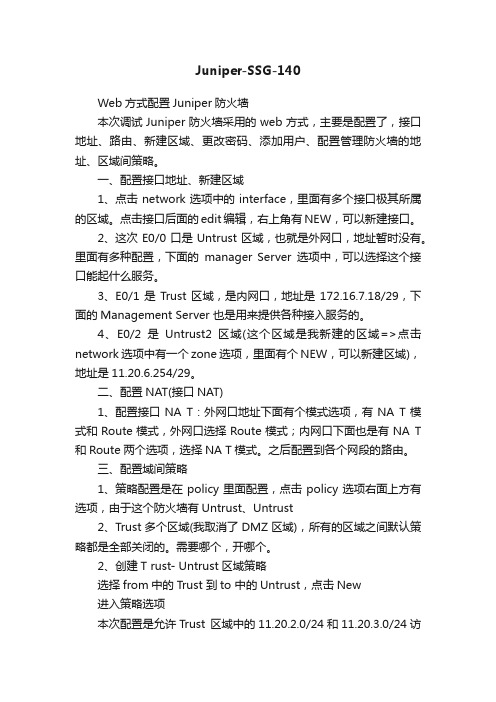
Juniper-SSG-140Web方式配置Juniper防火墙本次调试Juniper防火墙采用的web方式,主要是配置了,接口地址、路由、新建区域、更改密码、添加用户、配置管理防火墙的地址、区域间策略。
一、配置接口地址、新建区域1、点击network选项中的interface,里面有多个接口极其所属的区域。
点击接口后面的edit编辑,右上角有NEW,可以新建接口。
2、这次E0/0口是Untrust区域,也就是外网口,地址暂时没有。
里面有多种配置,下面的manager Server选项中,可以选择这个接口能起什么服务。
3、E0/1是Trust区域,是内网口,地址是172.16.7.18/29,下面的Management Server 也是用来提供各种接入服务的。
4、E0/2是Untrust2区域(这个区域是我新建的区域=>点击network选项中有一个zone选项,里面有个NEW,可以新建区域),地址是11.20.6.254/29。
二、配置NAT(接口NAT)1、配置接口NA T:外网口地址下面有个模式选项,有NA T模式和Route模式,外网口选择Route模式;内网口下面也是有NA T 和Route两个选项,选择NA T模式。
之后配置到各个网段的路由。
三、配置域间策略1、策略配置是在policy里面配置,点击policy选项右面上方有选项,由于这个防火墙有Untrust、Untrust2、Trust多个区域(我取消了DMZ区域),所有的区域之间默认策略都是全部关闭的。
需要哪个,开哪个。
2、创建T rust- Untrust区域策略选择from中的Trust 到to 中的Untrust,点击New进入策略选项本次配置是允许Trust 区域中的11.20.2.0/24和11.20.3.0/24访问UnTrust 区域中的124.128.232网络。
下面选项中有个source address 中选择New address , destination address中也是选择New address ,下面的service 是选择服务。
ssg140防火墙产品介绍

是 是 是 是 是 是 是
是 是 是 是 是
特征码数据库 扫描的协议
防间谍软件 防广告软件 防击键记录程序 即时消息 AV 防垃圾邮件 集成 URL过滤 外部 URL 过滤(4)
2
产品选件
选件
DRAM 统一威胁管理/内容安全(需要高内存 选件)
I/O选件
选件描述
适用的产品
SSG140 配有 256 MB 或 512 MB 的 DRAM。
SSG140
SSG140 系列可配置下列一流 UTM 和内容安全功能的任意 组合:防病毒(包括防间谍软件、防钓鱼)、IPS(深度检 测)、网页过滤和/或防垃圾邮件。
由瞻博提供的按年许可网页过滤方案系基于 Websense SurfControl 技术。
控制/阻止对恶意网站的接入。
ቤተ መጻሕፍቲ ባይዱ
瞻博网络的深度检测防火墙特征码包提供按年许可的 IPS 引擎。 防止应用级的攻击对网络进行泛洪。
在全部 SSG500 系列型号上都具有四个固定 10/100/1000 接 口,两个 USB 端口,一个控制台端口和一个辅助端口。
接入控制实施:在瞻博网络统一接入控制部署方案中,通过简单地增加 IC 系列 UAC 产 品,SSG140 系列网关便可作为接入控制实施点。IC 系列产品与 SSG140 系列交互, 通过充当中央策略管理引擎来扩充或替换基于防火墙的接入控制。为了适应攻击场景和 用户特征的不断变化,SSG140 基于更多的细粒度标准(包括端点状态和用户识别)来 允许或拒绝接入。
Juniper防火墙配置的导入及导出
Juniper防火墙配置的导入及导出juniper防火墙的配置文件可以通过多种方法导入导出,以便在防火墙出现故障时进行紧急恢复,因此维护防火墙要养成经常备份配置文件的好习惯。
下面看看juniper防火墙对配置文件可以做的一些操作。
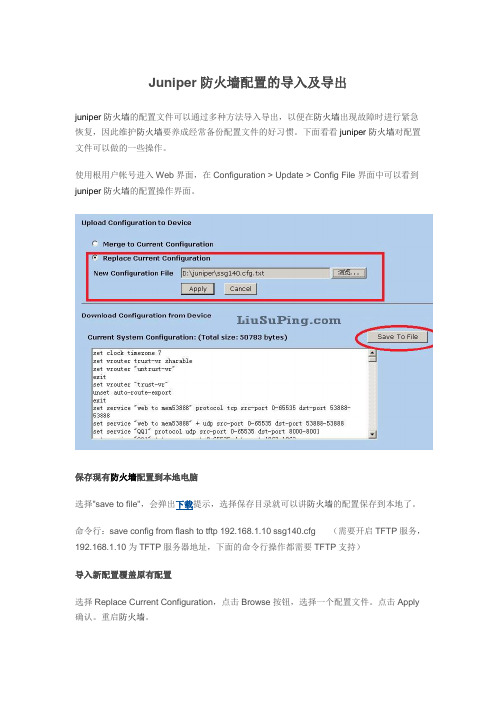
使用根用户帐号进入Web界面,在Configuration > Update > Config File界面中可以看到juniper防火墙的配置操作界面。
保存现有防火墙配置到本地电脑选择"save to file",会弹出下载提示,选择保存目录就可以讲防火墙的配置保存到本地了。
命令行:save config from flash to tftp 192.168.1.10 ssg140.cfg (需要开启TFTP服务,192.168.1.10为TFTP服务器地址,下面的命令行操作都需要TFTP支持)导入新配置覆盖原有配置选择Replace Current Configuration,点击Browse按钮,选择一个配置文件。
点击Apply 确认。
重启防火墙。
命令行:save config from tftp 192.168.1.10 ssg140.cfg to flash导入新配置与原有配置合并使用根用户或具有读写权限的帐号进入Web界面,在Configuration > Update > Config File 界面中,选择Merge to Current Configuration,点击Browse按钮,选择一个配置文件。
点击Apply确认。
重启防火墙。
命令行:SSG140-> save config from tftp 192.168.1.1 ssg140.cfg merge from trustLoad config from 192.168.1.10/cfg from trust .tftp received ctets = 2655tftp success!TFTP SucceededSave config ... ......................................................................SSH version 2 already active. ................Save System Configuration ...DoneDoneJuniper防火墙配置备份为防止Juniper防火墙设备故障情况下造成网络中断,保障用户业务不间断运行,现针对Juniper防火墙故障情况下的快速恢复做具体描述。
Juniper_SSG 140 SB 防火墙配置手册

Juniper SSG-140-SB防火墙配置手册初始化设置 (2)Internet网络设置 (6)一般策略设置 (16)VPN连接设置 (28)命令行接入 (39)恢复初始设置 (39)初始化设置1.将防火墙设备通电,连接网线从防火墙e0\0口连接到电脑网卡。
2.电脑本地连接设置静态IP地址,IP地址192.168.1.2(在192.168.1.0/24都可以),子网掩码255.255.255.0,默认网关192.168.1.1,如下图:3.设置好IP地址后,测试连通,在命令行ping 192.168.1.1,如下图:4.从IE浏览器登陆防火墙web页面,在地址栏输入192.168.1.1,如下图向导选择最下面No, skip——,然后点击下面的Next:5.在登录页面输入用户名,密码,初始均为netscreen,如下图:6.登陆到web管理页面,选择Configuration – Date/Time,然后点击中间右上角Sync Clock With Client选项,如下图:7.选择Interfaces – List,在页面中间点击bgroup0最右侧的Edit,如下图:8.此端口为Trust类型端口,建议IP设置选择Static IP,IP Address输入规划好的本地内网IP地址,如192.168.22.1/24,Manage IP 192.168.22.1。
之后勾选Web UI,Telnet,SSH,SNMP,SSL,Ping。
如下图:Internet网络设置1.修改本地IP地址为本地内网IP地址,如下图:2.从IE浏览器打开防火墙web页面,输入用户名密码登陆,如下图:3.选择Interfaces – List,点击页面中ethernet0/0最右侧的Edit选项,如下图:4.此端口为Untrust类型端口,设置IP地址有以下三种方法:(根据ISP提供的网络服务类型选择)A.第一种设置IP地址是通过DHCP端获取IP地址,如下图:B.第二种设置IP地址的方法是通过PPPoE拨号连接获取IP,如下图,然后选择Create new pppoe setting,在如下图输入本地ADSL pppoe拨号账号,PPPoE Instance输入名称,Bound to Interface选择ethernet0/0,Username和Password输入ADSL账号密码,之后OK,如下图:PPPoE拨号设置完毕之后,点击Connect,如下图:回到Interface –List,可以看到此拨号连接的连接状态,如下图:ethernet0/0右侧PPPoE一栏有一个红叉,表示此连接已经设置但未连接成功,如连接成功会显示绿勾。
Juniper防火墙新手教程8:Juniper防火墙配置的导入及导出
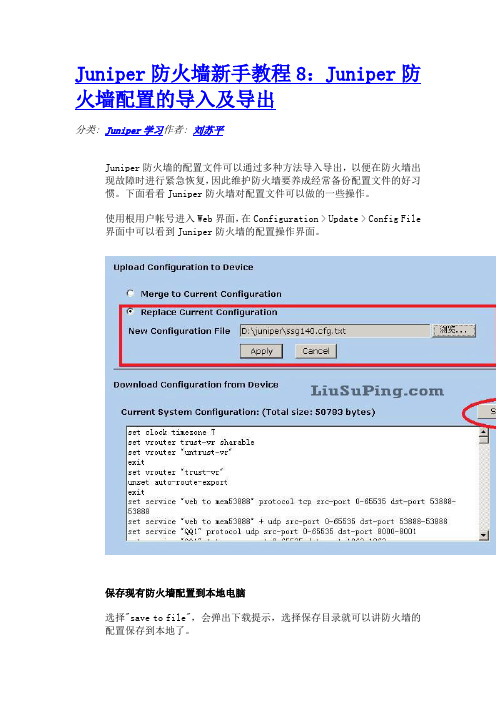
Juniper防火墙新手教程8:Juniper防火墙配置的导入及导出分类: Juniper学习作者: 刘苏平Juniper防火墙的配置文件可以通过多种方法导入导出,以便在防火墙出现故障时进行紧急恢复,因此维护防火墙要养成经常备份配置文件的好习惯。
下面看看Juniper防火墙对配置文件可以做的一些操作。
使用根用户帐号进入Web界面,在Configuration > Update > Config File 界面中可以看到Juniper防火墙的配置操作界面。
保存现有防火墙配置到本地电脑选择"save to file",会弹出下载提示,选择保存目录就可以讲防火墙的配置保存到本地了。
命令行:save config from flash to tftp 192.168.1.10ssg140.cfg (需要开启TFTP服务,192.168.1.10为TFTP服务器地址,下面的命令行操作都需要TFTP支持)导入新配置覆盖原有配置选择Replace Current Configuration,点击Browse按钮,选择一个配置文件。
点击Apply确认。
重启防火墙。
命令行: save config from tftp 192.168.1.10 ssg140.cfg to flash导入新配置与原有配置合并使用根用户或具有读写权限的帐号进入Web界面,在Configuration > Update > Config File界面中,选择Merge to Current Configuration,点击Browse按钮,选择一个配置文件。
点击Apply确认。
重启防火墙。
命令行:SSG140-> save config from tftp 192.168.1.1 ssg140.cfg merge from trustLoad config from 192.168.1.10/cfg from trust .!!!!!!!!!!!!!tftp received octets = 2655tftp success!TFTP SucceededSaveconfig ... .................................................... ..................SSH version 2 already active. ................Save System Configuration ...DoneDone。
- 1、下载文档前请自行甄别文档内容的完整性,平台不提供额外的编辑、内容补充、找答案等附加服务。
- 2、"仅部分预览"的文档,不可在线预览部分如存在完整性等问题,可反馈申请退款(可完整预览的文档不适用该条件!)。
- 3、如文档侵犯您的权益,请联系客服反馈,我们会尽快为您处理(人工客服工作时间:9:00-18:30)。
第一次配置juniper-SSG140(2010-04-27 10:10:43)、简述环境:1.双ISP,两个服务器6.6和6.8对外开放17991端口2.trust-vr和untrust-vr同在,zone untrust被修改到untrust-vr中3.6.6 VIP 180的地址,6.8 MIP 221的地址,应用源路由其实东西也不多,不过没配过的我开始真不知道如何配置juniper的地址转换set clock ntpset clock timezone 8set clock dst recurring start-weekday 2 0 3 02:00 end-weekday 1 0 11 02:00 set vrouter trust-vr sharableset vrouter "untrust-vr"exitset vrouter "trust-vr"unset auto-route-exportexit------------------------------------------------------------------------------若防火墙里没有你所用的服务就自己加吧-------------------------------------------------------------------------------------------------set service "17991" protocol tcp src-port 0-65535 dst-port 17991-17991 set service "3389" protocol tcp src-port 0-65535 dst-port 3389-3389 set alg appleichat enableunset alg appleichat re-assembly enableset alg sctp enableset auth-server "Local" id 0set auth-server "Local" server-name "Local"set auth default auth server "Local"set auth radius accounting port 1646set admin name "netscreen"set admin password "nJqNNxrLGyrLc0lEtsCBqfDtDMA/Pn"set admin user "hongyuan" password "nNnfG0rrJIWDcc8EysvMuSCt+LBiDn" privilege "all"-----------------------------------------------------------------------------------------如果要添加管理ip,别忘了添加内部网段地址,第一次我只加了远端的公网地址,导致内部要配置却进不去,只能console了。
--------------------------------------------------------------------------------------------------set admin manager-ip 192.168.6.0 255.255.255.0set admin manager-ip 114.255.150.140 255.255.255.255set admin manager-ip 219.141.171.130 255.255.255.255set admin auth web timeout 10set admin auth server "Local"set admin format dosset zone "Trust" vrouter "trust-vr"-------------------------------------------------------------------------------------------------"Untrust"默认是在"trust-vr"里的,我给改了--------------------------------------------------------------------------------------------------set zone "Untrust" vrouter "untrust-vr"set zone "DMZ" vrouter "trust-vr"set zone "VLAN" vrouter "trust-vr"set zone "Untrust-Tun" vrouter "trust-vr"set zone "Trust" tcp-rstset zone "Untrust" blockunset zone "Untrust" tcp-rstset zone "MGT" blockset zone "DMZ" tcp-rstset zone "VLAN" blockunset zone "VLAN" tcp-rstset zone "Trust" screen limit-session source-ip-basedset zone "Trust" screen limit-session destination-ip-basedset zone "Untrust" screen alarm-without-dropset zone "Untrust" screen on-tunnelset zone "Untrust" screen icmp-floodset zone "Untrust" screen udp-floodset zone "Untrust" screen winnukeset zone "Untrust" screen port-scanset zone "Untrust" screen ip-sweepset zone "Untrust" screen tear-dropset zone "Untrust" screen syn-floodset zone "Untrust" screen ip-spoofingset zone "Untrust" screen ping-deathset zone "Untrust" screen ip-filter-srcset zone "Untrust" screen landset zone "Untrust" screen syn-fragset zone "Untrust" screen tcp-no-flagset zone "Untrust" screen unknown-protocolset zone "Untrust" screen ip-bad-optionset zone "Untrust" screen ip-record-routeset zone "Untrust" screen ip-timestamp-optset zone "Untrust" screen ip-security-optset zone "Untrust" screen ip-loose-src-routeset zone "Untrust" screen ip-strict-src-routeset zone "Untrust" screen ip-stream-optset zone "Untrust" screen icmp-fragmentset zone "Untrust" screen icmp-largeset zone "Untrust" screen syn-finset zone "Untrust" screen fin-no-ackset zone "Untrust" screen limit-session source-ip-basedset zone "Untrust" screen syn-ack-ack-proxyset zone "Untrust" screen block-fragset zone "Untrust" screen limit-session destination-ip-basedset zone "Untrust" screen icmp-idset zone "V1-Untrust" screen tear-dropset zone "V1-Untrust" screen syn-floodset zone "V1-Untrust" screen ping-deathset zone "V1-Untrust" screen ip-filter-srcset zone "V1-Untrust" screen landset zone "Untrust" screen limit-session source-ip-based 512set zone "Untrust" screen limit-session destination-ip-based 512set interface "ethernet0/0" zone "Trust"set interface "ethernet0/1" zone "V1-Trust"set interface "ethernet0/2" zone "V1-Trust"set interface "ethernet0/8" zone "Untrust"set interface "ethernet0/9" zone "Untrust"----------------两条互联网在一个区域set interface ethernet0/0 ip 192.168.6.2/24set interface ethernet0/0 nat-----------------------------内网口启动NAT,去往untrust区或dmz区都会触发nat,除非把防火墙配成透传模式unset interface vlan1 ipset interface ethernet0/8 ip 221.7.199.182/29set interface ethernet0/8 routeset interface ethernet0/9 ip 180.136.240.114/30set interface ethernet0/9 routeunset interface vlan1 bypass-others-ipsecunset interface vlan1 bypass-non-ipset interface ethernet0/9 manage-ip 180.136.240.113set interface ethernet0/0 ip manageableset interface ethernet0/8 ip manageableset interface ethernet0/9 ip manageableset interface ethernet0/8 manage pingset interface ethernet0/8 manage telnetset interface ethernet0/8 manage webset interface ethernet0/9 manage pingset interface ethernet0/9 manage telnetset interface ethernet0/9 manage web-------------------------------------------------------------------------------------------------server auto detection开启,防火墙会自动ping这台内部地址,如果无法通信,status就是down--------------------------------------------------------------------------------------------------set interface ethernet0/9 vip interface-ip 3389 "3389" 192.168.6.6 set interface ethernet0/9 vip interface-ip 17991 "17991" 192.168.6.6 set interface ethernet0/8 vip interface-ip 3389 "3389"192.168.6.21-------看,是这里-------------------------------------------------------------------------------------------------若你有同网段多个ip地址可以用mip,注意我把它放在untrust-vr了-------------------------------------------------------------------------------------------------set interface "ethernet0/8" mip 221.7.199.179 host 192.168.6.8 netmask 255.255.255.255 vr "untrust-vr"unset flow no-tcp-seq-checkset flow tcp-syn-checkunset flow tcp-syn-bit-checkset flow reverse-route clear-text preferset flow reverse-route tunnel alwaysset pki authority default scep mode "auto"set pki x509 default cert-path partialset address "Trust" "221.7.199.180/32" 221.7.199.180 255.255.255.255 set ike respond-bad-spi 1set ike ikev2 ike-sa-soft-lifetime 60unset ike ikeid-enumerationunset ike dos-protectionunset ipsec access-session enableset ipsec access-session maximum 5000set ipsec access-session upper-threshold 0set ipsec access-session lower-threshold 0set ipsec access-session dead-p2-sa-timeout 0unset ipsec access-session log-errorunset ipsec access-session info-exch-connectedunset ipsec access-session use-error-logset vrouter "untrust-vr"exitset vrouter "trust-vr"exitset url protocol websenseexit------------------------------------------------------------------------------------------------juniper也有隐藏deny any any 所以,从trust到untrust要配置permit any any-----------------------------------------------------------------------------------------------set policy id 1 name "PERMIT_ANY" from "Trust" to "Untrust" "Any" "Any" "ANY" permitset policy id 1exitset policy id 2 name "PERMIT_PING" from "Untrust" to "Trust" "Any" "MIP(221.7.199.179)" "PING" permitset policy id 2exitset policy id 4 name "PERMIT_CT" from "Untrust" to "Trust" "Any" "VIP(ethernet0/9)" "3389" permit logset policy id 4exitset policy id 5 name "PERMIT_CNC" from "Untrust" to "Trust" "Any" "MIP(221.7.199.179)" "3389" permit logset policy id 5exitset policy id 6 name "test" from "Untrust" to "Trust" "Any""VIP(ethernet0/8)" "3389" permit logset policy id 6exitset policy id 7 name "PERMIT_CT_17991" from "Untrust" to "Trust" "Any""VIP(ethernet0/9)" "17991" permit logset policy id 7exitset policy id 8 name "PERMIT_CNC_17991" from "Untrust" to "Trust" "Any" "MIP(221.7.199.179)" "17991" permit logset policy id 8exitset nsmgmt bulkcli reboot-timeout 60set ssh version v2set config lock timeout 5unset license-key auto-updateset ntp server "210.72.145.44"set snmp port listen 161set snmp port trap 162-------------------------------------------------------------------------------------------------------------------------------------------------------------------------------------------------set vrouter "untrust-vr"-----------------------------------以下是untrust-vr里的路由set source-routing enableset route 0.0.0.0/0 interface ethernet0/8 gateway 221.7.199.177set route 0.0.0.0/0 interface ethernet0/9 gateway 180.136.240.113 set route source 192.168.6.6/32 interface ethernet0/9 gateway180.136.240.113set route source 192.168.6.8/32 interface ethernet0/8 gateway221.7.199.177set route 192.168.6.0/24 vrouter "trust-vr" preference 20 metric 1 exitset vrouter "trust-vr"-------------------------------------以下是trust-vr里的路由unset add-default-routeset route 0.0.0.0/0 vrouter "untrust-vr" preference 20 metric 1exitset vrouter "untrust-vr"exitset vrouter "trust-vr"exit。