天王KOD2.20说明书_
G-20产品说明书2010.12.30资料
G-20安全预警仪用户手册Ver 22.4.1一、配件主机车载充电器(输出12V 1A)支架USB数据线二、结构按键说明M键:菜单键,用于系统功能的切换。
左/右键:用于各种功能的设定及声音设定。
显示器:主要显示时间、速度、距离、方向及各功能显示。
电源接口:车载充电器接口USB接口:可连接电脑下载数据三、安装方法1、请将本机配送的支架放置在仪表板上的适当位置。
2、将主机与支架连接。
3、将车载充电器插入点烟器口。
4、将DC头插入本机电源接口,本产品开机运行。
显示屏上的字符方向,此操作可解决按支架方式安装主机可能出现的字符倒立的现象。
五、 系统功能设定 1、基本功能在一般模式下,连续按M 键可进行速度设定、超速设定(定速巡航功能)、模式设定、感度设定、亮度设定、速度补偿,通过左/右键调节设定,同时播报语音。
如图:提示:速度补偿指根据不同车型咪表的误差差异值不同,用户可自行调整咪表与本机显示速度差异。
2、声音设定正常使用情况下,直接按左/右键可调节音量大小,共有4个音量级,其中0表示静音。
3、返回功能在任何按键菜单提示下,无按键操作超过7秒钟,返回工作界面。
4、一键恢复在开机状态下,长按M键5秒钟,设备自动恢复到出厂设置。
※速度设定:在自设速度限值以下,自动静音功能,若车速在自设速度限值以上,收到雷达讯号或检测到照相点信息时,则会发出语音警报。
※超速设定:用户设定速度内本机无超速警告提示,车子在设定速度值以上,则语音警告提示超速,本功能为定速巡航功能。
※若主机已与卫星讯号连接时,荧幕时间显示中间“:”则会呈现持续闪烁状态。
※若主机未与卫星讯号连接时,荧幕时间显示中间“:”则不会有闪烁状态。
1、请登入纽曼官方网站:2、选择服务中心、点击登入下载中心3、在高级搜索中输入产品类别、产品系列、产品名称等点击查询即可下载升级版本。
注:请用户在对产品升级前,必须分清机型与软件版本,并仔细核实,现需升级固件的机型与固件使用机型、软件版本必须一致,否则,因升级固件所造成的机器问题,维修费用由用户承担。
KODAK 便携式电源站 ppS100 用户手册说明书

KODAKuser manualplease read this manual carefully before operating the product.please keep this manual with you for further reference.1. Set includeS 3i on 42.i ntroduct3. Safety inStructionS 5i on 94. tranSportat5. Get to know your kodak ppS100 10i nG 116. charG6.1. what it can power 11 6.2. diGital indicator 116.3. charGinG via mainS power Supply 127. technical SpecificationS 128. uSinG the kodak ppS100 13i nG 149. troubleShoot10. frequently aSked queStionS (faq) 1511. StoraGe and downtime maintenance 1612. Service life of lithium ion batterieS 1613. diSpoSal and recyclinG 1714. warranty and cuStomer Service 183Remark: we strongly recommend using standard car power inverter for a better user experience.423congratulations on purchasing kodak portable power Station ppS100 a plug-and-play power supply for outdoor use. with 84 watt-hours of stored energy, you can keep appliances, or electronic devices running.the kodak ppS100 portable power Station is designed to keep you powered up outdoor in your rvduring emergencies or power outages.Note the following points while reading through this instruction manual:• this manual was prepared with care and to the best of our knowledge.contact us should you have any questions relating to the product.• this manual may not be copied or duplicated, except for personal use.Disclaimer• our company cannot be held liable for damages caused by fire, earthquake, use by a third party, otheraccidents, intentional misconduct on the part of the customer, abuse or other abnormal conditions.• do not repair any damage to the ac plug or power supply on your own.• the warranty covers all terms and conditions of the warranty. contents that are not specified in thewarranty terms and conditions are beyond our responsibility.• our company assumes no liability for damages caused by incorrect use or non-compliance with thisinstruction manual.• this instruction manual, as well as other language versions can be downloaded as a pdf file on ourwebsite: .• Intended use: the kodak portable power Station ppS100 unit is intended as a power supply for elec-tronic devices with a maximum power consumption of 100 w. our product is not suitable to be usedwith equipment that relates to one‘s own personal safety or which relies heavily on electricity, suchas medical devices, equipment for nuclear facilities, the manufacture of air and spacecraft, etc. wetherefore assume no liability for accidents involving personal safety, fires or machine failures causedby using our product with the aforementioned devices.4observe these instructions to ensure safe usage.Explanation of symbols• Serious injuries include blindness, burns, electric shock, fractures, poisoning, etc., which can lead tocomplications, hospitalization or permanent treatment.• Injuries include burns, electric shock, etc., which do not lead to hospitalization or permanent treat-ment.• Property damage: includes buildings, belongings and pets, etc.this device complies with part 15 of the fcc rules. operation is subject to the followingtwo c onditions: (1) t his d evice m ay n ot c ause h armful i nterference, a nd (2) t his d evice m ustaccept any interference received, including interference that may cause undesiredoperation.5Do NOT disassemble, repair or modify the unit or the battery.doing so may result in electric shock, fire, etc.Do NOT place the unit close to or in a fire or expose it to heat. Keep out of direct sunlight.doing so may result in fire or injuries.Do NOT charge, use or store the unit in a bathroom or in an area exposed to rain or moisture.doing so may result in electric shock, fire, etc.Only use the output socket to power external devices. Never connect the output to mains power under any circumstances.connecting to the mains may lead to electric shock, injuries or fire.Do NOT touch the unit or the plug-in points if your hands are wet.doing so may result in electric shock.Do NOT connect any metallic objects to the AC input or output.doing so may result in electric shock, fire, etc.Do NOT rub your eyes if fluid from inside the unit should get in your eyes.if this should occur, flush eyes with water and seek medical attention immediately.this can lead to blindness.Do NOT dispose the unit together with household waste.follow the local law to dispose the unit.Do NOT use any inappropriate power cords.doing so may result in electric shock, fire, etc.Do NOT operate the unit above the specified input voltage.doing so may result in electric shock, fire, etc.Do NOT use the unit if it is not functioning correctly.doing so may result in electric shock, fire, damage to the unit, etc.Do NOT move the unit if it is recharging or in use.doing so may result in electric shock, damage to the unit or other injuries.6Use and store the unit only in a clean and dry environment. Do not use and store in dusty and wet environment.failure to do so may result in a short circuit, smoke or fire if metal dust or small metallic parts come in contact with the connections.Check the unit prior to every use. Do not use the unit if it is damaged, broken.if you notice that the unit has any damage or cracks, is broken, or has other abnormalities, do not cont-inue to use the unit and contact your dealer or our customer service center.Do not use the unit if the power cord is damaged or broken.Keep the unit away from children. Do NOT let children use the power supply unit.doing so may result in an accident or injuries. this unit must not be used by children. the unit and its connection cables must be kept out of reach of children. children must not play with the unit.this unit may only be used by persons with reduced physical, sensory or mental capabilities or lack of experience and knowledge if they are monitored or have been instructed in how to safely use the unitand understand the resulting risks.Keep this product away from pets.Do NOT use or store the unit in an area or environment with high temperature.doing so may cause the unit to deform or overheat.Should fluid from inside of the unit come in contact with your skin or clothing, wash the affectedareas with tap water.contact with the fluid may result in injuries.In a storm, unplug the power cord from the socket.a storm may result in an overcurrent coming from the socket, resulting in overheating, fire or other acci-dents.Do NOT charge the unit via power supply systems that operate outside of 100-240V.that may otherwise result in overheating, fire, etc.Do NOT place the unit on its side or upside down while in use or storage.doing so may result in leakage or cause the unit to overheat leading to other accidents.7if rust, peculiar odors, overheating or other abnormal circumstances are observed, stop using the unit immediately and contact the dealer or our customer service center.The unit complies with all legal requirements for transport of dangerous goods.the capacity of the lithium battery pack in the unit exceeds 80 wh.based on international standards: if this unit is to be sent by airplane, it must be transported in accordan-ce with iata standard packaging. iata instructions and labelling requirements and the relevant declara-tions must be completed.Make sure that the unit is properly secured when transporting it in a motor vehicle.failure to do so may result in damage to the unit, electric shock, overheating, fire and other accidents.Only charge and use the unit within an ambient temperature of 0 to 40 °C (32 - 104 °F).operating the unit above or below this temperature range may result in overheating or reduced perfor-mance.Switch the unit off immediately if it has accidentally fallen, was dropped or was exposed to vibra-tions.to prevent accidents, please contact the dealer or our customer service center to have the unit checked and repaired.Carefully read the instructions for the electric devices that you intend to connect to your power supply unit.Make sure that the device you are connecting is switched off before you connect it.a device starting up suddenly may lead to accidents or injuries.if the protective function is activated and the output of the device is switched off, disconnect the electric devices from the power output. Switch the unit off in case of non-use/storage in order to prevent electric shock and the battery from discharging unnecessarily, etc.891. Carry the unit with both hands.2. Placing the unit on a stable surface.3. Transporting the device.10220V 85W AC OutputFans utType-C port(input/output)USB OutputDigital IndicatorON/OFF Button QC3.0 OutputREMARKS1. press the button to turn on the digital indicator.2. press and hold the button for 2 seconds to turn ac outlet on/off.3. dc ports charge the devices automatically..4. we strongly recommend using standard car power inverter for a better user experience.11before use or storage, plug your kodak ppS100 into the wall until it is fully charged. if the display shows less than 20% capacity, plug it into a power source, like an ac outlet or a solar panel as soon as possible....and many morethe lcd display indicates the percentage of total charge remaining in your kodak ppS100.6.1. WHAT IT CAN POWER digital indicator 5w light ~13 hrs iphone 7~7 recharges Gaming console ~3 recharges 12“ macbook ~1.2 recharges 6.2. DIGITAL INDICATOR12use the uSb wall charger provided and plug your kodak ppS100 into any outlet.when the digital indicators displays 100, the kodak ppS100 is fully charged. this takes about 7 hours.7. TECHNICAL SPECIFICATIONSTrack the remaining batteypress the power button once to check the battery level from lcd display. to ensure you never run out of power, please recharge kodak ppS100 before use or storage. highly recommend to recharge kodakppS100 at least once every 3 month.Recharge your KODAK PPS100use the ac adapter and uSb c cable provided to recharge your kodak ppS100.Charge your devicescharge your mobile phone, tablet, console etc. from the uSb port.(qualcomm® quick charge™ 3.0 just for compatible devices)How to use AC outlet• press and hold the button for 2 seconds to activate the ac socket.• plug your ac appliance into the kodak ppS100‘s ac socket to power your the laptop, outdoor lights, etc.• press and hold the button for 2 seconds to turn off ac power.What to power from KODAK PPS100• uSb: Smart phones, tablets, e-readers, digital cameras, mp3-players, etc.• ac: laptops, Small applicances etc.• REMARKS: the power consumption of your device will determine the length of time that your ko-dak ppS100 will be able to supply it with power.How to use KODAK PPS1001. press the button to turn on the digital indicator2. press and hold the button for 2 seconds to turn ac outlet on/off3. dc ports charge the devices automaticallyBest-use strategy• when recharging devices with kodak ppS100, you should take note of the digital indicator.• if you plug in devices that have a high power requrement, the charge level of kodak ppS100 can drop quickly and you will not be able to extract the entire 84wh of energy.• on the other hand, if you’re charging devices that draw power more slowly(tablet or smartphone), you will be able to extract close to the full 84wh from kodak ppS100. if yor’re experiencing shorterren times, you can check the device’s power requirement.13Appropriate temperature usage• Charge protection: kodak ppS100 can charge your device when the ambient temperature is bet-ween 0 - 40°c. outside this temperature range, the system automatically stops charging but willrestart once the temperature is back inside the acceptable range.• Discharge protection: kodak ppS100 can power your devices when the ambient temperature is between 0 - 40 °c. outside this temperature range the system automatically stops charging yourdevice but will restart once the temperature is back inside the acceptable range.9. TROUBLESHOOTINGIf your devices are not recharging as they should using KODAK PPS100 follow these steps:1. ensure the device has been switched on and the led is showing the percentage of remaining charge.2. check the battery display. if it is at 20% or below, recharge your kodak ppS100.3. verify your device is suitable for use with the kodak ppS100.a. all kodak ppS100 output ports have their own max. power. check the kodak ppS100’s technicalspecifications to ensure your device is compatible.b. Some devices with rechargeable batteries, like laptops and tablets, may draw more power when inuse. in these cases, power down your device and recharge it.What should I do if the unit gets wet?immediately turn off the unit and wait until you are certain that it is completely dry before turning it backon. if you are unsure about when it is safe to turn it back on, please contact after sales service.141. What type of battery is in my KODAK PPS100?kodak ppS100 contains a 84wh lithium ion battery pack. lithium ion batteries are much smaller andlighter than normal lead-acid batteries and also can be cycled many more times.2. How do I know if my KODAK PPS100 is charged?to check the charge level of your kodak ppS100, refer to the digital indicator display. the number yousee on the display indicates the percentage of total charge remaining. press the power button to viewthis display. kodak ppS100 can be used until it is empty but we recommend to recharge when the levelis below 20%.3. Can I charge the KODAK PPS100 while supplying power at the same time?yes and no. the ac output supports simultaneous charging and discharging. please note, however, thatthis only makes sense with a remaining battery capacity of more than 10%. the uSb ports will not workwhile the device is charging.4. Can I take my KODAK PPS100 on a plane?yes, it is possible to carry the kodak ppS100 in your hand luggage. but please always check the individual restrictions of your airline. however, keeping the kodak ppS100 in the checked baggage is not permittedfor safety reasons as it contains lithium ion batteries.151. Charging to maximum capacityfully charge the power supply unit prior to long-term storage. charge the power supply unit at least onceevery three months and store the power supply unit only in a dry and dust-free environment which is outof reach of children. Suitable storage temperature: -20 to 40°c (-4 - 104 °f). keep out of direct sunlight.make sure that the unit rests on a stable surface.2. System shutdownif the system shuts down automatically because of lower battery capacity, please recharge it.3. Cleaningwipe away any dirt using a damp cloth.4. Failurefailure to maintain your kodak ppS100 by following these steps can result in battery damage which willvoid the product warranty.12. SERVICE LIFE OF LITHIUM ION BATTERIESCharge, supply current between 0 and 40°C (32 - 104 °F). Store between -20 and 40°C (-4 - 104 °F).using the battery at temperatures outside the lower and upper limits reduces the battery‘s running time.Do not connect a continuous load of more than 100 W.the unit‘s output stops automatically in case of overloading, since it reduces the running time of thebattery.Do not continue to charge the battery after it has charged completely.pay attention to the indicated capacity. do not charge the battery once it has been fully charged or thecharging process has been concluded. otherwise the service life of the lithium battery may be reduced.Switch off the unit if it is not being used.unnecessary power consumption also reduces the running time of the lithium battery.Fully charge the battery prior to placing it in storage.fully charge the power supply unit prior to lengthy periods of non-use for storage and recharge the unitat least once a year. after prolonged storage, it may be necessary to charge and discharge the batteryseveral times in order to reach full capacity.1617Lithium ion battery as soon as the end of the battery‘s service life is reached, the entire lithium ionbattery can be recycled. do not open or disassemble the unit.Electric device old electric devices may not be disposed together with normal household waste. according to the directive 2012/19/eu, the device must be disposed of in a controlled manner at the end of its service life. the recyclable materials contained in the unit shall be sent to recycling to reduce the burden on the environment.this unit contains lithium ion batteries. these are hazardous materials and are subject to specific trans-port and handling regulations. lithium ion batteries may ignite or explode if handled incorrectly.for the safe disposal of the unit, contact a collection point or your local municipality for more information and indicate that the unit contains lithium batteries.Package the product package consists of recyclable materials. dispose of these in an environmentally friendly manner and sort the materials in the provided collection systems.REPAIR TERMS AND CONDITIONS1. in the case of device failure which can be attributed to poor workmanship, please take the original sales receipt with purchase date (invoice, etc.) to the retail store. in case of normal use, the power supply unit will be repaired or replaced free of charge within the two year warranty period. in additi-on to that, the customer must bear any shipping charges that may occur.2. the repair is not free of charge in the following cases, even within the warranty period.• a warranty card or certificate or sales receipt with purchase date (invoice, etc.) is not presented.• the equipment failure was caused by improper use (including use that does not comply with the instructions set forth in the manual).• defects were caused by improper repairs, modifications, disassembly, etc.• equipment failure was caused by careless operation (dropping/falling/impact/contact with fluids/ deposits - on the inside or outside of the machine) or improper maintenance (mildew, dust, etc.).• damage was caused by use of unit for purposes other than intended (charged and recharged more than 300 times, etc.)• equipment failure occurred due to external influences, such as power supply or other electric devices and/or damage during inspection or repair.• faults that can be attributed to causes that are not cited above are beyond our scope of respon-sibility.3. note that we do not assume any liability for consequential damages (foreseeable damages, psy-chological damages, etc.).Contact distributor for technical support/customer service1819GBT GMBH© 2019 Gbt Gmbhan Gut nazareth 18a, 52353 düren, Germany | phone: 02421 / 20856-0the kodak trademark, logo and trade dress are used under license from kodak. qualcomm is a trademark of qualcomm incorporated, registered in theunited States and other countries. quick charge is a trademark of qualcomm incorporated. all information contained in this document is subject to change without notice.。
Edelbrock Performer Cylinder Head profit魔甘说明书
PLEASE study these instructions carefully before beginning this installation. Most installations can be accomplished with common tools and procedures. However, you should be familiar with and comfortable working on your vehicle. If you do not feel comfortable performing this installation, it is recommended to have the installation completed by a qualified mechanic. If you have any questions, please call our Technical Hotline at: 1-800-416-8628, 7:00 am - 5:00 pm, Pacific Standard Time, Monday through Friday.IMPORTANT NOTE: Proper installation is the responsibility of the installer. Improper installationwill void your warranty and may result in poor performance and engine or vehicle damage.DESCRIPTION: This new Performer cylinder head is designed as a bolt-on performance upgrade for 1987-2006 Jeeps with a 4.0L inline six cylinder engine. The Performer Jeep 4.0L is designed with 1991-2006 4.0L intake port locations and must be used with 1991-2006 intake manifold. The Performer Jeep 4.0L is designed with 1991-98 4.0L exhaust port locations and must be used with 1991-98 factory header or aftermarket exhaust header. This cylinder head will also fit 1976-90 AMC 4.2L engines with no modification to the water jacket and the appropriate intake manifold and header combination.The Performer Jeep cylinder head features all-new better flowing intake/exhaust ports along with a modern combustion chamber design and backcut and swirl polished valves. It retains the stock valve angle, pushrod length and valve cover rail height for use with factory components and off the shelf accessories. It also features larger reinforced rocker bosses for improved strength at high RPM and Heli-Coil® threaded inserts in the manifold bolt holes for added strength. A 3/4” deck throughout the head also promotes stiffness and durability. This cylinder head is machined to accept either distributor or coil pack ignition.NOTE: Complete cylinder head, #50169, is assembled and prepared for installation right out of the b ox. Bare head, #50159, is shipped with reamed and semi-finished valve stem guides and seats. Bare head will require final sizing and a valve job to match the specific valves being used. IMPORTANT: READ BEFORE BEGINNING INSTALLATION!For a successful installation, the Edelbrock Performer Cylinder Heads require some components other than original equipment parts. To complete your installation, you will need the following items:q Head Gasket Set: Edelbrock #7350q Head Gasket: Edelbrock #7348 or equivalentq Intake/Exhaust Manifold Gaskets: Edelbrock # 7275 or equivalentq Valve Cover Gasket: Edelbrock #7583 or equivalentq Head Bolt Kit: Edelbrock #8533 or equivalent CHECKING PISTON-TO-VALVE, VALVE-TO-BO R E AND PISTON-TO-HEAD CLEAR ANCES: Prior to installation, it is highly recommended that valve-to-piston clearances are checked and corrected to minimum specs, if necessary. These cylinder heads have stock valve sizes and will work with the valve pockets in stock pistons. Actual valve-to-piston clearance should be specified by your camshaft manufacturer. Valve-to-bore clearance should also be checked, and the top of the bore notched for clearance, if necessary (Min Clearance 0.030”). ACCESSORIES: Although Edelbrock Cylinder Heads will accept OEM components (valve cover, intake manifold, etc.), we highly recommend that premium quality hardware be used with your new head. Continue to next page for hardware recommendations.Head Bolts or Studs: High quality head studs or head bolts with hardened washers must be used to prevent galling of the aluminum bolt bosses. Edelbrock head bolt kit, #8533, includes all bolts which must be used with this cylinder head.Rocker Arms and Valve Train: These heads are designed to use stock rocker arm and valve train components.Valve Covers: This Edelbrock Performer cylinder head is designed to accept factory style valve cover.Intake Manifold: This Edelbrock Performer cylinder head must be used with 1991-2006 intake manifold. To install the manifold, clean gasket surfaces. Install gasket and intake manifold to factory specifications. Torque to recommended manufacturer’s specifications in the factory sequence. Refer to factory service manual.Exhaust Headers: This Edelbrock Performer cylinder head must be used with 1991-98 factory header or aftermarket exhaust header.Spark Plugs: Use 14mm x 3/4” reach gasketed spark plugs. Heat range will vary by application.NOTE: Use anti-seize on the plug threads to prevent galling in the cylinder head, and torque to 10 ft./lbs. Do not overtighten sparkplugs! If short reach plug is used, poor performance and possible engine damage may occur.INSTALLATION: Installation is the same as for original equipment cylinder heads. Consult service manual for specific procedures, if necessary. Be sure that the surface of the block and the surface of the head are thoroughly cleaned to remove any oily film before installation. Use alcohol or lacquer thinner on a lint-free rag to clean. Apply oil or suitable thread lubricant to head bolt threads and the underside of bolt heads and washers. Torque cylinder head bolts in three steps following the factory tightening sequence (See Figure 1). Edelbrock LLC • 2700 California St. • Torrance, CA 90503Tech Line: 1-800-416-8628Fig. 1 - Cylinder Head Bolt Tightening SequenceEdelbrock Cylinder Head Bolt Torque Spec(Torque specs below only apply if using ARP Ultra-Torque Fastener Assembly Lubricant; included with head ARP head bolt kits. If using other fastener lubricant(s), please use manufacturer’s recommended torque specs.)*NOTE: Make sure to use thread sealant on bolt #11 as it goes into a water jacket.First Pass: Torque all bolts, in sequence, to 25 ft./lbs.Second Pass: Torque all bolts, in sequence, to 40 ft./lbs.Final Pass: Torque all bolts, in sequence, to 80 ft./lbs..NOTES: A head bolt re-torque is recommended after initial start-up and cool-down (allow 2-3 hours foradequate cooling).SPECIFICATIONS:Head Bolt Torque:See Figure 1, or use head bolt manufacturer’s specifications Deck Thickness:3/4”Combustion Chamber Volume: 55 ±1ccValve Size (Except for 61169): Intake - 1.910” Exhaust - 1.500”Valve Seats:Hardened powdered metal, non-interlocking, compatible with unleaded fuel Valve Spring Diameter:1.265”Valve Spring Installed Height:1.720”Valve Spring Seat Pressure:**************************”Valve Spring Open PressureFlat Tappet Cam 260 lbs. @ .400” Lift Max. Valve Lift: .540”Coil Bind 1.120”Replacement Valve Springs: #5814 - Flat Tappet Cam。
热顶2双口缸说明书

Hot Top 2 Dual Dispenser User GuideThis dispenser is the property of Gehl Foods, LLC. IT MAY NOT BE RESOLD. Under the terms ofthe lease, only Gehl’s sauces may be used in the dispenser.For all customer service inquiries (including FREE parts, point-of-sale, questions or to return thedispenser, call customer service at 1(800)521-2873, or visit . Please have yourdispenser serial number found on back of the dispenser.Pan Lid Valve Guard Weights Bag Cap Opener / Puncture Tool ValveGehl’s 80 oz Product Important Note: 80 oz bags of sauce will require a puncture tool for opening the inner seal once the outer cap has been removed. Please use with CAUTION, as the puncture tool is sharp.Lid & Valve Guard will matchthe color of your dispenser Disposable valves included with 80 oz Product USE CAUTION: CONTENTS HOTpre-heating sauce Preheat a bag of sauce to 140°F before opening. The Gehl’s Hot Top 2 Dual Dispenser takes 4-6 hours to preheat an UNOPENED bag to the proper temperature in a heated dispenser.PartsRev01/18/2023loading the dispenser 1.Once the bag of sauce reaches at least 140°F , remove the outer cap and puncture the inner seal with the BagCap Opener/Puncture Tool provided. To puncture the seal, simply insert the tool completely and twist.2.Attach the valve to the tment on the bag and fasten securely using the screw collar. The valveopening should be facing down toward the short end of the bag - see photo at right.3.Place the bag of sauce in the dispenser. Align the valve between the dispenser pan using theguides on the side of the valve. Lower the bag and push the valve down into the U-shaped grooveuntil it is securely in place.4.Place a weight on top of the dispensing bag. Note: When product gets low, add an additional bag for preheating.The heated shelf life begins as soon as sauce is heating (see hot hold times in “Important Information”)5.Place the lid on the dispenser, and check to see that the valve guard is in place. If not, slide valve guard onto the tracks below the dispensing valves. Lid and valve guard are necessary for proper heating.**NEVER LEAVE A DISPENSER OPERATING WITHOUT THE LID AND VALVE GUARD IN PLACE**bag replacement 1. When the sauce ow begins to slow, remove the lid & weight and reposition the bag of sauce. Roll the top of thebag down while moving sauce toward the spout. Replace the weight and lid. Note: A second bag can bepreheated at this time. Place on top of the dispensing bag and replace weight. This will maximize ow.2. When a bag of sauce is empty, remove it from the dispenser and throw it away.3.Repeat the steps in “Loading the Dispenser” section.important information:•Prior to loading, write the date you are loading product into the dispenser on the bag witha permanent marker.•Hot holding times are: 5 days for yellow Cheese sauces, 3 days for white and 7 days for Chili•Note: The machine must be on and heating the entire time opened sauce bags are being held in itquestions?Visit or call 1 (800) 521-2873HOlding temperature • Gehl’s dispensers hold sauce at 140°F (min) when the lid and valve guard are properly in placeon the dispenser.• Temperature check procedure: Remove the heated bag of sauce from the dispenser. Whileholding the bag upright, remove the valve from the bag. Insert a sanitized thermometer directlyinto the sauce through the bag opening.*THE THERMOMETER ON THE OUTSIDE OF THE DISPENSER DOES NOT REFLECT THE TEMPERATURE OF THE SAUCE.*maintenance • Every morning before using - clean the valve and remove any excess air from the valve.- Wipe down the outside of the dispenser with a damp, clean cloth.- Remove and wash the valve guard with a damp, clean cloth.• As needed - before cleaning the inside of the dispenser, unplug and let cool. Wipe down with a damp, clean cloth. - Dry thoroughly before plugging unit back in.sauce storage Gehl’ sauces are shelf stable. Store unopened bags below 90°F, DO NOT FREEZE.Refrigeration • If refrigeration is necessary, remove the valve from the bag and reseal with the original cap.• When refrigerating, product must be cooled rapidly. For food safety, sauce chilled to 70°F within 2 hours or less and 40°F within 4 hours.• Sauces may be held in refrigeration for up to 7 days if maintained between 38°F and 42°F.re-heating • When reheating for serving, sauce must be heated rapidly. For food safety, sauce must reach 165°F within 2 hoursbefore it can be served.**COOLED SAUCE WILL NOT ACHIEVE 165˚F WITHIN TWO HOURS IN THE DISPENSER**• Alternate heating methods: Steamer over or hot water bath. DO NOT boil or microwave bags.• NOTE: Sauce can only be cooled and reheated once per bag **FOR FOOD SAFETY, THE DISPENSER NEEDS TO REMAIN PLUGGED IN WHEN SAUCE IS IN DISPENSER**GEHL FOODS, LLC, PO BOX 1004 GERMANTOWN, WI 53022 · FOR NUTRITION FACTS VISIT: Free Parts and Replacements Program*Gehl’s will provide FREE replacement parts for the life of the dispenser. The lid, valve guard, inside pan, weights, push buttons, bag opener and puncture tool are all Free replacement parts. Even the shipping is FREE. If the unit stops heating or the main housing breaks within the rst 3 years, Gehl’s will provide a replacement dispenser to you for FREE. If it is within the rst year, even the shipping is FREE. If the unit is 2 to 3 years old, a fee for shipping and handling applies for the replacement to be sent to you, but the return shipping of the nonfunctioning dispenser is FREE. Also, Gehl’s point-of-sales (POS) material is FREE and includes FREE shipping.*Certain restrictions apply. FREE shipping is ground service within the continental U.S. only, using a carrier of Gehl’s choice; replacement dispensers may be remanufactured dispensers; and a FREE replacement is available only if your dispenser hasn’t been damaged due to misuse, negligence or misconduct. Contact Gehl’s for additional information. This program is subject to change without notice. *If you have any questions or issues, please call our customer service line toll free at 800-521-2873 and let us help you.。
HOD精英2000版说明书
HOD点歌机说明书安全须知感谢您使用此卡拉OK点唱机!为方便您正确安全的使用和操作,请先详细阅读该手册并妥善保管,以备今后参考!本机内有高压电源,使用不当,有可能引起火灾及触电,严重者可能导致重伤及生命安全,请仔细阅读以下注意事项,注意操作。
设置场所请将本机置放在稳定的支架上使用,不可在颠簸、振动的环境中使用,如因人为跌落所造成的损坏,不予保修。
请勿将本机置于有水份或潮湿环境中,不要将本机暴露在雨雪中,以免引起火灾或机器故障。
请勿将本机置于阳光直晒或温度高的地方。
请将本机放在通风良好处,以免发生故障。
请勿将本机置于靠近发热产品及有磁性的物体附近,以免影响机器正常使用。
使用勿用湿手触摸电源。
拔电源时,请勿强拉电线,请将插头拔离插座。
为了你的安全,请勿自行拆卸本机外壳。
不可使用汽油、酒精等液体清洁剂,用柔软的干抹布擦拭即可。
长时间不使用此机时,请拔出电源插头。
其它为防止触电,有可靠的电源保障,请使用宽片插头宽槽插座相配并确保接插牢靠。
使用完本机后,请关闭电源。
如发现异常,请与各地经销商或我公司客服中心联系。
本机不适用儿童操作,请务必在大人指导下进行操作。
温馨提示未经我公司或我公司授权单位的认可同意,任何对本机的改装及变动都可能对用户的使用带来诸多不便。
功能特点1,支持超大硬盘高达2TG2,幻影同屏功能3,在线时尚换肤功能4,支持光电鼠标,点歌面板,红外点歌触摸屏5,单屏双屏同时使用功能,同时点歌互不影响6,支持串口(SATA)硬盘除了具有以上双屏硬盘点歌机的常见普通功能外,新版双屏硬盘点歌机还具有六大专业功能:1,支持播放格式多:除了解码AVI视频外,还能完美支持解码MPEG1/2(5M以下)的节目格式,支持多音轨的AVI节目。
2,超强专业后台管理工具:任意语言WIN系统运行,完美运行,不会出现任何乱码。
自动扫描生成最新歌库,通过USB连接卡拉OK点唱机,几分钟就可以更新好歌库数据机顶盒歌曲文字,简体繁体任意切换输出。
KOBE Range Hoods 德尔克斯系列产品安装指南与操作手册说明书
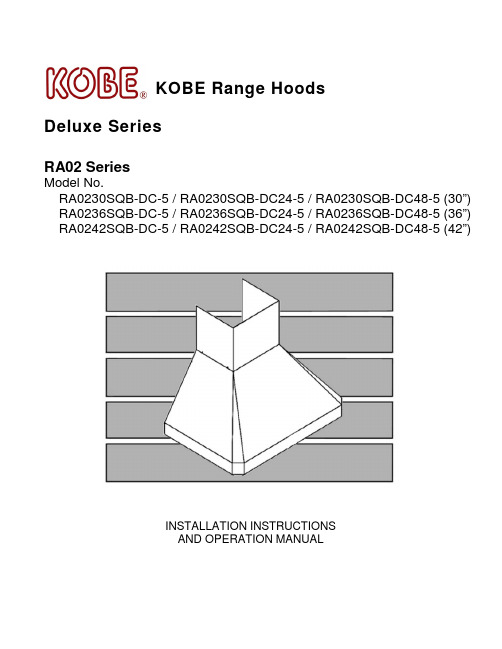
KOBE Range HoodsDeluxe SeriesRA02 SeriesModel No.RA0230SQB-DC-5 / RA0230SQB-DC24-5 / RA0230SQB-DC48-5 (30”) RA0236SQB-DC-5 / RA0236SQB-DC24-5 / RA0236SQB-DC48-5 (36”) RA0242SQB-DC-5 / RA0242SQB-DC24-5 / RA0242SQB-DC48-5 (42”)INSTALLATION INSTRUCTIONSAND OPERATION MANUALREAD BEFORE INSTALLATION1. Carefully check all contents of packages.2. Thoroughly inspect the unit for any shipping damages, cosmeticdamages or defects.3. Have a certified contractor/electrician test the unit before installation. IF THERE IS ANY PROBLEM:1. DO NOT INSTALL THE UNIT AND KEEP ALL ORIGINALPACKAGING MATERIAL.2. Have your original invoice as proof of purchase and product serialnumber ready.3. Contact your merchant for product replacement due to shippingdamages, cosmetic damages or defects.4. For other issues, email *********************************** orcall 1-626-775-8880 ext. 103, toll free 1-877-289-5623.1.2.3.[ENGLISH]- READ AND SAVE THESE INSTRUCTIONS -CONTENTSIMPORTANT SAFETY INSTRUCTIONS (1)COMPONENTS OF PACKAGE (3)INSTALLATION (4)OPERATION INSTRUCTIONS (8)MAINTENANCE (9)SPECIFICATIONS (10)MEASUREMENTS & DIAGRAMS (12)PARTS LIST (12)CIRCUIT DIAGRAM (16)TROUBLE SHOOTING (17)WARRANTY (18)PRODUCT REGISTRATION (20)- READ ALL INSTRUCTIONS CAREFULLY BEFORE STARTING -A L L W I R I N G M U S TB E D O N E B Y A P R O F E S S I O N A L A N D I NA C C O R D A N C E W I T H N A T I O N A L A N D L O C A L E L E C T R I C A L C O D E SIMPORTANT SAFETY INSTRUCTIONS- PLEASE READ THIS SECTION CAREFULLY BEFORE INSTALLATION - WARNING: TO REDUCE THE RISK OF FIRE, ELECTRIC SHOCK OR PERSONAL INJURY, OBSERVE THE FOLLOWING:1) Installation and electrical wiring must be done by qualified professionals and in accordance with allapplicable codes and standards, including fire-rated construction.2) When cutting or drilling into wall or ceiling, be careful not to damage electrical wiring or other hiddenutilities.3) Ducted fans must be vented to the outside.a) Before servicing or cleaning unit, open the light panel and SWITCH POWER OFF AT SERVICEPANEL.b) Clean all grease laden surfaces frequently. To reduce the risk of fire and to disperse air properly,make sure to vent air outside. DO NOT vent exhaust air into wall spaces, attics, crawl spaces or garages.NOTE - This warranty is invalid without an authorized agent’s receipt or if unit isdamaged due to misuse, poor installation, improper use, mistreatment,negligence or any other circumstances beyond the control of KOBERANGE HOODS authorized agents. Any repair carried out without thesupervision of KOBE RANGE HOODS authorized agents willautomatically void the warranty.- KOBE RANGE HOODS will not be held responsible for any damages topersonal property or real estate or any bodily injuries whether causeddirectly or indirectly by the range hood.WARNING: TO REDUCE THE RISK OF PERSONAL INJURY IN THE EVENT OF A RANGE TOP GREASE FIRE:1. Keep all fan, baffle/spacer/filter/oil tunnel/oil container and grease-laden surfaces clean. Greaseshould not be allowed to accumulate on fan, baffle/spacer/filter/oil tunnel/oil container.2. Always turn hood ON when cooking.3. Use high settings on cooking range ONLY when necessary.4. Do not leave cooking range unattended when cooking.5. Always use cookware and utensils appropriate for the type and amount of food prepared.6. Use this unit only in the manner intended by the manufacturer.7. Before servicing, switch power off at service panel and lock service panel (if possible) to preventpower from switching on accidentally.8.Clean ventilating fan frequently.What to Do In The Event Of a Range Top Grease Fire• SMOTHER FLAMES with a tight fitting lid, cookie sheet, or metal tray, and then turn off the burner.KEEP FLAMMABLE OR COMBUSTIBLE MATERIAL AWAY FROM FLAMES. If the flames do not go out immediately, EVACUATE THE AREA AND CALL THE FIRE DEPARTMENT or 911.• NEVER PICK UP A BURNING PAN – You May Get Burned.• DO NOT USE WATER, including wet dishcloths or towels – a violent steam blast will result.• Use an extinguisher ONLY if:a) You have a Class A, B, C extinguisher and know how to operate it.b) The fire is small and contained in the area where it started.c) The fire department has been called.d) You can fight the fire with your back to an exit.What to Do If You Smell Gas- Extinguish any open flame.- Do not try to turn on the lights or any type of appliance.- Open all doors and windows to disperse the gas. If you still smell gas, call the Gas Company and Fire Department right away.CAUTION1) For general ventilation use only. Do not use to exhaust hazardous or explosive materials and vapors.2) To reduce the risk of fire, use only metal ductwork. Sufficient air is needed for proper combustion andexhausting of gases through the flue (chimney) to prevent back drafting.3) Follow the heating equipment manufacturer’s guideline and safety standards such as those publishedby the National Fire Protection Association (NFPA), and the American Society for Heating, Refrigeration and Air Conditioning Engineers (ASHRAE), and code authorities.4) Activating any switch on may cause ignition or an explosion.5) Due to the size and weight of this hood, two people installation is recommended.ELECTRICAL SHOCK HAZARD – Can result in serious injury or death.Disconnect appliance from electric power before servicing. If equipped,the fluorescent light bulb contains small amounts of mercury, which mustbe recycled or disposed of according to Local, State, and Federal Codes.COMPONENTS OF PACKAGE(Must keep all material for returns or refunds){A} KOBE Range Hood{B} Warranty Registration Card{C} Quick Reference Guide{D} Oil Tunnel{E} Baffle Filter x 2 (30” & 36”)x 3 (42”){F} Spacer{G} 8” Round Exhaust Plate (42” only){H} Screws Package{I} Hood-Mounting Bracket{J} Screws Package{K} Duct Cover (Model No. RA02DC-1){L} Wire Cap{M} Screws Package{A}{B}{C}{D}{E}{F} {G}{H}{I} {J}{K} {L}{M}{N} Inner Duct Extension(Model No. RA02DC-24-1){O} Duct Cover Mounting Bracket{P} Screws Package{N} {O} {P}{Q} Outer Duct Extension(Model No. RA02DC-24){Q}- FOR MORE INFORMATION, PLEASE VISIT OUR WEBSITE OR CONTACT KOBE RANGE HOODS AT (626) 775-8880.Wire caps (3)M4 x 1-1/2” (4)M4 x 1-1/2” (2)30” & 36” 42”INSTALLATIONPLEASE READ ENTIRE INSTRUCTIONS BEFORE PROCEEDINGCalculation before InstallationCalculate the length of the installation, before installing the hood. (All calculation is measure in inches.)- FOR STAND ALONE -TABLE 1 ArrayA = Height of Floor to CeilingB = Height of Floor to Counter Top(Standard: 36”)C = Preferred Height of Counter Top to HoodBottom30” & 36” Hood (Recommended 27” to 30”)42” Hood (Recommended 30” to 36”)[(A – B] – (D + E)]D = Height of HoodE = Height of Duct CoverSAFETY WARNINGHOOD MAY HAVE VERY SHARP EDGES; PLEASE WEAR PROTECTIVE GLOVES IF IT ISNECESSARY TO REMOVE ANY PARTS FOR INSTALLING, CLEANING OR SERVICING.NOTE: BE CAREFUL WHEN USING ELECTRICAL SCREWDRIVER, DAMAGE TO THE HOODMAY OCCUR.NOTE: TO AVOID DAMAGE TO YOUR HOOD, PREVENT DEBRIS FROM ENTERINGTHE VENT OPENING.Decide the location of the venting pipe from the hood to the outside. (Figure 1)A straight, short venting run will allow the hoodto perform more efficiently.Try to avoid as many transitions, elbows, and long run as possible. This may reduce the performance of the hood.Temporarily wire the hood to test for proper operation before installingImportant:Peel protective film off the hood and the duct cover (if any).If necessary, prepare back wall frame with cross framing lumber for secure installation. Refer to Table 2 and measurements on Page 12 to decide the level of the lumber. (Figure 2)Loosen hood-mounting brackets at the back of the hood, adjust brackets and tighten screws.If necessary, remove the rubber stand on the back of the hood. (Figure 3)Figure 1 Figure 2 Figure 3CAUTION: If required to move the cookingrange to install the hood, turn off the poweron an electric range at the main electricalbox. SHUT OFF THE GAS BEFOREMOVING A GAS RANGE.1. Using references in Table 1 and measurementson Page 12, mark the leveling locations point for hood-mounting bracket on the wall.2. Secure two mounting screws (provided) to thewall, leaving an 1/8” space from the wall.3. Align the hood-mounting bracket to themounting screws on the wall and hang hood into place.4. Secure and tighten the mounting screws.CAUTION: MAKE SURE HOOD IS SECUREBEFORE RELEASING.Wiring to Power SupplySAFETY WARNINGRISK OF ELECTRICAL SHOCK. THIS RANGE HOOD MUST BE PROPERLY GROUNDED. MAKE SURE THIS IS DONE BY SPECIALIZED ELECTRICIAN IN ACCORDANCE WITH ALL APPLICABLE NATIONAL AND LOCAL ELECTRICAL CODES. BEFORE CONNECTING WIRES, SWITCH POWER OFF AT SERVICE PANEL AND LOCK SERVICE PANEL TO PREVENT POWER FROM BEING SWITCHED ON ACCIDENTALLY.5. Connect the electrical wires.- Connect three wires (black, white and green)to house wires and cap with wire connectors.Connect according to color: black to black,white to white, and green to green as shownon Figure 4.- If necessary to hide the electrical wireconnections, push wires back into the wiringbox. Access the wire connectionsunderneath the hood. To prevent anydamage, make sure wires do not slipbetween motor or any moving parts. Figure 4 Figure 5 Figure 66. Use 6” round steel pipe for 30” and 36” modelsor 8” round steel pipe for 42” model (follow building codes in your area) to connect the exhaust on the hood to the ductwork above.Use duct tape to make all joints secure and air tight. Refer Figure 5.7. Use four 4mm x 8mm screws (included) to attachduct cover to hood. Refer to Figure 6.8. Attach oil tunnel. Refer to Figure 7.9. Refer to Figure 23. Slide the baffle filter intothe hood. Push the baffle filter upward.Slide forward. Pull downward. Fit into place.10. Repeat until all baffle filters and spacers areresting against oil tunnel. Refer to page 8.11. Turn power ON in control panel. Check all lightsand fan operation.12. Make sure to leave this manual for thehomeowner. Figure 7 Figure 8OPERATION INSTRUCTIONSThis KOBE hood is equipped with two rotary controls with powerful centrifugal squirrel cage, baffle filters, and bright LED lights.The two rotary controls are Light Control & Speed Control. Refer to Figure 9.Figure 9Note: For best results, turn hood to QuietMode™ prior to preparation or cooking to establish airflow in the kitchen. Adjust speed as needed.Rotate the Speed Control clockwise to cycle from QuietMode™, Low, High, and Off;and rotate counterclockwise to cycle from High, Low, QuietMode™, and Off.Rotate the Light Control clockwise to turn on the light.MAINTENANCEFor the optimal level of operation, clean the range hood surface and baffles regularly.To Clean Hood SurfaceCAUTION: NEVER USE ABRASIVE CLEANERS, PADS, OR CLOTHS.*** Regular care will help preserve its fine appearance.1. Use only mild soap or detergent solutions. Dry surfaces using soft cloth.2. If hood looks splotchy (stainless steel hood), use an orange base cleaner to clean the surface ofthe hood. Avoid cleaner to get on the control switches. Only spread a light coating over the surface of the hood and leave on for a few minutes (do not leave on too long or this may cause damage to hood finish). Use soft towel to wipe off the cleaning solution, gently rubs any stubborn spots. Use a slightly damp towel to get rid of any cleaning solution. Use dry soft towel to dry the hood.3. To bring the glow back into a stainless steel finish, use a stainless steel cleaner.4. DO NOT allow deposits to remain for long periods of time.5. DO NOT use ordinary steel wool or steel brushes. Small bits of steel may adhere to the surfacecausing rust.6. DO NOT allow salt solutions, disinfectants, bleaches, or cleaning compounds to remain in contactwith stainless steel for extended periods. Many of these compounds contain chemicals, which may be harmful. Rinse with water after exposure and wipe dry with a clean cloth.To Clean Baffle Filters & Oil TunnelCAUTION: DRAIN BAFFLE FILTERS AND OIL TUNNEL BEFORE OIL WILL OVERFLOW.1. Remove the baffle filters and oil tunnel.2. Using a sponge, wash with warm soapy water. Dry completely before returning into place.(Note: Baffle Filters are top rack dishwasher safe.)SPECIFICATIONSMODEL / SIZE RA0230SQB-DC-5 / 30” / Single BlowerRA0236SQB-DC-5 / 36” / Single BlowerRA0242SQB-DC-5 / 42” / Dual BlowersRA0230SQB-DC24-5 / 30” / Single BlowerRA0236SQB-DC24-5 / 36” / Single BlowerRA0242SQB-DC24-5 / 42” / Dual BlowersRA0230SQB-DC48-5 / 30” / Single BlowerRA0236SQB-DC48-5 / 36” / Single Blower COLOR Commercial Grade Stainless Steel CONSUMPTION / AMPERE RA0230SQB-DC-5 – 320W / 2.86ARA0236SQB-DC-5 – 320W / 2.86ARA0242SQB-DC-5 – 350W / 3ARA0230SQB-DC24-5 – 320W / 2.86ARA0236SQB-DC24-5 – 320W / 2.86ARA0242SQB-DC24-5 – 350W / 3ARA0230SQB-DC48-5 – 320W / 2.86ARA0236SQB-DC48-5 – 320W / 2.86ARA0242SQB-DC48-5 – 350W / 3A VOLTAGE 120V 60HzNUMBER OF BLOWER 1 – 30”, 36”2 – 42”DESIGN 18-Gauge Seamless / Satin FinishFAN TYPE: CENTRIFUGAL Squirrel CageEXHAUST Top 6” Round – 30”, 36”Top 8” Round – 42”CONTROLS Rotary SwitchLIGHTS 3-Watt LED x 2 – 30”, 36”3-Watt LED x 3 – 42”HOOD DIMENSION (W x D x H) RA0230SQB-DC-5 29-3/4” x 24” x 18” RA0236SQB-DC-5 35-3/4” x 24” x 18” RA0242SQB-DC-5 41-3/4” x 24” x 18” RA0230SQB-DC24-5 29-3/4” x 24” x 18” RA0236SQB-DC24-5 35-3/4” x 24” x 18” RA0242SQB-DC24-5 41-3/4” x 24” x 18” RA0230SQB-DC48-5 29-3/4” x 24” x 18” RA0236SQB-DC48-5 35-3/4” x 24” x 18” RA0242SQB-DC48-5 41-3/4” x 24” x 18”DUCT COVER DIMENSION (W x D x H) 1) RA02DC-1 (Original Duct Cover)15” x 12” x 12”2) RA02DC-24-1 (Inner Duct Extension)15” x 12” x 24”3) RA02DC-24 (Outer Duct Extension)15” x 12” x 24”OPTIONAL ACCESSORIES (W x D x H) 1) 30” Stainless Steel Back PanelModel No.: SSP30 (30” x 32”) 2) 36” Stainless Steel Back PanelModel No.: SSP36 (36” x 32”)HOOD WEIGHT (lbs)Net Gross RA0230SQB-DC-5 55 67 RA0236SQB-DC-5 60 74 RA0242SQB-DC-5 75 91 RA02DC-1 5 7SPEED QuietMode™ Low High SINGLE BLOWERRA0230SQB-DC-5 RA0236SQB-DC-5 RA0230SQB-DC24-5 RA0236SQB-DC24-5 RA0230SQB-DC48-5 RA0236SQB-DC48-5 Air Capacity (cfm) 290 550 720 Sone* 1.8 4.7 5.4DUAL BLOWERSRA0242SQB-DC-5 RA0242SQB-DC24-5 RA0242SQB-DC48-5 Air Capacity (cfm) 450 700 1100 Sone* 2.5 6.0 8.0*One sone is equivalent to the sound of a refrigerator at 40 decibels. **Specifications subject to change without notice.MEASUREMENTS & DIAGRAMS*** All inch measurements are converted from millimeters. Inch measurements are estimated. *** All measurements in ( ) are millimeters.PARTS LISTMODEL NO.: RA0230SQB-DC-5 (30”)RA0236SQB-DC-5 (36”)RA0242SQB-DC-5 (42”)Inner Duct Extension Model No.: RA02DC-24-1 Baffle Filter for RA02 SQB-5 Series Outer Duct Extension Model No.: RA02DC-24 *Included in RA02 SQB-DC24-5 and SQB-DC48-5 Series *Included in RA02 SQB-DC48-5 Series onlyRA0236SQB-DC-5 / RA0236SQB-DC24-5 / RA0236SQB-DC48-5 (36”) RA0242SQB-DC-5 / RA0242SQB-DC24-5 / RA0242SQB-DC48-5 (42”)1 6” Round Plastic ExhaustRA0230SQB-DC-5RA0236SQB-DC-5L1-0505-0003 8” Round Exhaust Plate RA0242SQB-DC-5 L1-0505-00042 Duct Cover RA02DC-1 12-0200-012-613 LED Light (3W) L1-0403-03014 Valve Stem(LIGHT) L1-0405-0404-B 4A Valve Stem(ON/OFF) L1-0405-0402-B5 Knob L1-0405-0400-A6 Metal Oil Tunnel RA0230SQB-DC-5 B101-9130-14A Metal Oil Tunnel RA0236SQB-DC-5 B101-9136-14A Metal Oil Tunnel RA0242SQB-DC-5 B101-9142-14A7 Light Panel RA0230SQB-DC-5 B101-0230-06 RA0236SQB-DC-5 B101-0236-06 RA0242SQB-DC-5 B101-0242-068 Blower System RA0230SQB-DC-5RA0236SQB-DC-5X5-L1-0302-0120-802RO RA0242SQB-DC-5 X5-L1-0302-0120-802RE8A Motor Support RA0242SQB-DC-5 L1-0233-02429 Capacitor x 1PCSRA0230SQB-DC-5RA0236SQB-DC-5L1-0401-0120-24 Capacitor x 2PCS RA0242SQB-DC-5 L1-0401-0120-2410 LED Driver L1-0402-D00111 Capacitor Panel RA0230SQB-DC-5 L1-0201-0230 RA0236SQB-DC-5 L1-0201-0236 RA0242SQB-DC-5 L1-0201-024212 Baffle Filter L1-0214-019113 Stainless Steel Spacer {1-5/16”(33)x14-3/8”(365)} RA0230SQB-DC-5 B101-9130-15 Stainless Steel Spacer {4-5/16”(109)x14-3/8”(365)} RA0236SQB-DC-5 B101-9136-15 Stainless Steel Spacer {15/16”(23)x14-3/8”(365)} RA0242SQB-DC-5 B101-9142-15RA0236SQB-5 / RA0236SQB-DC24-5 / RA0236SQB-DC48-5 (36”)CIRCUIT DIAGRAMMODEL NO.: RA0230SQB-DC-5 / RA0230SQB-DC24-5 / RA0230SQB-DC48-5 (30”) RA0236SQB-DC-5 / RA0236SQB-DC24-5 / RA0236SQB-DC48-5 (36”)MODEL NO.: RA0242SQB-DC-5 / RA0242SQB-DC24-5 / RA0242SQB-DC48-5 (42”)TROUBLE SHOOTINGIssue Possible Cause SolutionAfter Installation, both motors and lights are not working. The power is not on. Make sure the circuit breaker and theunit’s power is ON. Use a voltage meterto check the power supply.The wire connection is not secure. Check and tighten wire connection. The control panel is defective. Replace the control panel.Lights are working, but motor(s) is not. The motor(s) is defective. Replace the motor.The capacitor(s) is defective. Replace capacitor(s).The control panel is defective. Replace the control panel.The range hood is vibrating. The blower system is not secure. Tighten the turbine impeller/squirrel cageand air chamber.The squirrel cage is not balanced. Replace the squirrel cage.Hood is not secured in place. Check the installation of hood, tighten themounting bracket.The motor is working, but the lights are not working. LED Light(s) is defective. Replace the LED light.The light wiring(s) is loose. Check wire continuity from lighttransformer to LED light housing(s). Light transformer is defective. Check power input and power output onthe light transformer. If it’s needed,replace the light transformer.The control panel is defective. Replace the control panel.The range hood is not venting out correctly. The range hood is installedoutside of the manufacturerecommended clearance.Adjust the clearance between the rangehoods and cook top to 27” to 30”. ForIsland range hood, the clearance betweenthe range hoods and cook top is 30” to36”.There is no make-up air inside thehouse.Open the window to enhance theperformance of the range hood bycreating a sufficient make-up air. Obstacle blocking the pipe work. Remove all obstacles from the duct work. The pipe size is smaller than thesuggested pipe size.Change the ducting according to themanufacture suggestion.Cold air is coming into the home. The pipe connection is notproperly sealed.Check the pipe installation.The damper is not properlyinstalled or is missing from theinstallation.Check the damper installation.The damper is not installed. By installing the damper, it will help toeliminate air backflow.WARRANTYWARRANTY CERTIFICATEIn order to obtain warranty service, you must provide proof of original purchase from a KOBE authorized Dealer. Please keep a copy of your original invoice as proof of purchase.ONE-YEAR LIMITED LABOR WARRANTY ON KOBE DELUXE SERIES:For one year from the date of your original invoice from a KOBE authorized dealer, we will repair any parts or components free of charge that failed due to manufacturing defects. KOBE reserves the right to replace, rather than repair the product free of charge at our sole discretion.It is your sole responsibility to ensure the product is readily accessible for the service technician to perform repairs. The service technician will not, under any circumstance, remove, alter or modify any fixture built around and/or connected to the product to gain access to perform repairs.TWO-YEAR LIMITED PARTS WARRANTY ON KOBE DELUXE SERIES:For two years from the date of your original invoice from a KOBE authorized dealer, we will provide non-consumable replacement parts or components free of charge that failed due to manufacturing defects. Consumable parts such as lights bulbs, filters, fuses, and oil cups are not covered by this warranty.WHAT IS COVERED:This warranty is valid in the United States and Canada. It is non-transferable and applies only to the original purchaser and does not extend to subsequent owner of this product. In Hawaii, Alaska and Canada, this warranty is limited. There may be additional shipping charges for parts and service technician travel costs in remote areas or locations 30 miles outside of KOBE authorized service area.WHAT IS NOT COVERED:1. Normal wear and tear, regular service and maintenance required for the product.2. Consumable parts such as light bulbs, filters, fuses, and oil cups.3. Chips, scratches or dents due to abuse or misuse of the product, use of corrosive andabrasive cleaning products.4. Damages caused by accident, fire, flood and other Acts of God.5. Services in remote areas or locations 30 miles outside of KOBE authorized service area.6. Labor cost incurred in connection with the removal of range hood, and reinstallation ofreplacement range hood, nor does it cover any other contingent expenses.7. Scratches inside the hood, back of the baffle filter, and inside the duct cover.THIS WARRANTY WILL BE VOIDED WHEN:1. Improper installation and failure to follow installation instructions.2. Any repair, alteration, modification not authorized by KOBE.3. Duct alteration, modification and connection.4. Incorrect electric current, voltage or wiring.5.Improper usage of the product such as commercially, outdoor or other usage other thanits intended purpose which is residential indoor usage only.6. Product is purchased from an unauthorized KOBE dealer.7. Product is damaged due to negligence, misuse, abuse, accident.If we determine that the warranty exclusions listed above applies or if you fail to provide all necessary documentation for warranty service, you will be responsible for all expenses associated with the requested service, including parts, labor, shipping, travelling, and any other expense related to the service request.TO REQUEST WARRANTY SERVICE, PLEASE CONTACT KOBE RANGE HOODS SERVICE CENTER:From the 48 contiguous states:Email (best): ***********************************Phone: 1-626-775-8880 ext. 103Toll Free: 1-877-BUY-KOBE (289-5623)From Alaska, Hawaii, and Canada:Email (best): ***********************************Phone: 1-626-775-8880 ext. 103WARRANTY INFORMATION FORMFill in the blanks and keep this paper with the original invoice in a safe place for future service purpose.1. Date of purchase :2. Model No. :3. Serial No. :For warranty service or spare parts purchase in US, contact: KOBE Service CenterEmail (best): ***********************************Phone: 1-626-775-8880 ext. 103Toll Free: 1-877-BUY-KOBE (289-5623)For Warranty service or spare parts purchase in Canada, contact: Email (best): ***********************************Toll Free: 1-626-775-8880 ext. 103Your notes:Deluxe SeriesKOBE Range Hoods11775 Clark StreetArcadia, CA 91006 USAThis KOBE hood is made for use in the USA and CANADA only. We do not recommend using this hood overseas as the power supply may not be compatible and may violate the electrical code of that country. Using a KOBE hood overseas is at your own risk and will void your warranty.Cette hotte KOBE est fabriquée pour usage aux États-Unis et au Canada seulement. Il n’est pas recommandé d’utiliser cette hotte à l’étranger puisque l’alimentation électrique pourrait ne pas être compatible et enfreindre le code de l’électricité de ce pays. L’usage de la hotte KOBE à l’étranger est à votre propre risque et la garantie sera annulée.Esta campana de extracción KOBE ha sido fabricada para ser utilizada únicamente en EE.UU. y CANADÁ. No recomendamos la utilización de esta campana en el extranjero debido a que la fuente de energía podría no ser compatible y podría violar el código eléctrico de dicho país. Utilizar una campana KOBE en el extranjero será a su propio riesgo y anulará la garantía.VER. 180208Information subject to change without notice.。
Eaton Moeller series PKZ0 旋转拨动锁定手柄说明说明书

Eaton 030851Eaton Moeller® series PKZ0 Rotary handle, lockable AK-PKZ0Allgemeine spezifikationEaton Moeller® series PKZ0 Accessory Lockable Rotary Handle03085126 mm32 mm 26 mm 0.01 kgCSA File No.: 165628 IEC/EN 60947-4-1 UL 508 ULCSA-C22.2 No. 14 CEUL Category Control No.: NLRV CSACSA Class No.: 3211-05 UL File No.: E36332Cannot be used in combination with VHI20-PKZ0.4015080308515AK-PKZ0Product NameCatalog NumberProduct Length/Depth Product Height Product Width Product Weight CertificationsCatalog NotesEANModel CodeBlackLockableFor locking motor-protective circuit-breakers PKZM0, PKZM4 and PKE as a main switch in compliance with EN 60204Lockable in the 0 (Off) position (with padlock)6.35 mm AccessoriesSwitch disconnector P-SOL and PKZ-SOL-25 °C55 °C0 W0 W0 W0 A0 WMeets the product standard's requirements. Meets the product standard's requirements. Meets the product standard's requirements. Meets the product standard's requirements.DA-DC-00004915.pdf DA-DC-00004910.pdf DA-DC-00004919.pdf DA-DC-00004886.pdf DA-DC-00004935.pdf DA-DC-00004912.pdf DA-DC-00004911.pdf DA-DC-00004890.pdf DA-DC-00004916.pdf DA-DC-00004945.pdf DA-DC-00004950.pdf DA-DC-00004913.pdf DA-DC-00004878.pdf DA-DC-00004918.pdf DA-DC-00004881.pdf DA-DC-00004917.pdf DA-DC-00004892.pdf DA-DC-00004888.pdf DA-DC-00004921.pdf DA-DC-00004885.pdfColor Features Functions Locking facility Thickness Product CategorySuitable forUsed withAmbient operating temperature - min Ambient operating temperature - maxEquipment heat dissipation, current-dependent PvidHeat dissipation capacity PdissHeat dissipation per pole, current-dependent PvidRated operational current for specified heat dissipation (In)Static heat dissipation, non-current-dependent Pvs10.2.2 Corrosion resistance10.2.3.1 Verification of thermal stability of enclosures10.2.3.2 Verification of resistance of insulating materials tonormal heat10.2.3.3 Resist. of insul. mat. to abnormal heat/fire by internalelect. effects10.2.4 Resistance to ultra-violet (UV) radiationDeclarations of conformityMeets the product standard's requirements.Does not apply, since the entire switchgear needs to be evaluated.Does not apply, since the entire switchgear needs to be evaluated.Meets the product standard's requirements.Does not apply, since the entire switchgear needs to be evaluated.Meets the product standard's requirements.Does not apply, since the entire switchgear needs to be evaluated.Does not apply, since the entire switchgear needs to be evaluated.Is the panel builder's responsibility.Is the panel builder's responsibility.Is the panel builder's responsibility.Is the panel builder's responsibility.Is the panel builder's responsibility.Not applicable.Is the panel builder's responsibility. The specifications for the switchgear must be observed.Is the panel builder's responsibility. The specifications for the switchgear must be observed.DA-DC-00004920.pdfDA-DC-00004961.pdfDA-DC-00004880.pdfDA-DC-00004937.pdfDA-DC-00004887.pdfDA-DC-00004952.pdfDA-DC-00004891.pdfDA-DC-00004953.pdfDA-DC-00004889.pdfDA-DC-00004879.pdfDA-DC-00004960.pdfDA-CE-ETN.AK-PKZ0WIN-WIN mit Push-in-TechnikProduktübersicht für den MaschinenbauSortimentskatalog Motoren schalten und schützenDA-CD-ak_pkz0DA-CS-ak_pkz0eaton-manual-motor-starters-circuit-breaker-pkzm4-dimensions.eps eaton-manual-motor-starters-pkz0-rotary-handle-dimensions.eps eaton-manual-motor-starters-rotary-handle-pkz0-rotary-handle-3d-drawing.eps10.2.5 Lifting10.2.6 Mechanical impact10.2.7 Inscriptions10.3 Degree of protection of assemblies10.4 Clearances and creepage distances10.5 Protection against electric shock10.6 Incorporation of switching devices and components 10.7 Internal electrical circuits and connections10.8 Connections for external conductors10.9.2 Power-frequency electric strength10.9.3 Impulse withstand voltage10.9.4 Testing of enclosures made of insulating material 10.10 Temperature rise10.11 Short-circuit rating10.12 Electromagnetic compatibility eCAD model Installationsvideos KatalogemCAD model ZeichnungenEaton Konzern plc Eaton-Haus30 Pembroke-Straße Dublin 4, Irland © 2023 Eaton. Alle Rechte vorbehalten. Eaton ist eine eingetrageneMarke.Alle anderen Warenzeichen sindEigentum ihrer jeweiligenBesitzer./socialmediaThe device meets the requirements, provided the information in the instruction leaflet (IL) is observed.10.13 Mechanical function。
天王椅维修手册

功能
电源滤波、保险丝及电源开关 为椅子提供相应受控电压
主控制端、控制整个椅子各个部位的动作 为气压按摩方式提供气体压力 气压按摩方式转换开关 为手控器VFD屏提供电压
的电控盒与外部部件信号转换接口 解码MP3文件、提供音频信号源
推杆: 推杆为24V DC供电,为椅子提供幅度变化
腿部推杆
背部推杆
推杆的拆卸
检测:
查看揉动电机是否动作
O
揉动电机传动带是否脱落
O
揉捏 电机
揉动霍尔是否已损坏、变形
O
磁石是否已掉落
处理:
检查对应配件是否完好
OK
O
检查连接线是否松动、完好 OK
O
更换心脏感应基板
OK
试 机
O
测试CN9端是否有电压输出 OK
O OK
更换主基板
更换揉捏电机 OK
心脏感应基板
10: 同时检测到丝杆上下限位信号
售后支持
1.主板介绍
①
一.线路板及仪表使用
7
3
2
4
1 5
6
住控制基 板
CN40 电源 插座
②
CN26, CN27, CN28主 变压器 初级
CN24 功放 电源 端
CN20, CN22 气泵 电源 端
CN10 敲打 电源 端
CN9揉捏 电源端
CN15 CN14 腿部 靠背 推杆 推杆
③
CN1320V电源端 ④
侧板推杆
推杆两端均为插销固定
拉掉卡环
拔出插销
五、腿部与靠背的拆卸
1、 靠背的拆卸
腿部固定螺丝
腿部连接插销
腿部连接气管和加热连接线
查看
- 1、下载文档前请自行甄别文档内容的完整性,平台不提供额外的编辑、内容补充、找答案等附加服务。
- 2、"仅部分预览"的文档,不可在线预览部分如存在完整性等问题,可反馈申请退款(可完整预览的文档不适用该条件!)。
- 3、如文档侵犯您的权益,请联系客服反馈,我们会尽快为您处理(人工客服工作时间:9:00-18:30)。
天王KOD嵌入式硬盘点歌机(V2.20)使用说明书安全注意事项警告:这标志提醒用户产品带有危险电压。
警告:为防止起火或触电事故,请不要让机器暴露在雨中或潮湿环境里。
机内有危险的高压配件,因而不要擅自打开机盖。
需要维修时必须委托合格的维修人员进行。
注意:为防止触电,请使用宽槽插座相配,并与接插牢靠。
注意:在使用完点歌机后,请关闭电源;点歌机不适用6岁以下儿童操作;务必通读本使用说明书,以便您掌握如何正确使用此点歌机。
当您读完本说明书后,请妥善保存好,以备日后参考,如果需要维修,请与经销商或本公司技术服务中心联系。
警告:未经授权的单位明确认可,任何对于本机的变动或改装都有可能对用户的使用带来诸多的不便。
目录一、使用前须知●安全注意事项 (1)●使用前须知 (3)二、功能介绍和说明●点歌机安装介绍 (4)●遥控器功能简介 (4)●点歌界面简介 (5)●功能按钮介绍 (7)●后台功能介绍 (7)三、附录1 (10)四、附录2 (14)五、附录3 (14)六、附录4 (14)使用前须知注意事项※使用本机前,请检查当地电压,应与本机工作电压相符。
※在插上或拔出交流电源时,应抓牢电源插头部分,不可拉扯电源线。
※若本机插头与电网插座相连,即使关闭电源,本机仍与交流电相通。
长时间不使用本机,请拔下电源插头。
※如果有液体或异物落入机内,请立即拔下电源插头,经检查后方可再行使用。
※切勿擅自拆卸机壳,任何维修都必须由专业技术人员进行。
放置地点选择※请将本机放置在通风良好之处,以防止机内过热。
※请勿将本机放置于直射阳光下或靠近热源的地方。
※请将本机置于水平位置,不要将任何重物放在本机上。
※请勿将本机放置于尘埃极度之处,以防灰尘对本机内部元件造成损坏,影响本机的正常工作,缩短机器的使用寿命。
附件检查※音频/视频连接线1条(三头)※遥控器1个※中文说明书1本遥控器的使用1、取下遥控器背部电池盖;2、按照电池盒内所标示正负极性装入两节5号电池;3、盖上电池盖;4、使用时,将遥控器直接面对本机遥控接收窗。
遥控时,应在8一、点歌机安装介绍音频 VGA 鼠标USB 视频键盘风扇二、遥控器功能简介(图片略)●0-9数字键根据点歌页面图片上的指示进入相应的功能或用于歌曲编号等输入数字类编号时使用●重唱按此键将重新播放当前正在播放的歌曲●切歌按此键将停止当前正在播放的歌曲、并开始播放已点歌曲列表中的下一首歌曲●原伴唱按此键可以选择以原唱模式播放歌曲或以伴唱模式播放歌曲●删除根据点歌页面图片上的提示,对误输入的信息进行删除●主页面在任何点歌页面下,按此键后将立即返回到点歌系统的主页面●已点歌按此键可以进入已点歌曲页面下,查看用户已经点播过的歌曲列表●优先在已点歌曲页面下,用此键可以将在播放列表中某一首歌曲的排列位置移动到最前面●返回返回到前一级点歌菜单●确认对输入的命令信息进行确认●上页、下页在浏览歌曲或歌星列表时,实现上下翻页显示●音量+、音量-调整当前点歌机的音量大小●拼音、字数根据点歌页面图片上的提示,实现对当前歌曲列表的二级检索或直接进入到相应点歌方式的界面上●歌星、语种、编号直接进入到相应点歌方式页面下的快捷键●暂停暂停当前歌曲的播放、再按一下该键可以恢复当前歌曲的播放●快进使当前歌曲的播放进入到快进模式、再按一下恢复到正常模式●喝彩、倒彩可以控制点歌机发出各种欢呼、喝彩等声音效果三、点歌界面简介:点歌页面结构图●主页点歌机系统启动后的初始显示页面,从这里可以进入到相应的各个功能页面下●主题点歌根据歌曲所属类型查找歌曲的一种点歌方式●拼音点歌根据歌曲名称的拼音字头查找歌曲的一种点歌方式●编号点歌通过输入歌曲的六位编码查找歌曲的一种点歌方式●歌星点歌根据歌曲的演唱者(歌星)名称来查找歌曲的一种点歌方式●语种点歌根据歌曲所属的语言类别查找歌曲的一种点歌方式●电影小品列出经典的小品和电影节目●已点歌曲显示已经选完的待播放的歌曲列表●更换界面本点歌机随机提供多套皮肤,客户可以根据个人喜好选择使用●系统设定对点歌机系统各种工作模式的设置,具体如下:◆幻影时间:调整里面的数值,可以改变屏幕的幻影等待时间◆打分开关:开启和关闭打分功能的选项◆鼠标调速:可以根据个人喜好调整鼠标的移动速度(灵敏度)◆待机音量:可以设置系统播放待机画面时使用的音量值◆进入后台:通过输入后台密码可以进入到系统的后台设置程序中,对点歌机进行加歌等维护工作(密码:000000)◆关闭系统:机器用完后在这里先关闭系统后在关掉机器的电源(密码:999999)四、功能按钮介绍●主页在任何点歌页面下,按此按钮后将立即返回到点歌系统的主页面●切歌按此按钮将停止当前正在播放的歌曲、并开始播放已点歌曲列表中的下一首歌曲●原伴按此按钮可以选择以原唱模式播放歌曲或以伴唱模式播放歌曲●重唱按此键将重新播放当前正在播放的歌曲●音大、音小按此按钮可调整当前点歌机的音量大小●已点按此按钮可以进入已点歌曲页面下,查看用户已经点播过的歌曲列表●拼音按此按钮可以进入拼音点歌页面下,进行拼音点歌操作●歌星按此按钮可以进入歌星点歌页面下,进行歌星点歌操作●播/停按此按钮将暂停当前歌曲的播放、再按一下该键可以恢复当前歌曲的播放●字数按此按钮可以进入字数点歌页面下,进行字数点歌操作●返回按此按钮将返回到前一级点歌菜单五、后台功能介绍:●歌曲库维护◆用户加歌:通过U盘,移动硬盘,移动光驱进行添加歌曲◆用户删歌:用拼音或编号查找到要删除的歌曲,选择要删除的歌曲,选中后歌曲会自动存储在删除歌曲列表中,点击“完成”删除歌曲保存在列表中,再点击“完成”选择列表中的歌曲被删除。
◆修复歌曲数据库:歌曲信息出现混乱时,可以用来对其进行修复。
◆导出歌曲文件:用拼音或编号查找到要导出的歌曲,然后用U盘或移动硬盘导出歌曲文件。
◆更新歌曲数据库文件:在PC上处理好的曲库索引文件,存储到U盘或移动设备里,然后更新到盒子中。
◆新歌推荐列表维护:把曲库中的歌曲,追加到新歌推荐列表中或从新歌推荐列表中删除。
◆排行榜列表维护:添加或删除排行榜中的歌曲。
◆导出歌曲数据库文件:用U盘或移动外设导出歌曲的数据库索引文件。
◆查看曲库盘容量信息:查看硬盘中存储和剩余空间。
●歌星库维护◆歌星信息与歌曲信息关联:如:在某个歌星下面找不到某个歌曲,但歌曲本身是存在的。
这时可以用此功能对歌星信息与歌曲信息进行关联,使之歌星下能点到找不到的歌曲。
◆更新歌星图片库:在PC上用曲库维护软件把歌星数据库的索引文件生成好后,利用移动设备更新到盒子里。
◆导出歌星图片库:用U盘或移动硬盘导出歌星信息的数据库。
●单/双屏模式转换◆双屏模式:指用显示器模式进行点歌操作。
◆单屏模式:指用电视上显示OSD菜单模式进行点歌操作。
●待机画面设置◆待机画面选择:本机提供五种待机画面,自行选择。
◆设置待机画面音量:调整待机画面音量的大小。
◆调整待机画面音量功能:设置待机音量是否能调整。
◆调整待机画面音音轨功能:设置是否允许更改待机画面的音轨。
◆设置轮播歌曲:可以用U盘导入轮播的歌曲列表或通过拼音或编号找到要设置成轮播的歌曲然后存在轮播歌曲列表中(详见附录3)。
◆更新待机画面:用U盘更新机内的待机画面。
◆导出待机画面:用U盘导出机内的待机画面。
●双屏界面维护◆设置双屏初始界面:设置开机后用哪一套点歌界面点歌。
◆添加前台界面:在不足四套的时候可以继续添加,否则不可。
◆删除前台界面:删除前台的点歌界面。
◆更新前台界面:用U盘更新前台的点歌界面◆更新前台公共界面:用U盘更新前台公共界面。
◆更新后台维护程序界面:用U盘更新后台的界面。
◆导出前台界面:将点歌界面导出到U盘上。
◆导出前台公共界面:将点歌界面的公共图片导出到U盘上。
◆导出后台维护程序界面:将后台界面导出到U盘上。
●设置屏幕幻影时间◆设置每次开机后的幻影时间,如果为“0”则没有幻影。
●打分功能设置◆不显示打分◆显示打分◆设置打分下限阀值:设置最低分是多少。
◆更新打分LOGO图片:◆导出打分LOGO图片:●更新滚动字幕信息◆用U盘或移动硬盘更新滚动字幕信息。
●PS/2口设备◆选择在点歌界面下使用鼠标操作或触摸屏操作。
●遥控器/控制面板内码维护◆遥控器内码学习:根据屏幕上的提示按遥控器上对应的按键,没有的可直接跳过,直到完成并保存。
◆更新遥控器内码:通过曲库维护软件编辑完的遥控器内码文件(ir.dat)可通过U盘或移动硬盘更新到盒子中。
◆导出遥控器内码:用U盘或移动硬盘导出ir.dat文件。
◆控制面板内码学习:根据屏幕上的提示按控器面板上对应的按键,直到完成并保存。
◆更新控制面板内码:通过曲库维护软件编辑完的控制面板内码文件(control.dat)可通过U盘或移动硬盘更新到盒子中。
◆导出控制面板内码: 用U盘或移动硬盘导出control.dat文件。
●修改后台密码●硬盘分区数量设置◆硬盘分区数量设置:根据硬盘分区情况设置此项。
●系统配置文件维护◆用U盘或移动外设更新或导出配置文件。
●关闭系统●附录1:U盘加歌的文件编辑步骤◆U盘加歌说明:第一步:在U盘的根目录下新建一个“vod”的文件夹,U盘必须是FAT或FAT32格式,如果U盘中有多个分区,请使用第一分区。
如下图:第二步:把歌曲文件拷贝到U盘的vod的文件中,重新编排歌号。
把文件名改为66****,扩展名为dat(小写)。
****代表4位数字,66****就是这首歌曲的编号,每次新加入歌曲的编号,不能与以前的重复,否则系统会提示您“歌曲编号不正确”,我们为歌厅预留的编号是:从660000到665000,为经销商预留的编号是:从665001到669999。
如:修改为“661000.dat”第三步:在vod的文件夹中新建一个文本文件,并改名为“vod”,扩展名是“.txt”默认的情况下这个扩展名不显示。
如下图:第四步:对文本文件vod.txt进行编辑.每项之间用半角分号隔开(;)如下图格式:歌名;演唱者;字数;拼音码;歌曲编号;声道;语种;歌曲类型;新歌推荐;排行榜其中“声道”对于标准的片源就输入2,如声道相反则输入3。
“语种”选:1国语,2英语,3粤语,4闽语,5日语,6韩语,7其他。
只需要填入相应的数字即可以;“歌曲类型”:1情歌对唱,2军歌,3儿歌,4生日歌曲,5影视插曲,6舞曲,7迪曲,8抒情歌曲,9电影,10小品,11相声,12戏曲,13二人转,0其它。
同样只填入对应代表的数字即可,如果都不是只必须填入数字“0”;“新歌推荐”:设置为新歌推荐的歌曲输入“1”,不设置则输入“0”;“排行榜”: 设置为排行榜的歌曲输入“1”,不设置则输入“0”;开始加歌1.在关机状态下,把U盘插入USB口。
2.开机。
3.在主界面里,按“8”键进入“系统设定”4.按“5”,键入密码“000000”,进入“系统维护”5.按“1”,进入歌库维护,按“1”,进入“客户加歌按“1”从U盘导入。